SolarColumbia
Well-known member
25 yrs WI winter garage floor rehab
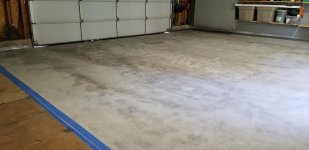
821 sq ft 3 car garage, never had anything done to it and it shows. I retired a couple of years ago, have been doing home projects and finally I am getting to this.
Goals are preventing further deterioration, smoother surface which would be easier to clean, and some improvement in appearance.
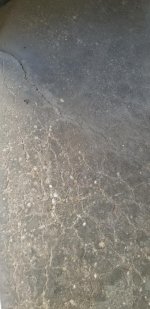
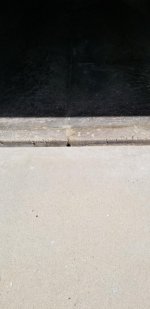
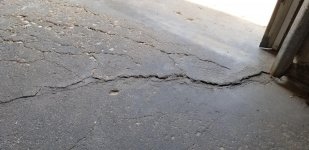
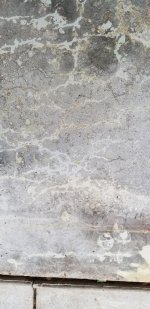
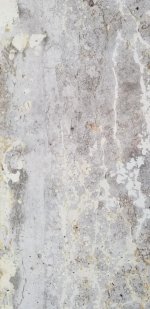
I am on a budget as I won't be receiving Social Security retirement for 4 years; but want to at least do some remediation now. I considered a full poly but with grinder rental and material it would be about $1200.00. The doors face south so UV is a consideration and that led me to the poly. The floor was poured with a slight pitch. It appears to have sunk a bit the first several feet in as shown by some left to right cracks, but the driveway is lower. There is a small low spot (circled in chalk in a pic) which is actually perhaps smaller than that. It is to the left of the expansion joint and there is some loose material there.
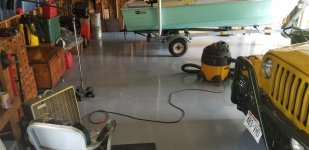
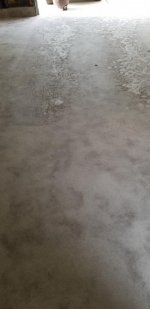
The one car bay is in great shape by comparison, with just a number of oil stains but no damage.
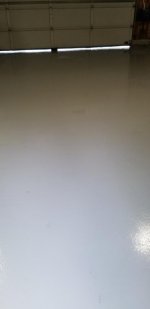
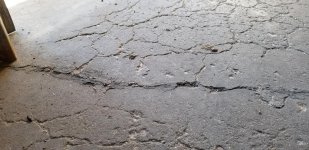
Could I make a 1/16" or less saw cut around the area where the cream is roughed up (325 sq ft), fill the deeper crevices and the hairline cracks with epoxy mortar, then grind and resurface that 17' × 19' area with 2 gal of HD 110, using minimal aggregate? If so, how do I handle the edge of the slab that goes to the driveway? A form of some type?
The area where the 2 vehicles park is subjected to mass quantities of de-icing from the roads and without having to grind down to aggregate I feel a few mils of epoxy is better than at most a 16th inch of a cement based resurfacer and a sealer.
I have ACT Cleaner coming this week for the multiple oil stains, but the left side as you look out the door is where my Jeep is parked and it needs a valve cover gasket and possibly a rear main seal, so many oil drips. I also had some auto maintenance disasters there with a massive oil spill, ATF, etc. I am wondering if I should grind first, apply Oil Stop primer and then fill the crevices and then resurface.
As far as the remaning 496 sq ft I was hoping to get it clean enough to apply LithiTek 4500 and SiloxaTek 8510.
Thoughts?
821 sq ft 3 car garage, never had anything done to it and it shows. I retired a couple of years ago, have been doing home projects and finally I am getting to this.
Goals are preventing further deterioration, smoother surface which would be easier to clean, and some improvement in appearance.
I am on a budget as I won't be receiving Social Security retirement for 4 years; but want to at least do some remediation now. I considered a full poly but with grinder rental and material it would be about $1200.00. The doors face south so UV is a consideration and that led me to the poly. The floor was poured with a slight pitch. It appears to have sunk a bit the first several feet in as shown by some left to right cracks, but the driveway is lower. There is a small low spot (circled in chalk in a pic) which is actually perhaps smaller than that. It is to the left of the expansion joint and there is some loose material there.
The one car bay is in great shape by comparison, with just a number of oil stains but no damage.
Could I make a 1/16" or less saw cut around the area where the cream is roughed up (325 sq ft), fill the deeper crevices and the hairline cracks with epoxy mortar, then grind and resurface that 17' × 19' area with 2 gal of HD 110, using minimal aggregate? If so, how do I handle the edge of the slab that goes to the driveway? A form of some type?
The area where the 2 vehicles park is subjected to mass quantities of de-icing from the roads and without having to grind down to aggregate I feel a few mils of epoxy is better than at most a 16th inch of a cement based resurfacer and a sealer.
I have ACT Cleaner coming this week for the multiple oil stains, but the left side as you look out the door is where my Jeep is parked and it needs a valve cover gasket and possibly a rear main seal, so many oil drips. I also had some auto maintenance disasters there with a massive oil spill, ATF, etc. I am wondering if I should grind first, apply Oil Stop primer and then fill the crevices and then resurface.
As far as the remaning 496 sq ft I was hoping to get it clean enough to apply LithiTek 4500 and SiloxaTek 8510.
Thoughts?
Attachments


Last edited:


 . . .
. . .