To avoid these ads, REGISTER NOW!

ZMotorsports Shop Projects 2.0

csp

Well-known member
Joined
Mar 23, 2010
Messages
5,720
Location
Franktown, CO
That is more Mike than the tool.

You can see what years of experience can do. Proper feed rate based on pressure is the key. That bit will have tons of life if only used by Mike...

This is absolutley true, but I doubt they would have been that long with a handheld 1/2" drill, even with a new bit and we know it won't fit under the drillpress.
 
To avoid these ads, REGISTER NOW!

StormcrowAz

Well-known member
Joined
Nov 3, 2011
Messages
750
Location
Phoenix, AZ
I should have bought a mag drill years ago as I think back about how often I would have been able to use it and save time..

Been thinking about a mag drill for a while as well, and similar thoughts come to mind. The amount of use versus cost seems to be a big mental deterrent for me. However, it does seem like when I get a new tool, I end up finding more uses for it than I originally thought I would.

Nice work on the table. I’m looking forward to seeing how you utilize it with fixturing, clamping, and such. Also interested to see what other cool things you end up using that mag drill on/for.
 
OP
Z

zmotorsports

ALLIANCE MEMBER
Joined
Oct 20, 2009
Messages
21,441
Location
Northern Utah
Been thinking about a mag drill for a while as well, and similar thoughts come to mind. The amount of use versus cost seems to be a big mental deterrent for me. However, it does seem like when I get a new tool, I end up finding more uses for it than I originally thought I would.

Nice work on the table. I’m looking forward to seeing how you utilize it with fixturing, clamping, and such. Also interested to see what other cool things you end up using that mag drill on/for.

I don't have any immediate projects in mind but just want to have the holes at the ready for the next time I "may" need them. I took some advice from guys on here as to the spacing as well as visualized where I had placed the last few larger projects so I feel fairly confident in my spacing.

At 12" centers IF I get to a point where I want more I can always split the difference and double the options.

I need to modify some of the F-clamps to fit in the holes on the fabrication table now. Machining some 5/8" stepped plugs may be a very near project in which to modify the F-clamps with.

Thanks for stopping by.
 
OP
Z

zmotorsports

ALLIANCE MEMBER
Joined
Oct 20, 2009
Messages
21,441
Location
Northern Utah
I arrived home and decided to look into my sticking sprinkler valve this evening. Both mornings that my front sprinkler system ran this week I noticed when I was heading to work the I had two zones on at the same time. I figured the previous zone’s valve didn’t close when the current one opened so a little tap with the flashlight helped the valve close so I figured I’d take a look at the filter assembly first. Sure enough it was quite filthy so a quick removal and cleaning of the filter followed by removal of the cover of the valve for zone four resulted in finding some debris that needed to be cleaned out as well.

Sorry, no pictures as I left my phone in the shop during the sprinkler repair.

Afterwards I thought I’d finish getting the holes drilled & tapped for the mounting of the axle fixtures to my fabrication table. I stopped on the way home and swapped the wrong drill chuck adapter for the correct one for the Hougen mag drill.

01aab9a92e051b6bcf2c0b928ad81d67.jpg

Power tapped the six 3/8”-16 holes using my tap guide.
3ed4cb78814c4d643a354cfed9477dca.jpg

Perfect alignment as the bolts threaded right in by hand. The axle fixtures are rock solid on the table now and easily added or removed from the table.
6932fb1128a23563287e22261bcda202.jpg

Thanks for looking.
 

Attachments

  • 3ed4cb78814c4d643a354cfed9477dca.jpg
    3ed4cb78814c4d643a354cfed9477dca.jpg
    98.3 KB · Views: 0
  • 6932fb1128a23563287e22261bcda202.jpg
    6932fb1128a23563287e22261bcda202.jpg
    96.5 KB · Views: 0
  • 01aab9a92e051b6bcf2c0b928ad81d67.jpg
    01aab9a92e051b6bcf2c0b928ad81d67.jpg
    84.9 KB · Views: 0
Last edited:
OP
Z

zmotorsports

ALLIANCE MEMBER
Joined
Oct 20, 2009
Messages
21,441
Location
Northern Utah
Table holes and axle jig look good.
What do you use to / place finished axle into for placement into vehicle?

Thanks for the comments.

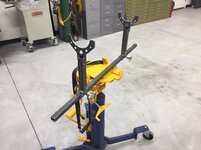
This is what I use to raise and lower axle assemblies from the vehicle.
e34ab0d27c9e6ae969c88cc0ece83f4c.jpg

Full build of the adapter can be seen back on about page 166/167.

Thanks for stopping by.
 

Attachments

  • e34ab0d27c9e6ae969c88cc0ece83f4c.jpg
    e34ab0d27c9e6ae969c88cc0ece83f4c.jpg
    100 KB · Views: 1

XJSuperman

Well-known member
Joined
Jan 26, 2018
Messages
3,088
Location
Central Iowa
First: Im definitely jealous of the mag drill. I will have one someday. Very handy.

Mike, we know you just went through axles in a couple jeeps (I think I remember that right), so what do you plan on getting into next for axles that you wanted this setup for? Don't take that the wrong way, I love being prepared for future projects, but usually I try and get something like this done before I get into the project. (Esp axles, where I don't usually get into them for quite awhile after a rebuild)

Just wondering what kind of fun stuff is coming up next in the shop!
 
OP
Z

zmotorsports

ALLIANCE MEMBER
Joined
Oct 20, 2009
Messages
21,441
Location
Northern Utah
First: Im definitely jealous of the mag drill. I will have one someday. Very handy.

Mike, we know you just went through axles in a couple jeeps (I think I remember that right), so what do you plan on getting into next for axles that you wanted this setup for? Don't take that the wrong way, I love being prepared for future projects, but usually I try and get something like this done before I get into the project. (Esp axles, where I don't usually get into them for quite awhile after a rebuild)

Just wondering what kind of fun stuff is coming up next in the shop!

I need to be more pro-active I guess. I've wanted to build a decent axle fixture for about 20 years now and just have never found the time (or more accurately made the time). Since closing down my business in 2017 I have focused solely on getting the shop and yard done and then the shop setup exactly the way I want. I am finally to the point of having the shop "nearly" setup the way I envisioned it from the first hint of us moving.

Now that I am getting it set up I would like to start taking on side jobs again to keep me busy and my mind (and hands) occupied and continue to learn. I am getting the little luxury items in place that I have always wanted to when those particular jobs come up I am ready.

To answer your question more specifically I have had a few people in our Jeep club inquire about doing some work for them on their Jeeps like regearing and some axle mods so I am getting prepared. IF the jobs come to fruition then I'm ready, if they don't come through the door at least I have a cool kick *** axle fixture to hand down to my son when I kick the bucket.:bounce:

No worries, I didn't take your comment the wrong way. Thanks for asking and for following along.
 
OP
Z

zmotorsports

ALLIANCE MEMBER
Joined
Oct 20, 2009
Messages
21,441
Location
Northern Utah
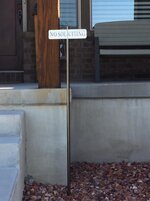
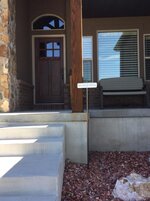
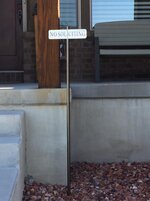
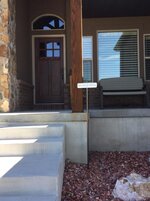
It looks like all of the pictures from the last few days are gone showing the fabrication of my “no soliciting” sign so I’ll just post up a few pictures of the finished product after installing it.

311faa7f0648f27407af52c42aa612ab.jpg

7666c5fd3c5561492fa48afa5e97f049.jpg

0918905acd4d74660b288d1da9b88ac5.jpg

After mowing lawns last night I dug out a few boxes of supplies for my next project.
f72de6e8fdebdd5dc1f6ba15bcbceb2c.jpg

cc9c5aadc4b03de5ac4727e1ccfc7bd1.jpg

Stay tuned.
 

Attachments

  • f72de6e8fdebdd5dc1f6ba15bcbceb2c.jpg
    f72de6e8fdebdd5dc1f6ba15bcbceb2c.jpg
    99.8 KB · Views: 0
  • 311faa7f0648f27407af52c42aa612ab.jpg
    311faa7f0648f27407af52c42aa612ab.jpg
    133.6 KB · Views: 0
  • 7666c5fd3c5561492fa48afa5e97f049.jpg
    7666c5fd3c5561492fa48afa5e97f049.jpg
    76.2 KB · Views: 0
  • 0918905acd4d74660b288d1da9b88ac5.jpg
    0918905acd4d74660b288d1da9b88ac5.jpg
    88.7 KB · Views: 0
  • cc9c5aadc4b03de5ac4727e1ccfc7bd1.jpg
    cc9c5aadc4b03de5ac4727e1ccfc7bd1.jpg
    84 KB · Views: 0

casmurbax

Well-known member
Joined
Sep 25, 2012
Messages
2,759
Location
Wilton, NY
It involves painting something....

Can you tell us more about that lift table? How easy is that to move around? How does it operate? How much does it weigh?

Sorry, if I am asking you to repeat something that might have been answered in an earlier thread.

Thanks
John
 
OP
Z

zmotorsports

ALLIANCE MEMBER
Joined
Oct 20, 2009
Messages
21,441
Location
Northern Utah
It involves painting something....

Can you tell us more about that lift table? How easy is that to move around? How does it operate? How much does it weigh?

Sorry, if I am asking you to repeat something that might have been answered in an earlier thread.

Thanks
John

Yep, small painting project coming up John.

The lift table shown here is one of two motorcycle lift tables that I have. I have an original Handy lift table that I purchased about 25+ years ago with the optional side panels. I've used it for motorcycles, snowmobiles and ATV's for the past 25+ years but last year bought the new Handy SAM 2 lift table shown here in the shop. I moved my original to the storage bay and will move it back into the shop when I need it for more than one bike in the shop at a time. I really like the SAM 2 being it has front and rear drop down sections for much easier tire removal and it is a bit longer and wider than the original version, both of which have 1k pound capacities and are air operated.

As far as moving around the shop, they both have steel wheels on the front and I have a dual wheeled dolly that picks up the rear in which to maneuver it around with. They weigh around 350 pounds so they're not what I would say difficult to move around but they don't roll around like a hand truck as they are a bit awkward. I couldn't bring myself to sell my original lift when I bought the SAM 2.

When I sold my Cycle Pro lift last year and bought the SAM 2 lift table I did so with the intent of getting into building bikes once my son moved out. When I get to that point I will use the original Handy lift as my long term bike lift and the new SAM 2 for general use but I am not to that point yet as I am still getting caught up on things that I've wanted to do for a few years now. My hope is get everything caught up by fall and be able to either take on side jobs doing machining or find a bike and have a winter project to play with and then sell it come spring.
 
OP
Z

zmotorsports

ALLIANCE MEMBER
Joined
Oct 20, 2009
Messages
21,441
Location
Northern Utah
Mike next time I am in the area I am stopping by with my Briefcase in a Suit...Knock...Knock...:bounce:

Ha Ha Pat.

I am dumbfounded by the number of door to door sales people this year. I know we've only been in this house for 3 years but we get at least one and sometimes 2-3 per afternoon/evening.

Last night was the first night we did not get anyone at the door in about 6 weeks or so. I'm going to say it was the sign.:bounce:
 

casmurbax

Well-known member
Joined
Sep 25, 2012
Messages
2,759
Location
Wilton, NY
HAHA 4 FN 27.

Don't forget to hold the sign in your hand and say I saw this on the ground, is this yours?

Yes sorry, I should have mentioned how nice your sign came out.
Thanks for answering my questions about the table.

I look forward to seeing what kind of bike you will be building.
 

4 FN 27

ALLIANCE MEMBER
Joined
Oct 19, 2015
Messages
4,635
Location
Minnesnowta
Ha Ha Pat.

I am dumbfounded by the number of door to door sales people this year. I know we've only been in this house for 3 years but we get at least one and sometimes 2-3 per afternoon/evening.

Last night was the first night we did not get anyone at the door in about 6 weeks or so. I'm going to say it was the sign.:bounce:

It is 734 feet from the road to the Door. Keeps most away...

So back about 6-7 years ago, 6:30 on a Sunday morning, I am in my chair doing a little self improvement reading and my Wife is sleeping. The Door Bell rings.

I open the door and there is this 20-25 year old Blonde, about a 8.5-9.5...and with a European accent says "I am selling children's books for a school project"...

Somewhat dumbfounded I explained it is 6:30 am on a Sunday and no F'ing kids live on this street...

Off she went on foot. Never to be seen again...but was arrested an hour later when her and her accomplices tried to break into a house a block over.

Other than an occasional Storm Chaser...nobody comes down the driveway...oh and the Uber Driver on contract for Amazon...don't park behind my house on the lower driveway at 9:30 on a winters night...you will cause me to break the "remain holstered" rule.
 

bradpac

Well-known member
Joined
Sep 8, 2013
Messages
721
Location
Central TX
I may have to borrow your sign idea. We get 3-4 people a week banging on the door, and with 2 large, protective dogs it gets loud in the house every time they do it. Our house is full brick so I haven't wanted to mount a sign anywhere. Maybe if I take an old revolver and screw the sign into the **** and have the barrel pointed down on the pole it might reinforce the message.
 

string8888

New member
Joined
Feb 1, 2013
Messages
2
Location
Kamloops, BC
Hi Mike,

Always appreciate your skills and the effort you put into anything you do. I have followed your projects, blogs, and YouTube channel for many years. I was wondering what you have for a vehicle lift in your shop? I’m in the process of trying to decide on a lift for my new shop and know you would have researched the heck out of it.

Appreciate any information you can share.

Cheers
Bert
 
OP
Z

zmotorsports

ALLIANCE MEMBER
Joined
Oct 20, 2009
Messages
21,441
Location
Northern Utah
Some pictures from tonight’s quality shop time.

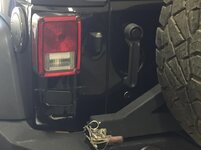
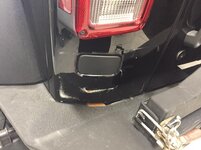
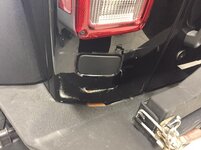
If you look at the driver’s rear quarter you can see where the plastic factory license plate holder had rubbed through the clear and base into the primer. This has bugged me ever since I relocated my license plate to the spare tire carrier a few months back.

On a side note, bonus points to anyone who happens to notice anything different. [emoji848]

295fb702781b9f18cf1b53eba3ac401f.jpg

6d11e8ee86a2aee86167fa1e2f271116.jpg

5e5259e87dfa0ad89dce12bfde3753b6.jpg

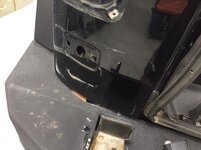
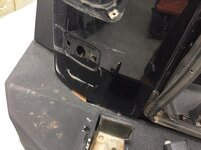
I don’t use this particular CB antenna mount any longer so I thought I’d remove it and fill in the holes while I’m at it.
3adf98cf3ea2c7f9db0269db1c60a4cf.jpg

09544d45507d765c468a971031d6f280.jpg

No turning back now.
4ce191b663c01e31588f9139107b5464.jpg

To plug the holes which were 3/8” and 3/16” I used my 9/16” Hougen RotoKut cutter to cut a slug out of some 18-gauge P&O sheet metal. The ID of the cutter is 3/8” and the plug fit perfectly. For the smaller hole I used my Roper Whitney hand punch with the 3/16” anvil and die.
b032fb3d41dd9bc232ac6899a483589c.jpg

Test fitting.
042c4983f69a46720fb4eecd147e6121.jpg

Small hole welded and I used a die grinder with 1/8” grinding disc to knock the top of the weld down to nearly flush with the parent material, followed by a Rolex disk to bring everything flush.
1114f5cdf47d5dae4294186f09b47fb0.jpg

8f6ba116d92da1f77371fa4dcd1bde2c.jpg

b1a05cfc31e68d5062ae7e966d85503f.jpg

24bf0be34676de34d332676348e64a33.jpg

Both blended and ready to hit with some 80-grit.
0f0ae4008ab6c832526d46222b50c987.jpg

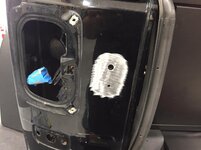
You can’t feel any deviation across the repair so all that should be needed is some epoxy primer followed by some primer surfacer then it should be ready to block, wet sand and go right into paint.
4e1bc8a650f1b512a4c339a398f6ea4b.jpg

cbe817b62369525b2243fabab7d1c6d0.jpg

I should receive my order from SPI tomorrow with my epoxy primer, 2k primer surfacer and universal clear. I stopped by my local paint & body supply today and picked up a pint of PPG DBC 9700 black and I about had a heart attack when I saw a pint of standard base color was $106 bucks. I know it’s been a few years since I bought paint but daaayuuum.
 

Attachments

  • 295fb702781b9f18cf1b53eba3ac401f.jpg
    295fb702781b9f18cf1b53eba3ac401f.jpg
    78.9 KB · Views: 1
  • cbe817b62369525b2243fabab7d1c6d0.jpg
    cbe817b62369525b2243fabab7d1c6d0.jpg
    71 KB · Views: 0
  • 3adf98cf3ea2c7f9db0269db1c60a4cf.jpg
    3adf98cf3ea2c7f9db0269db1c60a4cf.jpg
    64.5 KB · Views: 0
  • 5e5259e87dfa0ad89dce12bfde3753b6.jpg
    5e5259e87dfa0ad89dce12bfde3753b6.jpg
    97.4 KB · Views: 0
  • 6d11e8ee86a2aee86167fa1e2f271116.jpg
    6d11e8ee86a2aee86167fa1e2f271116.jpg
    58.8 KB · Views: 0
  • 09544d45507d765c468a971031d6f280.jpg
    09544d45507d765c468a971031d6f280.jpg
    83.3 KB · Views: 0
  • 4ce191b663c01e31588f9139107b5464.jpg
    4ce191b663c01e31588f9139107b5464.jpg
    72.2 KB · Views: 0
  • 4e1bc8a650f1b512a4c339a398f6ea4b.jpg
    4e1bc8a650f1b512a4c339a398f6ea4b.jpg
    69.5 KB · Views: 0
  • 0f0ae4008ab6c832526d46222b50c987.jpg
    0f0ae4008ab6c832526d46222b50c987.jpg
    70.3 KB · Views: 0
  • 24bf0be34676de34d332676348e64a33.jpg
    24bf0be34676de34d332676348e64a33.jpg
    86.6 KB · Views: 0
  • b1a05cfc31e68d5062ae7e966d85503f.jpg
    b1a05cfc31e68d5062ae7e966d85503f.jpg
    89.5 KB · Views: 0
  • 8f6ba116d92da1f77371fa4dcd1bde2c.jpg
    8f6ba116d92da1f77371fa4dcd1bde2c.jpg
    80.7 KB · Views: 0
  • 1114f5cdf47d5dae4294186f09b47fb0.jpg
    1114f5cdf47d5dae4294186f09b47fb0.jpg
    88 KB · Views: 0
  • 042c4983f69a46720fb4eecd147e6121.jpg
    042c4983f69a46720fb4eecd147e6121.jpg
    50.9 KB · Views: 0
  • b032fb3d41dd9bc232ac6899a483589c.jpg
    b032fb3d41dd9bc232ac6899a483589c.jpg
    98.1 KB · Views: 0
Last edited:
To avoid these ads, REGISTER NOW!

casmurbax

Well-known member
Joined
Sep 25, 2012
Messages
2,759
Location
Wilton, NY
On a side note, bonus points to anyone who happens to notice anything different.
New Plates?

x2

02dodger, did you loose a bunch of thread posts? You have been a member for 8 years and your first post is that you noticed Mike has new plates?
 
OP
Z

zmotorsports

ALLIANCE MEMBER
Joined
Oct 20, 2009
Messages
21,441
Location
Northern Utah
Hi Mike,

Always appreciate your skills and the effort you put into anything you do. I have followed your projects, blogs, and YouTube channel for many years. I was wondering what you have for a vehicle lift in your shop? I’m in the process of trying to decide on a lift for my new shop and know you would have researched the heck out of it.

Appreciate any information you can share.

Cheers
Bert

Thanks Bert. I apologize, I thought I had answered this but it must be one of the posts that was lost due to the forum glitch.

Anyways, the lift I have is an Ammco 10k pound lift. I bought it in 2010 and it has worked flawlessly. It is marketed as a 2-in-1 lift with the implication that it can lift vehicles in a symmetrical or asymmetrical configuration. Where I don't work on one specific line of cars or trucks this was appealing to me with the 3-stage arms in the front. The Challenger Versalift is supposed to be very similar as they come out of the same plant. They are assembled in the USA but like most others utilize off-shore components. It is ALI certified which was a requirement that I looked for.

I purchased mine through my local NAPA when they had it sale in their Real Deals flyer. For a while they rotated between the Challenger and the Ammco with their quarterly ads. There are a lot of decent lifts out there but I have been very pleased with my Ammco. They are not very popular for some reason, maybe marketing.
 
OP
Z

zmotorsports

ALLIANCE MEMBER
Joined
Oct 20, 2009
Messages
21,441
Location
Northern Utah
x2

02dodger, did you loose a bunch of thread posts? You have been a member for 8 years and your first post is that you noticed Mike has new plates?

Hell I was flattered that he's been a forum member that long and chose to chime in with his first post on my thread.:rocker:
 

string8888

New member
Joined
Feb 1, 2013
Messages
2
Location
Kamloops, BC
Thanks Bert. I apologize, I thought I had answered this but it must be one of the posts that was lost due to the forum glitch.

Anyways, the lift I have is an Ammco 10k pound lift. I bought it in 2010 and it has worked flawlessly. It is marketed as a 2-in-1 lift with the implication that it can lift vehicles in a symmetrical or asymmetrical configuration. Where I don't work on one specific line of cars or trucks this was appealing to me with the 3-stage arms in the front. The Challenger Versalift is supposed to be very similar as they come out of the same plant. They are assembled in the USA but like most others utilize off-shore components. It is ALI certified which was a requirement that I looked for.

I purchased mine through my local NAPA when they had it sale in their Real Deals flyer. For a while they rotated between the Challenger and the Ammco with their quarterly ads. There are a lot of decent lifts out there but I have been very pleased with my Ammco. They are not very popular for some reason, maybe marketing.
Thanks for the information about the lift Mike. We have a Challenger supplier a couple hours away, so I’ll reach out and see what they can do for pricing.
I knew I’d sent the question to you earlier but when I didn’t see my post or your reply, I assumed I had messed up (my first post on GJ ever), so I resent it. Thanks for taking the time to respond a 2nd time.

I always look forward to the projects you’re tackling as I have many similar interests. Now that I’m almost done building our house, I can spend some time in my new shop honing my skills.

Hope you get to enjoy the 4th of July with your family!
Cheers from Canada
Bert
 
OP
Z

zmotorsports

ALLIANCE MEMBER
Joined
Oct 20, 2009
Messages
21,441
Location
Northern Utah
Thanks for the information about the lift Mike. We have a Challenger supplier a couple hours away, so I’ll reach out and see what they can do for pricing.
I knew I’d sent the question to you earlier but when I didn’t see my post or your reply, I assumed I had messed up (my first post on GJ ever), so I resent it. Thanks for taking the time to respond a 2nd time.

I always look forward to the projects you’re tackling as I have many similar interests. Now that I’m almost done building our house, I can spend some time in my new shop honing my skills.

Hope you get to enjoy the 4th of July with your family!
Cheers from Canada
Bert

Thanks Bert, I appreciate that and best of luck in your new home and workshop/garage.
 

shortykorte

Well-known member
Joined
Sep 1, 2014
Messages
8,039
Location
Tallahassee, Fl
Man, it’s hard to keep up with all your projects [emoji106]

Two questions please.
On the brake stand, what is the on center distance between front and rear leveling feet?

Your taping stand, is that store brought or homemade? How is the paper/tape cut when pulling a piece off?


Sent from my iPhone using Garage Journal
 

Monza Harry

Well-known member
Joined
Dec 29, 2018
Messages
1,433
Location
Windsor ON
SK if you are looking for ideas for a future project, I plan on a couple of swing out arms for a multipurpose hanger and I plan on using some plain carbon bandsaw blade material, probably 32 tpi, punch a hole in each the end and the blade and it will hold the arms forward and cut my material. Sorry for jumping to the front of the line Mike, but I will forget this if I wait for .... wait what was I doing? Harry :scared::wtf: Really I just wanted to share FIRST!;)
 
OP
Z

zmotorsports

ALLIANCE MEMBER
Joined
Oct 20, 2009
Messages
21,441
Location
Northern Utah
Man, it’s hard to keep up with all your projects [emoji106]

Two questions please.
On the brake stand, what is the on center distance between front and rear leveling feet?

Your taping stand, is that store brought or homemade? How is the paper/tape cut when pulling a piece off?


Sent from my iPhone using Garage Journal


Shorty, the leveling feet are spaced on 13” centers front to rear and 31.5” side to side.

As for the taping stand, that is a purchased stand. I don’t know the brand as it is quite old. I’ve been using that one since mid-90’s. It works great. I had a cheapy one before but the tape wouldn’t stay in place nor tear worth the ****. This one solved both of those issues. There is a serrated edge which allows paper and tape to be cut precisely and the tape held pressed down onto the paper with a piece of round rod pulled down by a spring.


Sent from my iPhone using Garage Journal
 
OP
Z

zmotorsports

ALLIANCE MEMBER
Joined
Oct 20, 2009
Messages
21,441
Location
Northern Utah
Yesterday morning I met up with a local guy who was selling his FIL’s tools after he had passed. He was a machinist and most of his tools reflected his 40+ year career as a machinist.

After a few phone calls with the guy during the week I was curious but most items were clapped out and not worth much more than scrap.

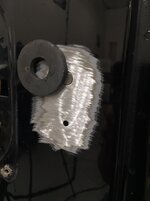
I did purchase a few end mills, some tap extensions, a shop made mini-pallet a couple of mill table clamps, a sine bar and four keyless chucks. Of the four keyless chucks the smallest and largest were seized up but I think I can soak and save them. The sine bar is in nearly new condition and the few end mills are either new or in good condition.
aeb1afe9192dd088379e4cf5b1f1fdd5.jpg

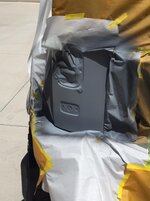
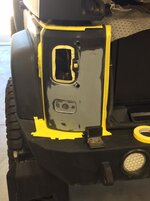
After arriving home I mixed up some SPI 2K primer and sprayed it on the rear corner of my Jeep.
c3f4895cebda7e396e1abb3a9e76f4b7.jpg

ed492c6b21b10c63052d2a165647e328.jpg

a406e804f37da33e2de724e031087558.jpg

We had our son and DIL over for dinner and then had a great viewing point on our deck of the surrounding fireworks.

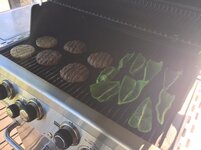
Burgers and green chili’s. Mmmmm.
9845be50244f0f4dd3504c6dded8c7d9.jpg
 

Attachments

  • 9845be50244f0f4dd3504c6dded8c7d9.jpg
    9845be50244f0f4dd3504c6dded8c7d9.jpg
    69.2 KB · Views: 0
  • a406e804f37da33e2de724e031087558.jpg
    a406e804f37da33e2de724e031087558.jpg
    67.5 KB · Views: 0
  • ed492c6b21b10c63052d2a165647e328.jpg
    ed492c6b21b10c63052d2a165647e328.jpg
    50.6 KB · Views: 0
  • c3f4895cebda7e396e1abb3a9e76f4b7.jpg
    c3f4895cebda7e396e1abb3a9e76f4b7.jpg
    70 KB · Views: 0
  • aeb1afe9192dd088379e4cf5b1f1fdd5.jpg
    aeb1afe9192dd088379e4cf5b1f1fdd5.jpg
    101.6 KB · Views: 0
Last edited:

shortykorte

Well-known member
Joined
Sep 1, 2014
Messages
8,039
Location
Tallahassee, Fl
Thank you Harry. I have some old blades that will be perfect.

Thanks Mike. I’m putting a stand together for my brake and was wondering about my front to back spacing. I don’t need another tip over. Oh, any leftovers 🤣


Sent from my iPhone using Garage Journal
 
OP
Z

zmotorsports

ALLIANCE MEMBER
Joined
Oct 20, 2009
Messages
21,441
Location
Northern Utah
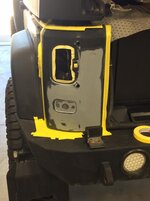
Tonight after arriving home I pulled the Jeep out and wet sanded the repair area.

I was very pleased with how the SPI 2K primer sanded. It had sat for about 56 hours so maybe that had something to do with it, meaning I hadn’t rushed it.

After drying everything and blowing the water out of the nooks and crannies I masked it again and mixed up some more SPI epoxy primer as a sealer. I probably could have gone directly to basecoat as there wasn’t any bare metal showing but I thought I’d go the extra step and apply a good uniform sealer prior to the PPG DBC basecoat. I mixed just a little bit of slow reducer into the epoxy primer seeing as how I'm using it as a sealer and wanted it to lay down nice and flat.

f3babf22a1053d9bacc5e0460b5cce58.jpg

f66066ff7595fb8382333f48dc5b8a18.jpg

f81484fc0d059df309c006253c339f03.jpg

6e99f86378cd700a92783253930a18fb.jpg

71bdc3392a958b933489981cb1e55261.jpg

Tomorrow if I can get out of work on time, or even a bit early I will get the color and clear on it.

Thanks for looking.
 

Attachments

  • 71bdc3392a958b933489981cb1e55261.jpg
    71bdc3392a958b933489981cb1e55261.jpg
    75.1 KB · Views: 0
  • 6e99f86378cd700a92783253930a18fb.jpg
    6e99f86378cd700a92783253930a18fb.jpg
    73.5 KB · Views: 0
  • f81484fc0d059df309c006253c339f03.jpg
    f81484fc0d059df309c006253c339f03.jpg
    64.2 KB · Views: 0
  • f66066ff7595fb8382333f48dc5b8a18.jpg
    f66066ff7595fb8382333f48dc5b8a18.jpg
    63.6 KB · Views: 0
  • f3babf22a1053d9bacc5e0460b5cce58.jpg
    f3babf22a1053d9bacc5e0460b5cce58.jpg
    83.2 KB · Views: 0
Last edited:

OutlawDrifter

Well-known member
Joined
Jan 20, 2015
Messages
3,894
Location
KS
Looks good Mike! As we both know, taking your time pays dividends on the backside when it comes to painting!
 
OP
Z

zmotorsports

ALLIANCE MEMBER
Joined
Oct 20, 2009
Messages
21,441
Location
Northern Utah
Looks good Mike! As we both know, taking your time pays dividends on the backside when it comes to painting!


That it does Marc. Plus I’ve switched products so there’s always the unknown with new products. Ive been a PPG guy for over 30 years and just recently switched to SPI. So far I really like the SPI epoxy primer and 2K primer.

I’ll let you know on the clear after tomorrow, hopefully. I’ve got seven days before I have to scuff the sealer but I don’t want to wait that long, I’d like to have this project wrapped up, cut and buffed by the weekend.


Sent from my iPhone using Garage Journal
 

OutlawDrifter

Well-known member
Joined
Jan 20, 2015
Messages
3,894
Location
KS
Please do let me know on the clear. I've heard really good things things about their products. I've used the Wanda "jobber" line for bc/cc with really good results on past projects.
 
OP
Z

zmotorsports

ALLIANCE MEMBER
Joined
Oct 20, 2009
Messages
21,441
Location
Northern Utah
Please do let me know on the clear. I've heard really good things things about their products. I've used the Wanda "jobber" line for bc/cc with really good results on past projects.

Will do Marc. Like you I've heard really good things about their Universal Clear so I'll let you know. Although this is such a small area it won't be the same as a complete or even a full clip.

However, so far I have been impressed with the epoxy primer and even the 2K primer of thiers.
 

casmurbax

Well-known member
Joined
Sep 25, 2012
Messages
2,759
Location
Wilton, NY
So I have a silly question.

Why did you not cover up the area where that plastic escutcheon goes?

as always looking like another great job.
 
To avoid these ads, REGISTER NOW!
Top Bottom