To avoid these ads, REGISTER NOW!

Above 1200 Sq/FT The ASYLUM - Happy 40th Birthday to Me! (Est. 2005)

Wokspaces above 1200 squarefeet.

ODIS

Well-known member
Joined
Apr 30, 2012
Messages
2,110
Location
Pacific Northwest
Looks great! Rattle can or HVLP?

AND

Thank you for:


All the best!
 
To avoid these ads, REGISTER NOW!
OP
S

shopnut

Well-known member
Joined
Feb 22, 2006
Messages
4,237
Location
Florida
Looks great! Rattle can or HVLP?

AND

Thank you for:


All the best!
Thanks. Rattle can on this project. I just acquired a hand-me-down HVLP system so I dying to try it on something now. I will now need to find a suitable match for the yellow enamel color in a can.

I used to believe the pictures merely supported the story and didn't like having the text sort of buried and lost in amongst the pictures. But with as many pictures as I take these days while working on project, the images ARE the story. I've also discovered an insertion method that only adds about 30 seconds to the whole posting process, so that helps too. I think most people just zip through and look at pictures anyway, unless something peaks their interest.
 
OP
S

shopnut

Well-known member
Joined
Feb 22, 2006
Messages
4,237
Location
Florida
A NEW FACELIFT FOR THE OLD MANLIFT… (Part 7 of 13)

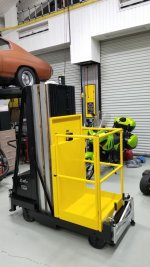
The basket is back on!
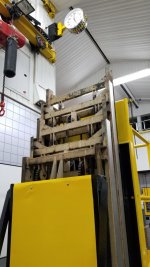
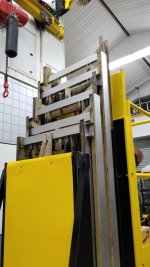
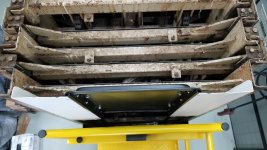
I mentioned magnetic sheet being used to cover up the rusty oil-covered mast sections and here they are with the final wider strips painted in silver and stuck to the vertical faces. Now that the basket is back on, you might be able to see why I painted the rear bracketry on the basket black… to serve as a separation between the silver mast and yellow basket. If you could see the yellow cover panel on the back of the mast, the symmetry would be even more noticeable.

attachment.php


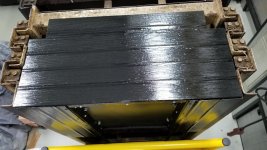
The narrower sample strips that were removed on the vertical members were recycled and cut down to work on the cross-members. You don’t see them until the basket is lifted, but they were just going to waste, otherwise. 10 minutes of time helped hide some more tan.

attachment.php


attachment.php


I did the same quick trick on the upper cross-members.

attachment.php


attachment.php


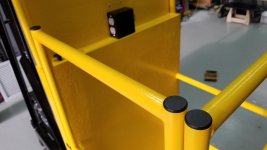
This is a shot of some updates made to the basket. I found some push-in caps that fit snuggly in the 6 open tube ends. The basket control box is mounted and now has a black color. And the door latch knob also has some fresh black paint (barely visible on the left)

attachment.php
 

Attachments

  • 3858-Cotterman-Manlift-RePaint-122.jpg
    3858-Cotterman-Manlift-RePaint-122.jpg
    77 KB · Views: 363
  • 3859-Cotterman-Manlift-RePaint-139.jpg
    3859-Cotterman-Manlift-RePaint-139.jpg
    65.8 KB · Views: 357
  • 3860-Cotterman-Manlift-RePaint-141.jpg
    3860-Cotterman-Manlift-RePaint-141.jpg
    65.4 KB · Views: 360
  • 3861-Cotterman-Manlift-RePaint-140.jpg
    3861-Cotterman-Manlift-RePaint-140.jpg
    80.2 KB · Views: 361
  • 3862-Cotterman-Manlift-RePaint-143.jpg
    3862-Cotterman-Manlift-RePaint-143.jpg
    74.2 KB · Views: 363
  • 3863-Cotterman-Manlift-RePaint-120.jpg
    3863-Cotterman-Manlift-RePaint-120.jpg
    77.7 KB · Views: 359
Last edited:

Bob Heine

ALLIANCE MEMBER
Joined
Oct 24, 2009
Messages
10,708
Location
Boca Raton, Florida
Mark, like all your projects, the lift looks great. I'm glad you didn't go for a sandblast and powdercoat refurb because the first chip would make you crazy.
 

shortykorte

Well-known member
Joined
Sep 1, 2014
Messages
8,039
Location
Tallahassee, Fl
Re: The ASYLUM - Turning a Crazy Vision into a Lakefront Gearhead Getaway: Year 6

Night and day difference. Good job.


Sent from my iPhone using Garage Journal
 
OP
S

shopnut

Well-known member
Joined
Feb 22, 2006
Messages
4,237
Location
Florida
Thread reply 3848 (before data restore)

************************************************

Knowing the forum has had server issues, lost thread replies, and lost attachments... I'm going to give Ryan a little time to see if he can retrieve the data before I repost any old entries back into this thread. If someone hears the data is lost forever, please let me know and I will repost things right away.

This is really no big deal for me... I have a MS-Word document where I prepare my stories before pasting them into this forum. It might take me maybe 20 minutes to repost the entries. Although I didn't lose any data myself, what I stand to lose is reader's comments and my responses to them, and that would be unfortunate because that is part of the fun as well, here on the Garage Journal.

Good luck with restoring the forum data Ryan!!

********************************************************


EDIT: I saw a message from Ryan indicating that it there is some hope, but he thinks the data is gone. So I will go ahead and re-post.
 
Last edited:
OP
S

shopnut

Well-known member
Joined
Feb 22, 2006
Messages
4,237
Location
Florida
A NEW FACELIFT FOR THE OLD MANLIFT… (Part 8 of 13)

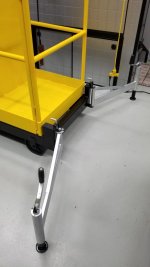
Outrigger assemblies were next on the list to get this man lift functional again. Here are all the painted parts.

attachment.php


Jack bearings and tubes were lubricated and all four outriggers were re-assembled.

attachment.php


The outriggers have latches on the frame that hold them in the stored or deployed position. I have purposely NOT lubricated these in the past in anticipation of the best paint adhesion during a re-paint “someday”. Well, “someday” finally came and these work so much better now with a little grease.

attachment.php


attachment.php


Here are the outriggers installed. I think the silver color works possibly better than yellow would have.

attachment.php


attachment.php


attachment.php
 

Attachments

  • 3870-Cotterman-Manlift-RePaint-138.jpg
    3870-Cotterman-Manlift-RePaint-138.jpg
    113.2 KB · Views: 254
  • 3869-Cotterman-Manlift-RePaint-136.jpg
    3869-Cotterman-Manlift-RePaint-136.jpg
    48.8 KB · Views: 256
  • 3868-Cotterman-Manlift-RePaint-135.jpg
    3868-Cotterman-Manlift-RePaint-135.jpg
    52.1 KB · Views: 252
  • 3867-Cotterman-Manlift-RePaint-131.jpg
    3867-Cotterman-Manlift-RePaint-131.jpg
    45.7 KB · Views: 254
  • 3866-Cotterman-Manlift-RePaint-130.jpg
    3866-Cotterman-Manlift-RePaint-130.jpg
    44 KB · Views: 252
  • 3865-Cotterman-Manlift-RePaint-127.jpg
    3865-Cotterman-Manlift-RePaint-127.jpg
    133.7 KB · Views: 254
  • 3864-Cotterman-Manlift-RePaint-126.jpg
    3864-Cotterman-Manlift-RePaint-126.jpg
    135.1 KB · Views: 256
Last edited:
OP
S

shopnut

Well-known member
Joined
Feb 22, 2006
Messages
4,237
Location
Florida
A NEW FACELIFT FOR THE OLD MANLIFT… (Part 9 of 13)

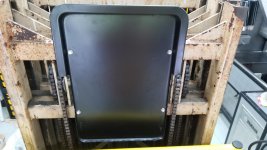
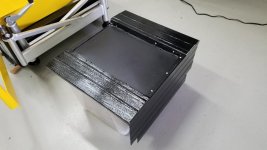
A cover panel to protect the basket occupant from the mast lift chains was missing since I bought the manlift and it was time to remedy that. I never worried about the safety aspect (and as an engineer, I sort of like seeing the things moving in there anyway), but I never liked the “unfinished” look. And now with a new paint job, this area was going to stand out like a sore thumb.

attachment.php


My cheap solution was some cheap baking sheets for $8 each. The original plan had one being used in the center and the second one cut in half and used on each side (there is an offset required to get around the chain sheaves. The center cover is already trimmed in this picture. I used my electric shears (shown), along with a hand shears, to trim the pan.

attachment.php


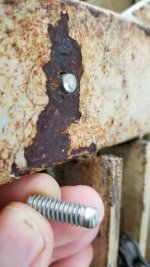
Forum member shortykorte reminded me of this method of using transfer punches to mark my clearance holes in the cover (thanks buddy!). I happen to have some ¼-20 weld studs on hand that worked perfectly as transfer punches, so I did not have to make any.

attachment.php


The cheap pan was pretty thin, so it was easy to make an impression in it on the points of the make-shift transfer punches. I circled the little indentations (out-dentations?).

attachment.php


Here is the pan with holes drilled, overlaid onto the punches.

attachment.php


And finally with fasteners hold it in place.

attachment.php


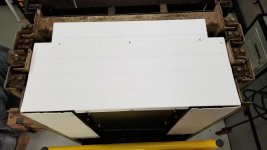
With the center cover in place, I changed my mind on how to do the side covers. The second pan would get used in the kitchen where it belongs and I found some scraps of white vinyl from the ASYLUM ceiling job that worked nicely. Here you can see them trimmed and attached to the center cover section.

attachment.php


It was starting to look pretty good, but I still wanted something on top to keep dust and debris from dropping in the top on the freshly oiled chains.
 

Attachments

  • 3877-Cotterman-Manlift-RePaint-161.jpg
    3877-Cotterman-Manlift-RePaint-161.jpg
    153 KB · Views: 254
  • 3876-Cotterman-Manlift-RePaint-159.jpg
    3876-Cotterman-Manlift-RePaint-159.jpg
    134.2 KB · Views: 250
  • 3875-Cotterman-Manlift-RePaint-157.jpg
    3875-Cotterman-Manlift-RePaint-157.jpg
    147.9 KB · Views: 250
  • 3874-Cotterman-Manlift-RePaint-155 (Edit).jpg
    3874-Cotterman-Manlift-RePaint-155 (Edit).jpg
    58.9 KB · Views: 248
  • 3873-Cotterman-Manlift-RePaint-154.jpg
    3873-Cotterman-Manlift-RePaint-154.jpg
    66.5 KB · Views: 254
  • 3872-Cotterman-Manlift-RePaint-152.jpg
    3872-Cotterman-Manlift-RePaint-152.jpg
    110.5 KB · Views: 251
  • 3871-Cotterman-Manlift-RePaint-151.jpg
    3871-Cotterman-Manlift-RePaint-151.jpg
    122.4 KB · Views: 253
Last edited:
OP
S

shopnut

Well-known member
Joined
Feb 22, 2006
Messages
4,237
Location
Florida
A NEW FACELIFT FOR THE OLD MANLIFT… (Part 10 of 13)

For covering the top of the mast to keep dust and debris from dropping in on the freshly oiled chains, I used some more white vinyl scraps I had on hand from a prior job. Those scraps have proven valuable for all sorts of projects, btw.

Here are some shots of the top cover addition

attachment.php


attachment.php


attachment.php


To make it look nice, it received a fresh coat of black paint designed to adhere to plastic.

attachment.php


Here is it, mounted on the manlift with those 4 screws I showed you earlier.

attachment.php


attachment.php


Since it is attached the last mast section, it goes up with it and creates an awning of sorts even when up. I’ve been known drop things from the basket occasionally, so that awning might just keep something from falling in the “works”. It bothers me that the underside is still white, so I might go back and shoot it with some black paint.

attachment.php


This was one of those jobs that seemed simple before starting, but ended up being fairly time consuming. As you can see, there were quite a few steps in this whole process, but luckily, the cover resulted in my satisfaction.
 

Attachments

  • 3884-Cotterman-Manlift-RePaint-173.jpg
    3884-Cotterman-Manlift-RePaint-173.jpg
    119.3 KB · Views: 253
  • 3883-Cotterman-Manlift-RePaint-172.jpg
    3883-Cotterman-Manlift-RePaint-172.jpg
    152.5 KB · Views: 256
  • 3882-Cotterman-Manlift-RePaint-171.jpg
    3882-Cotterman-Manlift-RePaint-171.jpg
    113.1 KB · Views: 254
  • 3881-Cotterman-Manlift-RePaint-168.jpg
    3881-Cotterman-Manlift-RePaint-168.jpg
    117.3 KB · Views: 254
  • 3880-Cotterman-Manlift-RePaint-164.jpg
    3880-Cotterman-Manlift-RePaint-164.jpg
    104.4 KB · Views: 256
  • 3879-Cotterman-Manlift-RePaint-163.jpg
    3879-Cotterman-Manlift-RePaint-163.jpg
    92.5 KB · Views: 255
  • 3878-Cotterman-Manlift-RePaint-166.jpg
    3878-Cotterman-Manlift-RePaint-166.jpg
    100.4 KB · Views: 259
Last edited:
OP
S

shopnut

Well-known member
Joined
Feb 22, 2006
Messages
4,237
Location
Florida
A NEW FACELIFT FOR THE OLD MANLIFT… (Part 11 of 13)

During this refurb project, I wanted to finally clean up the electrical system. In its prior life, a previous owner had removed the on-board battery charger. While doing so, they simply cut the wires (ugg!). This in turn disabled the 110V outlet located in the basket. To be honest, I have never really had a need for 110V in the basket because I normally use cordless tools, but I hate when integrated features are non-functional, you know?

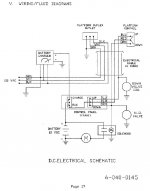
Here is the schematic for my particular battery-powered manlift version.

attachment.php


Pictured below is the way the ground controls looked since I bought it.

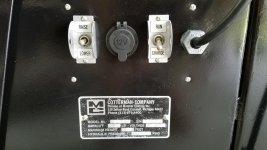
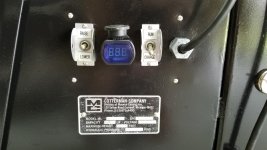
There was a key switch there which didn’t show up in the schematic (maybe an option?) and for which I didn’t have a key, so it is being removed. With the RUN/CHARGE switch in the CHARGE position, the UP/DOWN switch is disabled, and I consider this enough security.

What I wished the unit had was an Emergency Stop (E-stop) switch that cuts out all power from the battery, so I will be considering that as a safety upgrade someday. Why an E-stop? Well, any number of things can happen such as a stuck solenoid valve, that would keep raising the basket even when not demanded by the operator via the switch. That alone could be disastrous inside the shop, since the lift can raise higher than the ceiling. The best place for an E-stop would be in the basket somewhere, but that get’s complicated from a wiring standpoint, requiring relays or solenoids and such. I’ll ponder on this in the future and also look to the contemporary versions of this lift for design clues because they have integrated E-stops . In the meantime, I will rely on the hydraulic relief valve to possibly protect me from a “run-away” condition upon lifting.

In place of the key switch, I plan to add a 12V cigarette socket. This will primarily be used to plug in a voltmeter (essentially a fuel gauge for my deep cycle battery). A 12V power source in the shop can prove handy at times when I want to test automotive parts and accessories outside the vehicle.

The empty hole to the right I believe was where the power cord for charger and basket 110V power. I will be adding a short power cord back in here. I don’t need a long cord because I simply pull down one of the cord reels to plug into the manlift when recharging is needed.

attachment.php


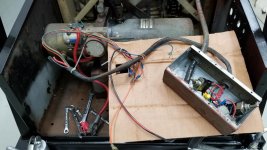
Here is the pump/battery/charger compartment. Ground control box is in red on the right.

attachment.php


Here is the 110V outlet in the basket, sporting its new black box paint job and gray outlet to spruce it up a bit.

attachment.php


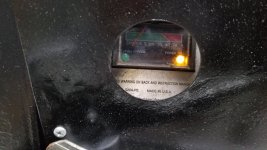
The meter on the battery charger already peeks out an existing window in the enclusure. It always has looked a little unfinished to me, but I don’t intend to change it right now.

attachment.php


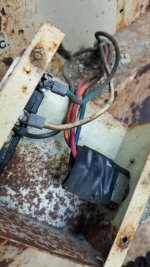
It was time to clean up this rat’s nest a little bit. The goal was to get functionality and safety back, and not necessarily aesthetics inside this enclosure.

attachment.php


Here are the parts I’m adding for the 12V outlet. I had the battery lead with fuse is laying around from a Battery Tender purchase. I made a simple little 6” adapter cord to enter the box and to go from the SAE 2-pin connector to some female spades connecting to the back of the 12V socket. The cigarette lighter socket and 12V voltmeter are also shown on the far right.

attachment.php


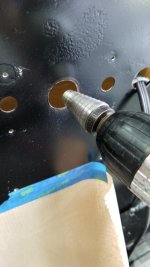
Enlarging the hole to accommodate the larger 12V socket is accomplished easily with a Unibit stepped drill bit.

attachment.php
 

Attachments

  • 3891-Cotterman-Manlift-RePaint-193.jpg
    3891-Cotterman-Manlift-RePaint-193.jpg
    54.1 KB · Views: 256
  • 3890-Cotterman-Manlift-RePaint-191.jpg
    3890-Cotterman-Manlift-RePaint-191.jpg
    80.6 KB · Views: 254
  • 3889-Cotterman-Manlift-RePaint-144.jpg
    3889-Cotterman-Manlift-RePaint-144.jpg
    147.7 KB · Views: 255
  • 3888-Cotterman-Manlift-RePaint-147.jpg
    3888-Cotterman-Manlift-RePaint-147.jpg
    146.8 KB · Views: 253
  • 3887-Cotterman-Manlift-RePaint-118.jpg
    3887-Cotterman-Manlift-RePaint-118.jpg
    64.6 KB · Views: 251
  • 3886-Cotterman-Manlift-RePaint-146.jpg
    3886-Cotterman-Manlift-RePaint-146.jpg
    149.7 KB · Views: 257
  • 3885-Cotterman-Manlift-Electrical-Schematic.JPG
    3885-Cotterman-Manlift-Electrical-Schematic.JPG
    57.8 KB · Views: 255
Last edited:
OP
S

shopnut

Well-known member
Joined
Feb 22, 2006
Messages
4,237
Location
Florida
A NEW FACELIFT FOR THE OLD MANLIFT… (Part 12 of 13)

Here’s a shot of the ground controls all finished up.

attachment.php


The plug-in voltmeter fits nicely there and I can push it in and be getting a reading anytime I’m running or charging the lift.

attachment.php


While the lift is in storage, I can simple pull the voltmeter out about a 1/4" to break connect and keep it from slowly draining the battery.

attachment.php


A 12V socket can be used for a number of things, such as this USB charger. And with hurricane season upon us in Florida, having backup power for small items could prove valuable. I have a USB charger inserted in the picture.

attachment.php


Here’s a view inside the compartment. You can see the cord attaching to the battery screw terminals. If I have an accessory that has an SAE 2-pin connector, I can also unplug the one here to test or power it. Lots of versatility!

attachment.php


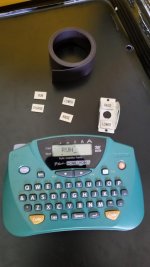
In the previous pictures, you might have notices some new switch labels. This is what I used to make them. Labels were affixed to magnetic sheet and they in turn were stuck to the metal switch guards.

attachment.php


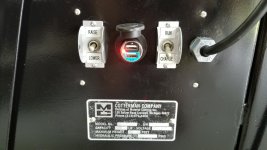
The control box in the basket also got some labels. Also note the cleaned up capacity label above the box.

attachment.php
 

Attachments

  • 3898-Cotterman-Manlift-RePaint-169.jpg
    3898-Cotterman-Manlift-RePaint-169.jpg
    35.8 KB · Views: 253
  • 3897-Cotterman-Manlift-RePaint-167.jpg
    3897-Cotterman-Manlift-RePaint-167.jpg
    50.8 KB · Views: 255
  • 3896-Cotterman-Manlift-RePaint-199.jpg
    3896-Cotterman-Manlift-RePaint-199.jpg
    149.3 KB · Views: 256
  • 3895-Cotterman-Manlift-RePaint-197.jpg
    3895-Cotterman-Manlift-RePaint-197.jpg
    137.3 KB · Views: 255
  • 3894-Cotterman-Manlift-RePaint-196.jpg
    3894-Cotterman-Manlift-RePaint-196.jpg
    146.6 KB · Views: 251
  • 3893-Cotterman-Manlift-RePaint-195.jpg
    3893-Cotterman-Manlift-RePaint-195.jpg
    127.4 KB · Views: 253
  • 3892-Cotterman-Manlift-RePaint-198.jpg
    3892-Cotterman-Manlift-RePaint-198.jpg
    147.3 KB · Views: 254
Last edited:
OP
S

shopnut

Well-known member
Joined
Feb 22, 2006
Messages
4,237
Location
Florida
A NEW FACELIFT FOR THE OLD MANLIFT… (Part 13 of 13)

There was one last detail I haven’t covered and that is the power cord. When purchased secondhand, it had already been removed for whatever reason. So I bought a nice heavy cord to exit next to the ground switches. Since it is 10 feet long, I needed to do something with the slack when not plugged in. I had always planned to do a cord reel for a neat and tidy installation, but gave up on that idea with time running short and needing to wrap this project up. I used some magnetic hooks to drape the cord from and keep it from swinging around when stored. So far that seems to be working nicely.

attachment.php


attachment.php


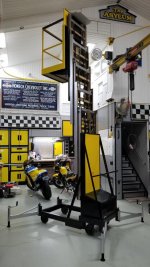
THE MANLIFT IS FINISHED!!!
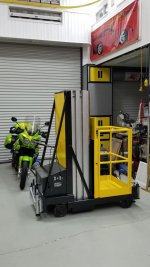
It is now TRULY an integral part of The ASYLUM. I’ll wrap up the project with some glamour shots.

attachment.php


attachment.php


Just so you don't forget what condition this thing was in when I started:

attachment.php


attachment.php


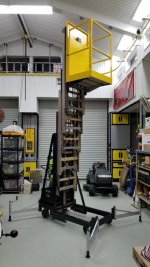
Here are a couple shots with the basket elevated:

attachment.php


My personal favorite:

attachment.php


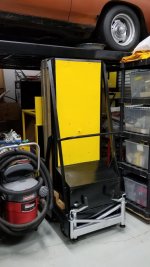
As I say goodbye to this project, I’ll store it away until it’s needed again (which will probably be next week already!). As a matter of chance, it fits under my HD-9 auto lift by fractions of an inch, but that’s all that’s needed and I consider it a real bonus.

attachment.php


Thanks for following along!
 

Attachments

  • 3905-Cotterman-Manlift-RePaint-189.jpg
    3905-Cotterman-Manlift-RePaint-189.jpg
    73.4 KB · Views: 252
  • 3904-Cotterman-Manlift-RePaint-190 (BEST).jpg
    3904-Cotterman-Manlift-RePaint-190 (BEST).jpg
    91.5 KB · Views: 2,143
  • 3903-Cotterman-Manlift-RePaint-185.jpg
    3903-Cotterman-Manlift-RePaint-185.jpg
    87.3 KB · Views: 245
  • 3902-Cotterman-Manlift-RePaint-178.jpg
    3902-Cotterman-Manlift-RePaint-178.jpg
    83.9 KB · Views: 247
  • 3901-Cotterman-Manlift-RePaint-175.jpg
    3901-Cotterman-Manlift-RePaint-175.jpg
    80.3 KB · Views: 246
  • 3900-Cotterman-Manlift-RePaint-201.jpg
    3900-Cotterman-Manlift-RePaint-201.jpg
    52.6 KB · Views: 248
  • 3899-Cotterman-Manlift-RePaint-200.jpg
    3899-Cotterman-Manlift-RePaint-200.jpg
    70.9 KB · Views: 248
Last edited:

shortykorte

Well-known member
Joined
Sep 1, 2014
Messages
8,039
Location
Tallahassee, Fl
Re: The ASYLUM - Turning a Crazy Vision into a Lakefront Gearhead Getaway: Year 6

Great job on the lift. Such a transformation. I’m glad you shared the schematic. I want to covert mine from a 3 motherboards, 1500 limit switches, super OSHA compliant system to a good old KIS system. For the basket switch/outlet box, is that the original box? The 12v socket with changeable accessories is a great idea especially the volt meter. Also setting it is up for a 12v power supply, genius. What kind of battery charger does it have?
I have a couple of need to do projects before I touch Christine but if the she was useable, it sure would be a huge benefit in my shop. I’m where if I had big stuff upstairs, I could work on Christine but can’t get stuff upstairs without Christine. [emoji22]


Sent from my iPhone using Garage Journal
 

cbacres

Well-known member
Joined
May 28, 2010
Messages
5,998
Location
SW Florida
Nice clean up job there. I also hate when things are butchered.

So... you got me to wondering..... being in a runaway lift that smashes and traps you into the ceiling verses a battery falling out and pinning one to the shop floor!:wtf::scared: :lol_hitti:lol_hitti

It’s a valid point though, switch/relays/valves stick. Maybe a simple main relay switch? They have shunt breakers for AC electric panels, it’d be a mechanical switch with a smaller current control circuit. All gas stations are equipped with these for gas dispenser and pump **** offs.
 

shortykorte

Well-known member
Joined
Sep 1, 2014
Messages
8,039
Location
Tallahassee, Fl
Re: The ASYLUM - Turning a Crazy Vision into a Lakefront Gearhead Getaway: Year 6

A simple solution which only requires a string shorter then floor to ceiling distance and a hand grenade. 🤣


Sent from my iPhone using Garage Journal
 
OP
S

shopnut

Well-known member
Joined
Feb 22, 2006
Messages
4,237
Location
Florida
Re: The ASYLUM - Turning a Crazy Vision into a Lakefront Gearhead Getaway: Year 6

Great job on the lift. Such a transformation. I’m glad you shared the schematic. I want to covert mine from a 3 motherboards, 1500 limit switches, super OSHA compliant system to a good old KIS system. For the basket switch/outlet box, is that the original box? The 12v socket with changeable accessories is a great idea especially the volt meter. Also setting it is up for a 12v power supply, genius. What kind of battery charger does it have?
I have a couple of need to do projects before I touch Christine but if the she was useable, it sure would be a huge benefit in my shop. I’m where if I had big stuff upstairs, I could work on Christine but can’t get stuff upstairs without Christine. [emoji22]


Sent from my iPhone using Garage Journal
Thanks man! Simple is most often best with our own equipment where we are using our brain a little bit to keep us out of trouble. And when it comes to the computer controlled stuff, you are out of luck if it doesn't have on-board diagnostics or you don't have fancy troubleshooting tools to "look inside" and see where the trouble lies.

Any effort to get the lift back working again will be time well spent, IMHO. Otherwise, that thing is just taking up shop space. Good luck!
 
To avoid these ads, REGISTER NOW!
OP
S

shopnut

Well-known member
Joined
Feb 22, 2006
Messages
4,237
Location
Florida
Nice clean up job there. I also hate when things are butchered.

So... you got me to wondering..... being in a runaway lift that smashes and traps you into the ceiling verses a battery falling out and pinning one to the shop floor!:wtf::scared: :lol_hitti:lol_hitti

It’s a valid point though, switch/relays/valves stick. Maybe a simple main relay switch? They have shunt breakers for AC electric panels, it’d be a mechanical switch with a smaller current control circuit. All gas stations are equipped with these for gas dispenser and pump **** offs.
Thanks Craig!

Good point... those lifts can be dangerous, up or down!

Thanks for the ideas. A battery cutout would be ideal. Another option might be what looks like a dump valve for the lift circuit in the hydraulic schematic . I haven't taken a look yet to see where it is on the the lift, but if this exists, it would "dump" the pressurized oil back to the tank as fast as the pump could produce it and stop the lifting motion. Plus it would be something on the low amp side (the control circuit), which is usually pretty easy to tap into. We shall see. I'll update you guys here if I move forward with something. I'll probably be making the modification right AFTER it happens the first time. LOL
 
OP
S

shopnut

Well-known member
Joined
Feb 22, 2006
Messages
4,237
Location
Florida
Re: The ASYLUM - Turning a Crazy Vision into a Lakefront Gearhead Getaway: Year 6

A simple solution which only requires a string shorter then floor to ceiling distance and a hand grenade. 🤣


Sent from my iPhone using Garage Journal
LOL But what about my new paint!!! And the entire shop!!! :lol:
 
OP
S

shopnut

Well-known member
Joined
Feb 22, 2006
Messages
4,237
Location
Florida
Re: The ASYLUM - Turning a Crazy Vision into a Lakefront Gearhead Getaway: Year 6

For the basket switch/outlet box, is that the original box?
Sorry, looks like I forgot to answer this question...

Yes, that is the original basket outlet box. It is a custom enclosure about the size of a 2-gang box and houses both the 110VAC outlet and the Raise/Lower switch. It looks to have enough room for an Emergency Stop switch (possibly a mushroom head type in the top face?) if I ever get around to that upgrade.

Here are a few shots inside while I was doing the refurb…

attachment.php


https://www.garagejournal.com/forum/attachment.php?attachmentid=1029255&stc=1&d=1594120266

attachment.php
 

Attachments

  • 3906-Cotterman-Manlift-RePaint-027.jpg
    3906-Cotterman-Manlift-RePaint-027.jpg
    89.4 KB · Views: 382
  • 3907-Cotterman-Manlift-RePaint-028.jpg
    3907-Cotterman-Manlift-RePaint-028.jpg
    81.7 KB · Views: 20
  • 3908-Cotterman-Manlift-RePaint-029.jpg
    3908-Cotterman-Manlift-RePaint-029.jpg
    80.6 KB · Views: 379
OP
S

shopnut

Well-known member
Joined
Feb 22, 2006
Messages
4,237
Location
Florida
THREE NEW INTEGRATED BATTERY TENDERS (CHARGERS)… (Part 1 of 2)

With stored vehicles in the shop, undoubtedly you need to deal with battery tenders or trickle chargers to maintain their batteries. While you could have one for every vehicle, I “share” them between vehicles and hit each battery for about one week out of the month to keep them topped off. Up until now, they have sat on the floor next to the vehicle being charged and that has been a nuisance with cords lying everywhere. So it was time to do something about it.

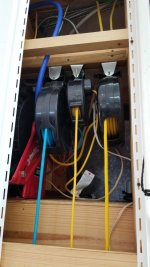
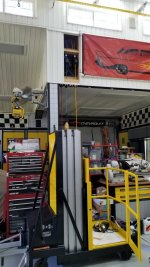
Cord and hose reels were some of the first things I equipped the shop with when I started outfitting it. And when I hid them in the side lofts, I added one extra fairlead for expansion someday. That someday is now. In the following picture, I have removed one of the vinyl panels so that you can see where the reels are located. Note the manlift is seeing its first real action… or should I say “reel” action, LOL.

attachment.php


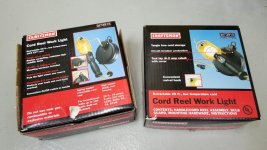
I purchased 4 of these low budget Craftsman cord reels in a 50% sale for $10/each a number of years ago and they have proven perfect as the basis to create an SAE 2-Pin extension cord to work in conjunction with the Battery Tenders.

attachment.php


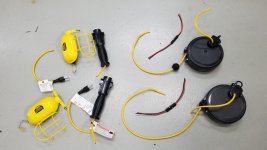
The first thing I do is cut the 110V ends from them so I’m just left with the reel. Parts on the left of this picture will be recycled someday. The SAE 2-pin connector pigtails will be spliced onto the reel.

attachment.php


This is an old picture of the original Battery Tender reel I made (because I forgot to take a picture of the new ones now), but it shows the finished product. I have been using the original one for over 10 years now without any charging issues on any of the batteries it was used on.

attachment.php


With the reels modified, I nestled one of them between two other reels up there.

attachment.php


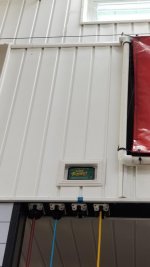
There was room to mount the Battery Tender directly above the fairleads.

attachment.php


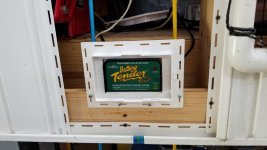
I added vinyl trim panel from my inventory to give it a finished look.

attachment.php


A cutout was added in the wall panel to complete the job.

attachment.php


But when I got all finished with the first Battery Tender installation, I just didn’t like how it disrupted the clean lines of that wall face. I had planned on repeating whatever I did here on the other loft across the way, so whatever I didn’t like here was soon going to be doubled.

In the end, I made an executive decision to change the Battery Tender location and the story continues…
.
 

Attachments

  • 3915-Battery-Tenders-11.jpg
    3915-Battery-Tenders-11.jpg
    42.6 KB · Views: 361
  • 3914-Battery-Tenders-10.jpg
    3914-Battery-Tenders-10.jpg
    109.6 KB · Views: 361
  • 3913-Battery-Tenders-09.jpg
    3913-Battery-Tenders-09.jpg
    68.5 KB · Views: 349
  • 3912-Battery-Tenders-04.jpg
    3912-Battery-Tenders-04.jpg
    72.8 KB · Views: 359
  • 3911-Battery-Tenders-17.jpg
    3911-Battery-Tenders-17.jpg
    114.5 KB · Views: 361
  • 3910-Battery-Tenders-16.jpg
    3910-Battery-Tenders-16.jpg
    149.1 KB · Views: 350
  • 3909-Battery-Tenders-01.jpg
    3909-Battery-Tenders-01.jpg
    93.5 KB · Views: 357
Last edited:

shortykorte

Well-known member
Joined
Sep 1, 2014
Messages
8,039
Location
Tallahassee, Fl
First off I didn’t understand the 2-pin on the reel but now seeing it all, that’s a great idea.
The green does stand out. How about using a solid piece of vinyl. Cut two round holes (or rectangle) where lights are and glue in a piece of white translucent plastic or acrylic.


Sent from my iPhone using Garage Journal
 
OP
S

shopnut

Well-known member
Joined
Feb 22, 2006
Messages
4,237
Location
Florida
First off I didn’t understand the 2-pin on the reel but now seeing it all, that’s a great idea.
The green does stand out. How about using a solid piece of vinyl. Cut two round holes (or rectangle) where lights are and glue in a piece of white translucent plastic or acrylic.
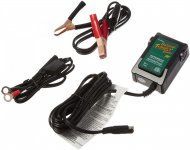
It seems the small trickle chargers/maintainers have somewhat standardized on a 2-pin SAE connection on the charger output (at least in the USA anyway). Then you have a choice on how it will connect to your battery, either with alligator clips or a more permanent ring terminal. Here are some examples of how these are kitted up when sold.

attachment.php


attachment.php


attachment.php


attachment.php


The retractable reels I have built are merely extension cords between the charger and vehicle connection.

attachment.php


I have already moved the chargers (which will be covered in Part 2), but your suggestion of a simple white vinyl cover is an elegant solution to hide those green charger faces and that will be considered. I do like the Delran Battery Tenders for their performance and reliability, but the latest design has very, very dim indicator lights on them. They are so dim that I need to turn off the shop lights to see them. I may consider tapping into the chargers and having auxiliary lights that are bigger/brighter and your idea of a cover panel would be a perfect place to mount these extra indicator lights. Thanks for the idea!!

I guess it’s time to take one of these chargers apart… FUN!!!
 

Attachments

  • 3919-Battery-Tender-Examples-04.jpg
    3919-Battery-Tender-Examples-04.jpg
    75.6 KB · Views: 318
  • 3918-Battery-Tender-Examples-03.jpg
    3918-Battery-Tender-Examples-03.jpg
    133.9 KB · Views: 318
  • 3917-Battery-Tender-Examples-02.jpg
    3917-Battery-Tender-Examples-02.jpg
    89.5 KB · Views: 314
  • 3916-Battery-Tender-Examples-01.jpg
    3916-Battery-Tender-Examples-01.jpg
    106.5 KB · Views: 318
Last edited:
OP
S

shopnut

Well-known member
Joined
Feb 22, 2006
Messages
4,237
Location
Florida
THREE NEW INTEGRATED BATTERY TENDERS (CHARGERS)… (Part 2 of 2)

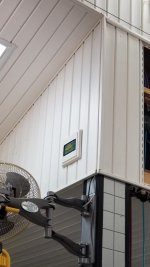
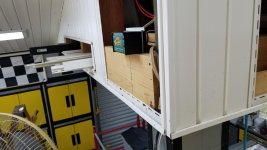
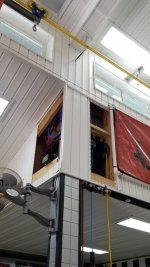
Rather than have the Battery Tenders on the front face of the lofts, I chose to move them around the corner to the triangular sides of the lofts. Sure, it set me back maybe 30 minutes, but what’s a few minutes in the grand scheme of things.

attachment.php


It was like Déjà vu mounting the Battery Tender and cutting out the vinyl, but at least it’s easier to repeat a task, right?

attachment.php


attachment.php


attachment.php


Here is the matching Battery Tender and reel in the other loft.

attachment.php


attachment.php


A third one was added near my main work area on the jib crane wall.

attachment.php


I plan to add 2 more eventually on the far side walls so I can reach any point in the shop, but that will happen sometime in the future.
 

Attachments

  • 3926-Battery-Tenders-30.jpg
    3926-Battery-Tenders-30.jpg
    66.2 KB · Views: 288
  • 3925-Battery-Tenders-21.jpg
    3925-Battery-Tenders-21.jpg
    66.6 KB · Views: 285
  • 3924-Battery-Tenders-20.jpg
    3924-Battery-Tenders-20.jpg
    74.2 KB · Views: 285
  • 3923-Battery-Tenders-15.jpg
    3923-Battery-Tenders-15.jpg
    58.8 KB · Views: 281
  • 3922-Battery-Tenders-14.jpg
    3922-Battery-Tenders-14.jpg
    118.5 KB · Views: 285
  • 3921-Battery-Tenders-13.jpg
    3921-Battery-Tenders-13.jpg
    115.6 KB · Views: 286
  • 3920-Battery-Tenders-12.jpg
    3920-Battery-Tenders-12.jpg
    74.5 KB · Views: 285
Last edited:

ODIS

Well-known member
Joined
Apr 30, 2012
Messages
2,110
Location
Pacific Northwest
Very nicely done, Sir!

For the folks planning their new garage space or remodeling an existing space, hope they will take your ideas and put them into action as well. Such great use of space and elimination of trip hazards are always “best” practices.

Thanks again for sharing your many talents!
 
OP
S

shopnut

Well-known member
Joined
Feb 22, 2006
Messages
4,237
Location
Florida
Very nicely done, Sir!

For the folks planning their new garage space or remodeling an existing space, hope they will take your ideas and put them into action as well. Such great use of space and elimination of trip hazards are always “best” practices.

Thanks again for sharing your many talents!
Thanks!

Yes, SAFETY FIRST!! At work, they drill this into our heads. And it works because our safety record is world class. We even record the "near misses" now because it helps identify deficiencies. Someone tripping on a cord, but not falling would constitute a "near miss" because someone could have gotten hurt. The whole philosophy does follow me home... safety glasses, ear protection, etc., are always close at hand, and used!! Of course that fateful night when I took a tumble from the step ladder... I guess SAFETY was on a coffee break!
 

shortykorte

Well-known member
Joined
Sep 1, 2014
Messages
8,039
Location
Tallahassee, Fl
Re: The ASYLUM - Turning a Crazy Vision into a Lakefront Gearhead Getaway: Year 6

Yepfcae19413d64be2e4295ca369498dc11.jpg
Safety First!!!!!


Sent from my iPhone using Garage Journal
 

Attachments

  • fcae19413d64be2e4295ca369498dc11.jpg
    fcae19413d64be2e4295ca369498dc11.jpg
    32.1 KB · Views: 1

IGO2XS

Well-known member
Joined
Apr 24, 2012
Messages
1,415
Location
Sarasota, FL
You have an amazing eye for detail! Looks awesome. I am sure I could find some way in my shop to use your idea!:bowdown:


THREE NEW INTEGRATED BATTERY TENDERS (CHARGERS)… (Part 2 of 2)

Rather than have the Battery Tenders on the front face of the lofts, I chose to move them around the corner to the triangular sides of the lofts. Sure, it set me back maybe 30 minutes, but what’s a few minutes in the grand scheme of things.
 

cbacres

Well-known member
Joined
May 28, 2010
Messages
5,998
Location
SW Florida
Mark, nice work, your making some of us look bad.:lol_hitti:lol_hitti

Great use of the reels, I’ll be cutting off the lamp holders on my reels as with all the LED battery lights, it’s nice not to be tied to cords.
 
Last edited:
OP
S

shopnut

Well-known member
Joined
Feb 22, 2006
Messages
4,237
Location
Florida
Mark, nice work, your making some of us look bad.:lol_hitti:lol_hitti

Great use of the reels, I’ll be cutting off the lamp holders on my reels as with all the LED battery lights, it’s nice not to be tied to cords.
If the shoe fits! LOL. Just kidding!! I've just been very ambitious lately, despite the the warm weather.

You reminded me that my existed trouble lights (on reels) hardly ever get used. They do have 110V taps in them so I mainly use them as extension cords these days. But perhaps I should just cut off the bulky lamp holders and install simple female sockets. Another project on the list!! Thanks (I think). :)
 

cbacres

Well-known member
Joined
May 28, 2010
Messages
5,998
Location
SW Florida
If the shoe fits! LOL. Just kidding!! I've just been very ambitious lately, despite the the warm weather.

You reminded me that my existed trouble lights (on reels) hardly ever get used. They do have 110V taps in them so I mainly use them as extension cords these days. But perhaps I should just cut off the bulky lamp holders and install simple female sockets. Another project on the list!! Thanks (I think). :)
When you do that, get the cord caps that are a nylon like material, they hold up much better that the harder plastic ones. I’ll look on mine to see if there’s a name.
 
To avoid these ads, REGISTER NOW!
Top Bottom