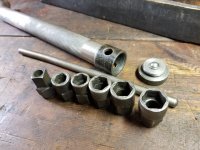
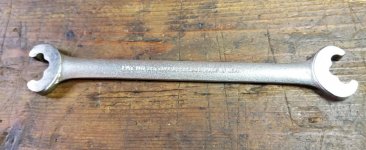
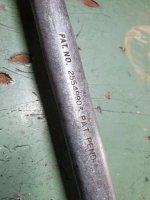
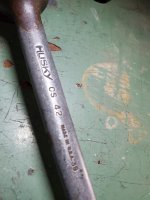
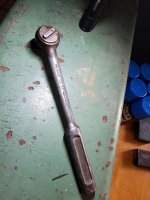
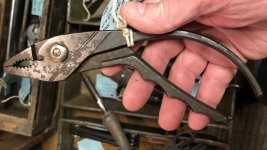
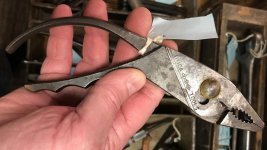
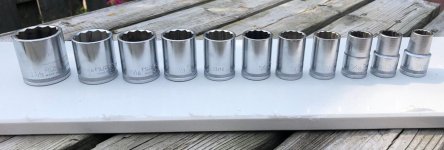
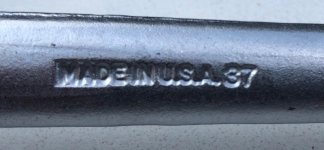
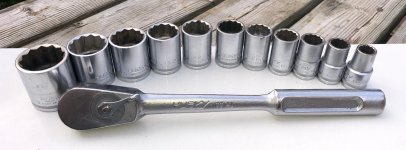
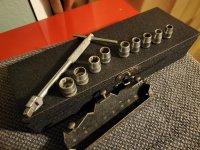
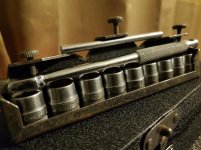
Found this NB 8” adjustable at a sale last week.

Sent from my iPhone using The Garage Journal mobile app
Sent from my iPhone using The Garage Journal mobile app


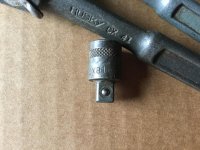
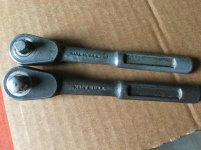


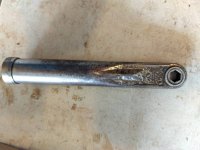
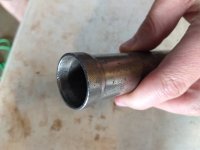
Pretty cool. You store sockets in handle I think.
Didn't click until now. I didn't think of it as a drive tool but now I understand [emoji1787]. I was thinking fixed size wrench.That was my guess on the Garage Sale thread, OTG, kinda like the Bog and the Edgar Guthard Billmont jobbies. But the end is not threaded for a cap.
You can add to the brand list:
Crescent
Litton
NBM
OTC
SP 45
Thorsen
"unbranded" (marked "USA" only)
Also, taking a SWAG that a limited number of Kilness design ratchets were produced either by National Hand Tool when they acquired the remnants of New Britain after the liquidation, or by Stanley briefly after acquiring NHT:
Master Mechanic
JS
Proto Challenger
My latest find (a Kilness patent Proto Challenger) also causes me to question how many might have actually be produced by Stanley after they acquired some of the remains of New Britain. And assuming Stanley did produce at least a few ratchets/brands using the Kilness patent, why did they stop using it? - Powderkeg
That's 30 brands, counting "unbranded" as a brand. As I said before, I think at least a few of these weren't actually produced by New Britain, but by either National Hand Tool, after they acquired the remnants of NB, or by Stanley, after they acquired NHT.
Here are two Husky CB-46 quick release ratchet. The top ratchet has the plastic spinner and is a 45 tooth. The bottom one is a 60 tooth ratchet with metal spinner. That is the only way to tell the difference in tooth count as New Britain never made a different number designation for the quick release ratchet.


It's definitely got more polishing and smoother chrome. Here's some pictures of it next to an NBM-35 ratchet. A few observations:The polishing and finishing around the head of the ratchet looks nicer than what I remember the New Britain production looking like. I'm betting on a reproduction.


The coil of that spring sits in the "crater" with the arms extending upwardly. The long arm pokes up through the slot in the "internal faceplate" and then goes up through small hole in the selector. The short arm of the spring pokes up through the small hole in the "internal faceplate" only.I have the Penncraft 3679, identical to the NB-46 and the CB-46 that you have with the thumb wheel. It wasn't working correctly so I disassembled it and found an inner spring (one long arm and one shorter) sitting it a crater underneath the internal faceplate on the mechanism. So I took that all apart and can't figure out where that spring sits or if something's missing. Any chance that you have a picture or two of the innards of one of those ratchets you have? Please?


The coil of that spring sits in the "crater" with the arms extending upwardly. The long arm pokes up through the slot in the "internal faceplate" and then goes up through small hole in the selector. The short arm of the spring pokes up through the small hole in the "internal faceplate" only.
Maybe this image will help. I wish I'd taken pics while it was further apart for you.

If you can put the spring on the "internal faceplate" with the short arm in the small hole and the long arm going up through the slot, the spring tension will hold itself in place. Then you can position the faceplate on the carrier, with the spring's coil dropping down into the "crater."
Next, get the internal faceplate tab opposite the spring to engage between the tabs on top of the pawl. Of course, the pawl has a spring under it. So, you'll have to hold things fairly tight with one hand at this point because the spring behind the pawl and the spring behind the internal faceplate are working against each other, wanting to knock everything out of alignment, until you get the e-clip back in place.
Now, put the selector over the top of the internal faceplate, with the long arm of the spring in the selector's hole. You'll probably have to rotate the selector so that the arm (with dimple pointed upwardly) drops down on the carrier in the open space above the pawl, where the carrier doesn't have the ridges. Continue to hold all this together while you reinstall the e-clip.
It's ALMOST certain that yours did not have a ball bearing under the spring. I say "almost" because I have an old 60-tooth 3/8-drive Champion Plugmaster flexhead made by NB, and it has a ball bearing under the pawl. The hole for the pawl spring is much deeper than in any of my other Kilness-design ratchets. It actually breaks through in the "crater" area. Maybe this was a manufacturing defect, and the fix was to add the ball bearing because the pawl spring was sitting too deep to work? Or maybe some of the very early production used a ball bearing, and they later figured out they didn't need it and eliminated it as a cost-saving measure? In any event, chances are you only need a pawl spring for your ratchet.Thank you very much for writing this up for me, I really appreciate it. It sounds like I had it together properly BUT it looks like I'm in trouble because there's no spring under the pawl. I was very slow and methodical about disassembling this unit so I don't know where it could've gone but it evidently popped out somehow. I thought it was odd that the pawl had no spring or ball bearing behind it like all the other ratchets I've opened up. The crater spring, for lack of a better term, was initially sitting completely down in the crater so I had to remove the quick release spring to remove the internal face plate to retrieve it and reset it in place. I think unless I can find a similar spring, I'm pretty much out of luck. It's too bad too because this one is really clean. Did the pawl also have a ball bearing somewhere that allowed it to glide from side to side? Presumably it would be set in the spring opening or something to that effect?
It's ALMOST certain that yours did not have a ball bearing under the spring. I say "almost" because I have an old 60-tooth 3/8-drive Champion Plugmaster flexhead made by NB, and it has a ball bearing under the pawl. The hole for the pawl spring is much deeper than in any of my other Kilness-design ratchets. It actually breaks through in the "crater" area. Maybe this was a manufacturing defect, and the fix was to add the ball bearing because the pawl spring was sitting too deep to work? Or maybe some of the very early production used a ball bearing, and they later figured out they didn't need it and eliminated it as a cost-saving measure? In any event, chances are you only need a pawl spring for your ratchet.
Next time I have one apart, I'll measure the free height of the spring. You should have an idea of the diameter you'll need to fit in the hole. Maybe you could find something that works at an Ace hardware store. You might even be able to pull a coil spring out of a click-pen and cut it down to work.

It's definitely got more polishing and smoother chrome. Here's some pictures of it next to an NBM-35 ratchet. A few observations:
- When I got it, it rattled noticeably if you shook it. After lubing it with grease (it was totally dry inside), it doesn't rattle nearly so much--but still a little bit. My NBM-35 doesn't rattle when shaken. I think this is because of the different selector cap design, which seems to have more clearance where it engages the selector mechanism.
- You can see how much smoother and nicer the chrome is compared to the old NBM.
- The head is also shaped a little differently, with a bit of a teardrop where the head meets the handle.
- The neck of the handle and the knurled grip are slightly larger in diameter. You can probably see this best when looking at the end of the handles. I know that when Craftsman ratchets and wrenches first went overseas, they grew considerably, presumably because Chinese steel required more material to achieve the same strength. Not sure if the increased size of this "USA" ratchet might mean it was forged in China and only assembled in the USA.
- The internal mechanism seems identical with the NBM. I took them apart and compared the pawls, and other than a little wear on the NBM, I couldn't see any difference at all.


Interesting. Thanks for posting.Your USA ratchet is a New Britain design. I have one. I believe the handle in the new one is slightly longer than the original. I can’t say for certain the maker, but I was told the USA marked ones were contract production and most likely made for government or military. I got mine in a set that included the ratchet and a set of SK metric sockets that were government surplus that were packed together in a welded clear non descript plastic.
Sent from my iPhone using The Garage Journal mobile app
I disassembled a 3/8 Penncraft with QR tonight, and I believe you're right. There was no spring under the pawl in my ratchet. I took some pictures of the disassembly, so hopefully this helps you get yours back together and working again.I appreciate that. I'm almost starting to think though that mine might be slightly different as the long arm/short arm spring appears to belong in the crater, as you mentioned, but there is no crater or any kind of knock out for a pawl spring. I'll have to take it apart again and double check and maybe I'll snap some pictures and post them here to see what you think.


I disassembled a 3/8 Penncraft with QR tonight, and I believe you're right. There was no spring under the pawl in my ratchet. I took some pictures of the disassembly, so hopefully this helps you get yours back together and working again.
Mechanism removed, but still assembled. The first thing I removed was the "safety pin" looking spring that sits flat on top. This spring is the one that pushes the pawl outward, with one of the tangs extending down through the "internal faceplate" to press against the back of the pawl.
http://i.imgur.com/JYv49Xo.jpg
There is no e-clip in this design. The QR spring is what retains the "internal faceplate." Because it's only spring-loaded (instead of fixed in place with an e-clip), you can lift the internal faceplate up slightly and pull the pawl out from under the faceplate. Once the pawl is out of the way, you can see that there is no spring or spring seat hole.
http://i.imgur.com/7qWbvCn.jpg
Here's a top view of the same stage of disassembly. You can see that the tabs on the pawl are completely captured by openings in the faceplate. The pawl is spring-loaded by the safety-pin spring, which allows the elimination of the pawl spring under the pawl.
http://i.imgur.com/2O1tt5x.jpg
The QR plunger can lift straight out, if it's aligned with the slots in the faceplate.
http://i.imgur.com/feymR3P.jpg
The faceplate can then lift off. Note the spring's orientation with the long leg extended up through the faceplate's curved slot. The short leg extends up through the small hole in the faceplate. Here are all the parts arranged (right-to-left) in the order I removed them.
http://i.imgur.com/4Re0LUf.jpg
Hope this helps!