tj675
Well-known member
Long time lurker here and I figured it was finally time to jump in. I’m hoping to use this space to document the restoration of our 1926 dairy barn.
Just over 3 years ago we started looking for a new home, first casually and then in earnest. We wanted a place that had character, barn/storage, and property (20 acres). This house was one of the first places that we saw, and after looking at a number of other homes, we just couldn’t find something that checked more boxes. We closed on the house in late 2018 and moved in 30 days later.
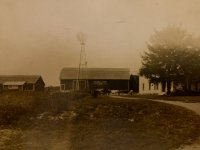
The property was originally a 300+ acre dairy farm in the late 1800s. This original barn and Victorian home burned in 1925.

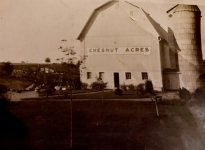
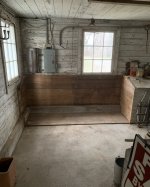
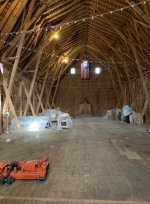
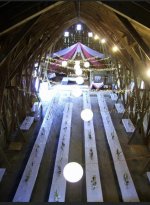
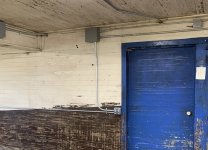
Mr. Chesnut went to work right away rebuilding the home and barn. The new barn was designed by Michigan State College of Agriculture (now Michigan State University) to show what could be done with new building processes. The structure is all done with 2x8’s and not post and beam. The first floor featured a dairy parlor that was 36ft x 85ft, 5 large stalls, a grain room, and a room for the milk tanks. The 2nd floor was all hayloft and a grand hayloft it is.
Here is a picture from shortly after the new barn was built. Take a look at the small trees in the foreground.

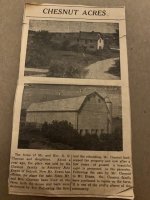
Mr. Chesnut sold the farm in the 30’s to an attorney in Detroit. The daughters mentioned in this article stopped by the farm in the early 90’s and provided these pictures.

The barn and silo from the late 40’s

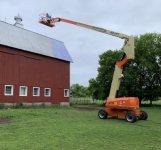
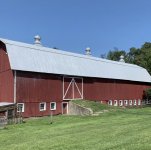
Here is a shot of how the barn looks today. The maple and elm trees sure have grown.

Just over 3 years ago we started looking for a new home, first casually and then in earnest. We wanted a place that had character, barn/storage, and property (20 acres). This house was one of the first places that we saw, and after looking at a number of other homes, we just couldn’t find something that checked more boxes. We closed on the house in late 2018 and moved in 30 days later.
The property was originally a 300+ acre dairy farm in the late 1800s. This original barn and Victorian home burned in 1925.
Mr. Chesnut went to work right away rebuilding the home and barn. The new barn was designed by Michigan State College of Agriculture (now Michigan State University) to show what could be done with new building processes. The structure is all done with 2x8’s and not post and beam. The first floor featured a dairy parlor that was 36ft x 85ft, 5 large stalls, a grain room, and a room for the milk tanks. The 2nd floor was all hayloft and a grand hayloft it is.
Here is a picture from shortly after the new barn was built. Take a look at the small trees in the foreground.
Mr. Chesnut sold the farm in the 30’s to an attorney in Detroit. The daughters mentioned in this article stopped by the farm in the early 90’s and provided these pictures.
The barn and silo from the late 40’s
Here is a shot of how the barn looks today. The maple and elm trees sure have grown.
Attachments
-
 44B349EE-06B1-4835-A6EC-1DC1CADA4B5B.jpeg76.7 KB · Views: 11,412
 -
 A9F4F4D8-D311-4AD7-9B78-67A90B9614C9.jpeg68.7 KB · Views: 11,342
 -
 5FA89D40-5F17-404F-AFFA-B8E5DA10E922.jpeg120.8 KB · Views: 12,443
 -
 A6B55966-F103-4FE0-9C2E-6E4DB4EDF8AF.jpeg104.7 KB · Views: 11,143
 -
 724F6561-2C80-4571-BA95-31F13900811D.jpg90.9 KB · Views: 11,027
Last edited:


 I could see myself living up there. Love this barn


")


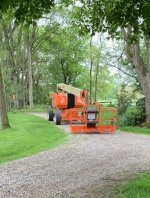
 Did you use a lift? Looks good though.