You are using an out of date browser. It may not display this or other websites correctly.
You should upgrade or use an alternative browser.
You should upgrade or use an alternative browser.
Above 1200 Sq/FT My 34x60 budget build
- Thread starter DJF3
- Start date
Wokspaces above 1200 squarefeet.
That looks like a lot of hard work. Looks like you have it under control. What kind of job you have, with long time on, long time off?
I sell parts for a large Cat dealer. My workplace is at the customer's somewhat remote minesite. 12 hour days or nights, 14 days on 14 days off. I took my last set off as vacation time, so it gave me 6 weeks off total. I've been doing this for about a year now and really enjoy it.
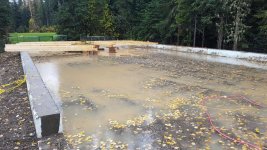
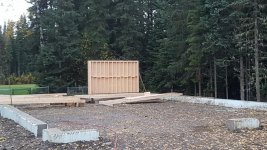
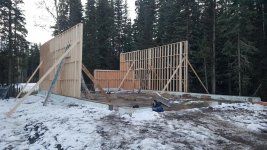
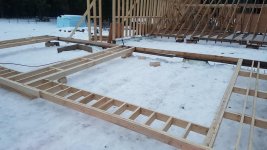
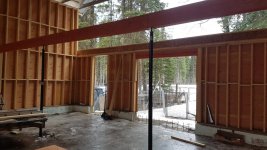
Time for some updates. Upon returning home after my last set, my foundation walls have been backfilled and packed. 42 loads of pit run! And more will be needed in the spring to finish landscaping. The weather was still very wet, cold snowy etc. Not conducive to pouring a concrete slab. So I shifted my efforts to building walls. The back wall went up fairly easy. It's only 8 ft high or so, since the I beams for the mezz will be sitting on the wall. Then I'll build the top half of the wall. I beams are not supposed to be exposed to the elements (OSB), so that part of the build will have to wait until the roof is on.
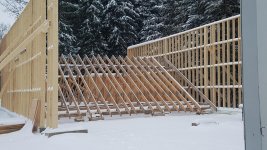
I started building the next 16 ft wall. I think I built it 12 ft long. I had no idea how I was going to sheet it 16 ft in the air, so I put the sheeting on while it was on the ground. Using a come a long and a jackall and blocking, I lifted the first wall section into place. WAY heavier than I thought. Took me about 3 hours to put up one section. LOTS of pucker moments lol.
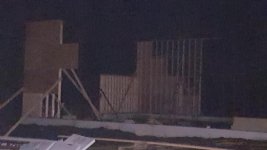
I thought I could jigsaw the next wall into place. It didn't work. So, I phoned some friends and we had a weekend build party. Got all the walls built (8 ft sections) and placed by Sunday afternoon! It's pretty amazing what 4 or 5 guys can accomplish is short order!
I started building the next 16 ft wall. I think I built it 12 ft long. I had no idea how I was going to sheet it 16 ft in the air, so I put the sheeting on while it was on the ground. Using a come a long and a jackall and blocking, I lifted the first wall section into place. WAY heavier than I thought. Took me about 3 hours to put up one section. LOTS of pucker moments lol.
I thought I could jigsaw the next wall into place. It didn't work. So, I phoned some friends and we had a weekend build party. Got all the walls built (8 ft sections) and placed by Sunday afternoon! It's pretty amazing what 4 or 5 guys can accomplish is short order!
Attachments
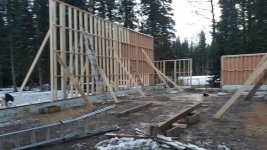
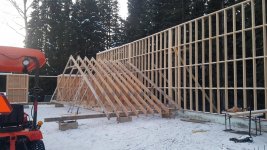
After all the walls were up, I put on some sheeting to give it some shear strength. As I built the walls, I only put on one top plate. This was on purpose. Next came the trusses. My neighbor convinced me to build the roof on the ground and lift it in with a crane truck. I watched his build and liked the idea. So, I laid out a workspace and started standing up trusses, bracing as I went. I attached the bottom of the trusses to my second top place via hurricane clips.
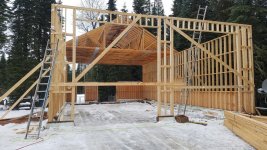
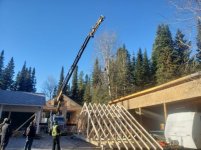
I was able to make two roof sections, each one 16 ft long. The crane operator didn't think he could lift anything bigger. So two roof sections and the front wall were built on the ground. The crane truck came and lifted them into place easy peasy! A little bit of adjustments on the walls with a sledgehammer, and the roof sections were attached!
I was able to make two roof sections, each one 16 ft long. The crane operator didn't think he could lift anything bigger. So two roof sections and the front wall were built on the ground. The crane truck came and lifted them into place easy peasy! A little bit of adjustments on the walls with a sledgehammer, and the roof sections were attached!
Attachments
-
 20201030_141143_resized.jpg157.5 KB · Views: 164
 -
 20201030_141056_resized.jpg159.3 KB · Views: 163
 -
 20201030_123401_resized.jpg159 KB · Views: 154
 -
 20201028_175122_resized.jpg143.3 KB · Views: 151
 -
 20201026_094140_resized.jpg162.3 KB · Views: 146
 -
 20201024_180953_resized.jpg161.6 KB · Views: 146
 -
 20201024_132427_resized.jpg157.2 KB · Views: 153



rixtrix1
Well-known member
This is looking fantastic!
Merry Christmas everyone! Hope the holiday season finds everyone healthy and well.
The last few weeks have not gone so well. Not terrible, but not great either. Saturday, Dec 5th, 5am I get a text from my wife to call her. Strange time for her to be texting. I'm at work and up anyway for breakfast. Turns out she spent the night at (not in, because visitors aren't allowed) the hospital with my oldest son. He had hit a moose with his car. Totaled the car, killed the moose. His face was pretty cut up, but thankfully he was ok otherwise. His two passengers were untouched! Pretty amazing for a Chevy Cavalier vs moose.
Fast forward to the night of the 8th. I'm heading home for my two weeks off. The week previous my wife had not been feeling well. Not flu like, but she got a test anyway. Came back negative. Now she feels flu like symptoms. She got a test the previous day, and this one came back positive for Covid. I work in a camp situation, and can't risk exposure and bringing it back to camp. So that night I stayed at a friends, the next day I went to the house and set up the travel trailer to live in. I was in the house to cook meals only, and use the bathroom. A little electric heater and the furnace kept the trailer quite comfy. I set up the satelite TV and hung out there. My kids also had to self isolate, since they were exposed. They spent most of their time in their bedrooms, playing video games. My wife was very sick for the whole two weeks I was home, and I couldn't do anything to help.
I spent the first few days at home trying to wrap my head around things, and figured out there wasn't much I could do, So, I continued on with my shop build. I planned on having a roof on the shop, but that hasn't happened yet. So I set about placing the strapping. I figured I have 20 to 24 hours in the strapping. Once that was done, I attempted to lay out the waterproof membrane so I could start laying the tin roof. I quickly discovered that was way beyond my comfort level. I think the peak is close to 26 ft off the ground!
I ran into another problem. I had removed the tin from my previous roof structure and saved it to reuse on this project. The previous roof was 40 ft long, the new shop is 60 ft. So the plan was to use the 40 ft from the south side, and 20 ft from the north side of the roof. That way, the color should match since the tin was 6 years old. Then I ordered 40 ft more tin for the north side. The north side is up against a tree line, and if there were a color difference it wouldn't be seen. What I realized is that when the tin from the north side comes to the south side, it has to be turned 180 degrees. One side of the tin has a dimple in the ridge that acts as an anti siphon groove, for a lack of a better term. It prevents water from being driven sideways underneath the overlapping tin. This groove would now be exposed unless I flipped the metal. Once flipped, the screw holes would no longer match up to the strapping I put up. So, I broke down and ordered all new tin. I also found a roofer to install all of it. It should be completed when I get home in the New Year.
The last project before I went back to work was to get the rest of the sheeting on. It took a while, but I finally got a system to get a sheet into place and get it nailed without moving ladders a bunch of times. I did get my son to help with lifting the plywood into place.
So that's were it sits for now. I'm not sure if there will be more building throughout the winter or not. Probably. I'm not one to sit around, but there is time for snowmobiling now! My son's face is all healed up, and my wife is finally feeling human again. So we are all healthy again.
The last few weeks have not gone so well. Not terrible, but not great either. Saturday, Dec 5th, 5am I get a text from my wife to call her. Strange time for her to be texting. I'm at work and up anyway for breakfast. Turns out she spent the night at (not in, because visitors aren't allowed) the hospital with my oldest son. He had hit a moose with his car. Totaled the car, killed the moose. His face was pretty cut up, but thankfully he was ok otherwise. His two passengers were untouched! Pretty amazing for a Chevy Cavalier vs moose.
Fast forward to the night of the 8th. I'm heading home for my two weeks off. The week previous my wife had not been feeling well. Not flu like, but she got a test anyway. Came back negative. Now she feels flu like symptoms. She got a test the previous day, and this one came back positive for Covid. I work in a camp situation, and can't risk exposure and bringing it back to camp. So that night I stayed at a friends, the next day I went to the house and set up the travel trailer to live in. I was in the house to cook meals only, and use the bathroom. A little electric heater and the furnace kept the trailer quite comfy. I set up the satelite TV and hung out there. My kids also had to self isolate, since they were exposed. They spent most of their time in their bedrooms, playing video games. My wife was very sick for the whole two weeks I was home, and I couldn't do anything to help.
I spent the first few days at home trying to wrap my head around things, and figured out there wasn't much I could do, So, I continued on with my shop build. I planned on having a roof on the shop, but that hasn't happened yet. So I set about placing the strapping. I figured I have 20 to 24 hours in the strapping. Once that was done, I attempted to lay out the waterproof membrane so I could start laying the tin roof. I quickly discovered that was way beyond my comfort level. I think the peak is close to 26 ft off the ground!
I ran into another problem. I had removed the tin from my previous roof structure and saved it to reuse on this project. The previous roof was 40 ft long, the new shop is 60 ft. So the plan was to use the 40 ft from the south side, and 20 ft from the north side of the roof. That way, the color should match since the tin was 6 years old. Then I ordered 40 ft more tin for the north side. The north side is up against a tree line, and if there were a color difference it wouldn't be seen. What I realized is that when the tin from the north side comes to the south side, it has to be turned 180 degrees. One side of the tin has a dimple in the ridge that acts as an anti siphon groove, for a lack of a better term. It prevents water from being driven sideways underneath the overlapping tin. This groove would now be exposed unless I flipped the metal. Once flipped, the screw holes would no longer match up to the strapping I put up. So, I broke down and ordered all new tin. I also found a roofer to install all of it. It should be completed when I get home in the New Year.
The last project before I went back to work was to get the rest of the sheeting on. It took a while, but I finally got a system to get a sheet into place and get it nailed without moving ladders a bunch of times. I did get my son to help with lifting the plywood into place.
So that's were it sits for now. I'm not sure if there will be more building throughout the winter or not. Probably. I'm not one to sit around, but there is time for snowmobiling now! My son's face is all healed up, and my wife is finally feeling human again. So we are all healthy again.
Attachments
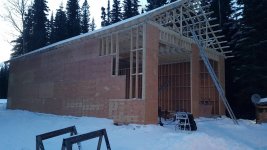


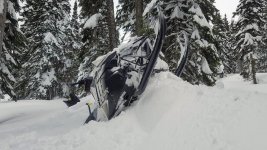
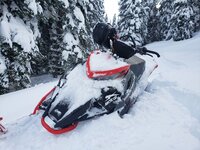
Time for more updates. Snowmobiling season wasn't bad, but not great either. Usually we put on 1200 to 1500 kms per season. This year was about 560 kms. The last ride was cut short due to a break down. I still don't know what's wrong. I came out under my own power, but it's parked in the shed for now and making some pretty bad noises from the powertrain. I'll look at it hopefully when I have a shop to work in!
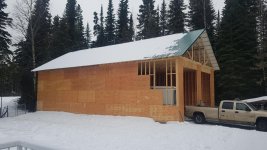
It's starting to look a little less like the partially completed death star lol.
It's starting to look a little less like the partially completed death star lol.
Attachments

Last edited:
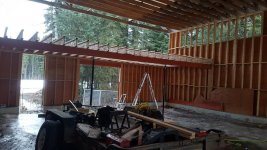
After the snowmobile season came to an abrupt halt, it was time to get back to building. The roof was completed around the middle of January, but there was still snow accumulation inside the shop. This quickly turned to ice, making it difficult to work. First up was starting the mezzanine. I have to get the beam and posts in, as the posts sit on the sono tubes and the floor gets poured around the posts. I climbed up into my attic and rigged two block and tackles to lift the beams into place. I can't remember the exact measurements, but the beam is 11 inches wider than the inside of the building. So to lift them into place, I had to lift one end much higher than it needed to be, so the other end could fit in between the studs. Then the beams went up and into place, one by one. This is a 3 ply LVL beam. Each one is 1.75" thick, and 9.75 inches high. Once in place, they got laminated together. 3 rows of nails 12" apart each side. That's alot of nails!
Next I placed the 34 ft I beam along the back wall, then the 12 ft I beams for the mezzanine floor and nailed everything down. The next step is to place the 3/4" tongue and groove plywood for the floor. Then the next section of the upper wall can go up. Plywood currently is over $95 per sheet! Measure thrice, cut once!
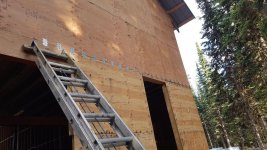
I also got one gable end sheeted in with plywood. I'm not sure yet what I'm doing with the attic, so I left that open for now. I'm thinking of a dutch door, leaving me the option of bringing light items up on a winch possibly.
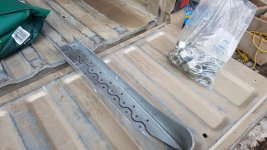
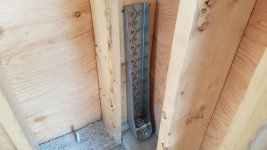
I also started to install the anchors at the corners and end of the sheer walls. 1" ready rod was already epoxied into the the foundation walls. Each anchor takes 30 2.5" screws. Then the special washer and a nut goes on and it gets tightened down. This is in addition to the regular 5/8" anchor bolts typically found every 4 ft.
Hopefully the ice melts quickly inside the building. Next will be vapor barrier, insulation, floor drain and rebar. Then I can pour the slab! So looking forward to that!
Next I placed the 34 ft I beam along the back wall, then the 12 ft I beams for the mezzanine floor and nailed everything down. The next step is to place the 3/4" tongue and groove plywood for the floor. Then the next section of the upper wall can go up. Plywood currently is over $95 per sheet! Measure thrice, cut once!
I also got one gable end sheeted in with plywood. I'm not sure yet what I'm doing with the attic, so I left that open for now. I'm thinking of a dutch door, leaving me the option of bringing light items up on a winch possibly.
I also started to install the anchors at the corners and end of the sheer walls. 1" ready rod was already epoxied into the the foundation walls. Each anchor takes 30 2.5" screws. Then the special washer and a nut goes on and it gets tightened down. This is in addition to the regular 5/8" anchor bolts typically found every 4 ft.
Hopefully the ice melts quickly inside the building. Next will be vapor barrier, insulation, floor drain and rebar. Then I can pour the slab! So looking forward to that!
Attachments



Last edited:
Kevkx125
Well-known member
DJF3 Nice build with a attic and a mezzanine can't wait to see it finished out.
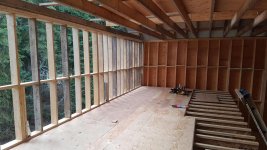
More progress last week. I did not prep for the concrete, I think I'll do that next. I had the I joists for the mezz installed, so next was the floor for the mezz. 3/4" tongue and groove, glued and screwed. 13 sheets at $92 per sheet!! Yikes! Once the floor was on, I could continue with my back wall.
Framed it up in two sections and put it in place. Remember those anchors I had to put in on the bottom? I need 6 more on this wall, tying the top and bottom walls together. The engineer decided I could use 4 small anchors and 2 large ones. The small ones required 1/2" ready rod, while the large ones take 1". Between double top plates, I joists, 3/4" plywood and the bottom plate of the top wall, I was over 20 inches. The 1/2" ready rod is a little bendy, so there was no problem drilling the holes and getting the ready rod through. The 1" ready rod is not so bendy. After hogging out the holes I was finally able to pass it through the holes and make the connections.
Another part of the engineering was to fasten the bottom plate of the top wall. I needed two rows of 3 1/2" nails, every 2 1/2 inches for over 32 feet! I'm not sure why, but that's what the engineer wanted. One row of nails went through the 2x3 on the I joist, the other row of nails only went through the bottom plate and 3/4" floor sheathing. I was very afraid that if I put both rows into the 2x3 that it would split. The drawings show only one row going into the 2x3, so that's what I did.
Next was the sheeting on the outside of the wall and gable end. More engineering. Now I have to tie the double top plate of the bottom wall to the I joist. The plans called for LTP4 or LTP5. These plates each take 12 nails and are spaced 8" OC....for 34 feet!
It's starting to come together! Once the floor is poured I can start putting in headers and doors.
Framed it up in two sections and put it in place. Remember those anchors I had to put in on the bottom? I need 6 more on this wall, tying the top and bottom walls together. The engineer decided I could use 4 small anchors and 2 large ones. The small ones required 1/2" ready rod, while the large ones take 1". Between double top plates, I joists, 3/4" plywood and the bottom plate of the top wall, I was over 20 inches. The 1/2" ready rod is a little bendy, so there was no problem drilling the holes and getting the ready rod through. The 1" ready rod is not so bendy. After hogging out the holes I was finally able to pass it through the holes and make the connections.
Another part of the engineering was to fasten the bottom plate of the top wall. I needed two rows of 3 1/2" nails, every 2 1/2 inches for over 32 feet! I'm not sure why, but that's what the engineer wanted. One row of nails went through the 2x3 on the I joist, the other row of nails only went through the bottom plate and 3/4" floor sheathing. I was very afraid that if I put both rows into the 2x3 that it would split. The drawings show only one row going into the 2x3, so that's what I did.
Next was the sheeting on the outside of the wall and gable end. More engineering. Now I have to tie the double top plate of the bottom wall to the I joist. The plans called for LTP4 or LTP5. These plates each take 12 nails and are spaced 8" OC....for 34 feet!
It's starting to come together! Once the floor is poured I can start putting in headers and doors.
Attachments



Next up is prep work for the concrete. First I dug in my basin for the floor drain. This is going to be a catch basin only, it's not going to drain anywhere. To drain it, I would have had to build a drain pad somewhere outside the building, plumb it, and run an oil skimmer. This way I can **** it out with a shop vac or sump pump if needed. I'm being told that the water will evaporate fairly quickly anyway.

Then, I had 10 yards of 1/2" minus trucked in. I used my little tractor to dump little piles everywhere. Raked them level and then packed it with the tractor. Then I used the garden tractor with a drag to flatten everything out. Checked and double checked level with my laser level, adding more gravel where needed.


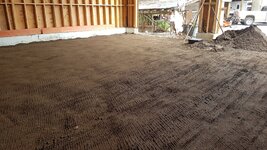


Then, I had 10 yards of 1/2" minus trucked in. I used my little tractor to dump little piles everywhere. Raked them level and then packed it with the tractor. Then I used the garden tractor with a drag to flatten everything out. Checked and double checked level with my laser level, adding more gravel where needed.
Once I was satisfied with the gravel being level (it's within 1/2"), the next step was to lay the poly. The poly has to come up the foundation walls and be sealed to them with acoustical sealant. Man, that is some sticky stuff! Very messy to work with if your not careful. After the poly comes 2" Styrofoam SM, then the rebar. Hours and hours of tying rebar. Thank god for the pre looped wires and the little tool! I had a supervisor for a while too!

I laid out my floor drain on top of the stryofoam, and ran the rebar up very close to it. The drain is honey combed on the sides, and there are gaps underneath. Once the concrete gets pour and sets up, it will lock the drain in place. Each section is about 40" long, and I had to silicone each joint to prevent it from popping out of place.
That's where I sit right now, waiting for the floor to be poured. Then it will be on to door headers, doors and electrical!
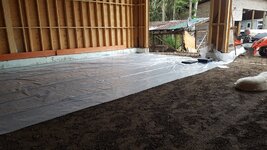
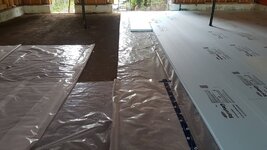


I laid out my floor drain on top of the stryofoam, and ran the rebar up very close to it. The drain is honey combed on the sides, and there are gaps underneath. Once the concrete gets pour and sets up, it will lock the drain in place. Each section is about 40" long, and I had to silicone each joint to prevent it from popping out of place.
That's where I sit right now, waiting for the floor to be poured. Then it will be on to door headers, doors and electrical!
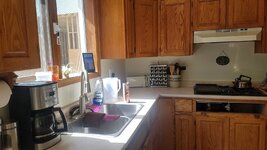
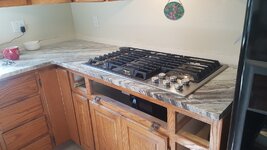
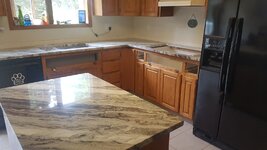
Just to break up the week a little, our new counter tops were installed. New sink and Jennair cook top too! What an upgrade! And while not directly garage related, I can justify posting this here. I saw a post about using an old counter top for a wood working bench. So that's what I'm going to do. The post I saw used the sink cut out for a spot to put a chop saw into. Great idea and good re-purposing of the old counter top. And a nice little Friday night fire to finish off the week.
Attachments



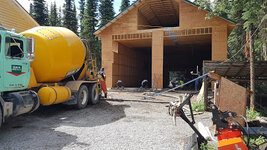
So..... 6 weeks ago I was ready for concrete. Finishers thought they could get to it by the end of June, but that didn't happen. I came home for my two weeks off and we were in the middle of a heat wave. 40 to 45 deg C, 113 F. Unheard of in BC. Too hot to work, too hot to pour concrete. Back to work for two weeks, and the day after I got home they came to pour. Finally! I now have a concrete floor! Something I've been missing for the past 15 years. Doors and headers are all framed in now, waiting for the overhead doors to arrive and get installed. Putting in headers by yourself takes some ingenuity, thankfully a couple of block and tackles came in handy. Electrical panel should be in when I get home, so now I get to learn all things electrical. I should get a fair bit done this time out, as I will be off for 6 weeks.
Attachments


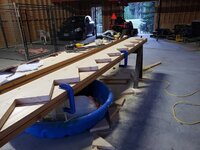
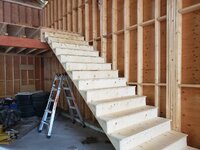
Where to start.....a lot happened in six weeks! I think the first thing I did was build a set of stairs. I decided to start with the small set first. 38" wide going from the mezz to the attic. Many, many, many calculations were made (and youtube videos watched) before the first cuts were made. One small error....I had a 10" run and cut a 10" tread, so I ended up with no nosing on the stairs. Lesson learned for the next set. I used 3 stringers for this set, and they are very solid. I used 4 stringers for my main staircase, from the ground floor to the mezz. They are also very sturdy. Next, I needed a way to attach the balusters. The ends of my joists were just open, so I framed them in with 2x4's and attached 3/4" plywood to them to box it in nicely.
Attachments


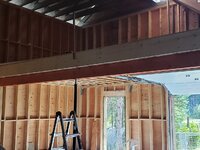
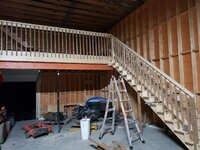
Next, the overhead doors went up. I paid to have them installed after watching and helping my neighbor do his. It took over a week to get one door functioning properly, the pros had both of mine done within the day. After the doors went up, I spent quite a bit of time doing electrical. Not many pictures of that. Again, I paid an electrician to install the sub panel from the house. I will do all the rest of the wiring. The next major addition was the hoist. I wasn't expecting to get one so soon, but I couldn't pass up this deal. I ended up with a 12000 lb Bend Pak for $2500! That is what I got done on my 6 weeks off. Now to finish up some framing to keep the weather out. I also managed to get some hunting, fishing and quadding in too!
Attachments
-
 20210908_191154.jpg328.3 KB · Views: 121
 -
 20211001_154217.jpg356.4 KB · Views: 119
 -
 20211003_131456.jpg268.5 KB · Views: 140
 -
 20211002_163737_capture.jpg398.3 KB · Views: 132
 -
 20210926_153041.jpg537.8 KB · Views: 122
 -
 20210926_154942.jpg303.5 KB · Views: 101
 -
 20210926_152912.jpg453.1 KB · Views: 118
Jayman17
Well-known member
Nice progress your place is coming along. Nice photos of your hunting trip, fall is definitely in the air.
Jay
Jay
We had a fairly successful hunting season. One son got a 4 pt mulie. I got a small 4pt. The other son got a small black bear, so we have meat and sausage in the freezer. It's been a long winter and some things have progressed, although slowly. The lifts on the hoist got bigger lol. Now, there is much more work going on IN the shop rather than ON the shop. First, it was my son's truck that needed a new rear diff and axle. Then both sleds required some repairs. My other son has an ongoing project where he is doing an WRX engine swap into an Impreza 2.5RS. That's been interesting. I finally closed in my gable ends and have just completed all the rough wiring. Now I'm waiting for an inspection in about 10 days, then I can start getting all the electrical hooked up. I've purchased all the vinyl siding and have that stored in the shop. 8% increase April 1st, so I bought before that. Still waiting for plywood to come down. I need 24 sheets of 3/4" T/G for my attic floor. Currently it's sitting at $95/sheet.
Earlier this winter we had friends sell their house much sooner than anticipated. They decided to retire and bought a 28ft fifth wheel to live in. They had to wait several weeks for the purchase of their RV lot to go through, so they ended up living in the fifth wheel in my shop for a time. It sure is nice to have space that is useable for things like that. I'm always willing to help out.
One note on my hoist. It was lifting uneven, and even after adjustments it still was not right. I brought the hoist experts in and in 10 seconds diagnosed a bad cylinder. I knew something was up with that one cylinder, as it would occasionally leak oil all over the floor. The local chrome shop said it needed a re-tube, as it was scored and rusted. Most likely from being stored outside by the previous owner. $2100 was the quote. I contacted the Bendpak dealer and got a complete replacement cylinder for $900. That will be going back in within a couple of weeks. Hopefully the hoist will lift properly then. I'm going to have to keep an eye on the other cylinder to make sure it wasn't subject to the same fate.
Hopefully I will be getting back into build mode and keep the pictures coming.
Earlier this winter we had friends sell their house much sooner than anticipated. They decided to retire and bought a 28ft fifth wheel to live in. They had to wait several weeks for the purchase of their RV lot to go through, so they ended up living in the fifth wheel in my shop for a time. It sure is nice to have space that is useable for things like that. I'm always willing to help out.
One note on my hoist. It was lifting uneven, and even after adjustments it still was not right. I brought the hoist experts in and in 10 seconds diagnosed a bad cylinder. I knew something was up with that one cylinder, as it would occasionally leak oil all over the floor. The local chrome shop said it needed a re-tube, as it was scored and rusted. Most likely from being stored outside by the previous owner. $2100 was the quote. I contacted the Bendpak dealer and got a complete replacement cylinder for $900. That will be going back in within a couple of weeks. Hopefully the hoist will lift properly then. I'm going to have to keep an eye on the other cylinder to make sure it wasn't subject to the same fate.
Hopefully I will be getting back into build mode and keep the pictures coming.
Attachments
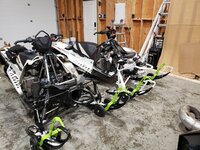
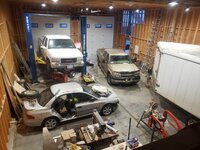


It's been a while, so it's time for an update I suppose. Not many more pictures, but some things have progressed.
My hoist seems to be functioning better with the new cylinder. Previously, it lifted quite uneven from side to side, and not level. Now it's closer to level, although not perfect since my floor has about 1" of slope to it over 17 ft. But, it is lifting evenly now! It was uneven before because one cylinder was doing all the work, and the cables were stretching.
I passed the rough inspection for the electrical, and completed the rest of the wiring. I have since passed the final electrical. The next step is to call for a framing inspection, then it's on to insulating. Starting July 5th, I'm working 7 out of 8 weeks, 12 hours a day 7 days a week. So not much will get done in the next two months, but then I'm off for a month after that. It's also the start of hunting season, so who knows what will get accomplished lol.
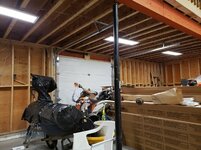
Here are some pictures of the lighting. I don't have pictures of the big lights I put up outside, but wow are they bright. On each gable end I put up a 100 watt LED wall pack, and on the side I put up a 60 watt. All the outside lights are on photocells and switches, so they only come on when it's dark out.
My hoist seems to be functioning better with the new cylinder. Previously, it lifted quite uneven from side to side, and not level. Now it's closer to level, although not perfect since my floor has about 1" of slope to it over 17 ft. But, it is lifting evenly now! It was uneven before because one cylinder was doing all the work, and the cables were stretching.
I passed the rough inspection for the electrical, and completed the rest of the wiring. I have since passed the final electrical. The next step is to call for a framing inspection, then it's on to insulating. Starting July 5th, I'm working 7 out of 8 weeks, 12 hours a day 7 days a week. So not much will get done in the next two months, but then I'm off for a month after that. It's also the start of hunting season, so who knows what will get accomplished lol.
Here are some pictures of the lighting. I don't have pictures of the big lights I put up outside, but wow are they bright. On each gable end I put up a 100 watt LED wall pack, and on the side I put up a 60 watt. All the outside lights are on photocells and switches, so they only come on when it's dark out.
Attachments


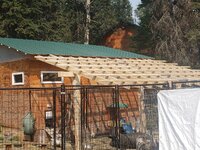
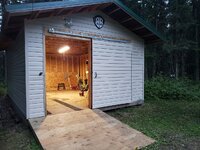
Wow!!! Over a year since an update. Sorry everyone. Life has just been plugging along. Progress on the shop has slowed significantly. I think I went too hard and burnt myself out. Plus, as stated earlier, there is work in the shop rather than on the shop. After passing the electrical inspection, I now have lights, doors, cement to work on, and a hoist. Next comes heat. I borrowed a mini hoe from a friend and dug the line in from the house. I managed to pick up a couple of used 75000 btu overhead radiant heaters. Before I can hang the heaters, I need drywall on the ceiling. So I hired someone who said they could do it while I was away for my 14 days. Lesson learned! Both overhead doors fell off the tracks since he did not put them back in the correct place. One door track wasn't even bolted back! And half the lights didn't get re-mounted either. I guess you get what you pay for. Anyway, I got that all rectified and continued on with the heaters. I got them wired and hung, and a gas installer completed the gas lines and hook up. Now I have heat, but no insulation yet. Priorities I guess lol. I've had a stack of siding staring at me for quite some time now, so that was my next push. I used to sell the product many years ago, but never installed it. I decided to start with my snowmobile shed that no one really sees. It was good practice. A few mistakes, but nothing major. I think it turned out really good! Backing up a bit, late fall/early winter of 2022 brought us chickens! Well, for the wife anyway. So....they need a home for the winter. Here comes the chicken coop and hay storage shed. Oh, along with the chickens came 2 goats and 3 pigs. Over the course of the winter, it became apparent that we needed more roof for the coop. So that happened a couple weeks ago too.
Attachments
-
 20230827_140252.jpg476 KB · Views: 76
 -
 20230825_195007.jpg414.9 KB · Views: 70
 -
 20221122_115813.jpg356.9 KB · Views: 67
 -
 20221116_104345.jpg317.7 KB · Views: 71
 -
 20230818_203811.jpg326.5 KB · Views: 70
 -
 20230730_174024.jpg313.4 KB · Views: 72
 -
 20230303_110116.jpg177.4 KB · Views: 68
 -
 20221020_140826.jpg604.5 KB · Views: 67
 -
 20221020_114035.jpg479.8 KB · Views: 68
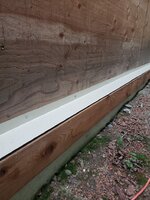
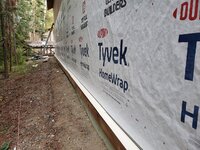
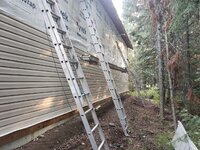
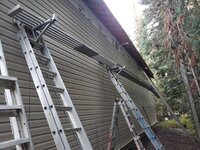
Since the wife got chickens, I decided to get a new Cat. Seems legit, doesn't it? Much fun was had with the new toy over the winter. Ok, back to the shop build. I want to start the siding, but there is much prep work to do first. Since I used ICF, I now have to protect it. So, I fastened a PT 2X6 all around the perimeter. Then I had a custom flashing bent up to ensure any water would run away from the building. Then starter strip, tyvek, corner posts and finally siding. I have to admit, it was a little unnerving installing the vinyl siding that far up in the air! I am done one wall and ready for facia and soffits. Next will be siding on the remaining three walls as high as I can with ladder jacks and planks, then I think I will have to rent a man basket to do the rest. The peak on the gable ends is at 27 feet! Stay tuned....more to come!
Attachments
-
 20230212_102452.jpg278.3 KB · Views: 65
 -
 20230213_142607.jpg350.2 KB · Views: 66
 -
 20230915_141419.jpg487 KB · Views: 65
 -
 20230917_094016.jpg209.8 KB · Views: 63
 -
 20230917_094033.jpg254.1 KB · Views: 56
 -
 20230917_142629.jpg404.8 KB · Views: 53
 -
 20230920_180340.jpg461.5 KB · Views: 52
 -
 20230924_183819.jpg386.3 KB · Views: 57
 -
 20230926_130341_resized.jpg1.2 MB · Views: 73
Slowly but surely more and more work is getting done. Heaters have been turned on and are warming the shop nicely, although I may have too many BTU's. I'm hoping I can correct that with the right thermostats. The first ones I put in only showed me warmer and colder. No temperature settings. And I discovered they didn't turn off. I figure at the lowest setting I'm still around 15C. That's actually too warm when you're working in the shop. So, I wired in a couple of light switches to turn the thermostats on an off. That became a bit of a pain to try and regulate the heat. I have now found thermostats that will go as low as 5C. I think those will work much better. I've also installed most of the insulation and vapor barrier in the lower section of the shop. The attic is next, hopefully within the next month or so. I'm going to hire that out as it's quite labour intensive. It took me two weeks to do the main part of the shop. It turned into a much bigger job than I imagined. I blocked off the stairs going to the attic space as best as I could, but I'm still losing heat. However, It was very comfortable to work last week when the temperatures outside dropped to -30C. I don't want to know what my heat bill is going to be lol.
Maybe, just maybe, I am starting to see the end of this project. Still lots and lots of work to be done, but the list is getting smaller. Once the insulation is all done, I have to do the walls. Half plywood, half drywall. Then tape, mud, and paint. Flooring on the mezzanine, and T/G plywood for the attic floor. Finish the siding, soffits and facia, and a little bit of landscaping to clean up around the edges and maybe that's it! Should only take another 2 years or so!
Maybe, just maybe, I am starting to see the end of this project. Still lots and lots of work to be done, but the list is getting smaller. Once the insulation is all done, I have to do the walls. Half plywood, half drywall. Then tape, mud, and paint. Flooring on the mezzanine, and T/G plywood for the attic floor. Finish the siding, soffits and facia, and a little bit of landscaping to clean up around the edges and maybe that's it! Should only take another 2 years or so!
Attachments


More progress has been made! Insulation was installed in the attic and the inspection passed. R24 in the walls for the main shop. R28 in the attic walls, R40 in the attic ceiling, and R70 blown in outside the attic space. 2 things I have to do for the inspector however. I have to provide attic access for the sides where the blown in insulation is. The other thing I have to do is seal the wall to the ICF. You can see where I started that on the wall behind the hoist. That's a pain and will require several rolls of Tuck tape. The new thermostats are working very nicely. I've got them set to about 7C and it's just right. The floor finally went in the attic. No more worrying about falling through the joists lol. I discovered the soffit and facia install is too high for my comfort level. I'm hiring that out and should be complete this week. We have has almost no snow. We have not been out on the snowmobiles at all. They may just remain parked until next year. Oh well, more time (and money) to spend on the shop. I have to finish now within two years or I will have to start my permit process over. I don't want to do that. The regional district changed the rules. It used to be a 3 year permit with a 3 year extension for $100. Now it's a 1 year extension for $300, and a second 1 year extension for $600. I'm hoping to have my final inspection before the first year is up. I've decided to go full plywood on the walls. I double checked my plans and I have 4 shear walls that require full plywood anyway. I figure the labor to mud and tape will be offset by the cost of the plywood. Plus, I can have unpainted plywood and still pass the final inspection. Drywall must be mudded, taped and painted to pass the final. More to come....
Attachments


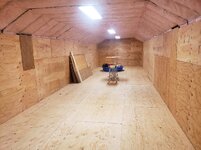


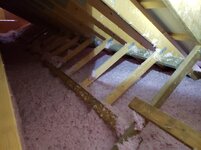
Plywood is all up on the inside. A few tricky pieces with several cut outs. Measure twice, cut one? Well, I measured about 20 times and cut once. Got this one around the door on the first try!
Soffits and facia are now done. I hired that out due to the height of the building. Way outside my comfort zone!
The wall is sealed to the ICF inside, and a "curb" has been installed.
Now I'm on to the siding. Lots of trim and prep work. Finally starting to look less like a barn and more like a garage lol
Soffits and facia are now done. I hired that out due to the height of the building. Way outside my comfort zone!
The wall is sealed to the ICF inside, and a "curb" has been installed.
Now I'm on to the siding. Lots of trim and prep work. Finally starting to look less like a barn and more like a garage lol
Attachments
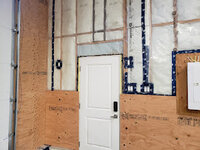
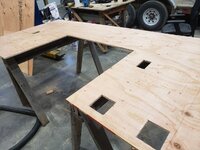
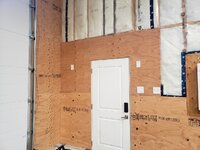
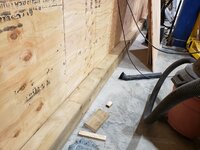
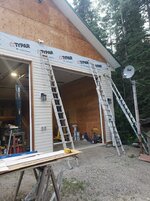
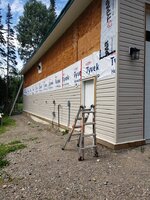
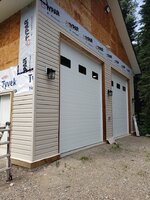



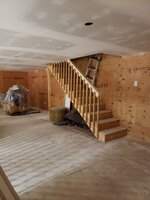
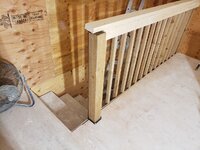
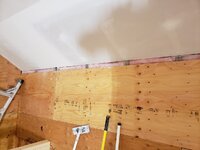
Wow...got a lot done this time around. Built a cabinet around my breaker box. Not really that exciting, but one more item to check off the list. Banister built for the attic stairs. Railing built in the attic. My plywood and drywall didn't quite meet up, so I installed a 1x4 trim board to cover it.
Attachments



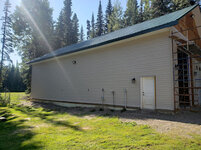
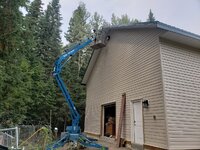
Completely finished the siding! Finally. All that's left on the outside now is some landscaping. The self levelling man lift was a gamechanger! And yes, those stumps are certified lol!
Painters are in now doing their thing. I'm doing 4 feet of light gray eurathane, then 12 ft of white on the walls. Ceiling will be white. Stairs, mezzanine floor and attic floor will be dark gray. Attic walls will be light gray, and the attic ceiling will be white. All the banisters and railings will also be light gray. Getting closer!
Painters are in now doing their thing. I'm doing 4 feet of light gray eurathane, then 12 ft of white on the walls. Ceiling will be white. Stairs, mezzanine floor and attic floor will be dark gray. Attic walls will be light gray, and the attic ceiling will be white. All the banisters and railings will also be light gray. Getting closer!
Attachments
-
 20240909_103857.jpg445.9 KB · Views: 40
 -
 20240908_190934.jpg332.8 KB · Views: 36
 -
 20240908_134720.jpg275.4 KB · Views: 34
 -
 20240908_134655.jpg434.9 KB · Views: 35
 -
 20240907_103318.jpg300.8 KB · Views: 36
 -
 20240907_103152.jpg531 KB · Views: 36
 -
 20240906_192850.jpg427.1 KB · Views: 37
 -
 20240905_200314.jpg335.4 KB · Views: 49
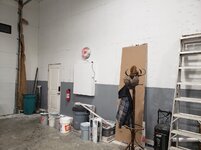
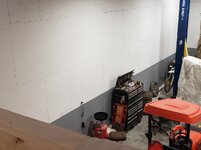
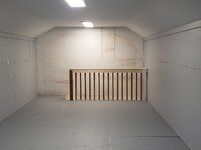
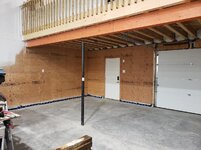
Painters have been in doing their thing. Here's some pictures of the white and gray walls. The attic space is done, except for one end wall and the railings. I'm still contemplating adding a stripe of color to the gray. Caterpillar colors. Cat yellow, red and black.
The shop is a disaster right now as everything was either under the mezz or in my enclosed trailer so the painters had a clear space to work in. Now everything is moved out from under the mezz so they can drywall and continue to paint that.
The shop is a disaster right now as everything was either under the mezz or in my enclosed trailer so the painters had a clear space to work in. Now everything is moved out from under the mezz so they can drywall and continue to paint that.
Attachments
-
 20241007_233846.jpg51.3 KB · Views: 26
 -
 20241007_233858.jpg200 KB · Views: 29
 -
 20241007_233920.jpg311.5 KB · Views: 30
 -
 20241007_233947.jpg161.4 KB · Views: 28
 -
 20241007_234001.jpg130.8 KB · Views: 27
 -
 20241007_234017.jpg87.6 KB · Views: 26
 -
 20241007_234125.jpg261.9 KB · Views: 27
 -
 20240730_064151.jpg19.2 KB · Views: 40