To avoid these ads, REGISTER NOW!

ZMotorsports Shop Projects 2.0

OP
Z

zmotorsports

ALLIANCE MEMBER
Joined
Oct 20, 2009
Messages
21,477
Location
Northern Utah
Maybe send them one injector to test, limit your exposure and earn their trust, or maybe prove to yourself they are not standup as you suspect.

Yeah, that's not a bad idea. I'll have to ponder it because we've already purchased another set of injectors which are on their way.
 
To avoid these ads, REGISTER NOW!
OP
Z

zmotorsports

ALLIANCE MEMBER
Joined
Oct 20, 2009
Messages
21,477
Location
Northern Utah
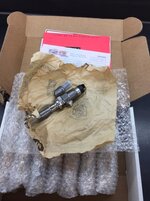
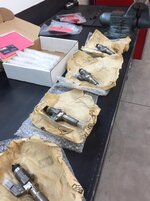
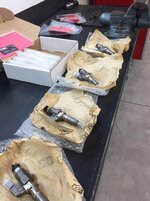
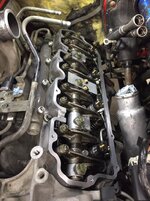
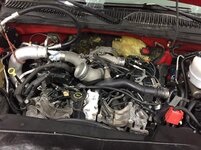
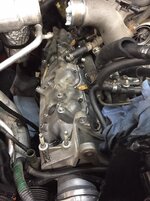
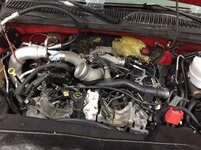
Removed the injectors tonight and cleaned the injector cups to accept the new injectors when they arrive.
dcf8f79932b74c8254a94544d21345c3.jpg

f4a1d56aa94475eff687ec3a974b71e1.jpg
 

Attachments

  • f4a1d56aa94475eff687ec3a974b71e1.jpg
    f4a1d56aa94475eff687ec3a974b71e1.jpg
    123.8 KB · Views: 0
  • dcf8f79932b74c8254a94544d21345c3.jpg
    dcf8f79932b74c8254a94544d21345c3.jpg
    110.7 KB · Views: 0
Last edited:

casmurbax

Well-known member
Joined
Sep 25, 2012
Messages
2,761
Location
Wilton, NY
That really stinks considering the amount of preventive maintenance you and your son do.

I was noticing the rags you use, are they lined on the bottom or will the liquids seep through? The ones I got off of Amazon Warehouse deal were not, they look similar to the ones I see in the latest pictures
 
OP
Z

zmotorsports

ALLIANCE MEMBER
Joined
Oct 20, 2009
Messages
21,477
Location
Northern Utah
That really stinks considering the amount of preventive maintenance you and your son do.

I was noticing the rags you use, are they lined on the bottom or will the liquids seep through? The ones I got off of Amazon Warehouse deal were not, they look similar to the ones I see in the latest pictures

Thank you.

The absorbent pads that are shown are PIG pads and they do a great job of absorbing liquids/fluids. They can be a bit spendy but work well and I watch for them on sale. NAPA has them in their Real Deals on occasion and I'll stock up.
 
OP
Z

zmotorsports

ALLIANCE MEMBER
Joined
Oct 20, 2009
Messages
21,477
Location
Northern Utah
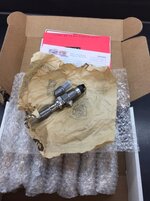
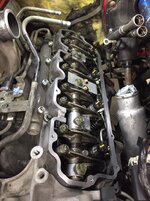
The injectors from LDS showed up today so I started the reassembly process.

630af0677a5565f3bfec00bcdfa0a04c.jpg

One bank laid out, installing O-rings and some Sil-Glide on the O-rings for assembling into the buckets without damage.
b7d73fb0321886b16205aa449c9a304d.jpg

Injectors torqued in place along with return lines installed with new seals.
9ea5b20557bbf34a14e834b5dd534531.jpg

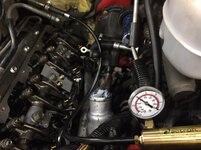
I pulled a vacuum on the return lines prior to installing rocker boxes to verify there are no leaks which can put diesel into the crankcase.
568c9a22755c4bfce99a8163f205765b.jpg

Tomorrow night I will install rocker boxes.

Thanks for looking.
 

Attachments

  • 9ea5b20557bbf34a14e834b5dd534531.jpg
    9ea5b20557bbf34a14e834b5dd534531.jpg
    127.1 KB · Views: 0
  • 568c9a22755c4bfce99a8163f205765b.jpg
    568c9a22755c4bfce99a8163f205765b.jpg
    90.2 KB · Views: 0
  • b7d73fb0321886b16205aa449c9a304d.jpg
    b7d73fb0321886b16205aa449c9a304d.jpg
    92.6 KB · Views: 0
  • 630af0677a5565f3bfec00bcdfa0a04c.jpg
    630af0677a5565f3bfec00bcdfa0a04c.jpg
    94.6 KB · Views: 0
Last edited:
OP
Z

zmotorsports

ALLIANCE MEMBER
Joined
Oct 20, 2009
Messages
21,477
Location
Northern Utah
Thanksgiving morning I finished assembly of my son’s LB7 while he and my DIL were in Phoenix with her family. I wanted it done before he got home.

Lower rocker boxes installed.
f15df9988918440ccc69276089343c7a.jpg

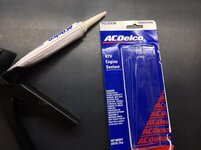
GM’s ES (Engine Sealant) has been my go-to sealant for about the past 15+ years now.
ae66ef3afa217c0381594e84c70219cf.jpg

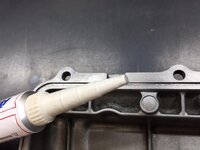
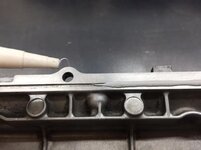
One of my pet peeves is seeing sealant/RTV oozing out of seams in ridiculous amounts on a vehicle. When it comes to sealant or RTV many seem to be under the impression that if a little is good then a lot must be great. I cut the tip of the nozzle narrow to only allow a bead of around 1/8”-3/16” is all.
0d760f3d48decfa4ce6deb5a44c38295.jpg

Then apply a small and consistent bead around the component. In this case there’s a small 1/8” channel machined in the upper rocker box.
81550d8d60f5c084cdcd6f0604edd0d3.jpg

After assembled and torqued to spec this is about all you should see.
235d1ef842bb84b8ab48c390f18abacf.jpg

27b3283d24f74172a0feb2e13bacc4dd.jpg

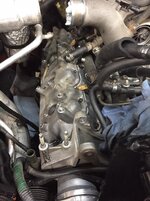
High pressure lines installed and going back together.
a1ec4336fbb5dfc0b2b76672b98e15e6.jpg

d7e3136fc536c2de96b9d7e1e44e8e4f.jpg


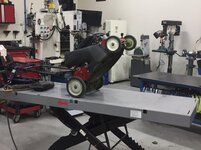
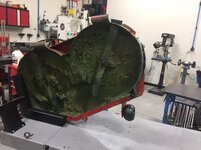
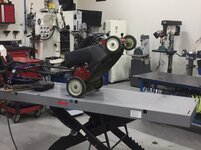
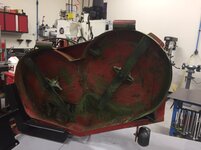
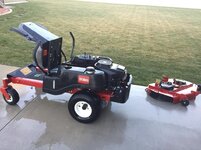
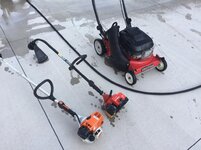
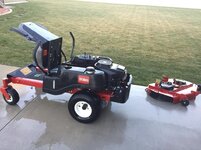
Tonight I brought the OPE into the shop to perform the annual year end service so it’s ready come spring.
2368f71867b1bde326877f9ab60c159b.jpg

2ac9ab5d54552f8c028869616d78bfeb.jpg

08bdada696276c9250d7b1cc5efd9b2f.jpg

acfaf41b93af509511cbdfafb3cf032a.jpg

d7f234030707a7a9267e666b18e5489d.jpg

With the decks mechanically cleaned and blades sharpened next will be to pressure wash everything and then change lubricants.
 

Attachments

  • 27b3283d24f74172a0feb2e13bacc4dd.jpg
    27b3283d24f74172a0feb2e13bacc4dd.jpg
    111.4 KB · Views: 0
  • 235d1ef842bb84b8ab48c390f18abacf.jpg
    235d1ef842bb84b8ab48c390f18abacf.jpg
    88.6 KB · Views: 0
  • 81550d8d60f5c084cdcd6f0604edd0d3.jpg
    81550d8d60f5c084cdcd6f0604edd0d3.jpg
    60.1 KB · Views: 0
  • 0d760f3d48decfa4ce6deb5a44c38295.jpg
    0d760f3d48decfa4ce6deb5a44c38295.jpg
    65.9 KB · Views: 0
  • ae66ef3afa217c0381594e84c70219cf.jpg
    ae66ef3afa217c0381594e84c70219cf.jpg
    85.7 KB · Views: 0
  • f15df9988918440ccc69276089343c7a.jpg
    f15df9988918440ccc69276089343c7a.jpg
    123.3 KB · Views: 0
  • a1ec4336fbb5dfc0b2b76672b98e15e6.jpg
    a1ec4336fbb5dfc0b2b76672b98e15e6.jpg
    115.3 KB · Views: 0
  • d7e3136fc536c2de96b9d7e1e44e8e4f.jpg
    d7e3136fc536c2de96b9d7e1e44e8e4f.jpg
    128.4 KB · Views: 0
  • 2ac9ab5d54552f8c028869616d78bfeb.jpg
    2ac9ab5d54552f8c028869616d78bfeb.jpg
    77.3 KB · Views: 0
  • 2368f71867b1bde326877f9ab60c159b.jpg
    2368f71867b1bde326877f9ab60c159b.jpg
    82.9 KB · Views: 0
  • d7f234030707a7a9267e666b18e5489d.jpg
    d7f234030707a7a9267e666b18e5489d.jpg
    74.6 KB · Views: 0
  • acfaf41b93af509511cbdfafb3cf032a.jpg
    acfaf41b93af509511cbdfafb3cf032a.jpg
    85.5 KB · Views: 0
  • 08bdada696276c9250d7b1cc5efd9b2f.jpg
    08bdada696276c9250d7b1cc5efd9b2f.jpg
    75.6 KB · Views: 1
Last edited:

OutlawDrifter

Well-known member
Joined
Jan 20, 2015
Messages
3,903
Location
KS
How is the deck to remove on the Toro zero turn?

I was pleasantly surprised to find very little buildup of clippings on the X724 this Fall. Must have really good air flow. Blades needed a serious sharpening, however.

I've got some.of the AC Delco sealant in my box to try on your recommendation, thanks. Do you generally buy the smaller tubes?
 
OP
Z

zmotorsports

ALLIANCE MEMBER
Joined
Oct 20, 2009
Messages
21,477
Location
Northern Utah
How is the deck to remove on the Toro zero turn?

I was pleasantly surprised to find very little buildup of clippings on the X724 this Fall. Must have really good air flow. Blades needed a serious sharpening, however.

I've got some.of the AC Delco sealant in my box to try on your recommendation, thanks. Do you generally buy the smaller tubes?


I have to ask, how do you get such a consistent bead of sealant? Do you use a tube key?

JB

Marc, the deck comes out from under the Toro ZTR very easily, takes all of about 30-seconds to remove. One cotter pin in the front and then lift it off of the height adjustment attachment points on the left and right at the rear of the deck and then lastly slip the belt off of the crankshaft pulley from the engine and slide it out. Installation takes a couple of minutes. The hardest part is just getting the rear lift points onto the height adjustment mechanism which you have to hold your tongue just right and the planets have to be in complete alignment.:D All in all it is still quite easy to remove/install. I generally pull it at least once throughout the season and then in the fall before putting away for a good cleaning. I don't use the deck washout feature as it leaves a mess and the garage smelling not so pleasant so I just pull the deck a time or two when needed.

As for the GM sealant, I just purchase the standard size tube which is 2.65 oz. It can usually be found a bit cheaper on line vs. the GM dealership but I've purchased from both.

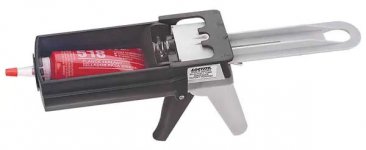
JB, if you look in the picture you can see the black squeeze applicator that I use as I haven't had the best of luck with the keys. My applicator has a pistol grip and the tube is inserted between the two large flat sections. As you squeeze the pistol grip the contents are forced out the top of the tube. It is very easy to use and combined with a small 1/8" to 3/16" opening at the tip it is very easy to control and apply a small consistent bead.
ae66ef3afa217c0381594e84c70219cf.jpg
 

Attachments

  • ae66ef3afa217c0381594e84c70219cf.jpg
    ae66ef3afa217c0381594e84c70219cf.jpg
    80.4 KB · Views: 1

quadrcr87

Well-known member
Joined
Jul 5, 2013
Messages
1,036
Location
Travelers Rest, SC
Nice job on the injector install Mike. Excess and sloppy sealant is usually a tell tale sign that someone has performed a shoddy repair to me. Its always something I look for when buying used. It is the worst on motorcycle and ATV engines as it is so visible. Do you really want to buy a machine that has RTV oozing out of the case halves? I cant trust the rebuild when I see that!

I did a set of injectors on my dad's 2001 Duramax back in 2009. That truck went through 3 sets of injectors in the 200K he owned it. I remember corrosion on the high pressure fuel line ends being a common problem. I believe GM recommended replacing all the lines during the injector change. I ended up walnut blasting the tips to save my dad some $. Have you seen this on either of your trucks?
 

JCQuick

Well-known member
Joined
Nov 29, 2008
Messages
4,933
Location
Apopka Fla.
I purchased one of those rtv squeeze tube tools about 20 years ago I love that thing i'm like you a little will go a long way
 
OP
Z

zmotorsports

ALLIANCE MEMBER
Joined
Oct 20, 2009
Messages
21,477
Location
Northern Utah
Nice job on the injector install Mike. Excess and sloppy sealant is usually a tell tale sign that someone has performed a shoddy repair to me. Its always something I look for when buying used. It is the worst on motorcycle and ATV engines as it is so visible. Do you really want to buy a machine that has RTV oozing out of the case halves? I cant trust the rebuild when I see that!

I did a set of injectors on my dad's 2001 Duramax back in 2009. That truck went through 3 sets of injectors in the 200K he owned it. I remember corrosion on the high pressure fuel line ends being a common problem. I believe GM recommended replacing all the lines during the injector change. I ended up walnut blasting the tips to save my dad some $. Have you seen this on either of your trucks?

That is one of the things I loved about working on snowmobiles, ATV's and motorcycles when I had my speed shop, everything is out in the open for all to see. I loved working on powersports machinery and the care and attention to detail that was evident when done correctly.

There was a sealant made by Threebond called 1104 that is very similar to the GM ES and I used that as well as the Yamabond sealant quite a lot. Both of those worked great for case halves where only a small amount was needed and they worked well.

As for high pressure lines, I haven't really seen too many issues on any of the Duramax's that I've done but I did insist on replacing them when I was doing these on a client's truck. I did replace them on my son's due to the miles but they really didn't look as bad as some I've seen.

Thanks for stopping by and checking my projects out.
 
OP
Z

zmotorsports

ALLIANCE MEMBER
Joined
Oct 20, 2009
Messages
21,477
Location
Northern Utah
I purchased one of those rtv squeeze tube tools about 20 years ago I love that thing i'm like you a little will go a long way

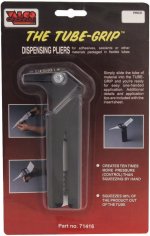
JC, what brand is yours? I got mine about fifteen or so years ago from my local Lawson rep and the tag/label has long worn off. He gave it to me as a promotional gift but I haven't seen them around. I've had a few people ask where they could get one like it and I have no idea what to tell them.
 

Bob Heine

ALLIANCE MEMBER
Joined
Oct 24, 2009
Messages
10,709
Location
Boca Raton, Florida
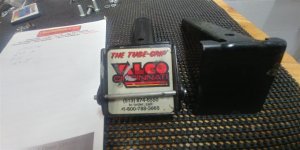
Mike, thank you for showing me another tool I didn't know existed but I have to have. Valco Cincinnati sells a couple that look like yours. There's a 2.5" and this 2" model. Both are about $25.
attachment.php


Amazon and several other online sites have them: https://www.amazon.com/dp/B007IQ539C/?tag=atomicindus08-20

Loctite sells a fancier one but it's over $100 most places. Looks like it's a lot bulkier so might not work so well in tight places.
attachment.php


Amazon has this one for $85: https://www.amazon.com/dp/B007IBQWVU/?tag=atomicindus08-20
~~~~~~~~~~~~~~~~~~~ EDIT~~~~~~~~~~~~
Looks like my brain and fingers work a little slower than purplezr2 and Justin. I chose the 2.5" model because I sometimes buy caulking in a tube and those tubes are wider than 2".
 

Attachments

  • Tube Squeezer.jpg
    Tube Squeezer.jpg
    75.2 KB · Views: 596
  • Tube Squeezer 2.jpg
    Tube Squeezer 2.jpg
    23.3 KB · Views: 596
Last edited:
OP
Z

zmotorsports

ALLIANCE MEMBER
Joined
Oct 20, 2009
Messages
21,477
Location
Northern Utah
Mike, thank you for showing me another tool I didn't know existed but I have to have. Valco Cincinnati sells a couple that look like yours. There's a 2.5" and this 2" model. Both are about $25.
attachment.php


Amazon and several other online sites have them: https://www.amazon.com/dp/B007IQ539C/?tag=atomicindus08-20

Loctite sells a fancier one but it's over $100 most places. Looks like it's a lot bulkier so might not work so well in tight places.
attachment.php


Amazon has this one for $85: https://www.amazon.com/dp/B007IBQWVU/?tag=atomicindus08-20
~~~~~~~~~~~~~~~~~~~ EDIT~~~~~~~~~~~~
Looks like my brain and fingers work a little slower than purplezr2 and Justin. I chose the 2.5" model because I sometimes buy caulking in a tube and those tubes are wider than 2".

Bob, the Valco in your first picture is the exact one I have. I also have one made by GTE (link to amazon) that is similar to the second picture you posted but it is less than stellar and I don't care for it. I thought being newer and more intricate it would be a joy to use but the KISS theory proves to work again and I keep using the good 'ole Valco one that never fails me.

https://www.amazon.com/dp/B0161DNLD2/?tag=atomicindus08-20
 
To avoid these ads, REGISTER NOW!
OP
Z

zmotorsports

ALLIANCE MEMBER
Joined
Oct 20, 2009
Messages
21,477
Location
Northern Utah
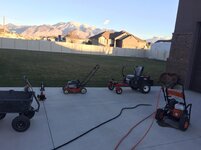
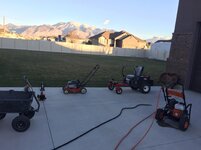
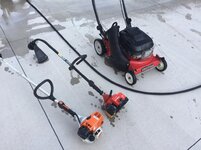
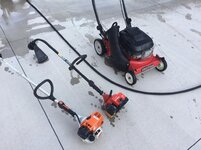
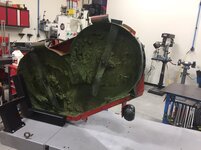
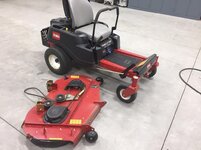
Last night I completed the last task of winterizing the lawn & garden equipment, pressure washing. I was barely able to complete before losing my light for the evening. These short days ****.

c609e73e394c9c6284b0439acb909dda.jpg

905c50292ac1c29a91ffc3742c77a182.jpg

0285e6716f29afbd9e501f0a0b5475af.jpg

I dried everything off, hit the pivot points with some lube, hit the bare metal under the decks with a little WD-40 and parked everything back in the garage until spring.

I then moved to the next job in my white board. This one is for a local guy who needs some holes drilled in a couple of Dana 60 hubs.
7ab7de5780f32fa6c8b5410c96dbc0f3.jpg

A few holes were welded up to go from the standard 8 on 6.5” bolt pattern to the 5 on 150 for his Toyota.
d624bbdcab2f2b2c6ebc754b9bce219c.jpg

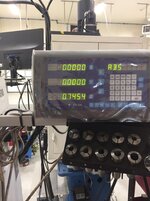
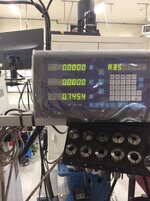
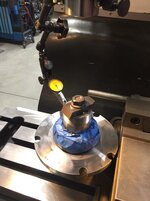
Set up on the mill and locating center.
2f2d5205c8708c07327d16f92d8e47ef.jpg

72ca93248aaa4c5839970d7d7600b449.jpg

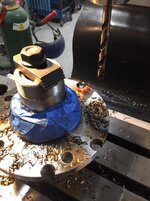
That was all for the evening as it was date night. Next will be to program in the bolt pattern and drill some holes and sneak up on the diameter for the knurls on the studs.

Thanks for looking.
 

Attachments

  • 905c50292ac1c29a91ffc3742c77a182.jpg
    905c50292ac1c29a91ffc3742c77a182.jpg
    90.2 KB · Views: 0
  • c609e73e394c9c6284b0439acb909dda.jpg
    c609e73e394c9c6284b0439acb909dda.jpg
    69.7 KB · Views: 0
  • 0285e6716f29afbd9e501f0a0b5475af.jpg
    0285e6716f29afbd9e501f0a0b5475af.jpg
    106.6 KB · Views: 0
  • 7ab7de5780f32fa6c8b5410c96dbc0f3.jpg
    7ab7de5780f32fa6c8b5410c96dbc0f3.jpg
    60.9 KB · Views: 0
  • 72ca93248aaa4c5839970d7d7600b449.jpg
    72ca93248aaa4c5839970d7d7600b449.jpg
    89.9 KB · Views: 0
  • 2f2d5205c8708c07327d16f92d8e47ef.jpg
    2f2d5205c8708c07327d16f92d8e47ef.jpg
    76.4 KB · Views: 0
  • d624bbdcab2f2b2c6ebc754b9bce219c.jpg
    d624bbdcab2f2b2c6ebc754b9bce219c.jpg
    65.2 KB · Views: 2
Last edited:
OP
Z

zmotorsports

ALLIANCE MEMBER
Joined
Oct 20, 2009
Messages
21,477
Location
Northern Utah
Do the wheels need to be bored out also, or are there off the shelf options?

I'm assuming the wheels are fine as he is driving the vehicle. He put this Dana 60 under his Toyota SUV and I was just hired to drill the 5 on 150 bolt pattern so his Toyota wheels will work front to rear. I don't know who he had machine the first set, I was just contacted a couple of weeks ago and when he dropped them off I was informed this set was to keep on hand as his backup/replacement set.
 

JCQuick

Well-known member
Joined
Nov 29, 2008
Messages
4,933
Location
Apopka Fla.
Mike your service on the "OPE" made my mind say WTH is he talking about :willy_nil Then i figured it out :D being in Florida i may still need to use mine so i don't get the option of winter storage :dunno:.

its funny you asked about the sticker on the sealant squeezer tool and the label. I see others have beat me to it. Yep mine still has the label and now that i think about it i got this at a Circle track trade show during speed weeks in Daytona which was back in the early 90's.
It was a Shop trip all us guys used to do back then

thanks to all the replies its good to know we can still get them
 

Attachments

  • RTV Squeze gun (Medium).jpg
    RTV Squeze gun (Medium).jpg
    124 KB · Views: 147
OP
Z

zmotorsports

ALLIANCE MEMBER
Joined
Oct 20, 2009
Messages
21,477
Location
Northern Utah
Mike your service on the "OPE" made my mind say WTH is he talking about :willy_nil Then i figured it out :D being in Florida i may still need to use mine so i don't get the option of winter storage :dunno:.

its funny you asked about the sticker on the sealant squeezer tool and the label. I see others have beat me to it. Yep mine still has the label and now that i think about it i got this at a Circle track trade show during speed weeks in Daytona which was back in the early 90's.
It was a Shop trip all us guys used to do back then

thanks to all the replies its good to know we can still get them

Thanks JC. Looks like quite a few people share my fondness of the Valco tube squeezer.

Lucky you not having to deal with winterizing. I wish I didn't have to deal with winter, period. That white **** can stay up north.
 

casmurbax

Well-known member
Joined
Sep 25, 2012
Messages
2,761
Location
Wilton, NY
I wish my OPE had views like that, I might have enjoyed using them more. I loved the scenery out there when I used to go out there to ski.
 
OP
Z

zmotorsports

ALLIANCE MEMBER
Joined
Oct 20, 2009
Messages
21,477
Location
Northern Utah
I wish my OPE had views like that, I might have enjoyed using them more. I loved the scenery out there when I used to go out there to ski.

Yeah, I'm not gonna lie, I love where we live. Unfortunately we didn't get to sit on the deck as much this year due to being too busy and the triple digit temps but I love the view from our deck and back yard.
 

kylefitz

Well-known member
Joined
Jun 29, 2006
Messages
218
Location
Kansas City, mo
Last night I completed the last task of winterizing the lawn & garden equipment, pressure washing. I was barely able to complete before losing my light for the evening. These short days ****.

c609e73e394c9c6284b0439acb909dda.jpg

905c50292ac1c29a91ffc3742c77a182.jpg

0285e6716f29afbd9e501f0a0b5475af.jpg

I dried everything off, hit the pivot points with some lube, hit the bare metal under the decks with a little WD-40 and parked everything back in the garage until spring.

I then moved to the next job in my white board. This one is for a local guy who needs some holes drilled in a couple of Dana 60 hubs.
7ab7de5780f32fa6c8b5410c96dbc0f3.jpg

A few holes were welded up to go from the standard 8 on 6.5” bolt pattern to the 5 on 150 for his Toyota.
d624bbdcab2f2b2c6ebc754b9bce219c.jpg

Set up on the mill and locating center.
2f2d5205c8708c07327d16f92d8e47ef.jpg

72ca93248aaa4c5839970d7d7600b449.jpg

That was all for the evening as it was date night. Next will be to program in the bolt pattern and drill some holes and sneak up on the diameter for the knurls on the studs.

Thanks for looking.
What do you do to winterize your small gas engines?

Thanks in advance
 

Attachments

  • c609e73e394c9c6284b0439acb909dda.jpg
    c609e73e394c9c6284b0439acb909dda.jpg
    65.5 KB · Views: 2
  • 905c50292ac1c29a91ffc3742c77a182.jpg
    905c50292ac1c29a91ffc3742c77a182.jpg
    90.2 KB · Views: 0
  • 0285e6716f29afbd9e501f0a0b5475af.jpg
    0285e6716f29afbd9e501f0a0b5475af.jpg
    101.7 KB · Views: 0
  • 72ca93248aaa4c5839970d7d7600b449.jpg
    72ca93248aaa4c5839970d7d7600b449.jpg
    86.8 KB · Views: 0
  • 2f2d5205c8708c07327d16f92d8e47ef.jpg
    2f2d5205c8708c07327d16f92d8e47ef.jpg
    73.2 KB · Views: 0
  • d624bbdcab2f2b2c6ebc754b9bce219c.jpg
    d624bbdcab2f2b2c6ebc754b9bce219c.jpg
    61.5 KB · Views: 0
  • 7ab7de5780f32fa6c8b5410c96dbc0f3.jpg
    7ab7de5780f32fa6c8b5410c96dbc0f3.jpg
    57.2 KB · Views: 0

paranoid56

Well-known member
Joined
Dec 18, 2008
Messages
1,596
Location
San Diego, Ca
I'm assuming the wheels are fine as he is driving the vehicle. He put this Dana 60 under his Toyota SUV and I was just hired to drill the 5 on 150 bolt pattern so his Toyota wheels will work front to rear. I don't know who he had machine the first set, I was just contacted a couple of weeks ago and when he dropped them off I was informed this set was to keep on hand as his backup/replacement set.

thats a weird combo, as most toyota 4x4s are 6lug. did he take a 2wd and convert it?
 
OP
Z

zmotorsports

ALLIANCE MEMBER
Joined
Oct 20, 2009
Messages
21,477
Location
Northern Utah
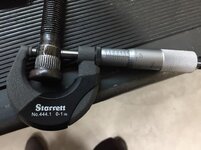
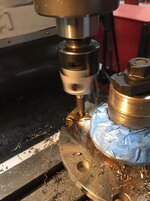
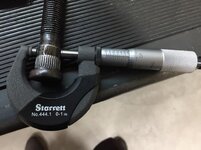
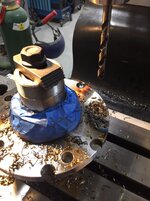
I finished up the D60 hubs yesterday so they can be picked up at the owner’s convenience.
Progressively stepped up to 9/16” drill.
dc4887d524a633ad588aa5c9be9fc902.jpg

Then used the 2” Criterion boring head to sneak up on the .604” diameter holes.
c0a9dec71123a8d57b6c640bf2d116a5.jpg

87da4cef16f34913d3e4c0ee827d71a4.jpg

d41c95d721f4a7fc664b1f95d4a9e601.jpg

b8c6c7c6d0eb8de27320e0c3026d2909.jpg

Ready so he can press the new studs in.
eff2f03a2dcfe486aa3a077799df5b99.jpg

Lastly the neighbors have been banging away on their shop since the trusses were delivered on Friday. By Saturday afternoon the trusses were installed and roof sheated.
b8dba90b7505ba1ad141a726a3f5dddc.jpg

1658573cf456886a110339d125e76134.jpg

The neighbor told me they have a roofer coming later in the week to shingle it. They’re cutting it a bit close as we’re supposed to have snow by next weekend.
 

Attachments

  • b8dba90b7505ba1ad141a726a3f5dddc.jpg
    b8dba90b7505ba1ad141a726a3f5dddc.jpg
    49.5 KB · Views: 0
  • 1658573cf456886a110339d125e76134.jpg
    1658573cf456886a110339d125e76134.jpg
    45.4 KB · Views: 0
  • eff2f03a2dcfe486aa3a077799df5b99.jpg
    eff2f03a2dcfe486aa3a077799df5b99.jpg
    99 KB · Views: 0
  • b8c6c7c6d0eb8de27320e0c3026d2909.jpg
    b8c6c7c6d0eb8de27320e0c3026d2909.jpg
    60 KB · Views: 0
  • c0a9dec71123a8d57b6c640bf2d116a5.jpg
    c0a9dec71123a8d57b6c640bf2d116a5.jpg
    102.8 KB · Views: 0
  • 87da4cef16f34913d3e4c0ee827d71a4.jpg
    87da4cef16f34913d3e4c0ee827d71a4.jpg
    86.7 KB · Views: 0
  • d41c95d721f4a7fc664b1f95d4a9e601.jpg
    d41c95d721f4a7fc664b1f95d4a9e601.jpg
    57.8 KB · Views: 0
  • dc4887d524a633ad588aa5c9be9fc902.jpg
    dc4887d524a633ad588aa5c9be9fc902.jpg
    106.1 KB · Views: 0
Last edited:
To avoid these ads, REGISTER NOW!
Top Bottom