nateo
Well-known member
I'm not entirely convinced I have any right to post in this subforum with the quality of work you guys do, but I'm pretty proud of how this project turned out and I wanted to show it off a little.
Please go easy on the embarrassing welds, it's the first time in 15 years that I've done any welding and I wasn't any good at it back then either!
Backstory: This year was our 11th anniversary and the traditional gift is steel. As usual I left the planning portion way too late and decided with a week and a half left to go that it wasn't worth ordering from Amazon so I'd better make something myself. Obviously my calculations were deeply flawed but I did manage to get it done in time.
Anyway, enter a rusty old grounding plate (which I had literally pulled out of the ground this summer), a welder that I hadn't had a chance to use yet, and the idea that our garden could use a sundial!
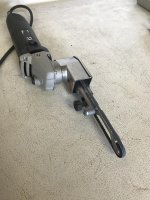
I did a bit of looking around online and realized that the geometry is actually pretty basic, especially if you have access to CAD. I drew up the sundial for my latitude and went to work cutting the plate. Not having access to a torch or plasma I ended up burning through a handful of cutting discs for the angle grinder. Yeah, it kinda looks like a gerbil gnawed the disc out but it's close enough to round for me!
View media item 108969View media item 108970View media item 108971View media item 108972
Most of the flakiest rust was on one side and banged off the plate with the strategic application of ball pein hammer. That left me with this.
View media item 108973View media item 108974
Next up was welder op #1, plugging the holes. It went well enough, first globbed over one side and then used that as backer to weld it shut from the other side.
View media item 108975View media item 108976
I had to abuse my poor bench grinder to clean up the gerbil tooth marks and get closer to an actual circle. Then I went to the stationary sander to square up the edge (bench grinder left a bit of an off 90° hollow).
View media item 108977
This is about half way through the edge cleanup. You can still see the grinder marks which are slowly being erased by the sander. You can also see I cut a bit to close to the line with the angle grinder here, we'll call that character.
View media item 108978
Since this post is already waaaay too long with too many pictures I'll leave it here, with a dry fit of the gnomon (that's what the pointy bit of a sundial is apparently called). No pictures of shaping the gnomon, pretty much the same process of cutoff disc, bench grinder, belt sander.
View media item 108988
Please go easy on the embarrassing welds, it's the first time in 15 years that I've done any welding and I wasn't any good at it back then either!
Backstory: This year was our 11th anniversary and the traditional gift is steel. As usual I left the planning portion way too late and decided with a week and a half left to go that it wasn't worth ordering from Amazon so I'd better make something myself. Obviously my calculations were deeply flawed but I did manage to get it done in time.
Anyway, enter a rusty old grounding plate (which I had literally pulled out of the ground this summer), a welder that I hadn't had a chance to use yet, and the idea that our garden could use a sundial!
I did a bit of looking around online and realized that the geometry is actually pretty basic, especially if you have access to CAD. I drew up the sundial for my latitude and went to work cutting the plate. Not having access to a torch or plasma I ended up burning through a handful of cutting discs for the angle grinder. Yeah, it kinda looks like a gerbil gnawed the disc out but it's close enough to round for me!
View media item 108969View media item 108970View media item 108971View media item 108972
Most of the flakiest rust was on one side and banged off the plate with the strategic application of ball pein hammer. That left me with this.
View media item 108973View media item 108974
Next up was welder op #1, plugging the holes. It went well enough, first globbed over one side and then used that as backer to weld it shut from the other side.
View media item 108975View media item 108976
I had to abuse my poor bench grinder to clean up the gerbil tooth marks and get closer to an actual circle. Then I went to the stationary sander to square up the edge (bench grinder left a bit of an off 90° hollow).
View media item 108977
This is about half way through the edge cleanup. You can still see the grinder marks which are slowly being erased by the sander. You can also see I cut a bit to close to the line with the angle grinder here, we'll call that character.
View media item 108978
Since this post is already waaaay too long with too many pictures I'll leave it here, with a dry fit of the gnomon (that's what the pointy bit of a sundial is apparently called). No pictures of shaping the gnomon, pretty much the same process of cutoff disc, bench grinder, belt sander.
View media item 108988

")