To avoid these ads, REGISTER NOW!

west of Philly - barn saving

OP
R

rieferman

Well-known member
Joined
May 18, 2009
Messages
2,586
Location
Collegeville PA (30 min west of Philly)
LOL... Yes, I suppose it would make quite a nice ironing board!

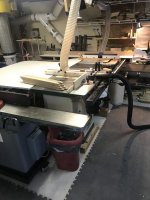
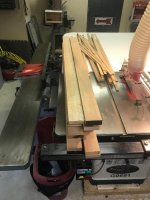
That piece of equipment is the Delta DJ-20 8" x 76" jointer. It's a 1997 model that came out of a prep school woodshop over in New Jersey.

It's currently 3-phase (which is part of the reason I got such a good deal) so I am in the process of figuring out how to install a VFD that will allow the machine to operate on my existing single phase 220 power.

Other than that, there were $5 worth of parts I needed to replace + I bought a $30 set of replacement knives. The tables are perfectly flat, which is a huge win.

A tool like this really takes the shop to another level. Being able to face and edge joint is a critical step in woodworking... perhaps the MOST critical step. So having a tool like this one is key.
 
To avoid these ads, REGISTER NOW!
OP
R

rieferman

Well-known member
Joined
May 18, 2009
Messages
2,586
Location
Collegeville PA (30 min west of Philly)
Almost there! Got the jointer running yesterday after installing a new receptacle, building a new power cord, and (mostly) installing the VFD. Complicated! Figuring out the switch and settings for the VFD today/tomorrow and then I should be DONE with this setup.
 
OP
R

rieferman

Well-known member
Joined
May 18, 2009
Messages
2,586
Location
Collegeville PA (30 min west of Philly)
Unprecedented times since my last post. For sake of future remembering.... COVID-19 (aka coronavirus) gripped the globe this year with momentum noticeably increasing around March 2020. As of this post, most around the world are at least keeping "social distance", with some areas following stricter orders. Unemployment is through the roof, many are working from home, and those that are on the front lines (food, healthcare, safety, other "essential businesses") are doing their best to provide the services we all depend on without getting themselves or others sick. Attitudes range from "this isn't a big deal" through hoarding. Sports leagues, major events, graduation ceremonies... cancelled. The economic impact is impossible to truly understand yet. Psychological impacts, social impacts, other impacts? We will see. The education system is figuring out how to teach through zoom meetings and emails. Boredom, mail orders, face masks, quiet, walks with the family, dogs living their best lives, cats wishing we'd all go back to work, reading books, working in the shop, gardening......

I came in here to talk about some projects I've been working on lately, but feels hollow somehow.

Hoping all the GJ crew is hanging in there.
 
OP
R

rieferman

Well-known member
Joined
May 18, 2009
Messages
2,586
Location
Collegeville PA (30 min west of Philly)
Hi GJ, I hope everyone is hanging in there.

In the shop, I finished figuring out how to install and program a VFD which enables my 220 power source to drive my 3-phase jointer. I also precision-installed brand new jointer knives using a dial indicator designed specifically for the task. That machine is a beautiful beast and a huge upgrade to my shop.

Meanwhile, I've been busy making minor adjustments across other areas of my shop since I have so much time to putter around out there right now.

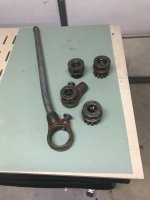
For example, my son and I took apart all my old pipe clamps, cleaned all the dried glue off each one, cut them all to a common length finally, wire brushed the threads, added threads to the back end (to accept extension lengths), built a new rack for all of them (it was driving me crazy that they were never nicely aligned in the old rack).

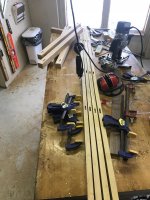
I also just finished a "panel glue up clamp support" thingie. Basically two perfectly parallel, perfectly flat pieces of plywood have perfectly aligned notches cut to perfectly hold my clamps when I'm doing a glue up. This will help me wrangle clamps when making table tops etc. The rack is light enough that I can hang it on the wall when not in use, and is also long enough (a little longer than 5 feet) to be useful for most situations that I'll typically encounter.

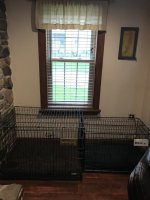
I'm also nearly done with the "luxury dog crate" for my two pups. Their existing metal crates work well, but the wifey has always longed for something that looks more like a piece of furniture since the crates are in our living room. Black walnut top (from a tree milled from our property years ago), black locust rails (from a left over fence post I had laying around), miscellaneous red oak, other oak, and mystery boards for all the other parts.... basically cleaning out all my lumber in the shop. The "cage" pieces are pieces cut from "hog panels" (4 gauge welded wire) which is surprisingly very cost effective ($25 for a 16 foot panel) and will be spray painted black for a nice look.

Next up, a customer asked me to make them a platform bed frame, so I'll be shifting into that work over the upcoming week or two.
 

Attachments

  • 760A17BB-8305-4269-B16F-649E61539A4A.jpg
    760A17BB-8305-4269-B16F-649E61539A4A.jpg
    116.7 KB · Views: 81
  • 14C4D039-3AA2-4E90-8247-5219A7DFD265.jpg
    14C4D039-3AA2-4E90-8247-5219A7DFD265.jpg
    92.2 KB · Views: 76
  • 551C0B0F-1705-4124-ABB9-AD7A3974B3C9.jpg
    551C0B0F-1705-4124-ABB9-AD7A3974B3C9.jpg
    149.3 KB · Views: 84
  • 6171EBE3-FDE5-4998-8639-72664F095B98.jpg
    6171EBE3-FDE5-4998-8639-72664F095B98.jpg
    74.6 KB · Views: 73
  • EBE4FCB9-F38B-435D-937F-F3A70D5933C3.jpg
    EBE4FCB9-F38B-435D-937F-F3A70D5933C3.jpg
    131 KB · Views: 81
  • 4E6FA9CA-42E5-49C5-B3FD-31F944ACE0DE.jpg
    4E6FA9CA-42E5-49C5-B3FD-31F944ACE0DE.jpg
    52.1 KB · Views: 85
Last edited:
OP
R

rieferman

Well-known member
Joined
May 18, 2009
Messages
2,586
Location
Collegeville PA (30 min west of Philly)
Thank you!

I tend to "reset" between every major project that I work on because I find that getting back to an organized space helps my brain become calm/organized again too.

And, over time, the resets have gotten more and more efficient... slight shifts in how the space is setup, tool improvements, better jigs, etc. It all really helps produce better results.
 
OP
R

rieferman

Well-known member
Joined
May 18, 2009
Messages
2,586
Location
Collegeville PA (30 min west of Philly)
Well, my Uncle Bob passed away last night unexpectedly from a massive heart attack. Good guy that I’ve known for 43 years. He was about 70 and had retired a few years ago - wish he’d been able to enjoy the time off more. Instead, his own wife couldn’t even ride in the ambulance due to the pandemic. RIP uncle!!!!

As he was a dog lover and also a crafty guy, I’ll consider this project I finished today a tribute to Uncle Bob Miller. Before and after pics included. Cheers
 

Attachments

  • ABC7B289-AA82-4266-B660-41B56AC2424D.jpg
    ABC7B289-AA82-4266-B660-41B56AC2424D.jpg
    91.9 KB · Views: 131
  • E6FC8237-32A9-4D93-A7BC-9ADBEB5CFDF5.jpg
    E6FC8237-32A9-4D93-A7BC-9ADBEB5CFDF5.jpg
    139.3 KB · Views: 144

Vette60

Well-known member
Joined
Mar 15, 2006
Messages
448
Location
Glen Allen, VA
Hi There. My condolences on your Uncle's sudden passing. That's always a kick in the gut when that type of news reaches you.

The custom "crate" looks fantastic - the before and after are really dramatic. You went from what could be considered an eyesore to what looks like a piece of furniture that absolutely belongs in the space. Nice work!
 
OP
R

rieferman

Well-known member
Joined
May 18, 2009
Messages
2,586
Location
Collegeville PA (30 min west of Philly)
At long last, I have optimized my woodworking clamp situation. This entailed a few things....

First, I rounded out my collection of aluminum bar clamps. These are one of the Harbor Freight gems, IF you do some minor modifications. Basically, you fill the interior of each bar with a snug-fit piece of whatever lumber you have laying around. Improves the rigidity while still keeping the clamps nice and light - I reach for these clamps first in any situation where the joint is nicely prepared and you don't need mega-force.

Second, I built a glue up rack. I think I may have posted that already, but basically a method of holding your clamps steady and on a common plane.

Third, I cut all my pipe clamps to a common length, and threaded the ends of each one. I now have a collection of easily-stored, easy-to-add-length-to, beast-mode clamps for when you need a lot of power.

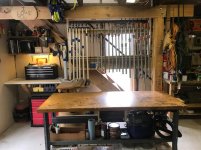
Fourth, I created efficient storage for the entire thing.

-----

Separately, our neighbor that shares our ******** court with us (the one pictured a page or two back) gifted a TV to the situation... this prompted me to...

First, I finally properly wired the entire court rather than the extension cord nightmare that was previously in place.

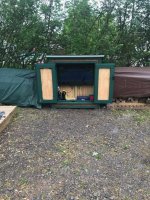
Then, I built a mini-shed for the TV and some gear to live within.
 

Attachments

  • tv cabinet 2.jpg
    tv cabinet 2.jpg
    150.5 KB · Views: 139
  • tv cabinet 1.jpg
    tv cabinet 1.jpg
    150.4 KB · Views: 130
  • organized clamps.jpg
    organized clamps.jpg
    154.5 KB · Views: 152
OP
R

rieferman

Well-known member
Joined
May 18, 2009
Messages
2,586
Location
Collegeville PA (30 min west of Philly)
Working on a customer order for a platform bed currently. Chunky frame with members each measuring about 3" x 6".

To keep price down they wanted me to work with dimensional lumber, which takes considerable effort to true up. The new jointer was a dream to use for this, and my little planer handled the work nicely.

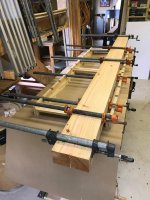
Glue up underway. Got a chance to use my glue up rack and it really helps so much, like having an assistant in the shop. Also, I added a simple attachment to the end of my bench to accept a 1000 foot role of masking paper that is sized to the width of my table... like you see over the table at doctor's office. Allows me to pull out what I need to protect the table from mess during glue or stain operations.

While I was waiting for the first glue up to dry, I turned my attention to the new Bosch 6" sander that arrived this week. What an enormous upgrade, I can't even put it into words. Nearly no vibration, and variable speed dial allows aggressive removal through fine finish work.

After testing the sander on a set of ******** board frames I'm building for another customer, I decided to rummage through the scrap pile for a method of keeping my sanding gear better organized. Free solution ain't my prettiest work, but works nicely and wasn't a time sink.
 

Attachments

  • platform bed parts.jpg
    platform bed parts.jpg
    101.3 KB · Views: 71
  • platform bed glue up.jpg
    platform bed glue up.jpg
    106.7 KB · Views: 67
  • sander and organizer.jpg
    sander and organizer.jpg
    99.6 KB · Views: 83
OP
R

rieferman

Well-known member
Joined
May 18, 2009
Messages
2,586
Location
Collegeville PA (30 min west of Philly)
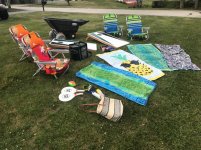
My in-laws have a beach house and we introduced them to ******** last year while visiting them. They loved it so much that I made them a nice set of boards painted with their daughters' college colors, and also bought them matching bags.

Trouble is... lugging chairs, coolers, ******** gear to the beach from the house is a struggle, and typical low-cost carts bog down easily in the sand.

In town, a few different businesses offer PVC beach carts with "Wheeleez" tires that work very nicely in sand... but the carts were in the $1200 (and higher!) range. Ridiculous.

Rather than shell that out, the in-laws asked if I could make them something.

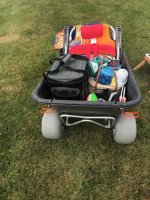
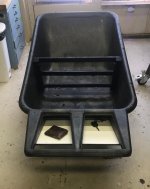
Luckily, the in-laws had a set of Wheeleez on hand from a kayak transport thingie (so that's a $150 savings for them). After much googling, I found a Rubbermaid cart that would be far sturdier than PVC carts, wouldn't rust/decay, and could be customized to meet their needs.

First, I removed the stock wheels, and modified the Wheeleez to fit instead.

Then, I added a center divider to keep chairs and other gear in their spot.

A piece of Azek was added under the handles to create a nook for small gear such as phones, keys, wallet.

Exterior hooks now securely hold their ******** boards.

Total price in this case was $200 (since the Wheeleez were free), so I saved my in-laws at least $1000. Seems like the least I can do since we are invited to enjoy their home each year, plus it's just nice to help family out.
 

Attachments

  • Beach cart DEMO ch boards loaded.jpg
    Beach cart DEMO ch boards loaded.jpg
    154.3 KB · Views: 93
  • Beach cart DEMO both sections packed.jpg
    Beach cart DEMO both sections packed.jpg
    148.6 KB · Views: 84
  • Beach cart DEMO front section packed.jpg
    Beach cart DEMO front section packed.jpg
    156.7 KB · Views: 80
  • Beach cart DEMO amount of gear.jpg
    Beach cart DEMO amount of gear.jpg
    155.4 KB · Views: 77
  • Beach cart BUILD center divider.jpg
    Beach cart BUILD center divider.jpg
    75.7 KB · Views: 74
  • Beach cart BUILD wheeleez.jpg
    Beach cart BUILD wheeleez.jpg
    110.5 KB · Views: 66
  • beach cart BEFORE.jpg
    beach cart BEFORE.jpg
    147.1 KB · Views: 70
OP
R

rieferman

Well-known member
Joined
May 18, 2009
Messages
2,586
Location
Collegeville PA (30 min west of Philly)
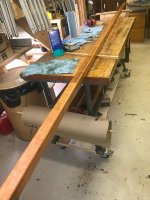
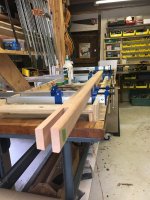
And then there's my current project... Making a 14 foot long railing out of cherry leftovers... lots of milling, glue up, true up, fitting.... ugh. Not nearly as smooth as last project, but hopefully will end well. (otherwise, it'll be a time consuming way to make fire wood)
 

kjdhawkhill

Well-known member
Joined
Jan 19, 2015
Messages
822
Location
Flyover state #4
Well, my Uncle Bob passed away last night unexpectedly from a massive heart attack. Good guy that I’ve known for 43 years. He was about 70 and had retired a few years ago - wish he’d been able to enjoy the time off more. Instead, his own wife couldn’t even ride in the ambulance due to the pandemic. RIP uncle!!!!

As he was a dog lover and also a crafty guy, I’ll consider this project I finished today a tribute to Uncle Bob Miller. Before and after pics included. Cheers

Late to the thread catch up for various reasons but sorry to hear about your uncle's passing. Hopefully family has found ways to get together and grieve without spreading...

That is a helluva a carpentry project around the crates. It looks like what the sky-mall end-table crate thing SHOULD look like if it weren't built out of particle board and had been designed by someone with actual woodworking abilities.
 
To avoid these ads, REGISTER NOW!
OP
R

rieferman

Well-known member
Joined
May 18, 2009
Messages
2,586
Location
Collegeville PA (30 min west of Philly)
Well, the railing project turned out nicely. I still have to install it, but here's a couple pics to show that "railing building ain't easy"
 

Attachments

  • railing 7_linseed finish close up.jpg
    railing 7_linseed finish close up.jpg
    66.9 KB · Views: 82
  • railing 6_mitered returns.jpg
    railing 6_mitered returns.jpg
    49.7 KB · Views: 85
  • railing 5_over 13 feet.jpg
    railing 5_over 13 feet.jpg
    101.2 KB · Views: 80
  • railing 4_the plan in action.jpg
    railing 4_the plan in action.jpg
    114.2 KB · Views: 77
  • railing 3_the plan.jpg
    railing 3_the plan.jpg
    81 KB · Views: 78
  • railing 2_parts prepped.jpg
    railing 2_parts prepped.jpg
    85.2 KB · Views: 79
  • railing 1_rough cherry.jpg
    railing 1_rough cherry.jpg
    85.2 KB · Views: 83
OP
R

rieferman

Well-known member
Joined
May 18, 2009
Messages
2,586
Location
Collegeville PA (30 min west of Philly)
And now installed! Walls and ceiling patched and painted ahead of time. All brackets into studs. Solid and a nice upgrade over previous 2-piece metal railing that was installed with a handful of sheetrock screws (and not into studs!)
 

Attachments

  • railing 8_installed.jpg
    railing 8_installed.jpg
    40.6 KB · Views: 75
OP
R

rieferman

Well-known member
Joined
May 18, 2009
Messages
2,586
Location
Collegeville PA (30 min west of Philly)
Some shop improvements are potentially on the horizon...

1. Currently, interior stairs cut into my shop space significantly. These will move outside and offer a dedicated entrance to the finished 2nd story.

2. Water/sewer will be brought to the building. Shop would get toilet and utility sink. Finished 2nd story would get full bath.

Township is open to all these improvements but may require a variance process (which we don't expect will be too much trouble). I'll post pics as possible - architect visit later this week.
 
OP
R

rieferman

Well-known member
Joined
May 18, 2009
Messages
2,586
Location
Collegeville PA (30 min west of Philly)
This month I had a customer order for a custom table for their Poconos cabin, so that's been a lot of fun to work on while we also continue to progress the home / shop renovation planning.

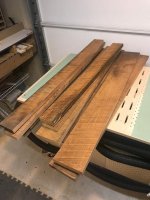
The customer really wanted a "character" table, so I'm using hickory from a local sawyer for the top. I installed traditional breadboard ends for the first time and it went well. But I'll tell you... hickory is soooo hard and heavy. I will literally have to swap out blades and knives before my next projects since the wood dulled my tools.

The base of the table includes mortise and tenon joinery and the slightest taper to the legs. I used poplar on these parts since the customer would like it painted. I am also installing a drawer on one side of the table.
 

Attachments

  • hickory table breadboard ends.jpg
    hickory table breadboard ends.jpg
    126.7 KB · Views: 88
  • hickory table top complete.jpg
    hickory table top complete.jpg
    148.9 KB · Views: 97

Seagoon

Well-known member
Joined
Jan 23, 2014
Messages
859
Location
Scunthorpe. UK.
I love the tabletop and I'm happy to see how to make a proper breadboard end,but I really think you have let down woodworking by having metal legs on your assembly table :)
 

Kev442

Well-known member
Joined
Jan 15, 2009
Messages
5,386
Location
Wi
Nicely done.
I still smile picturing that formerly derelict building being used to produce fine woodworking.
 
OP
R

rieferman

Well-known member
Joined
May 18, 2009
Messages
2,586
Location
Collegeville PA (30 min west of Philly)
I love the tabletop and I'm happy to see how to make a proper breadboard end,but I really think you have let down woodworking by having metal legs on your assembly table :)

Thanks bud!

Funny you should mention the work table... once our barn renovation occurs, I'm going to finally take a pause to build an optimized setup. I'll re-use the maple butcher block top (after flattening it and refinishing), add some proper woodworking vices and dog holes, and then am still deciding on whether to go with an adjustable height base (e.g. Noden adjust-a-base) or go "traditional" (likely the former since utility is so important to me)
 
OP
R

rieferman

Well-known member
Joined
May 18, 2009
Messages
2,586
Location
Collegeville PA (30 min west of Philly)
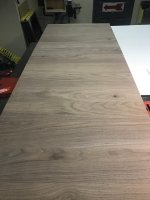
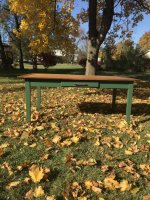
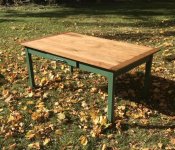
Table turned out nicely I think! Breadboard top, dovetail drawer, wooden drawer runners. Base from rough poplar and top from rough hickory. Base painted, top stained and poly coat.
 

Attachments

  • 036FD7C1-388A-407D-A02F-B18E697CDF04.jpg
    036FD7C1-388A-407D-A02F-B18E697CDF04.jpg
    151.6 KB · Views: 75
  • 10D7C38D-B97A-4829-949B-06077EE1B9AB.jpg
    10D7C38D-B97A-4829-949B-06077EE1B9AB.jpg
    161.8 KB · Views: 94
OP
R

rieferman

Well-known member
Joined
May 18, 2009
Messages
2,586
Location
Collegeville PA (30 min west of Philly)
I will hopefully have some more barn building info here in the near future.. The home addition/renovation that I mentioned recently looks like it will be achievable!

Our variance request was approved, permit issued, finance $$ received... and now the builder quotes are coming in, and are hitting the numbers we expected.

The interior stairs in the barn will become exterior stairs, thus freeing up a huge amount of floor space in my shop. Water/sewer will be brought out as well, so I'll finally have an on-grid utility sink on the first story.

More soon!
 
OP
R

rieferman

Well-known member
Joined
May 18, 2009
Messages
2,586
Location
Collegeville PA (30 min west of Philly)
All builders submitted their bids, and we selected one!!!!!

This guy happens to be our "middle" number in terms of $$$ but had a few things really going for him...

1) He's the most "local" of all

2) He was recommended to us by our architect, who has worked with him on many occasions... who is a 50 year family friend... so we trust his opinion quite a bit

3) We just liked him. He has 35 years of experience, trucks, equipment, network of subs etc.

4) And he can start in 3 weeks. YES!!


The house is the "major" (according to my wife and kids) portion of this renovation. It will gain an ample home office that I will use to pay the bills. And, it will contain our first ever (at 44 years old!?!?!?) honest-to-goodness owner's suite that we've ever had.

Yawn.

The tiny part of the project is around my barnnnnnnnnnnnnnnnnnnnnnnn.

Interior stairs in the assembly side of my shop will be moved to the exterior of the building. Which allows me to gain a window, a 20 foot wall, and 100 square feet of space... right where I need it.

As a result, and because I need my "next big challenge", I will be building a very nice workbench... Traditional wood working bench with face and tail vise, and shop made drawers underneath.

I will also be building all new cabinets, counters, shelving, clamp storage etc. etc. etc.

The entire shop will go from **** lights to more LED lighting.

YESSSSSSSSSSS. BIG WIN.


The shop will also gain an on-grid utility sink with hot water. My off-grid solution is pretty darn adequate, but this will be NICE.


Upstairs, the rec room gains a full bath, a kitchenette, and the new stairs/entry door. Apartment for friends/family to use when they visit (and to lure the kids back home for visits in the future when they go to college)
 
OP
R

rieferman

Well-known member
Joined
May 18, 2009
Messages
2,586
Location
Collegeville PA (30 min west of Philly)
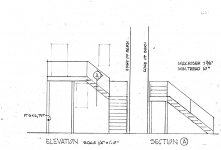
I can post 1 sketch so far... this is approximately how the new stairs will work on the barn.

Looking at my profile picture, there are two 2nd story windows on the face of my barn. The left hand one is where the door will now be. Stairs will go down towards the road, hit a landing, take a 90 degree turn and then come back towards my house (where I'm standing to take the picture).
 

Attachments

  • barn stairs sketch.JPG
    barn stairs sketch.JPG
    76.2 KB · Views: 45

Kev442

Well-known member
Joined
Jan 15, 2009
Messages
5,386
Location
Wi
Can't wait for all the progress pics, including any in the house you want to share.
 

ct71rr

Well-known member
Joined
May 19, 2009
Messages
478
Location
Massachusetts
Table turned out nicely I think! Breadboard top, dovetail drawer, wooden drawer runners. Base from rough poplar and top from rough hickory. Base painted, top stained and poly coat.

Very nice! The Breadboard is a nice touch. How do you like your Dewalt planer? Any issues with it?
 

shopnut

Well-known member
Joined
Feb 22, 2006
Messages
4,237
Location
Florida
attachment.php
 
To avoid these ads, REGISTER NOW!
Top Bottom