
You are using an out of date browser. It may not display this or other websites correctly.
You should upgrade or use an alternative browser.
You should upgrade or use an alternative browser.
Between 265 & 485 SQ/FT Nick's Two-Car Detached Vdub Garage
- Thread starter nicholam77
- Start date
Workspaces sized between 265 and 485 squarefeet.
Thanks Jake! Now to decide if I send the link to the wife to buy for Xmas or just buy it and wrap it for myself![mention]loganb [/mention] [mention]nicholam77 [/mention]
The Massaca jig is now $70 on sale.
https://masscaproducts.com/products...-bit-hex-key-screws-square-driver-stop-collar
Sent from The Garage Journal mobile app
OP
nicholam77
Well-known member
[mention]loganb [/mention] [mention]nicholam77 [/mention]
The Massaca jig is now $70 on sale.
https://masscaproducts.com/products...-bit-hex-key-screws-square-driver-stop-collar
Thanks for the heads up!

OP
nicholam77
Well-known member
More Table Saw Improvements:
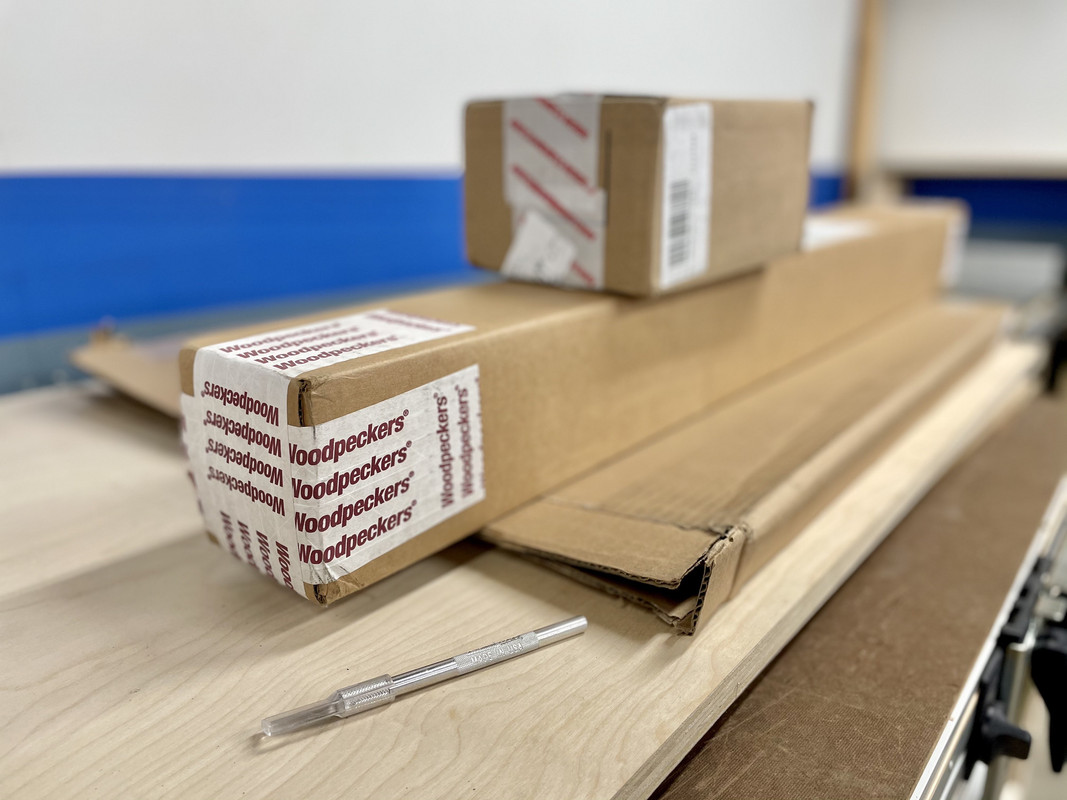
It's always a good day when packages get delivered
Been eyeing these mods for awhile and was able to score a good eBay deal. It's hard for me to resist a good deal.
In addition to trying to improve the dust collection, I've been wanting to improve my jobsite saw's fence in a couple of ways.
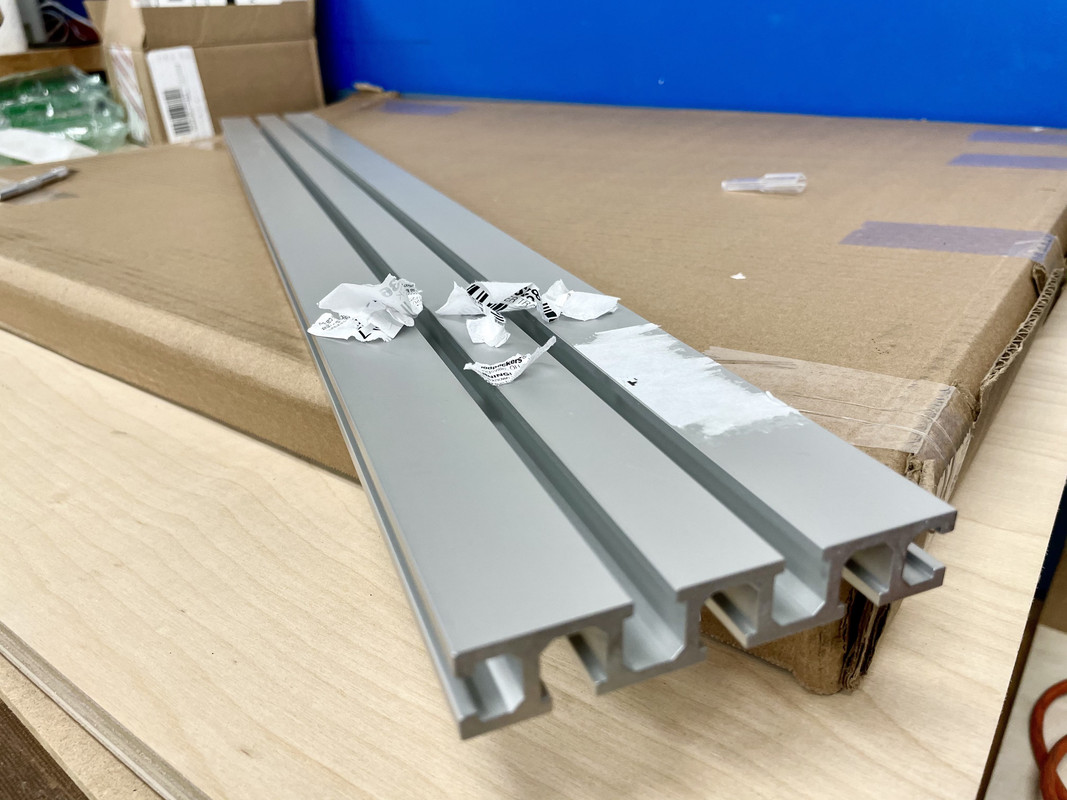
The first package is a 36" extrusion of Woodpecker's Super Track:
I love it when stickers rip off in a million pieces and leave glue and paper behind. Hard to believe sticker technology has only come so far... anyways I digress...
The idea is to bolt the Super Track to the existing DeWalt fence, making it longer and taller. To do so, I had to take it apart and drill some holes in it.
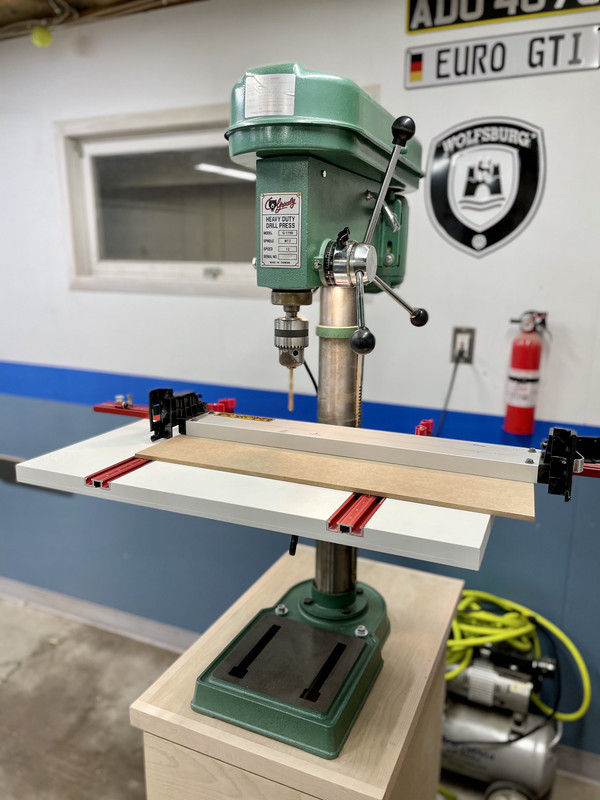
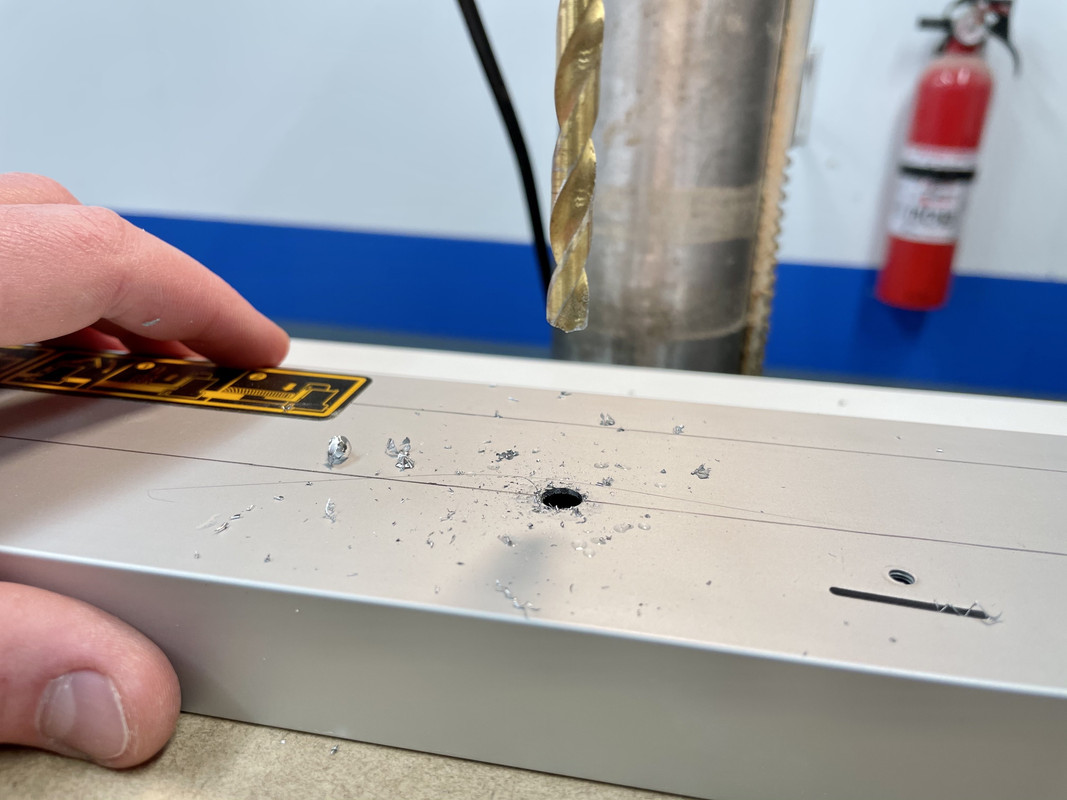
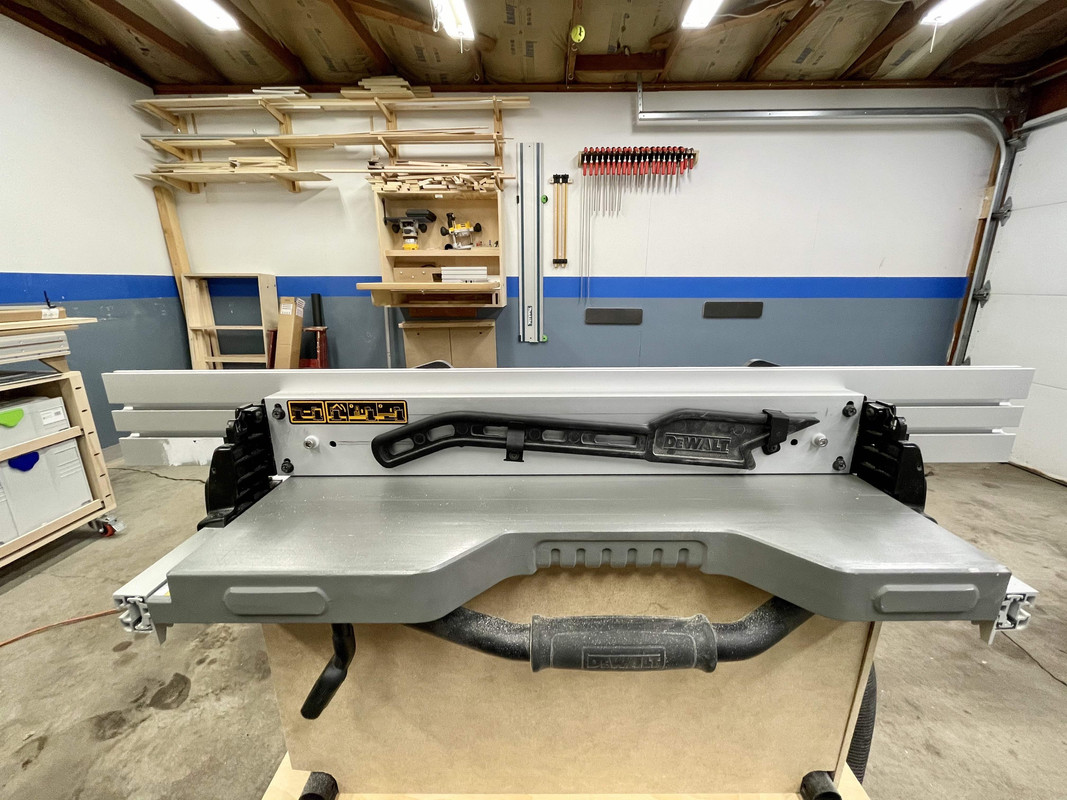
And... I mis-calculated, so I had to drill more holes.
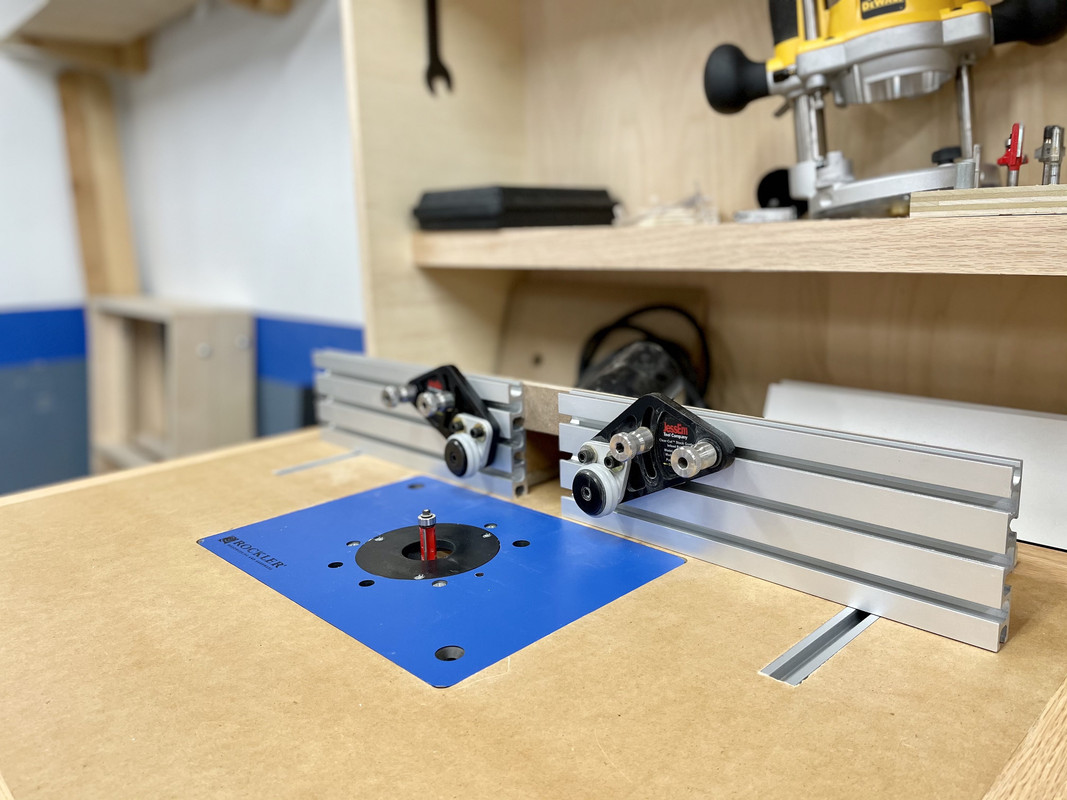
Now for the reveal of the second package, JessEm Clear Cut Stock Guides:
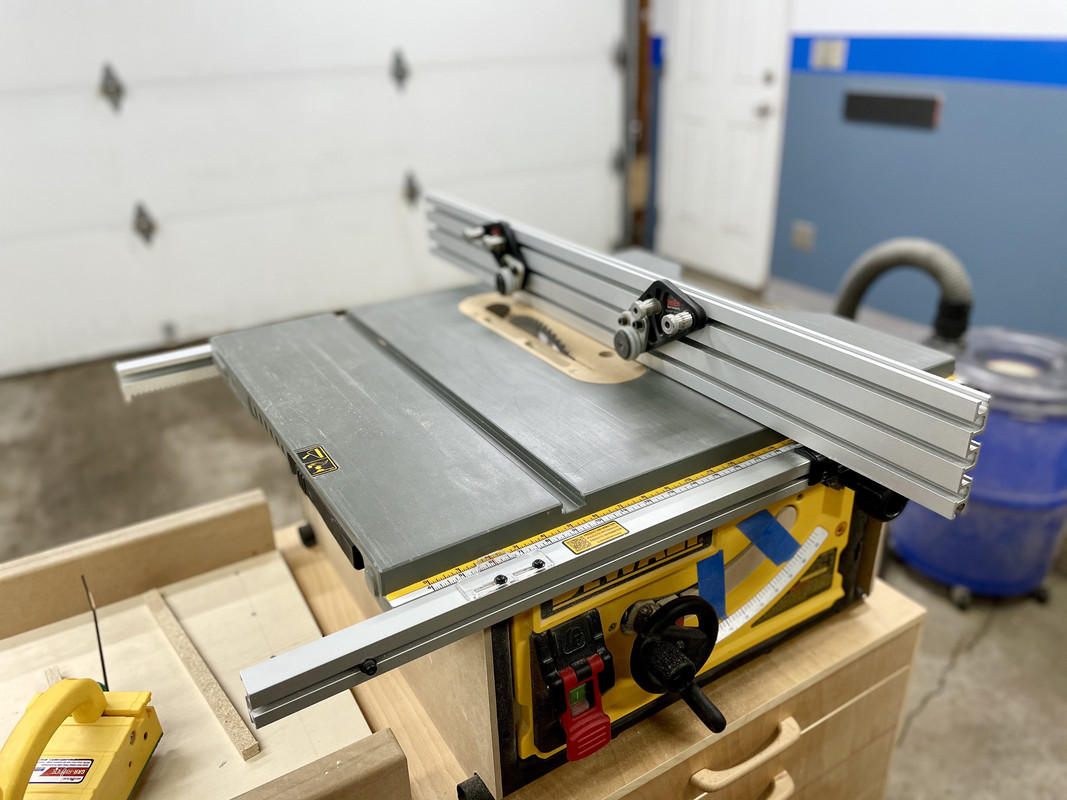

These are actually meant for router tables, but someone on FOG came up with this idea to use it on a jobsite saw, and others followed suit, with good reviews.
And combined with the longer fence, I now have 16 1/2" of in-feed reference before the blade with 3/4" material -- not bad for a jobsite saw!
Together these two mods have the following benefits for me:
And since I have Super Track extrusions on my router table fence, I can use them on the router, too
Hope everyone is having an enjoyable and safe Thanksgiving!

It's always a good day when packages get delivered
Been eyeing these mods for awhile and was able to score a good eBay deal. It's hard for me to resist a good deal.
In addition to trying to improve the dust collection, I've been wanting to improve my jobsite saw's fence in a couple of ways.
The first package is a 36" extrusion of Woodpecker's Super Track:
I love it when stickers rip off in a million pieces and leave glue and paper behind. Hard to believe sticker technology has only come so far... anyways I digress...
The idea is to bolt the Super Track to the existing DeWalt fence, making it longer and taller. To do so, I had to take it apart and drill some holes in it.
And... I mis-calculated, so I had to drill more holes.
Now for the reveal of the second package, JessEm Clear Cut Stock Guides:
These are actually meant for router tables, but someone on FOG came up with this idea to use it on a jobsite saw, and others followed suit, with good reviews.
And combined with the longer fence, I now have 16 1/2" of in-feed reference before the blade with 3/4" material -- not bad for a jobsite saw!
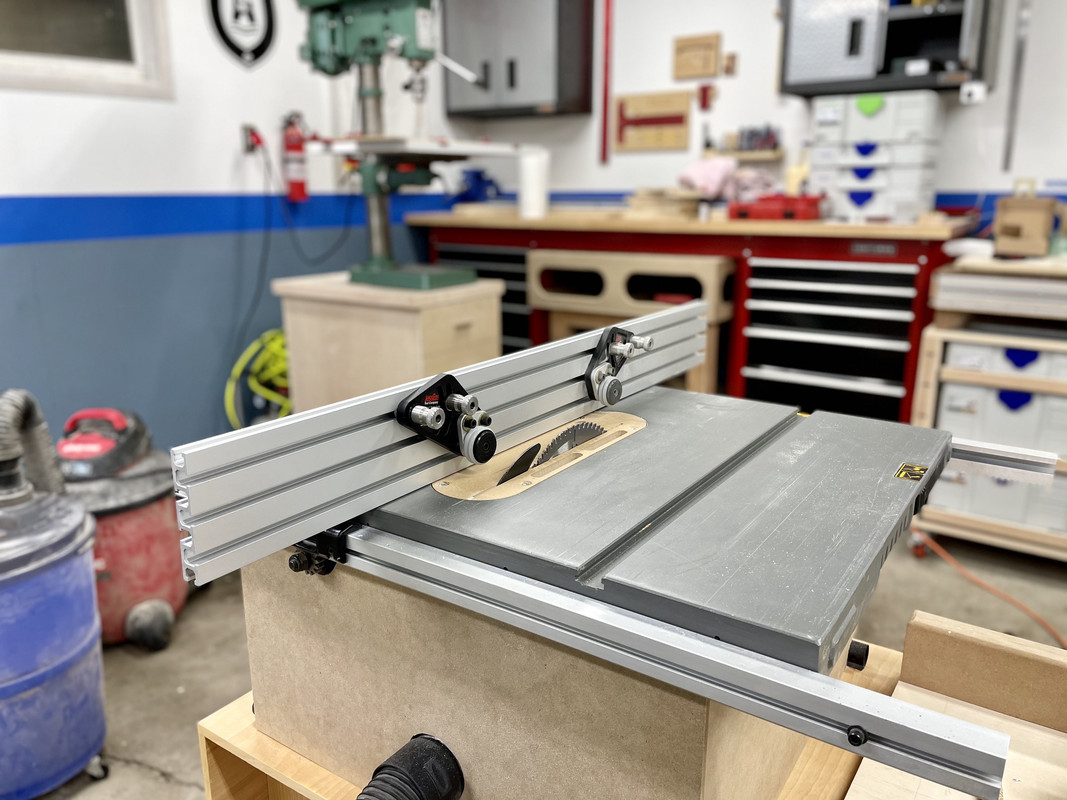
Together these two mods have the following benefits for me:
- Longer fence = more reference = better accuracy
- Fence can accept 1/4" hardware so JessEm guides and all manner of stop blocks, featherboards, and future jigs could be applied
- JessEm guides hold workpiece tightly against fence for extra precision, even as it passes the riving knife onto the outfeed table, something I always struggled with before
- The JessEm guides are anti-kickback so workpiece physically can't kick back (although off cut can)
- This makes any cutting of wider panels or very longer boards MUCH safer and more accurate
And since I have Super Track extrusions on my router table fence, I can use them on the router, too
Hope everyone is having an enjoyable and safe Thanksgiving!
Nice work on the fence upgrade! I plan to do the same with my Beisemeyer fence and 80/20 extrusion on my CM 133.xxxx saw.
The problem with stickers is you don't want them falling off, and also every surface reacts differently to adhesives. So humans must adapt and use heat! Get that adhesive hot and it "should" come right off.
The problem with stickers is you don't want them falling off, and also every surface reacts differently to adhesives. So humans must adapt and use heat! Get that adhesive hot and it "should" come right off.
Thanks Jake! Now to decide if I send the link to the wife to buy for Xmas or just buy it and wrap it for myself!
Shh...don't tell the wife but I used my Paypal balance from a sale this AM to buy the M2...super impressed with the vendor as I got a shipping notification 3 hours later and I have a tracking number!
I don't buy myself that many tools, but when I do it around the holiday season she gets frustrated as it's one less thing she could buy since I'm hard to shop for...oh well....if she finds this one it'll just be "no that's not new, had that for a long time"

Nick-Nice work on those saw upgrades! That looks incredibly handy and takes away one of my common frustrations with the jobsite style saws of limited contact area between fence and workpiece. Coupling that with the flexibility and interchangeability with the router is going to be very nice!
Denwood
Well-known member
That fence looks super boss..nice. I do like the positive adjust/robustness of the material hold down.
OP
nicholam77
Well-known member
Nice work on the fence upgrade! I plan to do the same with my Beisemeyer fence and 80/20 extrusion on my CM 133.xxxx saw.
Thanks! Reminds of the Very Super Cool Tools fence. I'm sure it will be great.
Nick-Nice work on those saw upgrades! That looks incredibly handy and takes away one of my common frustrations with the jobsite style saws of limited contact area between fence and workpiece. Coupling that with the flexibility and interchangeability with the router is going to be very nice!
Thanks! Yeah there are still definitely some big downsides to a job site saw but I think the bigger fence will be very helpful in getting the most out of it.
That fence looks super boss..nice. I do like the positive adjust/robustness of the material hold down.
Thanks!
Nick every time I come in here I have to give myself due time to read through your great post and study your photos. Always enjoyable.
Bret
Thank you, Bret, and thanks for taking the time to check it out. Your journal is one of the ones that inspired me to start doing longer posts full of pictures as you've always done such a great job with that. I think (hope!) they are more fun to read that way.
Denwood
Well-known member
Are the hold down wheels on the fence spring loaded at all? Just wondering how they do with uneven material? If there is such thing as "bling" for a table saw, you've nailed it..ha.
ChadTexas
Well-known member
Good Job! Keep up the good work.
OP
nicholam77
Well-known member
A Thanksgiving Surprise:
So I went over to my parents' (just myself, masked, socially distanced) for a short bit on Thanksgiving. It kind of randomly came up in conversation somehow, but my dad let slip that he had a few old hand planes I could inherit someday. And then he pivoted and said I could take them now if I wanted. I didn't even know he had any... but I've actually been wanting to get an old one for fun! So of course I accepted his offer.
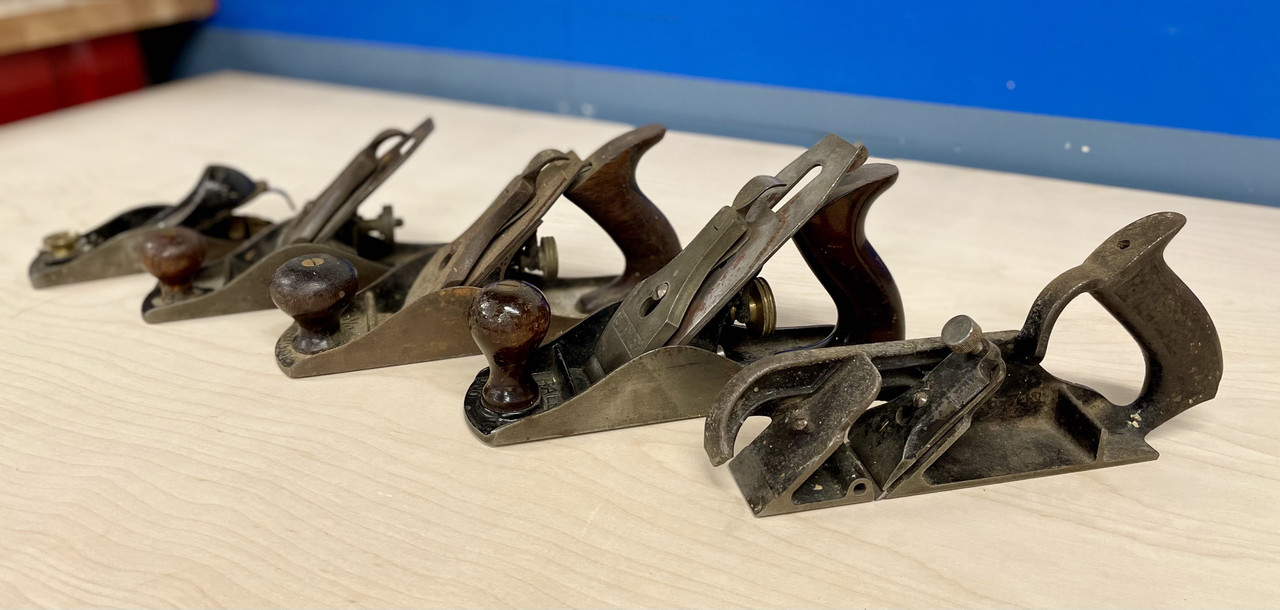
Turns out they belonged to my grandpa. I am a sucker for inherited tools, doesn't really matter if they are good or not, it just makes them special and meaningful.
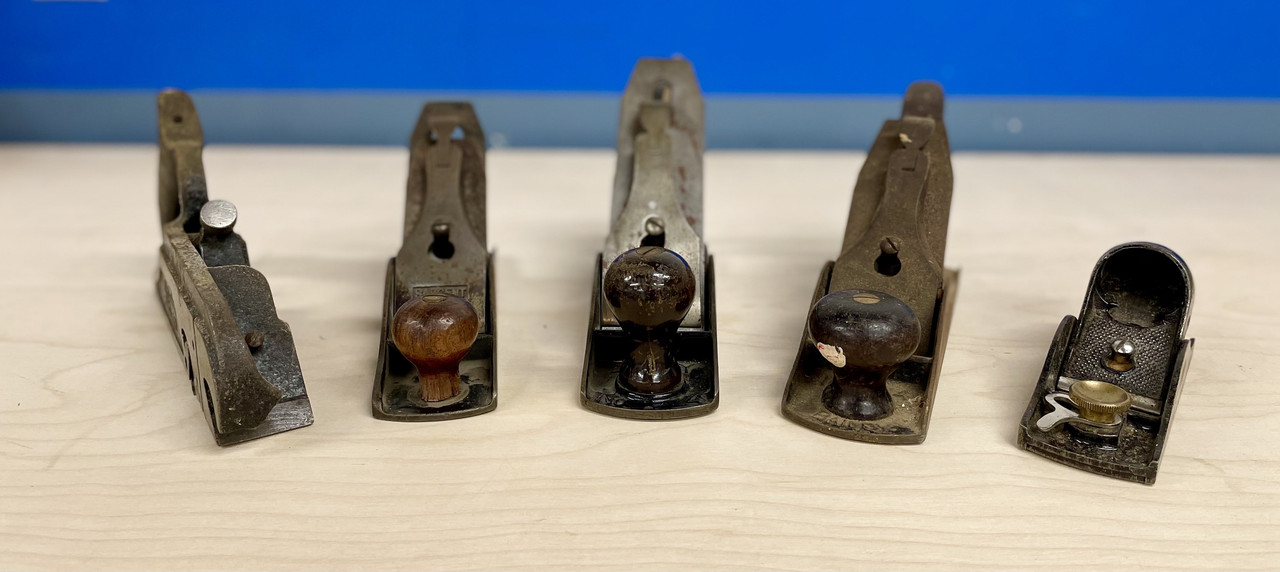
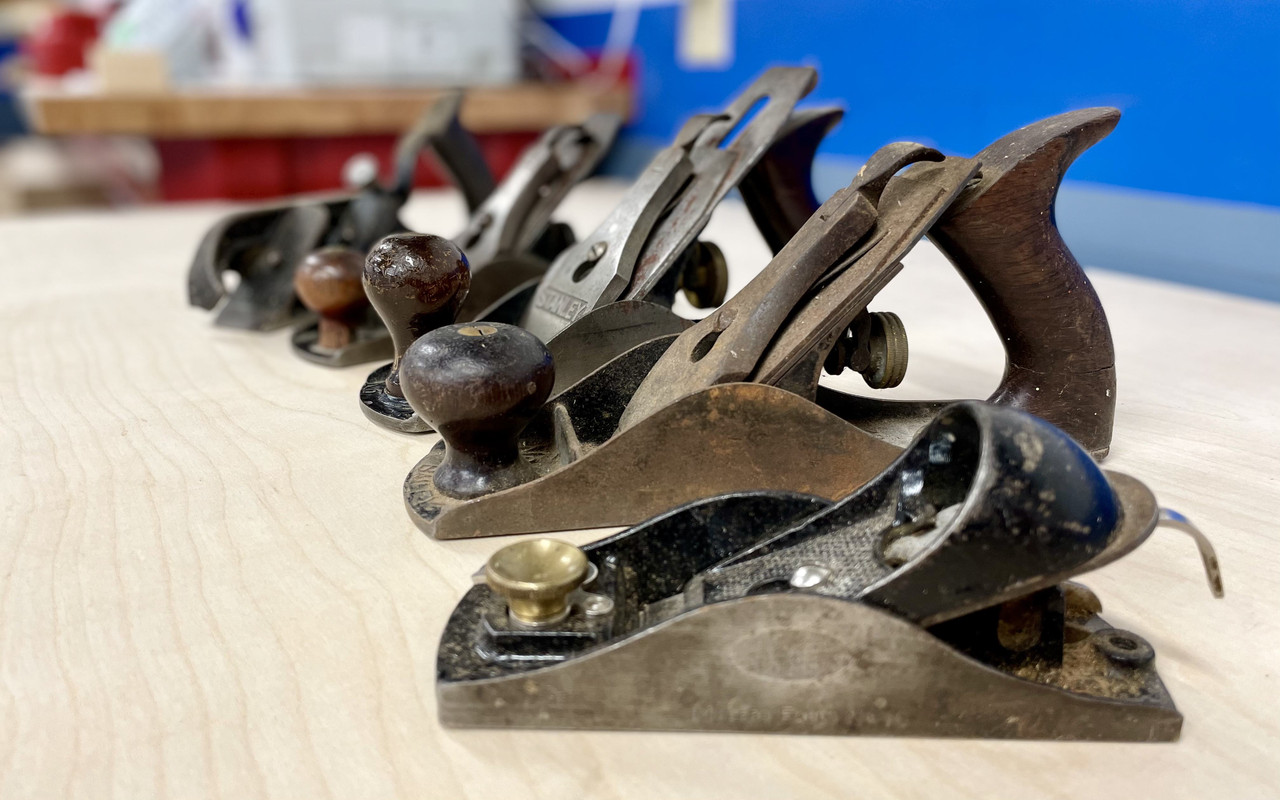
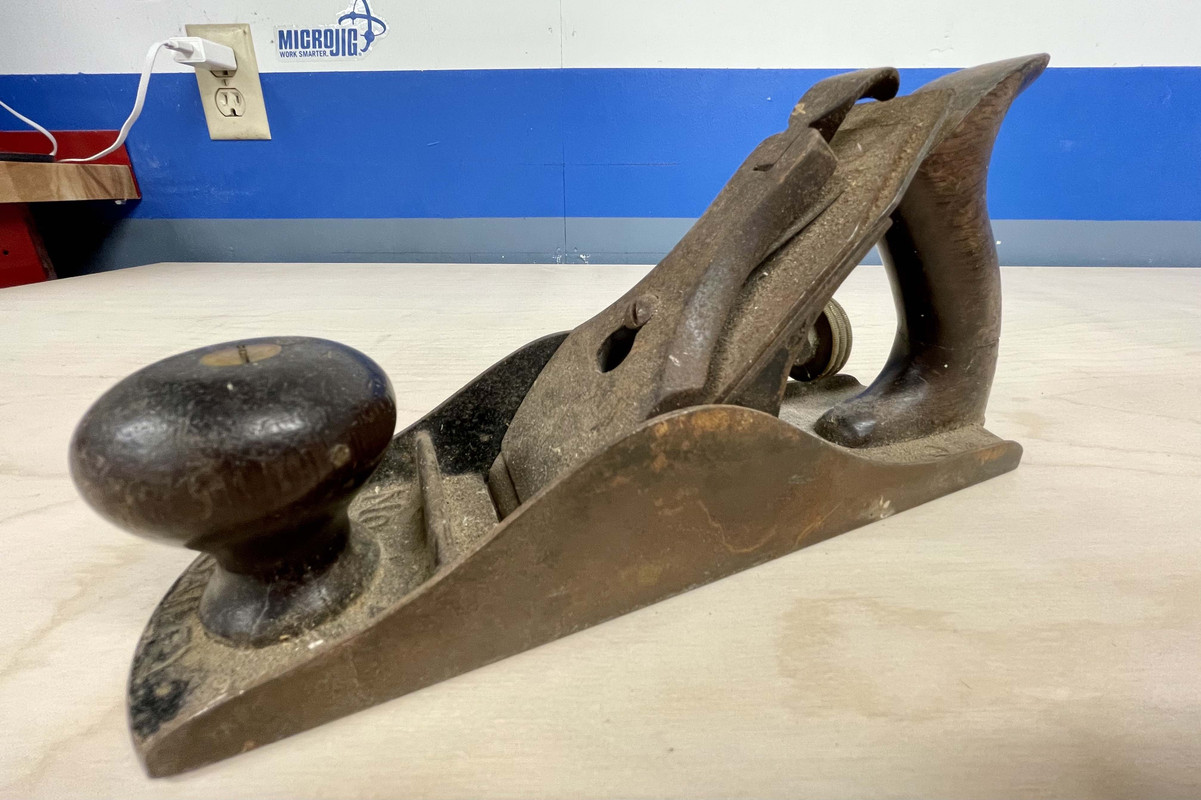
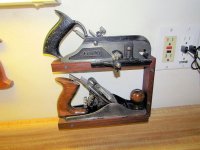
I know barely anything about hand planes, but it appears there are two Stanley Bailey No. 4's, perhaps a No. 3 labeled Sargent?, a Stanley No. 78 Rabbet plane, and a Miller Falls block plane.
From some cursory Google research it seems the Stanley Bailey No.4's are a dime a dozen, but the better condition one is the plane I'm most excited about:
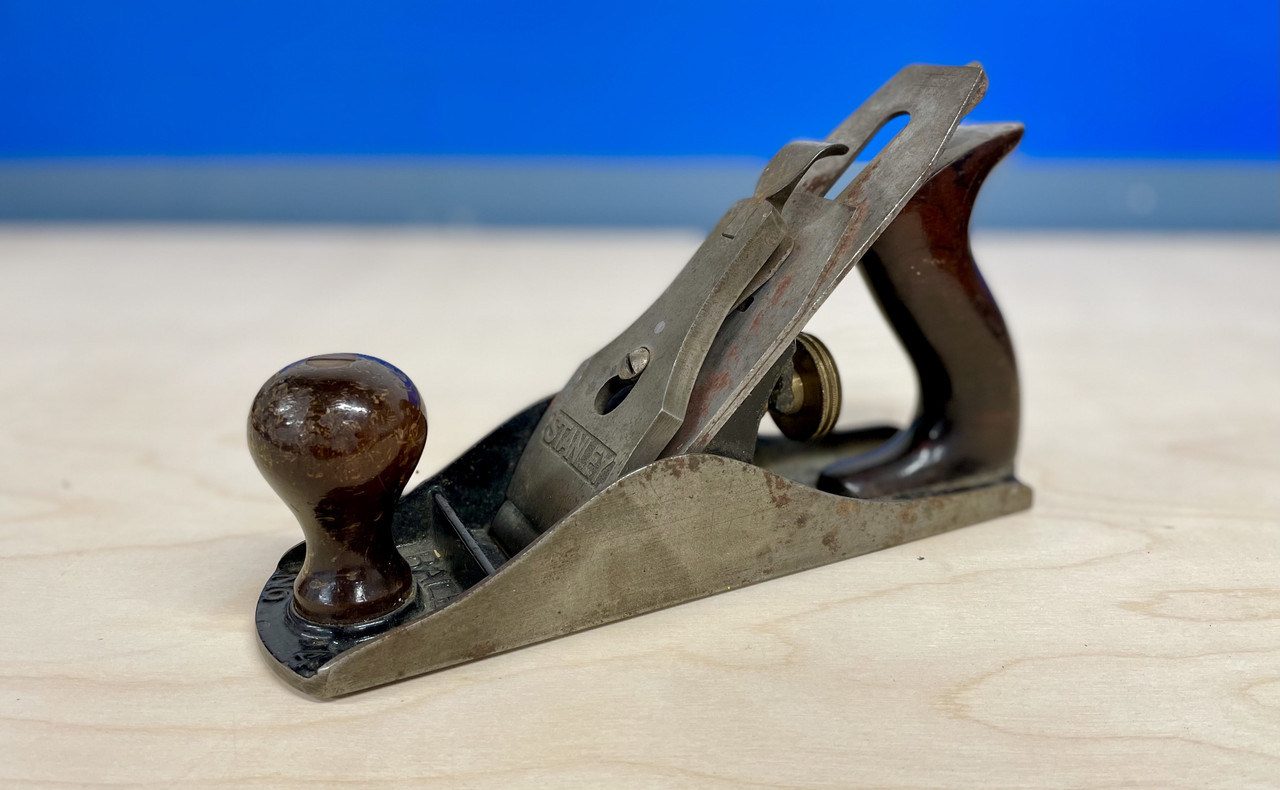
I feel like it's the closest to being cleaned up and useable.
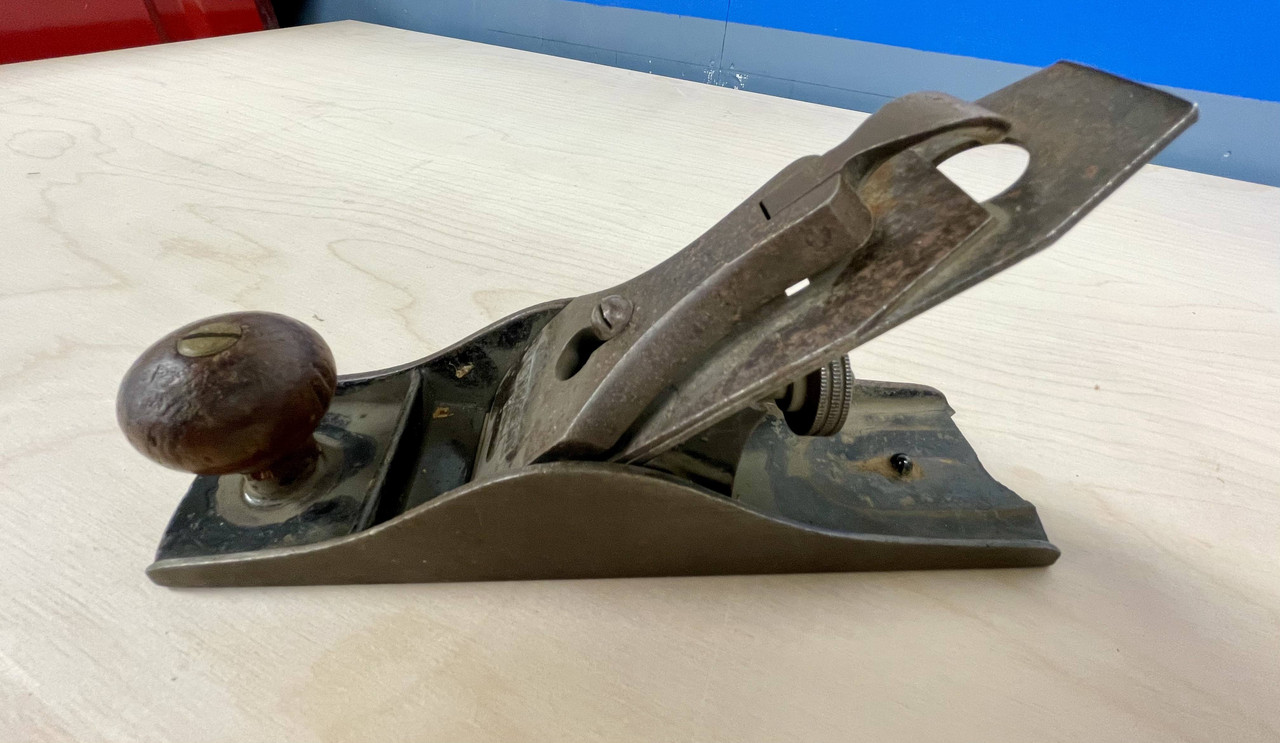
Here is the other No. 4:
That one is rustier and dirtier and I believe it must be older.
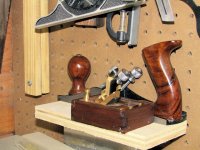
Below is what I presume might be a Sargent No.3 (the tote is missing and the heel of the sole is chipped off, surely it was dropped, not sure if it's salvageable):
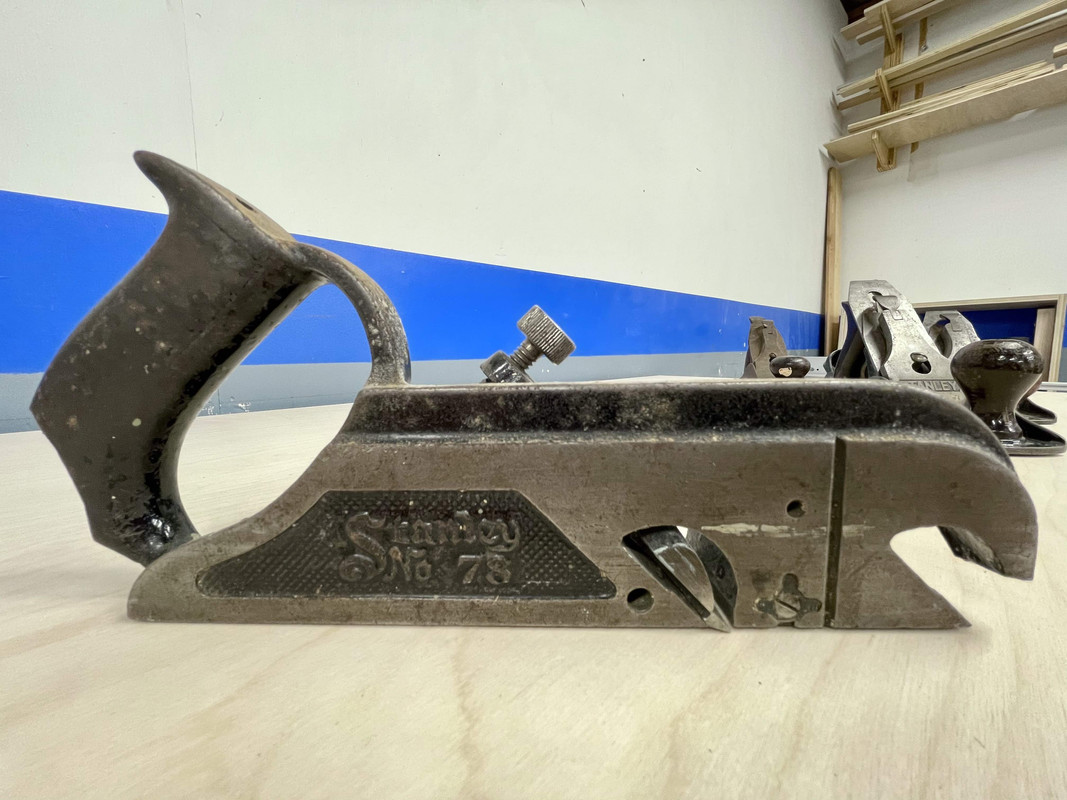
The No. 78 Rabbet plane:
Last night I started down a YouTube rabbet hole of how to set up and use bench planes. LOT's of stuff out there, it will take me awhile to absorb it all I think. I'll be sure to post up questions here for all you tool nuts!
So, yeah. I realize these aren't going to be cream of the crop planes but I'm pretty stoked to have them, even if they don't get heavy use!
So I went over to my parents' (just myself, masked, socially distanced) for a short bit on Thanksgiving. It kind of randomly came up in conversation somehow, but my dad let slip that he had a few old hand planes I could inherit someday. And then he pivoted and said I could take them now if I wanted. I didn't even know he had any... but I've actually been wanting to get an old one for fun! So of course I accepted his offer.
Turns out they belonged to my grandpa. I am a sucker for inherited tools, doesn't really matter if they are good or not, it just makes them special and meaningful.
I know barely anything about hand planes, but it appears there are two Stanley Bailey No. 4's, perhaps a No. 3 labeled Sargent?, a Stanley No. 78 Rabbet plane, and a Miller Falls block plane.
From some cursory Google research it seems the Stanley Bailey No.4's are a dime a dozen, but the better condition one is the plane I'm most excited about:
I feel like it's the closest to being cleaned up and useable.
Here is the other No. 4:
That one is rustier and dirtier and I believe it must be older.
Below is what I presume might be a Sargent No.3 (the tote is missing and the heel of the sole is chipped off, surely it was dropped, not sure if it's salvageable):
The No. 78 Rabbet plane:
Last night I started down a YouTube rabbet hole of how to set up and use bench planes. LOT's of stuff out there, it will take me awhile to absorb it all I think. I'll be sure to post up questions here for all you tool nuts!
So, yeah. I realize these aren't going to be cream of the crop planes but I'm pretty stoked to have them, even if they don't get heavy use!
Bob Heine
ALLIANCE MEMBER
Nick, a hand plane was one of the tools almost every household had back in the day. My father's Stanley No. 78 is a USA model and still has the depth stop and fence. My father-in-law's Waltham has quite a few stamped steel parts so I suspect in's from the mid-50s. My earliest memories of the Stanley are of my father trimming the doors in the house we lived in in 1948-52. We now have 9 grandchildren and 3 great grandchildren so maybe one of them will be interested in the history.

After I tuned up the antiques, I bought a Harbor Freight plane to use for every-day stuff along with a set of three mini-planes for the little fine-tuning jobs in the workshop. They work well and if I drop and break it, no big deal. For the big jobs I have a Makita electric hand plane (not as rewarding to use as the hand planes but very effective at making shavings).

After I tuned up the antiques, I bought a Harbor Freight plane to use for every-day stuff along with a set of three mini-planes for the little fine-tuning jobs in the workshop. They work well and if I drop and break it, no big deal. For the big jobs I have a Makita electric hand plane (not as rewarding to use as the hand planes but very effective at making shavings).
Attachments
Unruh
Well-known member
I’m been checking out those JessEm guides. You’ll have to give a review after you have used them more.
I love those old planes. I have a few, but need to get better about setting them up and sharpening. Now you need to build a sharping pond and share for us!
I love those old planes. I have a few, but need to get better about setting them up and sharpening. Now you need to build a sharping pond and share for us!
I’ve got a small assortment of hand planes in my shop. Two cents: get the block plane razor sharp to start, and keep it handy. I find I grab mine frequently, especially for adding small chamfers and cleaning up edges.
It’s easy to go down a rabbit hole comparing (and subsequently worrying about) steel types and sharpening angles, among other factors. The wood won’t know the difference. The beauty of using a handplane is that the feedback is instant and visceral.
Start with a soft wood like pine. See if you can take a section of 2x4 to 6 square faces.
If you’re in doubt, the answer is nearly always to make it sharper.
OP
nicholam77
Well-known member
That is awesome Nick. That is a great assortment of planes. More than I have. I have avoided the hand tool rabbit hole for a long time.
Bret
Thanks Bret -- ya I'm quite excited. After a closer look I think most of them I'll just clean up and throw in the sentimental museum, but the block plane and the nice No. 4 seem pretty promising for actual use!
Nick, a hand plane was one of the tools almost every household had back in the day. My father's Stanley No. 78 is a USA model and still has the depth stop and fence. My father-in-law's Waltham has quite a few stamped steel parts so I suspect in's from the mid-50s. My earliest memories of the Stanley are of my father trimming the doors in the house we lived in in 1948-52. We now have 9 grandchildren and 3 great grandchildren so maybe one of them will be interested in the history.
Bob, thanks for sharing those great pics and info! With 9 grandchildren and 3 great grandchildren surely one of them will be interested!
I’m been checking out those JessEm guides. You’ll have to give a review after you have used them more.
I love those old planes. I have a few, but need to get better about setting them up and sharpening. Now you need to build a sharping pond and share for us!
Yes, something I need to learn about for sure. Seems sharpening is priority #1 for good results.
I'll for sure give a more in-depth opinion about the stock guides. I hate to say it price-wise, but with your big fancy Saw Stop the larger TS guides may be more appropriate and convenient. The ones I got are not intended by JessEm for table saws (they are for router tables), but work for smaller pieces.
I’ve got a small assortment of hand planes in my shop. Two cents: get the block plane razor sharp to start, and keep it handy. I find I grab mine frequently, especially for adding small chamfers and cleaning up edges.
It’s easy to go down a rabbit hole comparing (and subsequently worrying about) steel types and sharpening angles, among other factors. The wood won’t know the difference. The beauty of using a handplane is that the feedback is instant and visceral.
Start with a soft wood like pine. See if you can take a section of 2x4 to 6 square faces.
If you’re in doubt, the answer is nearly always to make it sharper.
Good idea. That one should be fairly easy to get going I think because I think all it needs is a sharpen and light cleaning. I've heard a lot of people proclaim the usefulness of the block plane.
Good Job! Keep up the good work.
Thanks Chad! I'll try my best!
Are the hold down wheels on the fence spring loaded at all? Just wondering how they do with uneven material? If there is such thing as "bling" for a table saw, you've nailed it..ha.
Unfortunately they are not spring-loaded. You set the depth for the pressure you want and then tighten them down with an allen key (or by hand). Any "give" in the system is from the rubber wheels. I have to say they are a bit tricky to set, and I've noticed if I set them with too much pressure it's difficult to push the workpiece through, and it actually lifts my fence up and probably out of square.
But I agree, they do look pretty cool

----------------------------------------------------------------------------
So I haven't cleaned them at all yet, but for fun I set up the No. 4 as best I could based on a Paul Sellers video and even with a super dull and dented iron it took some plywood shavings:
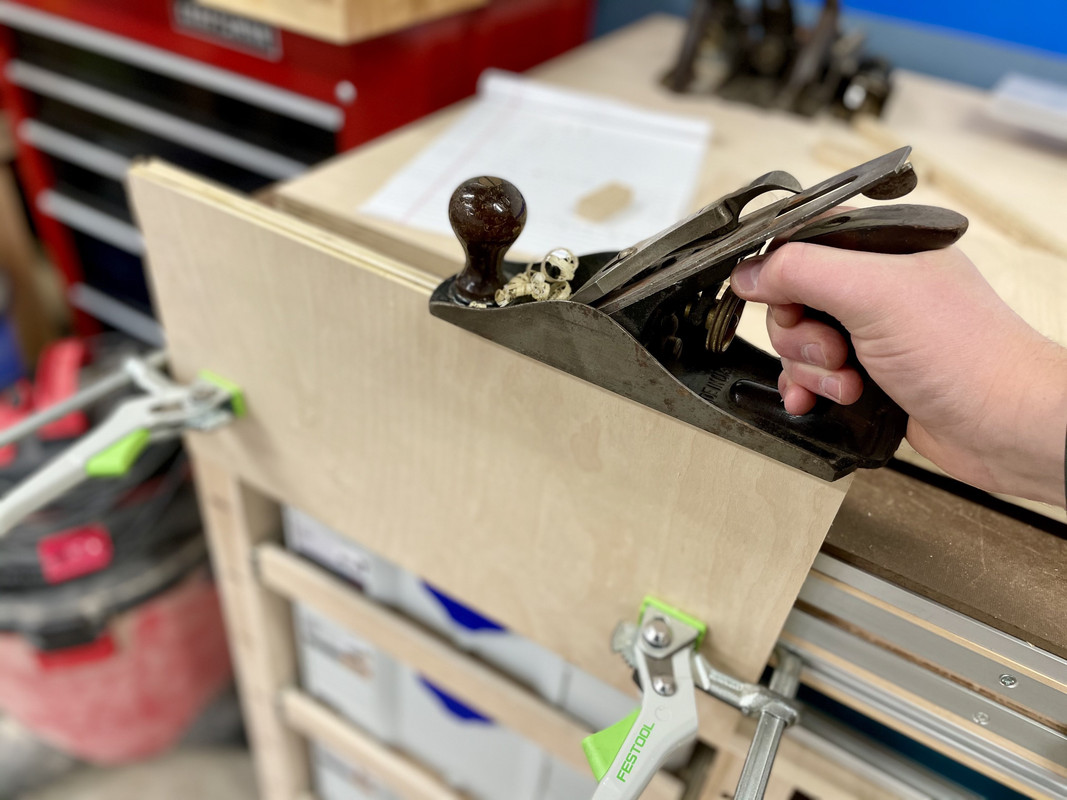
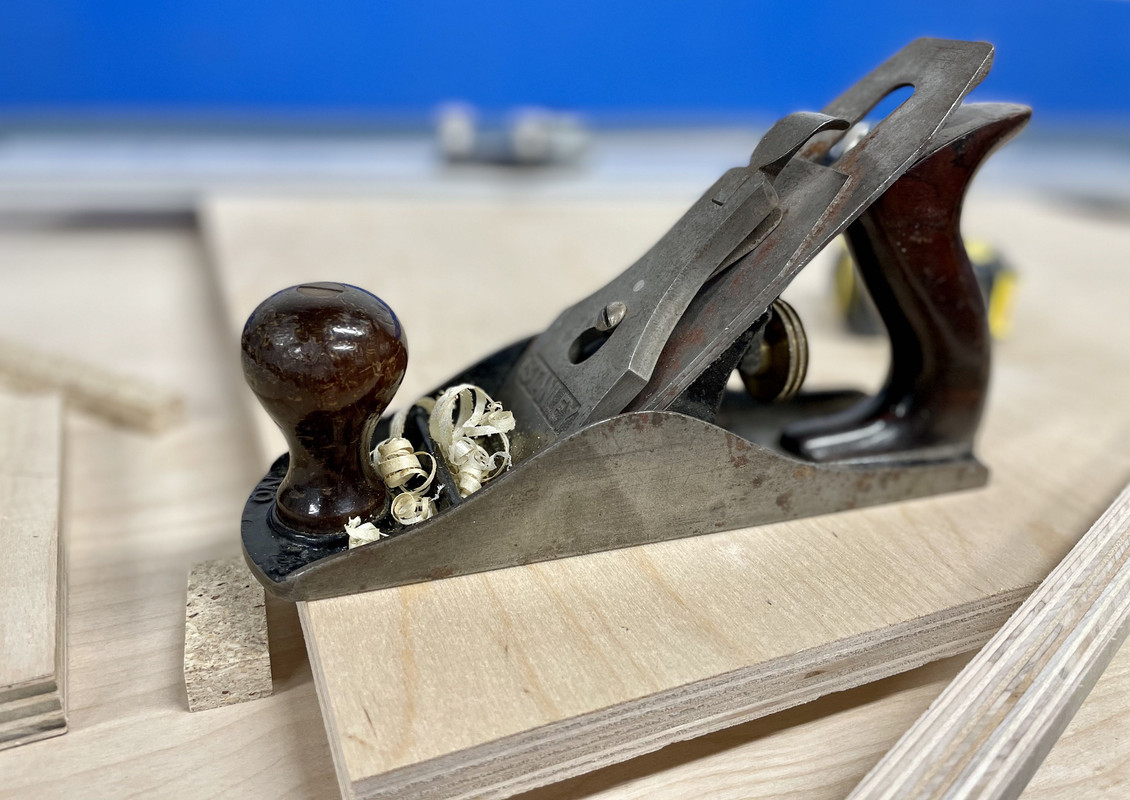
I wonder if it is worth it trying to sharpen the old iron it has or if I should just start fresh with a replacement. Either way... it's pretty fun! I do love my power tools, but I've really been wanting to try some hand tool stuff, so this might finally get me going.
...I wonder if it is worth it trying to sharpen the old iron it has or if I should just start fresh with a replacement. Either way... it's pretty fun! I do love my power tools, but I've really been wanting to try some hand tool stuff, so this might finally get me going.
I think its worth learning how to sharpen. You'll need to learn eventually, might as well do it on an old blade that you can't make any worse. By the time you buy replacement blades for all of them, you could have purchased a decent sharpening system. Even though they are your Grandpa's planes, I'd consider the blade a consumable - the plane itself is where the sentimental value lies.
Be careful when researching sharpening methods and tools. That is a heavily debated topic with little consensus. Just know that no matter what you choose, someone will be happy to point out that you made the wrong choice.
I think Stumpy Nubs has the best overview on the topic:
Last edited:
wasfast
Well-known member
I bought a Lee Valley blade for my #4 but it just postpones the sharpening some. I'd buy this: https://www.woodcraft.com/products/veritas-sharpening-system and use silicone carbide (3M Wet-n-Dry) sandpaper, working up through the grits. There are lots of options and price points. This works and is low cost.
OP
nicholam77
Well-known member
I think its worth learning how to sharpen. You'll need to learn eventually, might as well do it on an old blade that you can't make any worse. By the time you buy replacement blades for all of them, you could have purchased a decent sharpening system. Even though they are your Grandpa's planes, I'd consider the blade a consumable - the plane itself is where the sentimental value lies.
Be careful when researching sharpening methods and tools. That is a heavily debated topic with little consensus. Just know that no matter what you choose, someone will be happy to point out that you made the wrong choice.
I think Stumpy Nubs has the best overview on the topic:
Oh for sure, even if I got a replacement iron I would sharpen it. I just meant the old one has a dent in the edge and I didn't know if it was gonna take 4 hrs of hand-cramping labor to fix or not since I've never done it before. I think you're right though -- I'll give it a try on the old blade first.
Stumpy Nubs always seems to have a good no-BS approach. Thanks for the vid, that is helpful, although I'm still not sure what to do. I might grab some sandpaper to start and then upgrade if it becomes necessary. Not invest too much up front until I understand how it works better.
I bought a Lee Valley blade for my #4 but it just postpones the sharpening some. I'd buy this: https://www.woodcraft.com/products/veritas-sharpening-system and use silicone carbide (3M Wet-n-Dry) sandpaper, working up through the grits. There are lots of options and price points. This works and is low cost.
I think I am going to start here. Thanks!
___________________________________________
I've been slammed with work so not much new, but I was able to identify with confidence when the two No. 4 Stanleys were made using this website:
https://woodandshop.com/identify-stanley-hand-plane-age-type-study/
The newer one is a Type 15, manufactured 1931-1932
The older, rustier one, is a Type 9, manufactured 1902-1907
I was chatting with my dad and his dad (my grandpa) was born 1914, so the Type 9 pre-dates him even. It's highly likely that one or both No. 4 planes could have been my great-grandfather's, although neither of us know that for a fact.
They are a bit older than I expected, and I'm pretty happy about that! For almost 90 yrs old the Type 15 looks in top notch shape. After I clean it up, no reason it should last another 100 yrs.
Unruh
Well-known member
Nick! I am in the exact same boat as you with this sharping thing. A guy up the road from me is retiring and I bought a plane from him. I have a few older ones as well and now wanna learn how to sharpen them. I bought a diamond stone and now want an ultra fine ceramic stone for the final touch up. I’ve watched a bunch of videos about sharpening. I really like Rob Cosman’s channel. I’m excited with this new development in my woodworking journey!
BTW those planes are awesome! I wish that I had inherited some great tools like that. Your block plane looks really interesting.
BTW those planes are awesome! I wish that I had inherited some great tools like that. Your block plane looks really interesting.
[mention]nicholam77 [/mention] 
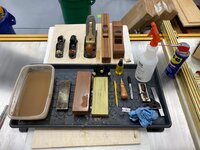
My sharpening set up. This discussion motivated me to tune up most of my planes, which in turn prompted a wee project.
Left to right:
- Stanley low angle block plane. Readily available on Amazon for about $50. It took forever to bed the sole in which had a sizeable hollow in it. So I didn’t, and did a cursory sharpening of the blade, and have been using it for about 5 years. This is what I use when there are nails or glue in my workpiece.
- Veritas low angle skew block plane. Inspired by the wood whisperer, I got this so I wouldn’t ‘need’ a conventional rabbet plane. It’s nice that it has a square shoulder for cleaning up corners, but it’s not a feature I use too often.
Or really ever.
- lie Nielsen 4.5 smoother. Cost an arm and leg and weighs nearly just as much. It’s gorgeous, expensive, and like a race car driven on the streets, appropriate and comfortable in brief sprints.
-home made jointer. I made this with a 2” hock blade. Super handy for cleaning up plywood edges before glueing on hardwood edge banding. A pain to adjust. The next ones I do will be with a euro-style screw adjuster. Same for the home made smoother.
Sharpening:
- Tupperware box for storage and soaking the stones
- Ikea plastic shoe tray for sharpening. It has coin dimples so items don’t sit flat in a tray of icky water and sludge
- 6” diamond stone to flatten the water stones. Super critical step that few people emphasize enough. If your stones aren’t flat, sharpening and squaring a blade will be impossible. I flatten my stones with a cursory couple of swipes every time I sharpen a blade.
- 1000/4000 dual stone
-8000 water stone for final cleanup and micro bevel.
- veritas sharpening jig. Easy to set up but more adjustment than I use. I set everything at 35 degrees and add a micro bevel at the end and call it good.
- Pencil to mark the stones as I flatten them
- sharpie to mark the blades to ensure I’m hitting the right surfaces
- fancy lie Nielsen screw driver I bought on a whim. Utterly unnecessary but better than a nickel
- starret 4” mini square for checking blades
- spray bottle for washing things off
- wd40 for warding off the rust
I’ll reiterate, there are a ton of ways to sharpen. Don’t overthink it. Go coarser to fix big nicks, and finer until you can see your reflection in the blade’s edge. If you’re sweating, cursing, or unhappy. Go sharpen and have a beer, in that order.
The proof is in the proverbial pudding.
Attachments


Unruh
Well-known member
[mention]nicholam77 [/mention]
My sharpening set up. This discussion motivated me to tune up most of my planes, which in turn prompted a wee project.
Left to right:
- Stanley low angle block plane. Readily available on Amazon for about $50. It took forever to bed the sole in which had a sizeable hollow in it. So I didn’t, and did a cursory sharpening of the blade, and have been using it for about 5 years. This is what I use when there are nails or glue in my workpiece.
- Veritas low angle skew block plane. Inspired by the wood whisperer, I got this so I wouldn’t ‘need’ a conventional rabbet plane. It’s nice that it has a square shoulder for cleaning up corners, but it’s not a feature I use too often.
Or really ever.
- lie Nielsen 4.5 smoother. Cost an arm and leg and weighs nearly just as much. It’s gorgeous, expensive, and like a race car driven on the streets, appropriate and comfortable in brief sprints.
-home made jointer. I made this with a 2” hock blade. Super handy for cleaning up plywood edges before glueing on hardwood edge banding. A pain to adjust. The next ones I do will be with a euro-style screw adjuster. Same for the home made smoother.
Sharpening:
- Tupperware box for storage and soaking the stones
- Ikea plastic shoe tray for sharpening. It has coin dimples so items don’t sit flat in a tray of icky water and sludge
- 6” diamond stone to flatten the water stones. Super critical step that few people emphasize enough. If your stones aren’t flat, sharpening and squaring a blade will be impossible. I flatten my stones with a cursory couple of swipes every time I sharpen a blade.
- 1000/4000 dual stone
-8000 water stone for final cleanup and micro bevel.
- veritas sharpening jig. Easy to set up but more adjustment than I use. I set everything at 35 degrees and add a micro bevel at the end and call it good.
- Pencil to mark the stones as I flatten them
- sharpie to mark the blades to ensure I’m hitting the right surfaces
- fancy lie Nielsen screw driver I bought on a whim. Utterly unnecessary but better than a nickel
- starret 4” mini square for checking blades
- spray bottle for washing things off
- wd40 for warding off the rust
I’ll reiterate, there are a ton of ways to sharpen. Don’t overthink it. Go coarser to fix big nicks, and finer until you can see your reflection in the blade’s edge. If you’re sweating, cursing, or unhappy. Go sharpen and have a beer, in that order.
The proof is in the proverbial pudding.

So good! I am not even close to this level of sharpening yet. I have a fine 1000 grit diamond stone and a extra fine ceramic stone. That is about all I use, but looks like I need to step up my game!
Attachments
OP
nicholam77
Well-known member
Nick! I am in the exact same boat as you with this sharping thing. A guy up the road from me is retiring and I bought a plane from him. I have a few older ones as well and now wanna learn how to sharpen them. I bought a diamond stone and now want an ultra fine ceramic stone for the final touch up. I’ve watched a bunch of videos about sharpening. I really like Rob Cosman’s channel. I’m excited with this new development in my woodworking journey!
BTW those planes are awesome! I wish that I had inherited some great tools like that. Your block plane looks really interesting.
I've watched a good handful of videos at this point, too -- there is so much out there it can be a bit overwhelming. I think I just have to attempt it and see what happens.
I've watched a few of Rob Cosman's videos but I'll have to revisit his channel.
Super jealous of your recent acquisitions.
And thanks, I am excited to have some inherited tools. Even if I just get the one solid Stanley #4 out of it I will be super happy.
My sharpening set up. This discussion motivated me to tune up most of my planes, which in turn prompted a wee project.

Thanks for this Jake! It's super helpful to see. I ended up getting a cheap Rockler kit to start. A glass plate and adhesive backed sandpaper, plus sharpening jig. It was inexpensive but I want to give that a shot and see how it goes before investing in any stones.
Your handmade planes are very interesting. Do they work well? I remember seeing a plywood jointer (or at least fairly long) plane on Paoson's Woodworking YouTube channel and it seemed to work well.
I've watched a good handful of videos at this point, too -- there is so much out there it can be a bit overwhelming. I think I just have to attempt it and see what happens.
I've watched a few of Rob Cosman's videos but I'll have to revisit his channel.
Super jealous of your recent acquisitions.
And thanks, I am excited to have some inherited tools. Even if I just get the one solid Stanley #4 out of it I will be super happy.
Thanks for this Jake! It's super helpful to see. I ended up getting a cheap Rockler kit to start. A glass plate and adhesive backed sandpaper, plus sharpening jig. It was inexpensive but I want to give that a shot and see how it goes before investing in any stones.
Your handmade planes are very interesting. Do they work well? I remember seeing a plywood jointer (or at least fairly long) plane on Paoson's Woodworking YouTube channel and it seemed to work well.
The wood won’t know how much you spent on sharpening paraphernalia. The wood won’t know if your plane sole is wood or metal.the wood will know if your blade is sharp, and it will tell you.
I really enjoy the small metal block planes and larger wooden jointers and smoothers. I’d be a liar if I said I use them every day, but when needed, they’re handy. Lightweight and warm to the touch. A stark contrast to my spendy but beautiful lie Nielsen. A maple or similarly hard wooden sole is key. And a small mouth. But they’re fun to make.
OP
nicholam77
Well-known member
The Pen Cube
It's been a couple weeks since I've posted something useful but I've had a couple irons in the fire, all to be revealed in due time.
Since I have tendency to start a new project before finishing the last, I've decided to try posting more of a full project vs. incremental updates. At least with smaller projects.
A bit ago I noticed Rockler had some baltic birch on sale so I grabbed a 24"x30" piece, shipped, for about $13. At that price thought I would see if it's any good. I've never used true baltic birch and I had a project in mind where stability would be important:
Peter Millard Pocket Money Rail Square
If you don't bother to follow the link, essentially it's a plywood track saw rail square, like TSO etc, but diy for cheap. I gave it my best shot:
Even spent some time making it purdy with roundovers etc. When checking the final product for square, I could see light on one axis and it was not perfect. Because of the length of cut it would be used with, I was unhappy with the results, although I didn't do any tests (like the 5 cut method).
Another idea popped into my head on how to do 90 degree cuts on the cheap, but more on that in a future post.
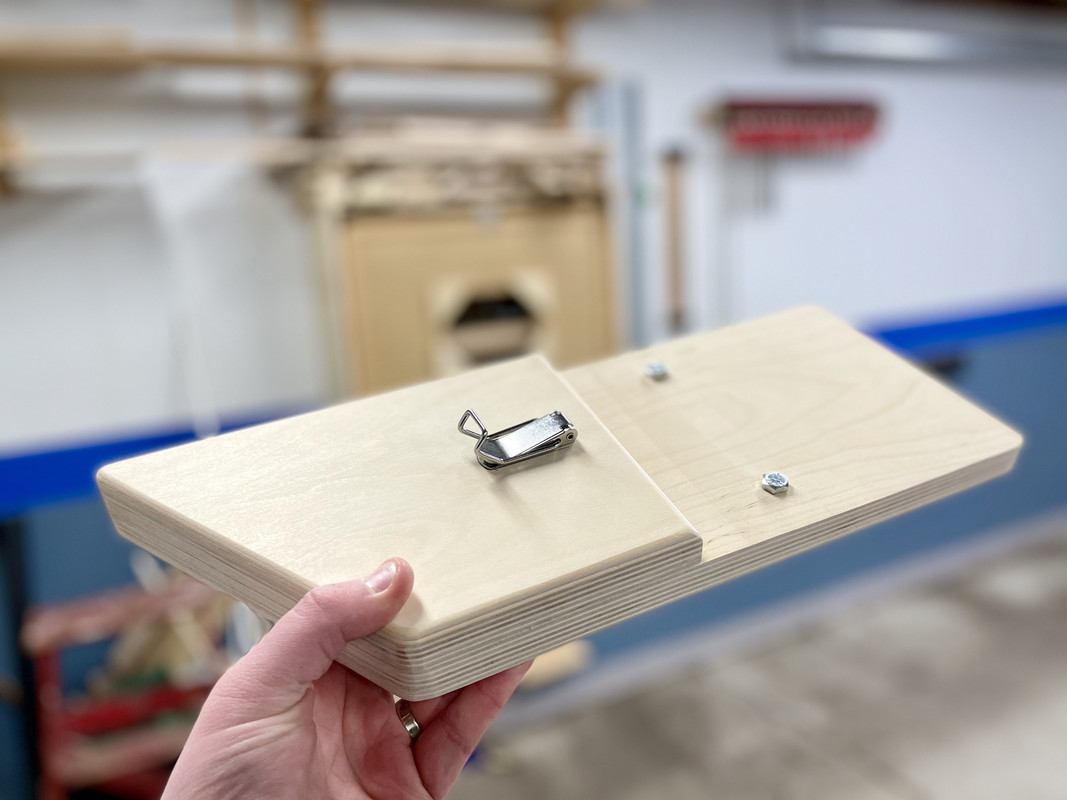
All this being said... I had some baltic birch leftover and had a random idea what to do with it -- a pen/pencil holder for my work-from-home office space.
About 8 yrs ago I bought a aluminum machined refillable pen from Karas Kusoms:
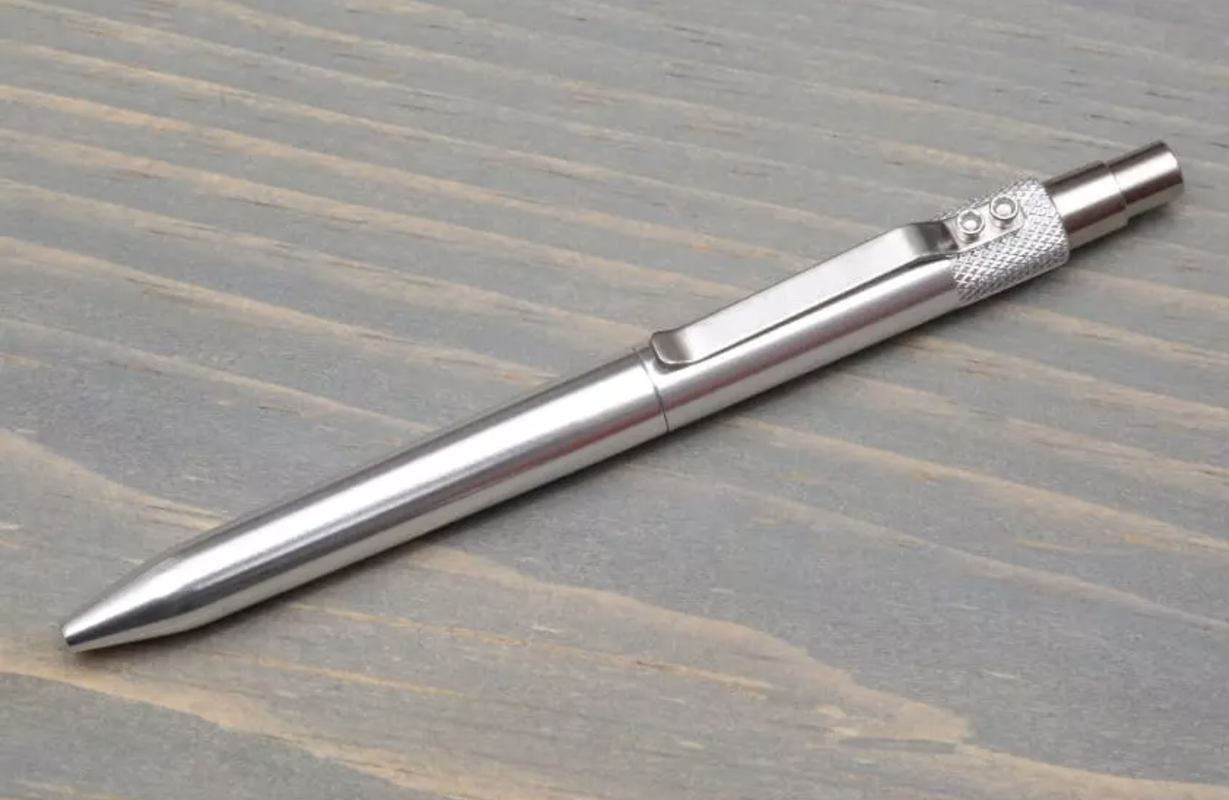
(their pic, not mine)
They make a bunch of fancy pants metal pens. They also sold a pen holder called "The Cube" milled out of a solid block of aluminum:
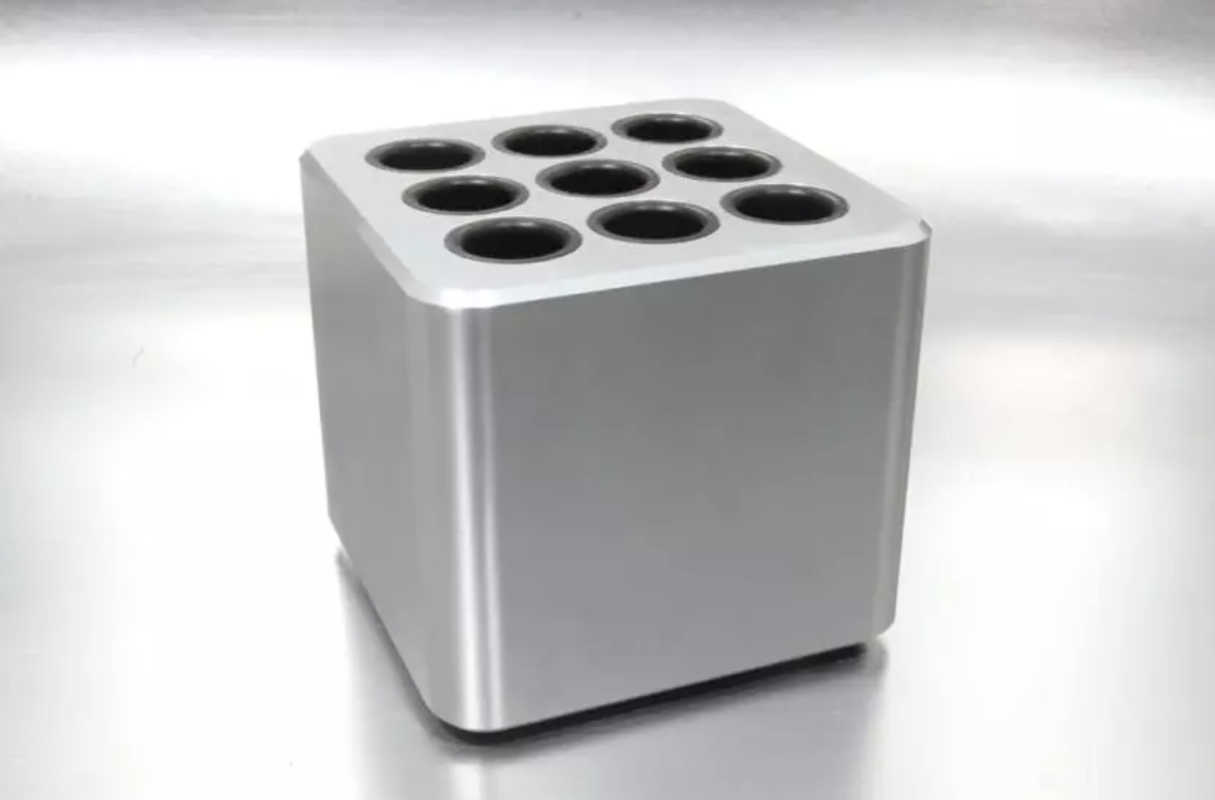
And.... it costs $105. But I always liked it. So my grand idea was to make a similar thingy out of the baltic birch.
So I started by making one layer, and then kept adding to it / flush trimming with the router:
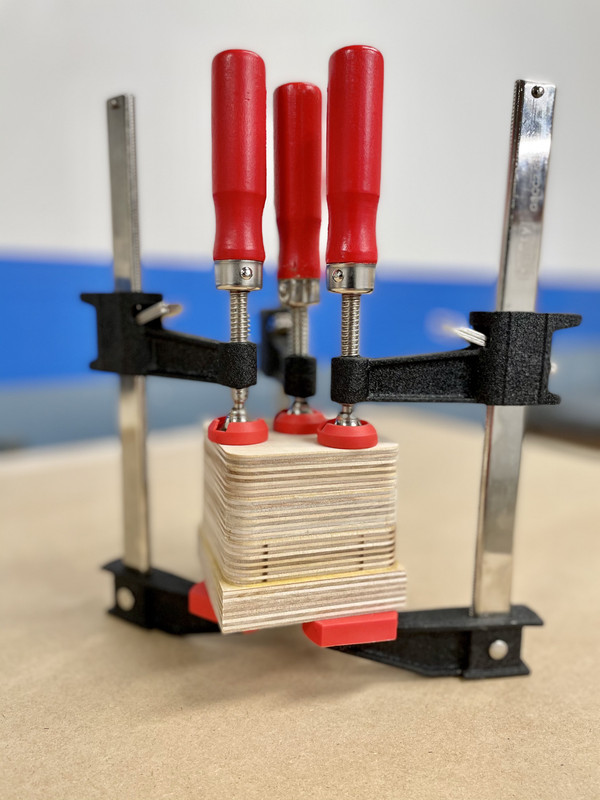
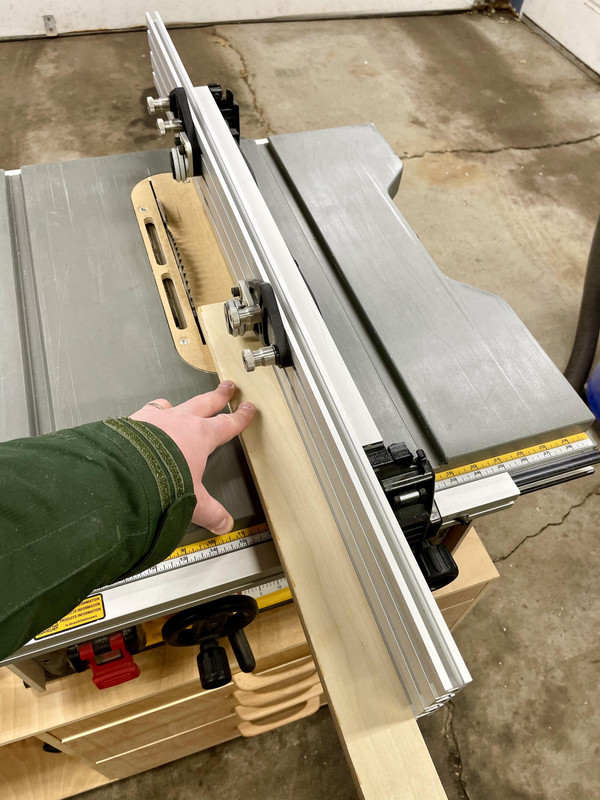
One note about the flush trimming -- I was doing it by hand and got some kickback, twice. It scared the **** out of me. Not sure if it was the density of the baltic birch or just a stupid idea, but for subsequent cuts I used the auxiliary fence, setting it flush with the cutter bearing:
This gave me more piece of mind that I wasn't going to lose a finger.
Then I did some layout with my favorite layout tool:
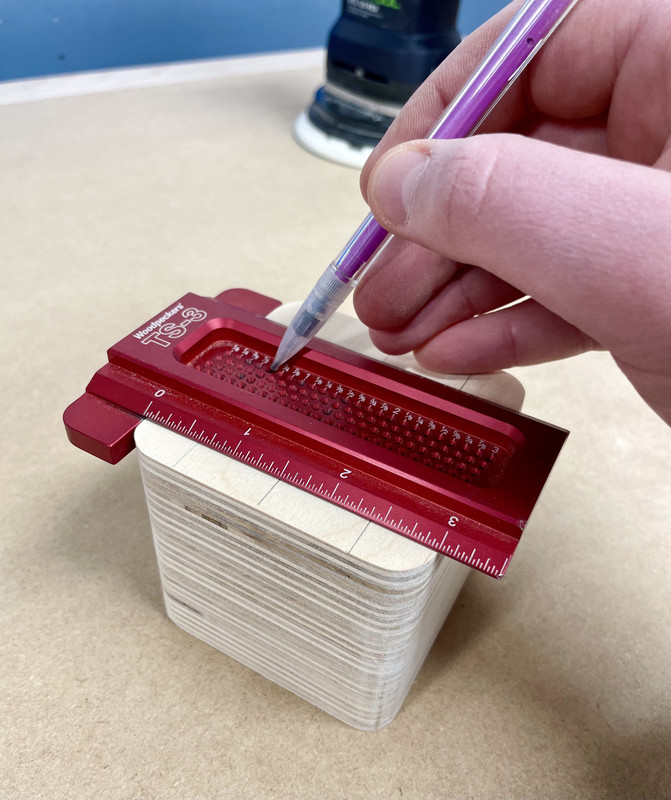
A little PSA, Woodpeckers brought these back from One Time Tool status to be a permanent offering, they were on sale recently but I think it ended. In case anyone is interested.
Before drilling the holes I decided to add a thin MDF layer with double-sided tape to prevent tearout (and had to do the layout again).
Measuring my pen it came in at .436 inches so I went with a .5 inch diameter hole.
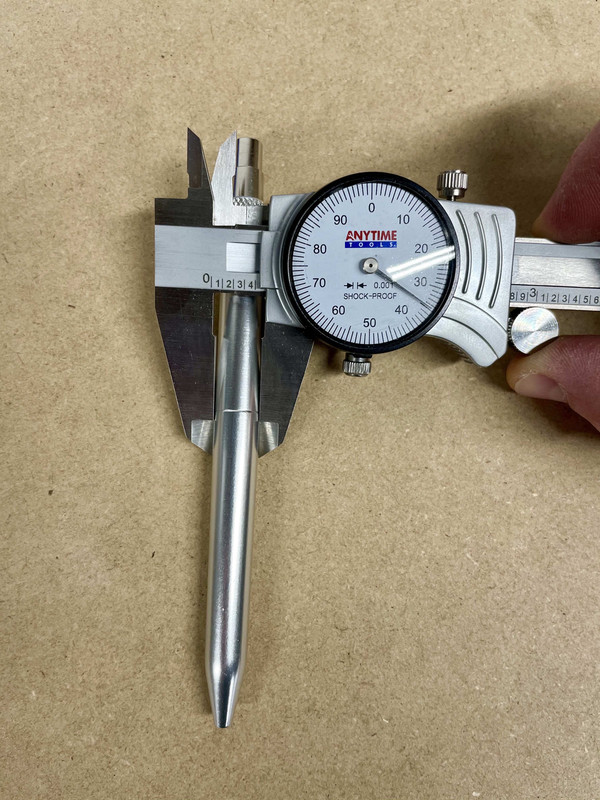
My only 1/2" drill bit was a regular twist bit, so I had some issues centering it on the layout lines, but as they say... good enough.
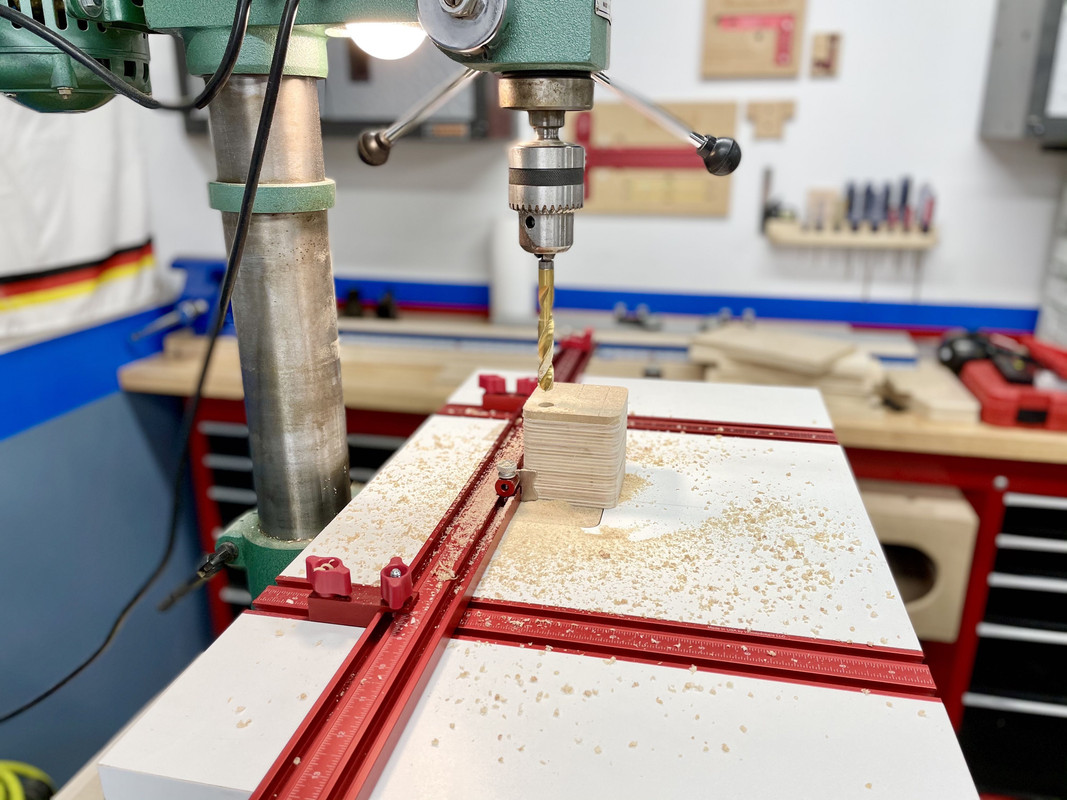
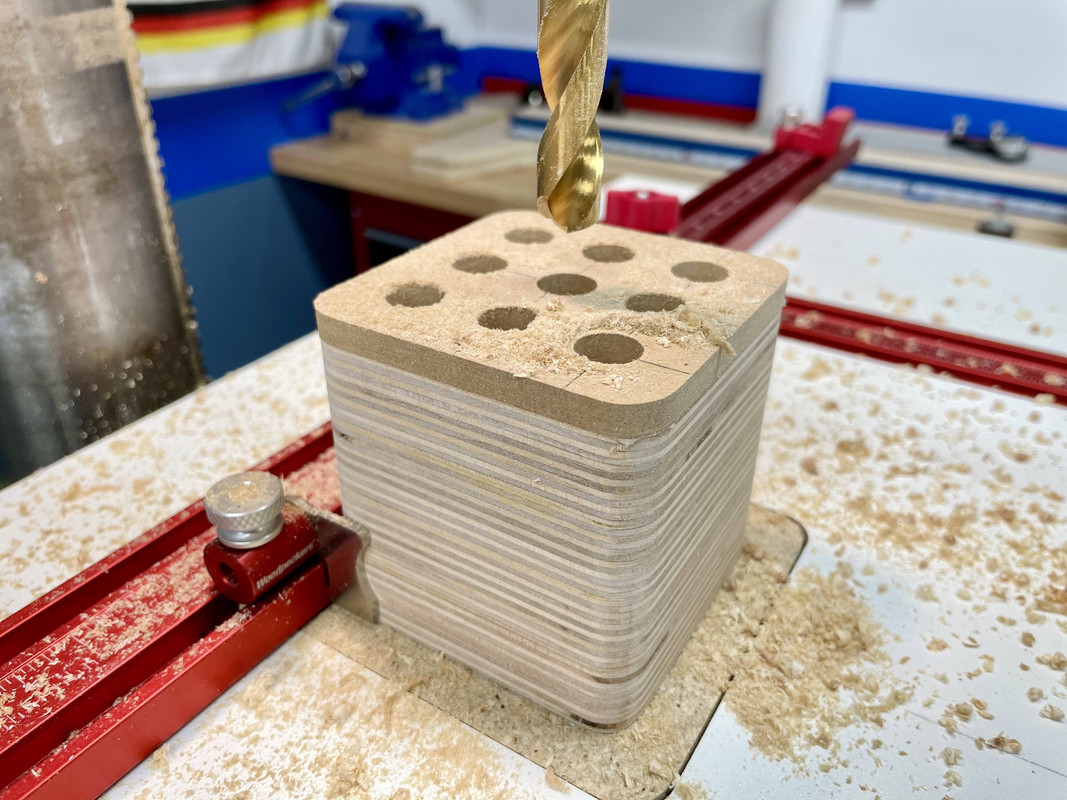
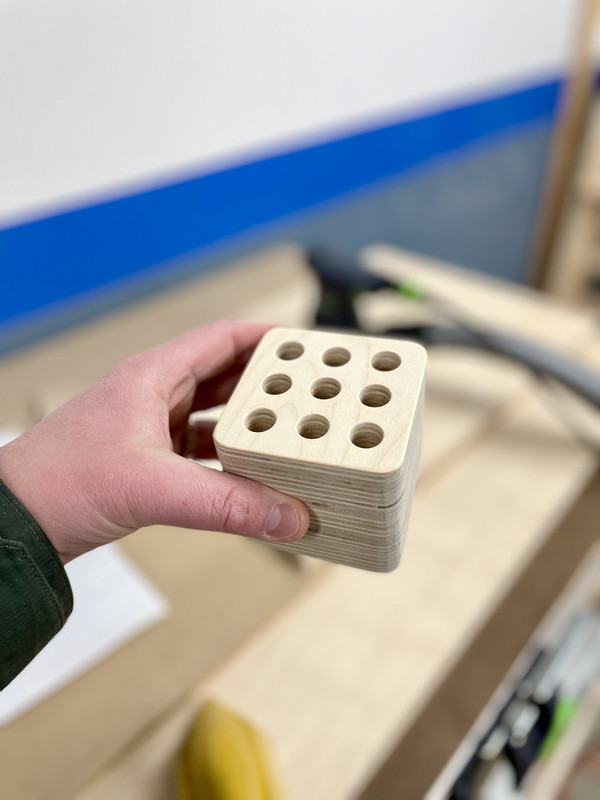
I still need to put another coat or two of finish, but here it is:
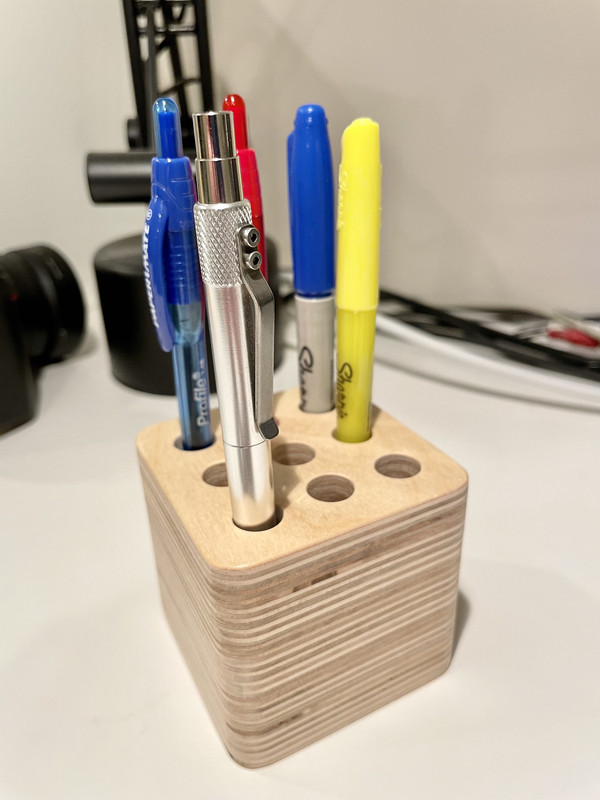
Super simple, but I like it!
It's been a couple weeks since I've posted something useful but I've had a couple irons in the fire, all to be revealed in due time.
Since I have tendency to start a new project before finishing the last, I've decided to try posting more of a full project vs. incremental updates. At least with smaller projects.
A bit ago I noticed Rockler had some baltic birch on sale so I grabbed a 24"x30" piece, shipped, for about $13. At that price thought I would see if it's any good. I've never used true baltic birch and I had a project in mind where stability would be important:
Peter Millard Pocket Money Rail Square
If you don't bother to follow the link, essentially it's a plywood track saw rail square, like TSO etc, but diy for cheap. I gave it my best shot:
Even spent some time making it purdy with roundovers etc. When checking the final product for square, I could see light on one axis and it was not perfect. Because of the length of cut it would be used with, I was unhappy with the results, although I didn't do any tests (like the 5 cut method).
Another idea popped into my head on how to do 90 degree cuts on the cheap, but more on that in a future post.
All this being said... I had some baltic birch leftover and had a random idea what to do with it -- a pen/pencil holder for my work-from-home office space.
About 8 yrs ago I bought a aluminum machined refillable pen from Karas Kusoms:
(their pic, not mine)
They make a bunch of fancy pants metal pens. They also sold a pen holder called "The Cube" milled out of a solid block of aluminum:
And.... it costs $105. But I always liked it. So my grand idea was to make a similar thingy out of the baltic birch.
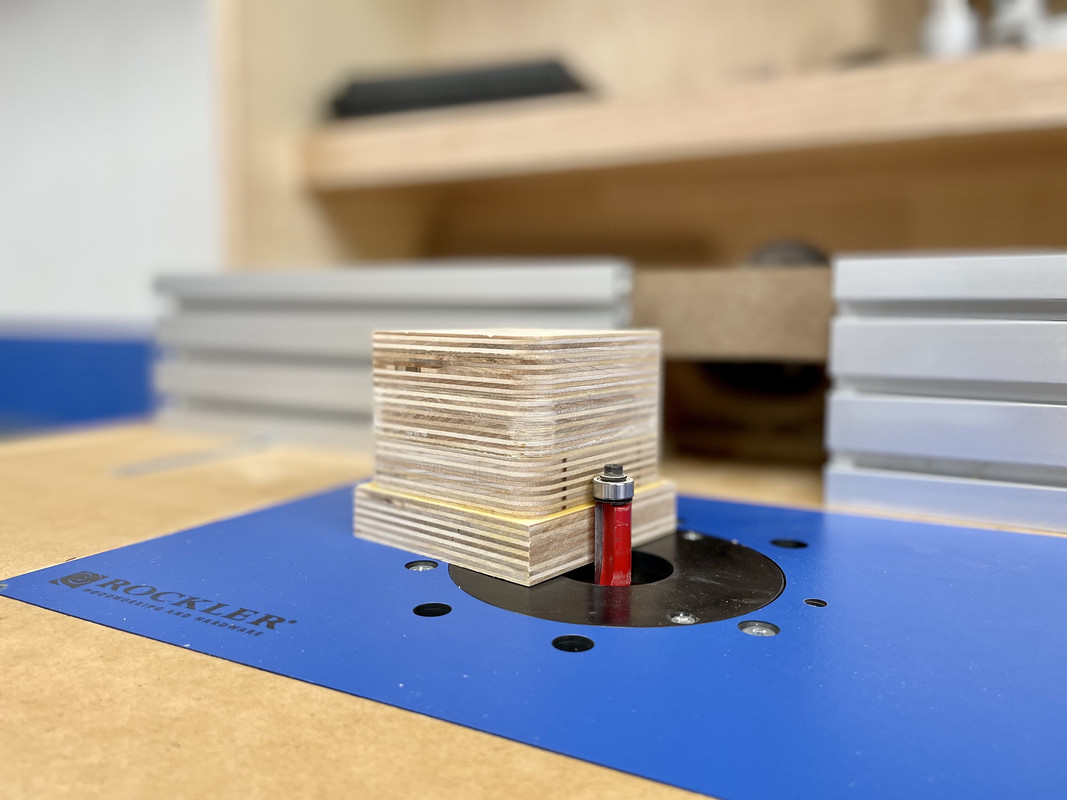
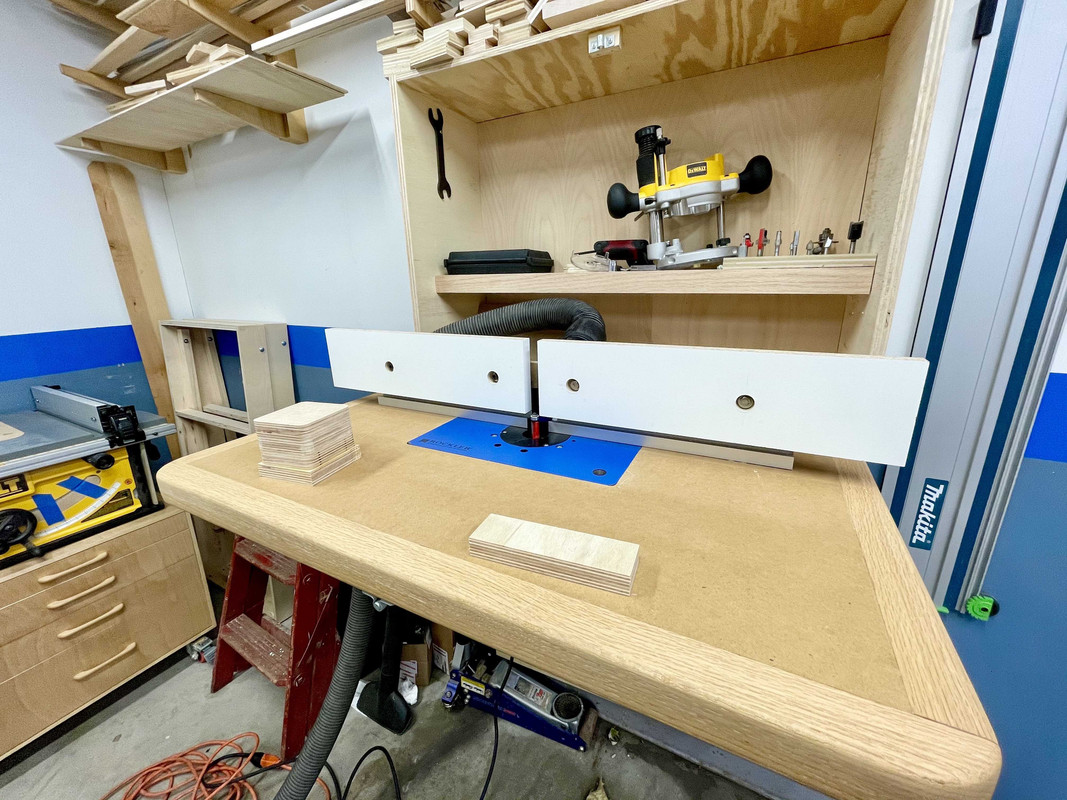
So I started by making one layer, and then kept adding to it / flush trimming with the router:
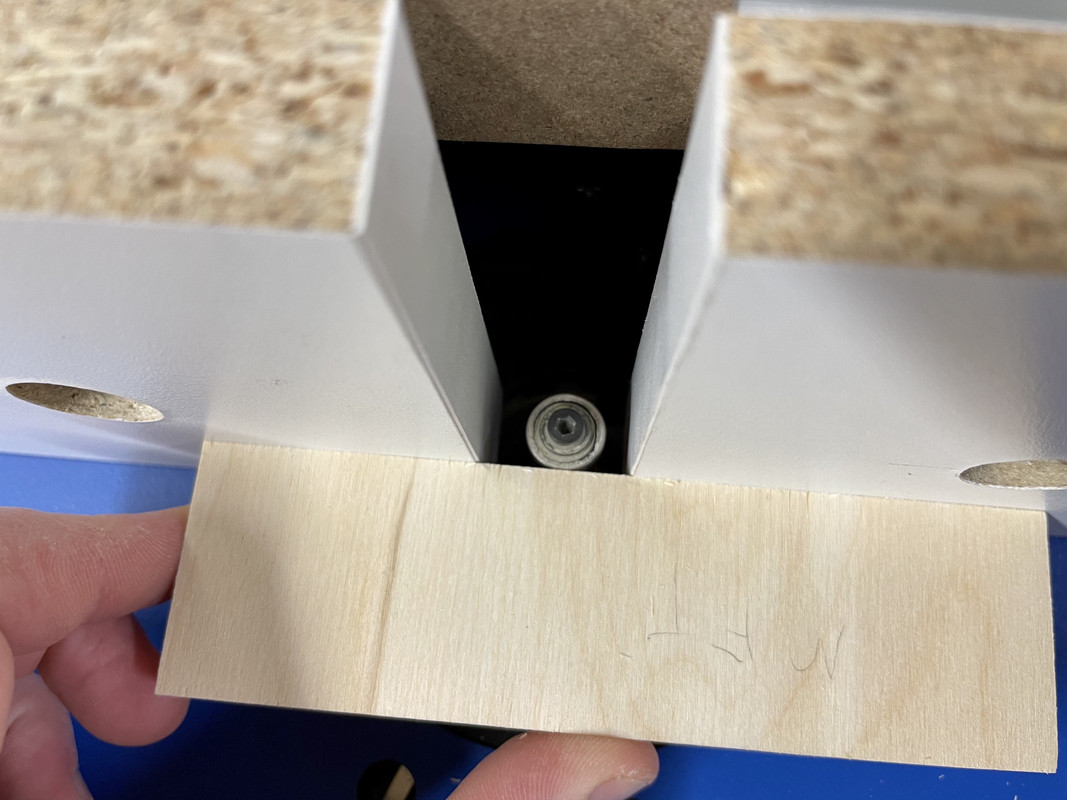
One note about the flush trimming -- I was doing it by hand and got some kickback, twice. It scared the **** out of me. Not sure if it was the density of the baltic birch or just a stupid idea, but for subsequent cuts I used the auxiliary fence, setting it flush with the cutter bearing:
This gave me more piece of mind that I wasn't going to lose a finger.
Then I did some layout with my favorite layout tool:
A little PSA, Woodpeckers brought these back from One Time Tool status to be a permanent offering, they were on sale recently but I think it ended. In case anyone is interested.
Before drilling the holes I decided to add a thin MDF layer with double-sided tape to prevent tearout (and had to do the layout again).
Measuring my pen it came in at .436 inches so I went with a .5 inch diameter hole.
My only 1/2" drill bit was a regular twist bit, so I had some issues centering it on the layout lines, but as they say... good enough.
I still need to put another coat or two of finish, but here it is:
Super simple, but I like it!
Mr. Roboto
Well-known member
Cool! Nice use of the scraps, and a great use of the drill press.
You mentioned centering issues. Did you drill with the 1/2" bit right from the beginning? Consider starting with an 1/8" bit next time to drill pilot holes and jump up from there.
You mentioned centering issues. Did you drill with the 1/2" bit right from the beginning? Consider starting with an 1/8" bit next time to drill pilot holes and jump up from there.
Trapps
ALLIANCE MEMBER
Super cool Nick!
[mention]nicholam77 [/mention] and other followers of this thread. I’ve been mulling over outfeed and assembly table ideas and came across this video on YouTube that captures most of what I think should work, and many of the folks I’ve drawn inspiration from.
OP
nicholam77
Well-known member
I like yours better than the aluminum. Now you can make them and charge half price.
Bret

Great idea! I like the plywood as a material, too.
Cool! Nice use of the scraps, and a great use of the drill press.
You mentioned centering issues. Did you drill with the 1/2" bit right from the beginning? Consider starting with an 1/8" bit next time to drill pilot holes and jump up from there.
Good idea. I used 1/2" bit from the beginning.
Super cool Nick!
Thanks!
[mention]nicholam77 [/mention] and other followers of this thread. I’ve been mulling over outfeed and assembly table ideas and came across this video on YouTube that captures most of what I think should work, and many of the folks I’ve drawn inspiration from.
You are right in assuming I like Huy's assembly table -- his was one of a handful of benches I took inspiration from for my MFT cart. In fact since he called his a "hybrid" of Tim Wilmots, Ron Paulk, etc, that's what gave me the initial idea to incorporate several people's designs. I'm ashamed I couldn't think of this myself but he also gave me the idea for the 1/4" hardboard spoil surface. Going back and watching his video again... I really do like the dowel pin locators, maybe I will add something like that. His videos also turned me on to the Misumi aluminum extrusions, which seem a bit cheaper than 80/20. All-in-all I agree, I think his assembly table is very well thought out.
On this tangent, my favorite "modern / youtube" bench builds are:
1) Tim Wilmots System Workbench
2) Alabama Woodworker (Huy) MO/AT Bench
3) Ron Paulk's various benches
4) Paoson Woodworking Multi-Function Workbench
5) Klavieratelier Multi-Functional Workbench - this one is in German, but exceptional
6) Guy's Woodshop MFT Extension Table
Looking back at my own build, I think the main change I would make is to create my own rail guide supports like in the Klavieratelier build. His seem super accurate and simple enough to do, and to be honest the trouble of routing out the out the profile in the bench sides was extra work and cost, and I find that for the price, the official MTF/3 Festool Rail Guide parts are not as accurate as I would like. A bit disappointing.
Do you have a thread, Jake? If not feel free to post a pic here if you build something, I'd love to see.
Mr. Roboto
Well-known member
Nick,
Wishing you and your family a very Merry Christmas and a happy new year!!! Enjoy celebrating with your little girl, it's truly a wonderful time!
Wishing you and your family a very Merry Christmas and a happy new year!!! Enjoy celebrating with your little girl, it's truly a wonderful time!
OP
nicholam77
Well-known member
Nick,
Wishing you and your family a very Merry Christmas and a happy new year!!! Enjoy celebrating with your little girl, it's truly a wonderful time!
Thanks man! Sorry I missed this... I went off the grid a bit and was doing just that! You're right, it's such a fun age! And same to you and your family, I hope you had a great Xmas as well!
OP
nicholam77
Well-known member
Just checking in guys, seems like it's a bit quiet around the forums, hopefully everyone is enjoying time with family and taking a break from projects
If anyone happens to drop by, I hope you have/had a great Xmas or holiday!
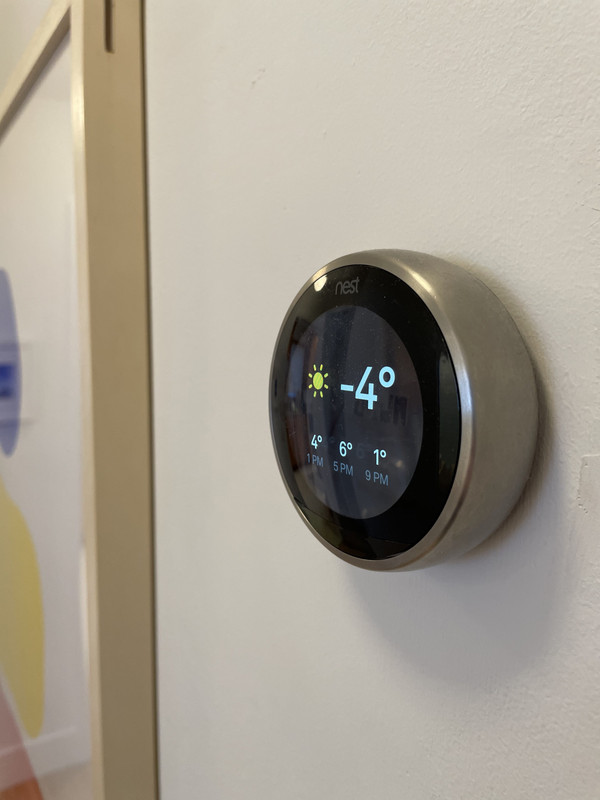
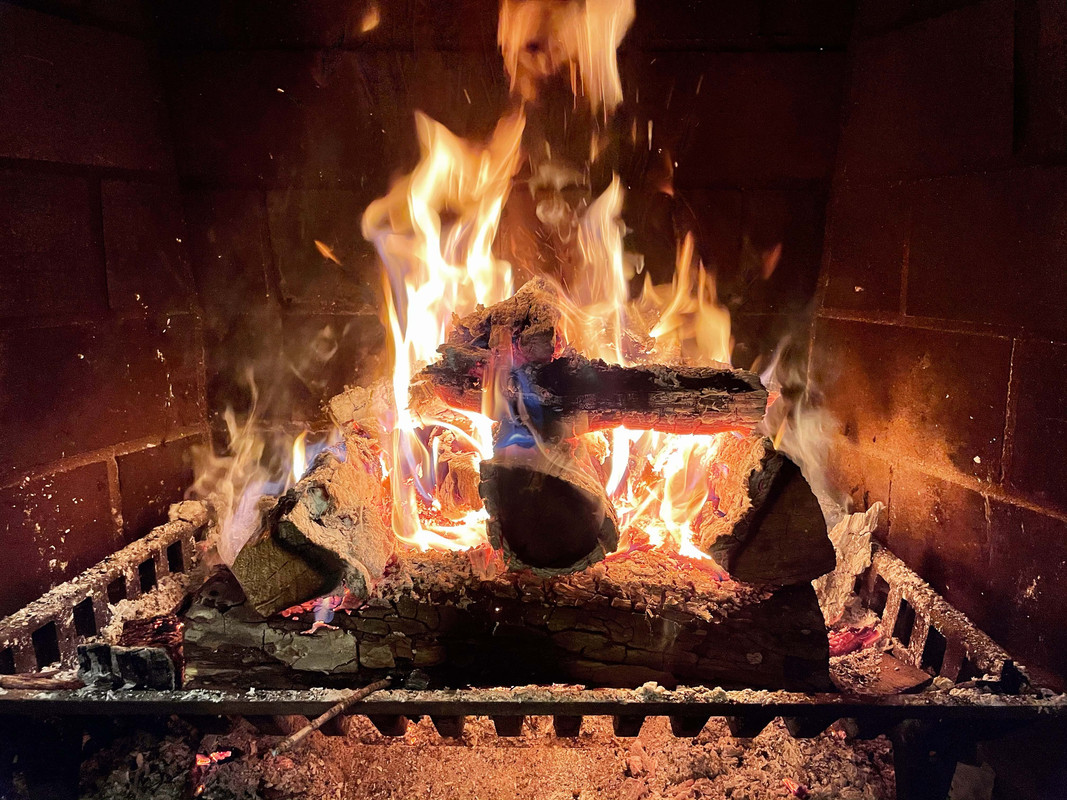
After an unseasonably warm Nov and Dec, it dropped off right before Xmas for us and we got some cold temps and white stuff.

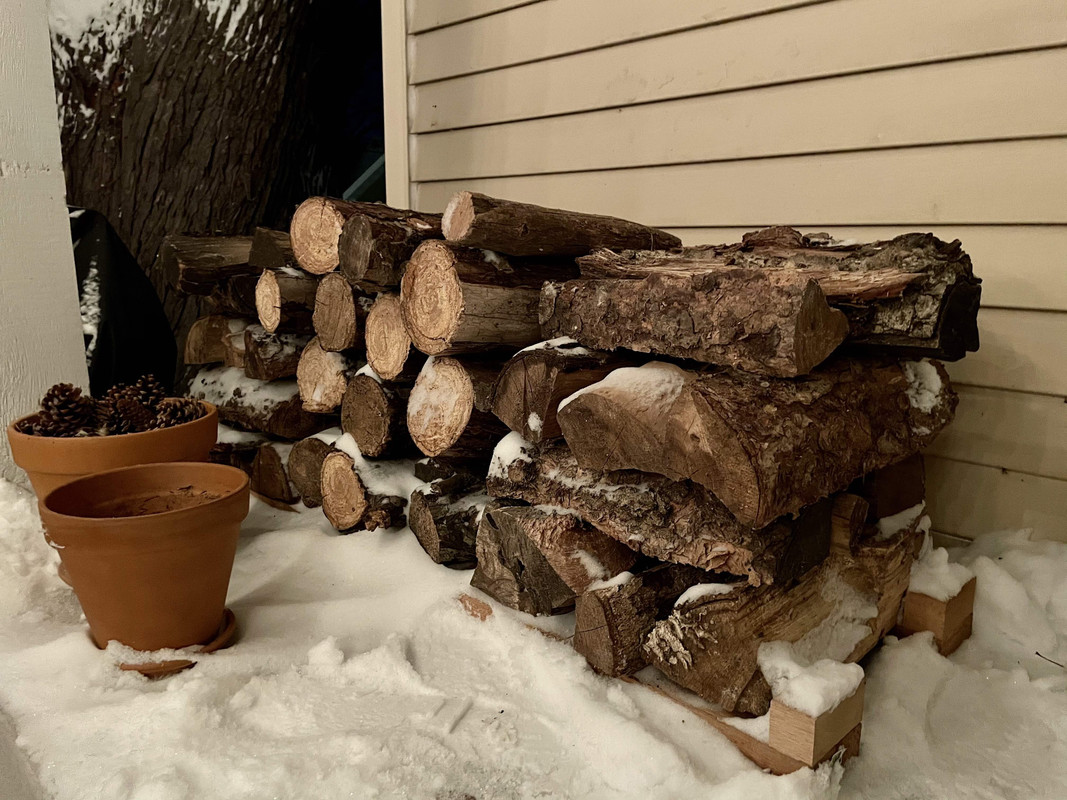
So in an effort to **** any heat there was in the house right out the chimney, I did a fire on Christmas Eve. Ye Olde Wood Pile is getting low.
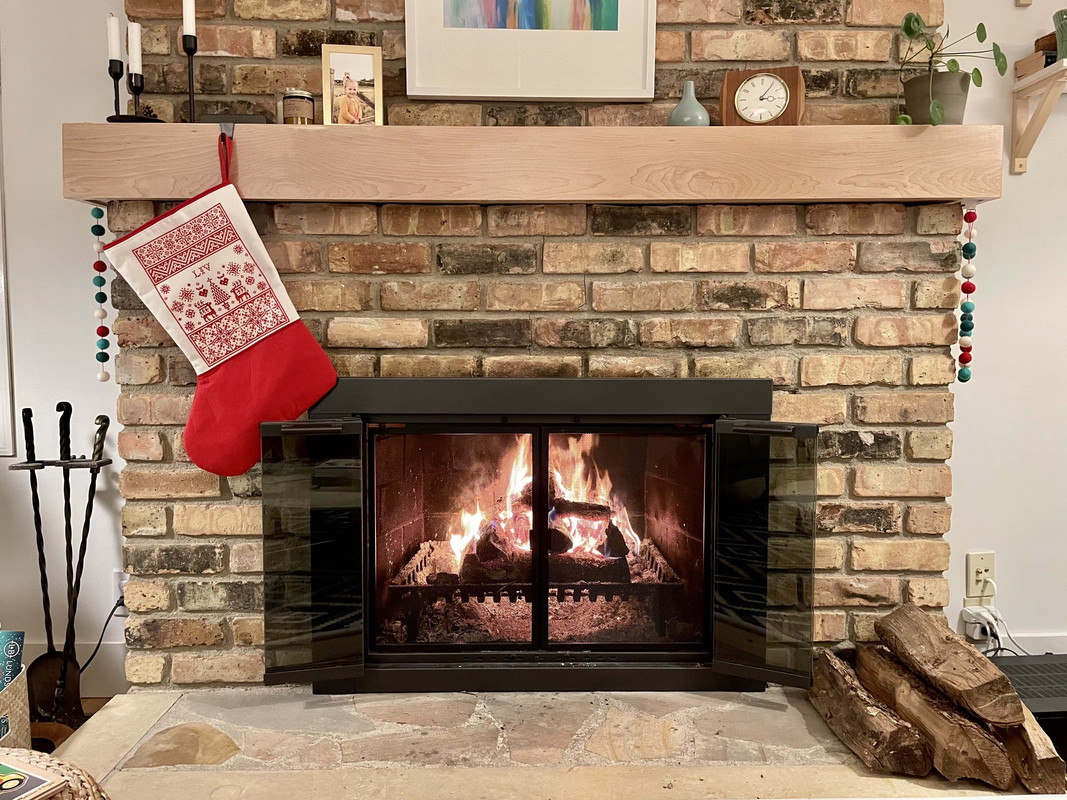
A bit weird not getting together with my parents and brother this year (he and his wife recently moved to NC), but we did the best we could over video chat.

I have a few projects in the queue, but I'm trying to take a bit of a break to "reset" for the new year. So, take care everyone, and see ya soon!

If anyone happens to drop by, I hope you have/had a great Xmas or holiday!
After an unseasonably warm Nov and Dec, it dropped off right before Xmas for us and we got some cold temps and white stuff.
So in an effort to **** any heat there was in the house right out the chimney, I did a fire on Christmas Eve. Ye Olde Wood Pile is getting low.
A bit weird not getting together with my parents and brother this year (he and his wife recently moved to NC), but we did the best we could over video chat.
I have a few projects in the queue, but I'm trying to take a bit of a break to "reset" for the new year. So, take care everyone, and see ya soon!
sawduststeve
Well-known member
Hi Nick,
Happy holidays to you and your family.
Great early present of the planes. Sharp block plane will get way more use than you would think, mine certainly does, even if it’s just sharpening my pencil.
Brad point drill bits FTW.
Enjoy your down time, take care
Best wishes
Steve
Happy holidays to you and your family.
Great early present of the planes
. Sharp block plane will get way more use than you would think, mine certainly does, even if it’s just sharpening my pencil. Brad point drill bits FTW.
Enjoy your down time, take care
Best wishes
Steve
OP
nicholam77
Well-known member
Hi Nick,
Happy holidays to you and your family.
Great early present of the planes
Brad point drill bits FTW.
Enjoy your down time, take care
Best wishes
Steve
Great to hear from you Steve, happy holidays to you too! Hope you are doing well!
I may have procured a set of brad point drill bits for Xmas
OP
nicholam77
Well-known member
I know I just said I was going to take a little break, but as part of that break, I decided to dive into the hand plane restoration tonight. Guess I can't help myself. And have a few questions for you knowledgeable GJ sorts.
Because it's flippin' COLD here I'm tackling this in my basement work-from-home office, indoors.
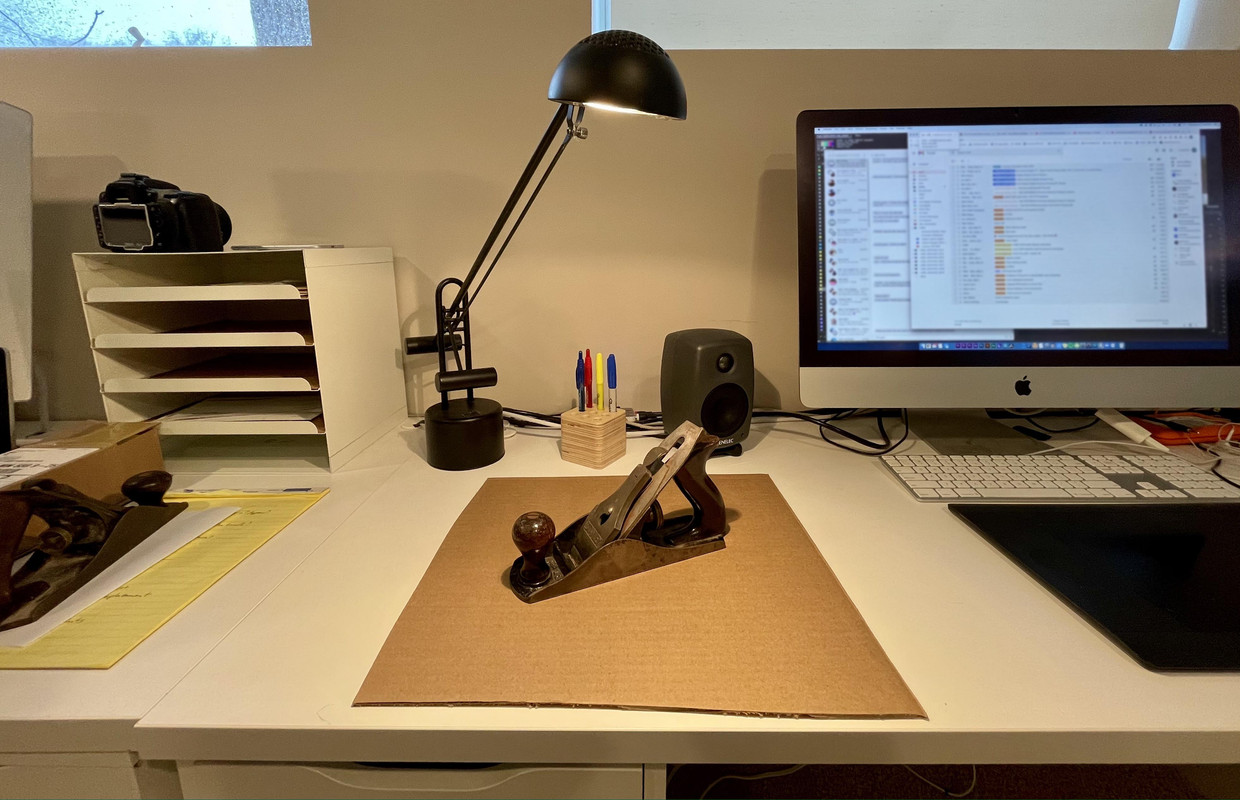
Quick refresher, this is the chosen No. 4 to get "restored" first, in its given-to-me condition:
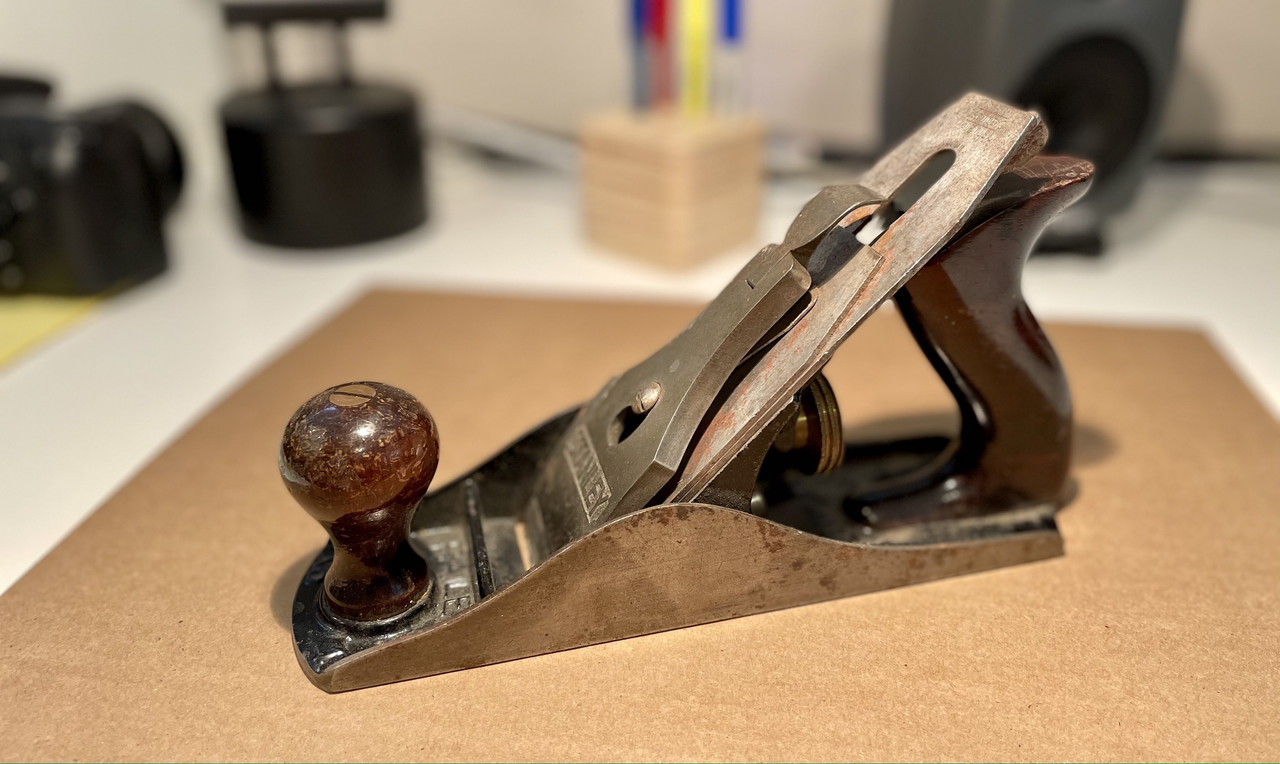
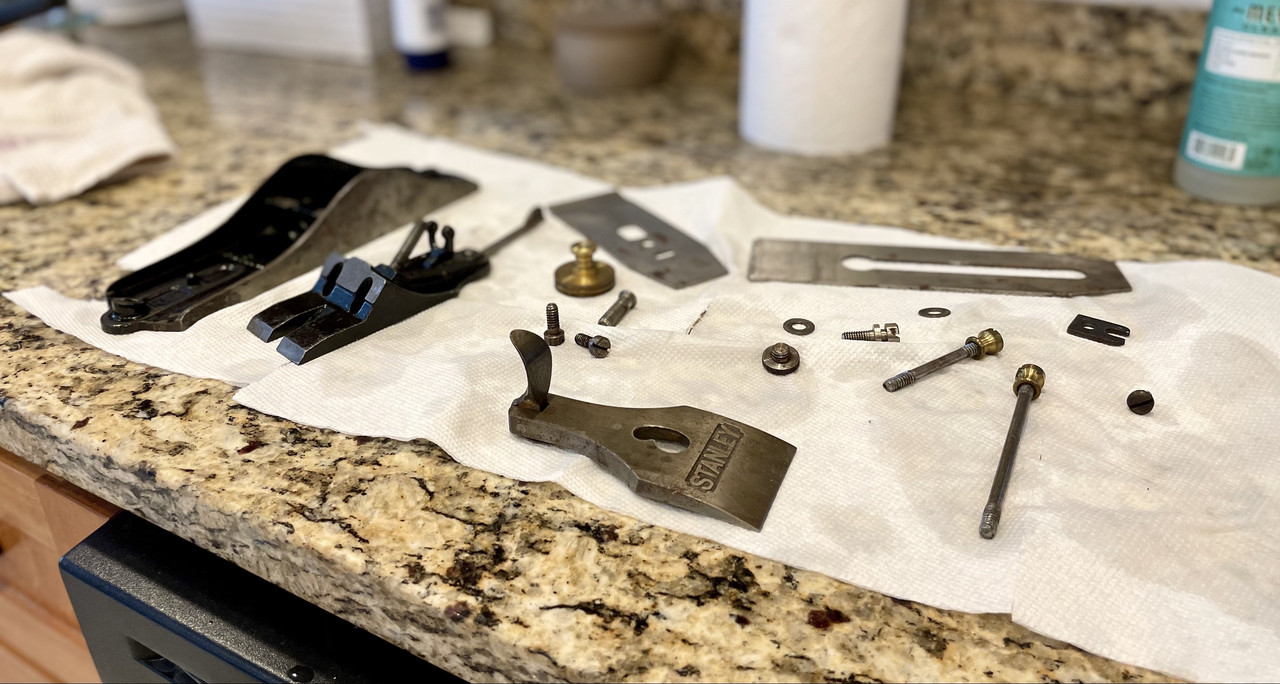
I did a quick disassemble:
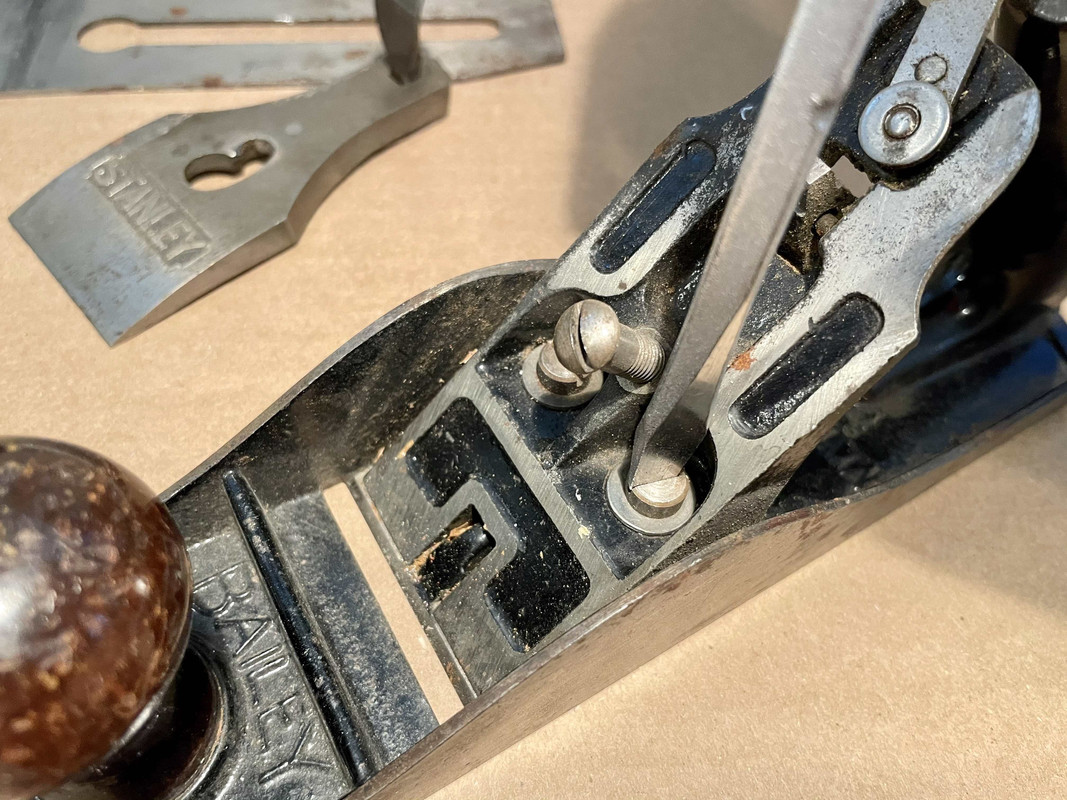
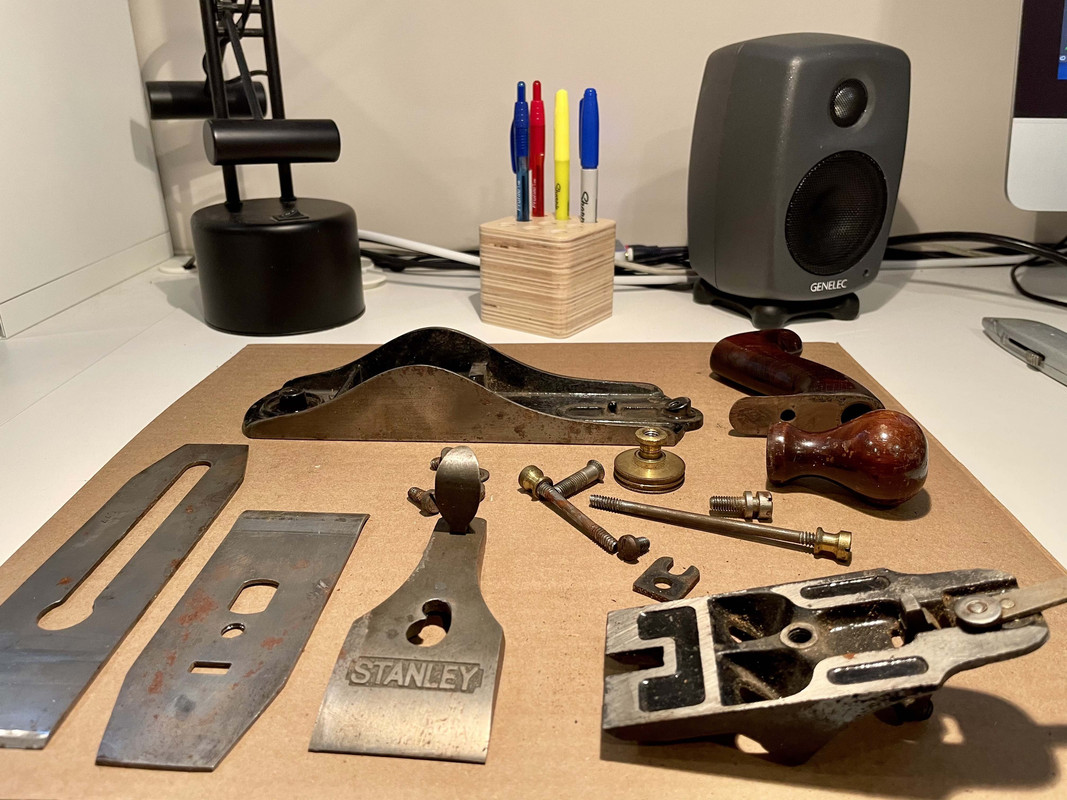
Some sawdust, dirt, and grime, but still looking pretty good I think. And proof it was used
The iron on the other hand... the bevel seems pretty jacked up, and here is my question #1 -- can any of you sharpening gurus tell me how bad this is? Is this correctable by hand sharpening with sandpaper? Or is this a bench grinder situation?
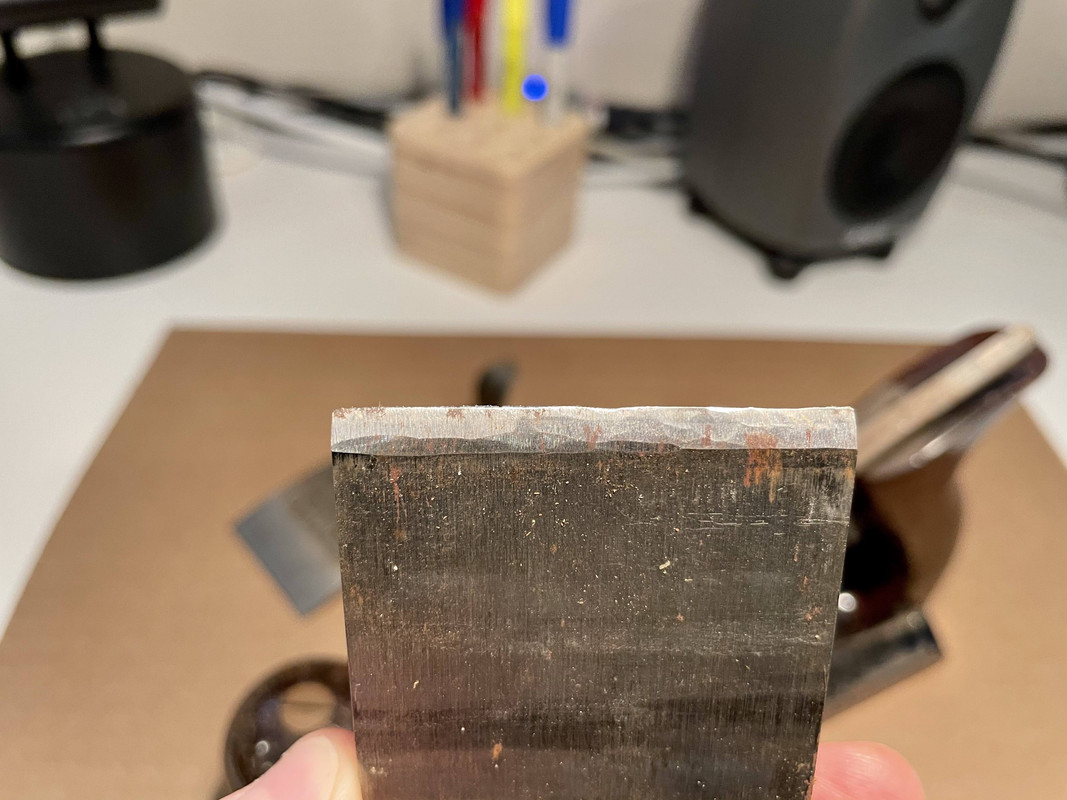
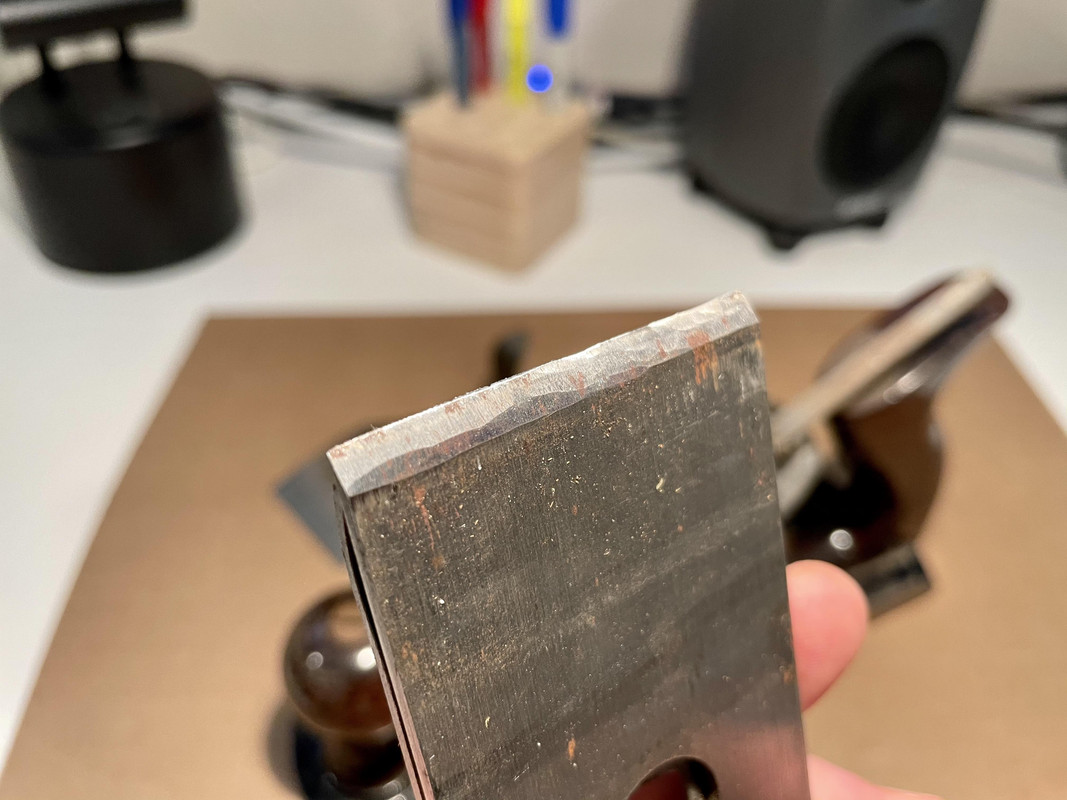

I literally have NO experience doing anything with metal so I'm kind of in new waters here.
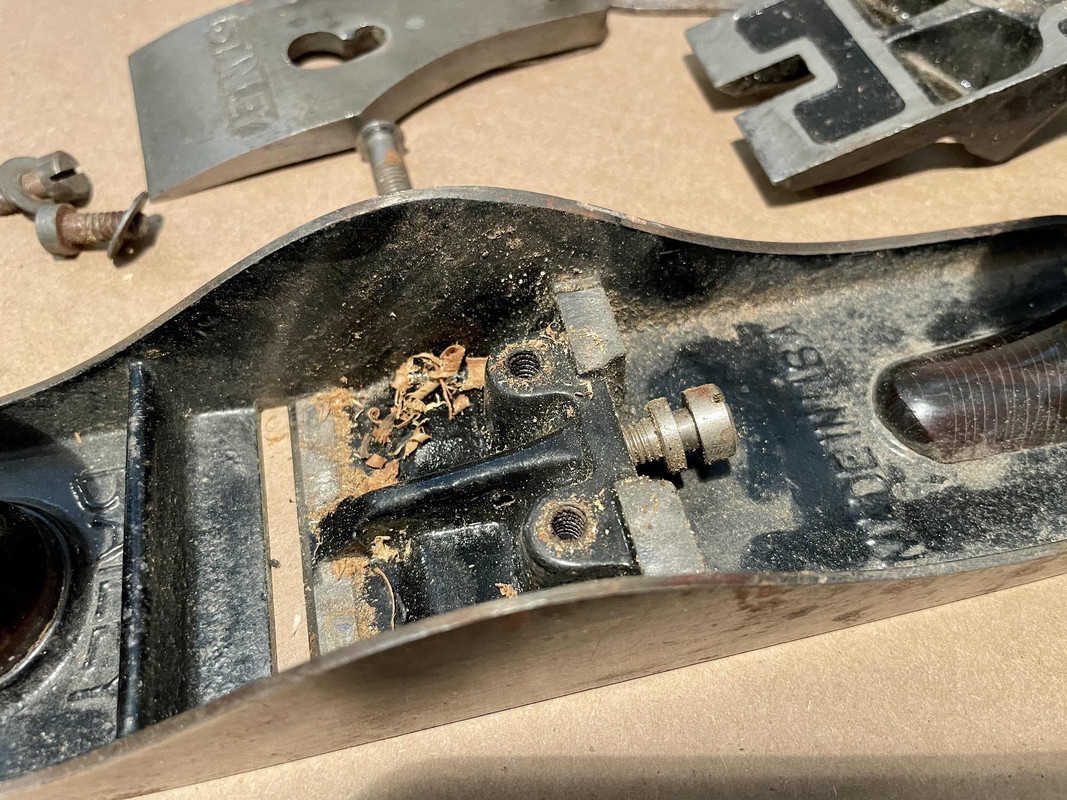
Moving on I wiped everything down with WD40 and a rag, and then rinsed thoroughly in the kitchen sink.
First rust removal bath I tried distilled white vinegar for about 1 hr.
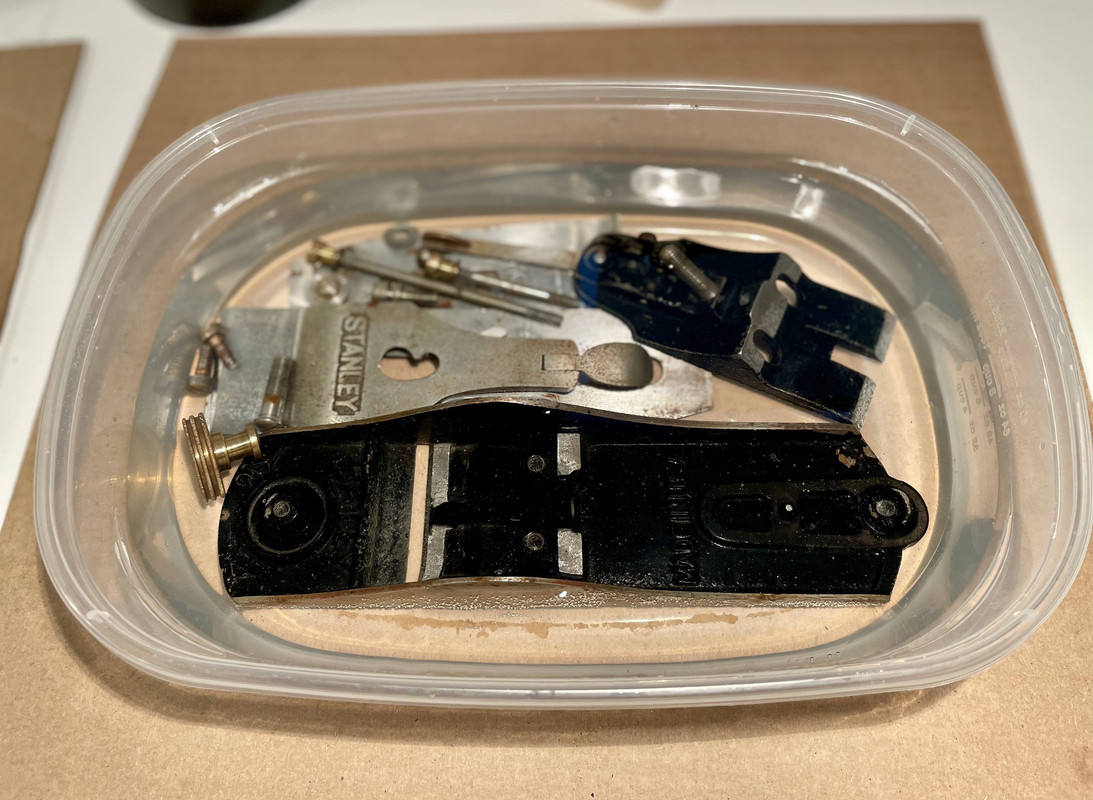
This cleaned up most parts pretty well, but there were some stubborn areas, so I transferred some select pieces (after rinsing again) to some Metal Rescue for a few hours.
After some scrubbing with a nylon brush and scotch bright pad, most pieces are looking pretty clean and rust free:
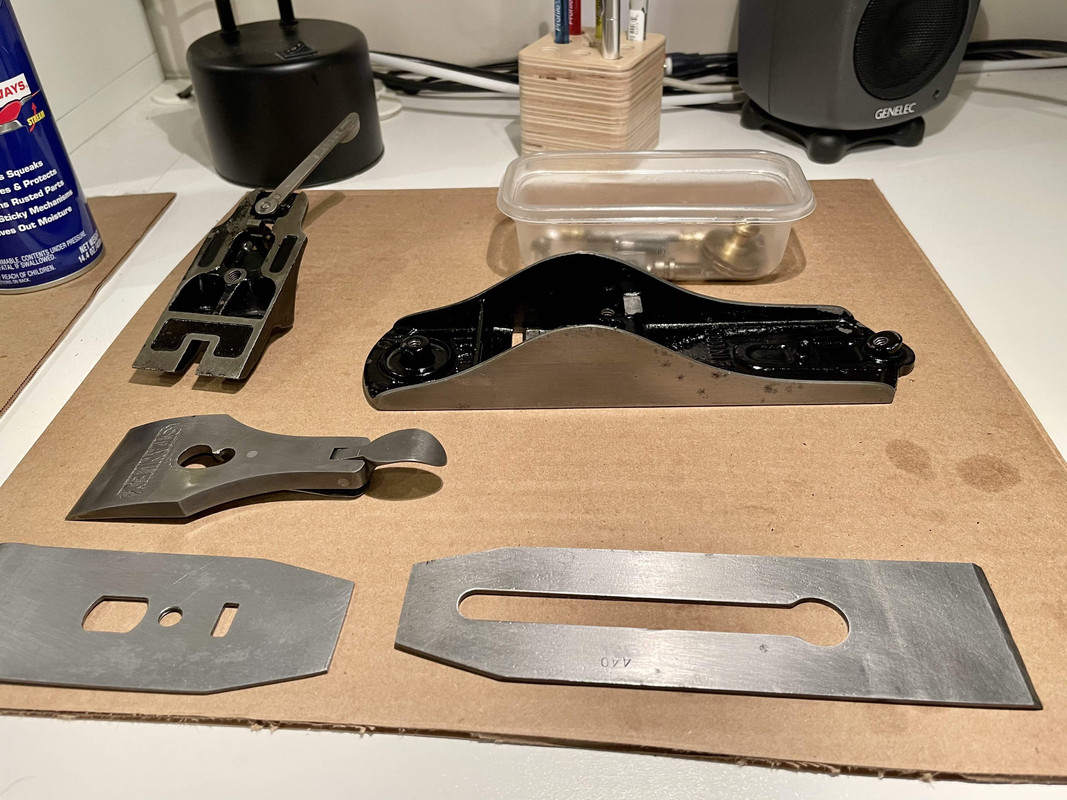
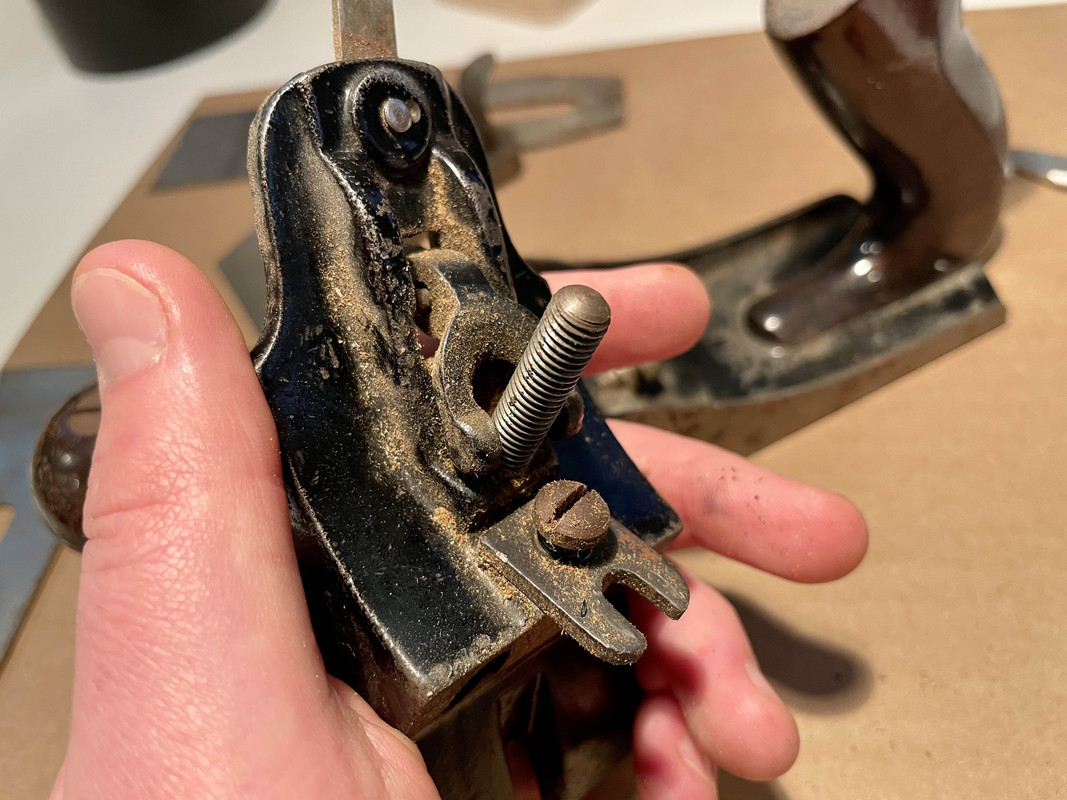
However, on both sides of the plane body, there are some dark spots (seen below):
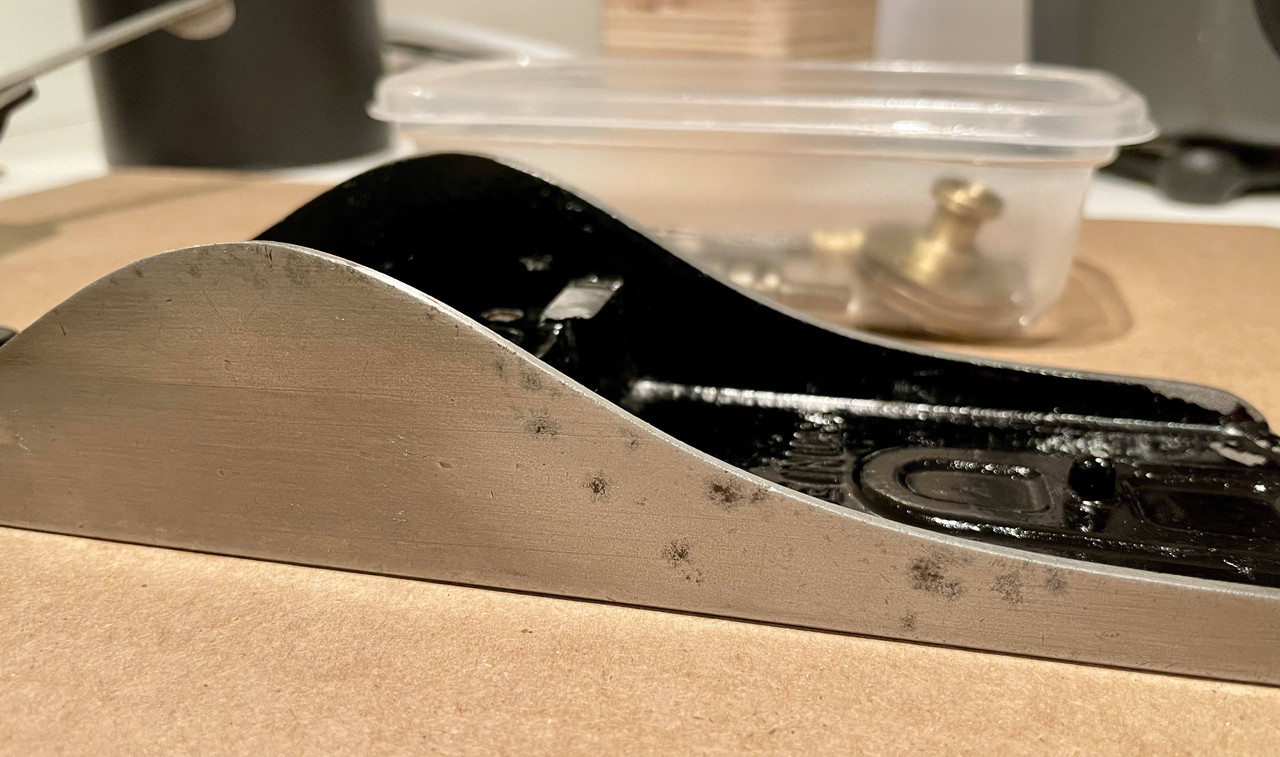

They feel raised to the touch and the scotch brite pad did nothing. So here's my question #2 - is this "pitting"? Or just stubborn rust or dirt? What should the next step be... dry or wet sand it with some coarse sandpaper? Wire brush? Put it back in the rust remover bath?
I'm not trying to make this tool look perfect by any means, but I would love the sides to look clean and free of dark spots (but not polished).
Question #3 - After rinsing the parts they started surface rusting right away. So I tried to dry very quickly and douse in WD40 which seems to prevent that so far. I still need to sand everything of course but is that adequate protection for now? Something better to do?
And lastly, question #4, which is mostly an opinion matter, the knob and tote have some dings and cracks in the lacquer (or whatever it is). In restoration videos I've seen people just apply some oil to the existing finish to moisturize and fill any cracks. But I noticed the existing finish mutes and kind of hides what I think is some pretty grain underneath:
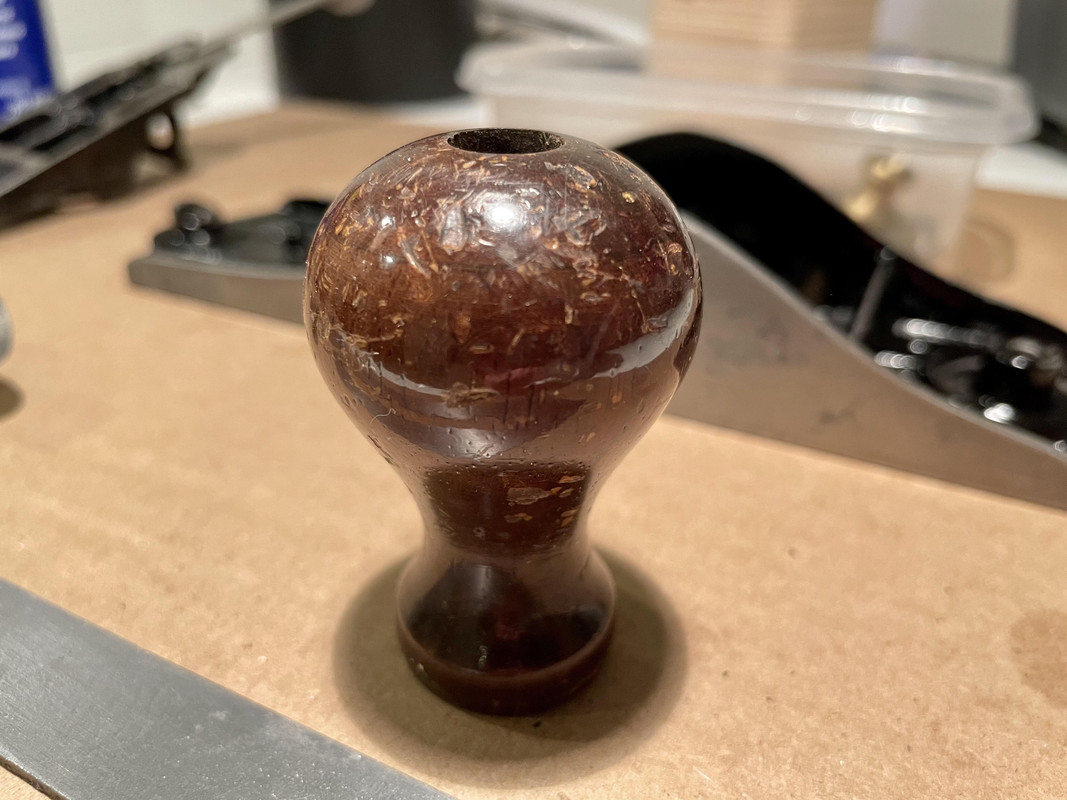
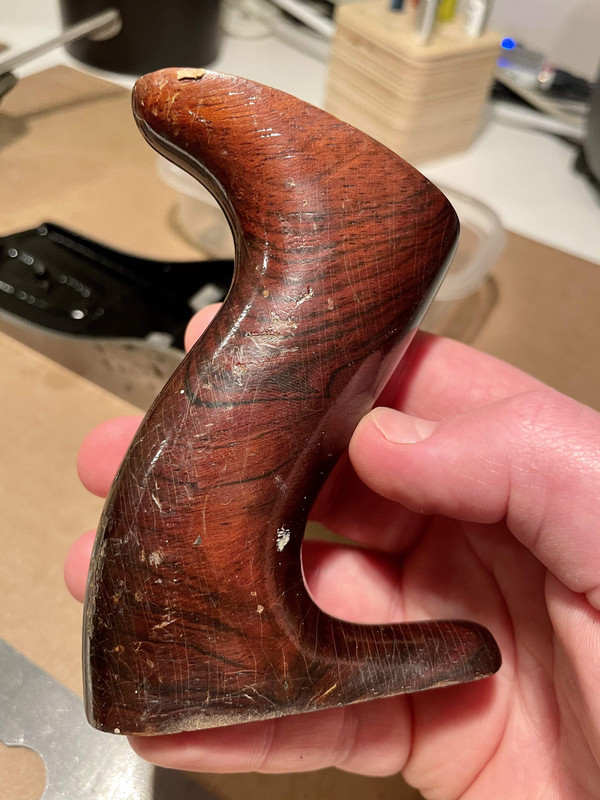
Would it make any sense to sand the knob and tote and just apply a oil that's more matte and less of a shiny hard film?
Again, I'm not trying to make it look perfect and brand new, because I still want it to feel like it was passed down to me, but I've never done anything like this and trying to get a gauge of what my options are and what's normal when restoring a plane.
If anyone has any thoughts on any of it, feel free to chime it, I'd love your input!
Because it's flippin' COLD here I'm tackling this in my basement work-from-home office, indoors.
Quick refresher, this is the chosen No. 4 to get "restored" first, in its given-to-me condition:
I did a quick disassemble:
Some sawdust, dirt, and grime, but still looking pretty good I think. And proof it was used
The iron on the other hand... the bevel seems pretty jacked up, and here is my question #1 -- can any of you sharpening gurus tell me how bad this is? Is this correctable by hand sharpening with sandpaper? Or is this a bench grinder situation?
I literally have NO experience doing anything with metal so I'm kind of in new waters here.
Moving on I wiped everything down with WD40 and a rag, and then rinsed thoroughly in the kitchen sink.
First rust removal bath I tried distilled white vinegar for about 1 hr.
This cleaned up most parts pretty well, but there were some stubborn areas, so I transferred some select pieces (after rinsing again) to some Metal Rescue for a few hours.
After some scrubbing with a nylon brush and scotch bright pad, most pieces are looking pretty clean and rust free:
However, on both sides of the plane body, there are some dark spots (seen below):
They feel raised to the touch and the scotch brite pad did nothing. So here's my question #2 - is this "pitting"? Or just stubborn rust or dirt? What should the next step be... dry or wet sand it with some coarse sandpaper? Wire brush? Put it back in the rust remover bath?
I'm not trying to make this tool look perfect by any means, but I would love the sides to look clean and free of dark spots (but not polished).
Question #3 - After rinsing the parts they started surface rusting right away. So I tried to dry very quickly and douse in WD40 which seems to prevent that so far. I still need to sand everything of course but is that adequate protection for now? Something better to do?
And lastly, question #4, which is mostly an opinion matter, the knob and tote have some dings and cracks in the lacquer (or whatever it is). In restoration videos I've seen people just apply some oil to the existing finish to moisturize and fill any cracks. But I noticed the existing finish mutes and kind of hides what I think is some pretty grain underneath:
Would it make any sense to sand the knob and tote and just apply a oil that's more matte and less of a shiny hard film?
Again, I'm not trying to make it look perfect and brand new, because I still want it to feel like it was passed down to me, but I've never done anything like this and trying to get a gauge of what my options are and what's normal when restoring a plane.
If anyone has any thoughts on any of it, feel free to chime it, I'd love your input!
Theodulf
Well-known member
Hey mate.
I've done some plane restoration/tuning with the grumpy old men's woodworking group I'm in (called the Traditional Tools Group).
The blade needs to be re-ground on a bench grinder, without question, then honed on a stone.
The lever cap ought to be fine but the cap iron will need to be honed on a sharpening stone as well. The aim is not to make it sharp, but to make the part where it contacts the blade perfectly flat.
To tune up the "shoe," reassemble the whole plane and tension it all up as you would for normal use, but with the blade withdrawn, so it won't be damaged. Glue a ~1 metre length of the blue abrasive paper that's intended for stainless steel (or similar, but this is most effective, I'm told) onto a piece of framing timber and clamp it to your bench. Use the same movement you would when cutting with the plane to flatten the "sole" (underside/bearing surface) on the abrasive paper and do the sides of the shoe the same way.
If the pitting is raised, this ought to help remove it but even if it's still visible, it won't cause trouble in use.
I've now done 4 (I think) planes this way, under the guidance of the experienced members of the group, including one that was both neglected and abused, from my school workshop, and they all cut like a dream once done.
Merry Christmas Nick!
If you don't have access to a bench grinder, you may be able to cut a guide block, attach some sandpaper to a flat surface, and given some time and elbow grease, you could probably save that blade. Basically what you'd do with a sharpening system, but just with a coarser paper at first to speed up the process. I'd start with a 60 or 80 grit paper and see how it goes.
For future reference, you could have let those parts soak in vinegar for a few days to really let the acid do its thing to the rust. You might try soaking the body again to see if it'll take care of those rust pockets (that's what it looks like to me at least) on the sides. Whenever you soak something in vinegar to remove rust, rinse the vinegar off with water, and then dunk the part in a baking soda bath for a few moments to neutralize any acid that may remain on the part, and then rinse with water again.
For rust protection, WD40 works okay, PB Blaster is better, but Boeshield T-9 is the bee's knees.
https://boeshield.com/
For the handles, I've had really good luck using Howard Restor-A-Finish to give new life to old finishes.
https://www.howardproducts.com/product/restor-a-finish/
It'd be worth giving it a shot before stripping off the existing finish. Make sure to also pick up a bottle of Feed-N-Wax if you do go this route. The finish may be a bit dull without it.
I'll be following along closely with your restoration - I'll have to double-check, but I think I picked up the same plane from the ReStore a few months ago and also need to go through it sometime.