hewey
Well-known member
Your mocked up workshop in your loungeroom looks better than my actual one! Nice work and Merry Christmas Gregor.


I'm glad you installed that light above your table - it makes for some very nice finished project photos.
Gregor,
I imagine you'd be hard-pressed to find someone who doesn't find that rifle and what you've done to it a thing of beauty, whether they approve of guns or not. I appreciate your care on a potentially divisive topic, but I'm glad you didn't keep this one hidden from us in the name of politics... because the end product is way too cool!
Despite the finishing hiccups, in my opinion, the tone of the wood came out perfect.
Gregor - I just started on your thread a couple days ago and finished it up tonight. What an enjoyable ride! Thank you. I can't wait to see what happens next.
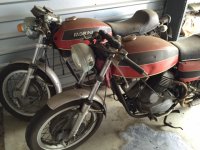
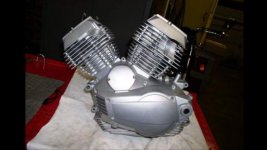
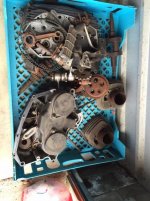
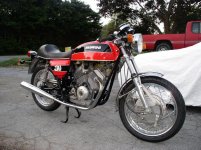
Since you like bikes, Here are two that I found in a friends storage unit. He stored them away for 26 years but never rode them. I knew nothing about bikes but decided I had to save them. I finished the worst one last year, got my motorcycle license this year but never got a chance to ride because I tore my rotator cuff on a bicycle ride. So I have something to look forward to when it warms up next spring. I should have the second one done this year. So if you are ever in the area, south of Philly PA, bring a helmet and we'll go riding. Cheers, mark
Excellent work Gregor. Well done. I will say, you have won me over with stippling as well. I was always against it for some reason or another. Probably because Ive seen so many ‘Bubba’ jobs over the years but your work is simply beautiful. Nice and clean.
Btw, I shoot that same KIDD bull barrel on my Ruger. For me, it’s a tack driver at 50 yards and a great suppressor host... the thicker barrel, imo, has a cleaner profile with the can and doesnt create a ‘heavy’ looking front end. Great choice for a plinker!
What a long, wild journey this has been. Thank you for the entertainment and education.


The desk still turned out to be a success because I was motivated to finally take a look at these two watches and fix them. That's a good way to end the year - wrapping up a few small projects and loose ends.
Happy New Year to you all!
Gregor


I’ll have to check out the index. I wish that was there a few weeks ago when I was searching for the pizza recipe! I haven’t made it yet but will hold off on posting a review until I have the process down.

I think I found something that might help save a few characters. As per this page...
https://www.garagejournal.com/forum/misc.php?do=bbcode#post
You can use the [post] tag instead of the full URL to do the same thing.
So this:
does exactly the same thing as this...Code:[PLAIN] [URL="https://www.garagejournal.com/xenforo/forumtmp/index.php?posts/37757/"]21[/URL] [/PLAIN]
and uses 21 characters instead of 83 for exactly the same result. That’s a 75% reduction!Code:[PLAIN] [URL="http://www.garagejournal.com/forum/showthread.php?p=37757#post37757"]21[/URL] [/PLAIN]
It won't be enough to link all of your index entries, but it will help fit a bit more in, and it's easier to type out too.
And for some reason I just had a funny feeling that this sort of hack might appeal to the engineer in you.

Just out of curiosity - has anyone ever washed a bicycle and not used the pressure washer to spin the wheels to 200mph? Pretty sure that is like clicking tongs.


Happy New Year Gregor...and family... Now, the cleanest in the district...
I spent DAYS reading everything. Fking Gregor. Now I'm starting my own thread. When I get 5 posts at least. Soo, 1 !


Since the van isn't square I'm a bit unsure how to progress. Building the ladder square on the ground will most likely not line up or fit and trying to do it one tack at a time on the van will be tricky but probably my only option.
So that's where I'm at. No plan, almost out of argon and a country in chaos! How will it end? Will my ladder be what we need to reach across the divide (from the ground to the roof)?
Stay tuned!
Gregor

You're not going to chuck those rungs into the lathe and knurl them? ANSI ladder standards are specific that rungs must be anti-slip finished.
You're a mean person.
...
So thanks!
Gregor
I don't watch the show, but a friend sent me this a few years ago and I think it might be appropriate now:
Hopefully I can explain this intelligently. Seems like the rear door is the ideal location (all of the shortcomings aside) so what if you mount it to the door, but at the top of the door and ladder rails, you make it so when the door is closed the rails engage via pins or tabs with supports that are actually integrated into the roof (or drip edge.) This would transfer the weight to a load bearing structure, and still allow the door to open easily.