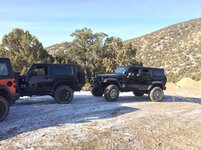
Good eye Ryan. Yes we had a new Gladiator with us on the run and I've wheeled with about a dozen over the past year now.
I'm not impressed for a few reasons. The length is not conducive for tight maneuvering on trails. Hell even my four-door bus is a bit tight at 116" wheelbase and 185" OAL but those Gladiators are 21" longer wheelbase and 33" longer OAL than mine. They have a large expanse behind the rear axle which has a nasty departure angle and the breakover angle allows them to hung up very easily.
If using it for an overlanding type vehicle I think they may be "ok" but for anything more than that on tight trails or especially rock crawling I think it needs to be up about 4-6 inches and on 40's to really be very competitive with the 4-doors in terms of trail manners.
I do like the 8 speed auto's that are coming in the new JL's and JT's and they help the V6 Pentastar use its power more efficiently. I think the Hemi powered Jeeps that will be coming are way overpriced for what they are. With the all-wheel drive and computer traction control I'm not sure how they will perform for anything serious without a lot of mods. But I guess that's one thing us Jeepers do is mod ****, so there is that.

In my opinion if you were to build an expedition vehicle that won't see ******** trails I would rather go with a full-size truck vs. the mid-size Gladiator as the trail manners would be quite similar.