To avoid these ads, REGISTER NOW!

Between 265 & 485 SQ/FT American Rembrandt’s lair

Workspaces sized between 265 and 485 squarefeet.

Joe-R

Well-known member
Joined
Apr 6, 2012
Messages
164
Location
St. Louis
Ladies and gents,

I thought I would finally start a thread of my own. I have been a member for a while and really enjoy the Garage Journal (GJ). I got here through the back door of the National Corvette Restorer's Society (NCRS). Terry (9C1) recommended I get on here after I posted some garage related questions on the NCRS Technical Discussion Board. He caveated his recommendation that he did it with reservation, however. I think he meant that this is one giant rabbit hole and that I might never get the car done if I am easily distracted (which I am!).

The first thread that really sucked me in was Thomas and Chris's epic thread (Restored 1930's Auto Shop). This one:

https://www.garagejournal.com/forum/showthread.php?t=51567


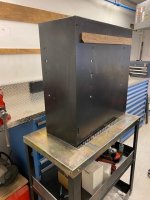
I have struggled with whether or not to start a thread cuz my fab skills pale in comparison to many on here. But I figure no one cares about that except me. :) I got my north wall 99 percent done for now (nothing is ever quite done in my world due to my OCD / perfectionism). So I thought I would post a pic and get the conversation started. Well hopefully I can figure out how to do that.

I want to thank lilscorpian (Matt) for the french cleat idea. He has awesome fab skills and a hyper organized shop. Here is his first thread I stole the idea from (the thread is called Tool Organization):

https://www.garagejournal.com/forum/showthread.php?t=174553

I used it to my advantage to hang the Gladiator wall cabs! I added some pictures of that as well.

My apologies to the Dutch for the title. I inherited a 66 Corvette from my Uncle when he passed. That’s what he called the car.

The garage is a very small two car (it’s 18’ x 18’ or 5.5 m square for you metric types). It started out pretty typically for this area with just brick walls, exposed rafters and a garage door opener with a light bulb.

I have added heat and A/C, studded out the walls, added lights and outlets (120 V and 240 V), reframed to eliminate overhead beam (want lift!), drywall plus air compressor with black iron loop. I also epoxied the floor but that failed due to moisture. I checked for moisture but apparently was not nearly thorough enough. I’ll add pictures for as much of this as I can when I get time. I almost forgot the addition of the rollup garage door with side opener and a man door. Oh, I should mention I did some but certainly not all of that.

Anyway that’s enough talk for now. I’ve been here long enough to know that it didn’t happen without pictures!!

Joe


Sent from my iPhone using The Garage Journal mobile app
 

Attachments

  • GarageNorthWallWithGladiatorCabs.jpg
    GarageNorthWallWithGladiatorCabs.jpg
    95.8 KB · Views: 218
  • WallFrenchCleat.jpg
    WallFrenchCleat.jpg
    58.5 KB · Views: 9
  • CabinetBackFrenchCleat.jpg
    CabinetBackFrenchCleat.jpg
    100.4 KB · Views: 8
Last edited:
To avoid these ads, REGISTER NOW!
OP
J

Joe-R

Well-known member
Joined
Apr 6, 2012
Messages
164
Location
St. Louis
Sounds interesting; I don't see those pictures yet!
Hi firebirdparts,

Well I had time to get the current pic up on here. The back in the day pictures are too big to upload as is. I played around with resizing and got nowhere. I will admit that I am rather tired today. So what is the easiest way to resize pictures? I was using Paint which allows you to change the percentage of full size or the number of pixels. It seems like being able to fit it to a file size would be faster. And how do you embed the pictures in with the text? I think the story would be easier to follow that way.

Anyway, thanks for your interest!

Joe
 

cleanspg

Well-known member
Joined
Nov 5, 2014
Messages
52
I use pixresizer. The UI is kind of dated but it works great. There are lots of other similar tools. Take a folder of pictures, select maximum width or height or both, press a button and now you have resized copies.
 
OP
J

Joe-R

Well-known member
Joined
Apr 6, 2012
Messages
164
Location
St. Louis
I use pixresizer. The UI is kind of dated but it works great. There are lots of other similar tools. Take a folder of pictures, select maximum width or height or both, press a button and now you have resized copies.

Thanks cleanspg,

I’ll definitely check that out! Probably over the holiday break. We’re off between Christmas and New Years every year.

Joe
 
OP
J

Joe-R

Well-known member
Joined
Apr 6, 2012
Messages
164
Location
St. Louis
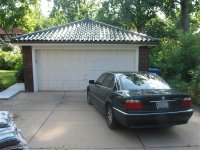
Thanks to cleanspg I got my pictures resized to GJ friendly size! Here's a couple of shots of the outside early on. The sidewalk on the left side was added when I had a carpenter put in a man door on the north side.
 

Attachments

  • GarageFront.jpg
    GarageFront.jpg
    89 KB · Views: 86
  • GarageFront1.jpg
    GarageFront1.jpg
    66.7 KB · Views: 69
OP
J

Joe-R

Well-known member
Joined
Apr 6, 2012
Messages
164
Location
St. Louis
Here's the freshly installed man door.
 

Attachments

  • GarageNorthSide.jpg
    GarageNorthSide.jpg
    86.9 KB · Views: 54
OP
J

Joe-R

Well-known member
Joined
Apr 6, 2012
Messages
164
Location
St. Louis
Here's the indoor lighting I had to work with in the beginning. Underwhelming eh?
 

Attachments

  • GarageOriginalLighting.jpg
    GarageOriginalLighting.jpg
    38 KB · Views: 65
OP
J

Joe-R

Well-known member
Joined
Apr 6, 2012
Messages
164
Location
St. Louis
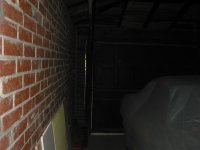
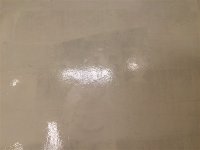
To say that the garage door and its frame were breezy would be a bit of an understatement.
 

Attachments

  • GarageCracksOverheadDoorSouth.jpg
    GarageCracksOverheadDoorSouth.jpg
    43.4 KB · Views: 60
  • GarageCracksOverheadDoorNorth.jpg
    GarageCracksOverheadDoorNorth.jpg
    47.1 KB · Views: 41
Last edited:
OP
J

Joe-R

Well-known member
Joined
Apr 6, 2012
Messages
164
Location
St. Louis
Sounds like you did a ton of work! Looking forward to the pics!
Thanks bdbecker! I sure did. I'm not done yet! I'll keep em coming for sure.

BTW I really enjoy your thread! You have done a lot with your space!:thumbup:

Joe
 
OP
J

Joe-R

Well-known member
Joined
Apr 6, 2012
Messages
164
Location
St. Louis
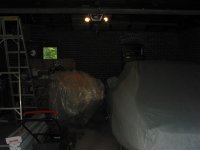
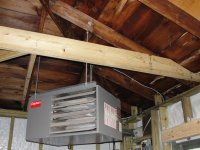
Here's another shot of it fairly early on. It gets cold here, so one of the first upgrades was to add heat!

Edit: The boxes in the second picture contain a new mini split A/C unit. It gets hot here too! It also shows my shop lights in temporary locations. I had forgotten about that.
 

Attachments

  • Garage4.jpg
    Garage4.jpg
    77.3 KB · Views: 54
  • Garage5.jpg
    Garage5.jpg
    83.2 KB · Views: 46
Last edited:
OP
J

Joe-R

Well-known member
Joined
Apr 6, 2012
Messages
164
Location
St. Louis
Here's the car after completing the framing. A friend and I framed out the walls to make space for insulation and wiring. It also seemed like a good reason to buy a DeWalt framing nailer. I had never used one before, it does make short work of putting up a wall!
 

Attachments

  • GarageConstructionFramingComplete.jpg
    GarageConstructionFramingComplete.jpg
    48.2 KB · Views: 52
Last edited:
To avoid these ads, REGISTER NOW!
OP
J

Joe-R

Well-known member
Joined
Apr 6, 2012
Messages
164
Location
St. Louis
Here we have more framing action.
 

Attachments

  • GarageConstructionFramingCompleteEastWall&X_Brace1.jpg
    GarageConstructionFramingCompleteEastWall&X_Brace1.jpg
    57.6 KB · Views: 57
  • GarageConstructionFramingCompleteEastWall&X_Brace2.jpg
    GarageConstructionFramingCompleteEastWall&X_Brace2.jpg
    58.3 KB · Views: 50
  • GarageConstructionFramingCompleteEastWall_X_BraceRemoved2.jpg
    GarageConstructionFramingCompleteEastWall_X_BraceRemoved2.jpg
    47 KB · Views: 49
OP
J

Joe-R

Well-known member
Joined
Apr 6, 2012
Messages
164
Location
St. Louis
Like I mentioned in the first post, I had a carpenter remove the old X brace overhead. He replaced that with essentially two trusses laid on their sides to open up the middle so a lift could go in. That also caused me to replace the garage door with a roll up type. Changes beget changes!
 

Attachments

  • GarageConstructionFramingCompleteSouthWall_X_BraceRemoved1.jpg
    GarageConstructionFramingCompleteSouthWall_X_BraceRemoved1.jpg
    71.7 KB · Views: 47
  • GarageConstructionFramingCompleteSouthWall_X_BraceRemoved2.jpg
    GarageConstructionFramingCompleteSouthWall_X_BraceRemoved2.jpg
    67.2 KB · Views: 43
  • GarageConstructionFramingCompleteNorthWall_X_BraceRemoved2.jpg
    GarageConstructionFramingCompleteNorthWall_X_BraceRemoved2.jpg
    65.7 KB · Views: 45
  • GarageConstructionFramingCompleteNorthWall_X_BraceRemoved1.jpg
    GarageConstructionFramingCompleteNorthWall_X_BraceRemoved1.jpg
    57.4 KB · Views: 49
  • GarageConstructionFramingCompleteNorthEastCorner_X_BraceRemoved1.jpg
    GarageConstructionFramingCompleteNorthEastCorner_X_BraceRemoved1.jpg
    71.3 KB · Views: 47
OP
J

Joe-R

Well-known member
Joined
Apr 6, 2012
Messages
164
Location
St. Louis
I shot some nails through the new stud wall into the concrete.
 

Attachments

  • GarageConstructionFramingCompleteSouthWestCorner.jpg
    GarageConstructionFramingCompleteSouthWestCorner.jpg
    58.6 KB · Views: 24
OP
J

Joe-R

Well-known member
Joined
Apr 6, 2012
Messages
164
Location
St. Louis
Here's the roll up door installed plus drywall. I hired out the drywall. I can do it but am not very good at it plus it takes me forever (truth be told I don't enjoy it all that much either!). Things are looking up!
 

Attachments

  • GarageDoorInside1.jpg
    GarageDoorInside1.jpg
    86.4 KB · Views: 43
  • GarageDoorInside2.jpg
    GarageDoorInside2.jpg
    77.1 KB · Views: 40
OP
J

Joe-R

Well-known member
Joined
Apr 6, 2012
Messages
164
Location
St. Louis
Thanks thickhead! I appreciate it! It’s getting better with a lot of help from the GJ community.

Joe
 
OP
J

Joe-R

Well-known member
Joined
Apr 6, 2012
Messages
164
Location
St. Louis
Here is a shot of the outside of the roll up door. Apparently I was unable to snap of picture of it before someone ran into it LOL! The first dent is always the hardest to get over...
 

Attachments

  • GarageDoorOutside1.jpg
    GarageDoorOutside1.jpg
    72.8 KB · Views: 37
OP
J

Joe-R

Well-known member
Joined
Apr 6, 2012
Messages
164
Location
St. Louis
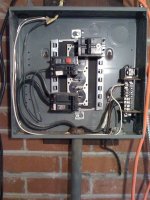
Here's the inside of the electric panel near the start of the job. It doesn't look like this now!
 

Attachments

  • GarageElectricalPanel1.jpg
    GarageElectricalPanel1.jpg
    76.5 KB · Views: 29
OP
J

Joe-R

Well-known member
Joined
Apr 6, 2012
Messages
164
Location
St. Louis
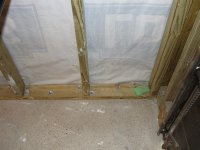
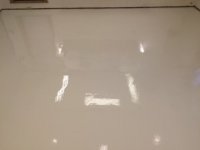
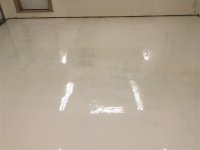
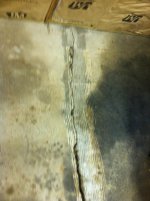
I suppose that one of the last things I did to the bones of the garage was epoxy the floor. It had a large enough crack to swallow a small dog right down the middle. The first step was to fill the crack with epoxy and grind it smooth. The first time I coated the floor I had a coverage problem. So I had to do it over. The second time I put down an oil barrier first. It looked like the previous owner just drained their oil on the floor when I got the house. I bought the epoxy floor coating from Scotty at Legacy Industrial. He was fantastic to work with. Here's some photos to show it off. I can only find a pic of it after the first coat. Trust me, it turned out great.
But is not holding up well long term. I did the moisture test where you tape a trash bag to the floor then pull it up the next day to see if there is any moisture on the back side. It passed. But with a little hind sight I see that I should have covered the whole floor with plastic before the rainiest day of the year. Water is causing my beautiful epoxy floor to bubble up and pop. Well, the pops are probably from rolling heavy objects over the bubbles. Also it is not holding up to welding very well. That is my bad, I didn't weld at the time I put down the epoxy. Scotty says they have a water barrier I could put down but I would have to start over. I think porcelain tile is probably the way to go next time.
I was originally going to get a four post lift but have changed my mind in favor of a two poster. A two post lift means I need thicker, stronger concrete. So I will probably wind up having it busted up and replaced after all that! Oh well, live and learn.
 

Attachments

  • GarageFloorCracksFilled2.jpg
    GarageFloorCracksFilled2.jpg
    55 KB · Views: 32
  • GarageFloorEpoxyPaintCoverageProblem1.jpg
    GarageFloorEpoxyPaintCoverageProblem1.jpg
    41 KB · Views: 31
  • GarageFloorEpoxyPaintPouredOut.jpg
    GarageFloorEpoxyPaintPouredOut.jpg
    51.9 KB · Views: 34
  • GarageFloorEpoxyPaintFirstCoat2.jpg
    GarageFloorEpoxyPaintFirstCoat2.jpg
    26.3 KB · Views: 34
  • GarageFloorCrackPlusWall_Insulation.jpg
    GarageFloorCrackPlusWall_Insulation.jpg
    88.8 KB · Views: 2
  • GarageFloorDoneRight3.jpg
    GarageFloorDoneRight3.jpg
    7 KB · Views: 9
Last edited:
thickhead

Well-known member
Joined
Apr 4, 2014
Messages
817
Location
Connecticut
I like the idea of going with porcelain too, just cant get myself to actually change the no worry floor I have now.
 

thickhead

Well-known member
Joined
Apr 4, 2014
Messages
817
Location
Connecticut
I just used latex concrete stain. Not really durable, so I just roll on another coat every couple years. Keeps concrete dust in control and doesn’t peel up like a paint would.
If I had know at the time I probably would have used one of the densifiers or sealers that are talked about here on the forum.
 
OP
J

Joe-R

Well-known member
Joined
Apr 6, 2012
Messages
164
Location
St. Louis
I just used latex concrete stain. Not really durable, so I just roll on another coat every couple years. Keeps concrete dust in control and doesn’t peel up like a paint would.
If I had know at the time I probably would have used one of the densifiers or sealers that are talked about here on the forum.

Thickhead,

Your solution sounds like a pretty good one. Probably not very expensive, just requires a little TLC every now and then. Maybe I'll look into the densifyers and sealers when the time gets a bit closer.

Thanks for the info!
Joe
 
To avoid these ads, REGISTER NOW!
Top Bottom