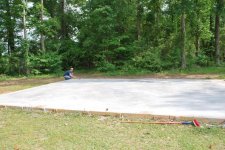
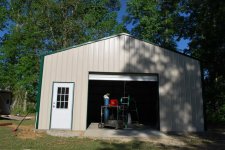
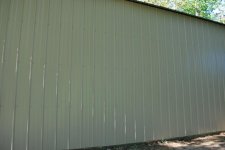
Well this is my firt post here i have not been a member long and already have gotten many great ideas, so i thoght i would post pics of my build and maybe return the favor to someone. I just finished my shop last week, it took a total of 7 days to build, thats from putting up the form to screwing on the last piece of trim. It is constructed of all metal 4" c purlins, and 4" square tubing, with 26ga paneling. 10ft walls, 14ft at the peak, one 10'x8' roll up door and a man door. This was not a kit i simply bought raw material in 20' and 24' lenghts and built what i had designed. Everything is welded and it turned out super stout. Hope everyone enjoys the pics!

You are using an out of date browser. It may not display this or other websites correctly.
You should upgrade or use an alternative browser.
You should upgrade or use an alternative browser.
My All Metal 24x30 Build
- Thread starter STEELE
- Start date

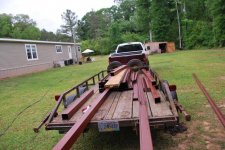
Also i would like to say I am not a welder, nor construction guru by trade, but simply a rototing equipment tech. But if anyone has any questions about how it was built i will be glad to answer. With the help of aome friends and family we did everything ourselves with the exception of finishing the concrete.
Attachments

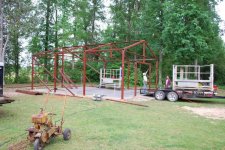
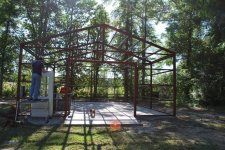
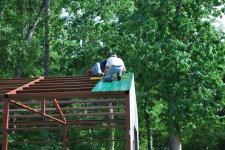
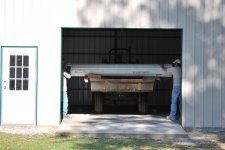
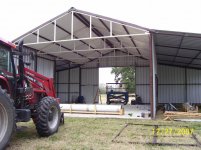
Here you can see the frame completed. We put a purlin at 0,30,60, and 90" on the walls, and there are 7 runs of lathing on each side of the roof. Once the frame was squared up we welded it down to plates that we had set in the concrete.
Attachments

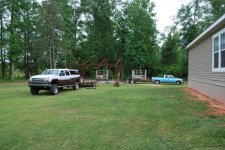
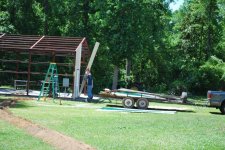
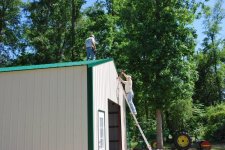
Putting on the end walls, and you can see who the real help is ha ha. We put a lip on the slab for the edge of the siding to sit on which i think gives it a real neat edge, also you can see the asket used to seal behind the metal. Keeps the creepy crawlys from comin ha ha
Attachments
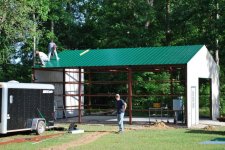
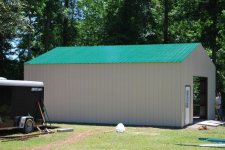
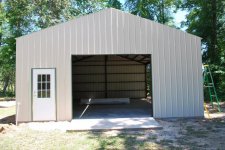

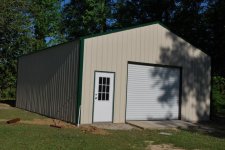
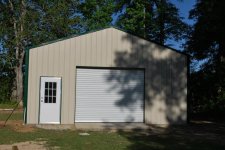
And the finished product. It is not documented nearly as well as some of the builds on here,But i am just proud of it and wanted to show it off ha ha.Like i said ask any questions you may have and i will answer them. I have a complete material list and even a cut sheet if anyone is interested in doing a project similar to this. Thanks for looking!
Attachments
twinturbosupra123
Well-known member
- Joined
- Jul 1, 2008
- Messages
- 54
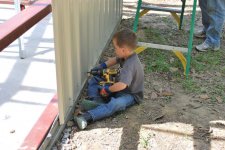
looks good man haha start that kid young job well done man
cletus66
Well-known member
Looks great !!!! 
Nosferatu
Well-known member
Outstanding work!
Thanks for the compliments guys. Yes it went up much smoother than i had anticipated, but I did have a lot more help than i thought i would. Of course i had already built it a few hundred times in my head ha ha. I dont have anything done on the inside yet, i rigged up some temp. lighting, moved my tool box and a few bikes in so far. I want everything to be clean and neat so im tryin to get a good picture of what i want it to look like before i start, i hate doin stuff twice.
Nighttrain
Well-known member
Real nice job on the build. Keep the young one busy with projects in the garage with you.
Palmetto
Well-known member
Looks great! and what a turnaround!! 7 days....Good for you.
One question though?
Why only one rollup door? It's going to get HOT in there in the summer with no way for the air to circulate! It's not too late to put a ridge vent on there either. They make a world of difference.
One suggestion....
Intermediate braces on your trusses.
I am no engineer, but judging from basic truss design, you need more support. Also, an easy addition since you have those manlifts, and probably some extra material. Your design might last forever, and be stout as all get out. But adding a little extra never hurts.
I really like your trencher. Wish it was mine!!!
Attachments

Last edited:
Well the short answer to the roll up door is money ha ha. I am already thinking about adding another door on the left sidewall for both air flow and privacy as my roll up door i have now faces the road and you know how people cant help but try and look at whats going on.
As far as the bracing im not really sure, i was not going to even put that piece of 4x4 in, but it was left over so they were dropped in. I was told at the width of my building i did not needa "truss" per say, as the main purpose of the purlin that spans the building was to keep the building from wanting to bow. Initally i was going to use a metal rod wih a turnbuckle welded in the middle but i thought that just kind of looked tacky and went ahead and purchased the 2 extra purlins. But i still may add what your suggesting as i cant see how it would hurt.
And the trencher is older than i am but works lke a charm. it has a winch that pulls it as opposed to being self propelled like the newer ones. You just park your truck where you wanna end up tie the cable to the ball, and walk away, just have to keep an eye on it because it has been known to break free and chew through walls and part of a slab (ask me how i know)
RbrtAWhyt
Well-known member
Thats a cool building. Was it a kit?
Thats a cool building. Was it a kit?
Read his first post.
No problem, all you need for the frame is:
11 4x4 sq. tubing 20ft long
1 4x4 24 ft long
40 4" C purlins 20ft long
9 4" C purlins 24ft long
Siding and trim:
20@10ft- walls
20@14ft- roof
2@14- ends
4@13
4@12
4@11
2@8- above the roll up door
I dont have the list of trim in front of me but that really depends on what length your manufacturer can make it in anyway. Add your favorite roll up door, man door, and 1500 metal screws and you have yourself a building. I hav a list of what length i cut all the frame material to if you are interested.
Bib Overalls
Well-known member
Nice job. You did good.
cyamaha2007
Well-known member
Man that is freaking sweet. What are the bottom of the trusses made of?
Palmetto
Well-known member
Well the short answer to the roll up door is money ha ha. I am already thinking about adding another door on the left sidewall for both air flow and privacy as my roll up door i have now faces the road and you know how people cant help but try and look at whats going on.
As far as the bracing im not really sure, i was not going to even put that piece of 4x4 in, but it was left over so they were dropped in. I was told at the width of my building i did not needa "truss" per say, as the main purpose of the purlin that spans the building was to keep the building from wanting to bow. Initally i was going to use a metal rod wih a turnbuckle welded in the middle but i thought that just kind of looked tacky and went ahead and purchased the 2 extra purlins. But i still may add what your suggesting as i cant see how it would hurt.
And the trencher is older than i am but works lke a charm. it has a winch that pulls it as opposed to being self propelled like the newer ones. You just park your truck where you wanna end up tie the cable to the ball, and walk away, just have to keep an eye on it because it has been known to break free and chew through walls and part of a slab (ask me how i know)

My truss design was a bit unconventional, but they work. I built mine the same way you did....I figured all my lengths, and ordered as components.
2-7/8 Drill Stem...
14'x14' Doors......I had to build a spreader bar, and lift mine from the top of the trusses with a come-along because my FEL woulnd go high enough!
Attachments
Looks good man, my inital plan was to use some 2 and 7/8 myself. Working in the oilfield industry i figured i could lay my hands on some pretty cheap, turns out i was wrong so i went the route i did. Really like the lean-to with the closed back, i will hopefully be adding something like that next year to mine.
mdkingsley
Well-known member
That looks like one tough building.
Great bones on the steel building.
Footing/foundation looks to have lip so that steel exterior runs right down to it prevent rodents getting in. How did you do that?
Also curious what is Total Cost you've got in the building with subtotals for concrete and materials.
Footing/foundation looks to have lip so that steel exterior runs right down to it prevent rodents getting in. How did you do that?
Also curious what is Total Cost you've got in the building with subtotals for concrete and materials.
Riverside
Well-known member
Your garage looks great; nice work!
I am also curious about the economics of your building. I assume that you considered a kit and decided this approach was cheaper (or better, for a given amount of money). I am considering a similar approach (I can weld), but I am a little wary, because many of my money-saving do-it-myself projects haven't been as cost-effective as I anticipated. Your thoughts . . . ?
I am also curious about the economics of your building. I assume that you considered a kit and decided this approach was cheaper (or better, for a given amount of money). I am considering a similar approach (I can weld), but I am a little wary, because many of my money-saving do-it-myself projects haven't been as cost-effective as I anticipated. Your thoughts . . . ?