To avoid these ads, REGISTER NOW!

Above 1200 Sq/FT Zeph's Quasi WWII Era Shop

Wokspaces above 1200 squarefeet.
OP
Z

zepher11

Well-known member
Joined
Jan 4, 2015
Messages
1,493
Location
Northern, Northern CalifornIA
Hey Zeph the bow cover came out great! I can see it now when you go to a show. "Hey that bow cover looks new' "I sewed it myself" Can you make one for me? and so on.
Great work!

Thank you. Yep, I posted on my Command Car FB page, and already getting asked if I can make more. lol

That would be a big "NO" go. I deal with the public, and they are never satisfied. I'm making a second canvas cover, but I'm giving it away. I don't think I have ever charged for something I have made. I only give things away. Not many complaints that way. I can only imagine how many complaints the MV canvas makers get. Probably why there are very few in the US.
 
To avoid these ads, REGISTER NOW!
Joined
Feb 2, 2021
Messages
12
Location
VA
http://www.northstate.news/Archives/After5/20-11 AF.pdf


CC_22811.JPG


Applied a few decals:

CC_2282.JPG


CC_2286.JPG


Then started bending up the oil lines and fitting the oil canisters to the flatheads:

CC_2283.JPG

Wow. What a thread. I have been a lurker for years. I recall reading this thread a while back. I spent some time randomly searching. The oil bits look familiar.

I am restoring a Ford 9N. Can you tell me more about the fittings you are using and have found success with? I had ideas of redoing the lines to more modern standards.. maybe get them fitted with a visit to a hydraulic shop?

Funny enough, maybe from my visiting this build years ago.. my 9N is being painted in Lusterless Early WWII olive drab. I intend to add stars to it or maybe the shark mouth and eyes.

What paint do you use on the Ford flatheads? Do they run hot enough needing special paints?

I am using RapcoParts paint.
Thanks!
 
OP
Z

zepher11

Well-known member
Joined
Jan 4, 2015
Messages
1,493
Location
Northern, Northern CalifornIA
Wow. What a thread. I have been a lurker for years. I recall reading this thread a while back. I spent some time randomly searching. The oil bits look familiar.

I am restoring a Ford 9N. Can you tell me more about the fittings you are using and have found success with? I had ideas of redoing the lines to more modern standards.. maybe get them fitted with a visit to a hydraulic shop?

Funny enough, maybe from my visiting this build years ago.. my 9N is being painted in Lusterless Early WWII olive drab. I intend to add stars to it or maybe the shark mouth and eyes.

What paint do you use on the Ford flatheads? Do they run hot enough needing special paints?

I am using RapcoParts paint.
Thanks!

Thank you! The oil fittings are just threaded brass fittings. Nothing out of the ordinary. I used to maintain a Ford 8N that my father-in-law had. Love those tractors. See them all over the place here. I don't recall it having an oil canister as stock. I don't think you would need a hydraulic shop for the fittings. Oil pressure should be fairly low. 60 PSI or lower I would think when cold. Much lower as it warmed up.

On the engines, I use Dupli-Color New Ford Grey Never had a problem heat wise, but if you exceed 500 degrees as they mention on the can, the paint holding up won't be your main concern. lol

I like that you're painted the 9N OD. Please post a photo here when you get it completed. I think we would all like to see it.

attachment.php
 

Attachments

  • New Ford Grey.JPG
    New Ford Grey.JPG
    28.5 KB · Views: 672

Wreckster23

Well-known member
Joined
Aug 15, 2014
Messages
369
Location
Newburgh, NY
Wow.. finally caught up with you. I remember peeking in some years back when you were just starting on the garage, it looks fantastic. Absolutely love watching your restorations as you go. Don't tell the wife.. I may have been looking for small MVs to take up place in our driveway..

All these photos, I can near smell the garage. I have many fond memories of what those old machines would smell and sound like. Closest I can get these days is the local fire dept, they're close.
 
OP
Z

zepher11

Well-known member
Joined
Jan 4, 2015
Messages
1,493
Location
Northern, Northern CalifornIA
Wow.. finally caught up with you. I remember peeking in some years back when you were just starting on the garage, it looks fantastic. Absolutely love watching your restorations as you go. Don't tell the wife.. I may have been looking for small MVs to take up place in our driveway..

All these photos, I can near smell the garage. I have many fond memories of what those old machines would smell and sound like. Closest I can get these days is the local fire dept, they're close.

Thanks for stopping by. These MV's are a lot of fun for sure. I was getting a good dose of canvas smell today. Love it for some reason. My wife hates the smell. So sad for her. hehe....
 
OP
Z

zepher11

Well-known member
Joined
Jan 4, 2015
Messages
1,493
Location
Northern, Northern CalifornIA
Finished up two more of the Command Car top bow covers and installed all the fasteners. Lots of sewing practice. Slowly making friends with the machine and bobbin. Still not totally in tune with the bobbin yet, but getting there. Probably could do better on the seams, but haven't really looked up how to make seams yet. Just winging it:

CC_25611.JPG


CC_2562.JPG


CC_2563.JPG


CC_2564.JPG


CC_2565.JPG


Nailed the binding around the edges on the next two covers. One really has to pay attention:

CC_2566.JPG


CC_2567.JPG


Before I sewed over the seam. I like that look better for some reason. I think it looks more "military" for some reason:

CC_2568.JPG


CC_2569.JPG


CC_2572.JPG


CC_2573.JPG


CC_2574.JPG


CC_2575.JPG


CC_2576.JPG


CC_2577.JPG


CC_2578.JPG


Also sourced some reproduction horns for the Dodges, however they came with a small cone like used on the WWII Jeeps. That's a no go.

I dug into my stash, and uncovered four original Autoline horn cones. Blasted and painted those today. Will assemble everything back up tomorrow:

CC_2560.JPG


CC_2579.JPG


CC_2580.JPG


CC_25811.JPG


CC_2582.JPG


CC_2583.JPG


Should have time tomorrow to mount the horns on my Dodge WC engines that I have set aside. However, my lawn is already like a foot tall!! Geez, thought I had a while before I had to get the mower out.... Early spring. :headscrat
 

XJSuperman

Well-known member
Joined
Jan 26, 2018
Messages
3,087
Location
Central Iowa
California is like another planet compared to here. My lawn is buried under 4ft of snow piled up by the plows and snowblower. It'll be a long time before I get to mow.

Horns look great Z. As does the bow cover!
 
OP
Z

zepher11

Well-known member
Joined
Jan 4, 2015
Messages
1,493
Location
Northern, Northern CalifornIA
California is like another planet compared to here. My lawn is buried under 4ft of snow piled up by the plows and snowblower. It'll be a long time before I get to mow.

Horns look great Z. As does the bow cover!

Thank you!

Yes, it has been crazy here. A month ago we had 12 inches of snow. Now today it's going to be 75 degrees or warmer.

Just checked the "to date" rainfall totals. Only 18.5 inches. Not good. Hopefully, we'll get a lot of spring rain.

4 feet of show is a lot. 12 inches just about does us in. I don't mind it cool, but not into the long cold spells.

Take it easy...
 

Wreckster23

Well-known member
Joined
Aug 15, 2014
Messages
369
Location
Newburgh, NY
4 feet of snow total over the last 3 weeks I think? We've all been keeping up with it and honestly we were due a proper winter yet. This will be good for the spring meltoff.

Out of curiosity, seeing as you have these wonderfully capable offroad vehicles.. ever take one in the snow?
 
OP
Z

zepher11

Well-known member
Joined
Jan 4, 2015
Messages
1,493
Location
Northern, Northern CalifornIA
4 feet of snow total over the last 3 weeks I think? We've all been keeping up with it and honestly we were due a proper winter yet. This will be good for the spring meltoff.

Out of curiosity, seeing as you have these wonderfully capable offroad vehicles.. ever take one in the snow?
The snowpack has been looking a lot better. Was looking really bad there for a while, so it's good to see that.

Unfortunately, every time it snows around here, the first thing I have to do is go to work. I haven't been able to be home when there's snow on the ground. Always gone in one or two days if it does snow. Haven't had an opportunity to drag one up to the mountains in the winter. I hear the NDT's are really lousy in the snow, so chains are the order of the day if it's snowy.

attachment.php
 

Attachments

  • WWII Jeep 53.JPG
    WWII Jeep 53.JPG
    123.8 KB · Views: 513

ttpete

Well-known member
Joined
Mar 8, 2011
Messages
6,737
Location
Dearborn, MI
The snowpack has been looking a lot better. Was looking really bad there for a while, so it's good to see that.

Unfortunately, every time it snows around here, the first thing I have to do is go to work. I haven't been able to be home when there's snow on the ground. Always gone in one or two days if it does snow. Haven't had an opportunity to drag one up to the mountains in the winter. I hear the NDT's are really lousy in the snow, so chains are the order of the day if it's snowy.

attachment.php

Those poor bastards must have been in Patton's Third Army during the Battle of the Bulge in 1944. Patton wouldn't allow tops up. He claimed that having a top up hindered being able to bail out in an emergency
 
OP
Z

zepher11

Well-known member
Joined
Jan 4, 2015
Messages
1,493
Location
Northern, Northern CalifornIA
Those poor bastards must have been in Patton's Third Army during the Battle of the Bulge in 1944. Patton wouldn't allow tops up. He claimed that having a top up hindered being able to bail out in an emergency

That sure doesn't look like a pleasant experience, but I'm sure there was a lot worse going on there at the time. Those guy were tough as nails. Frozen nails in this case.

I haven't seen a wire cutter curved like the one on this Jeep. Has a nice art deco look to it. I was planning on making one for my Jeep, but haven't got around to it yet.
 
Joined
Feb 2, 2021
Messages
12
Location
VA
Thank you! The oil fittings are just threaded brass fittings. Nothing out of the ordinary. I used to maintain a Ford 8N that my father-in-law had. Love those tractors. See them all over the place here. I don't recall it having an oil canister as stock. I don't think you would need a hydraulic shop for the fittings. Oil pressure should be fairly low. 60 PSI or lower I would think when cold. Much lower as it warmed up.

On the engines, I use Dupli-Color New Ford Grey Never had a problem heat wise, but if you exceed 500 degrees as they mention on the can, the paint holding up won't be your main concern. lol

I like that you're painted the 9N OD. Please post a photo here when you get it completed. I think we would all like to see it.

Thank you. I just really like those rubber hoses you have. Rather than running all the lines as the usual brake line style, I'd like to run hydraulic hose. Partly for looks.. other for resiliency. Those parts look perfect.

That engine is slick, too. Very well done.

As it comes together, I will certainly share some pictures. Some parts are painted. It looks cool. Going to be black (inner fenders, floor boards, some of the wheels). The rest will be Rapco's Early WW2 Lusterless OD. 12v. All electronic. LED headlight rounds. Old and new. Machinist is just stitching the motor back together. Next up, the rear end. I need to tear it out and.. redo the axle seals. Seems hardest job on the tractor.
 
OP
Z

zepher11

Well-known member
Joined
Jan 4, 2015
Messages
1,493
Location
Northern, Northern CalifornIA
Thank you. I just really like those rubber hoses you have. Rather than running all the lines as the usual brake line style, I'd like to run hydraulic hose. Partly for looks.. other for resiliency. Those parts look perfect.

That engine is slick, too. Very well done.

As it comes together, I will certainly share some pictures. Some parts are painted. It looks cool. Going to be black (inner fenders, floor boards, some of the wheels). The rest will be Rapco's Early WW2 Lusterless OD. 12v. All electronic. LED headlight rounds. Old and new. Machinist is just stitching the motor back together. Next up, the rear end. I need to tear it out and.. redo the axle seals. Seems hardest job on the tractor.

I only rebuilt the carb and replaced the genny and radiator on the 8N I used to use. Always looked at that thing and hoped I would never have to tear into it. Looked like a bit of work. I was a lot younger then though, so I didn't have the confidence I have to just tear into something.

I found the oil lines on Vintage Power Wagons' website. Here's a shot out of their parts catalog of the oil lines. Geez, I don't recall them being so expensive. I bought what I hoped would be a life time supply a long time ago. I was thinking like $10 each. However, parts prices are escalating faster than I've ever seen before lately:

attachment.php
 

Attachments

  • Oil Lines at VPW.JPG
    Oil Lines at VPW.JPG
    128.4 KB · Views: 452

BUGTHUG

Well-known member
Joined
Nov 12, 2010
Messages
2,960
Location
Kansas
those look like something you could have made at a tractor shop. I just did all the hoses on my Kubota bucket, man they were expensive also.
 
Joined
Feb 2, 2021
Messages
12
Location
VA
I only rebuilt the carb and replaced the genny and radiator on the 8N I used to use. Always looked at that thing and hoped I would never have to tear into it. Looked like a bit of work. I was a lot younger then though, so I didn't have the confidence I have to just tear into something.

I found the oil lines on Vintage Power Wagons' website. Here's a shot out of their parts catalog of the oil lines. Geez, I don't recall them being so expensive. I bought what I hoped would be a life time supply a long time ago. I was thinking like $10 each. However, parts prices are escalating faster than I've ever seen before lately:

attachment.php

Thanks. At those prices, though, I will find alternate methods! Supposing I was restoring a Power Wagon I'd also have deeper pockets. Not this poor man's 9N!

Here is motor at machine shop. Getting ready to finalize accessories, oil lines.. then break back down for paint.
 

Attachments

  • PXL_20210301_193146825.jpg
    PXL_20210301_193146825.jpg
    153.5 KB · Views: 50
  • PXL_20210301_193136088.jpg
    PXL_20210301_193136088.jpg
    156.1 KB · Views: 48
OP
Z

zepher11

Well-known member
Joined
Jan 4, 2015
Messages
1,493
Location
Northern, Northern CalifornIA
Took the day off today and made a 13 hour round trip to beautiful Florence, Oregon to drop off some generators and regulators at a shop up there. Tried to find someone that might do them around here, but they all denied me. The old "I can't get parts" routine. When I tell them I can, they say, oh I'm just not going to rebuild those anymore.

Anyhoo, found this guy Don Allen who does the Gener-Nator. Have seen his site before, but just thought it was intriguing at the time. Called him up a few weeks back, and he said he could help me out. He has a video with Jay Leno on his website. Jay uses him do rebuilds for him now. Here's his website: https://gener-nator.com/index.htm

Every time I go to Oregon it's blue skies until I cross over the Siskiyou Summit. Then rain all the way there and back to the Summit. Left at 4am and back just after 5pm. Always crazy to see the semi-truck triple trailers up there. Not allowed here in CA.

Every time I go by the little high school in Elkton, it reminds me of the movie Hoosiers. I like the stands for the football field. Looks like it seats about 15-20. The basketball gym, however, seats the whole town it appears:

These are the generators and regulators I was going to start with to get rebuilt. Still have a lot of others rat-holed. All original military Dodge. The big 75 pounders are 12 volt. I can barely lift those things. Have to use the engine crane to remove it from under the hood. The medium ones are fairly light at 35-40 pounds, and the small one is the original one for the Dodge VC1. It's very light compared to its big brothers. It's 6 volt as well:

CC_25911.JPG


Here's the sign at Don's shop right on HWY 101:

CC_2594.JPG


Basic view while in Oregon. Crossing the Umpqua River. The drive is beautiful even with the rain:

CC_2593.JPG


After crossing the summit and dropping down in elevation. North side of Mt. Shasta:

CC_2592.JPG


Also, last weekend I installed the horns on the flatheads:

CC_2585.JPG


Sourced the correct horn anti-vibration/insulator mounts:

CC_2586.JPG
 
OP
Z

zepher11

Well-known member
Joined
Jan 4, 2015
Messages
1,493
Location
Northern, Northern CalifornIA
Thanks. At those prices, though, I will find alternate methods! Supposing I was restoring a Power Wagon I'd also have deeper pockets. Not this poor man's 9N!

Here is motor at machine shop. Getting ready to finalize accessories, oil lines.. then break back down for paint.

Yeah, at those prices it spurs me to look for a more affordable alternative. There are other vendors out there.

On the engine...nice! I had forgot that the water neck was part of the head on those engines. Looks art deco. Even the old engines had flair back in the day.
 
To avoid these ads, REGISTER NOW!
OP
Z

zepher11

Well-known member
Joined
Jan 4, 2015
Messages
1,493
Location
Northern, Northern CalifornIA
Had a guy off one of the Dodge WC forums contact me and wanted to see if I would make him a Dodge WC52 Weapons Carrier windshield cover. Lots of the canvas makers produce a WWII Jeep windshield cover like this:

CC_26131.JPG


Actually, I used the one above as my pattern and gave it a go today:

CC_2596.JPG


Probably one of the hardest part was making sure that I located the holes for the windshield catches in the canvas:

CC_2597.JPG


CC_2598.JPG


CC_2599.JPG


CC_2600.JPG


CC_2601.JPG


Double layered the canvas at the top of the windshield frame and at the lower two edges:

CC_2602.JPG


I looked at this for like an hour trying to figure out how to sew this. It was a real mind binder. Finally, I just had to start sewing and work my way through it:

CC_2603.JPG


CC_2604.JPG


Starting the edge binding:

CC_2605.JPG


CC_26121.JPG


CC_2607.JPG


CC_2608.JPG


CC_2609.JPG


Used the common sense attachment hardware instead of the usual lift-the-dot hardware:

CC_26101.JPG


CC_26111.JPG


Crappy canvas, however. I can't find any good WWII style/color canvas. I ordered this by mistake as it said it was Army Duck Canvas. My mistake. Never ever order Duck Canvas in the future! Live and learn. Good practice canvas, however. I wish I could crack the code and find out where the WWII vehicle canvas makers get their canvas.
 

gpw_42

Well-known member
Joined
Apr 24, 2017
Messages
717
Location
NC Sandhills, USA
CC_2585.JPG


Sourced the correct horn anti-vibration/insulator mounts:

CC_2586.JPG

Zeph,

That makes for a long day...but I'm sure it was satisfying! Guess there's going to be another on the backside, when your starters are ready for pickup?

Do you have plans anywhere for those wooden "engine crates"? I have an engine which has been sitting on its side for...WAY too long. Think I might ought to build one of those to get the engine upright. It's fresh from rebuild in 2010(?), and I'm afraid that 4+ years in the NC humidity has the rings rusted to the cylinder walls. One way or the other, it needs some oil in the cylinders. Before coming here, it spent 5-6 years in the SoCal high desert after a shop in Vegas did the work for me. What an oddessy that became.

Steve
 
OP
Z

zepher11

Well-known member
Joined
Jan 4, 2015
Messages
1,493
Location
Northern, Northern CalifornIA
Zeph,

That makes for a long day...but I'm sure it was satisfying! Guess there's going to be another on the backside, when your starters are ready for pickup?

Do you have plans anywhere for those wooden "engine crates"? I have an engine which has been sitting on its side for...WAY too long. Think I might ought to build one of those to get the engine upright. It's fresh from rebuild in 2010(?), and I'm afraid that 4+ years in the NC humidity has the rings rusted to the cylinder walls. One way or the other, it needs some oil in the cylinders. Before coming here, it spent 5-6 years in the SoCal high desert after a shop in Vegas did the work for me. What an oddessy that became.

Steve

He said there's a major collector south of me that he does work for. Sounds like their mode of shipment entails meeting half way to receive/deliver generators, etc... He said half way point is where I'm at. Nice for me as he says he may be bringing all my stuff back to me. That would be fantastic if that works out. Not gonna hold my breath, however.

It's not too bad of a drive as it is really beautiful. I also found some dog friendly VRBO's right on the beach in the Florence area. Tried to talk my wife into going Friday and spending the night with the doggies, but she didn't want to participate. If I have to go back, I'll give it another go for an overnighter.

I don't have any plans handy for the engine crates, but I could draw up one for you no problem. Is it a six cylinder flathead, or a L134? Let me know, and I'll get the measurements and a little plan for you.
 

ZRX61

Well-known member
Joined
Aug 15, 2006
Messages
28,716
Location
Solar Blight Valley, SoCal
In related news:
I was at Wally World this morning & discovered they have OD green field jackets similar to the M65, but without the epaulettes for the bargain price of $25. (genuine Rambo clone versions are over $100)

No liner & fairly lightweight. George brand. Had to buy one :)
Roomie was amazed I didn't buy the black version.
 

Stuart in MN

Well-known member
Joined
Sep 8, 2005
Messages
23,114
Location
Minneapolis
OP
Z

zepher11

Well-known member
Joined
Jan 4, 2015
Messages
1,493
Location
Northern, Northern CalifornIA
In related news:
I was at Wally World this morning & discovered they have OD green field jackets similar to the M65, but without the epaulettes for the bargain price of $25. (genuine Rambo clone versions are over $100)

No liner & fairly lightweight. George brand. Had to buy one :)
Roomie was amazed I didn't buy the black version.


That's cool. Anything OD is good with me, of course. lol

I definitely have a WWII jacket problem. When they go on sale at my favorite super authentic WWII supplier, I end up buying. I have like four WWII tanker jackets...like Brad Pitt wore in Fury...still in the boxes as well as a bunch of M1941 jackets. Not to mention various other WWII uniform components. I just love that stuff, but it's a bad habit that I find hard to kick.

I do give them away often when kids come by and actually show an interest in WWII history. Really makes their days. At Christmas I sourced WWII dog tags for all the grand kids. They probably think I'm a strange old dude. :dunno: I did catch a couple of them wearing them recently, so that's something.
 

ZRX61

Well-known member
Joined
Aug 15, 2006
Messages
28,716
Location
Solar Blight Valley, SoCal


Yes, but mine doesn't look or hang anything like that because I weigh more than 90lb. Plus I rolled up the sleeves to above the elbow & have no intention of ever fastening the collar (it's folded down like a regular jacket) or using the hood. If I had seen that pic online I wouldn't have bought one.
The beige version was a bit too Steve *Crikey* Irwin


I see the link says most colors out of stock, local Wally had piles of them in all colors except the camo.


I'm thinking about cutting the hood out of the collar. (edit, cut it out, now it doesn't feel like I'm wearing a medical immobilizer collar)
 
Last edited:

gpw_42

Well-known member
Joined
Apr 24, 2017
Messages
717
Location
NC Sandhills, USA
He said half way point is where I'm at. Nice for me as he says he may be bringing all my stuff back to me. That would be fantastic if that works out. Not gonna hold my breath, however.

I don't have any plans handy for the engine crates, but I could draw up one for you no problem. Is it a six cylinder flathead, or a L134? Let me know, and I'll get the measurements and a little plan for you.

Good luck with being the mid-point and having that work out well for you. That'd be a boon! Thinking about some of the CA MV folks who might be on that list, but sure know the car culture there is a LOT larger than MVs.

Thanks much for the offer to draw up some plans - I'd be much obliged! This engine is a 23.5" head Dodge flat-6, from a 50s vintage car. Bought it from Ed in LA when I lived close by (relatively), b/c the original engine had a long crack about an inch or so below the deck, and the machine shop wouldn't guarantee a repair. Wanted to pull the series from the serial number, but can't get to it due to the way its laying...so just have to go from memory.

Speaking of Ed, he parted out a 1/2T WC frame about 10-11 years ago. I stood there while he cut it up and knew that I should have bought the whole thing, which he offered me before he cut it up. I could have put my axles under it and been well on my way, vs. having to get some welding done on mine. Hindsight....
 
OP
Z

zepher11

Well-known member
Joined
Jan 4, 2015
Messages
1,493
Location
Northern, Northern CalifornIA
Good luck with being the mid-point and having that work out well for you. That'd be a boon! Thinking about some of the CA MV folks who might be on that list, but sure know the car culture there is a LOT larger than MVs.

Thanks much for the offer to draw up some plans - I'd be much obliged! This engine is a 23.5" head Dodge flat-6, from a 50s vintage car. Bought it from Ed in LA when I lived close by (relatively), b/c the original engine had a long crack about an inch or so below the deck, and the machine shop wouldn't guarantee a repair. Wanted to pull the series from the serial number, but can't get to it due to the way its laying...so just have to go from memory.

Speaking of Ed, he parted out a 1/2T WC frame about 10-11 years ago. I stood there while he cut it up and knew that I should have bought the whole thing, which he offered me before he cut it up. I could have put my axles under it and been well on my way, vs. having to get some welding done on mine. Hindsight....

Oh yeah, I know Ed. He was recovering a lot of Dodge WC's back then. See him at the MV shows...when we can have them. However, it looks like the Plymouth show is a go in late April. I have my site reserved. Really looking to going.

Ok. I'll get some measurements for you this weekend of the engine crate.
 
OP
Z

zepher11

Well-known member
Joined
Jan 4, 2015
Messages
1,493
Location
Northern, Northern CalifornIA
Well, it's been since the first week of August of last year since I ordered the seat canvas for the Carryall project. It's frustrating for it just to sit there all done and not have the seats available.

I found some good seat canvas examples on the internet, so wanted to replicate them. However, not sure exactly how they make the seams. I practiced a bit last evening and gave it a shot. Here are the examples photos I have:

WC_26_Detail_Photo_80.JPG


WC_26_Detail_Photo_771.JPG


WC_26_Detail_Photo_791.JPG


Some of the tests to see if I could replicate the seam on the examples I found:

CC_26141.JPG


CC_26151.JPG


CC_2616.JPG


CC_2617.JPG


CC_2618.JPG


CC_2619.JPG


I am assuming that the lower band is sewn together first? I think that's what the seat guys would do:

CC_2620.JPG


Then I assume the top piece is sewn to the lower section carefully:

CC_26211.JPG


I stressed on making the curves then this happened. Yikes! No idea how to sew a 90 at this location. Was a buzz kill there for a while bot I powered through. Need to figure out this as it doesn't look good:

CC_2622.JPG


First seam:

CC_2623.JPG


CC_2624.JPG


Second seam or top stitch?

CC_2625.JPG


CC_2626.JPG


CC_2627.JPG


CC_2628.JPG


CC_2629.JPG


CC_2630.JPG


Some good and some bad. I wish I could crack the code on how these seat covers are sewn. And, I need to figure out how to make a 90 degree turn. Man, that was a min bender. Has to be a secret how how not to bunch the canvas up at that point.

Well, toss this one and back to the drawing board.
 
Last edited:

fourbyford

Well-known member
Joined
Aug 3, 2017
Messages
913
Location
North Idaho... almost Canada!
Hey Zeph,

I've been MIA for a while now... lots of catching up to do so I'm starting here...

Wow! Lots of progress around the WWII Shop. As always, awesome workmanship on a huge number of awesome projects!

You're coming along nicely with the sewing projects. I found a quick vid on the 'Tube that will help you solve the 90° corner dilemma. Check out "How To Sew A Boxed Corner" by DMS Outdoors. He demonstrates exactly what you're looking for.

Also, on the Cechaflo Channel, you might want to look at "A Basic Seat Cushion Cover-Car Upholstery". This vid doesn't specifically address boxed corners but there are good tips on laying out patterns, seam allowances, and his use of an office stapler to keep things aligned while stitching.

Keep on keeping on! Everything is looking great!

(PM sent)

...D
 
OP
Z

zepher11

Well-known member
Joined
Jan 4, 2015
Messages
1,493
Location
Northern, Northern CalifornIA
Thanks fourbyford for the links. Checked those out and found a few other videos. With my new found knowledge, I dinked around and practiced a few things. I then decided to make a sewing machine cover that would be constructed just like a seat cover for my Dodge Carryall project. Making the 90 degree corners is still a bit tricky, but way easier knowing how to do it.

Here are some of the photos. I discovered that instead of completing the entire loop around the seat that is sewn to the top of the seat cover, one can sew it so it fits exactly after it is sewn to the top cover. Pretty cool. Here is the lower section sewn to the top section before finishing it off:

CC_2634.JPG


Closing the gap now that the lower section is sewn together:

CC_2635.JPG


Here are some of the 90 degree corners I attempted:

CC_2636.JPG


Here is the cover with the top stitching completed. I was about half way done with the top stitching on this when I had a revelation on how to do it much easier and make it look much better. Can't really find a video or information on how to complete this technique yet:

CC_2637.JPG


CC_2638.JPG


Added the binding at the bottom to finish this cover off, but it is basically constructed and completed as a canvas seat cover for the Carryall. Here it is covering the sewing machine:

CC_2639.JPG


Now when I get some real WWII style canvas I think I'm ready to get to work. I contacted my Dodge WC parts guy in Minnesota thinking he may have a contact for canvas. He did. He said there are two type for the WWII trucks. Wet and dry canvas.

Wet for the tops and dry for the seat covers. Needless to say, only the few shop that produce canvas products for WWII vehicles can get it. One cna only order it in 100 yard increments, and not available online. Well, he hooked me up. Unfortunately, I had to buy a life time supply, but I have 220 yards of the stuff coming. Yee-haw! Go big or go home. :rocker:
 

fourbyford

Well-known member
Joined
Aug 3, 2017
Messages
913
Location
North Idaho... almost Canada!
Zeph, you're absolutely sewing like a PRO! Very nice work. I'm liking the top stitching!

Great to hear you found the authentic canvas. My guess is that it will be used up... lol

You are a young guy... right??

Lol

Take care,

...D
 
OP
Z

zepher11

Well-known member
Joined
Jan 4, 2015
Messages
1,493
Location
Northern, Northern CalifornIA
Zeph, you're absolutely sewing like a PRO! Very nice work. I'm liking the top stitching!

Great to hear you found the authentic canvas. My guess is that it will be used up... lol

You are a young guy... right??

Lol

Take care,

...D

lol...I keep thinking I'm a young guy. I will be 60 this year. I've just been goal driven all my life for some odd reason. I like to get projects completed, so this sewing is right up my alley. Thank shoulder surgery for getting the sewing machine.

I have to be busy all the time as I can't really seem to sit around and watch TV or anything like that. I think having a job where I work 50-60 hours a week for the past 42 years has kept me on my toes.

I already have had a dozen or so requests from the MV community to make canvas items for them. Not really a lot of WWII canvas makers out there, and when ordered it can take a long time to get the order completed. I'm on eight months now from when I ordered my Carryall seat canvas covers.

Maybe when I have more time beyond my own projects I might make some things for others. Geez, if you think I'm **** now, wait until I make something for someone else. For now I'm just content to learn and make my own items.

Thanks again for your help. I really appreciate it!
 
Joined
Feb 2, 2021
Messages
12
Location
VA
Probably the women who stitched those together during the war effort are not plentiful. Would be great to contact a VFW or WWII veterans outfit and see if any of it's members worked in such a space.

Or Periscope Films is an incredible YouTube channel with old timey, PSA, military training films and the like. Wonder if the channel has something in the archives...
 
OP
Z

zepher11

Well-known member
Joined
Jan 4, 2015
Messages
1,493
Location
Northern, Northern CalifornIA

That's nice. After sewing a little bit, It's amazing that that only costs like $17. That would be a two day project for me. lol

Still quietly watching your fantastic work.

Thank you. More to come!

Probably the women who stitched those together during the war effort are not plentiful. Would be great to contact a VFW or WWII veterans outfit and see if any of it's members worked in such a space.

Or Periscope Films is an incredible YouTube channel with old timey, PSA, military training films and the like. Wonder if the channel has something in the archives...

I have seen a lot of those old WWII training films. I find them fascinating. Really like the ones when they're in the machine shops and factories. They had it going on back then for sure. Lots of craftsmen, and craftwomen back in the day!
 
OP
Z

zepher11

Well-known member
Joined
Jan 4, 2015
Messages
1,493
Location
Northern, Northern CalifornIA
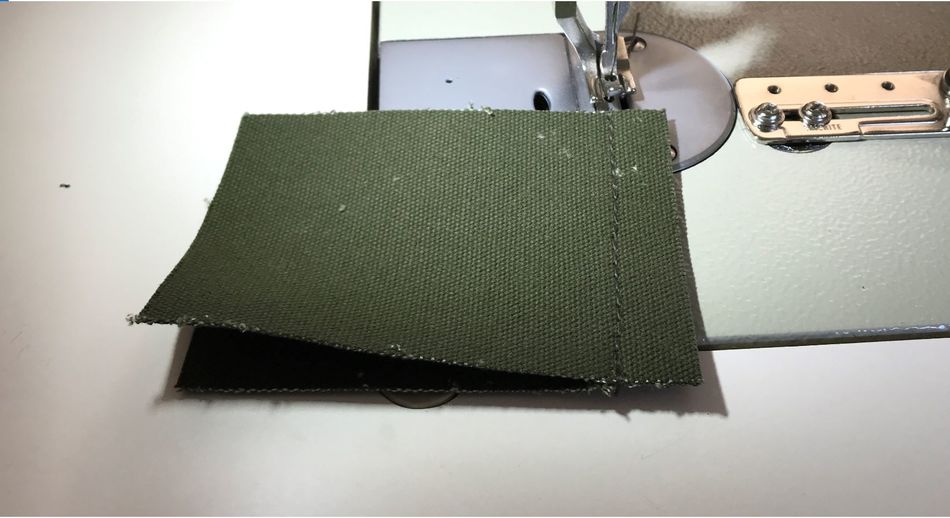
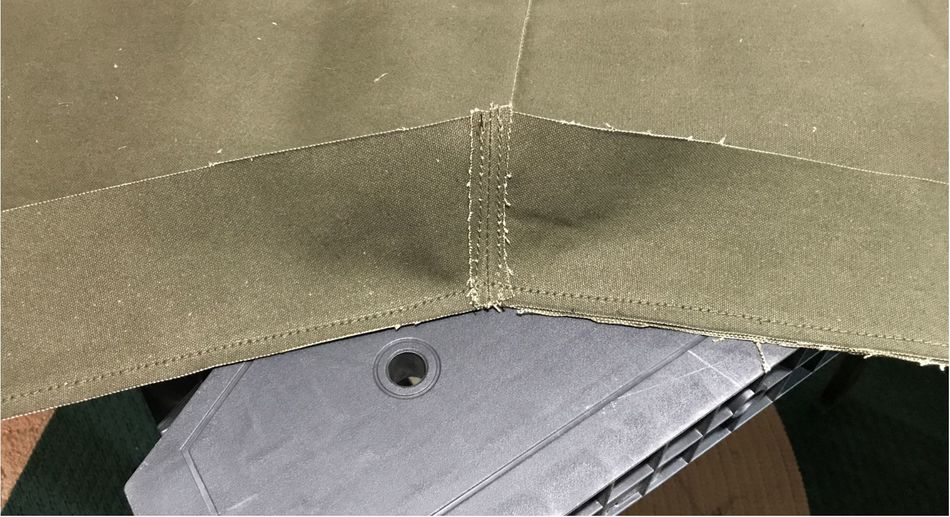
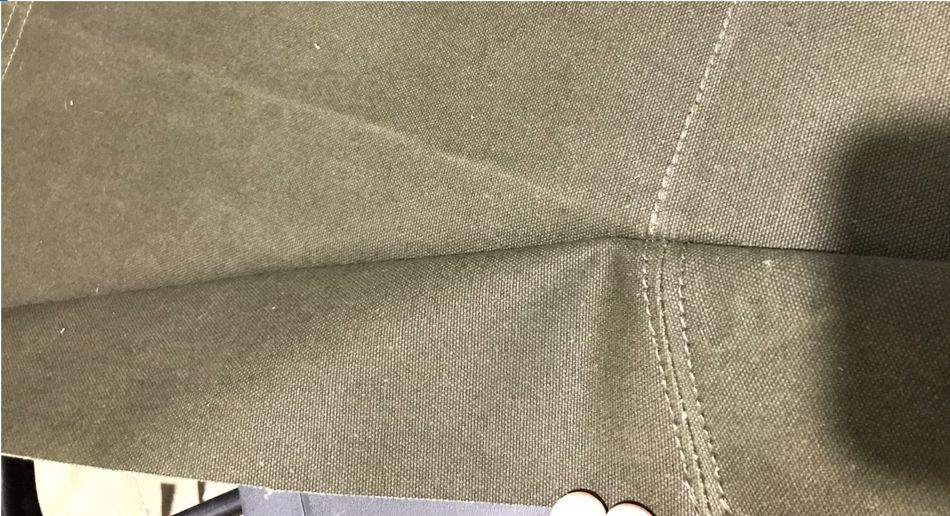
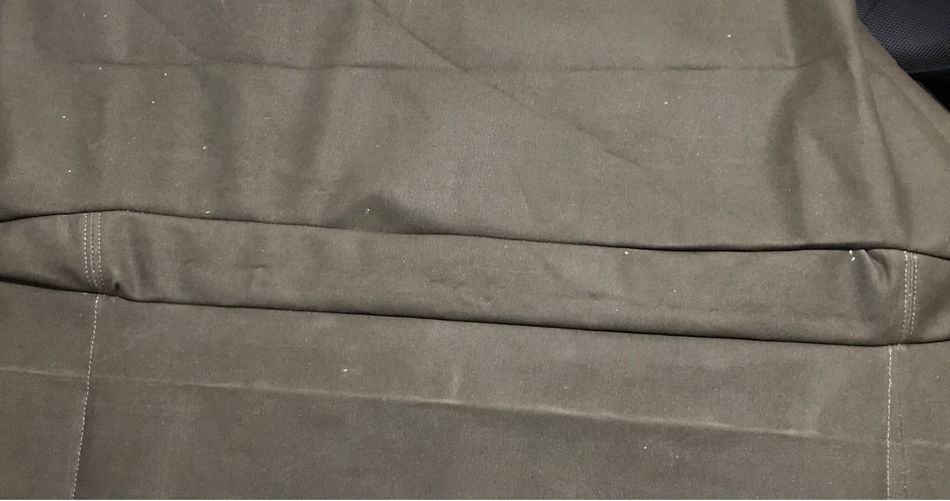
Have been busy sewing anything I can think of to learn as much as possible. Lots of making mistakes and working through them. I want to learn as much as possible before I start me seat project. Practicing 90 degree corners, which I’m pretty comfortable with now. Round corners, not so much. Also trying to determine seam allowances coupled with the top stitching. Seemed like had to add 3/4 inch to get the top stich to sit right, but now thinking even less after today’s trial and errors.

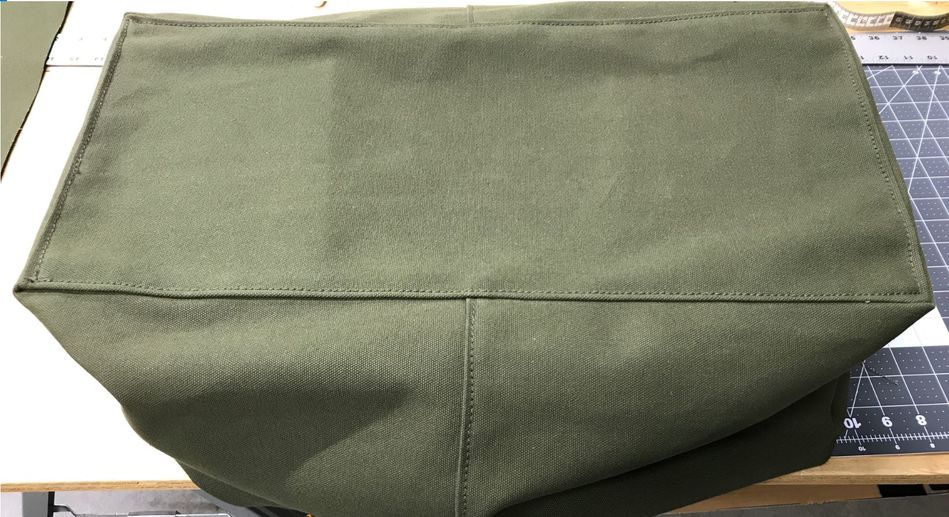
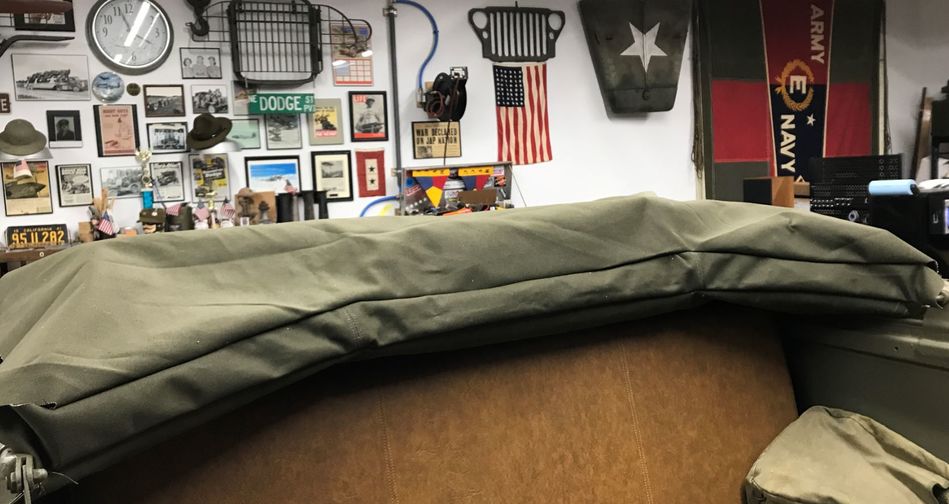
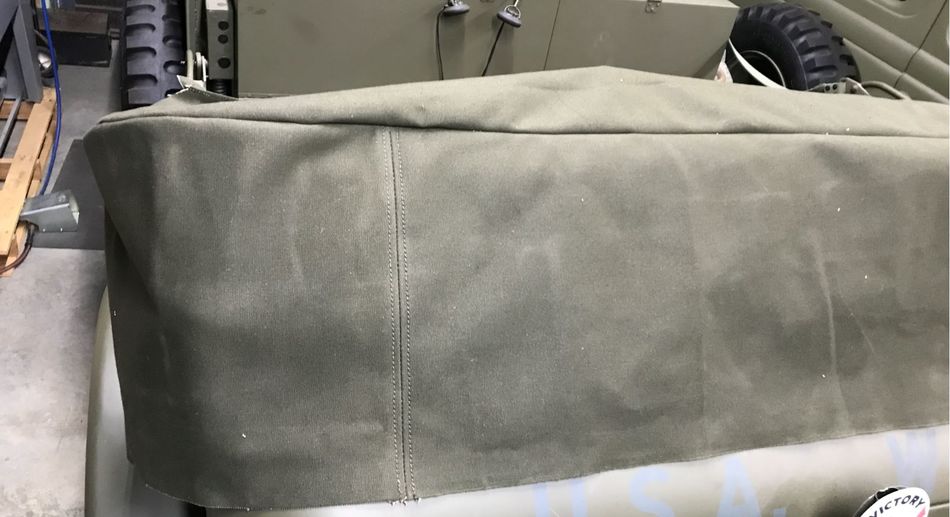
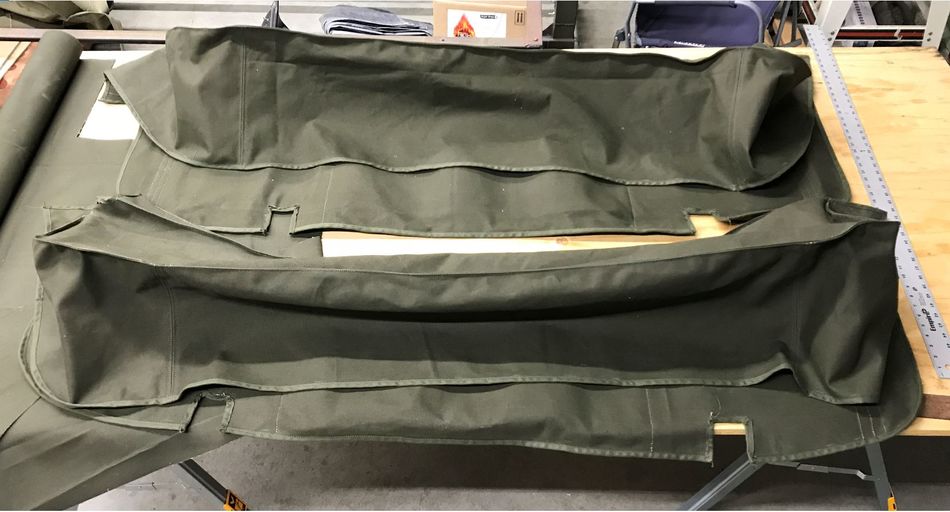
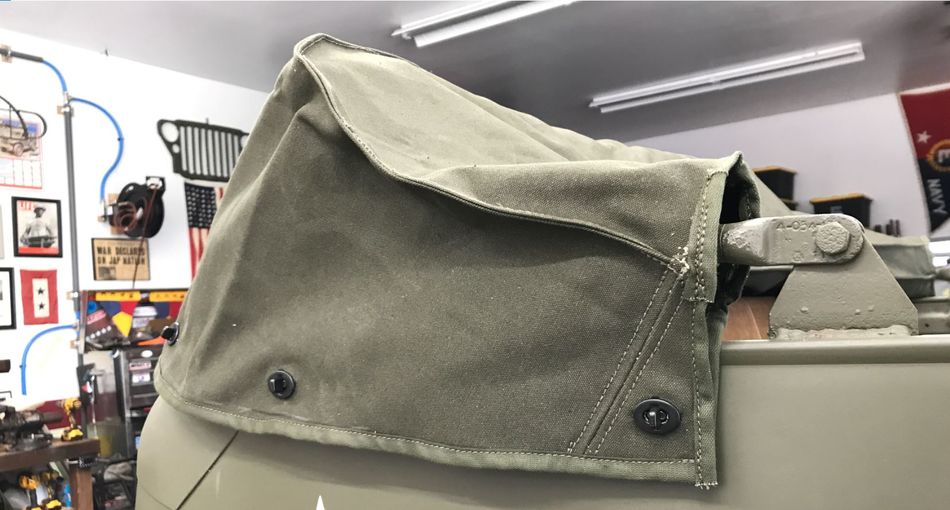
Told a guy at work I’d make a cover for one of his shortwave radios. I actually ended up making two as I learned a few things from the first design. He wanted a flap along the back, so I cut it all the way out, but then realized that I should have cut out inside the rear panel. That way it keeps its shape vs. not having the lower fabric section for support.

CC_26411.JPG


CC_2642.JPG


CC_2643.JPG


Much better with the connected lower section:

CC_2644.JPG

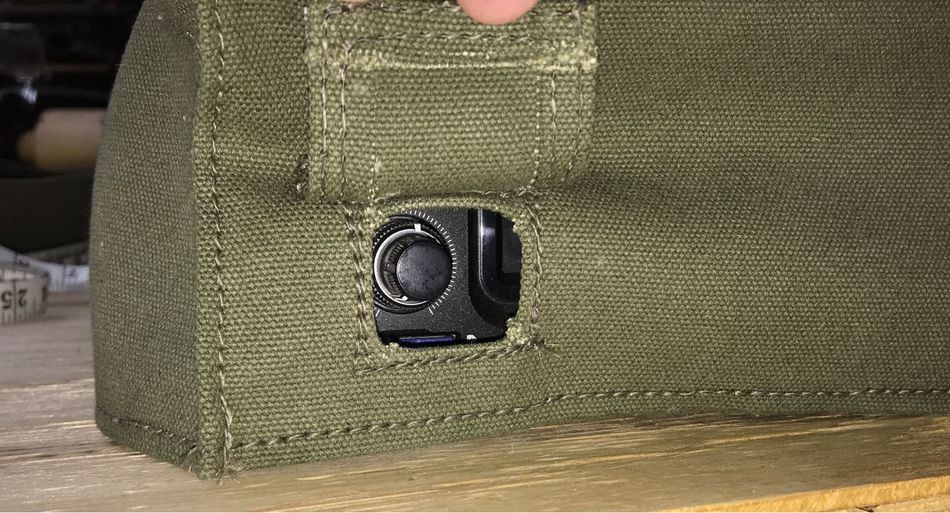
He wanted a little flap in the front for a power cord:

CC_2645.JPG


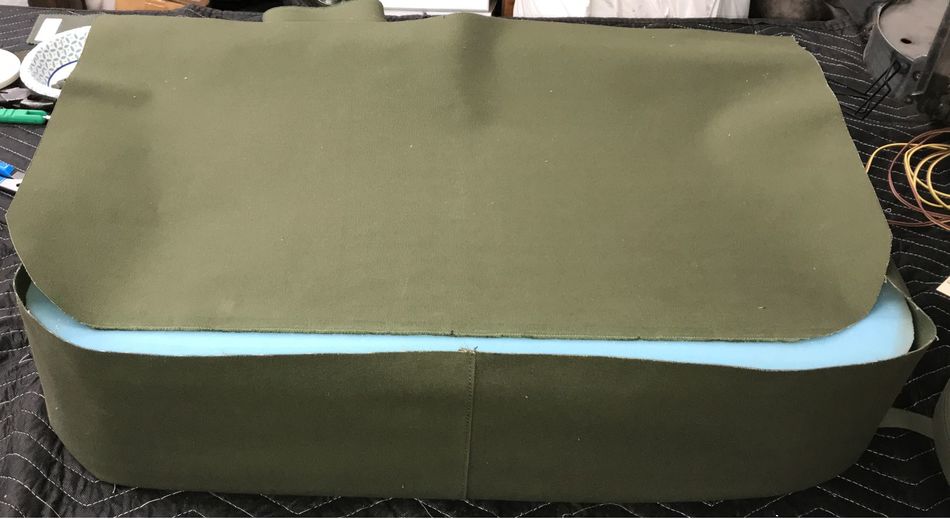
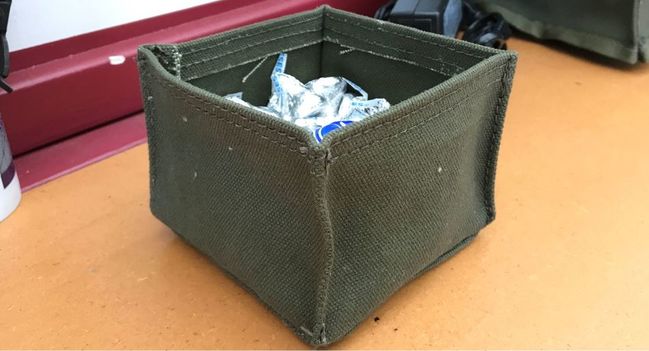
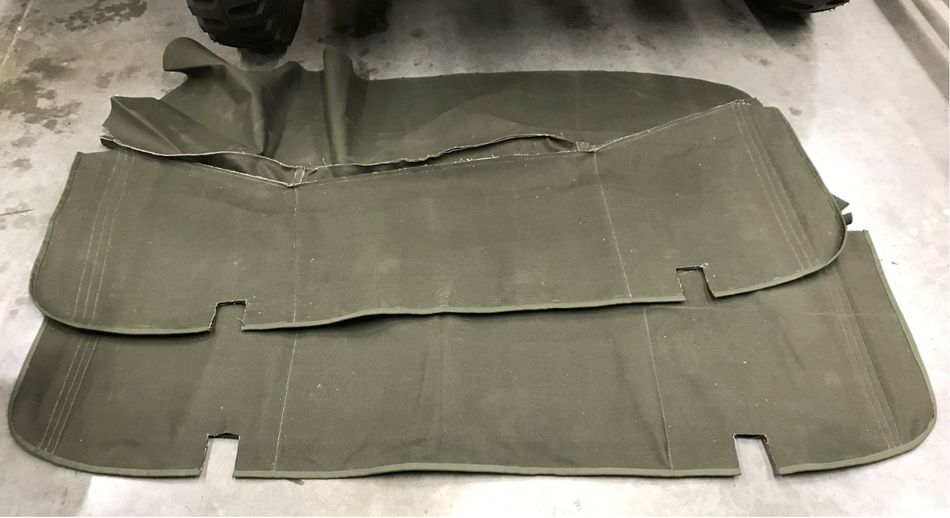
Next I decided to make a glove box insert for the half-ton Dodge WC’s. The box tapers in as it goes deeper. Thought it would be neat to have something that could pull out like a drawer. I had some floor mat rubber I had saved from my Dodge WC16 project, so I used that and sandwiched it between two sheets of canvas for the bottom:

CC_2648.JPG


CC_2647.JPG


CC_2649.JPG


Why make one. I made three for a couple of my Dodge Brothers:

CC_2654.JPG


CC_2655.JPG


CC_2650.JPG


CC_2656.JPG


I even added a little handle just to see if I could:

CC_26511.JPG


The little drawer in the glove box…guess what? It fits like a glove!

CC_2652.JPG


CC_2653.JPG


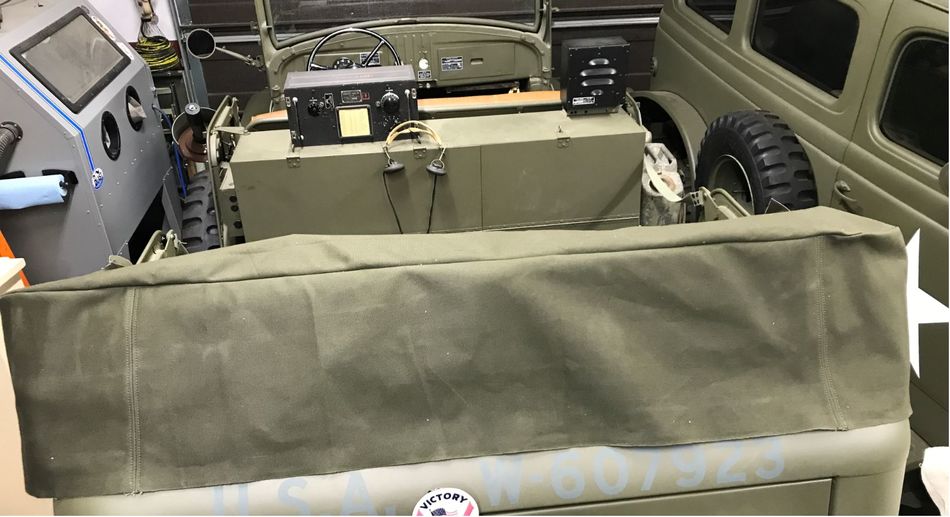
I also decided to make a miniature canvas type seat cover. About 3” x 3”. I top stitched it as well, but really tedious due to the small size, but turned out pretty good:

CC_2657.JPG


While I was sewing the handles to the glove box drawers, the machine started acting up. It would come to a grinding halt and jam up. It would rip the bobbin thread, or lose the needle thread. I was sewing through 10 layers of canvas. It just kept acting up and making a rat’s nest. I kept having to take it apart to clear the nest. Spent at least an hour with this happening over and over. I thought that maybe it was the stitch length or the tension, but not sure how that plays into everything yet. Eventually, this happened:

CC_2658.JPG


Machine crunched and the needle was ripped out of the holder and stuck in the fabric. I tried plyers and I could not get that needle out. Totally stuck and wasn’t sure what to do. Finally realized I could remove the screw for that center foot and pull it off to access the needle. I yanked it out of there. After looing at the needle for a while because I wasn’t sure how it went back in, I noticed that it seemed just barely bent, but wasn’t sure. Figured I would just insert a new one. Well, after all back together, it worked fine. Weird. Slightly bent needle do that? Must be very sensitive if so.

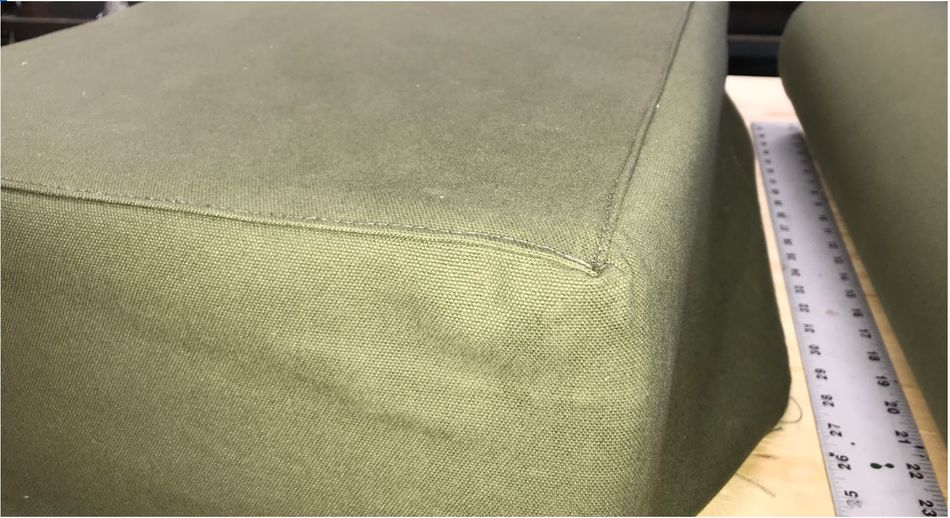
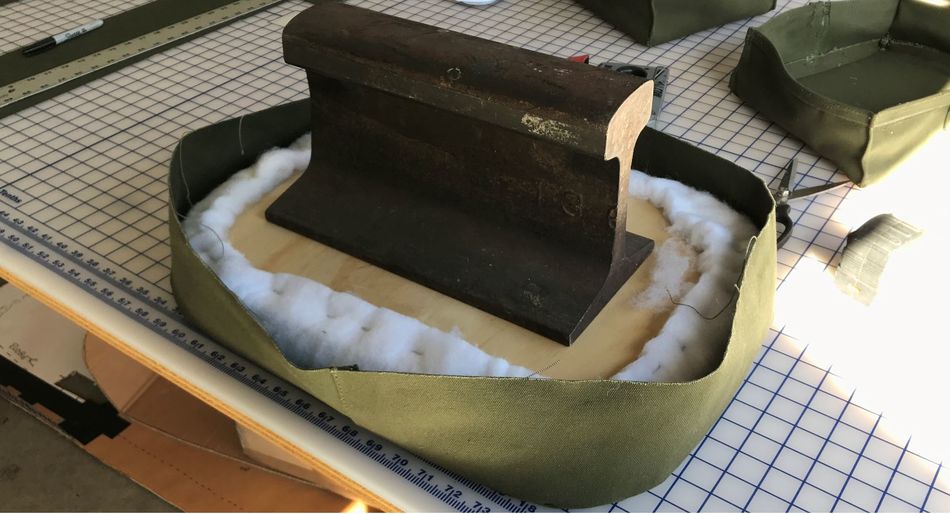
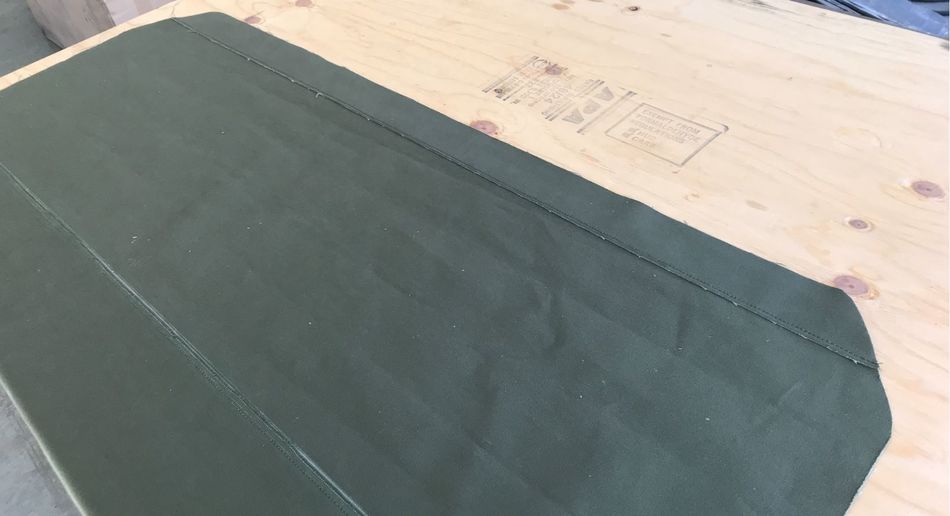
After that mess, I wanted to make a pad that was basically exactly like a seat cover, foam, etc…, to see how that goes before I start the seats on the Dodge Carryall when I get the canvas. I needed a pad that was missing from a piece of exercise equipment I have. Was a good project to see how a seat would come out. Only difference is that I cut the foam to be 2” thick vs. the 5” thick it was:

CC_2659.JPG


Sewed up a cover like a seat cover:

CC_2660.JPG


CC_26611.JPG


A little rail roading to compress the foam and batting so I could staple:

CC_2662.JPG


The pad:

CC_2663.JPG


CC_2664.JPG


My margins, or seam allowances, may have been too large. I used 1 and 1/2 inch as my allowance. I think 1/2 inch may be the way to go. Not a good representation as the foam was on 2” tall. I think I need to learn more on stapling the batting and fabric to the plywood. May go better when the foam is 4” and 7” thick. At least I hope so. I think I’ll look up some videos on that if I can.

Burned a lot of thread this weekend. Learned a lot, and realized I need to learn a lot. All enjoyable, however.
 
To avoid these ads, REGISTER NOW!
Top Bottom