To avoid these ads, REGISTER NOW!

ZMotorsports Shop Projects 2.0

OP
Z

zmotorsports

ALLIANCE MEMBER
Joined
Oct 20, 2009
Messages
21,441
Location
Northern Utah
Watch out MacTexas, I just started following Shopnut 2 weeks ago and I have 2 new items on the way already.

I think Mike is responsible for me buying at least a dozen things in the last year alone.

Mike does some pretty cool things and has no problem answering questions if you ask.

Mike is the reason I joined this forum. I started to follow what he was doing, his perfection and attention to the details that matter. Just stunning work. I wish he was my neighbor! Of course, if he was, I would put up all my Christmas lights on the eaves of the house, (entirely white lights), and have one red light about a third of the way down!

Thanks for the kind words guys, I'm flattered and appreciative.

I'm glad to hear others have benefitted from my posts. Sometimes I feel like I'm rambling on and on for nothing.

I've learned so much from others on this forum I am happy to be able to give back.
 
To avoid these ads, REGISTER NOW!
OP
Z

zmotorsports

ALLIANCE MEMBER
Joined
Oct 20, 2009
Messages
21,441
Location
Northern Utah
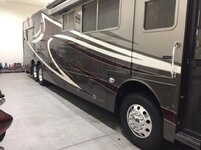
I've been working on installing a FASS (Fuel And Air Separation) system on our 2003 Monaco Dynasty on the Roadmaster S-Series chassis for the past couple of weeks. Unfortunately I've only been able to spend an hour here and there on it so it has drug out much longer than anticipated.

I purchased the FASS Titanium system back in October after returning from a gathering with our FMCA friends in Moab as one of them had just replaced their 2nd CAPS pump on their Cummins ISC. Seeing as the ISC and the ISL share the similar CAPS pumps I became a bit nervous/anxious and wanted to build myself in some additional reliability as my coach is racking up miles and I'm sure there is wear being introduced into the fuel system. The ISC and ISL engines are very reliable and great powerplants for mid to large sized diesel pusher RV's and the only area of concern is the CAPS system.

The CAPS pump system is the Cummins Accumulator Pump System that was a modular design. It was the design that Cummins used between the older mechanical fuel injection system used on the 8.3 prior to 1999 and before the HPCR (High Pressure Common Rail) fuel system that Cummins introduced around late 2003 for the 2004 model engines and is still being used today.

I have kept a very close eye on my fuel system over the years and have never had an issue with air intrusion like many fellow RV'ers but I have had to replace the OEM lift pump twice on our coach in the 14 years we've owned it. The OEM lift pump is not a continuous duty lift pump like found on the smaller Cummins B motors in light duty pickup trucks, rather the lift pumps on the ISC and ISL are merely to prime the system prior to starting. They run for a few seconds to build pressure to supply filtered fuel to the supply side of the injection pump. Once the engine fires, the lift pump shuts off and the injection pump pulls fuel using vacuum from the tank to the primary filter, then the lift pump, through the secondary filter and finally to the CAPS injection pump. As you can see this puts a big responsibility of the low pressure side of the CAPS pump to pull not only the 35+ feet from the tank but also through two filters. Add in wear over time that normally takes place and a gasket at the LPM (Lift Pump Manifold) where the lift pump mounts that is notorious for coming loose and leaking and there is a high probability that air can be introduced into the fuel system wreaking havoc on the CAPS injection pump.

I replaced my OEM lift pump when we first purchased the coach back in 2007 with 55k miles on it due to a slight leak that I detected. This was when ULSD was first being introduced as the CAPS system was not designed to run on ULSD and there was a surge of leaking Cummins lift pumps at the gasket as well as the electrical connectors. The lift pumps were the first to leak and create and air intrusion path to the fuel system, other areas such as connections soon followed to develop leaks. However, being under vacuum these leaks went undetected as they usually didn't leak fuel, they just sucked in air creating excessive wear and causing CAPS pump failures. I had replaced my OEM lift pump with an updated Cummins lift pump that was "redesigned" to cope with the ULSD fuel now being used. The coach ran perfectly until around 2014 when I had a stumble at higher RPM's and after extensive troubleshooting I discovered that the small check valve in the OEM lift pump was slightly stuck preventing flow of higher volume of fuel. I again replaced the lift pump with another OEM Cummins pump. The system has run flawlessly ever since and I keep a close eye on it knowing its possible shortcomings of having to draw fuel from such a distance.

After our friends 2nd CAPS failure and seeing a lot of failures popping up on RV forums I opted to build in a means of supplying constant fuel pressure to the CAPS pump as well as some additional filtering or "polishing" while I am at it. The FASS system seemed to be just what I was looking for. Fellow RV'ers have also used the AirDog system which is slightly different in the way it provides the fuel and I have also heard good things about them but ultimately any positive pressure you can give to the fuel on these CAPS engines is going to help immensely. It should also be worth noting that the engine's ECM is mounted to the side of the CAPS module system and utilizes the fuel to cool the ECM so an insufficient fuel flow can both starve the CAPS pump as well as affect the ECM. I have read failures of both over the last while.

As an FYI, most people seem to be mounting the FASS or AirDog pumps in the engine bays at the rear of these coaches in place of the primary filter. This makes for a very quick and easy installation as you simply remove the primary filter and insert the new fuel pump system in its place and wire it up. Many are still pulling through the OEM lift pump which seems to be working fine. I chose to go a different route and mount my FASS up front right next to the fuel tank behind the steer axle and tie into the existing fuel line feeding back to the engine. I have always been more fond of pushing fluids from the source rather than pulling from a distance but maybe that's just from my industrial maintenance background as those who are mounting their pumps in the rear engine bay are working fine without any issues.

I also chose to bypass my OEM lift pump and take it right out of the equation altogether. By doing so I did need to install a "dummy" relay to fool the ECM into thinking the OEM lift pump is still part of the system and avoid throwing any diagnostic trouble codes. The process I chose created a few hurdles but nothing that couldn't be overcome. Like most any mods or repairs on these large coaches, access is the biggest obstacle. Getting to the OEM lift pump to tap into the wiring and disconnect fuel lines took the most time. I also had to drop the starter motor for access which added some time but was well worth it terms of gaining access to perform a nice clean modification that looks as close to OE as possible.

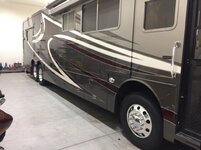
Follow along as I try to document the installation of a FASS fuel pump into our 40' Monaco coach. Prior to beginning I wanted to get some jackstands under the coach and create a bit more space to crawl around.
d201829a71190e8767904edb7e6f480d.jpg

Here is the system I went with. The FASS Titanium TS-D08-165G. Also some assorted NPT to JIC adapters & fittings.
f12f67a00433e06c56f26913dc7b7eba.jpg

47fa7ef307ec8bb06c9826efef51c2b9.jpg

0800c8fa02a4db9e9be7ad883f702f61.jpg

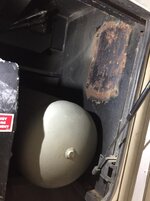
Mounting the pump and filter assembly was the first item to address as space above the fuel tank was not adequate. The surge tank for our Aqua-Hot system also resided right behind the passenger steer tire in the fuel tank bay so after much deliberating I opted to relocate the Aqua-Hot surge tank and mount my FASS assembly in its place.

Aqua-Hot surge tank removed.
18fe0bfc1a3b0423a34744b395e9cb9d.jpg

Area sanded with a DA and repainted with some extreme duty satin black paint.
58f46e41b704cb4e7a0abfb4bc81e705.jpg

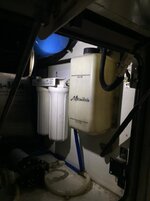
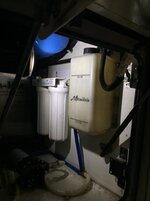
Aqua-Hot surge tank relocated nearer to the Aqua-Hot unit after moving the primary and secondary water filters inboard about 2 inches. FYI, this is where the surge tank is mounted on the Executive and Signature models but their storage bays are slightly larger than on the Dynasty model.
b6abe6dcdab57d7a529736a616275ae1.jpg

Stay tuned for much more of the installation....
 

Attachments

  • d201829a71190e8767904edb7e6f480d.jpg
    d201829a71190e8767904edb7e6f480d.jpg
    74.4 KB · Views: 1
  • f12f67a00433e06c56f26913dc7b7eba.jpg
    f12f67a00433e06c56f26913dc7b7eba.jpg
    67.1 KB · Views: 0
  • 0800c8fa02a4db9e9be7ad883f702f61.jpg
    0800c8fa02a4db9e9be7ad883f702f61.jpg
    94.6 KB · Views: 0
  • 18fe0bfc1a3b0423a34744b395e9cb9d.jpg
    18fe0bfc1a3b0423a34744b395e9cb9d.jpg
    70.9 KB · Views: 0
  • 58f46e41b704cb4e7a0abfb4bc81e705.jpg
    58f46e41b704cb4e7a0abfb4bc81e705.jpg
    49 KB · Views: 0
  • b6abe6dcdab57d7a529736a616275ae1.jpg
    b6abe6dcdab57d7a529736a616275ae1.jpg
    49 KB · Views: 0
  • 47fa7ef307ec8bb06c9826efef51c2b9.jpg
    47fa7ef307ec8bb06c9826efef51c2b9.jpg
    104 KB · Views: 0
Last edited:
OP
Z

zmotorsports

ALLIANCE MEMBER
Joined
Oct 20, 2009
Messages
21,441
Location
Northern Utah
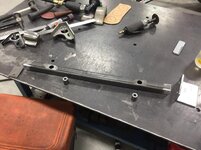
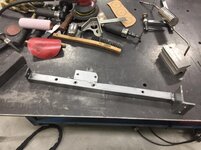
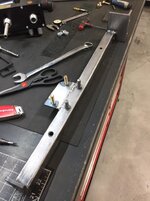
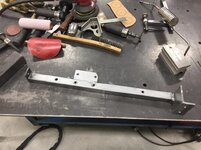
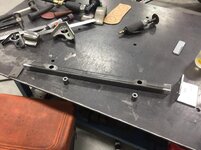
Next was to design and build the mounting bracketry for the FASS pump and filter assembly. I don’t want to merely bolt to the approx. 12-gage steel sheeting at the front of the fuel tank bay. Partially because of support but also I didn’t want to create a “tinny” sound from the pump being mounted to thin sheet metal.

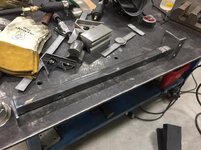
I decided to build a brace spanning across from the main chassis rail to the outer structural support then just tie into the sheet metal for extra support.

I found a scrap piece of 1.250” x .188” wall square tubing that was about the perfect length.
02e3f0f7c972528ff10997ee74f0a5be.jpg

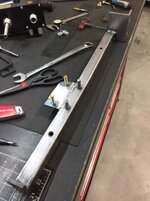
I don’t like bolting through square tubing without spacers to prevent crushing. In this relatively thick walled tubing I could have been fine but overkill seems to be my theme on projects.
5105c2c039ae0023ef5aa615b4e99f03.jpg

a95cda6174f06860d7439c7bc1e3c572.jpg

522c2dcb2475a48f7f88a80e38fd8362.jpg

Next was to weld the ends that would tie into the chassis rail and outer structure.
31dc61f239b95c812563adbdcb063443.jpg

89682c7d71e3799bce3da5d5c6b22b9a.jpg

Test fit to mark pump placement on the bracket.
3373a8fd8bfe1eebba3bf1b103eff4ce.jpg

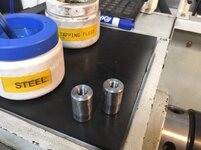
Machined a couple of threaded bosses for the pump mount.
8c39e5c84c884e58d4ae84935bd1a855.jpg

e81c0204edcee61fee3d0d68d3e30e0a.jpg

c4d1613875a7fd61ca48f6cfb12be0a9.jpg

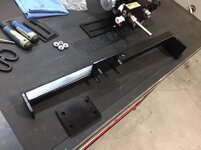
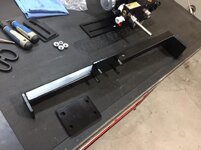
Mounting bracket nearly completed and prepped for paint.
1f0e5f397a3248ca93e40eb9dd92959d.jpg

ff7295356f2a988994c1729fd21c6456.jpg

8bf2758ee833c36035d95a28aaa7e887.jpg

Corresponding mounting plate being drilled with the same bolt pattern where a rubber isolator will be sandwiched between the pump and mounting bracket.
155300a3f2d31f9e7cba5bb59ad2bf8e.jpg

Painted and ready for final installation.
a378b2b1d975ceda439098e67d62f184.jpg

Bracket installed.
8d35f4cc1ab0631ff997cfcaa2408f95.jpg

More to follow.....
 

Attachments

  • 02e3f0f7c972528ff10997ee74f0a5be.jpg
    02e3f0f7c972528ff10997ee74f0a5be.jpg
    86 KB · Views: 1
  • 155300a3f2d31f9e7cba5bb59ad2bf8e.jpg
    155300a3f2d31f9e7cba5bb59ad2bf8e.jpg
    83.8 KB · Views: 0
  • 8bf2758ee833c36035d95a28aaa7e887.jpg
    8bf2758ee833c36035d95a28aaa7e887.jpg
    97 KB · Views: 0
  • ff7295356f2a988994c1729fd21c6456.jpg
    ff7295356f2a988994c1729fd21c6456.jpg
    98.9 KB · Views: 0
  • c4d1613875a7fd61ca48f6cfb12be0a9.jpg
    c4d1613875a7fd61ca48f6cfb12be0a9.jpg
    106.6 KB · Views: 0
  • 5105c2c039ae0023ef5aa615b4e99f03.jpg
    5105c2c039ae0023ef5aa615b4e99f03.jpg
    65.9 KB · Views: 0
  • e81c0204edcee61fee3d0d68d3e30e0a.jpg
    e81c0204edcee61fee3d0d68d3e30e0a.jpg
    102.8 KB · Views: 0
  • 8c39e5c84c884e58d4ae84935bd1a855.jpg
    8c39e5c84c884e58d4ae84935bd1a855.jpg
    74.9 KB · Views: 0
  • 3373a8fd8bfe1eebba3bf1b103eff4ce.jpg
    3373a8fd8bfe1eebba3bf1b103eff4ce.jpg
    48.3 KB · Views: 0
  • 89682c7d71e3799bce3da5d5c6b22b9a.jpg
    89682c7d71e3799bce3da5d5c6b22b9a.jpg
    101.4 KB · Views: 0
  • 31dc61f239b95c812563adbdcb063443.jpg
    31dc61f239b95c812563adbdcb063443.jpg
    80.7 KB · Views: 0
  • 522c2dcb2475a48f7f88a80e38fd8362.jpg
    522c2dcb2475a48f7f88a80e38fd8362.jpg
    76 KB · Views: 0
  • a95cda6174f06860d7439c7bc1e3c572.jpg
    a95cda6174f06860d7439c7bc1e3c572.jpg
    100.7 KB · Views: 0
  • a378b2b1d975ceda439098e67d62f184.jpg
    a378b2b1d975ceda439098e67d62f184.jpg
    93.3 KB · Views: 0
  • 8d35f4cc1ab0631ff997cfcaa2408f95.jpg
    8d35f4cc1ab0631ff997cfcaa2408f95.jpg
    53.2 KB · Views: 0
  • 1f0e5f397a3248ca93e40eb9dd92959d.jpg
    1f0e5f397a3248ca93e40eb9dd92959d.jpg
    99.1 KB · Views: 0
Last edited:
OP
Z

zmotorsports

ALLIANCE MEMBER
Joined
Oct 20, 2009
Messages
21,441
Location
Northern Utah
Prepping the pump by installing fittings.

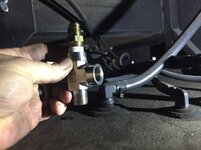
1/2” NPT to a -10 JIC elbow. This will be the supply from the tank.
794296dafdb635db6805b24771193863.jpg

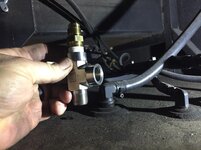
1/2” NPT to -10 JIC straight (black fitting) for the pressurized and filtered fuel leaving the pump manifold. The silver fitting is a 1/2” NPT to a -8 JIC which is the FASS return to the tank. This will run to a bung in the opposite side of the tank.
3d2ffc877b00a45b0c8dd9ee26ce86dd.jpg

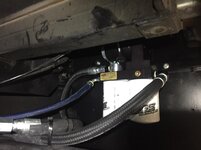
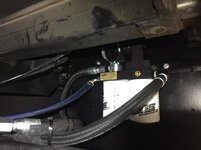
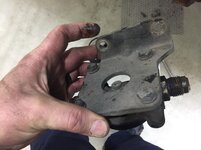
Pump and manifold assembly fastened to the mounting bracket.
6b24ed0e606f1033a7d173575035f178.jpg

04069d895426db37570877b8fa22d516.jpg

This “T” will be where the return line connects.
bb432cd104ebca03540ed5f525bdd945.jpg

I opted to cover the return line with some abrasion covering to provide a bit more protection to the hose as well as to hide the bright blue hose and make it appear more OE looking. The best mods are hidden in plain sight.
f45b5822cb273a45bfeae240e2cb5fd2.jpg

Return line completed.
f086155cfe1a2183a1f715bc68882616.jpg

Return line installed and connected at the driver’s side of the tank and to the FASS manifold assembly.
4bedf225bdd647fc9ad57b79239ef99c.jpg

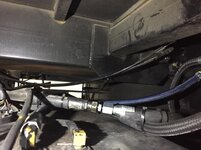
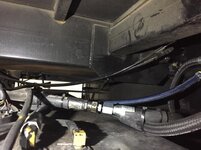
I had a couple of new 5/8” fuel lines made up with -10 female JIC connectors crimped on at my local hose supply house. One hose was 32” in length and went from the FASS outlet to the original hose feeding back to the rear of the coach. I remove the original hose from the tank and joined them with a -10 JIC male to male union. I then connected the 40” hose from the tank port to the inlet side of the FASS manifold.
ee39af2f7661dc1edef1c967da5d326e.jpg

Hoses done and filters installed. These will be easily accessed for filter servicing.
ad126d5b2d18660e568fe442f35a58c6.jpg

More to follow.....
 

Attachments

  • 6b24ed0e606f1033a7d173575035f178.jpg
    6b24ed0e606f1033a7d173575035f178.jpg
    54.6 KB · Views: 0
  • 794296dafdb635db6805b24771193863.jpg
    794296dafdb635db6805b24771193863.jpg
    92.3 KB · Views: 0
  • 3d2ffc877b00a45b0c8dd9ee26ce86dd.jpg
    3d2ffc877b00a45b0c8dd9ee26ce86dd.jpg
    98.6 KB · Views: 0
  • 04069d895426db37570877b8fa22d516.jpg
    04069d895426db37570877b8fa22d516.jpg
    61.6 KB · Views: 0
  • ad126d5b2d18660e568fe442f35a58c6.jpg
    ad126d5b2d18660e568fe442f35a58c6.jpg
    62.2 KB · Views: 0
  • ee39af2f7661dc1edef1c967da5d326e.jpg
    ee39af2f7661dc1edef1c967da5d326e.jpg
    88.5 KB · Views: 0
  • 4bedf225bdd647fc9ad57b79239ef99c.jpg
    4bedf225bdd647fc9ad57b79239ef99c.jpg
    76.2 KB · Views: 0
  • f086155cfe1a2183a1f715bc68882616.jpg
    f086155cfe1a2183a1f715bc68882616.jpg
    55.2 KB · Views: 0
  • f45b5822cb273a45bfeae240e2cb5fd2.jpg
    f45b5822cb273a45bfeae240e2cb5fd2.jpg
    70.9 KB · Views: 0
  • bb432cd104ebca03540ed5f525bdd945.jpg
    bb432cd104ebca03540ed5f525bdd945.jpg
    85.2 KB · Views: 0
Last edited:
OP
Z

zmotorsports

ALLIANCE MEMBER
Joined
Oct 20, 2009
Messages
21,441
Location
Northern Utah
Moving to the rear engine bay.

Seeing as how access to my original secondary filter was limited, I opted to remove my primary filter and relocate my old secondary filter to its location. This will provide a third filter in the fuel system and just before the CAPS pump. Probably overkill.

This is also where I deviated from most other people’s installation. I identified the hose on the right in the photo as the original feed from the tank. This is now the supply hose from the FASS pump assembly.

The hose on the left in the photo used to go from the primary filter to the OEM lift pump. I chose to remove the hose at the lift pump and connect it directly to the CAPS pump inlet. This allowed me to remove the other hoses completely from the coach and thus bypassing the OEM lift pump.
7eac56cd02a3d6cf3d0d941da88a400b.jpg

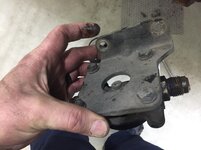
Original secondary filter head and mount which will be mounted under the left rear run box in place of the primary filter.
c9cb5923ad8a9b97e51dd6ba12082098.jpg

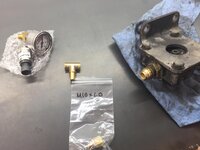
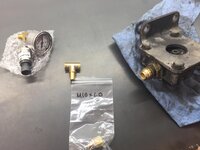
The filter head has a metric plug at the top. I purchased a 10mm x 1.0 to 1/8” NPT adapter and a 1/8” NPT “T” fitting.
41ecba776f76d5db35c2cfa523b6fcb3.jpg

221750ba505bcf18a9f51f4a778177ac.jpg

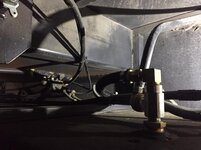
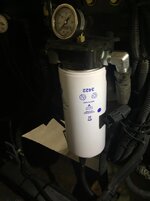
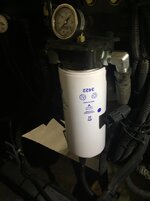
Filter head installed. This will be filter #3 in the system. I also installed a liquid filled 1.5” diameter fuel pressure gauge and a sending unit that will support a cockpit mounted fuel pressure gauge. This pressure will represent what is being seen at the CAPS pump and provide me with data to know what my pressure is at load as well as monitor when my filters will be in need of servicing.
a1329a8abd3618ea5446ac5bbb7c9b28.jpg

Hoses connected.
b4c1b170114683d81a9c61601258866c.jpg

Filter installed.
f61fbfc4be48e4397c04d23111173aa7.jpg

WIF (Water In Fuel) sensor wire extended, covered in convoluted casing to match OEM wiring and connected to the sensor at the bottom of the filter.
e65cff22d17c37c0aff34c6bce90ae77.jpg

More to follow......
 

Attachments

  • e65cff22d17c37c0aff34c6bce90ae77.jpg
    e65cff22d17c37c0aff34c6bce90ae77.jpg
    47.9 KB · Views: 0
  • f61fbfc4be48e4397c04d23111173aa7.jpg
    f61fbfc4be48e4397c04d23111173aa7.jpg
    72 KB · Views: 0
  • b4c1b170114683d81a9c61601258866c.jpg
    b4c1b170114683d81a9c61601258866c.jpg
    89.7 KB · Views: 0
  • a1329a8abd3618ea5446ac5bbb7c9b28.jpg
    a1329a8abd3618ea5446ac5bbb7c9b28.jpg
    70.9 KB · Views: 0
  • 221750ba505bcf18a9f51f4a778177ac.jpg
    221750ba505bcf18a9f51f4a778177ac.jpg
    107 KB · Views: 0
  • 41ecba776f76d5db35c2cfa523b6fcb3.jpg
    41ecba776f76d5db35c2cfa523b6fcb3.jpg
    68.2 KB · Views: 0
  • c9cb5923ad8a9b97e51dd6ba12082098.jpg
    c9cb5923ad8a9b97e51dd6ba12082098.jpg
    63.6 KB · Views: 0
  • 7eac56cd02a3d6cf3d0d941da88a400b.jpg
    7eac56cd02a3d6cf3d0d941da88a400b.jpg
    73.3 KB · Views: 0
Last edited:
OP
Z

zmotorsports

ALLIANCE MEMBER
Joined
Oct 20, 2009
Messages
21,441
Location
Northern Utah
Next was to bypass the OEM lift pump.

I removed the hoses and capped off the inlet and outlet of the LPM (Lift Pump Manifold) then extended the wiring for the lift pump. The inlet hose going to the OEM lift pump now goes directly to the CAPS inlet. This portion of the entire project was hands down the most difficult part because of how limited the access is to the OEM lift pump.
cf0ef7792a20eea9de02de6386f334dc.jpg

b7339495c8e2e629b2a98ec87cfd13af.jpg

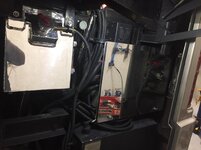
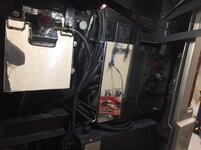
To fool the ECM into thinking the OEM lift pump is still connected a small load must be placed on the circuit. Many are just using an auxiliary relay such as for lighting and putting female connectors on the wires and connecting the relay then zip-tying the relay to the wiring harness near the OEM lift pump. This works perfectly but in the event that the relay ever fails it will require squeezing back into the area where the OEM lift pump resides and not easily accessed on our coach. I chose to extend the wiring in abrasion covering back to the right rear run panel and place the labeled relay inside of the enclosure.

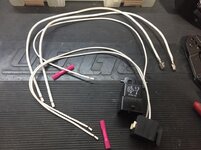
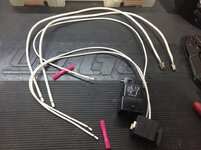
I also prefer to use OE style connectors when possible so I spent a few bucks more and purchased a relay and wiring harness as an assembly. This is the NAPA relay made by Echlin that I used.
7b81fc7db276df72b00a76a31fb33578.jpg

Seeing as how there is no load on the relay and I only needed the control side I removed the non needed wires altogether. I kept the wires going to pins 85 and 86 which are the coil in the relay.
3f5a4b9c78a2ba2a492ab934b476f34f.jpg

15fed26b4eb7d1e414a92bc9c226f9a2.jpg

Labeled the relay.
2c4c3b061f33888bee7f84987a727447.jpg

Mounted the relay.
6d0f6cfd3f5b5afa93b68a060b15d218.jpg

b764c3472820578928053419a760fab4.jpg

Reinstalled the cover back on the right rear run box.
7b9227d0c566722c027276dfef25abe2.jpg

That is as far as I’ve made it so far. All that is left is the wiring to the FASS pump and she’s ready to fire.

Thanks for looking.
 

Attachments

  • 15fed26b4eb7d1e414a92bc9c226f9a2.jpg
    15fed26b4eb7d1e414a92bc9c226f9a2.jpg
    99.2 KB · Views: 0
  • cf0ef7792a20eea9de02de6386f334dc.jpg
    cf0ef7792a20eea9de02de6386f334dc.jpg
    124.4 KB · Views: 0
  • b764c3472820578928053419a760fab4.jpg
    b764c3472820578928053419a760fab4.jpg
    78.2 KB · Views: 0
  • 7b9227d0c566722c027276dfef25abe2.jpg
    7b9227d0c566722c027276dfef25abe2.jpg
    73.4 KB · Views: 0
  • 6d0f6cfd3f5b5afa93b68a060b15d218.jpg
    6d0f6cfd3f5b5afa93b68a060b15d218.jpg
    85.7 KB · Views: 0
  • 2c4c3b061f33888bee7f84987a727447.jpg
    2c4c3b061f33888bee7f84987a727447.jpg
    58.3 KB · Views: 0
  • 3f5a4b9c78a2ba2a492ab934b476f34f.jpg
    3f5a4b9c78a2ba2a492ab934b476f34f.jpg
    106.1 KB · Views: 0
  • 7b81fc7db276df72b00a76a31fb33578.jpg
    7b81fc7db276df72b00a76a31fb33578.jpg
    70.5 KB · Views: 0
  • b7339495c8e2e629b2a98ec87cfd13af.jpg
    b7339495c8e2e629b2a98ec87cfd13af.jpg
    98.1 KB · Views: 0
Last edited:

Graham08

Well-known member
Joined
Dec 10, 2007
Messages
713
Location
Iron Station, NC
Nice work, Mike! I will never own a coach...the thought of having all the problems of a house and a truck rolled into one unit is overwhelming. You have my respect for staying on top of it with your level of detail.
 

OutlawDrifter

Well-known member
Joined
Jan 20, 2015
Messages
3,895
Location
KS
Mike, great write up!

ULSD is garbage, that is my stand on that situation.

I'm also in total agreement with pushing the fuel as opposed to pulling it. Your pump will not only last longer, but won't work as hard on initial prime each time you cold start.

The FASS stuff seems to be a great purchase, I've never used FASS(but have heard a lot of good things) or Airdog, my nephew ran an Airdog system on his 24V Cummins that was cranked way up.

I do not envy working in that cramped space, and now appreciate the long hood and easy access our W900L Kenworth's had even more!!
 
OP
Z

zmotorsports

ALLIANCE MEMBER
Joined
Oct 20, 2009
Messages
21,441
Location
Northern Utah
Nice work, Mike! I will never own a coach...the thought of having all the problems of a house and a truck rolled into one unit is overwhelming. You have my respect for staying on top of it with your level of detail.

Thanks Graham. I wouldn't let a little bit of work and acquiring of knowledge keep you from owning an RV, especially with your racing hobby. The two pretty much go hand in hand.

We bought our first motorhome to support our racing and then it turned into an obsession and passion of ours. There's nothing like traveling through these small 35 MPH towns across this great country and seeing them through the windshield.

Breaking down to this day is always my biggest fear when traveling but I refuse to let that fear stop me from enjoying the lifestyle.

I would encourage you to look at the positive aspects of RV ownership and not just the downsides. Although they are money pits.;)

I appreciate the comments and for following along Graham.
 
OP
Z

zmotorsports

ALLIANCE MEMBER
Joined
Oct 20, 2009
Messages
21,441
Location
Northern Utah
Mike, great write up!

ULSD is garbage, that is my stand on that situation.

I'm also in total agreement with pushing the fuel as opposed to pulling it. Your pump will not only last longer, but won't work as hard on initial prime each time you cold start.

The FASS stuff seems to be a great purchase, I've never used FASS(but have heard a lot of good things) or Airdog, my nephew ran an Airdog system on his 24V Cummins that was cranked way up.

I do not envy working in that cramped space, and now appreciate the long hood and easy access our W900L Kenworth's had even more!!

Thanks Marc, I appreciate the comments. I agree about the ULSD but unfortunately we have no other choice but to just deal with it and find ways to prolong the life of our rigs in spite of it.

Thanks for stopping by and checking out my latest project Marc.
 

bggrnchvy

Well-known member
Joined
Nov 14, 2011
Messages
589
Location
Pleasant Hill, CA
Pressure transducer to the CAPS pump is intelligent, I did the same on my Cummins powered Dodge to my CP3. With the extra filters you never quite 'know' when they need replacement without it. The pressure can be ok at idle (when you would look at an analogue gauge under hood), but quickly head to 0psi under heavy load. Smart.

The whole install is very clean, nicely done. I like the hose wrap and the crimp rings, simple stuff to really nail the finish.
 
OP
Z

zmotorsports

ALLIANCE MEMBER
Joined
Oct 20, 2009
Messages
21,441
Location
Northern Utah
Any plans to lit FASS on you and your sons Duramax trucks?

Yes. We have one sitting on the bench for my son's LB7 but haven't had time to install it. I bought it back in October when I bought the one for the coach.

Sometime in the near future I will put one on my 2006 Duramax as well. Just crazy busy the past several months and to be honest, I'm losing steam and ready to start traveling, doing some yard work and relaxing.
 
OP
Z

zmotorsports

ALLIANCE MEMBER
Joined
Oct 20, 2009
Messages
21,441
Location
Northern Utah
Pressure transducer to the CAPS pump is intelligent, I did the same on my Cummins powered Dodge to my CP3. With the extra filters you never quite 'know' when they need replacement without it. The pressure can be ok at idle (when you would look at an analogue gauge under hood), but quickly head to 0psi under heavy load. Smart.

The whole install is very clean, nicely done. I like the hose wrap and the crimp rings, simple stuff to really nail the finish.

Thank you. I try to pride myself performing mods to OE level. I really think mods that are hidden in plain site speak volumes as to the workmanship and skills of the mechanic. I love seeing all of the little details in people's work on their projects and how the devil is in the details.

I sure hope the next owner of this coach truly appreciates everything that has gone into keeping it in mint condition plus all of the upgrades/mods.
 

gorilla

Well-known member
Joined
Dec 13, 2007
Messages
1,655
it's nice to know that I'm not the only guy who writes notes on the mill vice.
 

LXCam

ALLIANCE MEMBER
Joined
Apr 23, 2013
Messages
19,200
Location
AZ
Well Mike I'm mildly disappointed. I can't believe you didn't put pressure sending units pre and post filter so you monitor the pressure drop for determination of filter change verses just a plain ole millage rule of thumb. Shame on you!.


Haha, another great project my friend and as always - well thought out and very impressive.
 

casmurbax

Well-known member
Joined
Sep 25, 2012
Messages
2,760
Location
Wilton, NY
Mike, Impressive detail to your thoughts, design and execution as always.

How the heck did you figure this out: "I discovered that the small check valve in the OEM lift pump was slightly stuck preventing flow of higher volume of fuel."

John
 
OP
Z

zmotorsports

ALLIANCE MEMBER
Joined
Oct 20, 2009
Messages
21,441
Location
Northern Utah
it's nice to know that I'm not the only guy who writes notes on the mill vice.

Yeah, had a guy at work who did that many moons ago and I guess I started doing it and it just stuck. He however, would usually not erase them though.:(

For a number or two it works great but anything more than that I use a notepad to keep everything straight in my head.


Well Mike I'm mildly disappointed. I can't believe you didn't put pressure sending units pre and post filter so you monitor the pressure drop for determination of filter change verses just a plain ole millage rule of thumb. Shame on you!.


Haha, another great project my friend and as always - well thought out and very impressive.

Sorry to disappoint you again Cam. Just following the KISS principle and if I see pressure drop either way I know there's an issue. Either with the pump itself or restricted filter(s).


Mike,
Great job on the fuel system upgrade. You can add me to the list of people that are learning from the project details you are sharing!

Andrew

Thank you Andrew. I appreciate the comments and for following along.
 
OP
Z

zmotorsports

ALLIANCE MEMBER
Joined
Oct 20, 2009
Messages
21,441
Location
Northern Utah
Mike, Impressive detail to your thoughts, design and execution as always.

How the heck did you figure this out: "I discovered that the small check valve in the OEM lift pump was slightly stuck preventing flow of higher volume of fuel."

John

I'm not gonna lie John, that one flat kicked my ****.

We were on our way to West Yellowstone and climbing the mountain passes on Highway 20 from Ashton up towards West Yellowstone when I was losing power on the grades. I immediately thought plugged filter(s) so in the campground I threw my spare primary and secondary filters on for the drive back home. I kept the old filters so I could cut them apart upon arriving home. During the drive home the symptom persisted so I knew it was something other than filters. I could back out of the throttle and the condition would clear up so I assumed it was a fuel starvation issue but it wasn't bad enough to get a CEL on the dash.

Upon arriving home I cut the filters apart and they were in really good condition still. I remembered my uncle had an issue on his 1989 Beaver Marquis that was similar but it would be bad enough to stall the engine. His turned out to be those little foil seals from fuel additives that had gotten into his suction line from the previous owner. I started disconnecting fuel lines on mine to determine if I had a restriction. I also learned a lot about the fuel system back then.

I detected free flowing in either direction of the OEM lift pump. I also knew what a PITA it was to change the OEM lift pump so I was hoping it was anything but that. Ultimately I decided to quit waffling and just remove the lift pump so I could examine it on the bench. Once I got it on the bench put a hose in a jug of fuel and ran it off a battery. I got a very small stream of fuel through it so I reduced some air pressure and decided to see if something was lodged in the lift pump manifold. I knew there was a check valve in the manifold based off of the diagrams and as I applied air pressure I immediately heard a pop. I tried running fuel through it again and everything started flowing at full volume.

I didn't want to put that pump back on due to me not trusting it so I bought another new Cummins OEM lift pump and installed it. The engine has run perfectly ever since. That was a tricky one to diagnose as well as messy and time consuming. Not to mention I had to do that diagnosis and repair outside as that was at our old home and the coach wouldn't fit in the shop.
 
To avoid these ads, REGISTER NOW!

Bigblue&Goldie

Well-known member
Joined
Mar 12, 2009
Messages
10,714
Location
AZ
Great job Mike! My friends dad has the same Cummins in a coach that is exhibiting the same issues you describe. The dealer has changed the injectors and few other things, but the problem is still there. I bet your upgrades might solve his problems.
 
OP
Z

zmotorsports

ALLIANCE MEMBER
Joined
Oct 20, 2009
Messages
21,441
Location
Northern Utah
Great job Mike! My friends dad has the same Cummins in a coach that is exhibiting the same issues you describe. The dealer has changed the injectors and few other things, but the problem is still there. I bet your upgrades might solve his problems.

Thanks Ryan. It would definitely be worth mentioning to him. Issues with coaches of this vintage seem to be showing up more and more on RV forums that are exhibiting various symptoms.

I was not experiencing any ill symptoms but my main goal for this modification was to avoid having such issues by doing this as a preventative measure.
 

casmurbax

Well-known member
Joined
Sep 25, 2012
Messages
2,760
Location
Wilton, NY
Mike, thank you for sharing that diagnosis with me. That had to be quite concerning having it happen on the way back home as well...
 
OP
Z

zmotorsports

ALLIANCE MEMBER
Joined
Oct 20, 2009
Messages
21,441
Location
Northern Utah
Mike, thank you for sharing that diagnosis with me. That had to be quite concerning having it happen on the way back home as well...

Yes. Frustrating to say the least. When it happened on the way to West Yellowstone I told the wife I must have a filter needing to be replaced and even mentioned I didn't want to starve that CAPS pump so I decided to change the filters at camp. I told her we must have gotten some bad fuel or something because I kept a close eye on filter intervals.

I was sick to my stomach when it happened on the way back home.
 

4 FN 27

ALLIANCE MEMBER
Joined
Oct 19, 2015
Messages
4,635
Location
Minnesnowta
Very Nice Mike!!!

My respect...working on a Motorhome can be a pain!!!

I had an 2004 Revolution by Fleetwood with a Cummins 350 HP. I had the same kind of issue coming back from Indy. Start pulling a hill and it was like somebody shut the Motor off for a slit second over and over.

Ended up figuring out the main line from the tank had a very small hole in to and it would cavitate. Since it was under warranty Freightliner took care of the issue.

Hope this works and solves the issue.

PS you do nice work!!! I despise hack jobs.
 
OP
Z

zmotorsports

ALLIANCE MEMBER
Joined
Oct 20, 2009
Messages
21,441
Location
Northern Utah
Very Nice Mike!!!

My respect...working on a Motorhome can be a pain!!!

I had an 2004 Revolution by Fleetwood with a Cummins 350 HP. I had the same kind of issue coming back from Indy. Start pulling a hill and it was like somebody shut the Motor off for a slit second over and over.

Ended up figuring out the main line from the tank had a very small hole in to and it would cavitate. Since it was under warranty Freightliner took care of the issue.

Hope this works and solves the issue.

PS you do nice work!!! I despise hack jobs.

Thanks Pat. Just to clarify though, I was not having any issues with our coach, it's been running flawlessly. This is just a preventive measure as there seems to have been a rash of CAPS failures lately among the RV crowds. On the other side there are probably hundreds of thousands of these in the OEM configuration between RV's and OTR trucks that haven't experienced any adverse symptoms so maybe this modification may have been unwarranted. Oh well, peace of mind has a price as well.:D
 

Graham08

Well-known member
Joined
Dec 10, 2007
Messages
713
Location
Iron Station, NC
Thanks Graham. I wouldn't let a little bit of work and acquiring of knowledge keep you from owning an RV, especially with your racing hobby. The two pretty much go hand in hand.

Thanks, Mike. My racing days are behind me...I get enough of that at my day job. I sold all of the sprint car related stuff at the end of 2019 to a fellow in Indiana who has raced my last creation a few times, including the 2020 Little 500.
 
OP
Z

zmotorsports

ALLIANCE MEMBER
Joined
Oct 20, 2009
Messages
21,441
Location
Northern Utah
Thanks, Mike. My racing days are behind me...I get enough of that at my day job. I sold all of the sprint car related stuff at the end of 2019 to a fellow in Indiana who has raced my last creation a few times, including the 2020 Little 500.

WOW Graham. I guess I didn't realize you got out of racing. I'm sure it wasn't an easy decision.

I know when I sold our race car, spare parts, etc. in 2006 it was a tough decision. I didn't give it up completely though as my son and I still sand drag raced for a bit and snowmobiled but in 2012 we made the decision to sell everything and just keep the Jeep, coach and Harley. I think selling the enclosed race trailer was the hardest thing for me because it pretty much signified that I would not be returning to racing. I don't know what the turning point for you was but for me it was looking towards retirement and having a deeper desire to have wealth in my later years and into retirement than a fast car.

I knew racing was expensive but I don't think I even realized what a drain it was on the bank account until after I gave it up. I found money that I didn't know existed, time I didn't know I had and the stress level dropped significantly.

Look on the bright side, now you have more time and money to enjoy RV'ing.:D
 

4 FN 27

ALLIANCE MEMBER
Joined
Oct 19, 2015
Messages
4,635
Location
Minnesnowta
Thanks Pat. Just to clarify though, I was not having any issues with our coach, it's been running flawlessly. This is just a preventive measure as there seems to have been a rash of CAPS failures lately among the RV crowds. On the other side there are probably hundreds of thousands of these in the OEM configuration between RV's and OTR trucks that haven't experienced any adverse symptoms so maybe this modification may have been unwarranted. Oh well, peace of mind has a price as well.:D

Thank you for the clarification.

Reading and comprehension are not my strong suit.

Piece of mind, especially miles form home is worth every penny. In the next couple of weeks I have to zip down to TN and drive a Tandem Monaco with a 32 foot Stacker Trailer and 2 cars on board to MN. Not my rig...have a friend who is sick that needs to get it sold but cannot work on it. I am a little concerned thus no peace of mind until I cross the I-94 Bridge in Hudson, WI.

He said it just needs to be cleaned which I believe is the case since he, like you is very meticulous about maintenance. When I get there I need to replace a Hydraulic Motor for a Side and adjust the Brakes on the Trailer...and I hope that is it.
 
OP
Z

zmotorsports

ALLIANCE MEMBER
Joined
Oct 20, 2009
Messages
21,441
Location
Northern Utah
Thank you for the clarification.

Reading and comprehension are not my strong suit.

Piece of mind, especially miles form home is worth every penny. In the next couple of weeks I have to zip down to TN and drive a Tandem Monaco with a 32 foot Stacker Trailer and 2 cars on board to MN. Not my rig...have a friend who is sick that needs to get it sold but cannot work on it. I am a little concerned thus no peace of mind until I cross the I-94 Bridge in Hudson, WI.

He said it just needs to be cleaned which I believe is the case since he, like you is very meticulous about maintenance. When I get there I need to replace a Hydraulic Motor for a Side and adjust the Brakes on the Trailer...and I hope that is it.

Best of luck on your trip Pat. Hope it doesn't turn out to be more work than you bargained for. Those trips to the unknown are stressful. Several years ago I was asked to come to a friends home to help on his coach and I loaded up the Jeep in the trailer and took as many tools as I thought I may need and then some. My biggest fear is I would not have the tools I needed or there would be problems he didn't tell me about and I was unprepared. I stressed the entire drive until I got there and saw what was in store. Turned out to not be nearly as big a job but my wife told me we're not making house calls any more. That was one and done. I don't think I was the most pleasant person leading up to that trip.:dunno:
 
OP
Z

zmotorsports

ALLIANCE MEMBER
Joined
Oct 20, 2009
Messages
21,441
Location
Northern Utah
I was able to spend about an hour on the coach yesterday.

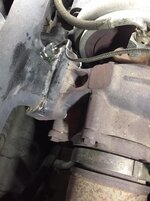
Drilled & tapped the exhaust manifold to accept the K-style pyrometer probe.
c25cf5a8928c8a270574f8901d80449c.jpg

Secured wiring away from the exhaust heat.
3f87d1392be972ed783b1acbe2815b25.jpg

Ran the wiring for the fuel pressure sending unit into the left rear run panel and tie into the wiring in which I run through the chassis and up to the cockpit. Encased it in abrasion coating to appear OE.
ec09ca958725b99570f231cd2e99c055.jpg

96aebca08963d0fb45307ace6334ef20.jpg

Machine a couple of aluminum standoffs to mount the pyrometer extension module.
5ea5152b1b8cf84b8d336814f6bb8e77.jpg

Extension module mounted and wires connected.
10f5e6be9b04539cb3023ded502656dd.jpg

Labeled.
c338ecad780b66f5a901c95236829b3e.jpg

Left rear run box buttoned up and everything at the rear is now completed.
3007a353eddb0a237bd380500bb9b235.jpg

Thanks for looking.
 

Attachments

  • 3007a353eddb0a237bd380500bb9b235.jpg
    3007a353eddb0a237bd380500bb9b235.jpg
    96.1 KB · Views: 0
  • 3f87d1392be972ed783b1acbe2815b25.jpg
    3f87d1392be972ed783b1acbe2815b25.jpg
    68.9 KB · Views: 0
  • c338ecad780b66f5a901c95236829b3e.jpg
    c338ecad780b66f5a901c95236829b3e.jpg
    58.5 KB · Views: 0
  • 10f5e6be9b04539cb3023ded502656dd.jpg
    10f5e6be9b04539cb3023ded502656dd.jpg
    121.8 KB · Views: 0
  • 5ea5152b1b8cf84b8d336814f6bb8e77.jpg
    5ea5152b1b8cf84b8d336814f6bb8e77.jpg
    109.1 KB · Views: 0
  • 96aebca08963d0fb45307ace6334ef20.jpg
    96aebca08963d0fb45307ace6334ef20.jpg
    87.5 KB · Views: 0
  • ec09ca958725b99570f231cd2e99c055.jpg
    ec09ca958725b99570f231cd2e99c055.jpg
    66.3 KB · Views: 0
  • c25cf5a8928c8a270574f8901d80449c.jpg
    c25cf5a8928c8a270574f8901d80449c.jpg
    97.6 KB · Views: 1
Last edited:
OP
Z

zmotorsports

ALLIANCE MEMBER
Joined
Oct 20, 2009
Messages
21,441
Location
Northern Utah
Looks like a nice clean, easy to read gauge.:thumbup:

Yeah, I've used the Z-Series analog gauges from Auto Meter many times now and they may not be all that "fancy" of a gauge but they are easy to read and work well. I have a boost gauge in my dash already that was OEM from Monaco but it is somewhat hard to see due to steering wheel placement. I ordered a Fuel pressure gauge, Boost gauge and a Pyrometer that will go alongside the driver's left knee position for easy viewing. My plan was to just T the new boost gauge in with the OEM boost gauge rather than remove the factory one.

This way one quick glance down to the left of the dash I can view fuel pressure at the CAPS pump, boost and exhaust temperature easily and quickly without really looking away from the frontal view.
 

OutlawDrifter

Well-known member
Joined
Jan 20, 2015
Messages
3,895
Location
KS
Yeah, I've used the Z-Series analog gauges from Auto Meter many times now and they may not be all that "fancy" of a gauge but they are easy to read and work well. I have a boost gauge in my dash already that was OEM from Monaco but it is somewhat hard to see due to steering wheel placement. I ordered a Fuel pressure gauge, Boost gauge and a Pyrometer that will go alongside the driver's left knee position for easy viewing. My plan was to just T the new boost gauge in with the OEM boost gauge rather than remove the factory one.

This way one quick glance down to the left of the dash I can view fuel pressure at the CAPS pump, boost and exhaust temperature easily and quickly without really looking away from the frontal view.

That should work out pretty good, I'd be interested to know what the pyro reads when you start working it in the mountains.
 

casmurbax

Well-known member
Joined
Sep 25, 2012
Messages
2,760
Location
Wilton, NY
Super clean install. Can't even tell the difference from factory or aftermarket install.. Though I think your aftermarket installation is probably better then some factory installs.

Are the gauges installed ?
 
OP
Z

zmotorsports

ALLIANCE MEMBER
Joined
Oct 20, 2009
Messages
21,441
Location
Northern Utah
That should work out pretty good, I'd be interested to know what the pyro reads when you start working it in the mountains.

That is exactly why I'm installing a pyrometer. I've contemplated it for a few years now but on an rv site/forum there have been some comments about in stock configuration some are seeing around 1350+ degrees. I would like to get that down a little IF I am truly running that warm. Only way to know is to get a baseline before I start tweaking. If I am well under that then I'm fine with it but if I am seeing near the same I want to up my boost slightly and see if I can get those exhaust temps down somewhat.
 
OP
Z

zmotorsports

ALLIANCE MEMBER
Joined
Oct 20, 2009
Messages
21,441
Location
Northern Utah
Super clean install. Can't even tell the difference from factory or aftermarket install.. Though I think your aftermarket installation is probably better then some factory installs.

Are the gauges installed ?

Thank you. No the gauges are not installed yet. I have run the wiring from the rear engine bay up to above the front axle. I still need to get the wiring up to the dash. I started fabricating the gauge panel but stopped to install the FASS fuel pump. I hope to have some time within the next week or so to complete the dash panel/pod and complete the gauge wiring.
 
To avoid these ads, REGISTER NOW!
Top Bottom