To avoid these ads, REGISTER NOW!

ZMotorsports Shop Projects 2.0

E12-535iTurbo

Well-known member
Joined
Feb 27, 2014
Messages
492
Location
The Netherlands
Mike, two things:
1) You do all that in an hour? That would be a days work for me.
2) I see you didn't disconnect the turbo from the manifold. How do you make sure no drill shavings mess up your turbo?
 
To avoid these ads, REGISTER NOW!

Mr.zippy

Well-known member
Joined
Apr 27, 2020
Messages
2,221
Location
Wyoming
I really appreciate the time, and photo's you put into your many projects. I learn something from each one of them. I have even been known to check out a couple of your YouTube clips. Thank you!
 
OP
Z

zmotorsports

ALLIANCE MEMBER
Joined
Oct 20, 2009
Messages
21,441
Location
Northern Utah
That wiring job is incredible. Hat off to you, sir

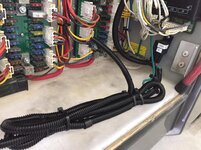
Thank you. I like to try and keep things as OE appearing as possible, especially when tying in wiring from aftermarket mods to a factory loom.


Mike, two things:
1) You do all that in an hour? That would be a days work for me.
2) I see you didn't disconnect the turbo from the manifold. How do you make sure no drill shavings mess up your turbo?

Just the pyrometer and wiring was completed in about an hour. That was the easiest and quickest part of the entire FASS installation however.

No, I did not remove the turbo assembly. I've done quite a few like this and just use a thick grease and drill the hole stepping up in size 3-4 sizes before reaching the required size and clean the bit often. Then I do the same thing with the tap, use a thick grease and clean it a time or two during the tapping process. Lastly I snake a small magnet down into the hole to ensure nothing fell in. As long as you take your time and don't rush the process it is quite easy to do without introducing metal shavings into the exhaust manifold.

I really appreciate the time, and photo's you put into your many projects. I learn something from each one of them. I have even been known to check out a couple of your YouTube clips. Thank you!

Thank you for the kind words. I appreciate that and I am glad you have found the information helpful.
 
OP
Z

zmotorsports

ALLIANCE MEMBER
Joined
Oct 20, 2009
Messages
21,441
Location
Northern Utah
And I thought I was the only one that labeled relays/modules.

Nice work as always Mike!

Thanks Vincent. Yeah, I try to label things as much as I can. Not only for my own benefit but also a future owner. It's also much easier to identify if needed to in a hurry vs. digging through notes.

I think I mentioned this earlier but I sure hope the next owner of this coach truly appreciates everything that has gone into it.
 

Blsmith

Member
Joined
Mar 15, 2021
Messages
10
Location
so cal
I've been reading your thread, there's a lot good info here.

The way you put your jeep and your son's jeep together was great.

Going back to pickup some more ideas.

Thanks
 
OP
Z

zmotorsports

ALLIANCE MEMBER
Joined
Oct 20, 2009
Messages
21,441
Location
Northern Utah
Tonight I finished up my FASS installation in our Monaco Dynasty.

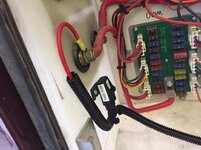
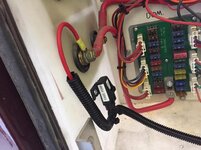
I ran the wiring into the front run box which is on the driver’s side just ahead of the steer axle.

I used the wiring harness that came with the FASS fuel pump and installed the relay on the side of the run box and tapped into an unused “key on” power terminal with a 3 amp fuse.
5f4f442295fd57e97360718735612f0c.jpg

a00544a3fc1c539913c863622a9c6851.jpg

Battery feed side of the relay tapped off power feeding the run box fuse panels through a 10 amp fuse and everything labeled.
34aab97509cc50a2f6635c3873e02ffc.jpg

After double checking the wiring and connections at the run box and at the pump I loosened the secondary filter/water separator at the FASS pump and prepared for priming.

Turned the key on and as soon as the pump tone changed I hurried and tightened the secondary filter. Only had a very small amount seep out before I was able to get it tight.

I could hear bubbles and air being being forced out through the return line and into the fuel tank but the entire system was drained so I figured it would take a minute or so, plus this gave me a chance to check all hose connections as well.

After cycling the key again I cranked it and she fired right up. It stumbled ever so slightly as there was air between the third filter and the CAPS injection pump that had to forced through and returned to the tank but it smoothed right out and idled great.

I let it run for several minutes before shutting down and letting it sit while I swept up and put tools away.

After about fifteen minutes I restarted and it fired right about like it always has but I noticed right away it idled smoother. I just thought maybe it was the placebo affect but my son stopped by and I asked him what he thought. His first comment was “it’s idling smoother”. I then figured maybe it actually is and not just in my head.

All in all a great modification and after a few more items on my gauge panel and wiring I can take her out for a spin.

Thanks for looking.
 

Attachments

  • 5f4f442295fd57e97360718735612f0c.jpg
    5f4f442295fd57e97360718735612f0c.jpg
    111.6 KB · Views: 0
  • 34aab97509cc50a2f6635c3873e02ffc.jpg
    34aab97509cc50a2f6635c3873e02ffc.jpg
    91.2 KB · Views: 1
  • a00544a3fc1c539913c863622a9c6851.jpg
    a00544a3fc1c539913c863622a9c6851.jpg
    115.6 KB · Views: 1
Last edited:
OP
Z

zmotorsports

ALLIANCE MEMBER
Joined
Oct 20, 2009
Messages
21,441
Location
Northern Utah
That install looks terrific, as always.

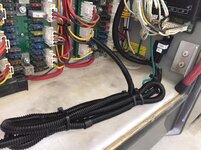
What is with the looped up wire loom in your first picture?

Thanks. The looped wire is the remaining wire loom that came with the FASS pump assembly. I coiled it up for the time being and used an Adel clamp to hold it in place.

I appreciate you following along on my various projects.
 
OP
Z

zmotorsports

ALLIANCE MEMBER
Joined
Oct 20, 2009
Messages
21,441
Location
Northern Utah
Our new Davco Shop Pro fuel priming system arrived at work this morning.

Priming the new DD13’s without this has been a joke. This should allow us to be much more efficient after a normal service or a major repair.

b06df64cdc553745ab181ba323e9663f.jpg
 

Attachments

  • b06df64cdc553745ab181ba323e9663f.jpg
    b06df64cdc553745ab181ba323e9663f.jpg
    87.3 KB · Views: 1

OutlawDrifter

Well-known member
Joined
Jan 20, 2015
Messages
3,895
Location
KS
Can't say as I've had to do that on DD13, but I've primed 3406B & E CATs, Big Cam IV and N14 Cummins, and the 70 Series Detroits....and of course many others in the AG tractor lineup!
 
OP
Z

zmotorsports

ALLIANCE MEMBER
Joined
Oct 20, 2009
Messages
21,441
Location
Northern Utah
Can't say as I've had to do that on DD13, but I've primed 3406B & E CATs, Big Cam IV and N14 Cummins, and the 70 Series Detroits....and of course many others in the AG tractor lineup!

The newer DD13, DD15 and DD16 have a small plunger on the injection pump module that can be a PITA to prime, usually only takes a few hundred pumps.:(

The module also has two filters internally as well as the Davco frame mounted 8-micron filter. This pressurizes the module as well as all three filters to eliminate the manual priming process as well as ensure fuel is immediately availabe at the injection pump to prevent the extended cranking. And the cussing.....

It's pretty slick, quick disconnect for the suction line that gets dropped into the tank, quick disconnect on the pressure hose that gets connected to the OEM connection on the side of the module. Open the ball valves and turn the pump on. Davco rep said only takes about 3-4 minutes to completely prime the entire system for an immediate start.

This can also be used to polish fuel from a contaminated tank, fuel from a shop container or can be used as a transfer pump from truck to truck. I don't know how often we'll use it for anything other than priming after a normal service or a major repair where the head was off or injection system was open but we have the option now.

My old CAT 3208 in our last coach was quite easy to prime with the manual primer. Even with the tank mounted up front after a fuel filter replacement I could usually have it running with only about 20-30 pumps of the primer.
 

OutlawDrifter

Well-known member
Joined
Jan 20, 2015
Messages
3,895
Location
KS
The newer DD13, DD15 and DD16 have a small plunger on the injection pump module that can be a PITA to prime, usually only takes a few hundred pumps.:(

The module also has two filters internally as well as the Davco frame mounted 8-micron filter. This pressurizes the module as well as all three filters to eliminate the manual priming process as well as ensure fuel is immediately availabe at the injection pump to prevent the extended cranking. And the cussing.....

It's pretty slick, quick disconnect for the suction line that gets dropped into the tank, quick disconnect on the pressure hose that gets connected to the OEM connection on the side of the module. Open the ball valves and turn the pump on. Davco rep said only takes about 3-4 minutes to completely prime the entire system for an immediate start.

This can also be used to polish fuel from a contaminated tank, fuel from a shop container or can be used as a transfer pump from truck to truck. I don't know how often we'll use it for anything other than priming after a normal service or a major repair where the head was off or injection system was open but we have the option now.

My old CAT 3208 in our last coach was quite easy to prime with the manual primer. Even with the tank mounted up front after a fuel filter replacement I could usually have it running with only about 20-30 pumps of the primer.

That sounds like a pretty slick tool, anything that helps save time and cussing is worth it!
 

Mark_17

Well-known member
Joined
Jun 27, 2018
Messages
754
Location
NJ
Great install as expected and as usual. If I was ever looking for a used toy or vehicle, I'd be stalking you- waiting for you to put something up for sale lol
 
OP
Z

zmotorsports

ALLIANCE MEMBER
Joined
Oct 20, 2009
Messages
21,441
Location
Northern Utah
Great install as expected and as usual. If I was ever looking for a used toy or vehicle, I'd be stalking you- waiting for you to put something up for sale lol

Thank you, I appreciate the comments. If/when I decide to sell something maybe I should post it here first.:D
 
To avoid these ads, REGISTER NOW!
OP
Z

zmotorsports

ALLIANCE MEMBER
Joined
Oct 20, 2009
Messages
21,441
Location
Northern Utah
Good way to start a bidding war :lol_hitti:thumbup:

I'd be ok with that. I usually take it in the shorts when I sell something because they expect the same price as they can get X, Y or Z locally, even when I try to explain why mine is different and I have all service records and can show them how it has been taken care of.

Maybe that's why I keep things so long.
 
OP
Z

zmotorsports

ALLIANCE MEMBER
Joined
Oct 20, 2009
Messages
21,441
Location
Northern Utah
Is there any aftermarket tuning options for the motor system?


Sent from my iPhone using Tapatalk


There are two companies that I know of that offer performance enhancing tuning for the Cummins ISC and the ISL. One company is merely a signal modifier and the other is a pickyback module that taps into the ECM wiring which also keeps the OE protection systems.

There are a few people that I know of using these on the ISC engines which put them about where the ISL is in terms of HP and torque, slightly higher. I don’t know of anyone personally using one on the ISL. What makes me nervous is that the ISL is already up against the maximum torque input of the Allison MD3060 transmission in my coach so adding another 20% would surpass the Allison spec’s. Even the companies that offer them won’t guarantee the ability to back off before damage to the transmission.

My cousin’s ISC runs well and he has had no issues but it pretty much is rated near my ISL now.

No plans to push it any more than what it’s rated at now. Our coach runs great as is I’m just trying to build in some additional reliability. I don’t really feel like having to remove the transmission and build it so I’ll keep the engine performance where it’s at.
 

bigdave_185

Well-known member
Joined
Feb 14, 2021
Messages
443
Location
Utah
I remember when edge tuned a friends GM top kick as a demo platform, it changed the vehicle upside down! But being as the Allison is maxed I wouldn’t push the envelope either. Clean fuel, clean air and good oil should run great.

Aux oil filter option?


Sent from my iPhone using Tapatalk
 
OP
Z

zmotorsports

ALLIANCE MEMBER
Joined
Oct 20, 2009
Messages
21,441
Location
Northern Utah
I don’t know why my projects seem to go south and cause me more work, frustration and stress.

My wife seems to think it is because I thirst for knowledge so much that I attract issues to have to solve. I can do with less issues.

Now for my dilemma/issue.

Last night when I fired up the coach I detected my fuel pressure was much higher than it should be. It was showing 26.5 PSI when it should be around 16-18 PSI max.
8b1b4c5769788c72df70a457244b2d5f.jpg

I checked the obvious things such as hose routing to make sure no kinks and ensured no tie wraps were too tight and anything else I could think of. I was 110% confident in my hose routing as far as connections and sequence of components and that all hoses were clear of obstructions.

This morning I made a call to FASS tech and the first several things he told me that cause this are tight bends in hoses and debris blocking hoses. I’m sure he hears this all the time but I tried convincing him that I was **** about all of the above.

I then asked him if there is some form of check valve or pressure relief and how the pressure is regulated. He informed me there is a spring and shuttle valve behind the return fitting and that’s how they control output pressure. I said that’s probably where I should start but he was confident it was something I had done during installation.

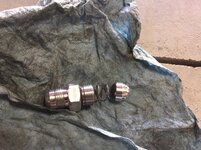
I removed the return hose and then the fitting shown here.
f62b8ec4851dcb27d7000ab3a194e01c.jpg

After removing the fitting and spring I used a mirror to inspect the shuttle valve. After some coercing with a small pick I was able to remove the shuttle valve.
9a21a3080421ce1b33e023602051ee1f.jpg

Fitting, spring and shuttle valve removed and in order. Upon using the fingernail test I detected a very small Knick or burr on the shuttle valve. I ever so slightly kissed the edge with some 400-grit emery paper then cleaned and reinstalled everything and lastly torqued the fitting to 40 ft/lbs.
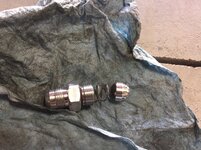
0b21c531771492ed6d8d0d93aa325956.jpg

Reconnected the return line and bled the air again before starting the engine.

Success.
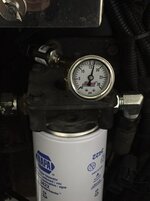
3101951f7886bea57357c574351bc408.jpg

Gauge is rock solid at 16.5 PSI.
a5d374922127765bc95810775bf2b592.jpg

Glad that’s done and I guess I can chalk it up to another “learning experience” as my wife says.


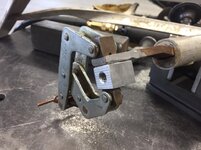
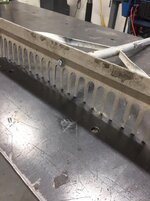
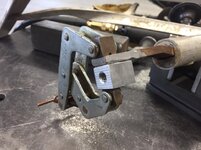
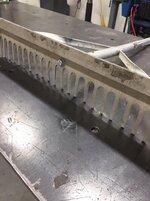
After completing the work on the coach and putting tools away I decided to quickly repair the landscaping rake that a friend dropped off and asked if I could fix it. I told him I thought I could save it.

Someone attempted to repair it once before by half *** welding a wing nut on it and bolting through the tines.
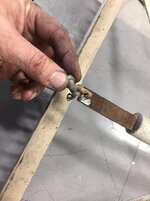
997a130556bf0459d2f5914968b0995e.jpg

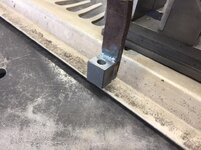
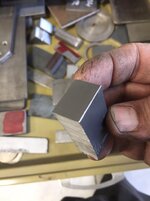
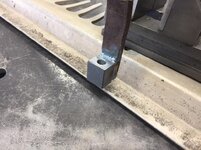
I dug through my scrap and found a piece of 3/4” square that I could cut down and thread.
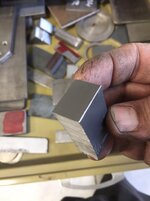
69ca5be30fb55a34185e42b23b15d7d8.jpg

Found center to drill and tap for a 5/16”-16 thread.
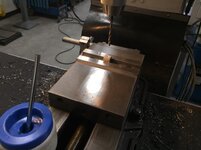
42546375e07253b910c7adb652b8adeb.jpg

9b42e6b000a6f0282397c1dbe15b0261.jpg

Clamped and ready for welding.
df52b0b8f785af82f0006840a00ef74d.jpg

Welding completed.
af6b6a42f88eb0caed8cc33267ae9aad.jpg

Painted.
922ca59188d745bead78a1f0136c468a.jpg

Completed.
16a5ec8b1269f2b8c55e3f9b0788a424.jpg

3ff58bd9fa6003309322bb48fa686317.jpg

Overall a productive night in the shop.
 

Attachments

  • a5d374922127765bc95810775bf2b592.jpg
    a5d374922127765bc95810775bf2b592.jpg
    83.4 KB · Views: 0
  • 997a130556bf0459d2f5914968b0995e.jpg
    997a130556bf0459d2f5914968b0995e.jpg
    74.7 KB · Views: 0
  • 69ca5be30fb55a34185e42b23b15d7d8.jpg
    69ca5be30fb55a34185e42b23b15d7d8.jpg
    64.2 KB · Views: 0
  • 42546375e07253b910c7adb652b8adeb.jpg
    42546375e07253b910c7adb652b8adeb.jpg
    74.8 KB · Views: 0
  • 9b42e6b000a6f0282397c1dbe15b0261.jpg
    9b42e6b000a6f0282397c1dbe15b0261.jpg
    72.9 KB · Views: 0
  • df52b0b8f785af82f0006840a00ef74d.jpg
    df52b0b8f785af82f0006840a00ef74d.jpg
    90.5 KB · Views: 0
  • af6b6a42f88eb0caed8cc33267ae9aad.jpg
    af6b6a42f88eb0caed8cc33267ae9aad.jpg
    116.4 KB · Views: 0
  • 922ca59188d745bead78a1f0136c468a.jpg
    922ca59188d745bead78a1f0136c468a.jpg
    71.2 KB · Views: 0
  • 16a5ec8b1269f2b8c55e3f9b0788a424.jpg
    16a5ec8b1269f2b8c55e3f9b0788a424.jpg
    94.3 KB · Views: 0
  • 3ff58bd9fa6003309322bb48fa686317.jpg
    3ff58bd9fa6003309322bb48fa686317.jpg
    99.5 KB · Views: 0
  • 3101951f7886bea57357c574351bc408.jpg
    3101951f7886bea57357c574351bc408.jpg
    61.1 KB · Views: 0
  • 0b21c531771492ed6d8d0d93aa325956.jpg
    0b21c531771492ed6d8d0d93aa325956.jpg
    124 KB · Views: 0
  • 8b1b4c5769788c72df70a457244b2d5f.jpg
    8b1b4c5769788c72df70a457244b2d5f.jpg
    72.8 KB · Views: 0
  • f62b8ec4851dcb27d7000ab3a194e01c.jpg
    f62b8ec4851dcb27d7000ab3a194e01c.jpg
    53.7 KB · Views: 0
  • 9a21a3080421ce1b33e023602051ee1f.jpg
    9a21a3080421ce1b33e023602051ee1f.jpg
    47.4 KB · Views: 0
Last edited:

bigdave_185

Well-known member
Joined
Feb 14, 2021
Messages
443
Location
Utah
That valve is a big improvement on the spring an ball they used to have. Good catch on the burr.


Sent from my iPhone using Tapatalk
 
OP
Z

zmotorsports

ALLIANCE MEMBER
Joined
Oct 20, 2009
Messages
21,441
Location
Northern Utah
That valve is a big improvement on the spring an ball they used to have. Good catch on the burr.


Sent from my iPhone using Tapatalk


Thanks. Just upset I even had to mess with it. My projects usually take a bit longer than I plan on but these unexpected issues really add to them and I’m really getting behind lately.
 

bigdave_185

Well-known member
Joined
Feb 14, 2021
Messages
443
Location
Utah
An old friend always tells me “work begets more work” and so forth. Just the way it is I guess


Sent from my iPhone using Tapatalk
 

E12-535iTurbo

Well-known member
Joined
Feb 27, 2014
Messages
492
Location
The Netherlands
No, I did not remove the turbo assembly. I've done quite a few like this and just use a thick grease and drill the hole stepping up in size 3-4 sizes before reaching the required size and clean the bit often. Then I do the same thing with the tap, use a thick grease and clean it a time or two during the tapping process. Lastly I snake a small magnet down into the hole to ensure nothing fell in. As long as you take your time and don't rush the process it is quite easy to do without introducing metal shavings into the exhaust manifold.

Thanks Mike,

That's also how we do it here. I always like to ask knowledgeable people on their methods, as it's an oppertunity to learn...

Again, thanks for everything you share on here.

BR. Jan
 

Mark_17

Well-known member
Joined
Jun 27, 2018
Messages
754
Location
NJ
Glad you got it figured out. We spend good money on aftermarket parts and it boils my blood when their QC doesn't match the price they charge.
 
OP
Z

zmotorsports

ALLIANCE MEMBER
Joined
Oct 20, 2009
Messages
21,441
Location
Northern Utah
Thanks Mike,

That's also how we do it here. I always like to ask knowledgeable people on their methods, as it's an oppertunity to learn...

Again, thanks for everything you share on here.

BR. Jan

I completely agree. I am always trying to learn as much as I can from the experts. I surely don't know everything and anything I can learn to improve my skillset is a feather in my cap.

Glad to hear you are doing the same mods in the same manner.

Thanks for following along and I appreciate the comments.

Glad you got it figured out. We spend good money on aftermarket parts and it boils my blood when their QC doesn't match the price they charge.

Agreed. I figured bolt it in and good to go. I hadn't planned on diagnosing an issue due to the manufacturing process.

I just called the FASS tech back that I spoke with yesterday to thank him for his assistance but more importantly to inform him of what I found during the diagnosis.

Thank you for continuing to follow along.
 
Last edited:

OutlawDrifter

Well-known member
Joined
Jan 20, 2015
Messages
3,895
Location
KS
I just called the FASS tech back that I spoke with yesterday to thank him for his assistance but more importantly to inform him of what I found during the diagnosis.

Thank you for continuing to follow along.

Hopefully he takes your info to a production meeting, QC manager, and their supplier for that part(if its not in-house).

I worked for an Ag manufacturing company as a Territory Manager in my last job, and took customer complaints and suggestions very seriously. We were a small enough company that I could get the point across and get changes made when necessary.
 
OP
Z

zmotorsports

ALLIANCE MEMBER
Joined
Oct 20, 2009
Messages
21,441
Location
Northern Utah
Hopefully he takes your info to a production meeting, QC manager, and their supplier for that part(if its not in-house).

I worked for an Ag manufacturing company as a Territory Manager in my last job, and took customer complaints and suggestions very seriously. We were a small enough company that I could get the point across and get changes made when necessary.

That would be the best outcome Marc, I hope that actually happens. I can't say for sure that it will because some companies don't take constructive criticism well. Luckily, most of those companies don't survive long but with FASS being around for a while and the technical support guy I spoke with seemed quite engaged in our conversation so I got the feeling it won't be swept under the rug and will be addressed.

I'm just happy mine is working perfectly now.
 

casmurbax

Well-known member
Joined
Sep 25, 2012
Messages
2,760
Location
Wilton, NY
Now isn't hat the 2nd time a check valve of some sort got you with a burr?

That landscaping rate got some nice treatment to it.

I am amazed that you found the problem rather quickly, not surprised about the treatment you received when you called the company, which is sad.

When you email them, give them a link to your installation.

Glad it worked out for you.
 

GRN96WS6

Well-known member
Joined
Dec 23, 2012
Messages
2,250
Location
SOMD
I see you mentioned hand pumping to prime, I really only have experience with my power stroke but there is no hand pump function that I'm aware of, when I change my filter I just cycle the key a few times and fires right up, is there a benefit or reason for the hand pump? I'm guessing so but just curious.
 

Bighead38

Well-known member
Joined
Nov 11, 2012
Messages
5,612
Location
Rockland County NY
I see you mentioned hand pumping to prime, I really only have experience with my power stroke but there is no hand pump function that I'm aware of, when I change my filter I just cycle the key a few times and fires right up, is there a benefit or reason for the hand pump? I'm guessing so but just curious.

At work a few weeks ago one of the drivers ran out of fuel. They said it was a nightmare to get fired up. It’s a Mack Granite, not sure why it was so bad.

I ran an old 930 Cat loader out of fuel in a blizzard years ago. Almost 2 hours of pumping to get it running, I learned my lesson. Now I just shut the machines down and wait for fuel instead of trying to stretch it.
 
OP
Z

zmotorsports

ALLIANCE MEMBER
Joined
Oct 20, 2009
Messages
21,441
Location
Northern Utah
Now isn't hat the 2nd time a check valve of some sort got you with a burr?

That landscaping rate got some nice treatment to it.

I am amazed that you found the problem rather quickly, not surprised about the treatment you received when you called the company, which is sad.

When you email them, give them a link to your installation.

Glad it worked out for you.

Thanks. Can't remember what the other valve was right off the top of my head. You may have to remind me.

I was confident the problem didn't come from the install and I figured the new pump was the place to look, especially after I drug the information out of the tech about how they control pressure. To be honest, I really didn't think that little burr would have been enough to cause the high pressure and was quite surprised when I reassembled the shuttle valve, spring and fitting and the pressure was right where it was supposed to be.

As for the landscaping rake, I hope he's happy with it. I haven't talked to him and just put it in his truck at work yesterday morning.


I see you mentioned hand pumping to prime, I really only have experience with my power stroke but there is no hand pump function that I'm aware of, when I change my filter I just cycle the key a few times and fires right up, is there a benefit or reason for the hand pump? I'm guessing so but just curious.


Most of the older diesels had hand pumps vs. the electric lift pumps of today. The CAT 3208 in our last coach was in a 1991 38' Beaver Contessa and the engine was a 1990 model year. It did not have an electric lift pump and the manner in which to prime the new filters were to unscrew the manual lift pump and pump it about 20-30 times until it filled the filter.

Even on the Duramax engines where they don't have a lift pump they have a manual prime pump to pull fuel from the tank up to and through the filter to purge the air prior to starting. I believe the Ford Powertroke and the Dodge Cummins light duty trucks are the only ones with electric lift pumps to prime the fuel system.

Cummins states right in their manuals to not fill fuel filters externally on these engines but to use the lift pump once the new filters are installed. Cycling the key a couple times is usually all it takes.
 
OP
Z

zmotorsports

ALLIANCE MEMBER
Joined
Oct 20, 2009
Messages
21,441
Location
Northern Utah
I just received an unexpected telephone call from FASS. The same tech I spoke with about my pressure issue had called me back to make certain everything was ok and I was not experiencing any further issues.

I have to say, THAT right there impressed me very much. THAT is customer service and to be honest makes this little hiccup that I had with my pump pretty much a non-event.

He wanted to know if there was anything else FASS could do for me pertaining to this issue or any other issues. I was honest and told him nothing more could be done as everything is fine, but the fact that he called me back a couple of days later to confirm everything was ok had been enough.

At this point I can't say enough about FASS and their customer service after the sale.
 
To avoid these ads, REGISTER NOW!
Top Bottom