To avoid these ads, REGISTER NOW!

Hein Werner Craigslist Purchase

gpstraub

Well-known member
Joined
Apr 7, 2009
Messages
84
Location
Pittsburgh, PA
Ladies & Gentlemen,

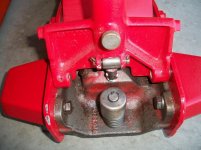
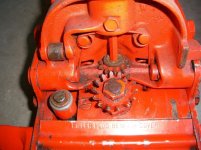
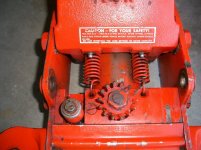
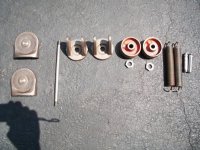
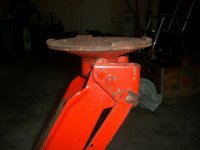
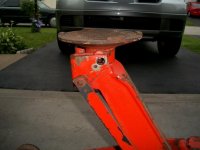
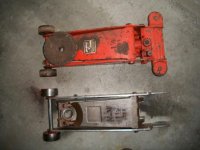
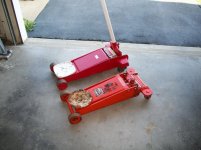
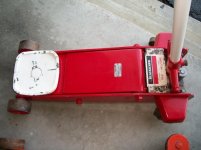
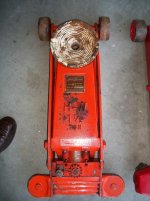
I thought I'd share my latest craigslist purchase. It's the second WS I've been lucky enough to obtain. I managed to shear the end of one of the saddle pins on my first WS clean off (don't ask how.... sheer stupidity on my part basically). Anyhow, Elroy was a fantastic help in suggesting a clevis pin to replace the broken saddle pin. That idea should work great and I still intend to perform the repairs but in my search for parts I came across this beauty on craigslist. The previous owner mentioned that it lifted the rear end of his full size GMC clear off the ground but it does slowly leak down. He also mentioned that there was a puddle of oil underneath the ram. So it sounds like I have an external and an internal leak. I'm super busy this week so I don't want to start tearing it down yet but I'm chomping at the bit. I'm looking forward to saturday morning when I can remove the ram and see what's inside. I love having the first look when I get that sucker open!

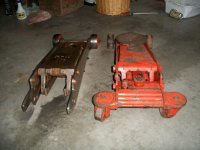
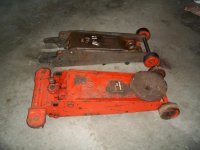
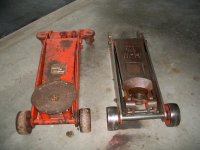
I attached some pics of it sitting next to a Blackhawk that I rebuilt for my dad last year. It's kind of neat comparing the two side by side :bounce:
 

Attachments

  • 100_0661.jpg
    100_0661.jpg
    81.5 KB · Views: 115
  • 100_0667.jpg
    100_0667.jpg
    76.3 KB · Views: 82
  • 100_0666.jpg
    100_0666.jpg
    82.1 KB · Views: 84
  • 100_0665.jpg
    100_0665.jpg
    66.3 KB · Views: 93
  • 100_0664.jpg
    100_0664.jpg
    103.4 KB · Views: 95
  • 100_0663.jpg
    100_0663.jpg
    87.5 KB · Views: 101
  • 100_0662.jpg
    100_0662.jpg
    84.1 KB · Views: 114
Last edited:
To avoid these ads, REGISTER NOW!
OP
G

gpstraub

Well-known member
Joined
Apr 7, 2009
Messages
84
Location
Pittsburgh, PA
A few more pics :)
 

Attachments

  • 100_0668.jpg
    100_0668.jpg
    77.3 KB · Views: 53
  • 100_0669.jpg
    100_0669.jpg
    68.7 KB · Views: 43
  • 100_0670.jpg
    100_0670.jpg
    88.8 KB · Views: 44
  • 100_0671.jpg
    100_0671.jpg
    115 KB · Views: 47
  • 100_0672.jpg
    100_0672.jpg
    94.3 KB · Views: 51
  • 100_0673.jpg
    100_0673.jpg
    101.9 KB · Views: 47

Hiball

Well-known member
Joined
Apr 30, 2009
Messages
14,029
Location
Missery
Congrats on your purchase, I would venture to say if its seaping and leaking that the Ram Cup is comprimised and excess oil is bypassing the packing on the Tank nut. If i can be of assistance sourcing a rebuild kit please dont hesitate to ask.

Steven
 
OP
G

gpstraub

Well-known member
Joined
Apr 7, 2009
Messages
84
Location
Pittsburgh, PA
Hiball, thanks for the help. I will definitely look you up as soon as I'm ready to purchase some rebuild parts.

I was comparing the pics of my new purchase to some of the pics Elroy has posted of his WS. I noticed that the casting of the lift arm seems to be different on mine. Specifically, I have noticed two things... There is a large H-W cast into the arm in front of the 1/2 TON lettering. Also, at the very back of the lift arm towards the handle, the place where the grease fittings insert and the back of the arm apprear different. Also, Elroy's jack has a smooth curve at the back of the arm, mine has a very angular dropoff. I was curious about anyones thoughts of whether this inicated an older or newer model.
 

Hiball

Well-known member
Joined
Apr 30, 2009
Messages
14,029
Location
Missery
did i miss something? :headscrat i thought hiball was the guy with jacks and you were the guy with vises. :lol_hitti

Ive broken a few in my day... Usually entailed a 6' cheater and me hanging off of it, But that is the end of my knowledge.
 

CRTDI

Well-known member
Joined
Jan 11, 2010
Messages
1,533
That's a nice find. Enjoyed the comparison pics with your Blackhawk, I've been wanting to see the details on an SJ-1 or 2 unit for a while. They are both amazingly clean.

Are there some design or functional elements that you prefer in one over the other?

Good luck with your rebuild!!
 
OP
G

gpstraub

Well-known member
Joined
Apr 7, 2009
Messages
84
Location
Pittsburgh, PA
I can honestly say that I don't prefer one over the other. There are a few fairly substantial differences between the two though. The biggest difference is that the Hein Werner has a cast iron lifting arm. The Blackhawk has a welded plate steel arm. I have absolutely zero experience in mechanical and structural engineering so I cannot say what the pros and cons would be between the two. One may have more lifting power than the other but I can only say from personal experience that they both seem powerful as hell and I have never had any problems lifting with either.

The second major difference would be the pumping handle. The Blackhawk has a simple pipe that can be slid out and removed when the locking bolt has been loosened. The Hein Werner has part of the release valvle mechanism built into the handle and can be removed by squeezing spring loaded pins. I guess I would have to say that the process of removing the Hein Werners handle is slightly more burdensome than the Blackhawk but it is really negligible. The Hein Werner probably evens the score by the fact that it has a t-bar on the top which helps hanging it up on the wall when it's removed... I have limited garage space so removing the handle helps store the jack when not in use.

I'd say that it's a fair tie between the two when it comes to my personal preference :)
 
OP
G

gpstraub

Well-known member
Joined
Apr 7, 2009
Messages
84
Location
Pittsburgh, PA
I had some fun today fiddling with the ram. Upon close inspection, I found an issue that Elroy had encountered and documented well in his OS rebuild. It looks like the head of the bolt on the plunger plug has been sawed off.

I realize that this was probably done to increase ground clearance. The ram has definitely been rebuilt at some point prior to me purchasing it. There are teeth marks on the cap nut, traces of silicone sealant where the cap nut meets the reservoir can, and if you look at the pic you can see that it was repainted after the rebuild because there is unblemished paint over the saw marks where the bolt head was removed.

What I'm wondering is... might this have been common practice when rebuilding a ram? Would a factory authorized rebuilder do something like this? Maybe the same fella that butchered the plug on my jack also did the same work on Elroys OS?

Either way, it's no big deal. Should be an easy repair. I just wanted to reveal my findings to anybody that may wanna fool with one of these things in the future.
 

Hiball

Well-known member
Joined
Apr 30, 2009
Messages
14,029
Location
Missery
Woops! Forgot to attach the pic. Here it is...

Dont attempt to remove that plug, It is not necesary. Ive never seen one that leaked, but i have seen 50+ where the owner tried to remove and it buggered it up enough to leak.
 
Last edited:

mjozefow

Well-known member
Joined
Apr 9, 2009
Messages
2,111
Location
Lafayette, IN
Ahh! Vises on the brain. Jack guru is what I meant. Oops.

I was trying to be nice and everything. That will show me. :lol:
 

bonneyman

Well-known member
Joined
Apr 22, 2010
Messages
8,804
Location
Desert SW
You know, you've got a huge tools place just north of Pittsburg in Beaver Falls. Tool Supermarket - Hamilton tools.
A friend of mine is from there, and one time when he visited he went to the tools store and brought back a video of the place. Holy smokes did they have alot of stuff!
 

Elroy

Banned
Joined
Oct 15, 2005
Messages
3,467
Location
kentucky
What I'm wondering is... might this have been common practice when rebuilding a ram? Would a factory authorized rebuilder do something like this? Maybe the same fella that butchered the plug on my jack also did the same work on Elroys OS?

That round plug actually answers a few questions. Hiball indicated that his older repair literature shows a "round" plug. We came to the conclusion that these round plunger plugs were factory installed helping to ensure that future service would be directed to factory authorized facilities.

So that would be the original factory installed plug. It appears that Hein Werner phased out this practice as time went on as Elroy's WS came factory equipped with the hex head plug.

Combine this early build feature with the fact you have a cast iron saddle yolk where Elroy's 1979 model had the newer formed steel yoke points to mid 70's or early production for your WS.

Dont attempt to remove that plug, It is not necesary. Ive never seen one that leaked, but i have seen 50+ where the owner tried to remove and it buggered it up enough to leak.

Probably good advise that Elroy's hard and bald head fragrantly ignored and we must say that in hind sight we would have probably been better off leaving the plug alone.
 
Last edited:
OP
G

gpstraub

Well-known member
Joined
Apr 7, 2009
Messages
84
Location
Pittsburgh, PA
Great info from Hiball and Elroy! I will def steer clear of messing with the plug and leave it as-is.

I am a little confused though. There seems to be an insert in the round plug that had the head sawed off. Do you think this was something that was done at the factory?
 

Elroy

Banned
Joined
Oct 15, 2005
Messages
3,467
Location
kentucky
I am a little confused though. There seems to be an insert in the round plug that had the head sawed off. Do you think this was something that was done at the factory?

That plug is actually a single piece of steel that "had" some type of drive head incorporated into it. The factory installed the plug then simply took a hack saw and cut off the drive feature to render the plug tamper proof.

That's Elroy's take on the situation and he's sticking to it. :headscrat
 

Hiball

Well-known member
Joined
Apr 30, 2009
Messages
14,029
Location
Missery
That plug is actually a single piece of steel that "had" some type of drive head incorporated into it. The factory installed the plug then simply took a hack saw and cut off the drive feature to render the plug tamper proof.

That's Elroy's take on the situation and he's sticking to it. :headscrat

That is exactly Right, All the Major players including Hein Werner, Walker, Blackhawk were competing to be the #1 Hydraulic jack company. None of them wanted there patents, secrets to get out to the public so they all implemented fasteners, Tank nuts requiring special tools to remove without damaging etc to not only protect there product but also make sure when service was needed that it was done by a authorized service center and not by Jon Public. I am very lucky to have alot of the special tools to handle these jobs as i inherited them from my grandfather who had a good friend in the business. The HW company didnt go nearly to the extremes as Blackhawk and Walker but they had there own little quirks, For instance the overload adjusting screw, Pump Piston Guide etc... In todays world the HW's can be overhauled with mininmal damage but as Elroy found out when he had to re-make his overload adjusting nut (In his rebuild) to fit a standard drive it does damage the part beyond its intended use. The Walker designed Tank nuts still cause problems for many rebuilders because they use the improper tool and normally end up causing damage that is costly to repair. :thumbup:
 
OP
G

gpstraub

Well-known member
Joined
Apr 7, 2009
Messages
84
Location
Pittsburgh, PA
Wow... you guys are fantastic. I would have scratched my head for hours and never figured out what was going on here. I am convinced the ram has been rebuilt at some point so I just assumed somebody lost/mangled a bolt and then took a shortcut by sawing of a replacement that had too much hang on it.
 
To avoid these ads, REGISTER NOW!
OP
G

gpstraub

Well-known member
Joined
Apr 7, 2009
Messages
84
Location
Pittsburgh, PA
Good news is... the ram leaks but it's definitely not coming from the plunger plug so that sucker can stay put. Whew! :thumbup:
 

Hiball

Well-known member
Joined
Apr 30, 2009
Messages
14,029
Location
Missery
Good news is... the ram leaks but it's definitely not coming from the plunger plug so that sucker can stay put. Whew! :thumbup:

Yep ive never seen one that leaked, And ive seen a bunch that were used on uneven floor or with bad wheels where it drug the ground and nearly leveled the plug even with the base.
 
OP
G

gpstraub

Well-known member
Joined
Apr 7, 2009
Messages
84
Location
Pittsburgh, PA
That plug is actually a single piece of steel that "had" some type of drive head incorporated into it. The factory installed the plug then simply took a hack saw and cut off the drive feature to render the plug tamper proof.

That's Elroy's take on the situation and he's sticking to it. :headscrat

That is one crazy way of doing things! You are definitely spot on though Elroy and Hiball. A closer look revealed that the factory paint job is intact over top of the odd cut job. It looks like they used a hack saw or angle grinder to get halfway thru the bolt and then smacked off the remainder with a hammer. Wild!
 
OP
G

gpstraub

Well-known member
Joined
Apr 7, 2009
Messages
84
Location
Pittsburgh, PA
I'm game planning for my Saturday morning teardown. I was wondering about the wheel attachment at the rear of the jack. I had a tough time getting the corrugated flap to rasie up and realized it was because the rear wheels were tightened to the point where it was binding. I unscrewed the wheels one turn and the flap now opens freely but there's a bit of side to side slop on the flap. Should I leave it this way or tighten it back up? I am assuming there's enough strucutural rigidty at the back of the jack created by the side plates bolting to the ram?
 

Hiball

Well-known member
Joined
Apr 30, 2009
Messages
14,029
Location
Missery
I'm game planning for my Saturday morning teardown. I was wondering about the wheel attachment at the rear of the jack. I had a tough time getting the corrugated flap to rasie up and realized it was because the rear wheels were tightened to the point where it was binding. I unscrewed the wheels one turn and the flap now opens freely but there's a bit of side to side slop on the flap. Should I leave it this way or tighten it back up? I am assuming there's enough strucutural rigidty at the back of the jack created by the side plates bolting to the ram?

As long as the frame rails are tight to the Jack base it will be fine, I wouldnt worry about any flap movement.
 
OP
G

gpstraub

Well-known member
Joined
Apr 7, 2009
Messages
84
Location
Pittsburgh, PA
Well, I made what I thought was a major blunder last night. I was being careless and accidentally whacked one of the grease fittings on the back of the lift arm with a large wrench. The top half snapped right off.

I was able to carefully drill out the remaining bit without touching the lift arm. Thankfully the fitting was relatively soft metal. I talked with the fellas at the local Grainger and they have a bunch in stock. It looks like their part # matches my size.

The fittings are not threaded. It is a "drive in type". I assume a few light taps with a ball peen should seat them properly? Maybe I have an excuse to buy a new tool..... :drool:
 

Attachments

  • 100_0673.JPG
    100_0673.JPG
    101.9 KB · Views: 26
OP
G

gpstraub

Well-known member
Joined
Apr 7, 2009
Messages
84
Location
Pittsburgh, PA
Here's a pic of the good fitting I removed. I measured it with a pair of calipers and it's an exact match for Alemite part # 3006. The specs are as follows:

Type: Str
Overall Length: 31/64"
Shank Length: 7/32"
Drill Diameter: 3/16"
Ball Check: No
 

Attachments

  • 100_0691.jpg
    100_0691.jpg
    42.5 KB · Views: 33
OP
G

gpstraub

Well-known member
Joined
Apr 7, 2009
Messages
84
Location
Pittsburgh, PA
Weekend progress:

My dad borrowed my 24" pipe wrench :mad: so I wasn't able to to work on getting the ram apart. The fun stuff will have to wait for later in the week. In the meantime, I took care of some of the bling. The saddle is primed and ready for paint. A bunch of the other bits and pieces stripped down to bare metal.

My buddies air compressor died on him so I got stuck using kleen-strip to get the paint off. Man that stuff is nasty to work with!!!
 

Attachments

  • 100_0693.jpg
    100_0693.jpg
    90.8 KB · Views: 34
  • 100_0695.JPG
    100_0695.JPG
    106.4 KB · Views: 32
OP
G

gpstraub

Well-known member
Joined
Apr 7, 2009
Messages
84
Location
Pittsburgh, PA
Most of them used the drive spline version, but I normally tap them and switch them over.

I have been considering tapping the holes and using threaded fittings but I can't imagine how I would get the main hinge pin out of the lift arm. The cross piece rod in the middle of the frame keeps me from pulling the side plates apart far enough to get the main hinge pin out. I would also like to remove it because the grease that's in there is about the consistency of chewing gum at this point...
 
OP
G

gpstraub

Well-known member
Joined
Apr 7, 2009
Messages
84
Location
Pittsburgh, PA
Dont attempt to remove that plug, It is not necesary. Ive never seen one that leaked, but i have seen 50+ where the owner tried to remove and it buggered it up enough to leak.

Okay fellas, I have a feeling this is going to be a really dumb question....

I removed the locking clip on top of the plunger and removed the spring assembly. The plunger stops at the top of it's action so how do I get it out if I can't pull it out from the bottom?
 

Hiball

Well-known member
Joined
Apr 30, 2009
Messages
14,029
Location
Missery
Okay fellas, I have a feeling this is going to be a really dumb question....

I removed the locking clip on top of the plunger and removed the spring assembly. The plunger stops at the top of it's action so how do I get it out if I can't pull it out from the bottom?

Not a dumb question, Earlier i was talking about that specialty tools that were required to rebuild some of the Manufacturers jacks. Well my friend you have found one of the locations. If you notice there is a collar that comes up aprox a inch and a half from the block and surrounds the pump piston. There is 2 **** cut out that will accept the specialty tool as it slips over the top of the piston. You following me? Now this collar threads into the block and normally isnt too tight, If you dont have the specialty wrench (You dont) you will need to use a pair of Vice-Grips (Prefer a good pair and its important to stay near the bottom) It has standard thread so lefty Loosey, Do NOT clamp the pliers down with extreme force and lightly turn the collar. IF... and only if you cant get it with the pliers, Put the unit inside a vice, depress the piston plunger as low as it can go and square a Punch up on the notch, prefferably away from the piston and give it some light taps till it breaks loose.

Steven
 
OP
G

gpstraub

Well-known member
Joined
Apr 7, 2009
Messages
84
Location
Pittsburgh, PA
I mentioned at the beginning of the thread that I came to acquire this jack while searching for a repair part for another identical one that I own.

I had a mishap with my first Hein Werner a couple of months ago when my dad and I were working on his old Elva. In a very clairvoyant jackass moment I left a prybar sitting between the frame rails of the jack while it was in the up position and lowered the jack. We heard a bit of a crunch when it hit the pry bar. Apparently the pry bar got wedged and sheared of a hunk of the saddle pin. The saddle pin was wedged so i had to drill it and use a screw extractor. It slid right out at that point and the fellas down at the local machine shop are making me a new pin tomorrow.

PS: I want to give credit to Elroy for suggesting a grooved clevis pin. I think it would have worked great but I could not find the proper size.
 

Attachments

  • 100_0715.JPG
    100_0715.JPG
    132.7 KB · Views: 32
  • 100_0714.jpg
    100_0714.jpg
    41.6 KB · Views: 37
  • 100_0724.jpg
    100_0724.jpg
    34.9 KB · Views: 37
  • 100_0722.jpg
    100_0722.jpg
    45.6 KB · Views: 38
OP
G

gpstraub

Well-known member
Joined
Apr 7, 2009
Messages
84
Location
Pittsburgh, PA
TWINS!!

Here are pics of the two side by side. The one that still has paint is the one that's getting the saddle pin replaced tomorrow.

The **** bare one is in the middle of a full rebuild.
 

Attachments

  • 100_0717.jpg
    100_0717.jpg
    52.3 KB · Views: 35
  • 100_0718.jpg
    100_0718.jpg
    49.5 KB · Views: 31
  • 100_0719.jpg
    100_0719.jpg
    53.9 KB · Views: 31
  • 100_0720.jpg
    100_0720.jpg
    52 KB · Views: 27
  • 100_0721.jpg
    100_0721.jpg
    56.2 KB · Views: 35

Elroy

Banned
Joined
Oct 15, 2005
Messages
3,467
Location
kentucky
PS: I want to give credit to Elroy for suggesting a grooved clevis pin. I think it would have worked great but I could not find the proper size.

That's nice of you to say. Sorry it didn't work our for ya. Fortunately it's a really simple part so don't let that machine shop yank your tail too much. They'll probably take more time grinding up a tool than making the part. If they're a well tooled shop then they'll have a parting bit that will work just fine.

While you're at it why don't you have them whip you up a fresh spreader bar then you can go ahead and split the frame. :pimpflash
 
OP
G

gpstraub

Well-known member
Joined
Apr 7, 2009
Messages
84
Location
Pittsburgh, PA
Progress :thumbup:

According to Hiball's instruction, I was able to remove the plunger assembly (will post pics later this eve when I get home). A light twist with a pair of pliers and the sucker unwound beautifully. I'm going to take the huge ram top nut off tonight. I assume a 24" pipe wrench used with a little caution should do the trick...
 
OP
G

gpstraub

Well-known member
Joined
Apr 7, 2009
Messages
84
Location
Pittsburgh, PA
While you're at it why don't you have them whip you up a fresh spreader bar then you can go ahead and split the frame. :pimpflash

Wow.... That is a VERY tempting idea. I'll take some measurements on the spreader and inquire at the machine shop. What were you thinking Elroy... add a bit of length and thread the ends?
 

Elroy

Banned
Joined
Oct 15, 2005
Messages
3,467
Location
kentucky
Wow.... That is a VERY tempting idea. I'll take some measurements on the spreader and inquire at the machine shop. What were you thinking Elroy... add a bit of length and thread the ends?

The length of a "bolt it" spreader bar would be the same as the inside dimension of the side plates with both ends drilled and tapped. The OEM bar would be longer as it is riveted in.
 
To avoid these ads, REGISTER NOW!
Top Bottom