To avoid these ads, REGISTER NOW!

VISE REPAIR 101 all vise repairs, lubricants, sources for parts and the tricks to fix

MattGavriloff

Well-known member
Joined
Jan 3, 2021
Messages
290
Location
Escanaba, Mi. South of Canada...
I reuse the old one unless there's a good reason not to...:dunno:

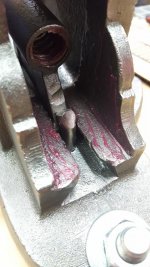
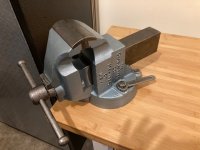
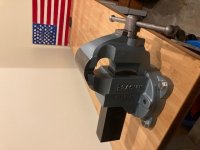
Clean, add any shimming desired to take up backlash, reinstall...:thumbup: This Parker 104 needed some help, like 1/8" of it, but the 953 was a nice tight fit as is.

Unless you meant missing/lost pins? Then I believe one common fix is a piece of appropriately sized drill rod, others will suggest their favorite fix I'm sure.
 

Attachments

  • 20210415_182003.jpg
    20210415_182003.jpg
    152.5 KB · Views: 53
  • 20210417_141132.jpg
    20210417_141132.jpg
    103.4 KB · Views: 53
To avoid these ads, REGISTER NOW!

Fretters

Well-known member
Joined
Jan 25, 2014
Messages
4,217
Location
South Yorkshire, England
What's the best solution for removed pins (which hold the nut)?

Do folks try to reinstall the old one, or fashion a new one? I saw a video of a fellow making one from a screw, but he tapped the base to make it stay in place. I'd prefer to try to match the old pin.

Keep the original, if possible. If not, pretty much owt will do as a replacement. It's not taking any notable load.
 

LesserSon

Well-known member
Joined
Feb 7, 2016
Messages
5,087
Location
PA USA
NYC -
The pin that holds the main nut resembles a common wire nail, IMO. Note how the pins are often cut or flattened at the top, bent over, easily peened. Common nails are cheap, ubiquitous, come in a wide range of guages.
If the original is lost or damaged, that would be my go-to. I would not use anything made of hardened steel.
 
Last edited:

wbarnes1001

Member
Joined
Jan 3, 2020
Messages
17
Location
Maryland
I was missing the pin that holds the main drive screw nut in place on my 974.5 Parker vise so I bought a piece of steel rod that was ever so slightly oversized for the hole from McMaster-Carr on the web. Then, when it arrived, I placed it in my cordless drill supported on my bench and used the drill to rotate it at speed while I used the large arbor band in my Dremel tool to reduce the diameter until it just snugly fit in the hole to where I could use a punch to set the pin firmly. I did not try yo bend it over to touch the drive screw nut, however. I simply placed 2 small washers in the small opening between the nut and the pin to take up the slack completely.
 

Marcotte97

New member
Joined
Apr 9, 2021
Messages
4
Location
Massachussets
I used the original one and put a small weld on the backside (that touches the nut) and filed it to a taper so the more I hammer it in the tighter the nut gets
 

MattGavriloff

Well-known member
Joined
Jan 3, 2021
Messages
290
Location
Escanaba, Mi. South of Canada...
FYI...I don't think that nut needs to be ROCK SOLID. Obviously we're trying to take up backlash, but a little side to side can allow for any slight missalignment of the screw/nose, especially when nearly fully closed. Plus, aligning the screw to nut when installing the slide, with no play can be tough in my opinion on some of the vises with real tight tolerances overall. On my little Reed 103 that has the best fit slide I have even seen, and not even 1/8th turn backlask, the nut still has a small amount of side to side play. I don't know if it is/was intentional, but that's how I see it. YMMV...;)
 

wbarnes1001

Member
Joined
Jan 3, 2020
Messages
17
Location
Maryland
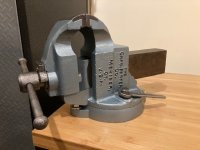
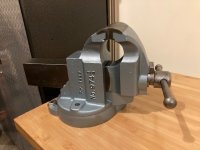
My 974.5 Parker vise restoration is finally complete! I finished lettering it this week with a black Sharpie paint marker (fine tip). Perfect for the job and I would recommend using it rather than trying to letter it with a brush. I used anti-seize on the large bolt that connects the swivel base as well as the one that engages the brake shoes. The rest of the movement areas had Mobil 1 synthetic grease applied. Last step, I drilled the bench and mounted the vise.
 

Attachments

  • Parker Vise Restoration Complete 1.jpg
    Parker Vise Restoration Complete 1.jpg
    64.9 KB · Views: 45
  • Parker Vise Restoration Complete 2.jpg
    Parker Vise Restoration Complete 2.jpg
    68.9 KB · Views: 42
  • Parker Vise Restoration Complete 3.jpg
    Parker Vise Restoration Complete 3.jpg
    71.3 KB · Views: 41
  • Parker Vise Restoration Complete 4.jpg
    Parker Vise Restoration Complete 4.jpg
    59.4 KB · Views: 43
  • Parker Vise Wire Brushed, 1.jpg
    Parker Vise Wire Brushed, 1.jpg
    65.3 KB · Views: 35

MattGavriloff

Well-known member
Joined
Jan 3, 2021
Messages
290
Location
Escanaba, Mi. South of Canada...
BARNES, Looks good! Very nice job. :thumbup:

Is there a specific reason for mounting it how/where you did? Everyone has their own use for each vise (and sometimes that use is just to look good..lol), so I'm wondering what your plans for that one are?...:beer:
 

11b30b4

Well-known member
Joined
Jul 16, 2020
Messages
1,029
Location
GA
Sometimes its easier to just give it a new handle. When I want to straighten one, use my big Wilton with smooth jaws. Just giving it a good squeeze between the jaws will get it close. For the final straightening, I use small aluminum shims, one on the high point, others a little to each side. Can usually get the handle close enough to straight that is plenty acceptable. This method has its limitations, one being handle size. At some point a hydraulic press will be the answer.

Well that is just genius ed4banger. Fantastic idea.
 

wbarnes1001

Member
Joined
Jan 3, 2020
Messages
17
Location
Maryland
Thanks Matt! Leg support of the Gladiator bamboo bench did not let me mount it with 2 feet forward and one in the middle at the back as it should be. I also didn't want it in the middle of the bench so I mounted it off to the side. I will be able to do anything I need to with the swivel action I believe. First job is to press in new driveshaft u-joints for the 65 Mustang.
 
OP
D

drivesitfar

Well-known member
Joined
Oct 23, 2013
Messages
36,075
Location
Pacific Northwest
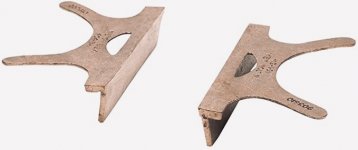
NC: I’m sure you could hear them up a bit before bending them around your vises towers or hammering them lightly but I’ve never heated my Wilton copper jaw covers over my Reeds and no issues here.

Where may I ask are you getting the bronze jaw covers or did you make some? Pics?

All: this last week several members over on the big vise thread answered my question how they’d bend a vise handle back straight and some great posts. I’ll copy and paste them over here when I have more time or take a look there.
 

va.grouseman

Well-known member
Joined
Mar 26, 2011
Messages
4,965
Location
Southern-Central VA.
Thanks Matt! Leg support of the Gladiator bamboo bench did not let me mount it with 2 feet forward and one in the middle at the back as it should be. I also didn't want it in the middle of the bench so I mounted it off to the side. I will be able to do anything I need to with the swivel action I believe. First job is to press in new driveshaft u-joints for the 65 Mustang.


WB, I'd go kinda gingerly with the u-joint pressing or any kind of pressing for that matter.---You have a beauty of vise there and it sure would be a tragedy to damage it with too much cranking.---Many a vise has gone to the scrapyard for that very reason.---One really needs an actual press for pressing and a vise for clamping/holding.---But not really any of my business, your vise, carry on.
 

Shiftless

Well-known member
Joined
Mar 9, 2014
Messages
14,599
Location
East Bay SFO
WB, I'd go kinda gingerly with the u-joint pressing or any kind of pressing for that matter.---You have a beauty of vise there and it sure would be a tragedy to damage it with too much cranking.---Many a vise has gone to the scrapyard for that very reason.---One really needs an actual press for pressing and a vise for clamping/holding.---But not really any of my business, your vise, carry on.

:+1: to that

That’s a far too nice a vise to see it suffer structural damage. A vise is not a press and a press makes a pretty crappy vise.:)
 

Outlawmws

Well-known member
Joined
Aug 9, 2011
Messages
39,334
Location
The Badlands
I don't see pressing a U-joint ON as any kind of issue, unless the bores are buggered and needs excessive pressure.

Pressing a U-Joint OFF however, I'd be VERY careful. If it pops loose easily, Fine, if not, get it to a press...

A large heavy fine thread (bridge) C clamp is a better safer tool as needed, if a press isn't available...
 

PierceA

Well-known member
Joined
Aug 6, 2020
Messages
471
Location
SE Michigan
I've replaced hundreds of U-joints. With Michigan salted winter roads, the U-joints are usually seriously rusted in place.. I agree with Outlawmws that if they don't start to move easily, go to a hydraulic press.

Personally, I use a torch to cut the center of the 'X' out, then the needle bearing caps push inward quite easily, I usually use an air chisel to push them in. Then a brake cylinder hone inside the bores of the yokes.

Next is the use of the vise as a press. As Outlawmws said, they will press in very easily if everything is aligned and no burrs are remaining.
Personally I LIKE using the vise: it provides a system where only two hands WILL do the job, and most importantly a good 'feedback' to me if the bearing cup binds, or bottoms agains the cross bar. A hydraulic press is much more difficult to use, and very difficult to have any feedback or feel. When the hydraulic press tells you it's bound or bottomed, you already have tons too much pressure on the joint.

Just like any tool, it can be used well and properly with some finesse and feeling. But also virtually any tool can be destroyed by heavy handed carelessness.

This ability to destroy any tool is evident by all the bent handles and hammer-scarred handles on our vises. I cannot fathom hitting a handle with a hammer, it's going to be springy, so if you want it tighter use muscle and body weight. NOT a hammer!

And you should see the gorrilla-hammer marks on the handles of my Parker 978, and several other large 6" and 7" vises..

PierceA
 
OP
D

drivesitfar

Well-known member
Joined
Oct 23, 2013
Messages
36,075
Location
Pacific Northwest
Pierce: nice post and well thought out and written letting all of us know that the vise is not a PRESS, but if conditions are right it can be used for that purpose.

also thanks for the advice on straightening my handles with my big outdoor Reed 4c if I chose to do that. since it's a small handle I might tend to try it and see if it doesn't put too much stress on my big vise, but like you said even if it's a big vise it can still be damaged. I did (and do) grease it up a bit more than my other vises cause it's outside so that part is covered and speaking of covered I have a huge plastic storage container over the top of it so it really doesn't see much weather.
 

NYCone

Active member
Joined
May 22, 2016
Messages
33
I'm finally getting around to taking my Rock Island 574 apart and I came across this on the screw.

I realize the damage is relatively small, but what do folks do to make this "better"?
 

Attachments

  • 20210427_214801_HDR.jpg
    20210427_214801_HDR.jpg
    142 KB · Views: 77
To avoid these ads, REGISTER NOW!
OP
D

drivesitfar

Well-known member
Joined
Oct 23, 2013
Messages
36,075
Location
Pacific Northwest
Cone: funny you post that scratch as somewhat of an issue after posting maybe the worst abused dynamic slide i've ever seen. doesn't that SCRATACH get hidden by the sleeve and doesn't the set screw fit in the hole? i'm taking a guess that one of the prior owners missed the hole with the set screw and that's what caused that scratch?

I don't think we've seen pics of your Rock Island vise so if you'd like to post a few more pics of your entire vise that would be great.
 

NYCone

Active member
Joined
May 22, 2016
Messages
33
I'm getting there with the pics. As you may have surmised, I'm not that handy with the phone camera.

That damage was likely caused by a loose set screw.

I just got the Rock Island apart. It's in pretty good shape. Brass jaws. I need jaw screws, or I may MIG in the old Phillips head and saw in a flat head screw surface to save the screws. They seem to be hard to find. The old Phillips pattern is beat up.

I'm still at a standstill with the Columbian 605.5. I measured the damaged slide, and it's 2.5 inches wide all the way down, despite the holes in the top. Can I just use it as is or is a solid top essential for the operation? I've attached a pic of that slide.
 

Attachments

  • 20210416_171151_HDR.jpg
    20210416_171151_HDR.jpg
    161.2 KB · Views: 55

txlonghorn1989

Well-known member
Joined
Feb 27, 2017
Messages
2,786
Anyone know what pins I am looking for to replace the pins for the vise nut housing on a Wilton 3½" bullet vise? I believe it is a model 9350. These pins are 3/16" at the exterior end of the pin and just under 1-1/16" in length. They are also splined at the exterior end and smooth toward the inside the vise nut housing. I noticed that the splined ends have a bevel so they fit flush with the exterior. Thanks!
 
OP
D

drivesitfar

Well-known member
Joined
Oct 23, 2013
Messages
36,075
Location
Pacific Northwest
Cone: click on the paperclip just above in the middle where you are writing your posts and attach pictures of your vises and other items sort of like how we attach pics to an email. you can load up to 7 pics per post and they'll show up as thumbnails that a member can click on twice to get full size. ask questions if you need help.

I wouldn't weld any nuts or your jaws to your vise unless there was no other method to get them on. it sounds like you just need to customize some jaw screws that most of us has done and we talk about a lot on this thread. one method is to hold the screw's head up against your grinder's stone and grind an angle. another method is to put the screw in your drill press or drill and use a file to grind an angle while the bolt is spinning. there are a few other good methods so just ask and post up several pics so we are sure we all know what you are looking to do.

TEX: there are more than a few member's posts on this thread and I heard KMScott wrote a blog about how to make new pins for wiltons. if you buy longish screws that can be turned out with an allen wrench, grind off the threads where they go into the vise nut and tap threads in the body of your wilton that should work nicely especially if you or the next person has to remove them to clean or repair the vise.

post up some pics?
 

txlonghorn1989

Well-known member
Joined
Feb 27, 2017
Messages
2,786
...

TEX: there are more than a few member's posts on this thread and I heard KMScott wrote a blog about how to make new pins for wiltons. if you buy longish screws that can be turned out with an allen wrench, grind off the threads where they go into the vise nut and tap threads in the body of your wilton that should work nicely especially if you or the next person has to remove them to clean or repair the vise.

post up some pics?

drives I reread KMS' blog earlier today. He does nice work. After seeing the video 11b posted about removing the pins with a hex wrench it was easy peasy! The other bullet vise I have is gonna take some creative solution I think. It looks like it had the vise nut housing yanked off with a bearing puller. The two pins were still in their holes but bent out towards the rear of the vise. It also appears that that the holes for the pins in the vise nut housing ripped out and have been refilled with JBWeld (I'm guessing). Wouldn't be the prettiest solution but I'm thinking I could maybe just turn that nut housing a turn or two and redrill some new pin holes (or screwholes) then fill the other two holes with JBWeld or something. Seems like that could be good as it needs to be for a homeowner's vise. Is that all clear as mud?
 
Last edited:

LesserSon

Well-known member
Joined
Feb 7, 2016
Messages
5,087
Location
PA USA
NYCone -
The four long edges of the slide are its only structurally necessary elements. The flats just connect and align the edges. Holes like the one near the dynamic jaw, if not right at those edges, are essentially cosmetic, and your “repair” of them can be, too. I would personally avoid a repair involving high heat (like welding), as it could introduce stresses, and hence warpage. Filling the holes will help keep the screw clear of debris, so I would advocate an epoxy filler like SteelStik.
The larger hole, though, is part of a larger fail - you can see two cracks running toward the end. Those may require structural repair, brazing, I would think. And then fitting the slide in the tower. Used lightly on small items, they don’t “need” to be repaired, but if you mean to use this at capacity, they should be fixed properly before using anything like epoxy.
 
Last edited:
OP
D

drivesitfar

Well-known member
Joined
Oct 23, 2013
Messages
36,075
Location
Pacific Northwest
Lesser: great information and I agree!

Tex: Wilton should have changed out those pins and put in screws from the beginning or maybe they liked replacing vises for those that broke their vises and this break wasn't covered under warranty. in any case having screws would be a great upgrade for their vises moving on and for you and others anytime you take the vise apart.

yep many many members have turned that back piece 180 degrees, drilled a couple new holes and put their bullet vises back together and their vises have worked well for years now. take a few pics cause they always help with our conversations and especially if you have questions.

good luck!!

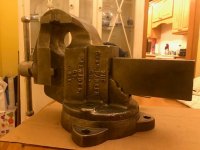
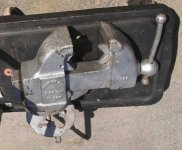
ALL: I know some sellers think spray bombing a rusty old vise improves it's value, but honestly when I see a vise like this I offer less or just walk away. this old Rock Island #142 also has an interesting homemade plate for under the bench to mount it's old swivel style. when i get time to do this i'll strip it and hopefully I won't find any cracks or welds under the silver spray bomb.
 

Attachments

  • Rock Island 142 bench vise 1 (2).jpg
    Rock Island 142 bench vise 1 (2).jpg
    144 KB · Views: 45
  • Rock Island 142 bench vise (2).jpg
    Rock Island 142 bench vise (2).jpg
    144.4 KB · Views: 46
  • Rock Island 142 bench vise 2.jpg
    Rock Island 142 bench vise 2.jpg
    132.5 KB · Views: 43

NYCone

Active member
Joined
May 22, 2016
Messages
33
Here are some Rock Island 574 shots.

It's in pretty good shape. I'm just getting it apart and cleaning it. I need to find a good anvil to straighten the rotation clamp handle, it's bent (no photo).

It has some minor issues:

  • Damage from a loose set screw
  • The company badge has some paint it needs for a full restoration.
  • Not sure what to do about the brass jaws. I love them, the question is whether to leave them as is for the patina they bring, or the grind them flat
  • It has a small bit of damage at one edge of the slide. Do folks tap the metal back in place, or file it flat?
 

Attachments

  • 20210429_000809_HDR.jpg
    20210429_000809_HDR.jpg
    65.6 KB · Views: 35
  • 20210429_000821_HDR.jpg
    20210429_000821_HDR.jpg
    89 KB · Views: 31
  • 20210429_000828_HDR.jpg
    20210429_000828_HDR.jpg
    132.5 KB · Views: 32
  • 20210429_000835_HDR.jpg
    20210429_000835_HDR.jpg
    146.8 KB · Views: 32
  • 20210429_000839_HDR.jpg
    20210429_000839_HDR.jpg
    141.4 KB · Views: 34
  • 20210429_000902_HDR.jpg
    20210429_000902_HDR.jpg
    88.7 KB · Views: 42
OP
D

drivesitfar

Well-known member
Joined
Oct 23, 2013
Messages
36,075
Location
Pacific Northwest
Cone: first off it's not the best to use a REAL ANVIL for cold steel work cause they were built for hot work and you can chip off their sides. SO just pick up a small piece of RR track and use it as your cold steel small items anvil. or buy a small press.

as far as that nick on the slide is it keeping the slide from moving in and out normally or is it catching on it. personally i'd hand file it or leave it be if it's not an issue.

as far as your brass jaws that's your call, but shining them up more or putting copper, brass, bronze, aluminum or some soft metal jaw covers over them for more gripping power might help you for some of your projects. personally I don't like jaws that are sharp cause I rarely want the item i put in my vises scratched up so I use copper jaw covers. i do have a few old vises with some nasty sharp jaws that I certainly can use for gripping without caring for the item inside them, but I usually find that my copper jaws do a good job.

nice looking vise and quite an improvement over the old Columbian with all the holes in it's slide.
 

NYCone

Active member
Joined
May 22, 2016
Messages
33
Cone: first off it's not the best to use a REAL ANVIL for cold steel work cause they were built for hot work and you can chip off their sides. SO just pick up a small piece of RR track and use it as your cold steel small items anvil. or buy a small press.

Good point. I meant an anvil in the sense of pounding on it, not in the formal blacksmith anvil sense. I don't have anything I'd trust to pound on now. My last piece of steel/iron for that purpose was at my father's place. Now, my best bet would be an abandon railroad track, or to buy something.
 

PierceA

Well-known member
Joined
Aug 6, 2020
Messages
471
Location
SE Michigan
NYCone. That 'damage' on the mainscrew from the setscrew getting loose is not a problem at all. If the collar is diffucult to get back over the scratches, use a flat file to remove the raised metal. The scratches are under the collar when the vise is in use so they have zero effect on the function of the vise..

For the dents and dings on the slide corners. I'm sure you have seen plenty of vises with cracked or broken corners on the slide.. They are easy to break if missused. For a bent over top corner, I often will back up the slide on an anvil or heavy work bench, then with a small hammer TAP the overhanging metal back in place.. a lot of small taps, working from ends of the dent toward the middle usually works pretty good.
I don't like to file away any metal on these vises.. once it's filled off, it's gone.. Some gentle hammer work will usually minimize the amount of metal needed to file smooth.

PierceA
 

NYCone

Active member
Joined
May 22, 2016
Messages
33
For the dents and dings on the slide corners. I'm sure you have seen plenty of vises with cracked or broken corners on the slide.. They are easy to break if missused. For a bent over top corner, I often will back up the slide on an anvil or heavy work bench, then with a small hammer TAP the overhanging metal back in place.. a lot of small taps, working from ends of the dent toward the middle usually works pretty good.
I don't like to file away any metal on these vises.. once it's filled off, it's gone.. Some gentle hammer work will usually minimize the amount of metal needed to file smooth.

PierceA

That was my thinking, Never having done it on a vise before, I wanted to see if it was a viable solution.

Thanks
 

PierceA

Well-known member
Joined
Aug 6, 2020
Messages
471
Location
SE Michigan
It depends on the metal alloy. Some are pretty easy to 'nudge' back into shape.. Some alloys are very brittle and the mushroomed-over metal just breaks off. No loss i it does, since the alternative was the file it off anyway..

PierceA
 
OP
D

drivesitfar

Well-known member
Joined
Oct 23, 2013
Messages
36,075
Location
Pacific Northwest
if some of you might not want to set up an E (electrolysis) tank another option is a molasses tank (4 parts water and 1 part molasses) that some call a **** VAT that really is slow and steady rust removal. i'm hearing over on the RUST REMOVAL THREAD (https://www.garagejournal.com/forum/showthread.php?t=473607) that mentions this. as with anything there is good and bad so thought i'd bring it up as another option.

anybody ever tried this molasses dip? I've heard the mix can work with 9 parts water to 1 part molasses, but i'm betting more molasses 4 to 1 would maybe work a bit better. i'm also guessing molasses at a feed type farm store is a lot less expensive than what you buy at your grocery store?

Pierce: that bending over metal sort sounds like the method of folding metal making knives and such. interesting and agree that if it breaks off it was going to be gone anyway if it was filed.
 

Outlawmws

Well-known member
Joined
Aug 9, 2011
Messages
39,334
Location
The Badlands
I've used molasses, at 10% and it works well, if slow. I found putting the plastic tub I was using (it wasn't large) in the sun on the hood of a parked car got the solution VERY warm adn that worked better than cold. If not maintained it will start stinking, but read up and you can minimize/slow that quite a bit. Feed molasses is much cheaper than from the grocery store, if you have access to a feed store.
 

txlonghorn1989

Well-known member
Joined
Feb 27, 2017
Messages
2,786
Recently picked up a Parker 975. I've been checking the big auction site with no luck. Anyone have a Parker No 3 wrench they would be able and willing to part with? If not how about a 15/16" 6-point DBE or combo wrench any brand they'd part with? I've checked and I don't have any 6-pt wrenches that size. If I can just find that size I'll make my own. Thanks for any consideration or thoughts on sourcing something.
 
Last edited:

ALTEREGO

Well-known member
Joined
May 15, 2018
Messages
420
Location
@HOME
New project coming soon. I was able to procure an old, heavily rusted Ridge / Simplex 4 1/2 vise a while ago thanks to a very good friend that was kind enough to pick it up in his town (over two hours away from me) and bring it with him when he came to visit his family.
It is missing the main screw collar, the single pipe jaw insert that goes on the sliding jaw and one of the locking nut mechanisms. I will ask in the vise parts thread in case someone has some extras laying around, if you guys have any leads please let me know. I will update his post with pictures asap, too excited to share I forgot to take pictures!
 

11b30b4

Well-known member
Joined
Jul 16, 2020
Messages
1,029
Location
GA
Hello everyone, Drivesitfar asked me to post some pics of my most recent rebuild. While there is only a small amount of repairing with this vise, there are a few things that some of yall may find helpful.

My Wilton C0 before:
View media item 111561
And After:
View media item 111857
Of note on this rebuild, I could only get one pin out of the pipe jaws so I painted them in place. I guess I could have drilled them out and made new pins but that is something I will need to look into at a later date.
The handle was bent, and I have been making new handles for almost all my vises with damage handle, so I fabricated a new one for this vise as well. Someone here on the forum suggested using high strength 1144 stress relived carbon steel for the handles and this is what I have been doing ever since.
https://www.mcmaster.com/steel-rods/material~1144-carbon-steel/

For the end balls I try to reuse the balls from the original handle but if they are too small or badly damaged, I use Low-Carbon Steel Balls.
https://www.mcmaster.com/balls/material~low-carbon-steel/

I have a metal lathe and these balls are case hardened, punching through the outer hardening is a bit of a process. There are other steel balls available that are not hardend and that may be a better option for some of yall.

I normally order the closet steel rod in size as I can get, and McMaster-Carr has a good selection. If needed, I will face each end, then turn he rod to the size needed. Once turned, I will dry sand the rod with 60, 80, 120, 150, 220, 320 grit sandpaper then wet sand with 400, 600, 800, 1000 grit sandpaper. Lastly, I apply Mothers mag and wheel aluminum polish. Next, I turn the ends of the rod to fit the diameter of the doles that will be drilled into the balls.
View media item 111742
Next, I face one side of the balls. Center drill it, then progressively drill the center out until I get the proper sized hole. In this pic, I am drilling a reused ball from my Reed 204 1/2R rebuild.

View media item 111178
Next, I place the rod in a vise and weld the end ball on the rod. I am by no means a good welder and I only have a stick welder so the weld may not look great, but it gets the job done.

View media item 111854
View media item 111855
View media item 111856
Once one end is done, REMEMBER to slide the rod inside the spindle nut the weld the other end the same way. I am sure no one like cutting the rod, turning it again then drilling a new ball to get it right the second time (albeit an inch shorter).

Next, I use a belt sander to grind the weld down the place the rod back in the lathe at a slower speed to sand the end balls (yes that can be tricky with the spindle attached). Again, this is the Reed handle.

View media item 111183
Anyway, that’s my handle fabrication process.

Another thing I did on this Wilton is some marginal casting repair. If you have some small damage to a casting like small holes or slits from grinding wheels, I like to use PC-7. This is a 2-part epoxy that when cured is machinable, you can even tap it. No, it is nowhere close to being as strong as a weld or the cast iron; however, if it’s a repair you plan on painting over and it is not in an area that will be subject to abuse, then this is a good choice. Once mixed and applied, you can use a wet finger to smooth it and reducing the amount of sanding needed to clean up the repair. You could even texture it with sandpaper to make the repair (once painted) look like the rest of the casting. On this Wilton, I used PC-7 to fix all the damage I caused with the drift pin when I was attempting to remove the pins on the pipe jaws. Additionally, the tail end of the vise has some small broken edges where the tail cap inserts. Here is the tail end with the PC-7 applied.

View media item 111738
And here is the painted tail end complete.

View media item 111858
Anyway, if anyone wants to know more about the repairs I have done on this vise or others, fell free to check out my workshop build. I link all my builds there. If there is anything on those builds that yall find beneficial, let me know and I will add them to this vise repair thread.
https://www.garagejournal.com/forum/showthread.php?p=9046007#post9046007

I hope I wasn’t too long winded.
Have a good one.
 

rsqmike

New member
Joined
Jan 1, 2018
Messages
2
I picked up a parker 384 1/2A that in great shape but of course the pin is frozen. I've been work on it with kroil oil with no return yet. Any help?
 

Mr. Wonderful

Well-known member
Joined
Jan 15, 2018
Messages
1,781
Location
Pacific Northwest
Rsq,

welcome! Myself and a few others here have had good luck making a screw jack from two bolts and a threaded coupler. you can use it to push the pin up from inside. I also have a 384-1/2 but mine wasn't frozen in. Great vise btw. Probably my favorite user. If you search screw jack on here you will probably get an idea of what it is. I don't have any pics of the one I made unfortunately. Good luck!
 
To avoid these ads, REGISTER NOW!
Top Bottom