To avoid these ads, REGISTER NOW!

Between 265 & 485 SQ/FT Nick's Two-Car Detached Vdub Garage

Workspaces sized between 265 and 485 squarefeet.
OP
N

nicholam77

Well-known member
Joined
Dec 18, 2016
Messages
2,671
Location
Minneapolis, MN
Random Bits

So I've had my hands full with the baby, and work, and the house is being a bit of a PITA.

The main thing is we had a sewage backup in the basement laundry.

IMG-4138-2.jpg

IMG-4146.jpg

I normally get our main line cleaned out once a year due to incessant tree roots, but apparently was a bit behind schedule and it decided to let us know in a miserable way.

Of course had the plumber out, pulled back a bunch of roots and sent the camera down.

They recommended a main line replacement, for, wait for it...

$26,000!

Now normally I'd think they're just fishing for money, but three houses down just had it done a couple weeks ago, and the house across the street had it done a few years back. And our next door neighbor had a partial line replacement last year after a few backups. So either they're all getting swindled or there are actually some issues with the pipes on these older homes.

I'm not an expert in sewage mains but looking at the camera feed there were definitely some offsets and bumps.

Insurance would cover $10k, but there's no way in hell I'm putting $15k into this at the moment so the plan is to just keep clearing the roots more aggressively every 6 months until disaster strikes. :LOL:

Additionally, because the overflow got some carpet wet, we are looking at getting that replaced since it's toxic waste, but with the deductible it barely makes sense to replace with similar carpet. I'm not in the headspace for a full basement remodel at the moment including flooring, so lots to think about.

Personally I'd like to move in the next 5 yrs (and upgrade garage 😁!) but real estate is so competitive here in the neighborhoods I want to live in, who knows what we'll be able to do.

Also, the outside water spigot is leaking continuously, gotta find time to replace that.

And admittedly I installed it incorrectly in the first place but my garage roof insulation is falling down, just in time for winter.
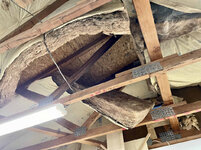
IMG-4148.jpg


On the upside I did go to the last Cars + Coffee of the season with my dad and daughter this weekend.

The highlight for me was this Carerra GT. According to the owner, 1 of 2 in Minnesota and one of roughly 1200 worldwide. The first and only other time I've seen one was in an all-glass boutique dealership in downtown Los Angeles circa 2006.

IMG-4169.jpg

Just to clarify, the cool guy on the left with the chain and blue laces is NOT me. :ROFLMAO:
 
To avoid these ads, REGISTER NOW!
OP
N

nicholam77

Well-known member
Joined
Dec 18, 2016
Messages
2,671
Location
Minneapolis, MN
What do you get for 26k?

That seems 😳 high.

No kidding! I would have been in shock except the neighbors 3 houses down was $25k a few weeks ago.

According to the proposed repair plan:

- Excavate a 70-75 foot trench (10 feet deep) to replace the damaged sewer line with new PVC piping.

- This excavation would including removing two of the private concrete walkway panels, 2 of the city's sidewalk panels, 10 linear feet of concrete curb and gutter, as well as approximately 100 sq ft of blacktop roadway.

- The restoration of the items above is included in the price that is provided.

- Once the new piping is laid in the trench, the work would be inspected by an approved city official and upon a passed inspection, the excavation would be backfilled in a manner that would both support and protect the new installation.

- The disturbed area would then have black dirt and seed placed. The restoration of the concrete and roadway would occur following the completion of the work.


It also says:

They are not responsible for any final grading or sodding of the excavated area.

All other repairs such as concrete, retaining walls, landscape restoration (grass, shrubs, trees) or anything else that may be damaged by excavation equipment) will be sole responsibility of the homeowner.

Portions of the work will include jackhammering a section of concrete in the basement to expose the main sewer line. The plumbing company will fill that area with concrete, but all other repairs such as flooring replacement will be the sole responsibility of the homeowner. The technicians will remove flooring if necessary with no guarantee that it can be replaced or reused.


Basically I'll lose half my front yard and flower garden as well as a small tree. And probably have to redo the basement flooring.

In addition to the insane cost, it sounds like a nightmare to get everything back to the way it was.
 

bdbecker

ALLIANCE MEMBER
Joined
Nov 18, 2015
Messages
5,574
Location
Iowa
Dude, I feel your pain.


That was my old house. Sewer was run at an angle across my front yard instead of a straight shot to the street. Thankfully it missed my driveway by a couple of feet.

It is worth getting a few quotes when it comes to a job like this. I was able to find a company to do the job at a significantly lower price than the first two places I spoke with. It was a smaller company that only did work like this, as opposed to a bigger outfit that covered the whole spectrum of plumbing work. Even if you plan on moving in the near future, it may very well come up during the inspection. Keep up with keeping it clear for now, but use that time to try and find a better price.
 
OP
N

nicholam77

Well-known member
Joined
Dec 18, 2016
Messages
2,671
Location
Minneapolis, MN
Dude, I feel your pain.


That was my old house. Sewer was run at an angle across my front yard instead of a straight shot to the street. Thankfully it missed my driveway by a couple of feet.

It is worth getting a few quotes when it comes to a job like this. I was able to find a company to do the job at a significantly lower price than the first two places I spoke with. It was a smaller company that only did work like this, as opposed to a bigger outfit that covered the whole spectrum of plumbing work. Even if you plan on moving in the near future, it may very well come up during the inspection. Keep up with keeping it clear for now, but use that time to try and find a better price.

Yeah, it's no small hole they have to dig!

That's 100% the plan. The quote I got was from a large commercial company (only one who I could get to clear the roots right away). But I will for sure take the time to shop around, and clear it more often in the meantime. I'd wager it's totally possible it will continue to operate fine for a number of years with regular maintenance, but it's one of those ticking-time-bomb situations where I know I won't be able to put it off forever.
 
OP
N

nicholam77

Well-known member
Joined
Dec 18, 2016
Messages
2,671
Location
Minneapolis, MN
GTI Oil Change

Well I've been convinced it's worth it so I'm back at it with another oil change.

IMG-4187.jpg

IMG-4195.jpg

My wife's car I can just drive up on ramps. Mine won't clear in the front so have to jack it up. Definitely takes twice as long.

For that reason and the fact that the oil filter is on top in my car, I'd like to get one of those pumps to **** it out from the top. Would be much easier in winter, too.

IMG-4178.jpg

Shop towels coming in handy 👍

IMG-4180.jpg

IMG-4183.jpg

I was also reminded doing oil changes it's nice to inspect the bottom of the car. Two common (at least enough to be aware about) problems on this car are the rear main seal and the water pump. I didn't see any leaks and everything looked clean.

Filled 'er up with LiquiMoly because that's what the flag says!

IMG-4190.jpg


IMG-4192.jpg

Actually I'm not one to have a particular allegiance to a certain brand of oil or anything, it's just what I've always used so I keep doing the same.

While the hood was popped I gave the engine bay a quick "detail" if you can call it that.

IMG-4201.jpg

IMG-4204.jpg

Back in business!
 

bj383ss

Well-known member
Joined
Sep 29, 2011
Messages
3,166
Location
TX
Nick sorry to hear about the sewer. Any kind of water coming in or going out of the house always causes stress when it is not going the direction it should. Only advice I will give is when I had the plumbing issue arise at my old house I had it fixed and then the next year it was on the market. And having gone through that we revaluated our home owners insurance and upped everything for better coverage. The water leak I had the plumbing was not covered by insurance but whatever it damaged was. :rolleyes:

Oil changes are an annoyance sometimes but I always feel better knowing I put the proper oil in, and tightened everything to the right spec. The Camaro is just high enough I can barely slide the jack under the front cross member. I remind myself this every time my brain wants to lower the car. What a pain in the *** it would be to get it up in the air. My wife's car has the oil filter on the top as well. It must be a EU thing. After changing oil filters from the bottom for 30+ years it was weird changing hers for the first time.

Bret
 

Kriesel

Well-known member
Joined
Mar 25, 2014
Messages
138
Location
Afton, Minnesota
I had to do a new septic system this year... About the same price as your sewer line, which is nuts because I had an entire drain field put in. I wonder why it's the same to do a huge drain system compared to your main line...

I had the sewer back up at my first house a little, but it didn't wreck anything. Maybe try drying it out good, and hire some carpet cleaners to clean it up good.

I use Fumoto valves to drain oil in my vehicles, makes it easier. I like that I can just flick the valve open, let it drain while I do something else, and finish it up later and the only tool I used was a drain pan at that point. Having the filter on top is definitely nice as well.
 
OP
N

nicholam77

Well-known member
Joined
Dec 18, 2016
Messages
2,671
Location
Minneapolis, MN
Nick sorry to hear about the sewer. Any kind of water coming in or going out of the house always causes stress when it is not going the direction it should. Only advice I will give is when I had the plumbing issue arise at my old house I had it fixed and then the next year it was on the market. And having gone through that we revaluated our home owners insurance and upped everything for better coverage.

Thanks Bret, we did "up" our insurance recently. Actually, we did it when we saw the neighbors yard dug up a few weeks prior. The max coverage is still only $10k (minus deductible), but good to have it at the max.

IMG-4059.jpg

Camaro is just high enough I can barely slide the jack under the front cross member. I remind myself this every time my brain wants to lower the car. What a pain in the *** it would be to get it up in the air.

Can confirm it's a PITA. But it looks cool :cool:

I did lowering springs only on my GTI to save money and it's trashed the shocks after 4ish years. My first experience lowering but if I ever did it again I'd do springs+shocks or coilovers.

I had to do a new septic system this year... About the same price as your sewer line, which is nuts because I had an entire drain field put in. I wonder why it's the same to do a huge drain system compared to your main line...

Bummer! Idk why it's so expensive, probably combination of commercial company quote and everything in Saint Louis Park is more expensive than it should be
 
OP
N

nicholam77

Well-known member
Joined
Dec 18, 2016
Messages
2,671
Location
Minneapolis, MN
Table Saw Cart Tune-Up

I wish I had more to show for myself but it's been another couple of long weeks with work, and my daughter caught a stomach bug, which then I caught after staying up with her puking all night last Wednesday. So multiple days of being incapacitated, barely any sleep, and didn't even take a sick day.

My daughter turned 3 on Oct. 12th and I can't believe it's been 3 yrs. I love having kids, but the one-two-punch of toddler + baby has really been kicking my *** this time around and I am missing being able to work on projects. Especially in this perfect fall weather. Can't help it. 😁

My wife just went back to work from maternity leave this week, so yesterday when I finally had a down hour at "work" (read: home), and my daughter was at daycare and the baby at my mother-in-law's, I had a chance to putter in the garage for a minute!

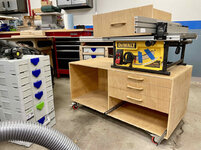
I wanted to pick something quick and small to accomplish, which was replacing two locking casters on my table saw cart that were broken. I bought replacements months ago and never got to it.

Turned out to be a bigger process than I thought, because my back is trashed from lifting my dad's pantry cabinets amongst other things. Been dealing with that pain for almost 3 months now. So I have to take it easy and there's no way I could flip the table saw cart over to access the casters without taking it all apart.

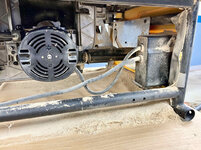
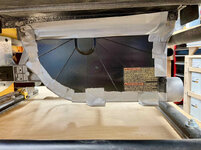
I took the opportunity to clean it all out.

IMG-4332.jpg

IMG-4330.jpg

My magnetic dust enclosure shields do a good job of containing what would just go into the air or floor. I'm not sure where all this sawdust comes from underneath the machine because the blade is enclosed and I always use a shop vac?

IMG-4333.jpg


Then had to remove all the drawers and remove the table saw from the cart itself.

IMG-4334.jpg

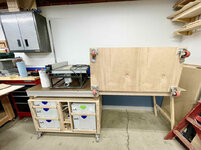
Then the cart was tolerably light enough to lift onto my MFT.

IMG-4336.jpg

Broken caster where the locking pedal got jammed crooked. I tried to fix it but it was really stuck.

IMG-4335.jpg

IMG-4337.jpg

Replaced and all fixed up. Glad to have this (boring) task done because it's good to have a steady locked base when making cuts so nothing slips!
 

Evilstig

New member
Joined
Mar 2, 2017
Messages
1
GTI Oil Change

Well I've been convinced it's worth it so I'm back at it with another oil change.

IMG-4187.jpg

IMG-4195.jpg

My wife's car I can just drive up on ramps. Mine won't clear in the front so have to jack it up. Definitely takes twice as long.

For that reason and the fact that the oil filter is on top in my car, I'd like to get one of those pumps to **** it out from the top. Would be much easier in winter, too.

IMG-4178.jpg

Shop towels coming in handy 👍

IMG-4180.jpg

IMG-4183.jpg

I was also reminded doing oil changes it's nice to inspect the bottom of the car. Two common (at least enough to be aware about) problems on this car are the rear main seal and the water pump. I didn't see any leaks and everything looked clean.

Filled 'er up with LiquiMoly because that's what the flag says!

IMG-4190.jpg


IMG-4192.jpg

Actually I'm not one to have a particular allegiance to a certain brand of oil or anything, it's just what I've always used so I keep doing the same.

While the hood was popped I gave the engine bay a quick "detail" if you can call it that.

IMG-4201.jpg

IMG-4204.jpg

Back in business!
I can verify the water pump issue. My '15 GTI has had two water pump replacements and I am the original owner. First one was under warranty but the second cost me about $1100. Amazing if you ask me because I haven't even changed the brake pads with 62,000 miles.
 

White Shadow

Well-known member
Joined
Jan 26, 2014
Messages
985
I was also reminded doing oil changes it's nice to inspect the bottom of the car. Two common (at least enough to be aware about) problems on this car are the rear main seal and the water pump. I didn't see any leaks and everything looked clean.

So I have an Audi with essentially the same engine (but longitudinally mounted) and both are issues on my car as well. First, the rear main seal has been updated with a different design. The lip of the seal gets pushed in over the end of the crankshaft instead of the original design that just gets pushed over with the lip sliding outwards. The new design solves the problem of the leaking rear main seals.

Also, the plastic water pumps are known to fail, but almost always by leaking due to stress cracks in the plastic housing or by seal failure due to oil leaking on them. There are a few different options for aluminum pumps that solve the cracking issue.
 
Last edited:

T-handle

Well-known member
Joined
Jun 17, 2019
Messages
440
Location
Northern Ostrobothnia Finland
Sorry to hear your sewer problem Nick. The fixing price of the mainline is unbelievable. You can buy your own excavator and still save money 😅
If there's more people on your street that need the mainline operation ask a group price, could be cheaper.

Nice work on your workshop! Love the oil pan of your GTI :love:
 

Dan in Pasadena

Well-known member
Joined
Feb 18, 2009
Messages
13,157
Location
Pasadena, CA
Does the main line have to be TEN feet deep? That seems crazy deep unless you live on a hill or something. Any chance you can hire a backhoe operator and have that work done, tunnel under side walks instead of removing/replacing them?
 

loganb

ALLIANCE MEMBER
Joined
Dec 29, 2011
Messages
5,578
Location
Omaha, NE
Sewer issues....ugh!

That 25k seems astronomical but then again it does include significant road work so that just makes it seem high. Is it an option to just replace the main to the street and skip the road excavation or is that where the worst part of the line is?

Makes me thankful that when we bought this house we had a sewer inspection as part of the process so have no worries about that. I replaced the main line from my Iowa house to the septic distribution box myself...but that was a piece of cake compared to yours as it was in the country with no neighbors and wasn't too worried about the proper regrading/backfill. A $500 trailer and mini excavator rental and half a dozen sticks of pipe and a couple Fernco couplers and had a good ole time for 2 days :) Much better time fixing it then my wife had on day 2 of me being gone on a week long work trip when it backed up on her thanks to roots intruding into the clay line!

The cart tune-up is a worthwhile project and one of those I enjoy as it just makes the rest of the time in the shop more enjoyable when $h!t works! Hopefully the back starts to feel better soon....I'm about to try a chiropractor for some nagging issues I've got but nothing as significant as you're dealing with so hopefully the kids don't overwork you or that back so you can be ready for the upcoming snow shoveling season!
 
OP
N

nicholam77

Well-known member
Joined
Dec 18, 2016
Messages
2,671
Location
Minneapolis, MN
You can buy your own excavator and still save money 😅
If there's more people on your street that need the mainline operation ask a group price, could be cheaper.

Nice work on your workshop! Love the oil pan of your GTI :love:

Buy an excavator — now there's a fun idea!!

Thanks T! The GTI oil pan "honey comb" pattern is actually a design motif elsewhere on the car (grill, rear diffuser, weather mats, etc). Kind of an odd place for it to show up, underneath the car where no one can see, almost an easter egg in a way.

Does the main line have to be TEN feet deep? That seems crazy deep unless you live on a hill or something. Any chance you can hire a backhoe operator and have that work done, tunnel under side walks instead of removing/replacing them?

It says the depth of the city main is 10', the depth of the main at the home foundation is 8'. So yes I would think the hole would need to be ~10 ft' deep. In the pic a few posts up you can see how much dirt came out of our neighbors' yard. 😁

I have no idea about the sidewalks but one is very close to the house.

Is it an option to just replace the main to the street and skip the road excavation or is that where the worst part of the line is?

I guess anything would be possible, but the largest offset they found (2") was at 62' out from the house, so almost at the end by the street. If / when we do it, it probably makes sense to do the whole thing and make sure it's taken care of because there were multiple issues throughout the length of piping.

Makes me thankful that when we bought this house we had a sewer inspection as part of the process so have no worries about that. I replaced the main line from my Iowa house to the septic distribution box myself...but that was a piece of cake compared to yours as it was in the country with no neighbors and wasn't too worried about the proper regrading/backfill.

Well now I wish I had done that but honestly when we bought the house I had no idea what I was doing. I've learned a LOT of things since. :ROFLMAO:

hopefully the kids don't overwork you or that back so you can be ready for the upcoming snow shoveling season!

Lol I've actually been worried about that very thing! I don't know when it will snow but usually anytime from Halloween onwards is fair game. And bagging the leaves from our giant maples will be a challenge, too. Frustratingly, the kids have overworked me (or my back rather), and I'm sure that has to do with why it's taking so long to heal fully. But it's kind of unavoidable. Cramming my 3 yr old in the GTI usually involves lifting her awkwardly, picking them up, bobbling / napping the baby in the frontpack, etc.

I can verify the water pump issue. My '15 GTI has had two water pump replacements and I am the original owner.

@Evilstig that's a bummer. They should really update the design so it's not a point of failure! I had my headunit die / glitch out early on under warranty, thankfully, that would have been an expensive one, too. Other than that no major bills outside of maintenance.

So I have an Audi with essentially the same engine (but longitudinally mounted) and both are issues on my car as well. First, the rear main seal has been updated with a different design.

Hmmm, well I'll keep an eye on it. If I ever upgrade the clutch I'll do one of the iABED seals. What Audi?
 

White Shadow

Well-known member
Joined
Jan 26, 2014
Messages
985
Hmmm, well I'll keep an eye on it. If I ever upgrade the clutch I'll do one of the iABED seals. What Audi?

A5. She's a bit modified. I had to upgrade my clutch just this past winter because the stock clutch was taking a beating trying to deal with the additional torque. I guess quattro also didn't help the clutch situation since the car basically never spins a tire. I needed something with a much high torque rating and ended up with a Southbend clutch. So far, so good...no complaints and the clutch holds the power just fine.

I was considering getting an iABED rear main seal, but I got a lot of feedback from people who said that they tend to leak. THe iABED seal is similar to the factory upgraded seal in that the lip needs to be pushed toward the block, so maybe the leaking ones were due to installation error. But I did talk to a mechanic who refuses to use iABED anymore because he had two in a row leak on him and he even used the factory installation tool, which is supposed to be foolproof. So I just decided to go with the factory upgrade and it's not leaking at all. I used an $11 installation tool that I purchased from ECS Tuning and I replaced the seal when I had the transmission out to do the clutch.
 

Attachments

  • A5A.jpg
    A5A.jpg
    100 KB · Views: 36
  • AC2.jpg
    AC2.jpg
    223.9 KB · Views: 43
OP
N

nicholam77

Well-known member
Joined
Dec 18, 2016
Messages
2,671
Location
Minneapolis, MN
A5. She's a bit modified. I had to upgrade my clutch just this past winter because the stock clutch was taking a beating trying to deal with the additional torque. I guess quattro also didn't help the clutch situation since the car basically never spins a tire. I needed something with a much high torque rating and ended up with a Southbend clutch. So far, so good...no complaints and the clutch holds the power just fine.

I was considering getting an iABED rear main seal, but I got a lot of feedback from people who said that they tend to leak. THe iABED seal is similar to the factory upgraded seal in that the lip needs to be pushed toward the block, so maybe the leaking ones were due to installation error. But I did talk to a mechanic who refuses to use iABED anymore because he had two in a row leak on him and he even used the factory installation tool, which is supposed to be foolproof. So I just decided to go with the factory upgrade and it's not leaking at all. I used an $11 installation tool that I purchased from ECS Tuning and I replaced the seal when I had the transmission out to do the clutch.

That's a great looking A5! I like the quad exhaust. I was actually considering that very car as I've always liked the looks back when trying to figure out what to get, but knowing kids were on the horizon I got suckered back into VW with a Golf. And I'm glad I did, car seats are pain enough as it is.

Interesting about the iABED seal, I had not heard that. But I also wasn't aware there was a factory upgrade. I wonder if that fits the Mk7, too. I don't really have plans to do the clutch unless I get forced into it. I'd like to go full tune + clutch + tires but don't want to spend the money. But if I get a leak and it's a "while you're in there" sort of thing... we'll see 😁
 

White Shadow

Well-known member
Joined
Jan 26, 2014
Messages
985
That's a great looking A5! I like the quad exhaust. I was actually considering that very car as I've always liked the looks back when trying to figure out what to get, but knowing kids were on the horizon I got suckered back into VW with a Golf. And I'm glad I did, car seats are pain enough as it is.

Interesting about the iABED seal, I had not heard that. But I also wasn't aware there was a factory upgrade. I wonder if that fits the Mk7, too. I don't really have plans to do the clutch unless I get forced into it. I'd like to go full tune + clutch + tires but don't want to spend the money. But if I get a leak and it's a "while you're in there" sort of thing... we'll see 😁
Thanks...yeah, I love the car. I think the A5 is one of the nicest looking coupes on the road. I've always been a fan of VAG vehicles.

The OEM upgraded seal will fit your car if you ever need to do it. The older style seals always seem to leak before too long and that's mainly because the seal can separate from it's backing plate. The new seals are secured differently so that they will not separate. Always try to keep an eye on your PCV because if it fails you will most likely end up causing your rear main seal to fail as well if it's the original design. If the PCV fails, the easiest escape route for the pressure in the crankcase is through that rear main seal.
 

Attachments

  • A2AJ.jpg
    A2AJ.jpg
    197.8 KB · Views: 29
To avoid these ads, REGISTER NOW!

wreckdiver1321

Well-known member
Joined
Aug 12, 2021
Messages
1,039
Location
Billings, MT
Nick, just wanted to poke my head in and say hi!

I've been going through your thread for a few weeks on and off, and it's been fun to watch you have a family and become more of a carpenter. Pretty cool stuff! I'm a big fan of the VW as well, I'd love to find a Golf GTi as a daily but they're not very common out here.

Props to you for keeping those cars looking as good as they do - my entire family is from the Twin Cities area, so I know what winter does to your cars over there.

***** to hear about those sewer issues! I've had to deal with plumbing issues in my last house and that was a disaster. I can't imagine having to do sewage lines. We had our sewer main cleaned and scoped before we bought our new place, but I think we'll still do an annual or biannual cleaning. Luckily I know a great plumber. Hopefully it doesn't turn into a total shitstorm for you. :lol_hitti

Anyway, nice work! Congratulations! Looks great! Etc., etc. Haha you've got a new reader, I like what you're doing.
 
OP
N

nicholam77

Well-known member
Joined
Dec 18, 2016
Messages
2,671
Location
Minneapolis, MN
@White Shadow Thanks for the info, that's good to know!

Nick, just wanted to poke my head in and say hi!

I've been going through your thread for a few weeks on and off, and it's been fun to watch you have a family and become more of a carpenter. Pretty cool stuff! I'm a big fan of the VW as well, I'd love to find a Golf GTi as a daily but they're not very common out here.

Props to you for keeping those cars looking as good as they do - my entire family is from the Twin Cities area, so I know what winter does to your cars over there.

Thanks for checkin' it out!

Home ownership has been a journey for me for sure, from basically knowing nothing to wanting to renovate everything I can. Early on I became addicted to seeing the "before & after" and how I could improve something, it felt good to know it was something I directly accomplished vs. paying someone else. I wouldn't call myself a carpenter by any means, but I do feel like I've learned a lot by doing. The biggest downside for me is time equity and burnout, and balancing that with family and work. The latter two always come first, and don't leave a lot of time for projects and hobbies. This seems to have gotten worse as times go on and the kids have multiplied. :oops:

Funny you say that about the cars — I feel like my car care routine has all but disappeared :ROFLMAO: , but I appreciate it nonetheless! My wife gets hers washed regularly at a commercial car wash place (she's a lost cause), and honestly I'm sort of negligent of her car with things like waxing it and cleaning it. My car... I hand wash a few times a year (yes, you read that right) and get touchless car washes when I can in the winter (if it's not too cold!). Then pressure wash the bottom and clay / seal twice a year. But you should see it in between a winter wash with all the salt and dirt it's almost a different color!

I definitely don't baby it, though!

90667.jpg

A50-D3971-8-C3-E-4534-8-F47-BB4-C2-F32-A9-D0.jpg

Always nice when someone knows the Twin Cities! Anyways, appreciate the kind words!

🍻
 

Matias

Well-known member
Joined
Feb 28, 2015
Messages
616
Location
Finland
Congrats on the new family member, even if now it's already "old news" :D Hope everything is still going strong, I understood that time is even more scarce now ;)

Sorry to hear about the sewage line. It's all the extra work and money with kind of nothing that is better afterwards. I mean, someone totals your car, you get to get a new one, your dishwasher breaks, you get at least to choose a new and maybe better one. Your sewage breaks, well you pour a lot of money to just get where you were before. We just had to repair a blower fan the air system in our house, even though it was "only" $1000, it's still just money down on nothing, and got nothing from the insurance even if it was about 6 years old machine... Good luck, hope you find a significantly lower quote.

Saw you did the oil change and engine bay clean, nice! Did you already do your bi-annual washing and sealing, or did I miss it? :) We're getting our first freezing temps here in Finland. Which means I need to reel in all the garden hoses and shut down the water outside. Which means no more washing outside => have to clean and wax the cars and bikes now so it'll be done at least before winter. I bought the battery operated washer from Kärcher, which enables me to do quick cleans in the garage, but it's not the same...
 
OP
N

nicholam77

Well-known member
Joined
Dec 18, 2016
Messages
2,671
Location
Minneapolis, MN
Congrats on the new family member, even if now it's already "old news" :D Hope everything is still going strong, I understood that time is even more scarce now ;)

Thanks @Matias !

I know what you mean about the sewer + similar feeling like lighting money on fire, and it won't even increase the value of the house because people expect a working sewer when they buy, haha.

I have not done the "bi-annual washing and sealing" yet. The snowy pics above are from previous years. You are ahead of us in temps -- we've had an unseasonably warm October (was 70° F / 21° C yesterday!), #thanksGlobalWarming. 😬 Temps will likely drop soon so I'll have to get to it sooner than later. I like to swap to winter rubber at the same time and I usually wait until it's consistently below 40° F / 4° C to do that.

The battery operated washer sounds cool -- I have seen those. I'd go for it but my garage has no drain and don't want to make a mess.

Thanks for checking in!

🍻
 
OP
N

nicholam77

Well-known member
Joined
Dec 18, 2016
Messages
2,671
Location
Minneapolis, MN
Fusion Frustration

Fusion 360, that is.

I've been intrigued by the use of 3D printing for the shop, especially by @Bakafish and @loganb . And @bj383ss and @T-handle , you have lit a fire in me with all the cool things you've been making and organizing.

I'm still in the research phase (hello YouTube rabbit holes!) and haven't purchased anything, but I figure it would be a good winter project?

In addition to trying to learn about 3D printing basics, which are overwhelming in and of themselves, I've been watching Fusion 360 tutorials, as it seems that's a popular modeling software for 3D printing that has a free personal-use license. The thing that interests me the most about 3D printing is being able to design something from scratch and be able to print it, especially things that are too small, too complex, or too time consuming to make out of wood.

Turns out Fusion 360 is not easy. :( I'm familiar with Autodesk as a company (the company I work for uses their high-end Flame and Flare systems for video post-production), but I have no background in 3D or CAD.

Sketchup on the other hand, I was able to jump into pretty easily. I certainly don't know much about Sketchup, but enough to get by and get my simple models done fairly quickly.

Anyways, one project I'd like to 3D print and design is a "flag stop" for my MFT fence extrusion. If you'll recall I made this version out of wood and an off-the-shelf part:

IMG-4396.jpg

It's OK... but I didn't do a good job with the tolerances so there is wobble and it just doesn't feel that good to use.

IMO this would be a perfect opportunity for a 3D printed part, and they actually exist for 20x40 extrusions, commercially from BenchDogs and from 3rd parties on Thingiverse. But... my dumba$$ went with a 30x60 extrusion for some reason, so those won't work.

My plan was to test my elementary skills and make the part for my extrusion in both Sketchup and Fusion360 and compare the processes.

The Sketchup version came together very quickly (30min or less):

MFT-Flip-Stop-guide-lines.jpg

The manufacturer of the aluminum extrusion I use, Misumi Engineering, had a CAD download for the extrusion available (it even prepares it according to how you spec the part!), and this was available in a Sketchup file format, and it imported into my drawing with ease.

One thing Sketchup has that I rely on heavily are "guide lines". These are transparent lines that you can set at specific places to line up parts, rectangles, lines, etc. Fusion 360 sort of has this, but it's different and not as fast.

Another thing I love about Sketchup and HATE about Fusion 360 is the orbit tool. It's so much easier in Sketchup. Somehow in Fusion 360 I constantly lose the view I want.

MFT_flip_stop.gif

Part fits good:

Block-on-extrusion.jpg

Quickly modeled the "flag stop", and found some M6 socket head bolts and nuts in the Sketchup 3D Warehouse. Another huge plus for Sketchup -- access to tons of existing models right in the app that you can easily import.

MFT_Flip_Stop_full.jpg

Now for the Fusion 360 version.

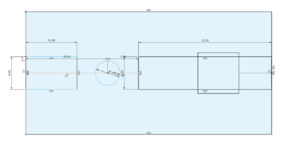
As I understand it, everything in Fusion 360 starts with a 2D "sketch":

fusion5.png

These are very exacting, and you almost have to plan it out before you draw.

fusion4.png

It's not that intuitive to me to think of a 3D object as a 2D drawing, but that's how it works. In making this "sketch", I had lots of trouble getting it to do what I wanted (like align parts to midpoints, snap to lines, move things around). Ultimately it's just user inexperience on my part, but for a noob it's way less contextual and easy to "figure it out".

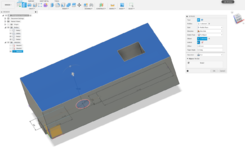
Then you extrude.

fusion1.png

If the sketch is done well, the extrusion should actually be pretty easy.

fusion2.png

fusion3.png

In the end, my Fusion 360 attempt took about 10x as long to make the model.

But... I feel better about it. I'm confident it's "solid" and that the dimensions and geometry are correct. In theory, it should be much easier to adjust after the fact, whereas in my opinion adjusting anything in Sketchup after the model is extruded is a royal PITA and often gives weird results.

From my research you can 3D print from Sketchup, but with Fusion 360 it's actually a feature. You can literally pick File --> 3D Print and send it to your slicer of choice.

Even though it's not that friendly to me I think I'm going to keep at it and see if I can break down the barriers to the basics. I can tell how powerful it is.

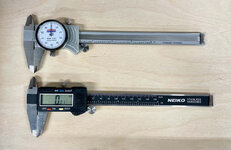
One last bit, I got a cheap digital caliper to take measurements. Sorry @Bakafish , no Mitutoyo here :ROFLMAO:

IMG-4395.jpg

IMG-4390.jpg

Seems to work ok!
 

loganb

ALLIANCE MEMBER
Joined
Dec 29, 2011
Messages
5,578
Location
Omaha, NE
Logan, T our evil plan is working. :LOL:

evil plan.JPG

Nick you'll be picking it up quickly!

As you get more practice you'll be able to quickly think thru what you think the most efficient method to model something is which actually changes based on how much "future modification" you might want to do. The more modification/adjustment one might need to do to something, I find it's easier to spend more time initially dimensioning/referencing things "properly" so that my modifications are easier

Had I modeled the flag stop block, I probably would've done it in this rough sequence....keep in mind there isn't always a "Right" way and again depends on how much future usage/flexibility you may want in the model:
  1. Main "Block" extrusion as a rectangle: Either from the end or from the top or bottom...but draw a rectangle then extrude in the necessary direction. Based on what I see I'd probably go from the end/side
  2. Track in the bottom: This can be done as either a removal of material based on oversizing the extrusion from step 1, or adding material just for the center that rides in the aluminum
  3. End hole
  4. Top hole or top square cutout
  5. Other top feature
  6. Chamfers/roundovers
You could easily combine steps 1 & 2 if you "draw" the end profile and extrude from an end vs the top/bottom, depending on how you dimension/reference things it could make changes easier or harder down the road...however for our hobbist use where nobody else will use the files(vs having to follow company standards so mirrors design practices others use) I don't think it's a consequential decision which way to go here

I've found its often easier and allows better future modification to not try and accomplish too much in a single "step" in CAD. For example on that top face, the hole and the square cutout could potentially be drawn then cut in the same sketch/operation...however I'd make them 2 different sketches and 2 different cut operations as I've found that enables better flexibility but that decision also depends on what the design intent is. If those features were going to ALWAYS be at a fixed distance and cut depth because they mate with something else, it makes sense to sketch and cut them together.

End of the day....practice will make ya better. And in case you were wondering....you could order an Ender printer from Amazon and have it by the weekend and still have several weeks to order a Prusa MK3S+ and have it before Christmas(they ship DHL) based on their current 5 week lead time! For more fuel to the fire....hit out r/functionalprint and r/3dprinting for more fun and ridiculous things to print.

PS: You can make fun Xmas gifts for people on them.....so use that to justify to the wife why you have to get it early. Also gives you time to figure out what else you need then that can be Xmas gift ideas for others to get you!
 

Bakafish

Well-known member
Joined
Feb 7, 2017
Messages
477
Location
Tokyo
Fusion 360 was not intuitive, it has a real learning curve, and its constant evolution makes finding the correct solution to solving any issues you may be facing harder as there is a multitude of 'answers' that are potentially out of date and no longer relevant to the version you are using. BUT, it really is the best solution I have ever used to move my ideas into tangible results, and can ultimately do everything I have needed of it, often with little effort. There are some good YouTube videos that show the 'best practices' for new users to follow as it is really easy to paint yourself into a corner and make everything more difficult and frustrating. I'm still working on my approach, trying to leverage components and joints and fighting against interdependencies ruining my day, but I'm convinced the effort to master this tool will continue to be be worth it. Just FYI, Fusion has a built in slicer, so you don't even need to export to Cura, not that it is a real burden.

As far as the 3D navigation, it allows you to change the default behaviors/key bindings to those of other programs that may be more natural. I found that the "Alias" key bindings coupled with a Logitec Master 3 mouse and some button macros in the Logitec software solved all my navigation problems. One thumb button moves my frame of reference, the other handles the orbital movement. I set up macros to make Cura behave the same way, so I'm not having to change mental models when moving in 3d space. (I haven't used the Fusion360 slicer which may be more than capable, Cura has served me well so far.)

On 'cheap' digital calipers, I think the biggest disadvantages are that they do not tend to be 'Absolute' meaning they don't know their actual position when powered up and need to be zeroed very often, and that they eat batteries (likely trying to keep track of where they are.) These sound like minor complaints, but adding 'friction' to using a tool discourages good practices. If you have to spend a second zeroing it everytime, or worse if you screw up and mis-zero it leading to a bad reading, it's going to make you hesitate to use it as often as you should. I just bought a smaller 150mm Mitutoyo FluidProof caliper used for $50, and it is perfect. But if you are not wanting to take the risk of a used tool, I think calipers are so critical and often utilized that it is worth spoiling yourself on a good one. Maybe what you got is acceptable :dunno:

On the printer front, I think the Prusa MK3S+ is the most effortless way to get great and reliable results. Never heard a bad word about Prusa, they seem like a quality outfit. But an Ender 3 variant is so cheap and gets you 95% of the way there, with a bit more hand holding and effort, but still turn-key for a beginner. I have been trying to exceed the capabilities of my Ender in order to justify building or buying something more capable, but the damn thing refuses to submit and just spits out serviceable parts no matter what I ask it to do. I'd rather see you have a printer than sit on the fence, so if the cost is holding you back, get a Ender and get started.
 

T-handle

Well-known member
Joined
Jun 17, 2019
Messages
440
Location
Northern Ostrobothnia Finland
Logan, T our evil plan is working. :LOL::LOL::LOL:
Buhahaa:p

Learning CAD sounds interesting Nick! I'll be skating with you as you go, maybe learn something too(y)

I usually go easy way and search something already designed from Thingiverse and scale the size with Cura for my needs.

Here's a flag stop for mft slide btw. Flag stop Pretty similar to your design but yours seems to be beefier=better

I'm not sure about the Prusa prizing in states, Here it's around 1000€. If I had that kind of money to use for a printer I would buy three Creality printers and the rest of the money would go to all sorts of filaments:ROFLMAO:

In other words I'm happy with Ender 3. Hmm three printers throwing organizing bins 24/7:unsure:

Welcome to the rabbit hole Nick(y)
 
OP
N

nicholam77

Well-known member
Joined
Dec 18, 2016
Messages
2,671
Location
Minneapolis, MN
Logan, T our evil plan is working. :LOL::LOL::LOL:

LOL Bret! :ROFLMAO:

As you get more practice you'll be able to quickly think thru what you think the most efficient method to model something is which actually changes based on how much "future modification" you might want to do. The more modification/adjustment one might need to do to something, I find it's easier to spend more time initially dimensioning/referencing things "properly" so that my modifications are easier

This is a big takeaway for me. With Sketchup I've just extruded as I go along, making it up and adjusting as needed. I need to learn how to consider what I need to do before I actually do it, and what adjustability is needed, which is new for me. I also get that a lot of Fusion's power lies in parameters and constraints, but that they might not always be necessary for every model, so yeah I think you hit the nail on the head.

You could easily combine steps 1 & 2 if you "draw" the end profile and extrude from an end vs the top/bottom, depending on how you dimension/reference things it could make changes easier or harder down the road...

Case in point — I had not considered drawing the side profile and extruding that. That makes a lot of sense. I was attempting to make things easy to modify by adding parameters for the dimensions, extruding "to object", constraining elements to midpoints etc. But I think for fun I am going to go back and simplify, try the side profile, do it more in your order, and see if I have an easier time.

I've found its often easier and allows better future modification to not try and accomplish too much in a single "step" in CAD. For example on that top face, the hole and the square cutout could potentially be drawn then cut in the same sketch/operation...however I'd make them 2 different sketches and 2 different cut operations as I've found that enables better flexibility but that decision also depends on what the design intent is. If those features were going to ALWAYS be at a fixed distance and cut depth because they mate with something else, it makes sense to sketch and cut them together.

I was watching some tutorials that emphasized sketching everything before doing any extruding, but I do see why that could be problematic. I had some overlapping elements in the sketch that probably shouldn't have been, and would have been easier if I extruded the basic rectangle shape first. This is all super helpful.

There are some good YouTube videos that show the 'best practices' for new users to follow as it is really easy to paint yourself into a corner and make everything more difficult and frustrating.

The main series I've been watching is Paul McWhorter. I was drawn to it because instead of just showing how to do things, he seems to focus more on what not to do, or why you do it a certain way.

If you have any other recommendations please let me know!

As far as the 3D navigation, it allows you to change the default behaviors/key bindings to those of other programs that may be more natural. I found that the "Alias" key bindings coupled with a Logitec Master 3 mouse and some button macros in the Logitec software solved all my navigation problems.

Hmmm, I'll have to look into that but I'm not using any keyboard shortcuts. Just dragging the mouse around, either with the orbit tool or the view cube. It just seems very unnatural and gets stuck at weird angles to me, whereas in Sketchup I can easily dial in the exact view I want. But I'm getting more used to it.

On 'cheap' digital calipers, I think the biggest disadvantages are that they do not tend to be 'Absolute' meaning they don't know their actual position when powered up and need to be zeroed very often, and that they eat batteries (likely trying to keep track of where they are.) These sound like minor complaints, but adding 'friction' to using a tool discourages good practices.

Totally hear that and I admire your dedication to quality tools. I'm not against used tools as long as they work properly, and $50 isn't out of reach, but I just wanted to hit the ground running. I think they will be good enough for me for now. Maybe if I find I'm using them all the time I'd upgrade one day.

But an Ender 3 variant is so cheap and gets you 95% of the way there, with a bit more hand holding and effort, but still turn-key for a beginner.

That's what I'm after, beginner friendly, good quality but doesn't have to be perfect. Would rather sink less money into it because it's yet another hobby offshoot I don't even really have time for!

Here's a flag stop for mft slide btw. Flag stop Pretty similar to your design but yours seems to be beefier=better

Thanks T! I actually modeled mine based off that one. I can't use that one (or the official Festool stop), because the MFT fence extrusion is completely different size than my aftermarket one. The reason mine is bigger and "beefier" is just matching the size of my extrusion which is larger (30mm) deep, so I made the "block" relatively proportional at 30 x 60 x 15.

Another reason to customize is I wanted to use this special extrusion T-nut I have on hand for my specific extrusion:

IMG_4394.jpg

This is why I really want to learn the basics of this stuff. I know there are millions of pre-made models out there, but sometimes it just makes sense to have it customized.

I'm not sure about the Prusa prizing in states, Here it's around 1000€. If I had that kind of money to use for a printer I would buy three Creality printers and the rest of the money would go to all sorts of filaments:ROFLMAO:

Unassembled kit looks like $750 + whatever shipping and taxes. I've also read great things but that's far more than I want to spend. It seems like the popular choice, probably for a reason, but I'm mainly looking at the Ender 3 V2 since it's much cheaper and also well-reviewed. And it sounds like you and Bret and Baka agree!
 

fourmotioneer

Well-known member
Joined
Mar 19, 2015
Messages
218
Location
Ann Arbor, MI
Heh, your CAD woes made me laugh. I just tried SketchUp last evening and thought it was the most confusing way to create a model!

I use Fusion 360 for my hobby work, and for two years I used SolidWorks as a design engineer…SketchUp tripped me up for the first 30 minutes. I’m used to sketching the shape and then going back to dimension. Seems like in SketchUp that’s not a thing.

I think you will get used to the 2D sketch -> 3D feature process pretty quickly.
 

loganb

ALLIANCE MEMBER
Joined
Dec 29, 2011
Messages
5,578
Location
Omaha, NE
+1 to all the rest of the gang pushing you down the hole has said.

I love my prusa, but would have 0 problems buying an ender. My brother has 2 at work as well as a Prusa at home and all perform very comparable. In fact I've kicked around buying an ender so I could dedicate them based on nozzle size or material type.... haven't done it......yet

Also, when you decide you like fusion... here is your next gift idea

https://www.amazon.co/dp/B000LB7G00/

makes the process of rotating, zooming and panning in 3d as intuitive as if you were holding the part in your hand. Now it's gotten way more expensive since I bought my personal use one... but it's awesone!
 

Bakafish

Well-known member
Joined
Feb 7, 2017
Messages
477
Location
Tokyo
To be clear, the key bindings were only used to assign them to the extra buttons on my mouse. Only the 'Alias (software)' set of keybindings made it possible to do those macro assignments. There are several additional thumb buttons on my mouse, the primary 2 I use for 'orbit' and 'pan' which, along with the 'zoom' assigned to the mouse wheel, makes movement control much more natural. You also may want to note that the orbit axis point (depicted by a green point marker) often moves based on what you have selected which can be disorienting, but can be manually set before orbiting with the mouse.

Right now there are a lot of Ender 3 variants, I'm not up to date on all the differences, but the most helpful mods I made to mine are now offered as factory options on the different models or easily added. So I'd make sure to get a unit with the Quiet Stepper Driver board, and I highly recommend the Creality Glass bed plate and optionally an authentic BLTouch bed leveling probe. The Glass bed has provided good adhesion for me without having to do any kind of glue sticks or hairspray. Just a quick pre-wipe with some alcohol and print. And it is extremely flat, which helps ensure successful prints in more ways that would be immediately obvious. The BLTouch probe is not necessary, but has reduced the amount of fiddling I have to do before printing to a minimum. It gives me confidence that my first layers are where they need to be and cut down the number of variables that can affect a successful print. There are other bed probes out there, I do not doubt they are effective but I only have experience with the BLTouch.
 

loganb

ALLIANCE MEMBER
Joined
Dec 29, 2011
Messages
5,578
Location
Omaha, NE
Any good ideas on how not jump into the 3D printing rabbit hole? Maybe downloading Fusion 360 and finding out it's too complicated? :D

Jump into the shallow end with a random, off brand poorly supported printer with no user fan base following on the internet then beat your head against the wall as you try and get something to print right. You'll shortly get so frustrated you can't get even the stock files to print that you won't even worry about designing your own stuff and will climb back out of the rabbit hole quickly and shun it for years to come!

Not speaking from personal experience...but have heard the story a lot

Buy a Prusa or Creality machine.....welcome to the rabbit hole. Lots of other good machines out there, those are just what seem to be the most common, top regarded non-resin printer manufacturers for hobbyists
 
OP
N

nicholam77

Well-known member
Joined
Dec 18, 2016
Messages
2,671
Location
Minneapolis, MN
H A P P Y H A L L O W E E N !

"A Ghost Story"

I had the kids all weekend while my wife was at work, so nothing in the way of projects, but I was very much looking forward to taking my oldest trick-or-treating for the first time.

I don't really have many Halloween decorations, but my dad gave me this light up ghost that's about 3 ft tall and about 30 yrs old that we had through my whole childhood. I had it set out in the front yard and it was working, but the day before Halloween it wouldn't light up!

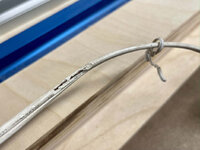
I took it apart and cleaned and tested the socket, there was power, but no light. I couldn't figure it out. After 20min of fiddling I was so confused and about to give up, and then I noticed on the neutral side of the cord there was a small cut that was only occasionally making contact.

I snipped the cord, eliminating the faulty section and spliced it back together.

IMG-4500.jpg

Another section of the cord had some wire exposed, probably from an animal gnawing on it.

IMG-4502.jpg

So I wrapped that and the connectors with electrical tape.

I'll have to replace the whole assembly sometime but this will get me by this year. It works again!

IMG-4503.jpg

IMG-4524.jpg

Funny thing is my neighbor two doors down has the same ghost! Also from ~30 yrs ago and also given to him by his dad. I could hardly believe it. :ROFLMAO:

Trick or treating was a success, my daughter was a pink "Ballerina Princess", pretty much as stereotypical "3-yr-old-girl" as you can get

IMG-4512.jpg

IMG-4523.jpg

Finished off the evening with one of my latest favorite brews, the Warpigs Foggy Geezer.

IMG-4528.jpg

🍻
 

bepjrfan

Well-known member
Joined
Aug 14, 2015
Messages
170
Location
North Dakota
Oh snap... I'm borderline about to join ya in this department. Mostly a lurker on these forums, but follow many of the same people you do and damn it has been tough holding out! Go with the Ender 3v2?
 

bdbecker

ALLIANCE MEMBER
Joined
Nov 18, 2015
Messages
5,574
Location
Iowa
That chewed up cord is probably from a squinney.


Once they get a taste for copper (or aluminum), nothing is safe. We had a serious issue with them on the farm. It got so bad that it wasn't safe to even park cars outside because they'd chew on any wiring they could access. Dad waged war on them and eventually got rid of the problem animals. I've had issues with them chewing the aluminum ties on the chain link gate, but (fingers crossed) no issues with cars yet.
 
To avoid these ads, REGISTER NOW!
Top Bottom