To avoid these ads, REGISTER NOW!

Between 705 & 1200 SQ/FT Mixed Grill - From London , England - GRIZZMAKES world

Workspaces between 705 and 1200 squarefeet.

51rider

Well-known member
Joined
Dec 21, 2009
Messages
502
Location
London, England.
Another build update that I always look forward to!

Looking good-especially with the ally roof:)

Hope today has been productive-despite the rain:(
 
To avoid these ads, REGISTER NOW!
OP
G

Grizz1963

Well-known member
Joined
Jan 7, 2010
Messages
12,025
Location
Rochester, KENT. UK
Another build update that I always look forward to!

Looking good-especially with the ally roof:)

Hope today has been productive-despite the rain:(


Morning Mate...... 3.30am and Nicola and I are both awake, she has even made us a cuppa tea...... :bounce::bounce::bounce: No, not what you think, but rather Pizza Hut syndrome.
Ordered in Pizza tc last night, now both got dry mouth etc.


Yes, the rain did mess up 6 hrs of Saturday build time...... but as you will see later when I do the update, I got on with other little jobs.
 
OP
G

Grizz1963

Well-known member
Joined
Jan 7, 2010
Messages
12,025
Location
Rochester, KENT. UK
Right, update time for yesterdays build actions.

I guess the neighbours would not be impressed if I were to start tooling about at 05.00am.


I started out slow, doing the rope on the inner joins, using the Sikaflex Oldbus Dave had brought me. Not knowing, the first length was done with too much Sikaflex, but after that it went better.

By 9am I was just about to start working with tools etc, when a gust of wind lifted the 3m x 1.5m ally sheet, bashing it into the gazebo frame and deposting the lot into the neigbours fence, resulting in what you see below..... council tip fodder.

P1080080.jpg


From there it just got worse.

I did call my mate Scott "Jabbo" who is working 7 days a week for the last 40 days on a project, with a bit of flexibility, to come help with giving a hand.
He was over here within 30 minutes to help me get the ally sheet down and give moral support as it had started raining too.

Thanks again Scott, you really are a good guy !!!

We got the first section down, by which time I had to call off any further progress due to the weather.
Spare wheels on the roof are to get the silicone around the hatch to bond closely with the ally, to keep it all tight.


P1080083.jpg


Because there is a join in the front of the ally sheeting, I decided to get on with cutting and chaping the ally for the front. This must have freaked out Scott's thinking, as he is a engineer and is obsessive to the N'th degree about preciseness.
Armed with a rough drawn cardboard template, I drew it all onto the ally, grabbed the angle grinder and cut. Followed by prepping and smoothing all the edges.
Perfect fit .

P1080084.jpg


Progressing slowly.

P1080085.jpg


At this point Scott had to get back onto the site where he is working, and I carried on on my own for a while, till my mate Steven came around (he lives 40 miles from here) to drop off a bottle of brandy and to give moral support, make coffee and generally boss me around. This was usefull, as I got to make a start on the lightboard for the trailer as the rain was not letting up.

Steven helping.

P1080092.jpg


Steven left at about 5pm to go back to his wife and son. Followed at 6pm by the arrival of Nicola.

By 7pm I went out and fixed the front bib piece to the body.

It has a 100mm overlap from the large sheet of ally, so it is screwed down much higher than needed. I hope to get on with finishing that later today, and then to start on the skinning of the galley and attaching its hinge.


P1080094.jpg


Looking outside, the clouds do not inspire me with confidence to complete what I want to do very quickly, but here's to optimism.

Thanks for looking in.
 
OP
G

Grizz1963

Well-known member
Joined
Jan 7, 2010
Messages
12,025
Location
Rochester, KENT. UK
Well, what can I say ?

The ally is on, the hatch is skinned.

Thanks to Nicola, Scott and Steven for the last few days. Without them I would not be where I am tonight. KNACKERED !!

It has been great having a few people about, helping, supervising and generally keeping me going.

The build is not done by a long shot, but the big jobs are done.

Keeping in mind that I have done post of this build without plans of any nature, and just making it up as I went along, most of the cockups could be hidden as there is always another layer to cover up etc.

Today Nicola saved the day......

When the ally sheet came to the end, to pass over the bib I fitted last night, there was a "bubble" up front. I was going to just cut 400mm up the centre, and then camouflage it later with something...... Not Nicola, she told me to have a coffee, come back and seek a different answer. I went away and came back, and realised that if I started mounting from the once side, the "bubble" would be at the one side, necesitating me to only cut a very thin sliver out the side. Both sides were already fixed at that point.

This was the result of Nicola's input.

P1080105.jpg


Once screwed down with one of the trip strips you would be hard pressed to point out the mistake.

Next up the job I have been procrastinating for some time.

Hatch skinning.

At this point Nicola was weak in her Anorexic state and needed to fight her way into some chocolate covered peanuts, fortunately she made it before thigs turned ugly.

P1080112.jpg


View of the front of the trailer, and the skinned hatch.

P1080115.jpg


This was a hernia inducing procedure, getting the hatch cover onto the body, the shed next to me, and my rain meter were very obstructive, and the whole body is still on the ramps, so quite high.

P1080117.jpg


EUREKA ! ! !


Rear view of the trailer.

After all this time, to see it like this had Nicola and I lauging out loudly and hysterically. Mad I know, but what a relief to get to this point.

P1080125.jpg


Pic taken from my bedroom window, I love the look of the galley hinge.

Now I am tired, satisfied and ready for bed, after 2 very stiff brandy and Cokes.


Thank you everyone for your support and interest to date in this build, it would not be as much fun, or as informed without everyone on this forum giving their input.

There is clearly still work to be done, loads of it, but this has to be the most difficult part of the build.


P1080129.jpg


Jockey wheel, wheels, mudguards, fine tuning door amd a couple of hatch locks tomorrow, and also an attempt to get it out of my back yard so that I know it can be towed, and does not weigh a ton.
 
OP
G

Grizz1963

Well-known member
Joined
Jan 7, 2010
Messages
12,025
Location
Rochester, KENT. UK
Just did the roughest of calculations to add up the time spent on building this teardrop trailer to date. Just added the time I could identify on the build thread.

This does not include the time spent thinking, dreaming, or plotting the next part to be made up.

Works out at 360 hrs, and that excludes time on the internet, updating threads, searching, reading ets.

If you work on 12 hour days, that is 30 days :shock:


Working on 8 hr days, it is 45 days worth of work.


I do not think I will be building Teardrops for a living.


Right, of to B&Q Hardware to look for a couple of locking tatches for the hatch.

Today is D-Day + 1
 

naki kid

Well-known member
Joined
Oct 18, 2008
Messages
272
Location
New Plmouth_New Zealand
Hi from from down south real south ha.Love the Tear drop might have to build one oneday after I finish the barn the landscaping the fences and the on top of it all I have to get our 37 chysler royal on the road again .I feel sorry for you with the lack of space but you do well with what you have,good on you.
 
OP
G

Grizz1963

Well-known member
Joined
Jan 7, 2010
Messages
12,025
Location
Rochester, KENT. UK
Thanks Naki Kid.

I have learnt a long time ago to just get on with what I have.

In South Africa I had a 6meter carport, loads of concreted space, and a 7 car garage.... that was cool, now I just have to be more sensible.
 
OP
G

Grizz1963

Well-known member
Joined
Jan 7, 2010
Messages
12,025
Location
Rochester, KENT. UK
Just went to B&Q and then to tip that gazebo frame at the tip.


Look at what all followed me home.

The charger is "dead" cant be bothered to try fix a fus and the plug that is shattered.

The drill is brand new, but has a foreign 2 pin plug on the charger, BUT comes with 2 batteries... so I just need to dig out my international multi adaptor.....
The Dremmel type multi tool seems unused as well.

The wall sign I got off a guy as I was driving out, and wanted to bin it. Perfect garage decoration.


The rest of the stuff is for Nicola's garden, and the new one once we move there.

Not a bad trade for a bunch of broken poles.


NOW BACK TO WORK !!


P1080133.jpg
 
OP
G

Grizz1963

Well-known member
Joined
Jan 7, 2010
Messages
12,025
Location
Rochester, KENT. UK
Don't forget its Classic Ford on sunday at the pod.

The deadlines are all set around Santa Pod.

We plan it yearly in advance and then meet up with the German contingent and some of the Belgians, Dutch and others from Europe.

My Transit with it's new Zetec conversion should be ready as well having passed MOT and gotten FREE TAX two weeks ago, but Nicola is not prepared to "Roadtest" both .

We will be there, look out for a Jolly Roger on a 5meter flagpole along the rear fence away from the track and noise.

P1080880.jpg
 
OP
G

Grizz1963

Well-known member
Joined
Jan 7, 2010
Messages
12,025
Location
Rochester, KENT. UK
Another very long day, only came in at 9.30pm.

However, there is a lot of news.

I am sure the bulk of it will be sad for those who have followed this thread, with or without adding comments or opinions.

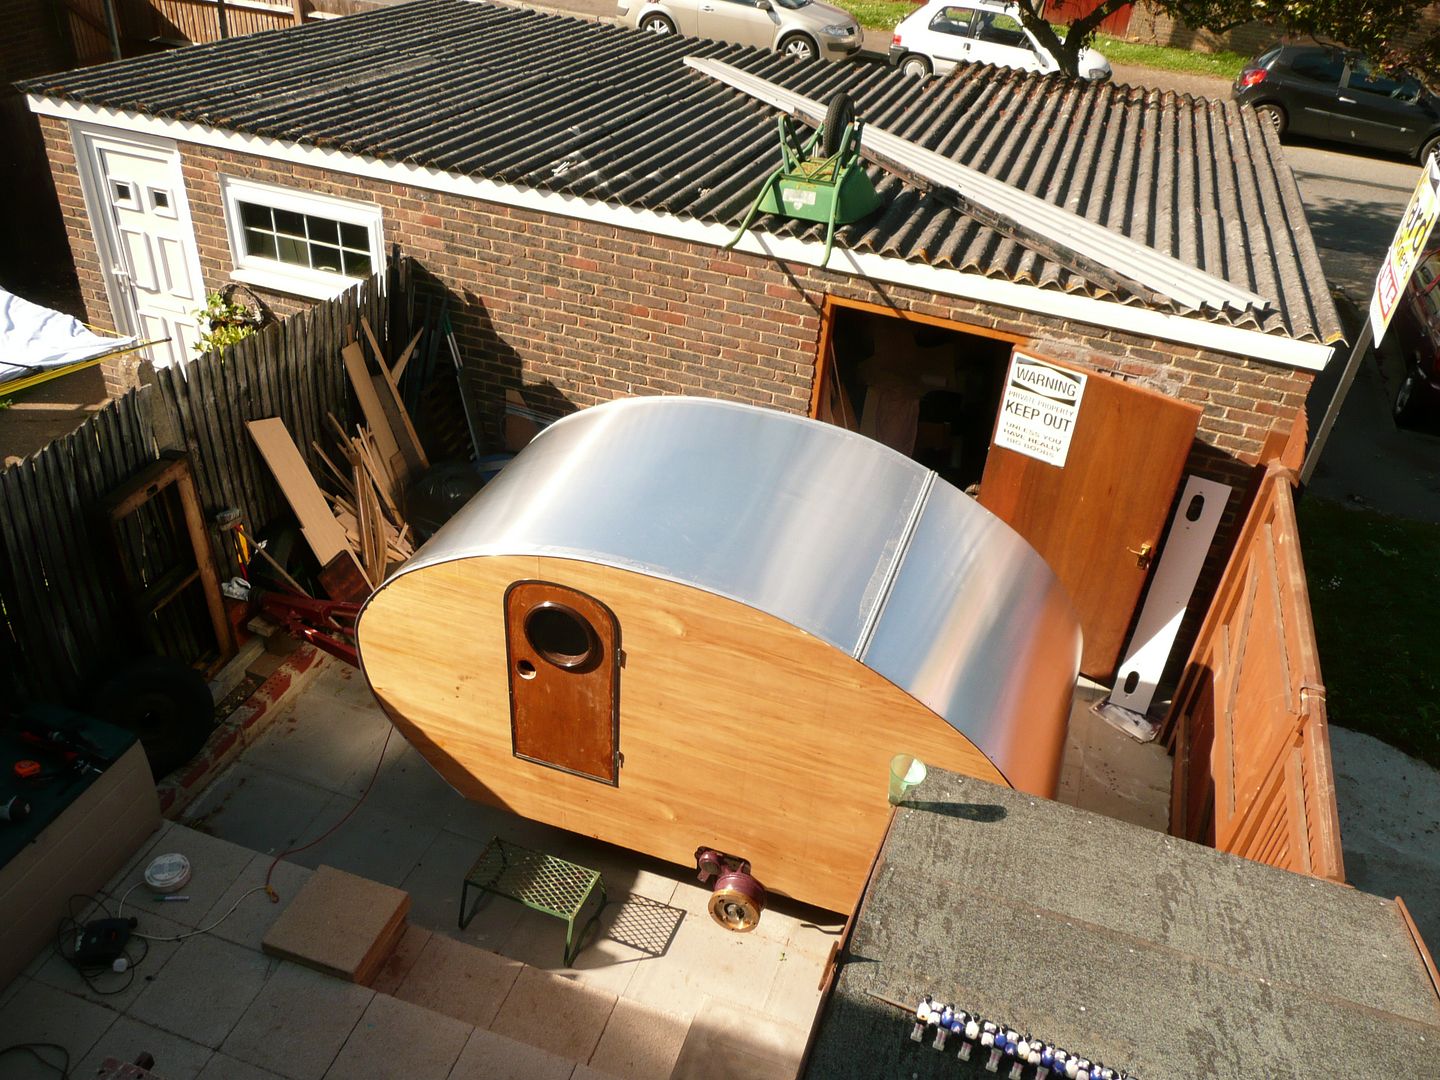
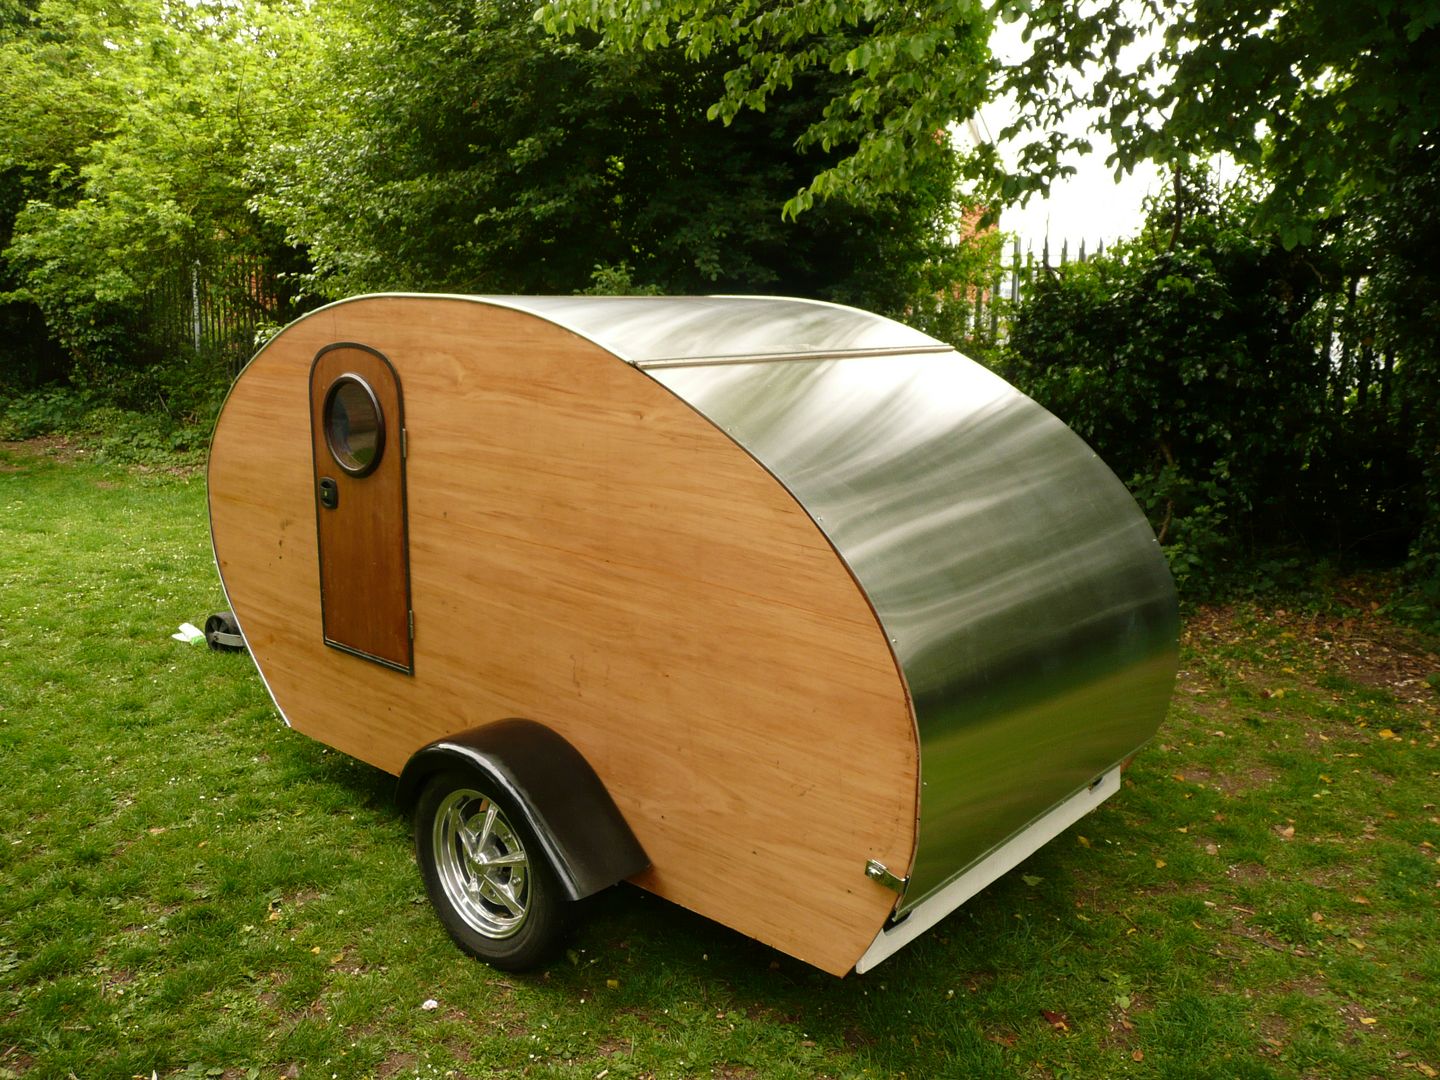
THE GRIZZ-POD IS DONE ! !


Came home from sleeping 8 hours dead at Nicola's place last night.

Went via B&Q for some bits like the latches on the hatch, some doweling for the curtains Nicola is making up and some "Sticky Stuff remover" fot the glue from the selotape I had used to try control the mess of the Sikaflex. ****** selotape glue has proved much harder to shift than the Sikaflex.

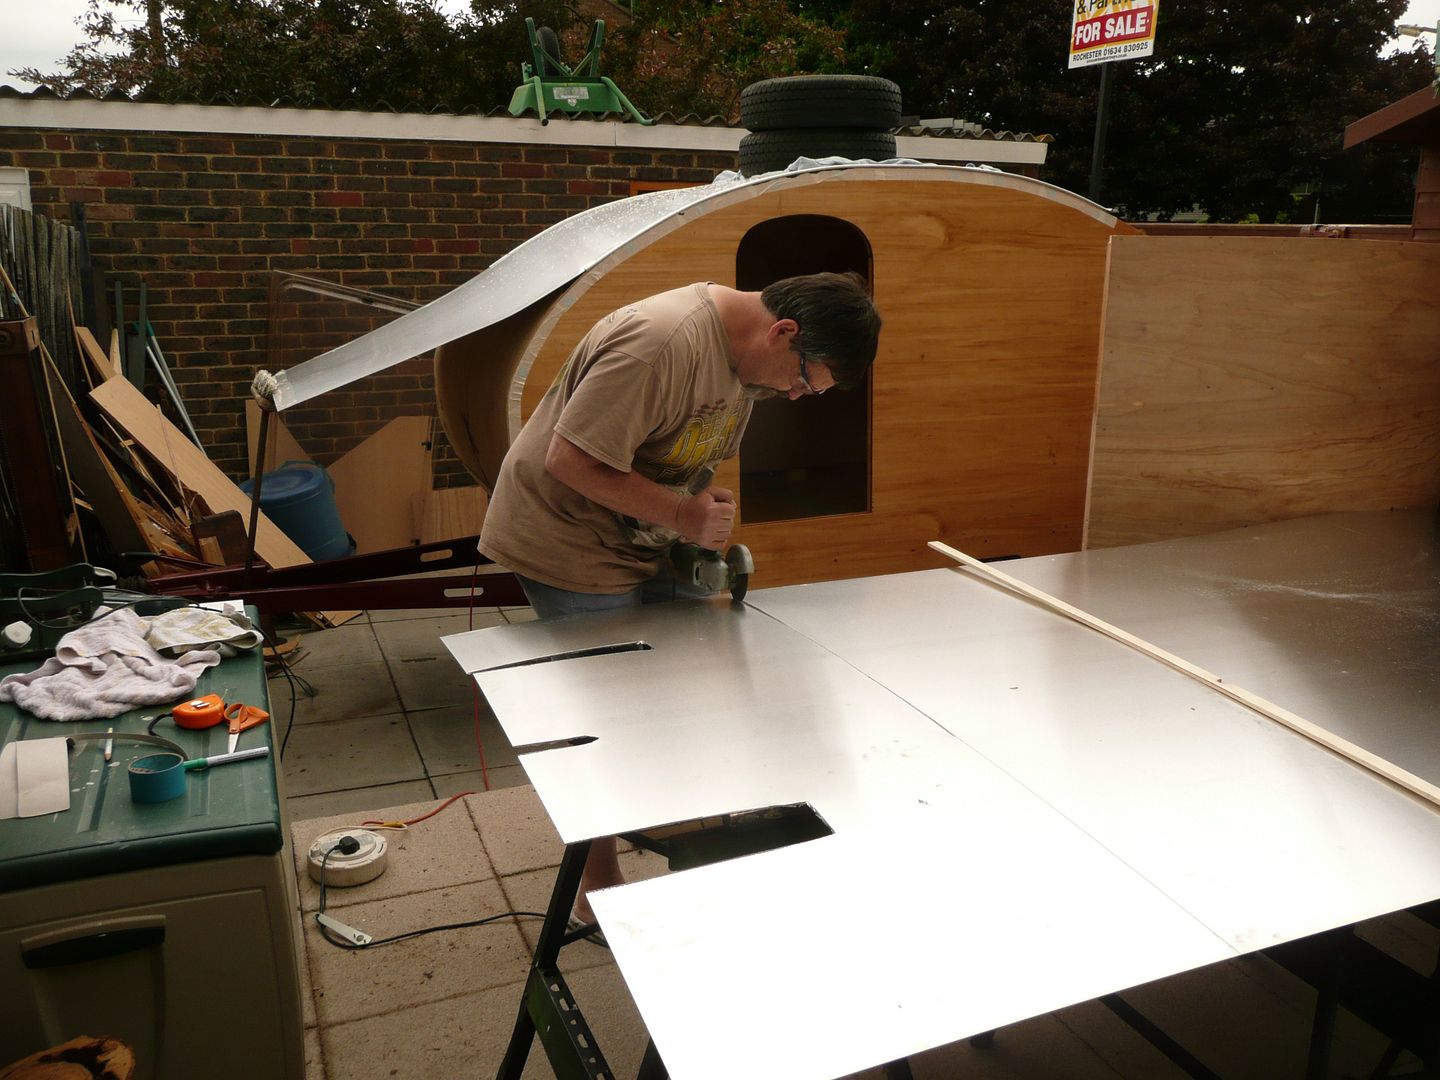
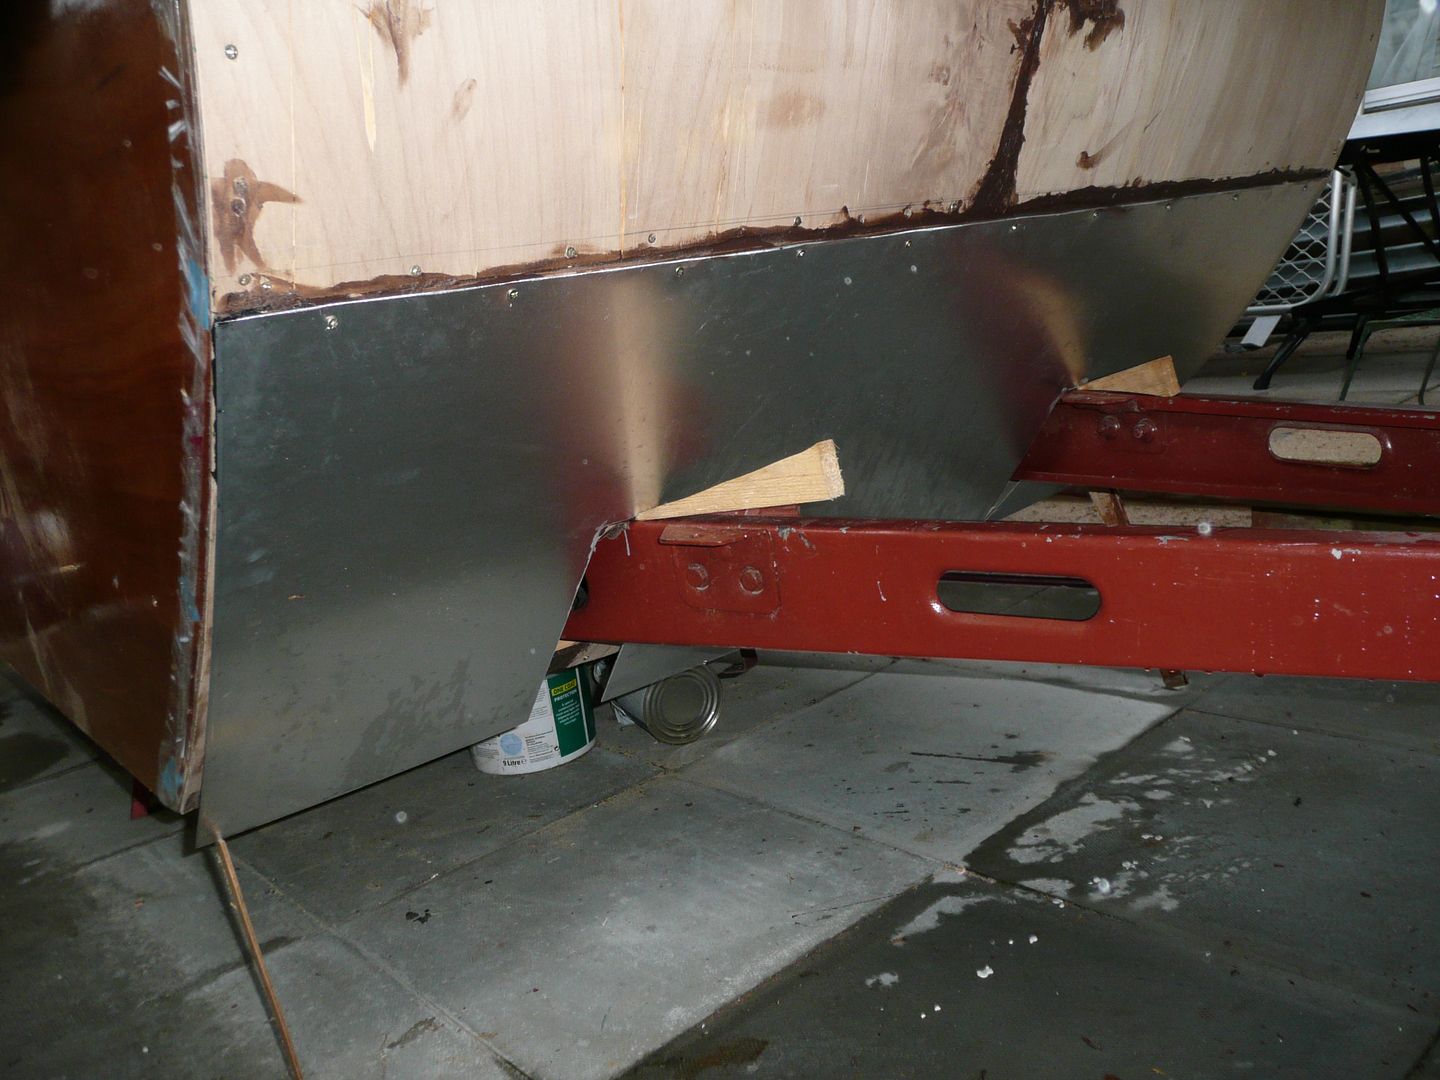
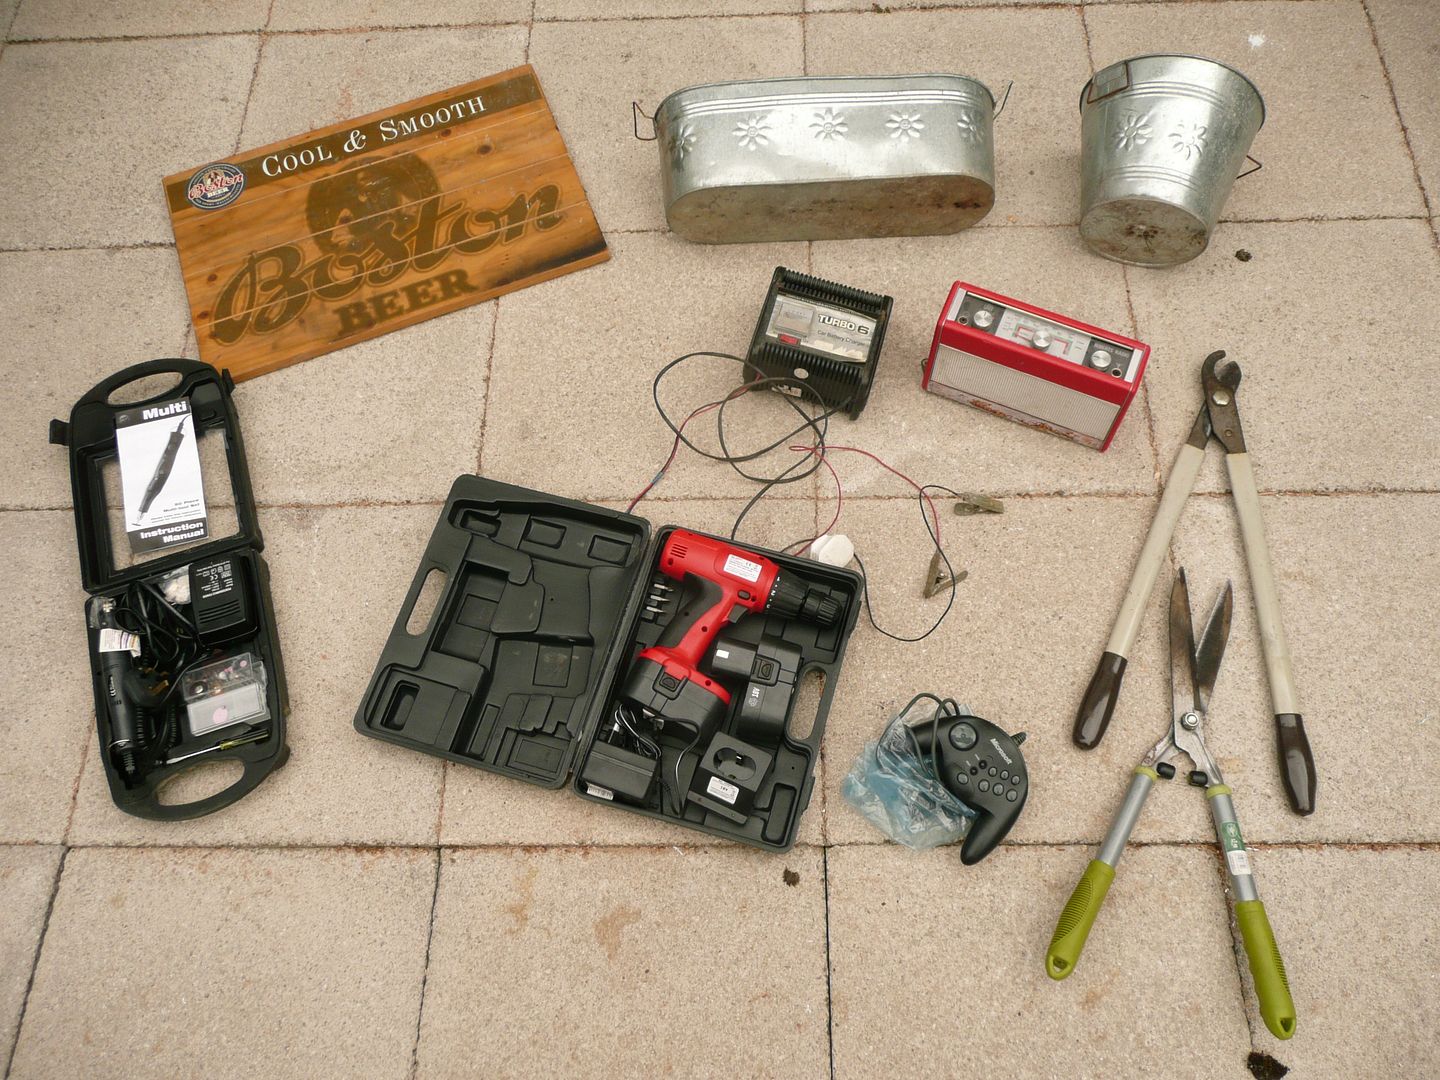
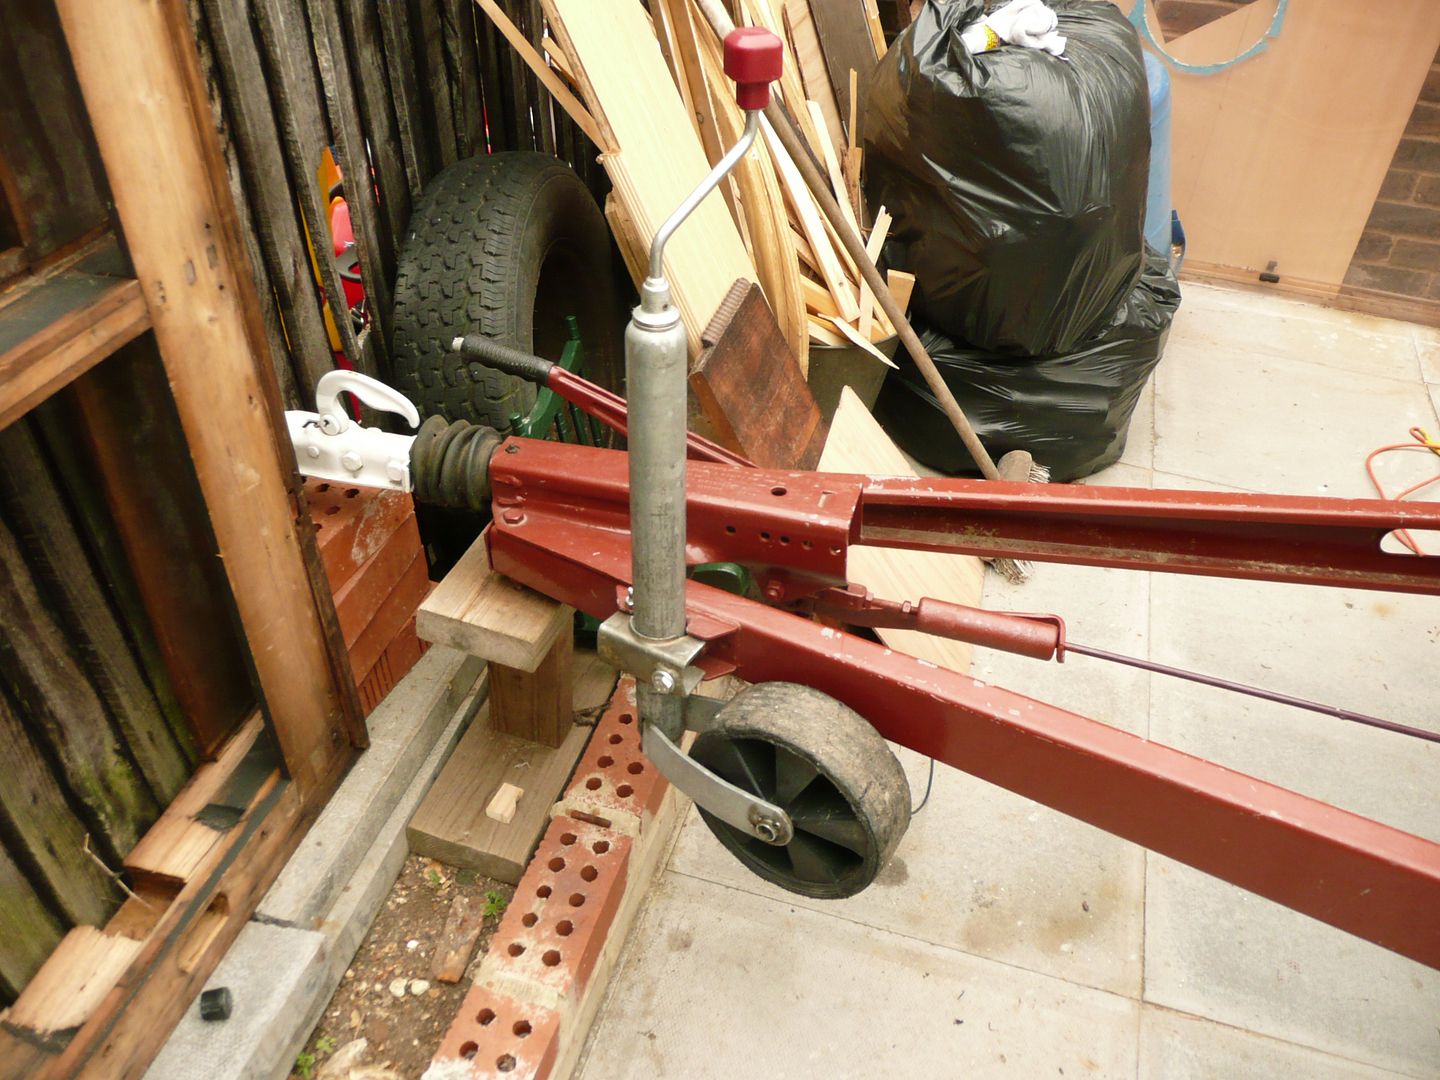
Anyway, got home from the council tip with my hoard, then proceeded to dig out the Jockey wheel I bought from the breakers last year, had to give it some angle grinder action around the bracket, and also had to recut the thread on the securing bolt.

Nice wide wheel for moving on grass.

P1080135.jpg


This picture should tell it all.

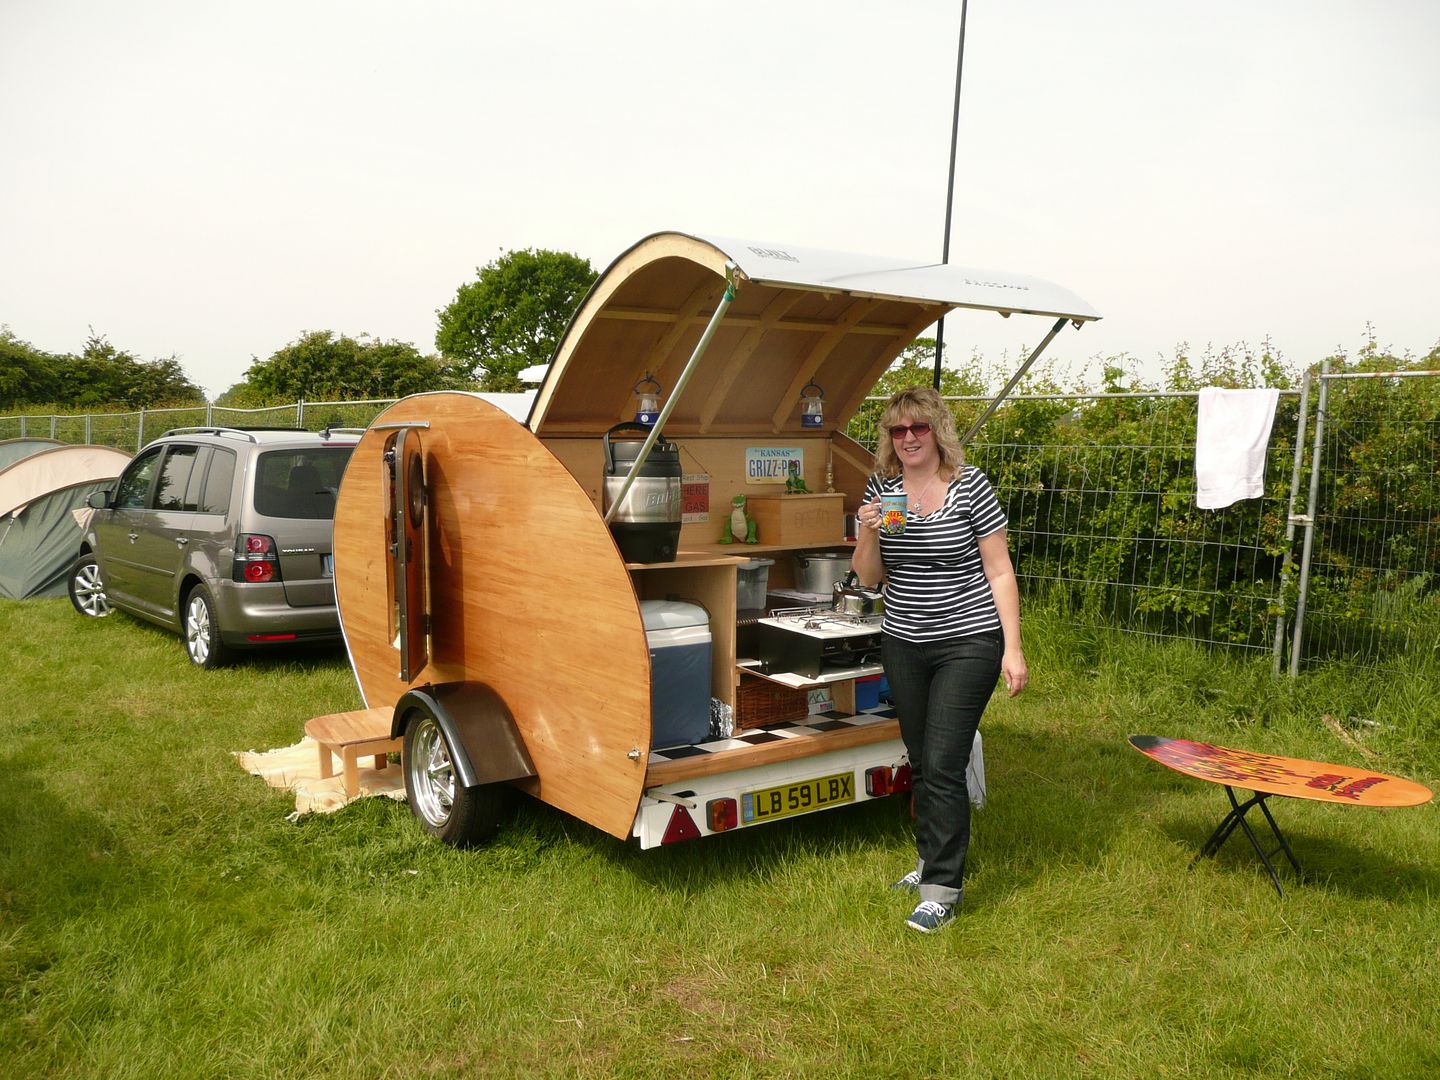
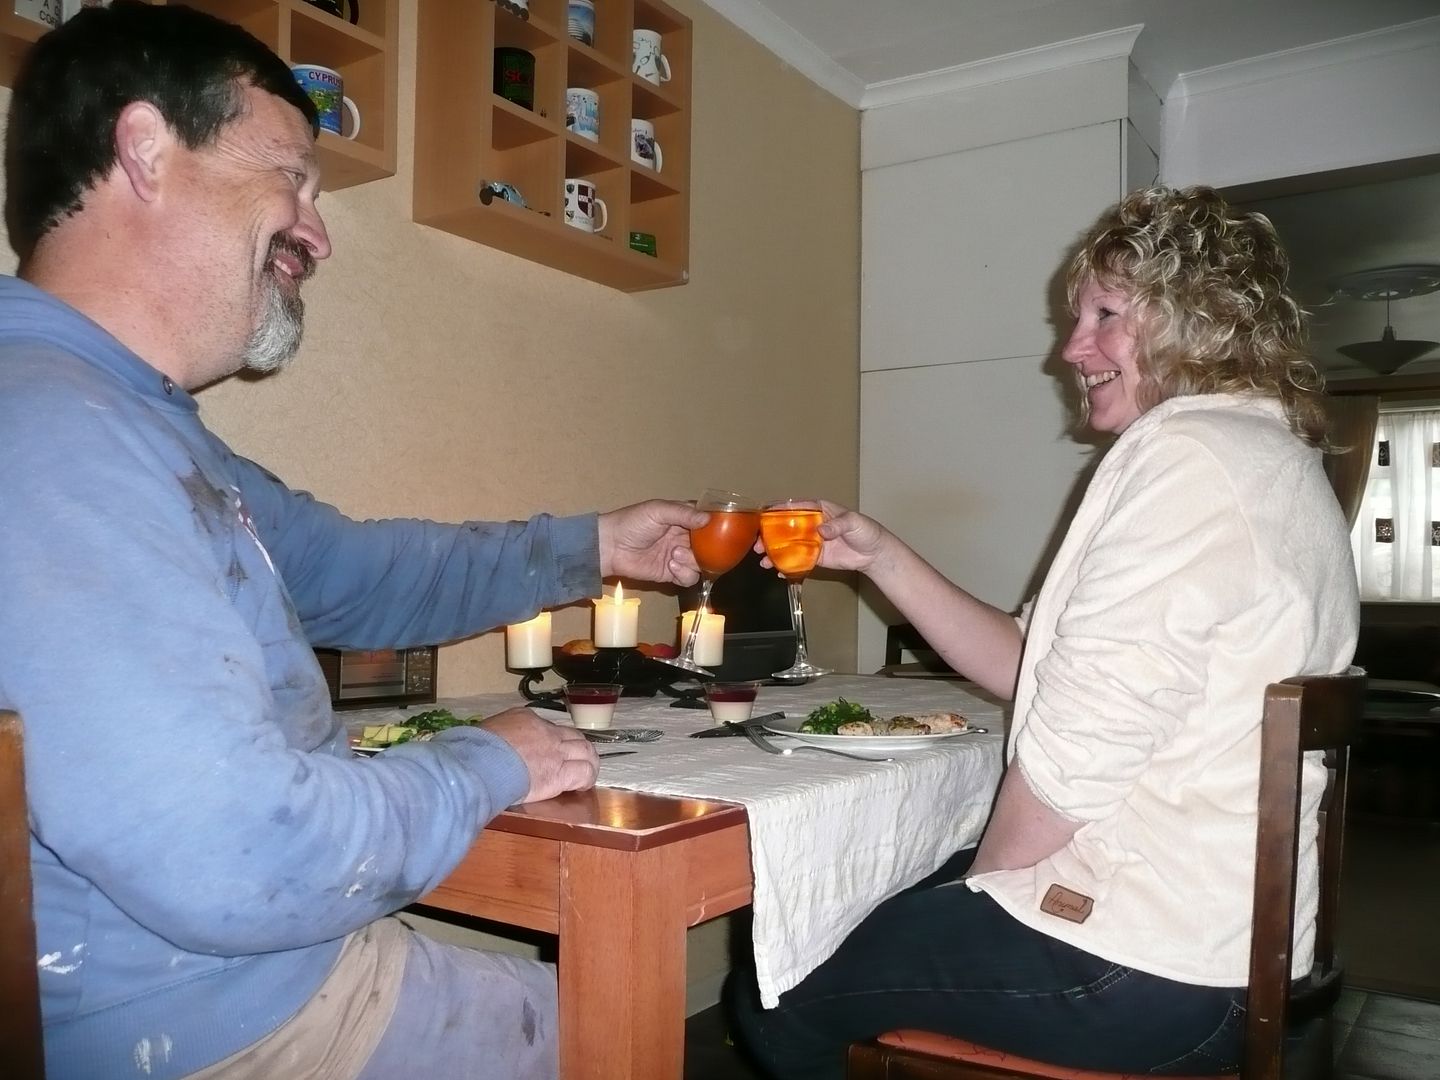
Celebration for what was happening today.

I used the time delay on the camera, and Nicola who is camera shy would only allow me this one chance.

She made us a romantic lunch between doing other bits to the trailer and helping me.

What a girl ! ! !

P1080138.jpg


I guess the job is never really done.
Nicola loved the fact that I was covered in sawdust or is that router dust ?
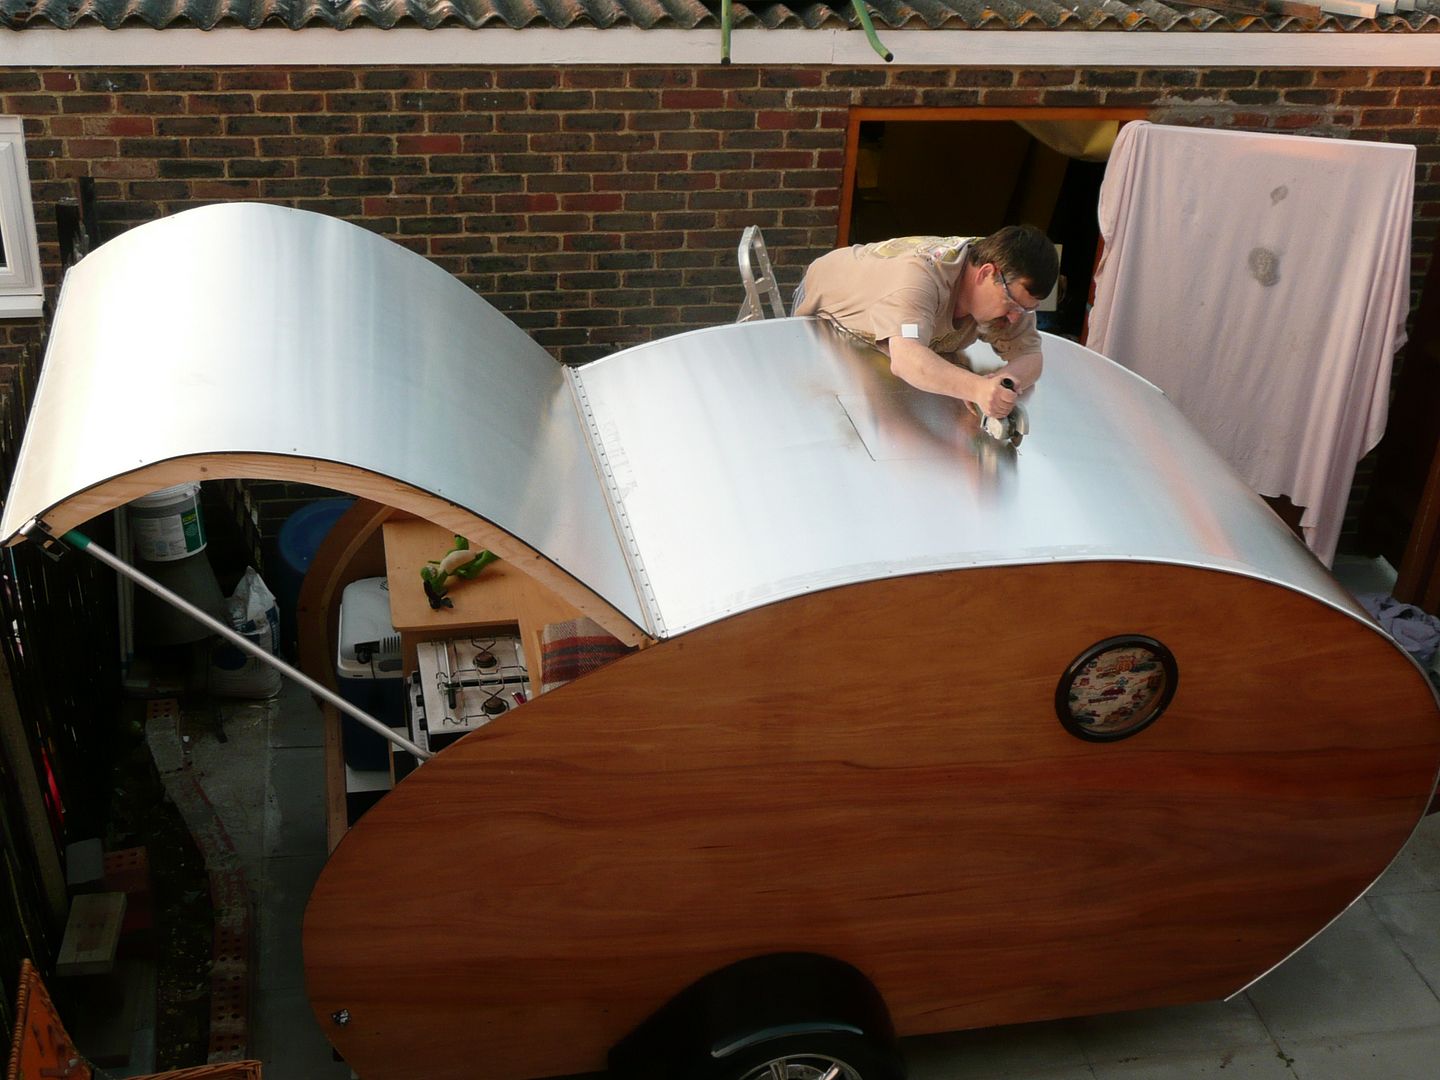
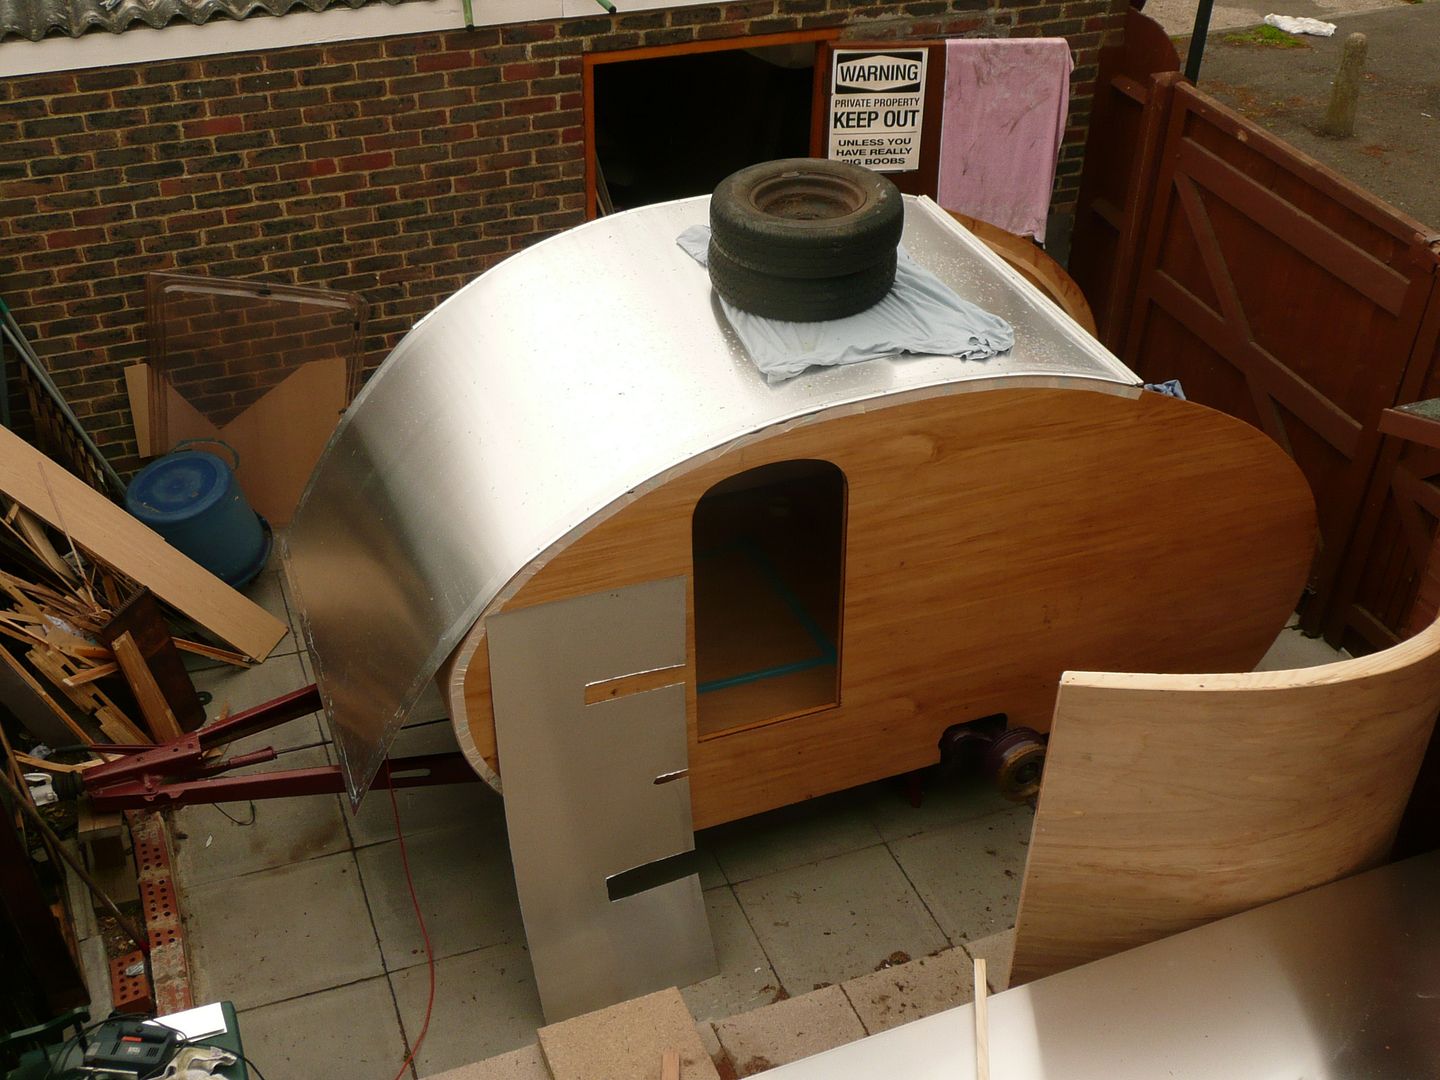
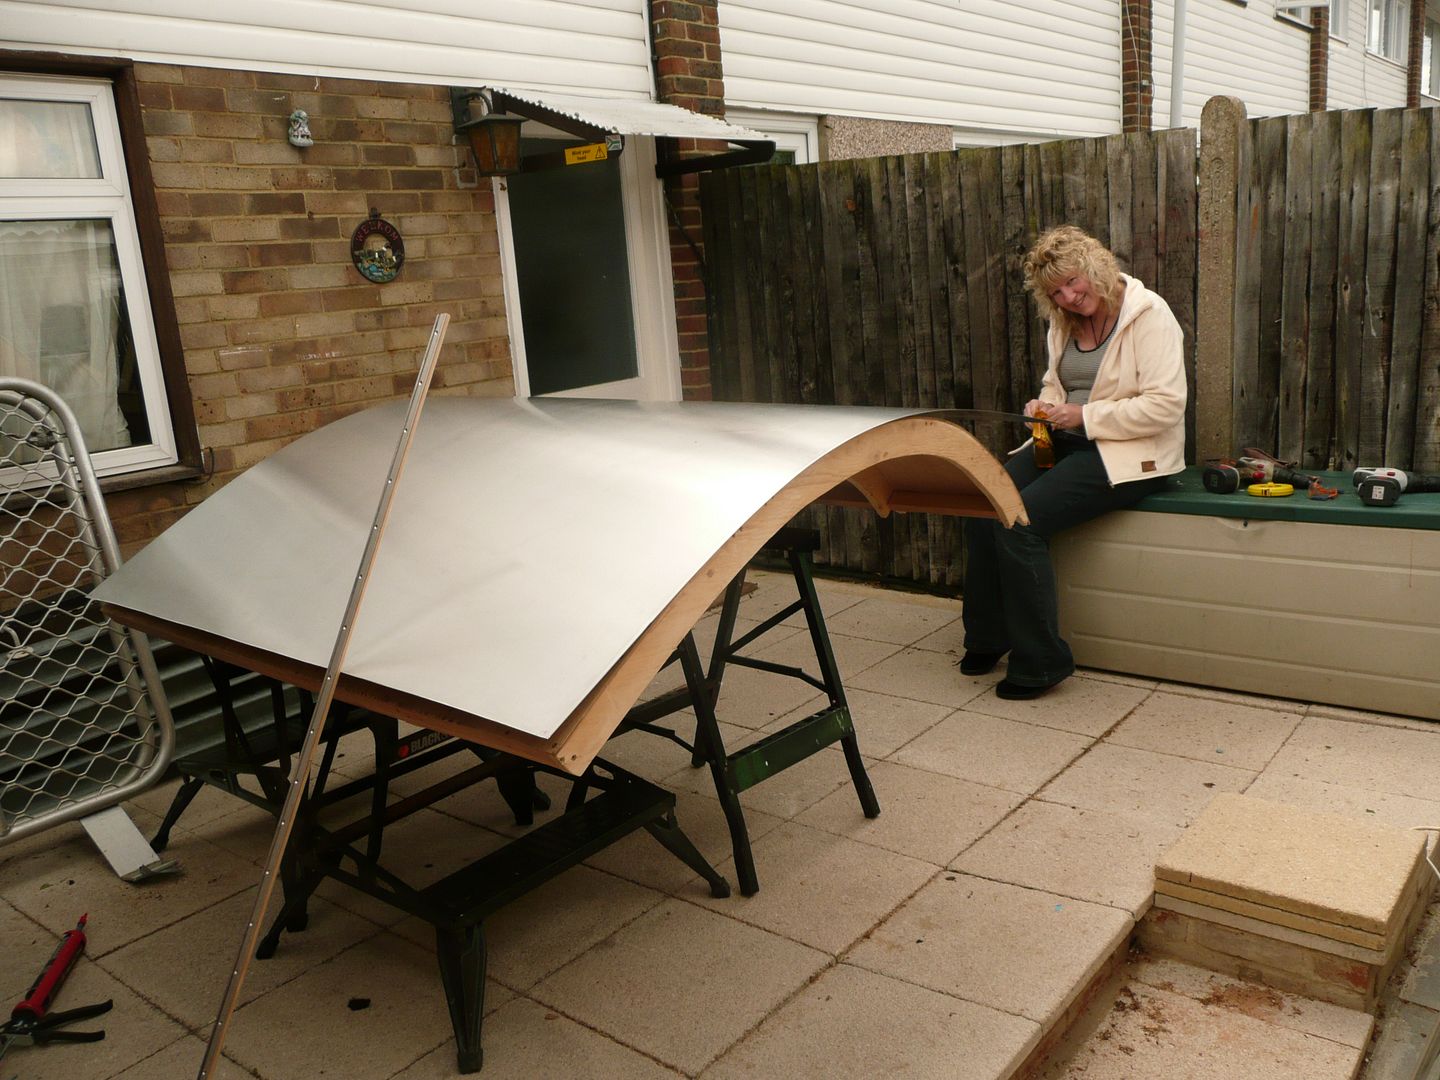
I was busy recessing the sides to allow the latches in without obstruction.
Would not want our kit falling out the rear going down the motorway.

P1080141.jpg


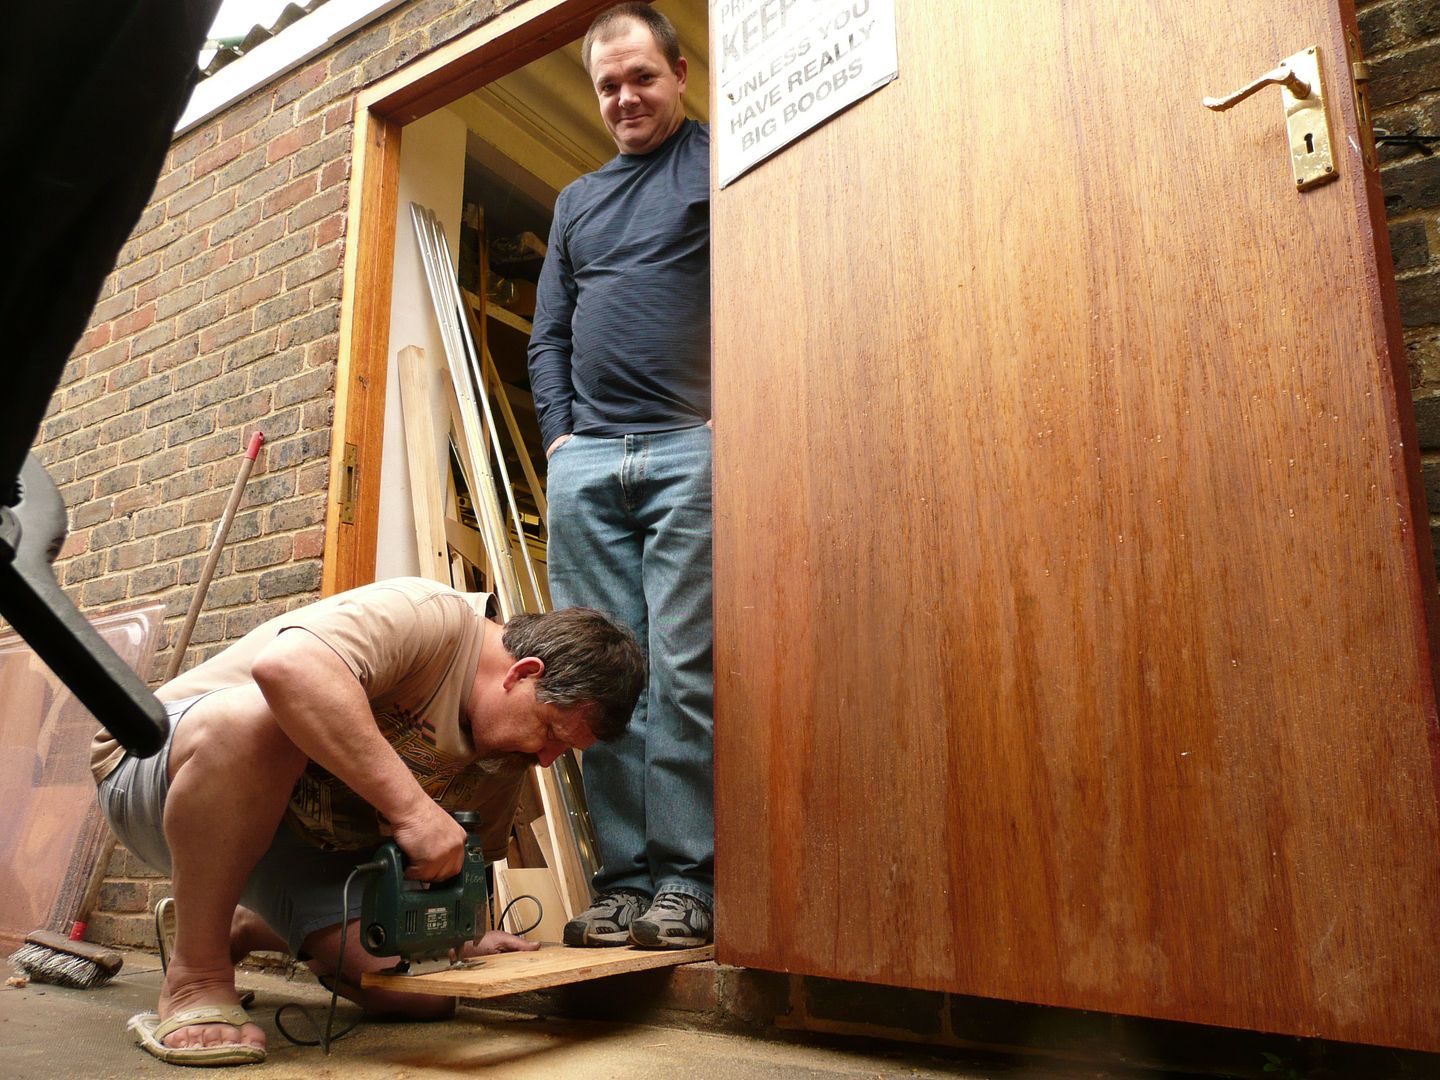
Doing the jobs I am too lazy to do. Selotape glue removal.

P1080145.jpg


WHOOOOOOO . . . . . !!
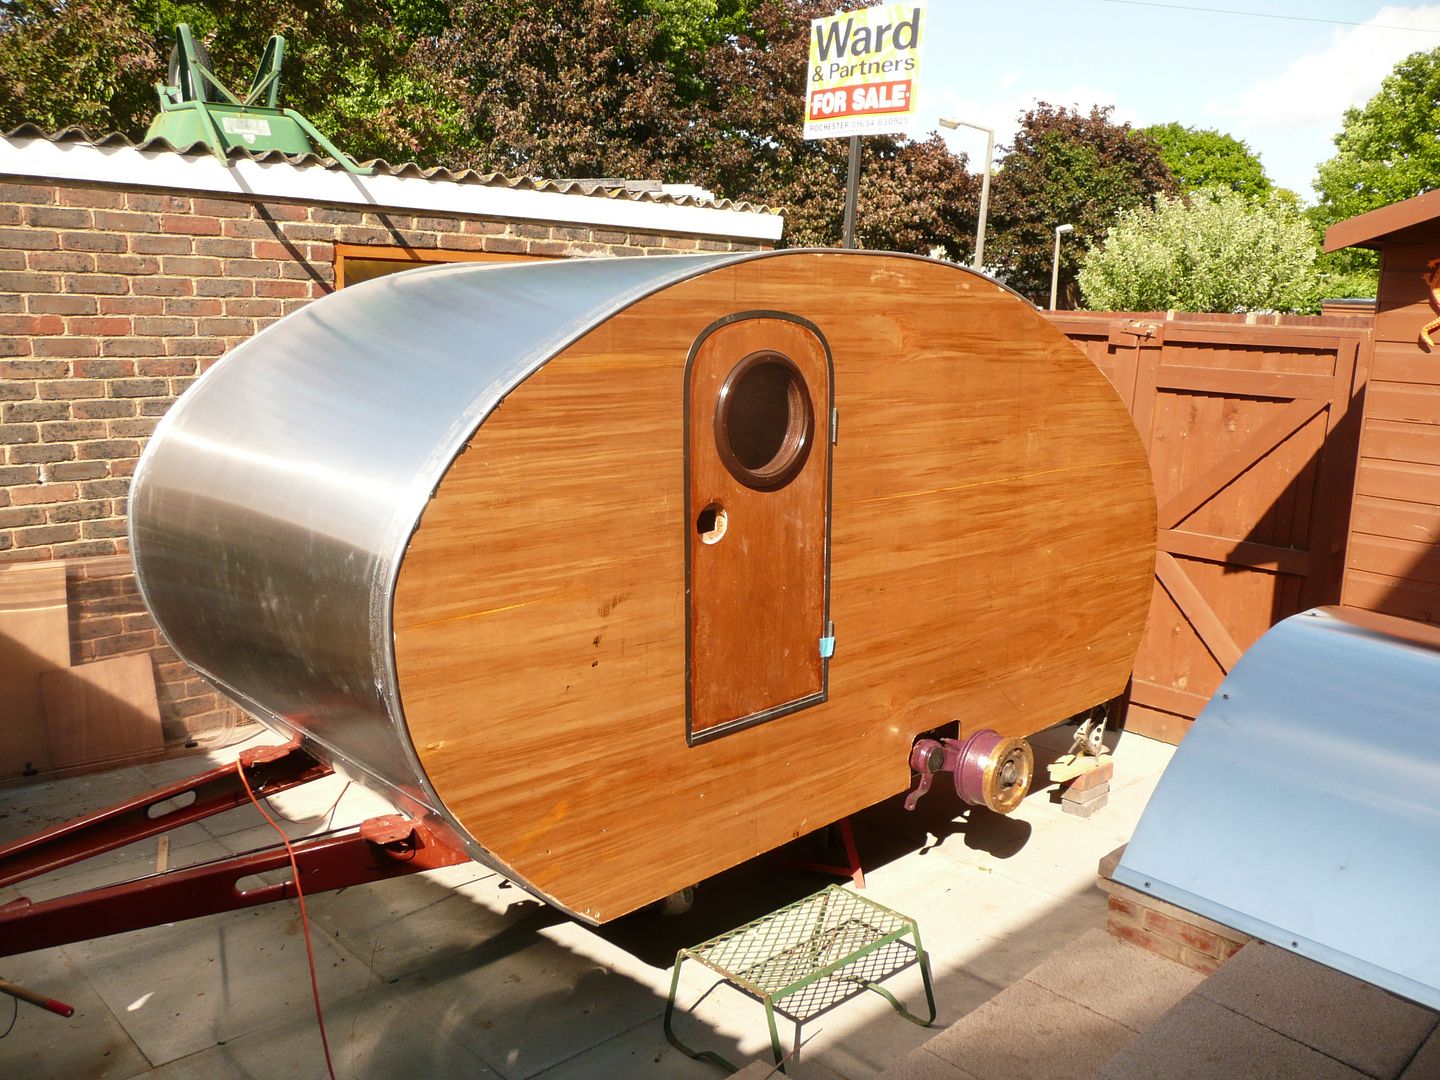
What have we here ?

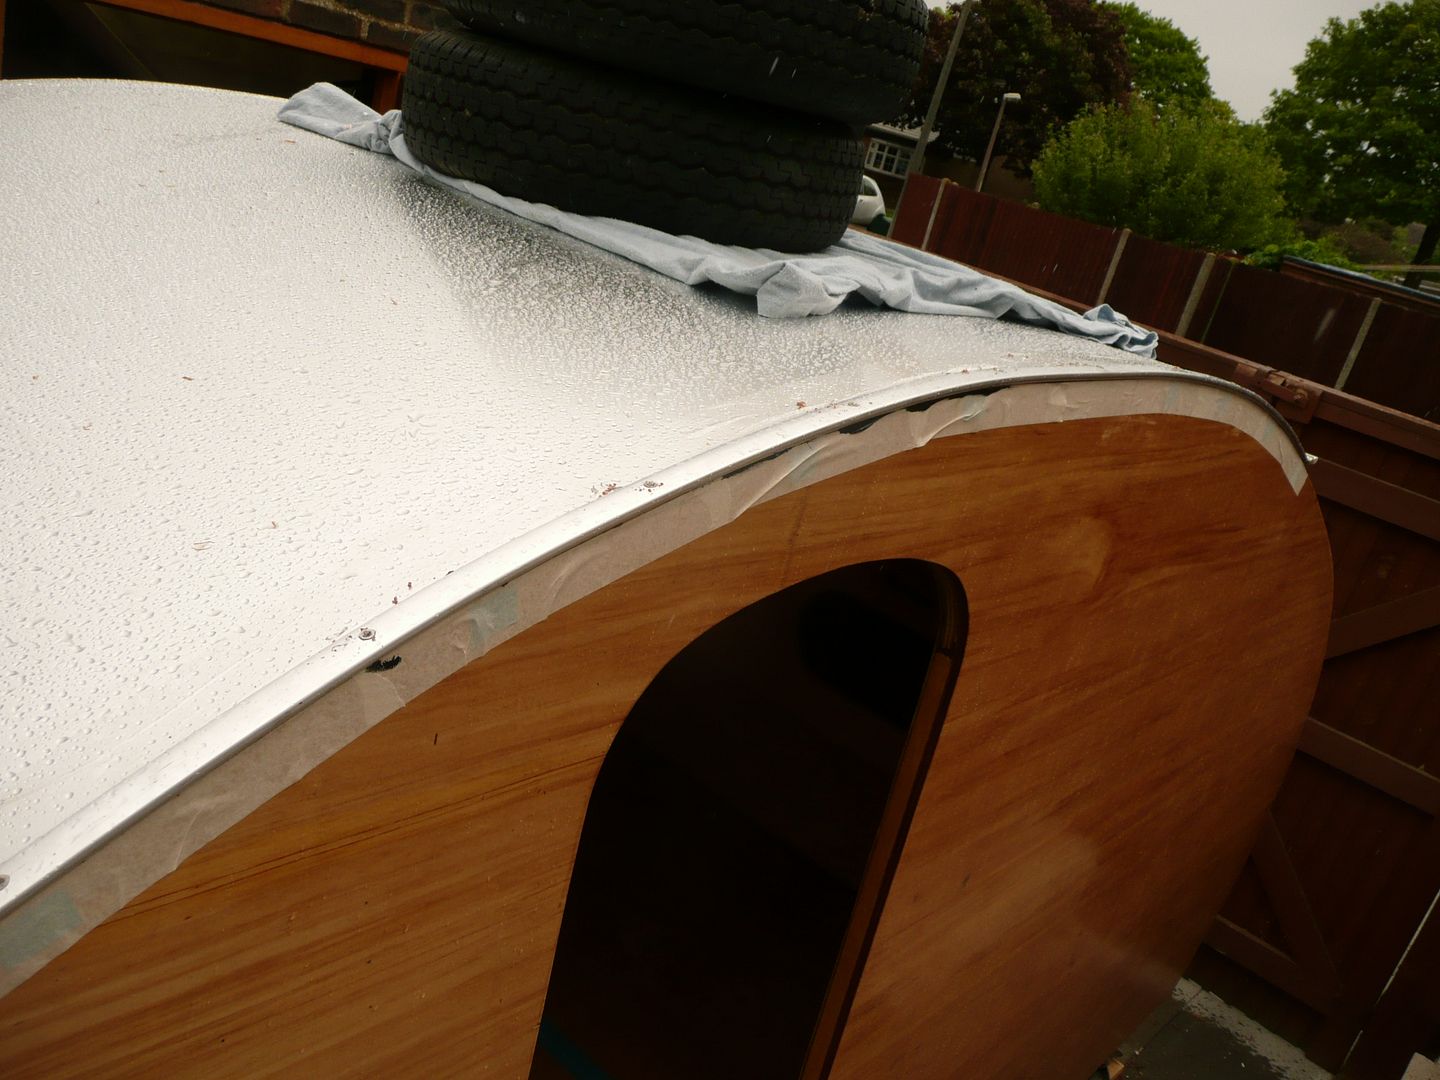
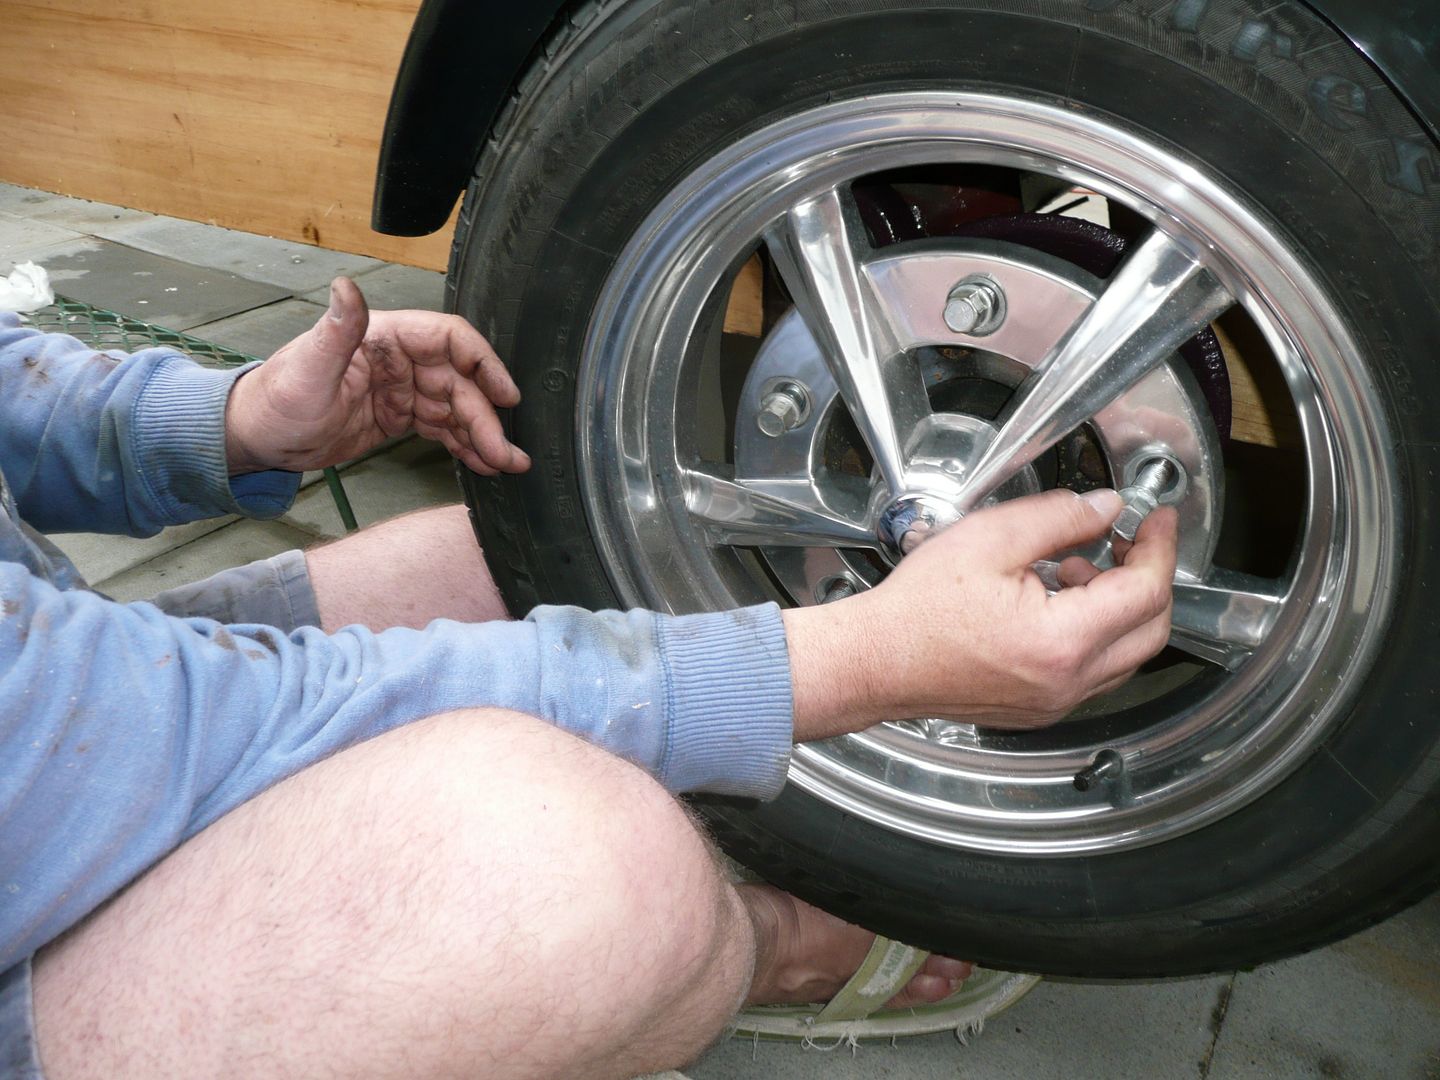
Wheels and mudguards being fitted.

P1080152.jpg


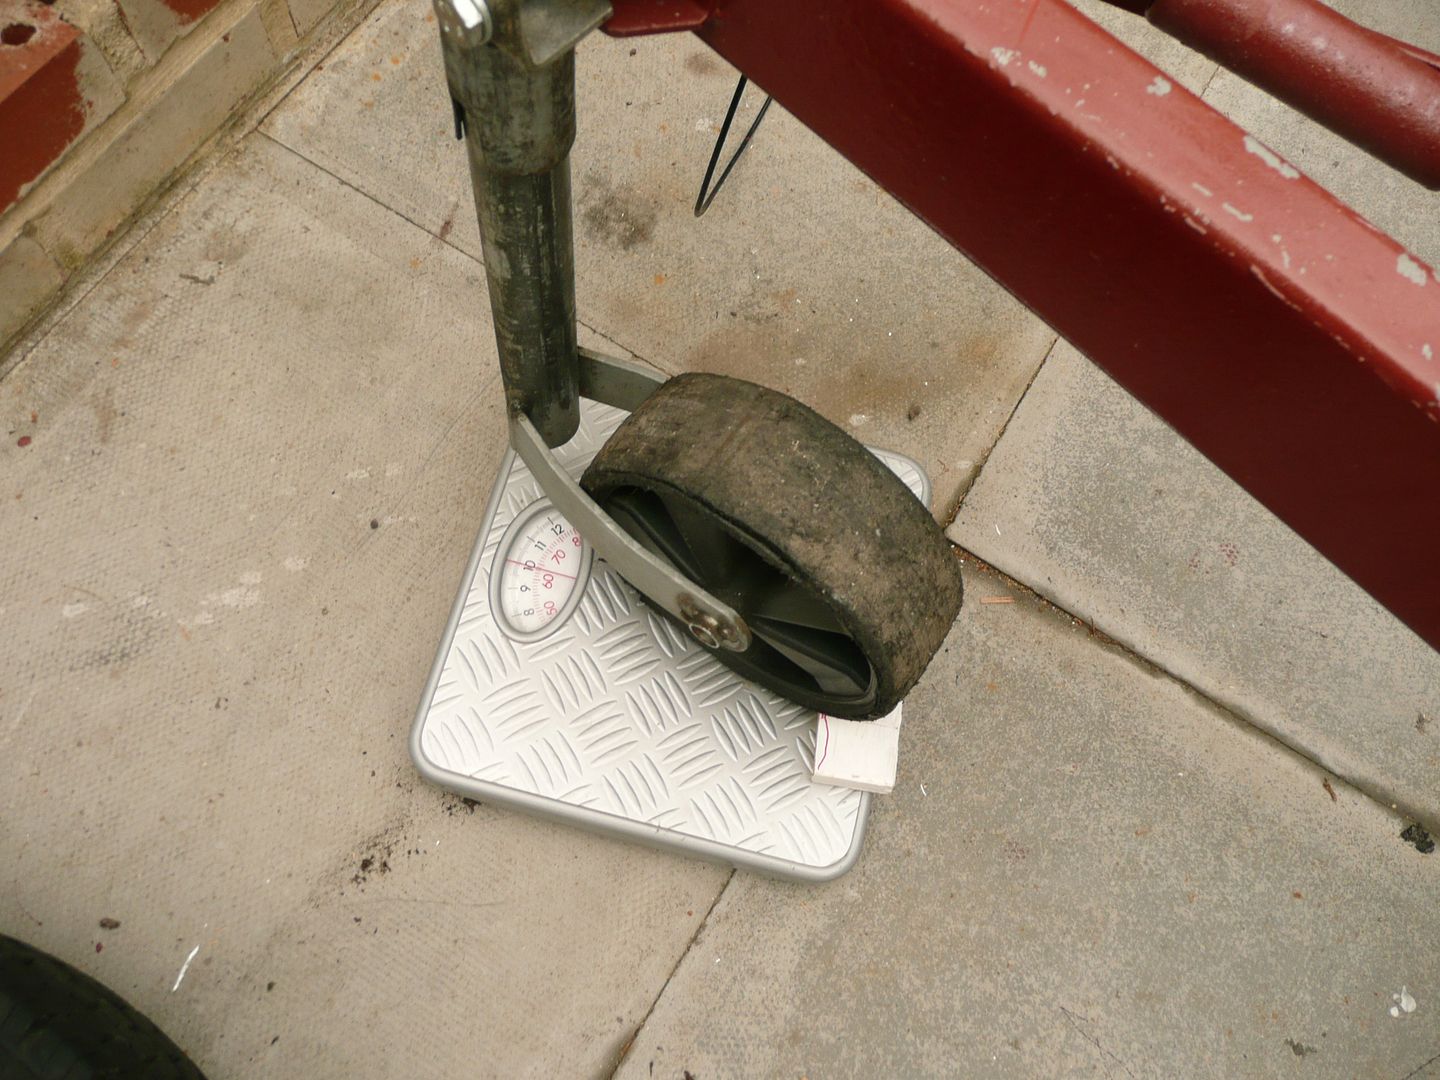
Tongue or hitch weight is something I have been worried about as everyone goes on about it.

I knew the bias was reasonable.

However, the unladen hitch weight is 63kg which means that when the galley is loaded with cooler box, food etc, it should reduce the number a bit more.

P1080155.jpg


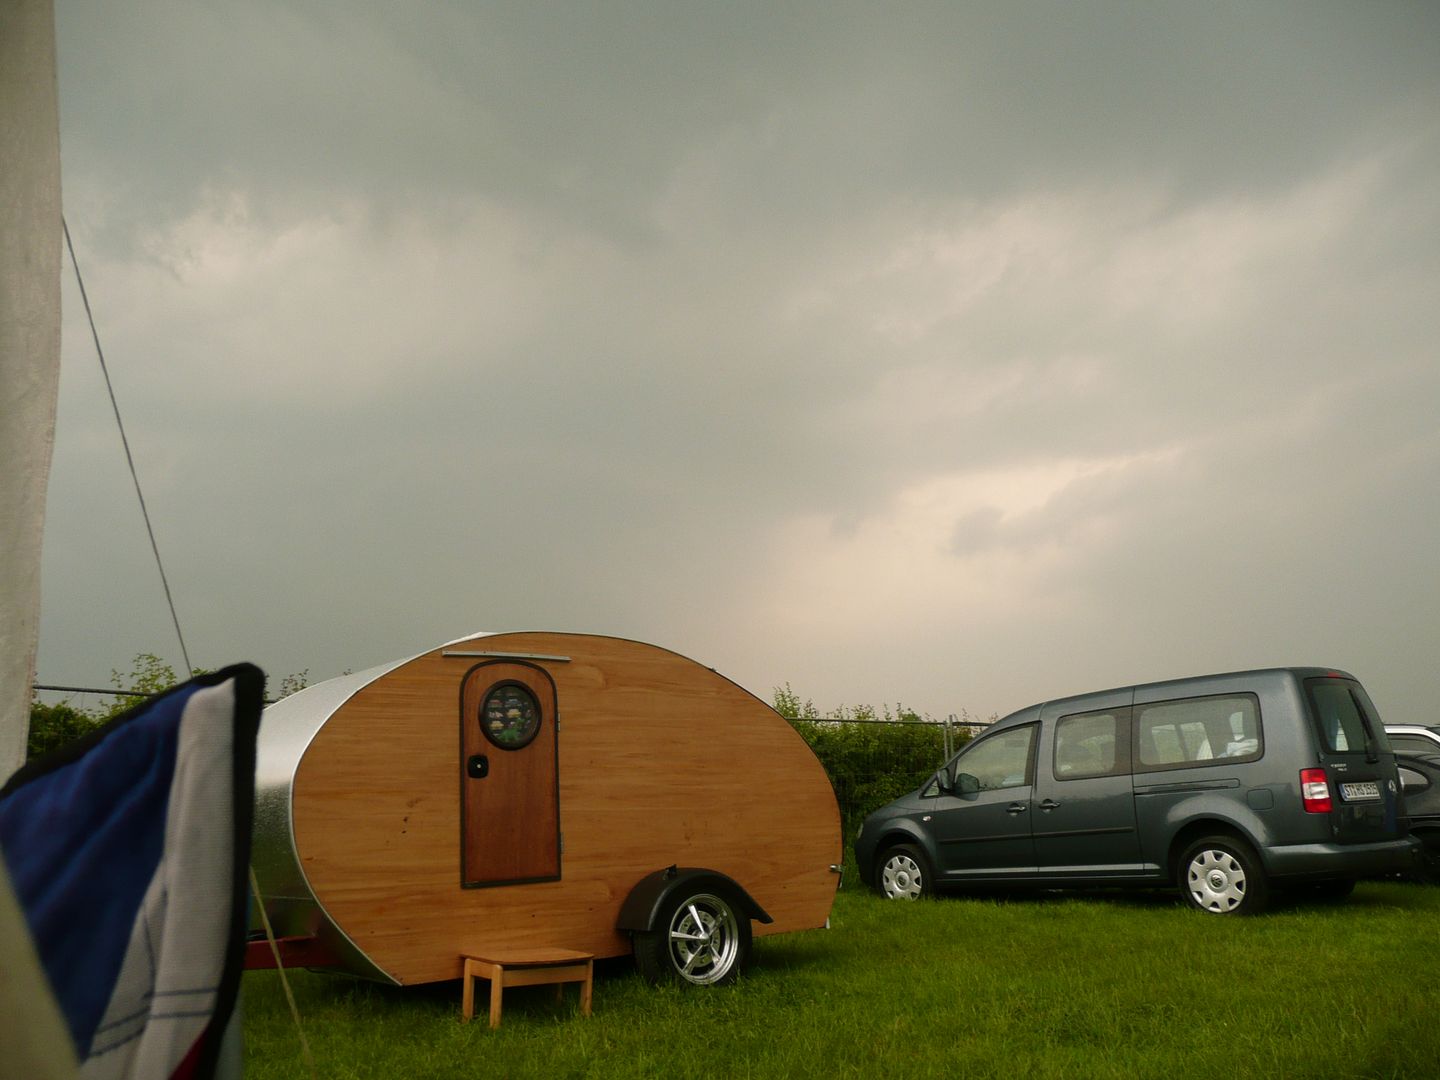
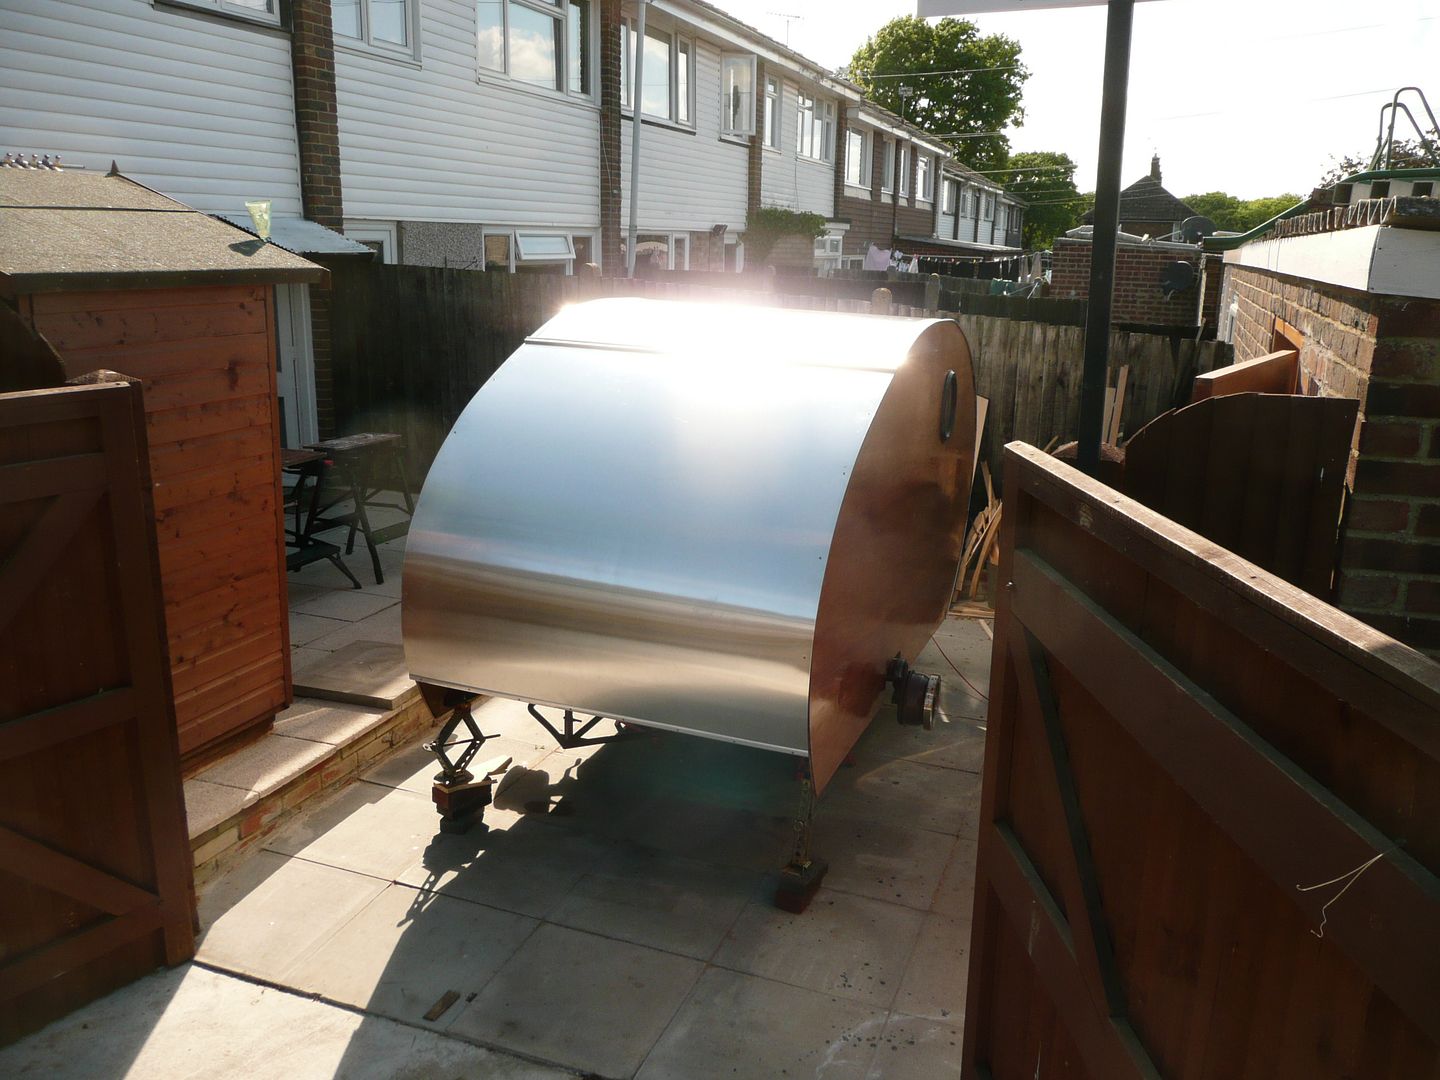
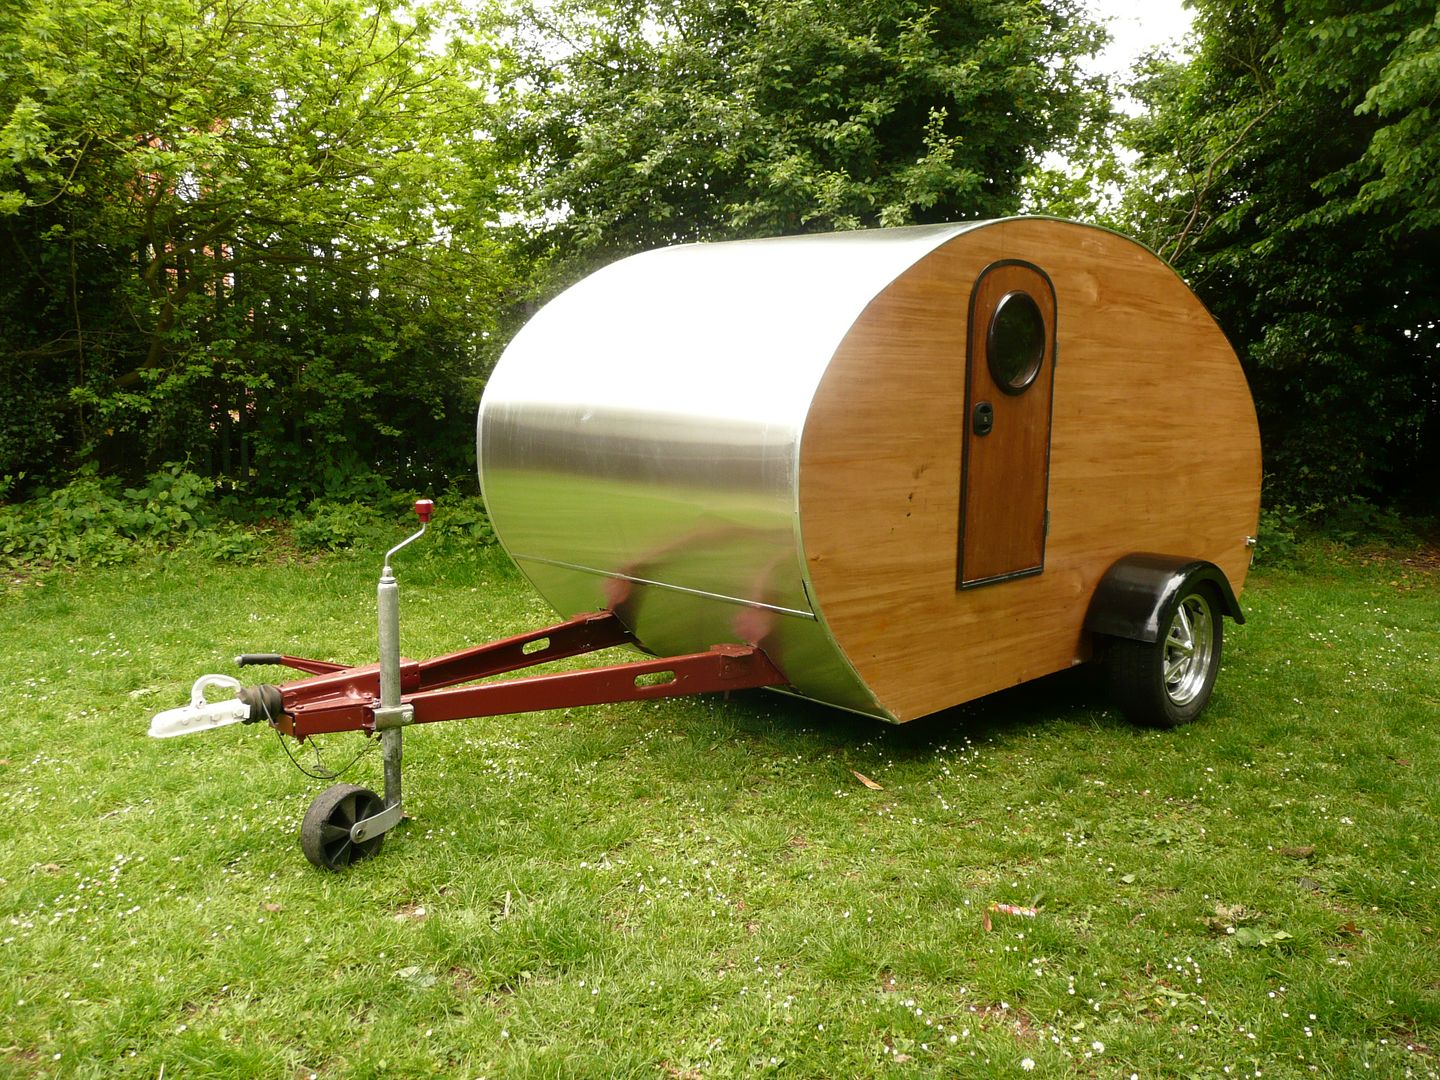
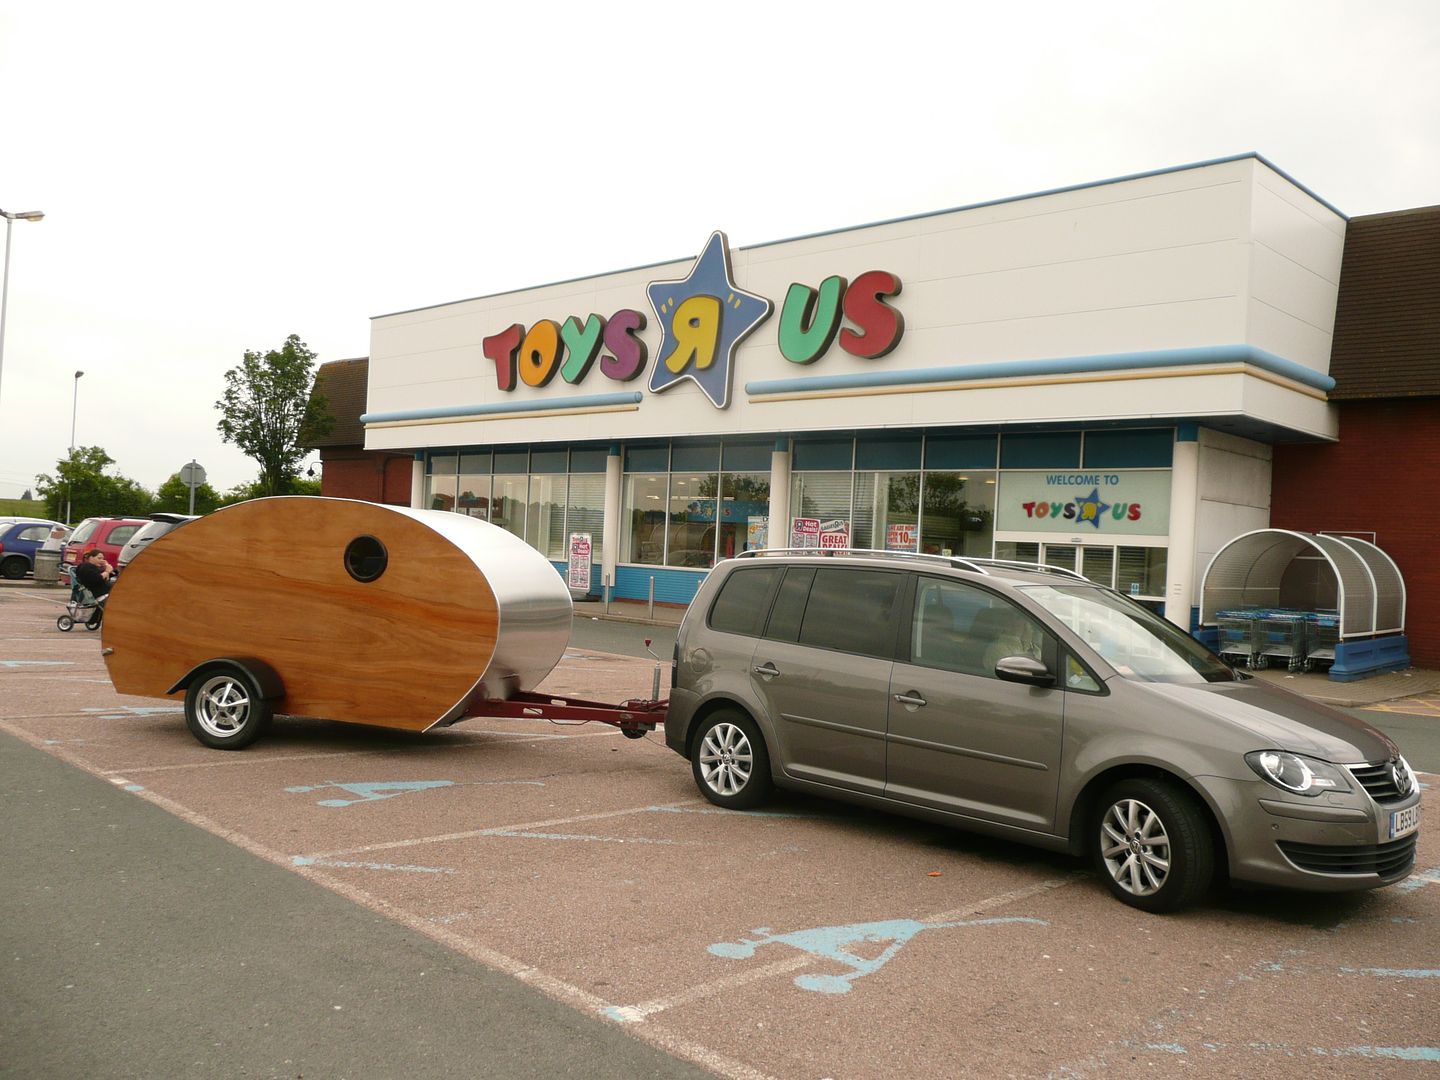
First time out on it's own wheels !

P1080156.jpg


Nice rear.

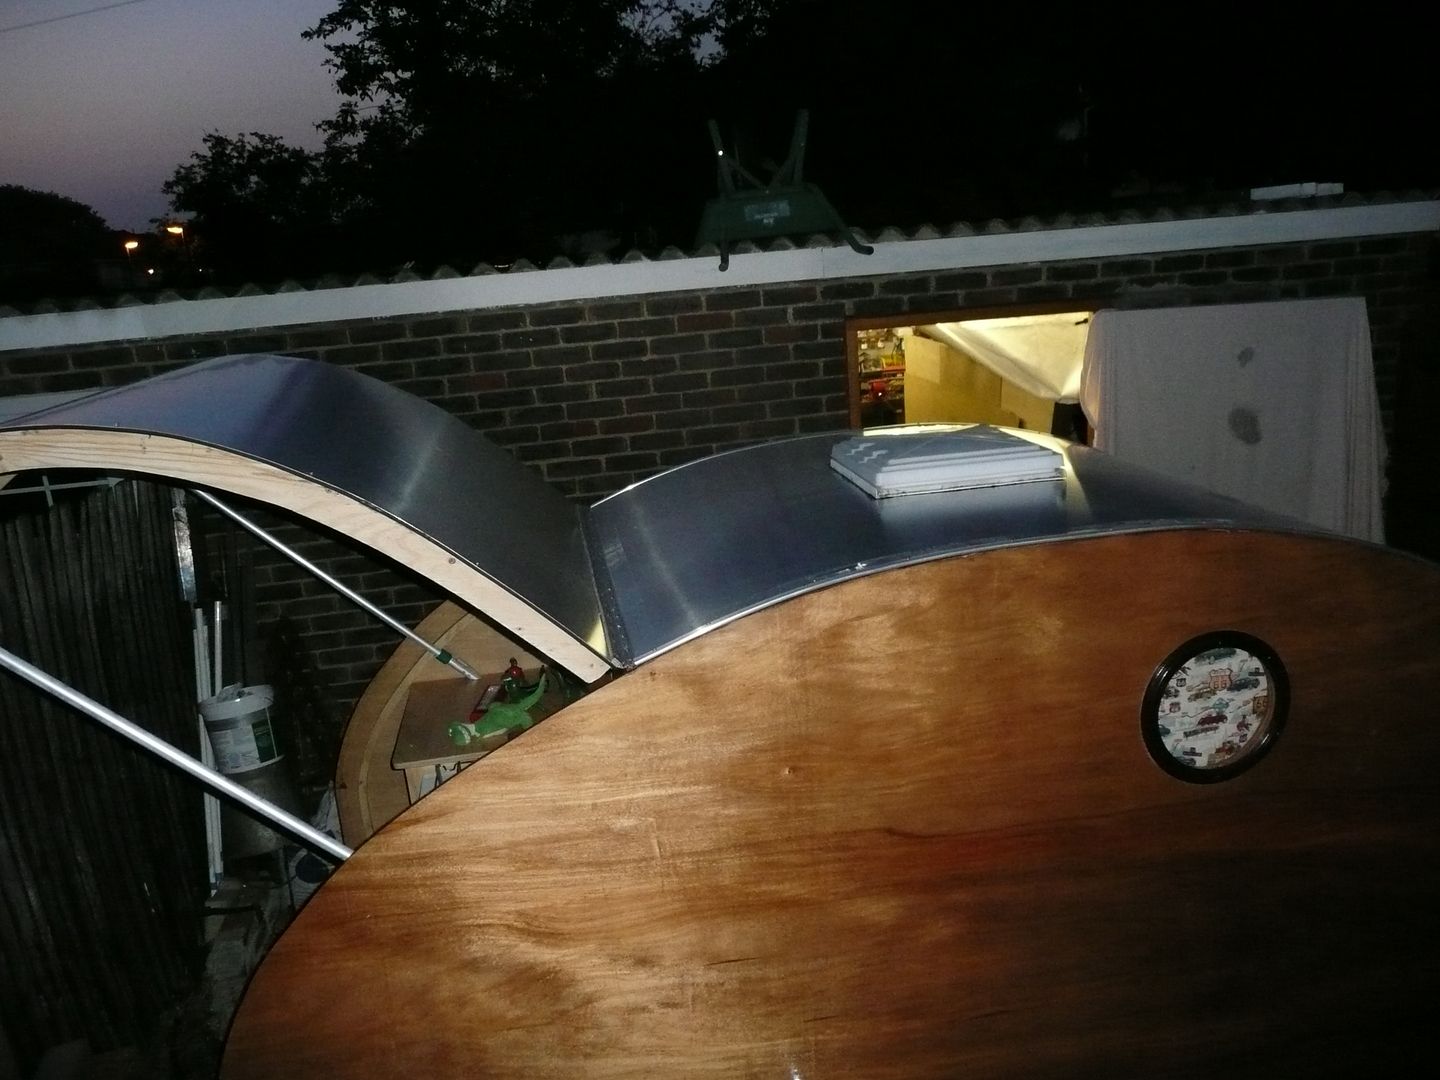
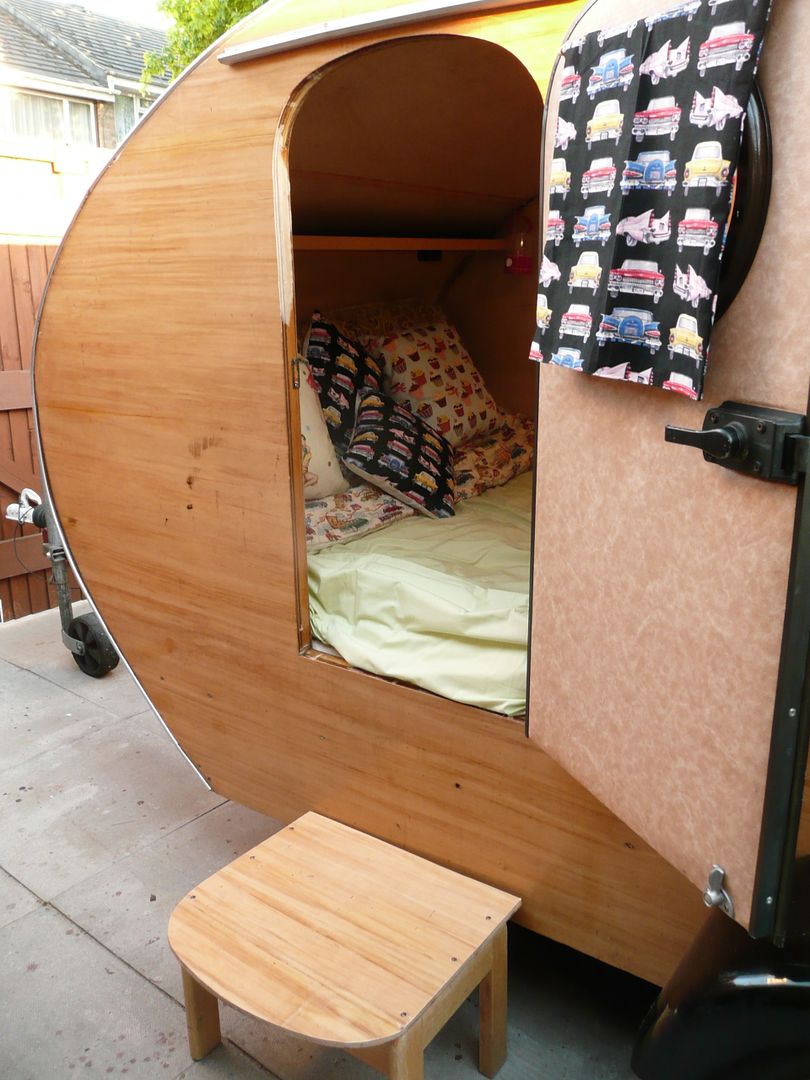
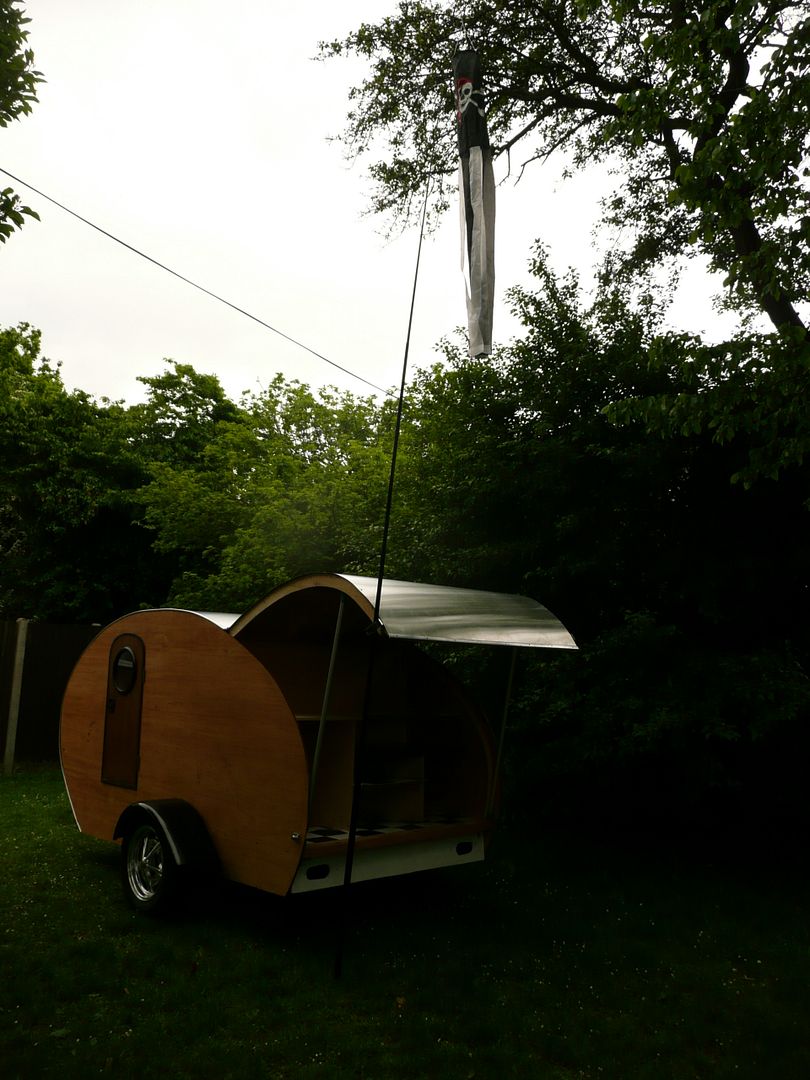
Hatch insulation not yet done at that point, only done after 8pm.

P1080162.jpg


Sorry for the dark photo, but it was what was available.
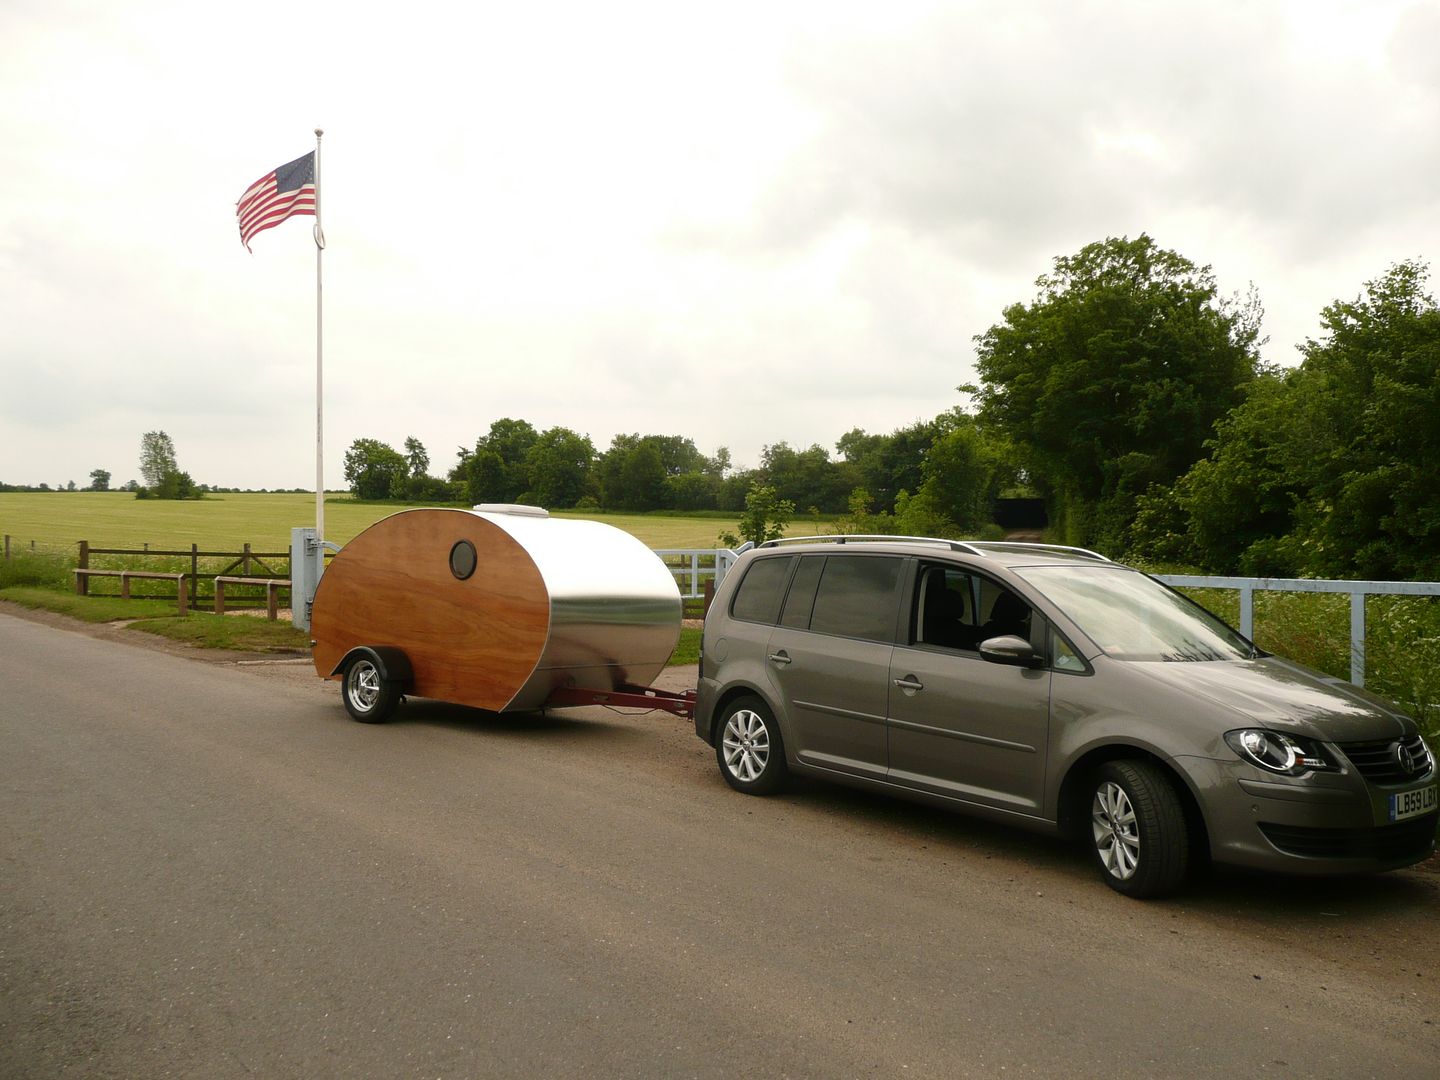
Just wanted our Jolly Roger up there.

P1080163.jpg


What a change, and look..... SPACE .

P1080168.jpg


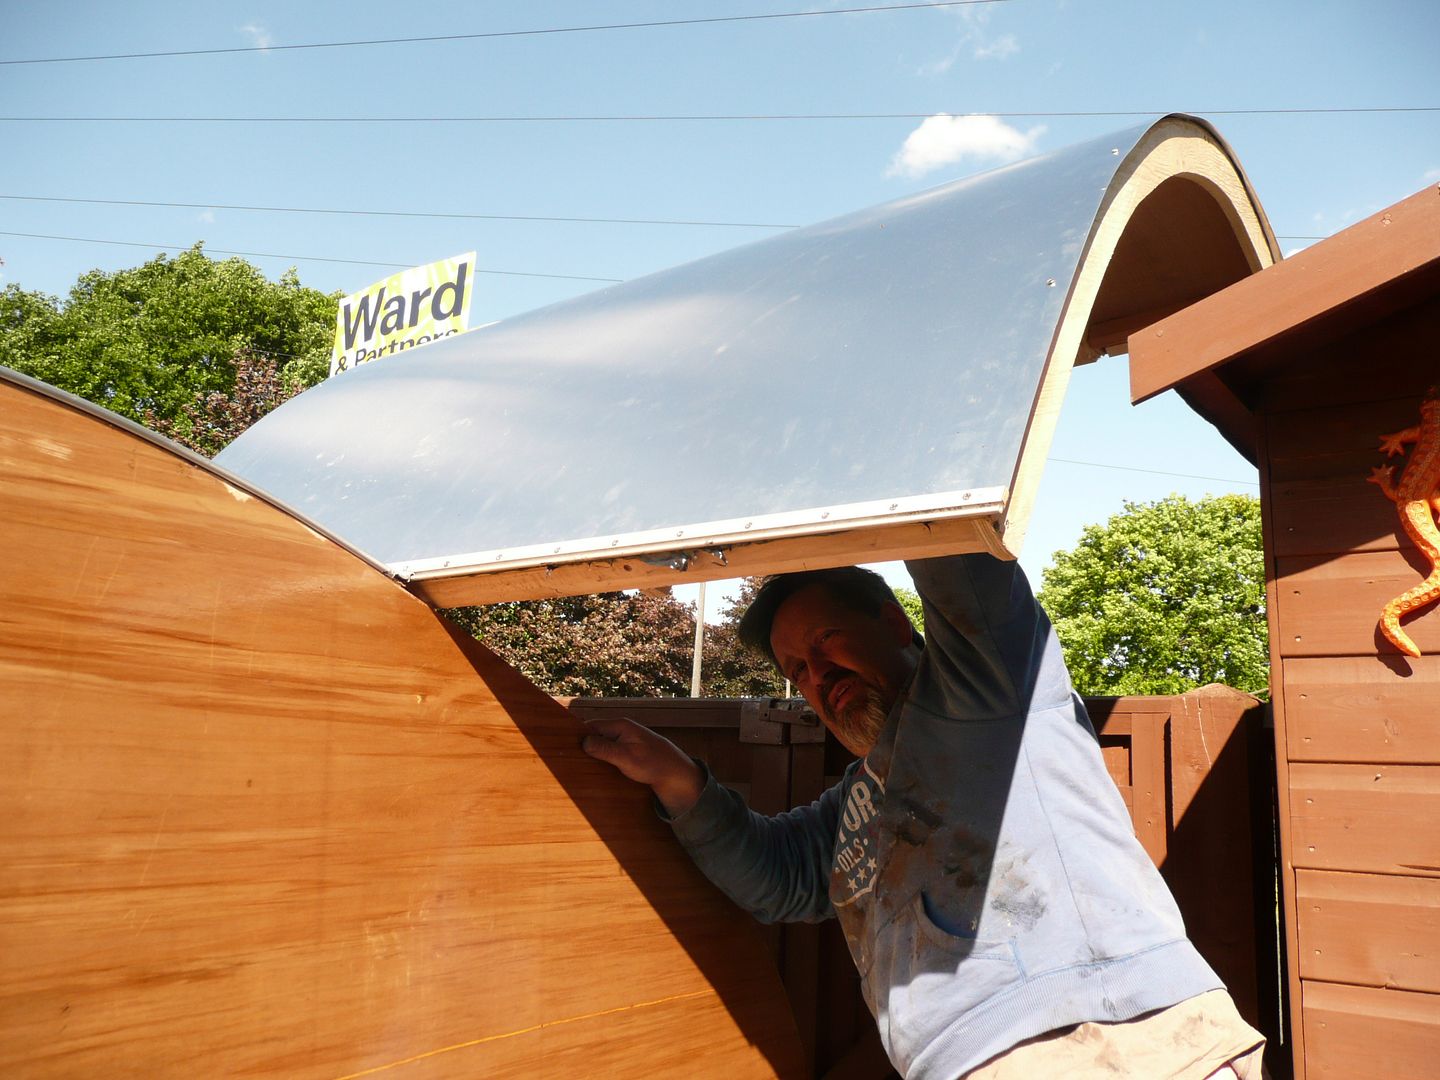
Made the hatch supports so that even a 6foot 6inch German can get in there without bashing his head.

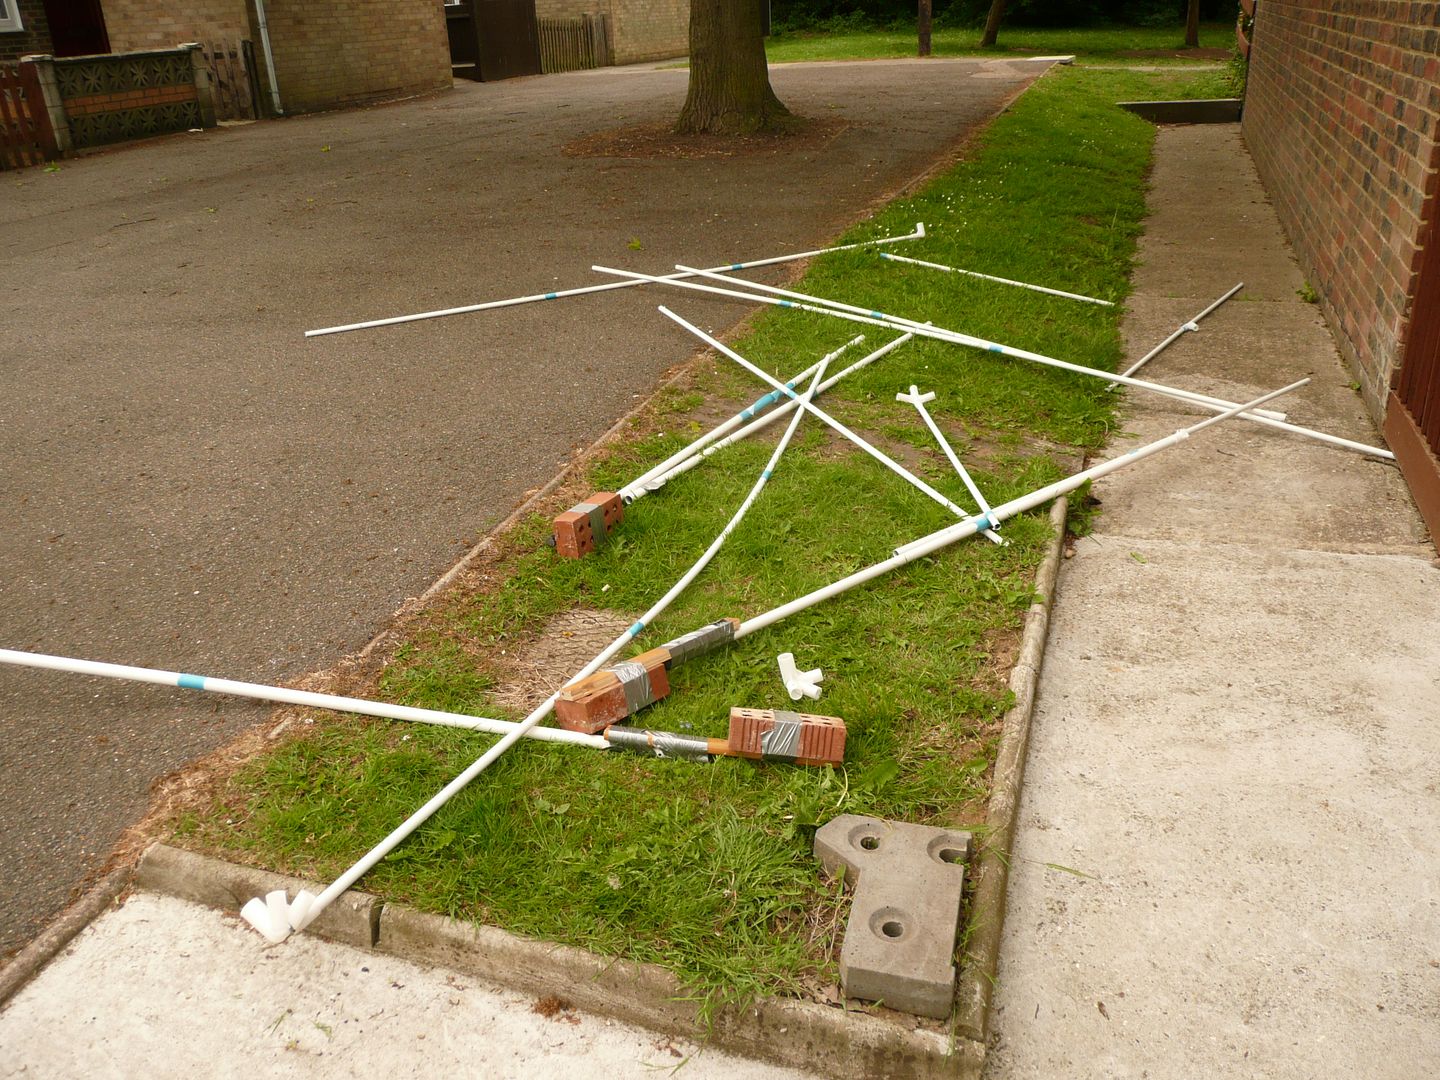
Used some old ally mop handles that one of the hospitals had thrown out. Inverted the bottom so that the ally pipe fits into the section that used to screw into the head. Secure.
At the top in the hatch itself, I used some Oak accross the corner for the pipe to kick into. Secure.

P1080171.jpg


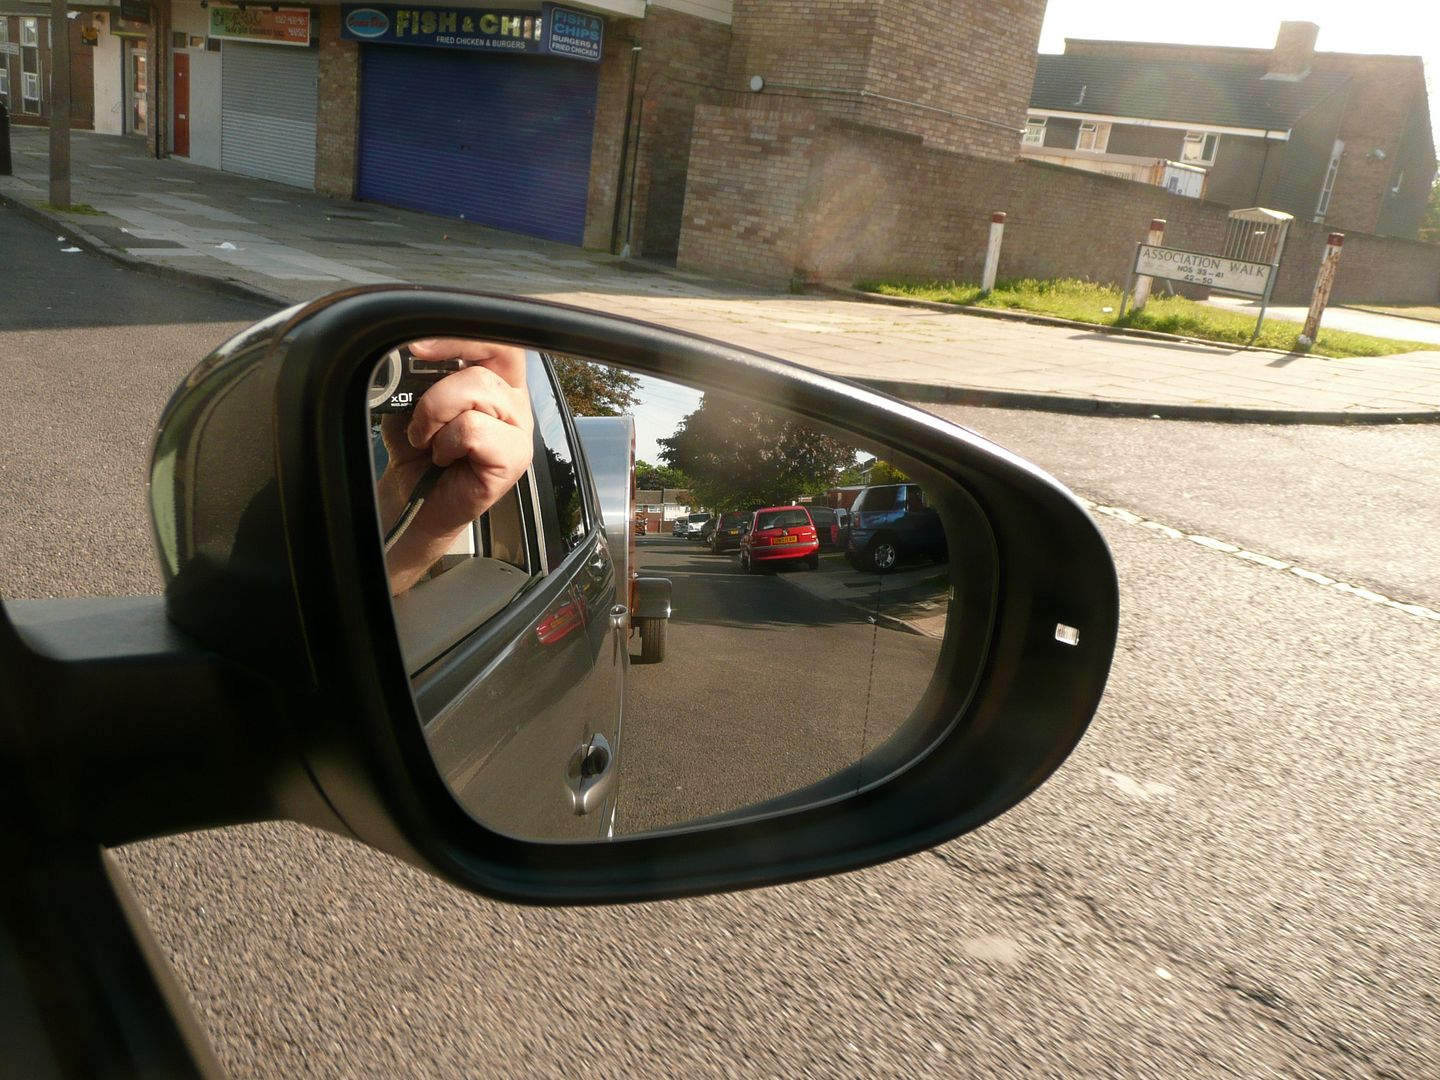
LASTLY, just to prove it was out, and road tested.
It tows beautifully. Light and secure.

These trailers are toys to some of us.

To me it was a great project, but I will say that if it was not for the understanding nature of Nicola, I would have been screwed.

Thanks to all who participated in various ways to make this a success. Your cuppa tea is waiting.

There will be a few more updates as I continue to fine tune the Teardrop.

What do you think of the final product ?

371 hours build time, think about it before you start, it is addictive this hobby.


P1080169.jpg
 

51rider

Well-known member
Joined
Dec 21, 2009
Messages
502
Location
London, England.
In a word, "Fantastic!" :bowdown::thumbup:

Despite the rain, you did ****** well!

A lot better than me:( Fell 10ft off a ladder rapidly followed by the tree I was attempting to trim branches on:wtf:

Some one must have been looking out for me as I missed some concrete paving slabs, when I fell, by about 20mm & I also had the presence of mind to let go of the chainsaw on the way down :shocking:

Nothing broken but I am as sore as hell-even had to cut short the trip to Enfield pageant as walking is a little difficult:(

Enjoy & please post the updates when you eventually get it painted :bounce:
 

Jack Olsen

Super Moderator
Staff member
Joined
Mar 22, 2009
Messages
6,678
Location
Los Angeles
The teardrop looks great. I'm looking forward to the paint scheme, too.

Has it been highway tested with an occupant in the back? I suspect it's illegal, but I'd be curious what the ride is like at highway speeds back there.
 

993James993

Well-known member
Joined
Feb 24, 2008
Messages
524
Congratulations Grizz! The teardrop is beautiful. 371 hours well spent by any account.
 

bazzateer

Well-known member
Joined
Oct 8, 2009
Messages
6,075
Location
Watford, Great Britain
The teardrop looks great. I'm looking forward to the paint scheme, too..
The man speaketh the truth - Excellant work Rian! :bowdown:

Has it been highway tested with an occupant in the back? I suspect it's illegal.
The man suspect-eth correctly! Very mucho illegal although there may be an exception for testing repairs - 20+ yrs since I learnt all that twaddle!:lol_hitti
 

Hylke

Well-known member
Joined
Mar 21, 2010
Messages
59
Location
Netherlands
Great build! Love the DIY.

I'm also pretty interested in how it handles behind your car. Can you feel it pull or push you while braking or accelerating? And does it tend to bounce at a certain speed, or is it stable at highway speeds?
 
OP
G

Grizz1963

Well-known member
Joined
Jan 7, 2010
Messages
12,025
Location
Rochester, KENT. UK
Great build! Love the DIY.

I'm also pretty interested in how it handles behind your car. Can you feel it pull or push you while braking or accelerating? And does it tend to bounce at a certain speed, or is it stable at highway speeds?

Hallo Hylke, I was telling Nicola yesterday, it is reasuringly easy to tow, and pulls dead steady.
The chassis was braked, and with the Taunus Transit, it needs to be helping with the stopping duties.

The Touran I have is a Diesel with 140 Bhp, no idea what torque it is, but it really pulls it very easily.

No bounce at all, I did go fast and slow over speed bumps.
 
To avoid these ads, REGISTER NOW!

Scout Driver

Well-known member
Joined
Nov 20, 2009
Messages
4,286
Location
South Dakota
Congrats to you and Nicola!! :beer: It turned out beautiful. Your thread has been very fun to keep up with. Let us know how the first camping trip goes.

Scott
 
OP
G

Grizz1963

Well-known member
Joined
Jan 7, 2010
Messages
12,025
Location
Rochester, KENT. UK
Is it wrong of me to prefer the wood look rather than the painted optoins?


My one neighbour was here at about 9pm, and I actually told him I was falling in love with the sheer retroness of the wood and ally finish.... so it is not wrong at all.

It may end up staying that way in the end.
 
OP
G

Grizz1963

Well-known member
Joined
Jan 7, 2010
Messages
12,025
Location
Rochester, KENT. UK
Did loads of bits tonight and the last of the big jobs.

Cut the hole in the roof, which clearly spoils the clean lines, but there is no way I am turning that into a mobile sauna.

Nicola was sorting all the camping stuff from the bus into a more sensible package.
She also sorted the galley the way she wants it.

In the mean time,I fine tuned the door, added hooks, lights etc, and made a stool/step for getting in and out of the caravan etc.

Nicola was worried about whether cutting a hole into a perfectly good roof was a good idea. So raced upstairs to take a "I told you not to do it" photo while I was cutting the hole.

I am please to say it is fitted , sealed and looks great from the inside.

P1080176.jpg


I forgot to take pic while it was light of the hatch in place, also not the curtains Nicola made out of the left over fabric.


I need to get to bed, it's almost midnight.

P1080178.jpg
 
OP
G

Grizz1963

Well-known member
Joined
Jan 7, 2010
Messages
12,025
Location
Rochester, KENT. UK
Quick update tonight.

I am off to bed early.

Fitted the Grizz-Pod lettering this morning at 6am.

P1080180.jpg


Tonight I made up the bed after bringing down the mattresses etc

Pics will tell the story, I am knackered.

P1080186.jpg


The little stool came from another hospital tip so I took off the fabric and foot rest, and replaced it with part of the door cut out. Remember the rest went into making up the cookers sliding shelf.
It now makes a real comfy seat and step.

P1080191.jpg
 
OP
G

Grizz1963

Well-known member
Joined
Jan 7, 2010
Messages
12,025
Location
Rochester, KENT. UK
Getting the trailer ready for its maiden voyage tomorrow up to the Classic Ford Show, Nicola came over from her place and sneaked this sticker into my hand from behind and walked away......

I am really chuffed, I had planned on buying and ordering the " Home Built 2010 " sticker from the USA, but this is as good as, in fact much better as she had gone and found it on the web, after a search.

The way the trailer is reversed into the back yard there is no way of getting a decent photo , but when it is outside or parked up somewhere I will get a decent pic of both the name and this sticker.


SOOOOOO Looking forward to this weekend.


P1080195.jpg
 
OP
G

Grizz1963

Well-known member
Joined
Jan 7, 2010
Messages
12,025
Location
Rochester, KENT. UK
Thanks Guys.

Well, I am back, trailer unpacked, stored, bedding in the wash, and a couple of mads planned.... nothing big, but running the small electric cooler box on the Tow vehicles 12V and Ice bricks the first day, and then the 12Volt spare battery the 2nd day.

I will do a full write up and loads of photos in a couple of days, right now I am just procrastinating, as I have my manager out tomorrow for the day with me, and I should be preparing for her.

I took a load of car pics and a few weird interest pics at the show.

THE TRAILER WAS A HIT ! ! !

Loads of people coming to take a look, chat and saying they wanted one too.

Tonight I will only post a few pics.


Firstly, before we left,I pulled over and took a pic of just how wide the trailer runs VS the VW Touran.

P1080200.jpg


Next pic is where we camped at Santa Pod Raceway. Far away from the noise, and close to the edge of the field.
This is Nicola with her first cuppa tea from the galley. Well Chuffed.

P1080212.jpg


We spent the weekend as always with Dave "Oldbus" , Thorsten, Michael, Ulla and Dave's son Christian, older son Alex has final exams on Monday, so could not make this years trip.

As always the weekend was too short, and I had work on my mind.

The Grizz-Pod did however get it's first rain test, and it was not a force 9 gale, but certainly a decent half hour or more of solid rain.

NO LEAKS TO REPORT !!

This was what the skies looked like just as it opened up to start tipping it down.

P1080287.jpg


Next up a couple of pics for the American Teardroppers.
Without whose help and motivation I would have been in more trouble than I care to admit.

Thanks to Teardrops and Tiny Travel Trailers, as well as Tearjerkers.

Santa Pod was a WWII air station, with American presence.

Here is a memorial stone to all those who made the greatest sacrifice.

P1080346.jpg


This pic gets the Stars and Stripes in the background of the Grizz-Pod - Perfect.

A salute to the origins of my trailer.

P1080348.jpg


One pic for Chris Squier - Teardrop-Focus.

Here is a modded Ford Focus for you.

P1080327.jpg


Lastly, we had a delay of about 40 minutes on the way back, with stop and start traffic.

At one point on the Dartford Bridge we stopped completely, wich made for a very quick, one shot photo opportunity.
And what a lucky shot, taken with the camera pointed rearward in my hand, and no focus.

Great pic to end the 220 mile maiden trip of the Grizz-Pod with.

The rest of the pics to be posted later this week.


P1080359.jpg


I guess I cannot do a quick report.

Rest to follow soon, if you guys Want to see more.
 

Scout Driver

Well-known member
Joined
Nov 20, 2009
Messages
4,286
Location
South Dakota
Happy for you that the first outing went well. Question for you.....what is the car in the last pic. you posted? The one with the "****" comment on the tail? I really like it!

Scott
 

chevazon

Well-known member
Joined
Oct 17, 2009
Messages
63
Location
Durham City, UK
Grizz - great looking pod. I have been on my John O`Groats to Lands End motorbike jaunt and have missed the last week but I have caught up with the build.
Looking forward to seeing it in the flesh soon.

Scout Driver - the car is a Mk 1 Ford Zephyr Zodiac 4 door which has been converted to a 2 door. (they never made a 2 door unless it was a convertible) circa 1955 probably has a V8 stuffed in it.
 

Brookesy

Well-known member
Joined
Jun 26, 2008
Messages
341
Location
West Midlands, UK
Enjoyed Santa Pod yesterday shame the weather ruined it toward the end of the day it hammered it down while we were in the beer tent even that started to flood.
 

porschedude996TT

Well-known member
Joined
Oct 28, 2007
Messages
2,384
Location
Santa Maria, California
Griz, that was one amazing build. Somehow I missed this whole build until now, I'm not sure. You are a very resourceful man. I enjoyed the thread, all the pictures, and your humor. I especially like all the English phrases and trying to figure out the meanings.
 

Vernmotor

Well-known member
Joined
Jan 12, 2008
Messages
1,318
Location
Mt.vernon oh
and your humor. I especially like all the English phrases and trying to figure out the meanings.


I gald I am not the only one ! great read I love'ed it..
 

Skyline

Well-known member
Joined
Nov 11, 2008
Messages
3,586
Looks like a great project. What are the inside dimensions?

Do you think it will be too hot inside over the summer? Any thoughts on how to keep it cool?
 
OP
G

Grizz1963

Well-known member
Joined
Jan 7, 2010
Messages
12,025
Location
Rochester, KENT. UK
Looks like a great project. What are the inside dimensions?

Do you think it will be too hot inside over the summer? Any thoughts on how to keep it cool?


1420mm wide inner sides.
Outside is 1500mm

Side sheets of ply started out as 5x10 ply.

Pop roof vent open, sleep.... it has 20mm polystyrene between 12mm and 4mm ply outer and inners.

When too hot, we just open the door 6 inches and go back to sleep.
 
OP
G

Grizz1963

Well-known member
Joined
Jan 7, 2010
Messages
12,025
Location
Rochester, KENT. UK
THANKS FOR THE COMPLIMENTS AND COMMENTS ALL.

It has been great sharing, and the evolution will carry on over time.

The next thing to do is to get my BMW R1200GS and Nicola's 1956 Ford Anglia back on the road and into daily use.

I will post up the photos from the automotive side of the car show later on when they are all loaded.
 
To avoid these ads, REGISTER NOW!
Top Bottom