
You are using an out of date browser. It may not display this or other websites correctly.
You should upgrade or use an alternative browser.
You should upgrade or use an alternative browser.
1920-60s DELTA / ROCKWELL picture thread - Post your Delta!
- Thread starter Hoorn
- Start date
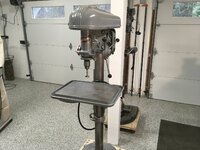
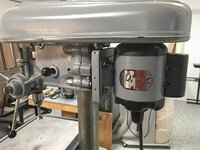
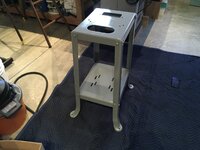
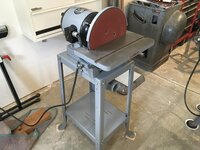
I think so! It’s advertised as enamel and I’ve found that it does seem much “tougher“ than regular paint. I’d say it’s better than regular paint and it does resist scratches but it’s probably not 100% scratch proof. I used it on a disc sander and a drill press and it’s held up extremely well. I will say that I’m also careful with my machinery and I try not to bang them up. Still, they’re in a shop setting that I use every day for at least four or more hours. I use the sander and drill press routinely and they still look great. If I restore another old Delta, I will definitely use the Rustoleum smoke grey enamel to finish it.Hi Jim
I'm about to start painting my drill press. Is the Rustoleum you suggest durable and scratch resistant?
Jim C.
Attachments
-
 25D38C75-23BB-4054-B5E1-2A5CDAA9E291.jpeg384.2 KB · Views: 114
 -
 D2023341-597E-4629-8FEC-0B4B00838418.jpeg295 KB · Views: 93
 -
 67313447-D684-47D4-9088-AF1E76741A4C.jpeg282.3 KB · Views: 65
 -
 26F085C0-1560-4E95-93FA-860D1EC34093.jpeg274.9 KB · Views: 69
 -
 5BC9F974-553B-452E-B846-28BF5E232A0C.jpeg303.2 KB · Views: 63
 -
 82DA6A8A-3806-4E80-B5F4-CC65B7DEBD06.jpeg225.8 KB · Views: 61
Last edited:
It seems every machine Delta made in this era had such beautiful style and graceful lines, and no exception to that was their 6x48 belt sander.
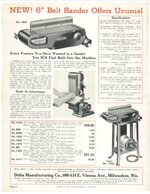
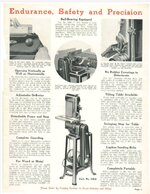
Introduced in 1937 the Delta Model 1400 was touted as having "unusual value". In the 30s it was one of the first finishing machines to be completely enclosed where only the moving belt was open. It could be easily set for vertical or horizontal use in mere seconds. The original design was so efficient and well engineered that it lasted almost unchanged into the Rockwell International years. In the late 1960s "Rockwell / Delta" added a 12" disc, making it quite a formidable sander.
Here it is debuting with a splash on pages 2 and 3 of the 1937 Delta catalog.
This awesome design remained for almost 40 years.

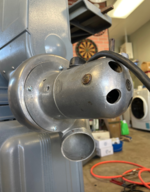
Some of the accessories offered for this belt sander are now very hard to find, such as the solid cast iron pulley guard (weighing in at 35 pounds) and the Hamilton Beach "sawdust blower" dust collector.

During the war Delta also began offering this belt sander with a cast iron pedestal so you could have a 205 pound belt sander without the motor.

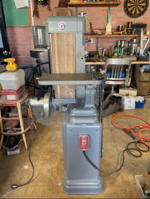
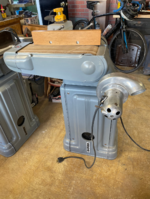
To really show how beautiful these belt sanders are, I have received permission from a friend of mine to post these pictures of his fully restored gem. Although it sports a "Rockwell" badge, the design is unchanged from the Milwaukee era. The cast iron pedestal is from the 1940s, the original Hamilton Beach sawdust blower is either from the late 1930s or early 1940s, as after World War II it was no longer available. It also has another tough to find accessory, the belt sander fence for the horizontal position.
In the background of these pictures you can tell that when it comes to collecting vintage tools, in particular Delta, he can stop searching as he has already won the game.


Introduced in 1937 the Delta Model 1400 was touted as having "unusual value". In the 30s it was one of the first finishing machines to be completely enclosed where only the moving belt was open. It could be easily set for vertical or horizontal use in mere seconds. The original design was so efficient and well engineered that it lasted almost unchanged into the Rockwell International years. In the late 1960s "Rockwell / Delta" added a 12" disc, making it quite a formidable sander.
Here it is debuting with a splash on pages 2 and 3 of the 1937 Delta catalog.
This awesome design remained for almost 40 years.
Some of the accessories offered for this belt sander are now very hard to find, such as the solid cast iron pulley guard (weighing in at 35 pounds) and the Hamilton Beach "sawdust blower" dust collector.
During the war Delta also began offering this belt sander with a cast iron pedestal so you could have a 205 pound belt sander without the motor.
To really show how beautiful these belt sanders are, I have received permission from a friend of mine to post these pictures of his fully restored gem. Although it sports a "Rockwell" badge, the design is unchanged from the Milwaukee era. The cast iron pedestal is from the 1940s, the original Hamilton Beach sawdust blower is either from the late 1930s or early 1940s, as after World War II it was no longer available. It also has another tough to find accessory, the belt sander fence for the horizontal position.
In the background of these pictures you can tell that when it comes to collecting vintage tools, in particular Delta, he can stop searching as he has already won the game.
Attachments

Nutria
Well-known member
That is a nice celebration of these fine sanders.
Nutria
Well-known member
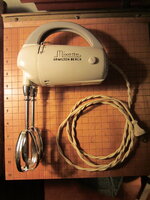
That original Hamilton Beach blower is too cool. I felt lucky to find a Breuer Tornado for mine, but that Hamilton Beach would be the grail. I was pleasantly surprised by how well the Tornado does, and I imagine that the Hamilton Beach is similar.
Speaking of grails, those art deco bases are just beautiful . . . I have the notoriously noisy, and unbeautiful, enclosed cabinet on my 6 x 48.
Speaking of grails, those art deco bases are just beautiful . . . I have the notoriously noisy, and unbeautiful, enclosed cabinet on my 6 x 48.
5Prosjeff
Active member
Thank you Hoorn for posting the photos of my restoration. The write-up is awesome and I hope everyone enjoys this as much as I do.
As a side note, if anyone out there has a bag for my sawdust shooter I’d be interested to see it.
As a side note, if anyone out there has a bag for my sawdust shooter I’d be interested to see it.
Nutria
Well-known member
It's far from original equipment, but this fleece bag has worked really well for me. I use it on my planer too.As a side note, if anyone out there has a bag for my sawdust shooter I’d be interested to see it.
Mintgrun
Well-known member
Also not original, but I use a leaf blower/vacuum bag on my planer that has a built in blower. They're $3 at the St. Vinnies store and usually unused. Mine's plain white, but some come with logos like TORO on them. You could add DELTA to a plain bag.
HAMILTON BEACH
HAMILTON BEACH
5Prosjeff
Active member
Thank you Nutria,It's far from original equipment, but this fleece bag has worked really well for me. I use it on my planer too.
I looked at the bag you suggested and the site opened me up to many other options. I’ve done quite a bit of sewing with my industrial sewing machine and thought it may be cool to see one up as well, maybe paint a Delta insignia on it too.

5Prosjeff
Active member
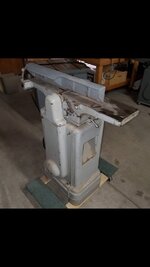
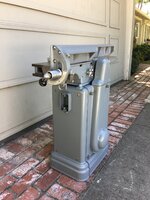
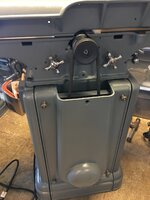
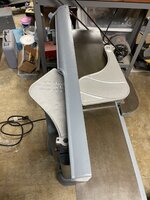
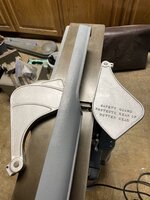
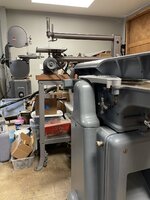
Here is another of my Delta restorations
6” jointer with the cast iron base and rare Rear Cutter Head Guard. This is a very old model as it has no serial number badge and no holes where it may have been. 1935?
6” jointer with the cast iron base and rare Rear Cutter Head Guard. This is a very old model as it has no serial number badge and no holes where it may have been. 1935?
Attachments
-
 9D6EEE65-5964-45DD-BB66-6226199D0E9D.jpeg105.7 KB · Views: 74
 -
 481F2A17-B733-4C18-AE50-2595B94D56D4.jpeg114.7 KB · Views: 72
 -
 80084F5F-2527-4F5E-96AF-B0B9B9209F5F.jpeg315.9 KB · Views: 70
 -
 80DDBAAD-E448-460B-89CB-AA0BB869785D.jpeg355.4 KB · Views: 68
 -
 472EC0E6-3BC2-4222-A191-817A5C2C4022.jpeg261.4 KB · Views: 62
 -
 1D98F272-F0DC-43EE-88A7-E510975FF7D9.jpeg227.4 KB · Views: 63
 -
 652703E5-555E-469B-927B-3623C16CE91A.jpeg390.4 KB · Views: 64
 -
 3C42B734-D12B-4649-BF9C-B9030B8DA7C9.jpeg353.2 KB · Views: 67
 -
 D47B751C-11EC-418A-BAE0-9B46E79B1214.jpeg359.8 KB · Views: 66
 -
 DD7CC11E-B068-4A92-B8F2-BA09D758FB19.jpeg327.5 KB · Views: 74
Nutria
Well-known member
Gorgeous-- I saw a bit of it photobombing your sander pics. I need to find one of those rear pork chops.
5Prosjeff
Active member
This one I have is cast iron which is pretty rareGorgeous-- I saw a bit of it photobombing your sander pics. I need to find one of those rear pork chops.
5Prosjeff
Active member
Haha, I’ve got 5 cast iron bases, one still has to be refurbished, painted and put together for my Tilty that I’ve restored. It has the cast iron belt guard as well.Is that 4 or 5 cast iron pedestals?! Every picture has yet another cast iron pedestal in the background, and each one is perfect, wow.
The Earth may spin off its axis because so much weight is concentrated in your workshop!
5Prosjeff
Active member
That Jack shaft is just too cool! I’m on the hunt again!Here is a 1938 Delta DP220 that I posted last summer - but it gets a curtain call for this Delta Milwaukee thread. There was much discussion as to whether or not the jack shaft assembly was made by Delta or not. This question is still unresolved and may never be figured out. The "Model 14-207" which went by DP220 because of the head casting number, had a very long production run with Delta.
When this lever is forward as shown, the belts are tight. When the lever is released and rotated back, all the tension is released making belt changes quite easy.
Here the lever is back and you can see all the tension is out of the belt, with the two motor mount plates separated.
Here is a picture that GJ member @BradnCali found in a Delta catalog that shows the exact jack shaft assembly being used in manufacturing, most likely during WWII with a woman manning the drill press.
And here is one of the greatest badges ever created.


jmarkwolf
Well-known member
Hi JimI think so! It’s advertised as enamel and I’ve found that it does seem much “tougher“ than regular paint. I’d say it’s better than regular paint and it does resist scratches but it’s probably not 100% scratch proof. I used it on a disc sander and a drill press and it’s held up extremely well. I will say that I’m also careful with my machinery and I try not to bang them up. Still, they’re in a shop setting that I use every day for at least four or more hours. I use the sander and drill press routinely and they still look great. If I restore another old Delta, I will definitely use the Rustoleum smoke grey enamel to finish it.
Jim C.
Decided to try your suggested paint. What did you do for surface prep? Did you use their primer?
I just got my drill press base back from the sand blaster. Planning to start painting today. The bare casting is pretty rough. Thinking primer will help smooth the finish.
Last edited:
Hi Jim
Decided to try your suggested paint. What did you do for surface prep? Did you use their primer?
I just got my drill press base back from the sand blaster. Planning start painting today. The bare casting is pretty rough. Thinking primer will help smooth the finish.
I glass bead blasted everything. All the stamped steel parts got a coat of primer, a light sanding with a red scotch bright pad, a coat of the enamel paint, a light sanding again with the red scotch bright pad and then a second finish coat of the enamel paint. The cast iron parts got two coats of the enamel paint. No sanding before or between coats. Just two coats of the enamel paint. Prior to painting the cast iron parts and the stamped steel parts, I used compressed air to remove any glass bead/dust, etc. Then I made a few passes over the parts with a heat gun to help remove any moisture left by the compressor. Don‘t linger over the parts with the heat. Just wave it over the parts with a few passes, they should not be warm, and then start painting.
Jim C.
Last edited:
@Jim C. I ran across this old post of yours while researching Delta tilty's.
Here's my 1947 Delta tilt top table saw in 100% completely unrestored original condition. I also have the blade guard assembly, which is not shown in this picture. When I was about ten years old I built my first woodworking project (with adult supervision) using this saw. Decades after making that project, the saw ended up being my first old Delta machine and the one that got me started on a life long search for more old Delta machinery.
Jim C.
That's an awesome story and appreciate you sharing. What an incredible bond you must have with that tilt top. To expand on what I said earlier about the Delta machines that you've posted on this thread, you have a very impressive lineup. I started as a vintage Craftsman guy, but seek old Delta more often now. Their 9" diameter RI motors in particular are the best from that era.
Here's my 1947 Delta tilt top table saw in 100% completely unrestored original condition. I also have the blade guard assembly, which is not shown in this picture. When I was about ten years old I built my first woodworking project (with adult supervision) using this saw. Decades after making that project, the saw ended up being my first old Delta machine and the one that got me started on a life long search for more old Delta machinery.
Jim C.
That's an awesome story and appreciate you sharing. What an incredible bond you must have with that tilt top. To expand on what I said earlier about the Delta machines that you've posted on this thread, you have a very impressive lineup. I started as a vintage Craftsman guy, but seek old Delta more often now. Their 9" diameter RI motors in particular are the best from that era.
Hoorn,
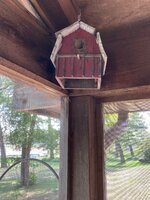
You must have done some digging to find that story. When I was about ten years old I made a bird house using a 1947 Delta tilt top table saw. The saw belonged to my childhood friend’s father. They lived directly across the street and the saw resided in a small shop in their basement. I grew up seeing that saw on a regular basis. Well, to make a long story short, many years later, my friend’s dad passed. His mom decided to downsize and for whatever reason, no one wanted the table saw. So, I got a phone call asking if I wanted it. “Of course!“ was my answer. Anyway….
That bird house was the beginning of a lifelong love of woodworking and the table saw was the beginning of my interest in vintage woodworking (mostly Delta) machinery.
Jim C.
You must have done some digging to find that story. When I was about ten years old I made a bird house using a 1947 Delta tilt top table saw. The saw belonged to my childhood friend’s father. They lived directly across the street and the saw resided in a small shop in their basement. I grew up seeing that saw on a regular basis. Well, to make a long story short, many years later, my friend’s dad passed. His mom decided to downsize and for whatever reason, no one wanted the table saw. So, I got a phone call asking if I wanted it. “Of course!“ was my answer. Anyway….
That bird house was the beginning of a lifelong love of woodworking and the table saw was the beginning of my interest in vintage woodworking (mostly Delta) machinery.
Jim C.
Attachments

Jim_No_Garage
Well-known member
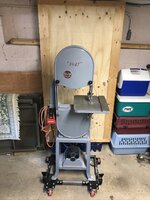
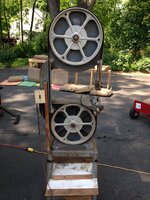
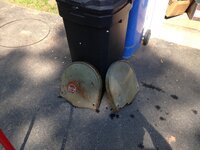
So a few years ago I saw "1947" - a Delta 14" Bandsaw at the curb during bulk pickup and brought it home. A cleanup, repaint, new trunion brackets, tires and bearings and it's back in service for another 70 years.
Cheers
Jim
Cheers
Jim
Attachments
@Jim_No_Garage outstanding! Great save. I like what you did there with the date.
Jim_No_Garage
Well-known member
Yes - that was my first "cut" on my daughter's Cricut machine.@Jim_No_Garage outstanding! Great save. I like what you did there with the date.
454ragtop
Well-known member
Dp645 11" triple duty drill press, dates to about 1939. Sweetheart of a little drill press, has features that were deleted on later 11" drill presses, tilting table, longer quill travel are 2 that come to mind.
Last pic shows an 11-100 I just sold last week, 1960 vintage, shiny original paint, strangely the buyer didn't want the "retirement" light, so I took it off.
I'll post some pics of my WWII era DP600 and a couple sanders in a day or 2.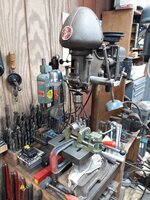
Last pic shows an 11-100 I just sold last week, 1960 vintage, shiny original paint, strangely the buyer didn't want the "retirement" light, so I took it off.
I'll post some pics of my WWII era DP600 and a couple sanders in a day or 2.
Attachments


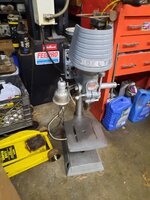
@454ragtop fantastic early model 220.
Regarding the 220, if the front pulley guard has four cast lines running through the Delta badge, it was originally equipped as a high-speed pulley, if there are five cast lines, it would have been the slow speed pulley.
Beyond the difference in the raised lines, the high-speed version has a higher peak whereas the slow speed is wider and stocky. A high-speed pulley will fit with any guard, the slow speed pulley will not fit in a pulley guard designed only for a high-speed pulley.
Very nice drill presses you have.
Regarding the 220, if the front pulley guard has four cast lines running through the Delta badge, it was originally equipped as a high-speed pulley, if there are five cast lines, it would have been the slow speed pulley.
Beyond the difference in the raised lines, the high-speed version has a higher peak whereas the slow speed is wider and stocky. A high-speed pulley will fit with any guard, the slow speed pulley will not fit in a pulley guard designed only for a high-speed pulley.
Very nice drill presses you have.
Last edited:
During those early Delta years to make moving around some of the equipment easier, they offered a unique style of wheels to attach to the feet of the splayed foot, open steel stand. Introduced in the 30s and appearing sporadically in catalogs until the early 1950s was the cast iron caster attachment.

Here are several pictures showing different angles of the solid cast iron casters on my 1937 belt sander and after I cleaned them up.
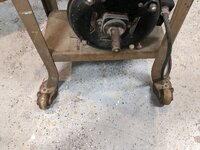


You can see by the way they are configured that they can be mounted in three different angles on any foot. A square nut is captured underneath the caster and does not turn when you tighten the screw. The round pads are simply to even out the pedestal.
These were around until the retractable casters were introduced in 1954.
Another interesting part of these cast iron wheels was the handle assembly that is almost always missing when you find a machine with these casters. I received permission from member @5Prosjeff to post a few pictures of his Delta shaper, the forward handle attachment is visible.

With two screws to tie down the attachment the handle would pull out and retract to use as a type of guide to lead the equipment around the workshop.
Here you see both attachments supporting the handle.
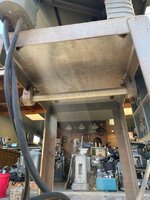
And yes, also visible in that picture is an unbelievable amount of Delta treasure.
If you have any Delta cast iron casters please post them!
Here are several pictures showing different angles of the solid cast iron casters on my 1937 belt sander and after I cleaned them up.
You can see by the way they are configured that they can be mounted in three different angles on any foot. A square nut is captured underneath the caster and does not turn when you tighten the screw. The round pads are simply to even out the pedestal.
These were around until the retractable casters were introduced in 1954.
Another interesting part of these cast iron wheels was the handle assembly that is almost always missing when you find a machine with these casters. I received permission from member @5Prosjeff to post a few pictures of his Delta shaper, the forward handle attachment is visible.
With two screws to tie down the attachment the handle would pull out and retract to use as a type of guide to lead the equipment around the workshop.
Here you see both attachments supporting the handle.
And yes, also visible in that picture is an unbelievable amount of Delta treasure.
If you have any Delta cast iron casters please post them!
454ragtop
Well-known member
Hoorn, the drill press I posted is not a DP220, it's a DP645. Not very common, when I found it in a dark basement at an estate sale I thought it was a DP220, though in the back of mind something seemed off. The DP 645 was only made for a couple years before they changed to the Homecraft model, and did away with a lot of the DP220 like features.
454 you are absolutely correct. I looked at that picture way too quickly and appreciate the correction. The information regarding the amount of cast lines is still relevant as regards the 220 models, but now that I look closer I recognize yours is a 645, it doesn't apply.
Last edited:
454ragtop
Well-known member
Hoorn, actually the belt guard info doesn't apply to the 645, it was only available with the high speed pulleys. Keep in mind, this is an 11" drill press, not 14" like the DP220.
d42jeep
Well-known member
Here is a grinder that I found at a Stateline, NV garage sale in 2017. The thing is very powerful and I have to treat it with some respect. Still working like new.
-Don
-Don
LeonardY
Well-known member
I've posted this before. Here's my 1936 Delta band saw. I have the receipt from when my Godfather's father bought it.
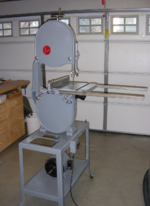
Here's what it looked like when I got it.
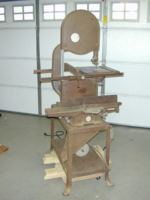
Here's what it looked like when I got it.
Nutria
Well-known member
Outstanding machine and history. Nice fence. I really like the chrome speeder wheel for tension adjustment. I imagine that wasn't original-- off of a table saw?
Gorgeous restoration on that bandsaw Leonard. Top tier in every way.
Can you show a few more pictures of the upper wheel guide assembly handle please? The first time I saw one I thought someone had slapped a handled wheel from another manufacturer on top as Delta primarily used the star knob. But I have since bought a metal cutting Delta bandsaw with that same long upper wheel adjustment handle that reaches above the wheel covers and also has a handled wheel on it. I have found one or two others on the internet and now yours. All primarily 1930s models.
Thank you so much for posting that beautiful band saw.
Can you show a few more pictures of the upper wheel guide assembly handle please? The first time I saw one I thought someone had slapped a handled wheel from another manufacturer on top as Delta primarily used the star knob. But I have since bought a metal cutting Delta bandsaw with that same long upper wheel adjustment handle that reaches above the wheel covers and also has a handled wheel on it. I have found one or two others on the internet and now yours. All primarily 1930s models.
Thank you so much for posting that beautiful band saw.
LeonardY
Well-known member
Thanks.Gorgeous restoration on that bandsaw Leonard. Top tier in every way.
Can you show a few more pictures of the upper wheel guide assembly handle please? The first time I saw one I thought someone had slapped a handled wheel from another manufacturer on top as Delta primarily used the star knob. But I have since bought a metal cutting Delta bandsaw with that same long upper wheel adjustment handle that reaches above the wheel covers and also has a handled wheel on it. I have found one or two others on the internet and now yours. All primarily 1930s models.
Thank you so much for posting that beautiful band saw.
The original part was a small knob.
I upgraded the tracking arm. Put in a high tension spring and added the Spinner wheel.
I bought everything from Iturra Design. He doesn't have a website that I know of. He's an expert on the band saw. His name is Louis Iturra.
Not sure if he's still in business. The last information I have for him was back in 2011. Here's the phone and email: 904-642-2802 [email protected]
LeonardY
Well-known member
I won this in a lottery at work when they closed down the wood shop. It came with every accessory imaginable.
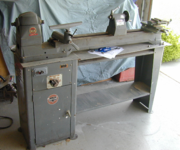
Jim_No_Garage
Well-known member
I ordered my repair parts from Iturra in 2020 so they were in business at that time. I called and requested/ordered a catalog. When the catalog arrived I did the whole "Wish Book" thing and called in my order. Good people.Thanks.
The original part was a small knob.
I upgraded the tracking arm. Put in a high tension spring and added the Spinner wheel.
I bought everything from Iturra Design. He doesn't have a website that I know of. He's an expert on the band saw. His name is Louis Iturra.
Not sure if he's still in business. The last information I have for him was back in 2011. Here's the phone and email: 904-642-2802 [email protected]
Jim
jmarkwolf
Well-known member
Hi JimI glass bead blasted everything. All the stamped steel parts got a coat of primer, a light sanding with a red scotch bright pad, a coat of the enamel paint, a light sanding again with the red scotch bright pad and then a second finish coat of the enamel paint. The cast iron parts got two coats of the enamel paint. No sanding before or between coats. Just two coats of the enamel paint. Prior to painting the cast iron parts and the stamped steel parts, I used compressed air to remove any glass bead/dust, etc. Then I made a few passes over the parts with a heat gun to help remove any moisture left by the compressor. Don‘t linger over the parts with the heat. Just wave it over the parts with a few passes, they should not be warm, and then start painting.
Jim C.
So far, I'm very pleased with the color and application of the Rustoleum enamel you suggested. I've been applying the gray primer coat to everything, particularly because of some rust spots that I removed left a few bare metal spots. Then applied two coats of the enamel each within an hour or so, per application instructions on the can, as opposed to waiting 48 hours for each new application.
After 24 hours the paint is indeed dry to the touch per the application instructions on the can. The gloss really brings out the roughness of some castings like the base, but I don't care.
Now, I'm debating how best to paint the underside of the full length of the belt guard. Particularly around the back end where the spot-welded spring-loaded hinge is located (pics later), between the upper and lower belt guard.
Looking forward to completing the painted parts and reassembling when I get the spindle parts back from Hammerscale.