To avoid these ads, REGISTER NOW!

What did you do "IN" your garage today?

Outlawmws

Well-known member
Joined
Aug 9, 2011
Messages
39,324
Location
The Badlands
On the hopeless case broken studs, the "last resort" (first for some...) is to get a nut a size smaller on the threads and weld it to the center to the broken stud. The heat helps break the bond, and the nut allows you to wrench it off.
 
To avoid these ads, REGISTER NOW!

Magnum440d100

Well-known member
Joined
Dec 2, 2018
Messages
3,581
Location
Indiana
I do have a confession to make. Out of the 10 studs that hold the manifold on my truck, I was only able to extract 9 of them. That 10th one was so hard that I could barely make a dent in it with cobalt and carbide drill bits. Maybe all the oxy-acetylene and welding hardened it.

As much as I hate to admit it, I gave up on that one and just put the manifold back on with 90% of the fasteners. There's no ticking, no rough running, and no check engine light so at least the task was accomplished. Still, I tend to be an overthinking perfectionist so it's not easy letting that go.
I started the manifold removal a few weeks back actually. I snapped 2 bolts, and one is rusty enough that the correct size wrench does not fit. None of my wrenches or sockets fit it. So it’ll have to be ground off or something. I “may” weld a nut on it so I can get a wrench on it, but with how rusty the bolt is, I dunno.

That is why I haven’t wholly started. Lol

As far as what did I do in the garage today?? Not a dang thing. Been preparing for the storm we are supposed to get. Got food made, extra water filtered and stored, extra firewood brought inside to help/keep/stay dry, candles and flashlights at the ready, etc.

I don’t think it’ll be as bad as they say, but I’m ready to be without power for a little bit.

If I were done organizing the garage, I could pull the Dakota in and work on the manifold. But it’s not in the cards right now I guess. I’d rather have it running/driving with an exhaust leak, than pull it apart and need to drive it through the storm somewhere (even though I have the K1500 lol).
 

FMB4

Well-known member
Joined
Jan 19, 2017
Messages
2,926
Yep, exh studs can be a huge pain. This is especially true when they're broken off flush or below the head surface. That said, I've very good success using high quality L.H. drill bits on such.
 

HPRifleman

Member Emeritus
Joined
Nov 18, 2019
Messages
767
Location
Wayne, IL
On the hopeless case broken studs, the "last resort" (first for some...) is to get a nut a size smaller on the threads and weld it to the center to the broken stud. The heat helps break the bond, and the nut allows you to wrench it off.
Tried the weld-nut-to-stud trick several times to that stud. The nut just twisted off each time.
 

HPRifleman

Member Emeritus
Joined
Nov 18, 2019
Messages
767
Location
Wayne, IL
Yep, exh studs can be a huge pain. This is especially true when they're broken off flush or below the head surface. That said, I've very good success using high quality L.H. drill bits on such.
Oddly enough, the ones that were broken off sub-flush came out pretty easy. Just drilling into them a little bit got them moving and I could then twist them out.
 

Arne73

Well-known member
Joined
Mar 20, 2010
Messages
1,477
Mortise lock on the garage door needed some attention. Lock cylinder got loose, last time we broke a key. Got it tightened up.
Wife needed to go to urgent care before I had the driveway blown out.
Damn tractor wouldn't start, no spark. Fiddle-farted with the new-this-summer coil for an hour until it decided to start.
 

rayra

Well-known member
Joined
Dec 1, 2014
Messages
4,724
Location
Escaped from Los Angeles
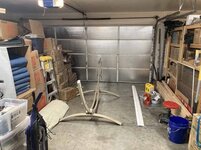
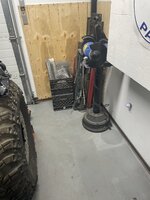
I'm back on my remaining 9 toes and industriously tidying up the messes in the garage workshop area, preparing to kick off both additional beam work on the back yard pergola and work on a couple stone gabion walls in the front yard. Trying to pick the style of livestock panel I can bend and form into the gabion baskets, which I hope to commence next week. 11 weeks before things start heating up around here. 16 tops before it gets too hot to be hand-stacking stones all day.

Some Before and During pix
 

Attachments

  • sparta workshop mess 1.jpg
    sparta workshop mess 1.jpg
    74.3 KB · Views: 76
  • sparta workshop mess 3.jpg
    sparta workshop mess 3.jpg
    71.7 KB · Views: 78
  • sparta workshop mess 4.jpg
    sparta workshop mess 4.jpg
    63 KB · Views: 76

bugnut

ALLIANCE MEMBER
Joined
Jul 14, 2012
Messages
3,998
Location
Central Ohio
Cleaned and put away. Washed up all the supplies after draining the ultrasonic and straining the evaporust. Looks better now!
 

CSRPenFab

Well-known member
Joined
Oct 27, 2015
Messages
5,148
Location
Meridian Idaho
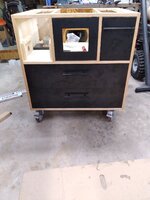
After adding my most recent EGO 52v addition (snowblower), I'm committed to the EGO line of tools now. Mower, Carbon Fiber shaft string trimmer, edger, blower, and snow blower, and the mess of chargers and batteries laying around my bench an work cart was starting to annoy me.

I had a half sheet of 3/4" plywood that was painted black laying around the shop. It used to be a cargo shelf in my now sold Lexus GX460. Hmmm, I can do something useful with this! An hour later, I'd whipped up a nice wall mounted board to hold 3 chargers and up to 4 spare batteries. I found the 3D printed battery mounts on Amazon, and they work slick to hold the batteries. Much better now and I don't have to fumble with the chargers ever again!

EGO Board.jpg
 
To avoid these ads, REGISTER NOW!

zmotorsports

ALLIANCE MEMBER
Joined
Oct 20, 2009
Messages
21,464
Location
Northern Utah
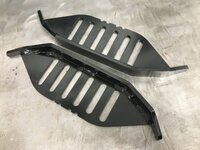
Installed Armorskids on my Snow thrower, washed the truck and smoked some cigars.

I've actually been looking at those as my Toro needs new skids. I was going to build something a bit more stout than the OEM ones but then saw the SnowBlowerSkids and they appear to be reasonably priced. Don't know that I would really save much building them myself.

Have you had a chance to use the snowblower yet with them installed? I'm curious how they work.
 

BuffettFan

Well-known member
Joined
Jul 11, 2017
Messages
10,920
Location
Central Illinois
Moved everything to the back of the garage so the new overhead door could be installed.
It was ordered in August.
Then snowmaggeden happened.
Door is reschedule for Monday.
Now everything is shoved together and it's freaking cold.
Think I'll make a gallon or two of bourbon BBQ sauce instead.
 

FMB4

Well-known member
Joined
Jan 19, 2017
Messages
2,926
I'm putting together an 'In Memory Of' wood framed wall hanging display in honor of the man who would have been my wife's uncle. He served with the US Army 36th Combat Engineer Corps in the European theater during WWII under General Hodges. He made it through the D Day landings, and the fighting through the low countries, only to be KIA just inside Germany during the Battle of Hurtgen in the later months of 1944 (Nov to be exact). He was 19 at the time of his death.

There's a website that covers this very sad event that my wife found just recently. This site covers the others who also lost their lives while serving with US forces during WWII that were from the small N. CA community that he was from. She has a vintage US Army photo of him in his 'dress' uniform that she's going to add to the site along with a photo of the wall hanging (once I'm finished with it). I'll post the URL once she does so.
 

ambenz

Well-known member
Joined
Dec 12, 2010
Messages
4,237
Location
NW Chicago Suburbs
Well, my continuing effort to "clean and bling" up my engine bay of my mustang is in full swing.
Some of my beginning thoughts can be found in a earlier post in this thread here.
Kay mentioned I should disassemble and freshen up the stock alternator internals if I was going to polish the case.
You disassemble alternators to polish them. Taking the opportunity to freshen the brushes n bearings.
So, that was my plan even though I never took a alternator apart before.
I disassembled enough motors so it shouldn't be that hard.
Wrenched the unit off its aluminum bracket and started disassembling the external parts.
0201221017.jpg

It is a good thing I didn't order a rebuild kit for the alternator as, come to find out, the sealed rear bearing was press fitted on the shaft and on the external housing!
Without using a puller and possibly damaging the back cover, and without a press to reassemble this known good working alternator, I decided to stop any further disassembly and consider saving this as a known good backup and ordering the chrome alternator I was considering.
And that is what I am doing.
Once I did get it reassembled, I repainted the fins and did a little test polishing to see how well I could make this stock unit look.
0201221414.jpg

Well, it will never look as good as a chrome one but it will still work should I need a known good alternator in the future.
The aluminum did polish up pretty good using my Rupes Nano and some aggressive compound, I decided to remove the aluminum bracket from the engine and see how well I could polish that too.
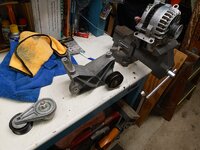
0203221008.jpg

FYI, a little tip if you work on your car or have consumable items you buy, you should date and mileage your parts and consumables!
As my water pump shows, It close to 20K and 4 years old but I remember installing it like it was last summer!
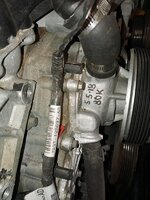
0203221008b.jpg

I have had this Duro Aluminum Jelly Cleaner and Brightener so I figured I see what it could do to the alternator bracket.
Following the directions, I didn't see any noticeable change to the part so I went back to my compound.
0203221010.jpg

I'm breaking out all my polishing equipment in a effort to only polish the visible area of the bracket the alternator doesn't hide.
I have an agressive compound and my Rupes Nano, my drill and a Polishing kit to play with....
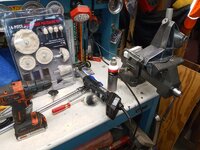
0203221106.jpg

...One thing I didn't have was a dedicated metal polishing wheel on a high speed motor stand.
I might be looking into a stationary machine what will polish metal parts.
I see what you all do polishing metal and that word be quite impressive to have in my arsenal.
Using the tools at hand, I was able to polish up the bracket after some trial and error....
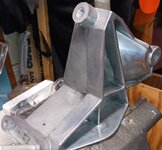
0203221133.jpg

I installed the bracket back on the engine after ceramic coating the polished areas with Croftgate Assurance 2.0.
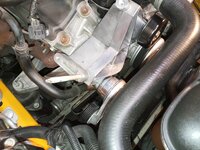
0203221201.jpg

I cleaned up the rust on the engines head bolts and am now awaiting delivery of my chrome alternator due in today from American Muscle....
order.png

It 5 more amps than the stock one and I am a bit curious what the manufacture did to gain 5 amps compared to the 130 amp stock alternator? It gives them a better than stock "brag", I suppose....LOL!
 

Bob Heine

ALLIANCE MEMBER
Joined
Oct 24, 2009
Messages
10,708
Location
Boca Raton, Florida
Using the tools at hand, I was able to polish up the bracket after some trial and error....
0203221133.jpg
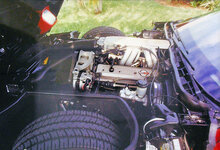
Be careful or you could fall into a pretty deep rabbit hole. I grew up admiring the chromed out show car engines and discovered I am in a very different bracket. My solution was to polish the aluminum on my engines. When I bought my '87 Corvette in 1991 the engine was all rough cast.
First Purchased 2a.jpg
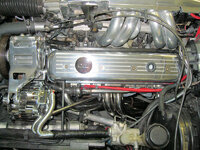
Over the years I've replaced a few parts with chromed items (alternator) and the impossible to polish magnesium valve covers with polished aluminum.
Driver Side Bling.jpg
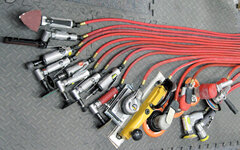
I often start the process with a flat file to remove the casting flash and then block sand the flat stuff. I use a pneumatic angle die grinders with 3M quick change disks with various grit sandpaper, Scotch-Brite disks from coarse to fine and then buffing pads with white compound. A few other air tools come into play but aren't really necessary.
Sanding & Grinding Tools 800.jpg
As this polishing disease progresses, you'll need a de-burring wheel on a stationary grinder (the 6" wheels are still sticker shock).
 

Jazz1

Well-known member
Joined
Jan 3, 2016
Messages
4,188
Location
Thunder Bay On.
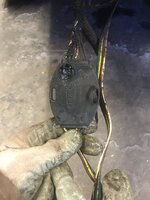
Tail lights quit working last night on my '91 Toyota truck. amazingly only a few minutes to find the culprit is the trailer "junction" wiring thingy. Hopkins HM43315. Its a plug and play unit so removed it and until new one arrives,,,lights working again
 

Attachments

  • 66560906402__F3BFCA3F-2CA8-448D-9C1A-F4DA71E3A32A.JPG
    66560906402__F3BFCA3F-2CA8-448D-9C1A-F4DA71E3A32A.JPG
    272.8 KB · Views: 67

Mikeske

Well-known member
Joined
Apr 28, 2017
Messages
2,131
Location
Washington State
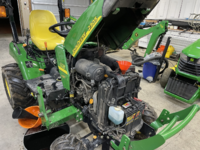
I decided to prepare my tractor for the spring season, Yeah I know the tractor is smallish a John Deere 2305 with a front end loader, backhoe and mower deck. Yesterday I fully service the engine including replacing the air, fuel and oil filters also draining and refilling the coolant and the front drive axle 90 wt oil. Today I did the transmission by draining replacing the spin on oil filter and removing, cleaning the screen filter and magnets and then reassemble everything and filling up the various fluids. At 375 hours the entire tractor has fresh fluids and ready for the next year.

Also gave the tractor a bath before I started but the dirty side of the tractor just gets rinsed off as it is impossible to get everything and I just leave a fine layer of dirt as nobody can see that.
 

Attachments

  • tempImageMuP2sz.png
    tempImageMuP2sz.png
    3.2 MB · Views: 50
  • tempImageKK6TQY.png
    tempImageKK6TQY.png
    3.3 MB · Views: 48
  • tempImageUZcDbw.png
    tempImageUZcDbw.png
    3 MB · Views: 52
  • tempImagesYiicn.png
    tempImagesYiicn.png
    3.2 MB · Views: 60
Last edited:
To avoid these ads, REGISTER NOW!
Top Bottom