To avoid these ads, REGISTER NOW!

Modifications to the HF 4 and 5 drawer service carts - what changes have you made?

SILVERPLATE

Well-known member
Joined
Jun 29, 2005
Messages
1,702
Location
Fort Worth, Texas
Here’s how she stands currently. Since applying bedliner to the top, I added two more of the Harbor Freight magnet strips to the sides, mounted two sets of the corner guards (trimmed to fit around the lower bolts), flipped the trim pieces over so the black sides face out, and also added a magnet to the back which holds the lid when I flip it over to use it as an open-till cart.

I also installed two more swivel casters, but not the blue-wheeled ones that everyone gets from Harbor Freight. If you pull up the available replacement parts for this cart, you can order the locking swivel casters that come with the cart via telephone directly from Harbor Freight for $15.08 each, with free shipping (I found out on the phone that any replacement parts ordered from Harbor Freight ship for free). These are better casters than the ones everyone buys in store, for less money ($15.08 vs $16.99).

0FE99D0B-585F-40EF-9338-1D34B28116CE.jpeg

6152F8CA-986B-4657-A0EB-796F36AB20ED.jpeg

E49EC012-CA22-4CDB-B891-62B8A42BF89B.jpeg

C090061B-C10F-419E-9C3F-65FFD51A5F12.jpeg
All great ideas. Like the flipping lid all the way around. Great cart.
 
To avoid these ads, REGISTER NOW!

Markmanuel

Member
Joined
Apr 15, 2016
Messages
22
I have been following this thread for years and have to say I have seen some very inspiring mods throughout the years. JavyLSU’s white cart is absolutely stunning in a more recent post. I have done a few mild mods over the years but after laying down my racedeck floor, my old black cart needed something done.

I decided to paint portions to match the blue tiles in my floor. It has been a pain finding paint in stores with all the supply shortages. I ended up with this color as it was the clusters available and I bought the last 2 cans in my area.

I found some blue tool box liner that closely ties in to my scheme. I even put liner in the screwdriver slots both under the lid and the lower outside ones. I
have some blue U Channel ordered for the lips that should create a nice effect around the edges. I should get that tomorrow.

My handle was scrapped up a bit and rather than painting, I glued strips of liner around the handle. It now provides and nice grip when moving cart around and ties into color scheme.

lastly I got a couple Kobalt magnet strips from Lowe’s. These magnets are beasts! I have to pry off the magnetic strip from my box with a screw driver. It is 3 times as strong as the other magnetic strips you see in pictures.

FB6186BA-CAC3-4FEE-B3AF-5906C252741B.jpeg

FD3A4CA2-DB34-4559-9FDD-46AE44D8F331.jpeg

0D4E10F9-682D-479D-8CD9-28BA09600EDA.jpeg
 

Attachments

  • 0394AF8A-9EF7-4693-A767-B7A78C730AC7.jpeg
    0394AF8A-9EF7-4693-A767-B7A78C730AC7.jpeg
    357.1 KB · Views: 172

willbird

Well-known member
Joined
Dec 24, 2019
Messages
65
Location
NNWW Ohio
Wanted more storage for battery powered tools. Looked far and wide for drawers to add on and stumbled onto these.
NavePoint 3U Rack Mount Drawer
They are made to fit into what they call a server rack. They come in different heights so in the space the two "3U" fit in one could also choose any combination that added up to to 6. Six 1U for example, or three 2U.
k34QTFd.jpg
Can provide more detailed pics if there is any interest. Used 2" x 2: angle that I had but 1" x 1" would work. Support under back side is 3" square tubing. I just tack welded the two drawers together and tacked them onto the 3" tubing.
Here is how I setup to notch the bottom if the cart, kinda scary, do or die LOL. Worked out fine.
hMqh50m.jpg

They take the standard 5/8 tubular locks. Found a seller on Ebay who has both 90 degree and 180 locks and can supply them keyed alike.
No affiliation but the seller was easy to work with.

Planning on getting 6S foam to put inside the drawers and cutout for battery powered tools and stuff like hammer drill bits. A Milwauki M18 5" grinder will fit which was one of the tools that I wanted to store.

The bottom area of my cart just used to collect junk anyway. Kind of want to box in the remaining area and leave the front open. It is a good place to store my fall protection harness.
 
Last edited:

99TDR

Member
Joined
Oct 19, 2021
Messages
18
Location
Long Island, NY
Here’s how she stands currently. Since applying bedliner to the top, I added two more of the Harbor Freight magnet strips to the sides, mounted two sets of the corner guards (trimmed to fit around the lower bolts), flipped the trim pieces over so the black sides face out, and also added a magnet to the back which holds the lid when I flip it over to use it as an open-till cart.

I also installed two more swivel casters, but not the blue-wheeled ones that everyone gets from Harbor Freight. If you pull up the available replacement parts for this cart, you can order the locking swivel casters that come with the cart via telephone directly from Harbor Freight for $15.08 each, with free shipping (I found out on the phone that any replacement parts ordered from Harbor Freight ship for free). These are better casters than the ones everyone buys in store, for less money ($15.08 vs $16.99).

Thanks javyLSU for the post/idea of the spare parts.
I've had the 5 draw cart for about a year, and in the tight spot I need to part the cart, it's a PIA with only 2 swivel wheels.
Ordering saves me a trip a few towns over to HF.
Not in a rush, and free shipping!
It seems from you post/pix, it's the same wheel I have on mine.

Great thread in general, been picking through this thread and others. These carts really picked up a following for good reasons IMHO.
I'm not a huge fan of HF in general, but for certain items. One's Gotta know what your buying from HF, and all is good.

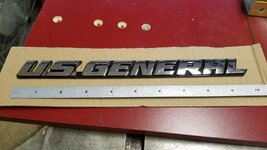
There hasn't been a US General box I didn't like. These boxes are a great bang for the buck.
I have a bunch of very old Craftsman boxes (even 1 new topper box), and a more than a few of the larger Husky boxes.
I really like the US General series of boxes for the money.
I use the 5 draw cart for all the most common task stuff. It sits right inside the garage door. Oil change tools, brake tools, funnel and such, note pads, windshield "colorforms" (oil change/inspection dates - so the family remebers what's due when, with their ride), one draw as just the sockets needed for lug nuts of what the family drives and the correct corresponding torque limiter extension. All the super common items commonly used and needed at reach.
I have a 1 draw Husky box I use out in the driveway during the project. It collects the tools in use during the project (all get returned to the big boxes when done). The bottom of the Husky are my wheel chucks and parts bins to capture the fastners as they get removed. My single garage is too small to get my trucks/jeeps into. I've been a shadetree wrench turner for about 45years.

enough of the intro...
FYI On to the wheels.... (my reason for my first post)
As with most HF stuff, tons of PN and SKU for practically the same item.
With my cart, on the label, it has a PN of 64030, and a SKU ending in 639.

The HF available replacement parts list shows that my SKU ending in 639 is s/b a PN 64033. (see below)
It has a PN for the locking caster wheel of 19140 / $5.94 ea

If I go by my PN 64030 , the HF available replacement parts list shows that a 64030 SKU should end in 305.
It has a PN for the locking caster wheel of 19068 / $15.08 ea

I called HF to order, they are saying that the 19068 is the one for my box, 64030. ($15.08 ea. as javyLSU denotes)

I Ordered 4 in case they are different enough, at worse, I'll use the two I took off or have left over for another cart.
Capture2.JPG

A screen grab from the HF available replacement parts..
( Link to the HF PDF : https://manuals.harborfreight.com/manuals/parts/HFT_Parts_Listing_2020-02-26.pdf )
Capture1.JPG
 

99TDR

Member
Joined
Oct 19, 2021
Messages
18
Location
Long Island, NY
Conveniently, see my post above this one..

So the wheels came in over the weekend, and when I dumped them out onto the work cart, I was like, these things are huge, I must have smaller ones, the other number, on mine.. But the eyes were playing tricks on me... they are exactly the same.. so now a lot easier to pilot the cart back into it's parking spot.

BTW, for those looking to swap out your fixed casters for the swivel, little hint, when installing the new caster from the "top" , put two of the bolts in from the bottom and nuts on hand tight, to keep the caster hanging, so you have both hands free to hold the bolt down in the tray side, and work blind with the other hand installing the flat and nut... once those two are in, remove the ones in the wrong way, and install correctly.

Of course the one with the dead grass and cobwebs is the OG that is on the cart, new one to the right (terrible weld).
PXL_20211024_204144805-med.jpg
 
Last edited:

fartymarty

Well-known member
Joined
Nov 9, 2012
Messages
1,348
Location
Fort Worth
I appreciate the thought. Wanting to beautify my series 1 end cabinet & towel bucket

I have a badge. If it looks like what you want then start a conversation with me and we can talk about shipping/mailing cost. It's stuck to the cardboard with original adhesive ...perhaps a long soak in water would remove the card board without hurting the adhesive????
 

Attachments

  • 20211031_121329.jpg
    20211031_121329.jpg
    225.8 KB · Views: 279

thr3squared

Well-known member
Joined
Oct 4, 2018
Messages
391
Location
CA
I have been following this thread for years and have to say I have seen some very inspiring mods throughout the years. JavyLSU’s white cart is absolutely stunning in a more recent post. I have done a few mild mods over the years but after laying down my racedeck floor, my old black cart needed something done.

I decided to paint portions to match the blue tiles in my floor. It has been a pain finding paint in stores with all the supply shortages. I ended up with this color as it was the clusters available and I bought the last 2 cans in my area.

I found some blue tool box liner that closely ties in to my scheme. I even put liner in the screwdriver slots both under the lid and the lower outside ones. I
have some blue U Channel ordered for the lips that should create a nice effect around the edges. I should get that tomorrow.

My handle was scrapped up a bit and rather than painting, I glued strips of liner around the handle. It now provides and nice grip when moving cart around and ties into color scheme.

lastly I got a couple Kobalt magnet strips from Lowe’s. These magnets are beasts! I have to pry off the magnetic strip from my box with a screw driver. It is 3 times as strong as the other magnetic strips you see in pictures.

FB6186BA-CAC3-4FEE-B3AF-5906C252741B.jpeg

FD3A4CA2-DB34-4559-9FDD-46AE44D8F331.jpeg

0D4E10F9-682D-479D-8CD9-28BA09600EDA.jpeg

Very nice setup! Can I ask where you got the blue foam mat?
 

Mr Ratchet

Well-known member
Joined
Mar 3, 2011
Messages
928
Location
Michigan
Here is a 5 drawer that is at work. I just got one for home the other day. I have them set up the same way except the one at home has swivel casters all the way around. I took off the blue wheels and put the black ones that came with the cart back on.
WC-1.jpg

I mounted the can trays up higher so that I have full access to the bottom and added a 1/4" thick liners.
tray.jpg

I mounted a magnet from HF on each cart to hold the added side tray in place when folded down. I also have now added a drawer liner to each tray held down with double sided tape.
WC-3.jpg

I cut a drawer liner into strips and then punched holes in them to go into the screw driver/pry bar sections. I like this better than using grommets as it protects the whole area. I punched slightly smaller holes in the liner to give it a grommet affect.
strips.jpg

Here's a before and after with the strips.
WC-4.jpg
Sides.jpg

The only things left is putting a thicker material on the tops with double side tape and maybe a magnet on the back cross member to keep the top from flapping around. The work cart has the top open and folded down and only closes when I'm pushing it around longer distances. The home cart may stay this way too but, I might add the pistons on so the lid can stay in the upright position.
 
Last edited:

AceofSpad3s

Well-known member
Joined
Oct 1, 2014
Messages
1,808
Is there a good mechanical way to directly mount 1/8 hardboard to the top without having heads of fasteners sticking proud of the surface? All I can think of right now is pop rivets, or bolting a thin sheet of ply to the top then gluing it. Don't like either option since the rivets still wouldn't be totally flush and laminating it to a piece of ply would make it impossible to change out and add extra weight for the struts to deal with.
 

ste6168

Well-known member
Joined
Apr 23, 2015
Messages
217
Location
Morehead City, NC
I just got one of these, 5 drawers, for free. At some point, ill start to set it up and will be stealing plenty of ideas from this thread.
 

zanyad

ALLIANCE MEMBER
Joined
Apr 26, 2018
Messages
2,777
Location
NE Ohio
Is there a good mechanical way to directly mount 1/8 hardboard to the top without having heads of fasteners sticking proud of the surface? All I can think of right now is pop rivets, or bolting a thin sheet of ply to the top then gluing it. Don't like either option since the rivets still wouldn't be totally flush and laminating it to a piece of ply would make it impossible to change out and add extra weight for the struts to deal with.
Use #8 or smaller flat head socket cap screws with a nut underneath. #8's head height is .112" max. Countersink the hardboard to the appropriate depth before attaching.

McMaster linky.

For reference, I used a selector from Holo-Krome to make my recommendation, available from e.g. MSC in both inch (Holo-Krome Selector #99013) and metric (Holo-Krome Selector #99014) versions.
 

darkzero

Well-known member
Joined
Oct 20, 2011
Messages
3,326
Location
SoCal
Last edited:
To avoid these ads, REGISTER NOW!

X1 Mike

Well-known member
Joined
Dec 4, 2008
Messages
8,389
Location
Flagler, Fl
I'm liking your idea here. I have a problem with most answers or situations, I'm a paraplegic and use a wheelchair. So mounting any tools, etc is an issue because I need to have them mobil but also on something that allows my wheelchair to go underneath. I have my grinder and vise on a moveable metal table but it's a tad to big for my space. But if I could mount those plus my drill press, and made the top overhang as you did, that could solve my problems. Thanks,

Haven't looked at this thread in a while and didn't see any responses. Have you modified your cart to suit? Love that I could give you an idea that helps make your work in the garage a little easier.
 

RVAGuy

Member
Joined
Feb 6, 2022
Messages
17

RVAGuy

Member
Joined
Feb 6, 2022
Messages
17
Super Coupon on HF website good from Feb 7- Feb 20. 5 drawer cart $50 off at $219 in 8 colors.
 

rick carpenter

Well-known member
Joined
Jan 20, 2011
Messages
3,778
Location
Huntsville, East Texas
I have been following this thread for years and have to say I have seen some very inspiring mods throughout the years. JavyLSU’s white cart is absolutely stunning in a more recent post. I have done a few mild mods over the years but after laying down my racedeck floor, my old black cart needed something done.

I decided to paint portions to match the blue tiles in my floor. It has been a pain finding paint in stores with all the supply shortages. I ended up with this color as it was the clusters available and I bought the last 2 cans in my area.

I found some blue tool box liner that closely ties in to my scheme. I even put liner in the screwdriver slots both under the lid and the lower outside ones. I
have some blue U Channel ordered for the lips that should create a nice effect around the edges. I should get that tomorrow.

My handle was scrapped up a bit and rather than painting, I glued strips of liner around the handle. It now provides and nice grip when moving cart around and ties into color scheme.

lastly I got a couple Kobalt magnet strips from Lowe’s. These magnets are beasts! I have to pry off the magnetic strip from my box with a screw driver. It is 3 times as strong as the other magnetic strips you see in pictures.

FB6186BA-CAC3-4FEE-B3AF-5906C252741B.jpeg

FD3A4CA2-DB34-4559-9FDD-46AE44D8F331.jpeg

0D4E10F9-682D-479D-8CD9-28BA09600EDA.jpeg

Tell me about painting over powder coat please. I've read online it can be an ordeal. I want the single-drawer or four-drawer, but white, and HF only offers the five-drawer in white.
 

jakemac

Well-known member
Joined
May 21, 2013
Messages
9,035
Location
New England
You have to scuff the finish of the powder coat so the new paint has something to bond to. Very labor intensive.
 

iagsxr

Well-known member
Joined
Jan 10, 2010
Messages
1,504
Location
Vinton, Iowa

GeoBruin

Well-known member
Joined
May 5, 2018
Messages
3,739
You know the 5 drawer is on sale for the same price as the 4 drawer right now right?
 

racinfarmer

Well-known member
Joined
Feb 6, 2012
Messages
2,155
Location
Minnesota/Utah
Tell me about painting over powder coat please. I've read online it can be an ordeal. I want the single-drawer or four-drawer, but white, and HF only offers the five-drawer in white.
You are in luck!


rick carpenter

Well-known member
Joined
Jan 20, 2011
Messages
3,778
Location
Huntsville, East Texas
The folding tops on this little utility cart from my work may be of interest. The tops have the edges bent over at 90 degrees and the back edges are what grab the top rails. The tops rotates upward, slip up a little to clear the rails, then slip down the channel 'locking' them in place. The triangulation is only a few inches. Obviously not heavy duty but someone may figure out a way to modify it.
 

Attachments

  • image_67196673.JPG
    image_67196673.JPG
    388.9 KB · Views: 250

Mr Ratchet

Well-known member
Joined
Mar 3, 2011
Messages
928
Location
Michigan
Here is my home cart which is the same as my work one from above. I set them up similar with most of the same mods. The other models are listed above as well.


I cut down the locking rods on both carts and touched up the paint. Instead of putting the hunk of metal back in the plastic cap, I used pieces of wood. That way it's just wood resting against the touched up paint. I plan to leave the caps off on the home cart and on for the cart at work. Here's the home. These carts should come this way. USG would save two inches of locking rod per cart. They could also sell extra caps for $5 to $10 for replacements.
H-CT.jpg

Both have this rubber mat on the top held on with double sided tape.
H-CM.jpg

Here is a little hammer rack I made for the inside of the drawer. The handle part has two screws from the bottom of the drawer to hold it in place.
H-CH.jpg

I also put in aluminum right angle in some of the drawers to create dividers. I riveted them in place and cut the liners accordingly.
H-CP.jpg
H-CSD.jpg
H-CD.jpg
 

rick carpenter

Well-known member
Joined
Jan 20, 2011
Messages
3,778
Location
Huntsville, East Texas
How are y'all storing your shank-type tools? I have this little wooden box in my Husky box now for my punches and chisels. When I get my HF cart and add some Vessel screwdriver shanks it might suddenly seem unsatisfactory.

image_67513345.JPG
 
  • Like
Reactions: 555

Radio Flyer

Well-known member
Joined
Mar 28, 2010
Messages
1,689
Location
Suburban Chicago
How are y'all storing your shank-type tools? I have this little wooden box in my Husky box now for my punches and chisels. When I get my HF cart and add some Vessel screwdriver shanks it might suddenly seem unsatisfactory.

image_67513345.JPG
I have a variety of old silverware trays to store and sort things like that. Although not pretty, it works for me.


Also, looking to push this past 100 pages!
 

Mr Ratchet

Well-known member
Joined
Mar 3, 2011
Messages
928
Location
Michigan
How are y'all storing your shank-type tools? I have this little wooden box in my Husky box now for my punches and chisels. When I get my HF cart and add some Vessel screwdriver shanks it might suddenly seem unsatisfactory.

image_67513345.JPG
I just line them up next to each other in both my cart and main box. See the picture above yours that shows them in my cart. You can also make dividers like I did. You can leave them loose or rivet them down.
 

ER70S-2

Well-known member
Joined
Jan 2, 2015
Messages
798
This has probably been discussed already, but I couldn't find it. Why does the box have a "Series 2" badge and sticker on the website photos?


I just got one and there is no badge or sticker, but it's clearly part number 56429. The photo on the box doesn't have a badge, either. I really don't care either way. Just curious.
 

darkzero

Well-known member
Joined
Oct 20, 2011
Messages
3,326
Location
SoCal
This has probably been discussed already, but I couldn't find it. Why does the box have a "Series 2" badge and sticker on the website photos?


I just got one and there is no badge or sticker, but it's clearly part number 56429. The photo on the box doesn't have a badge, either. I really don't care either way. Just curious.
My guess is preproduction model and/or for marketing/advertising purposes. My series 2 cart doesn't have it either, I got mine before the price increases & before the white was available. My series 1 cart has no stickers/badging at all. Well it did include the badge but it was not attached to the front of the cart, it was just laying in a drawer.

Kind of like the Daytona jacks. On their website the label on the lift arm or whatever it's called is right side up. Every jack I've owned & used is labeled this way.

daytona-feature-dktp.jpg


But the jacks you actually get the label is still upside down. (Took this pic today when I was there)
20220410_122613.jpg

(Not my pic)
maxresdefault.jpg

Pic on the box shows how they actually come, upside down.
20180705_134739.jpg


Not a big deal, doesn't affect the functionality, but I'm a weirdo & it bothered me so when I got mine I took the label off & flipped it right side up. I also flipped the name plate.

20180705_163736.jpg
20180705_162127.jpg
 
Last edited:
To avoid these ads, REGISTER NOW!
Top Bottom