To avoid these ads, REGISTER NOW!

ZMotorsports Shop Projects 2.0

signcrafter

Well-known member
Joined
May 9, 2012
Messages
12,532
I was down to the turbo last week when I had to replace a turbo coolant line after the 4" piece of rubber sprang a leak. But I have the 6.7 and not sure which turbo they use, hoping I won't need a rebuild kit part number for a little while. Ford wants good money for the whole coolant line, about a foot of shaped metal tube that goes into the turbo at the back of engine, then a 4" piece of rubber that connects the tube to a ****** on the crossover at the front of the engine. This was a late night repair so I just put a piece of heater hose I had on and clamped and called it good. But to get to it I had to pull the intake and a bunch of other stuff.
 
To avoid these ads, REGISTER NOW!
OP
Z

zmotorsports

ALLIANCE MEMBER
Joined
Oct 20, 2009
Messages
21,478
Location
Northern Utah
Didn't get much shop time last night. Got home from work late after having to go in and work some graveyard shift the day before and then the wife was home when I arrived so I figured I had better take advantage of her car being home so I took it to get the emissions testing and pay the annual taxes and registration on it and the coach before taking it for a wash job. We have had a daily dose of rain and/or snow for 2+ weeks now so it was in dire need of a bath. Unfortunately we are only supposed to have about 2, maybe 3 days until the next big series of storms so the clean car won't last long.


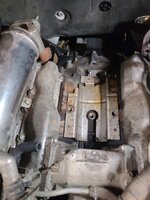
While I didn't have time to install the turbo on the engine I did take the time I had to use it for the most benefit and that was to prep the top of the block to receive the freshly rebuilt turbo. The heat shield was removed and clean as well as the valley of the block. I prepped the oil supply boss by cleaning it and then cleaned the oil drain line gasket material and prepped for the new gasket.
lbz56.jpg


I then replaced the small 90-degree coolant hose for the turbo as well as installed the cleaned heat shield in the valley and installed the new oil drain line gasket. At this point I am glad I removed the driver's side up-pipe which should give me a little better access to the drain line fasteners upon reassembly.
lbz57.jpg


I felt like it was a busy evening as I was running around like a chicken with its head cut off, but I sure didn't get much accomplished.
 
OP
Z

zmotorsports

ALLIANCE MEMBER
Joined
Oct 20, 2009
Messages
21,478
Location
Northern Utah
Turbo is back in the engine bay and secured to the engine.

After finding the right angle of the dangle to get the turbo to sit into the valley with the oil drain line nearly in place the turbo must be lifted up slightly to installed the oil feed line. You have to raise the turbo up about 4 inches and move it towards the driver's side as far as possible with it pressing up against the fuel line and then it is possible to snake the oil feed line down under the turbo and start the banjo bolt. Be sure to install a new seal as I don't recommend reusing the old seals, they are a one time use seal. Once it is torqued to spec then you can let the turbo sit back down into position.
lbz58.jpg

As you are setting the turbo back into position in the above step look to the back of the flywheel housing and make certain the oil drain line falls into place properly on the two studs protruding up from the flywheel housing. You should have already installed the gasket before attempting to put the turbo into the valley. I can see know why I was glad to remove that driver's side up-pipe as it made getting this drain line easily into place and especially having easy access to the fasteners. Don't get ahead of yourself though and forget to torque these nuts to spec, which is 18 ft/lbs.
lbz59.jpg

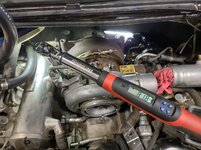
Before installed the 3 pedestal mounting bolts I rocked the turbo back ever so slightly in order to install the two coolant hoses onto the turbo lines. In the picture below you can see the elbow coolant line at about the 7 o'clock position and the other straight coolant line just under the LCD display on the torque wrench. Once the coolant lines are in place you can proceed to torque the pedestal bolts to 80 ft/lbs.
lbz60.jpg

Then, before I forgot about the oil drain line fasteners and got ahead of myself I raised the truck up and went to the back side to torque the nuts securing the oil drain line to the flywheel housing. A torque wrench will fit although a bit snug. It's especially helpful if you have a fine tooth head as you will need a short throw due to lack of room between the firewall and back of the passenger's head.
lbz62.jpg

Then with the turbo fully fastened back onto the engine I moved down to the exhaust manifolds and using ratchet and my Lisle tap holders I chased the 10x1.5 threads in both exhaust manifolds to aid in assembly.
lbz63.jpg

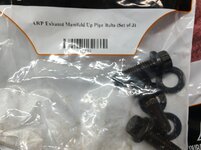
With everything ready to start bolting the up-pipes in place I prepped the new ARP fasteners and new GM gaskets.
lbz64.jpg


Thanks for looking.
 
OP
Z

zmotorsports

ALLIANCE MEMBER
Joined
Oct 20, 2009
Messages
21,478
Location
Northern Utah
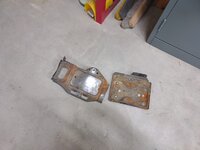
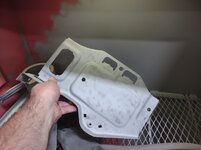
Friday night I didn't have much time in the shop but I at least wanted to get the battery trays bead blasted and painted so they be curing over the weekend.

Haven't used the blasting cabinet much lately but when it's needed it sure is a nice piece of equipment to have in the shop. This was my first large piece of shop equipment I ever bought. This was purchased clear back in 1988 my my MAC tools dealer.
lbz66.jpg

The battery trays were in rough shape. Funny, the truck only has 114k miles on the clock but the first 9 years I owned the truck it unfortunately had to live outside 24/7. It wasn't until the past 5+ years that it's been able to live indoors. Even though the battery trays were hidden I wanted to be sure when it goes back together it's as clean as I could possibly make it, even if no one else will know it but me.
lbz65.jpg

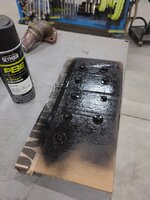
Glad I exchanged the crushed glass media a few months ago as it cut fairly well and left a nice blasted surface for the POR-15 to bite into.
lbz67.jpg

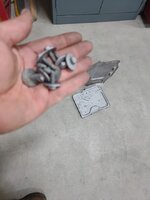
I also tossed the fasteners in the mesh basket to blast.
lbz68.jpg

Fasteners ready for some E-coat primer.
lbz69.jpg

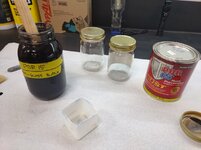
Dug out the bottle of POR-15 from the cabinet. Anyone who's used this stuff knows that once that lid comes off the first time, there won't be a second. :ROFLMAO:
lbz70.jpg

Both trays painted with POR-15 and hung to cure.
lbz71.jpg

Fasteners hit with 3 coats of semi-gloss E-coat primer.
lbz72.jpg

Trays cured and ready to be installed. Also new NAPA Legend batteries at the ready as it goes back together. The old batteries were getting some age on them and I would like to start driving my truck more once the weather cooperates.
lbz73.jpg


More pictures to follow.....
 
OP
Z

zmotorsports

ALLIANCE MEMBER
Joined
Oct 20, 2009
Messages
21,478
Location
Northern Utah
Got a late start Saturday morning. Wife and I sat and enjoyed our morning sipping our coffee and relaxing.

Got out to the shop late morning and started by prepping the new ARP fasteners for installation. Nickel anti-seize applied to the threads and the new GM exhaust gaskets at the ready.
lbz81.jpg

Driver's up-pipe positioned with new gasket and new fasteners started at the manifold. This is also where the benefits of chasing the threads come in as the fasteners can easily be threaded in by hand.
lbz82.jpg

I then moved up to the back of the turbo to install the gasket and fasteners. One step I like to do it to take a good visual and ensure the gaskets haven't slipped out of position and to make certain they are properly aligned before tightening in place. Sometimes a mirror is needed to see them.
lbz84.jpg

Once happy with gasket placement the fasteners are snugged down and then torqued to spec. @ 39 ft/lbs. It's a bit tight up behind the engine but a torque wrench will fit so no excuse not to torque these fasteners. I've seen so much erroneous information about the torque spec's on these fasteners on the Duramax forum and others. Some say 80 ft/lbs. and some say no need to torque, just get them as tight as possible. Yes, there is a factory recommended torque and it is 39 ft/lbs. according to the GM FSM.
lbz83.jpg

Then moving on to the passenger's up-pipe while I was right there. Installed the gaskets and fasteners up at the back of the turbo as well as the passenger's side exhaust manifold and then torqued to spec.
lbz85.jpg

Raised the truck back up and went under to torque the driver's up-pipe to spec. at the manifold.
lbz86.jpg

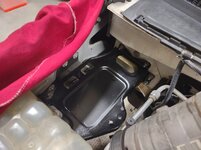
Before installing the freshly painted battery trays that I had applied the POR-15 quite liberally to, I chased the hold down threads.
lbz87.jpg

Also the brackets and components were given a quick cleaning with Power House before reinstalling. Here is the glow plug relay and the mounting bracket ready for installation.
lbz88.jpg

Inner fender cleaned and air box mounting tray cleaned and ready to accept the factory air box. Again, no one will ever see this but I'll know it's nice and clean under the air box.
lbz89.jpg

With the up-pipes, downpipe and all heat shields in place it was time to move topside and secure the modified turbo heat shield as well as the glow plug relay brackets and module. Resecured the fuel lines in place and ready to call it a day.
lbz90.jpg

That was quitting time for Saturday afternoon and a good place to stop.

Thanks for looking.
 
Last edited:

WoodsTruck

Well-known member
Joined
Jan 12, 2013
Messages
1,028
What did you use for thread coating on the hold down bolts since the tray threads were chased out and likely bare metal?
Or am I getting ahead of myself again?
 
OP
Z

zmotorsports

ALLIANCE MEMBER
Joined
Oct 20, 2009
Messages
21,478
Location
Northern Utah
What did you use for thread coating on the hold down bolts since the tray threads were chased out and likely bare metal?
Or am I getting ahead of myself again?

The batteries are not in the truck yet, but for general use fasteners I use Permatex nickel-graphite anti-seize. It has a 1600 degree rating and is my "go-to" anti-seize for pretty much everything except exhaust or high temp. applications whereas the nickel anti-seize has a 2400-degree temperature rating.
 
OP
Z

zmotorsports

ALLIANCE MEMBER
Joined
Oct 20, 2009
Messages
21,478
Location
Northern Utah
I was able to get quite a bit completed last night but not finished. I think I spent too much time cleaning things and chasing what I thought was a coolant leak.

My plan all along being this deep into the repair would be to replace the thermostats while the cooling system was drained and open. I nearly forgot but fortunately saw the new GM thermostats sitting on the workbench near the FASS system and I remembered. Only had to move a couple of wire looms and removed two brackets and the t-stat housing lifted right up allowing easy access to the thermostats for replacement.
lbz94.jpg

I had one showing it was partially open which makes sense as the last couple of times I drove the truck it struggled coming up to temp and under normal driving sat a bit lower on the temperature gauge than normal so I'm glad I took the time to replace the t-stats.
lbz95.jpg

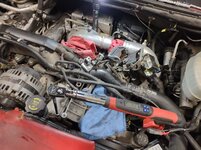
After cleaning the housing and mounting surface I reinstalled the t-stats and torqued the housing to 15 ft/lbs.
lbz96.jpg

Next I pulled a vacuum on the system to ensure there were no leaks. I generally attach my Air Lift vacuum assembly, pull a vacuum and walk away for 20+ minutes to make sure it holds a vacuum. I wanted to check the cooling system integrity before buttoning up the top of the engine in case I had a leak. Seeing as how I had the lower radiator hose, thermostat housing as well as both coolant hoses going to the turbo disconnected at some point during this repair I wanted to make absolutely certain I had no leaks. Well, things weren't cooperating otherwise I think I could have finished the truck up last night.

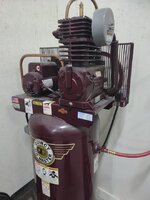
I connected the Air Lift to the reservoir, pinched off the overflow hose from the surge tank and pulled the vacuum. It pulled down to around 23 inches pretty well but when I valved it off the gauge started creeping back toward zero. Damnit. I turned the radio off so I could listen and unfortunately heard something else that wasn't so great. I could hear air but it wasn't coming from around the truck and was very faint. After ******* around I decided to walk to the RV storage bay and I could hear my shop air compressor still hissing out the unloaded valve. ****! I've got a check valve with something stuck in the disc or under the spring again. :mad: I figured I'd address that once I get the truck completed but it bugged the ever living **** out of me the rest of the night.

I then went back to the truck to see where my leak was. I could detect nothing. I removed the vacuum assembly and installed my pressure tester and figured maybe I'd have better results using soapy water and pressure in the cooling system. I sprayed around all of the connections that I had disturbed during the repair and found NO BUBBLES. I thought for a moment maybe the overflow tube coming off the surge tank could be the culprit so I removed the hose and installed a rubber cap and worm clamp. It held 14 PSI of pressure perfectly. Well, that must have been the issue.
lbz97.jpg

I removed the pressure tester and reinstalled the Air Lift vacuum assembly, pulled a vacuum down to nearly 25 inches of vacuum, valved it off and walked away for a few minutes. It appeared to be holding perfectly so I resumed the reassembly process. I only wasted about an hour chasing a leak that didn't exist. Oh well, I felt better knowing it was being buttoned up without the possibility of a coolant leak after the truck was up and running. That is why I love using the Air Lift so much as there is no guessing and no relying on luck not to have a leak. With as many cooling system connections and hoses on the modern automobile there are just too many possible leaks to leave them to chance.
lbz98.jpg

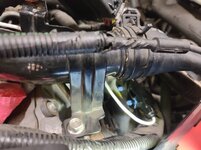
Reattaching the upper coolant hose brackets to the rigid line as well as reconnected the turbo vane sensor connector.
lbz99.jpg

I fixed the small 1/8" line that feeds my boost gauge on my A-pillar and connected my Kent Moore intercooler tester to ensure there were no leaks to the intercooler assembly or piping. All looked good as far as intercooler integrity.
lbz01.jpg

This picture is for WoodsTruck. I didn't end up having to apply any additional anti-seize as there was already a light film on the battery hold down bolts from previous removal/installation cycles. This is my general use anti-seize that gets used for such things as this that aren't prone to high heat. I also use this on all suspension components as it has excellent staying properties, even on our Utah winter roads.
lbz05.jpg


Thanks for looking.
 
OP
Z

zmotorsports

ALLIANCE MEMBER
Joined
Oct 20, 2009
Messages
21,478
Location
Northern Utah
While the cooling system had a vacuum being applied and once I got most of the top of the engine put together, I turned to cleaning a few things to give the cooling system just a little more time to prove it was tight.

Yep, Power House to the rescue. Cleaned up the upper radiator shroud before reinstalling.
lbz00.jpg

Then grabbed the factory airbox and gave it a good cleaning. Top, bottom and all sides got the full treatment.
lbz02.jpg

Ductwork between the mouthpiece and the airbox also got a good cleaning. Down inside the ribs of the expansion bellow were especially dirty.
lbz03.jpg

Mouthpiece, airbox and ductwork all installed as well as the MAF sensor wiring reconnected. The A/C compressor is back in place with all wiring connected as well as serpentine belt and upper fan shroud installed. Cooling system hasn't budged so I can now rest assured that system is tight and sound.
lbz04.jpg

Fresh coolant installed, overflow tube reconnected and batteries installed and connected.
lbz06.jpg

lbz07.jpg

That was where I quit for the night. I have to add a fresh fill of engine oil and double check everything then it should be ready to fire. I also have been dumping some engine oil down into the turbo every so often while I've been reassembling things so it should have a fair amount of oil for the first start.

Thanks for looking.
 

signcrafter

Well-known member
Joined
May 9, 2012
Messages
12,532
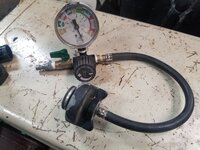
Mike, do you notice any drop in the vacuum gauge on a good cooling system? I've used an airlift for a while now and usually in 20 minutes or even less time I see a small drop in vacuum. Usually a few inches. But then get the pressure tester out and no leak down. Think the instructions even mention something about a small leak down is normal if I remember right. So I usually pressure test first and then just use vacuum to fill system. But curious on your experience? My thought was that cooling systems were designed to be under pressure and not vacuum so thought something in the cooling system didnt seal 100 percent under vacuum but would seal under pressure.
 
OP
Z

zmotorsports

ALLIANCE MEMBER
Joined
Oct 20, 2009
Messages
21,478
Location
Northern Utah
Mike, do you notice any drop in the vacuum gauge on a good cooling system? I've used an airlift for a while now and usually in 20 minutes or even less time I see a small drop in vacuum. Usually a few inches. But then get the pressure tester out and no leak down. Think the instructions even mention something about a small leak down is normal if I remember right. So I usually pressure test first and then just use vacuum to fill system. But curious on your experience? My thought was that cooling systems were designed to be under pressure and not vacuum so thought something in the cooling system didnt seal 100 percent under vacuum but would seal under pressure.

Your experience mirrors mine Scott. On occasion I do see a slight drop but not a few inches of vacuum, usually less than one (about a needle's width), if at all. I was surprised on my system once I capped of the surge tank overflow hose as it held rock solid and never moved for nearly an hour. I thought it had only been 20-30 minutes when I was working but when I looked at the clock I noted it had been almost an hour exactly. Yes, I got sidetracked and lost track of time.

I have actually seen a few that would creep up on vacuum, but when I put my pressure tester on them they held and then when returned to service never leaked. I agree that I feel it can pull in a slight amount of air when in vacuum but never actually leak coolant once filled. When they continue to creep towards zero is when you know you have a leak and probably large enough that it will actually leak coolant once filled.

Even knowing that I generally don't bring out the pressure tester unless I suspect something as that's just one more step and time. I pull a vacuum and valve it off to test the integrity. If it holds, which most do, then I simply attach the siphon hose and fill the system and it was all done with one tool and one pull down. IF I suspect something as it's not holding then I'll dig out my pressure tester. I also added an air fitting to my pressure tester as it takes much less time to fill these large systems. I control the air with the petcock and then once it gets close to system pressure I can valve it off and use the hand pump for fine tuning the pressure. I did that small modification about ten years ago when testing a large RV cooling system and I find myself loving it every time I use it, so much more than hand pumping on those large systems.
 

signcrafter

Well-known member
Joined
May 9, 2012
Messages
12,532
Thanks Mike. If you get time I would live to see you modified pressure tester. I did something similar a while back also, I had an older stant and I stole the hose and gauge off the body and adapted an air fitting on it. Worked decent but i was always a little scared sending pressure in there, even with a regulator hooked up. And there wasnt a good way to fine tune it. But having air and hand pump in one tool sounds like the way to go.

20230117_112155.jpg
 
OP
Z

zmotorsports

ALLIANCE MEMBER
Joined
Oct 20, 2009
Messages
21,478
Location
Northern Utah
Thanks Mike. If you get time I would live to see you modified pressure tester. I did something similar a while back also, I had an older stant and I stole the hose and gauge off the body and adapted an air fitting on it. Worked decent but i was always a little scared sending pressure in there, even with a regulator hooked up. And there wasnt a good way to fine tune it. But having air and hand pump in one tool sounds like the way to go.

20230117_112155.jpg

Nice Scott.

Mine is an older Snap-on tester but I think it was made by Stant. It's hard to see in the picture above so I'll get a better picture when I can of the assembly. I just added a 90-degree brass street elbow into the hand pump assembly and put a small petcock with an air fitting so I can regulate with the petcock and then close it off and fine tune it with the hand pump. On small systems I just use the hand pump so I didn't want to eliminate that.
 

signcrafter

Well-known member
Joined
May 9, 2012
Messages
12,532
Thanks Mike. One more question for you about your intercooler tester. Is there anything you need to plug or block off when you do a boost test like that?
 
OP
Z

zmotorsports

ALLIANCE MEMBER
Joined
Oct 20, 2009
Messages
21,478
Location
Northern Utah
Thanks Mike. One more question for you about your intercooler tester. Is there anything you need to plug or block off when you do a boost test like that?

No, just connect the tester to the inlet of the hot pipe and it will test the integrity of the entire system right to the intake. It will bleed off as you are pushing air into the engine but it should only be about a pound per second, anything more than that and you have a leak somewhere. I also turn off the radio and listen carefully as I'm testing. Also be careful not to over-pressurize. I will generally go up to around 10 PSI and stop and listen. If all sounds good I'll go to mid/upper teens and then finally around 25~ish PSI but that's about where I stop adding pressure.
 
OP
Z

zmotorsports

ALLIANCE MEMBER
Joined
Oct 20, 2009
Messages
21,478
Location
Northern Utah
As soon as I arrived home I commenced fixing my air supply issue. I rely on air a lot in my shop and without it things come to a halt.

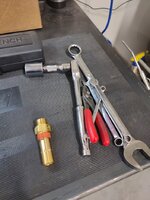
I purchased a spare check valve a few years ago when I had the original one fail so I was able to walk to the drawer and grab the new check valve as well as the tools I'd need in the RV bay.
shop1.jpg

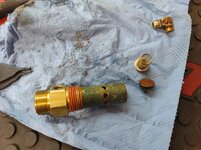
Removing the pressure relief.
shop2.jpg

Found the issue with. Although there was some debris from corrosion, the worst part was the snap ring was half way out of the groove allowing the disc to **** in the bore and bleed off tank pressure. Not sure how in the hell a snap ring could have come partially out of its groove but that was a new one. I'll clean up this one and put it back in the drawer to use as a spare for next time.
shop3.jpg

Check valve installed with pressure relief and street elbow installed for the unloader valve.
shop4.jpg

Test running to ensure it shuts off without leakage.
shop5.jpg

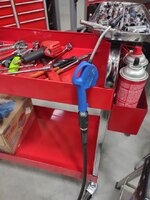
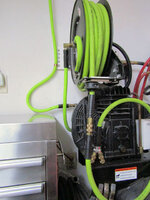
While the tank was filling I thought I'd open up my package that arrived. Ironic it arrived on the same day as the shop air system repair. Must be shop air day..... :unsure: I have been using the Milton hi-flow couplers for years now but I have grown less and less impressed with them as they have become harder and harder to connect to air tools and require two hands to disconnect. Yes they flow well but that's about where my positive attitude of them stops. I should have listened to Paco (fnieto) years ago when he suggested I forego the Miltons and just go straight to the Prevost couplers. They are spendy but would have been less expensive in the long run had I just bought them from the start. I bought eight with 1/4" FNPT for the majority of my hoses and a couple of 3/8" FNPT as my two reel hoses have 3/8" NPT threads. I also opted to try a couple of their pivot or swivel adapters as I really like those on things like die grinders and small air ratchets for accessibility. I have been using the Dynabrade swivels and like them but thought I'd give the Prevost a try.
shop6.jpg

New Prevost couplers installed and ready for use. I must say they connect much, much easier than the Miltons and removal is a one-handed chore now by simply pushing the button and they pop free and bleed the air. No more worrying if the air hose is going to launch across the shop and contact anything.
shop7.jpg

shop8.jpg


With the shop's air supply back up and running I could continue on with the night's work.
 
OP
Z

zmotorsports

ALLIANCE MEMBER
Joined
Oct 20, 2009
Messages
21,478
Location
Northern Utah
Back on the Duramax project at hand.

I filled the engine with a fresh fill of Shell Rotella T4 15W-40.
lbz001.jpg

I also opted to replace the fuel filter seeing as how the inner fender was still removed and access was unobstructed.
lbz002.jpg

Seeing as how the truck was due for a standard LOF service at the time of the turbo repair I replaced the spin-on transmission filter at this time as well.
lbz003.jpg

Prior to firing, I cranked it for about 15 seconds to ensure I had oil pressure. Then fired it up for a couple of minutes and shut down to check for leaks. When everything appeared to be good I fired it back up and let idle for about 15 minutes while I cleaned up the mess in the shop.
lbz004.jpg

Lastly, I reinstalled the passenger's inner fender and rotated the tires as part of the LOF service. I torqued the wheels back on and finished shop cleanup.
lbz005.jpg

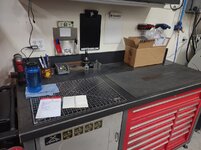
Benches were cleaned and ready for next job.
shop9.jpg

This bench has had parts stacked on it for several months. Now the only box remaining is the new tail light housings and pigtails for the coach which will be a future project.
shop10.jpg


Thanks for looking and for following along.
 
To avoid these ads, REGISTER NOW!

LXCam

ALLIANCE MEMBER
Joined
Apr 23, 2013
Messages
19,214
Location
AZ
Those Prevost Couplers look pretty sweet Mike, maybe one day I'll grow up and move away from the generic **** I always use.

Funny you mention Paco, over the last couple months I've wonder on many occasions what's happened to him.
 
OP
Z

zmotorsports

ALLIANCE MEMBER
Joined
Oct 20, 2009
Messages
21,478
Location
Northern Utah
Those Prevost Couplers look pretty sweet Mike, maybe one day I'll grow up and move away from the generic **** I always use.

Funny you mention Paco, over the last couple months I've wonder on many occasions what's happened to him.

I only played with them for a short time last night Cam but my first impressions are very positive. I should have just bought them from the beginning and not wasted time or money on the others. The only downside of the Prevost comparted to the generic or even the Milton, besides the cost, is that the Prevost couplers will not accept the standard plugs, only the high flow. I only had the high flow plugs on things that I felt required high volume, things like impact guns and die grinders in particular and then slowly started switching over the rest such as my sanders and most of my air ratchets. However, things like blow guns I still had my standard 1/4" plugs on so now I have to order more of the high flow plugs. :rolleyes: It's a racket I tells ya....:ROFLMAO:

As for Paco, I sent him a personal message back in December wishing him a Merry Christmas and to check on him as I hadn't seen him active in quite some time, unfortunately, I have not gotten a response. I hope he is ok, he was so insightful in his posts and I simply drooled over his shop every time he showed pictures of it.
 

Bob Heine

ALLIANCE MEMBER
Joined
Oct 24, 2009
Messages
10,709
Location
Boca Raton, Florida
New Prevost couplers installed and ready for use. I must say they connect much, much easier than the Miltons and removal is a one-handed chore now by simply pushing the button and they pop free and bleed the air.
Mike, you had me at one-handed. I converted all my fittings to Milton V-style a decade ago but also put whips on the tools so the big reel donut isn't right next to the fitting. Before I start the conversion to Prevost quick connects, I wanted to verify that it's compatible with the Milton V-stye male fittings. I like the idea of not fighting to connect a tool when the hose is pressurized.
 

rattle_snake

Well-known member
Joined
Jun 25, 2015
Messages
5,240
Location
Chandler, AZ
I don't need to switch air couplers but your not helping with your fancy new ones either.
V's need to be oiled to operate smoothly but, yes quite the POP! when released.
 
OP
Z

zmotorsports

ALLIANCE MEMBER
Joined
Oct 20, 2009
Messages
21,478
Location
Northern Utah
Mike, you had me at one-handed. I converted all my fittings to Milton V-style a decade ago but also put whips on the tools so the big reel donut isn't right next to the fitting. Before I start the conversion to Prevost quick connects, I wanted to verify that it's compatible with the Milton V-stye male fittings. I like the idea of not fighting to connect a tool when the hose is pressurized.

Bob, yes, I can confirm that the Prevost couplers will mate perfectly with the Milton V-style male plug and the Milton couplers will in fact work on both the standard male plugs as well as the hi-flow male plugs. But the Prevost will NOT work with the standard male plugs.

I just ordered some more hi-flow male plugs to fit a few more of my tools and a couple of my air hoses that I used as extensions. However, I plan on keeping a couple of the coiled hoses in the middle of the shop that don't get used much for anything other than blow guns on the old Milton couplers so I can use either the hi-flow plugs OR the standard plugs. I have some paint guns and various other tools that I don't necessarily want to spend the time, or especially the money, converting so by having a few hoses with the Milton couplers on them I can use accordingly. Other than that everything in my toolbox has hi-flow plugs and I will convert the last couple of coiled hoses near my machining/fabricating section of the shop over to the Prevost couplers as soon as the last few plugs arrive.

I have heard for years how nice the Prevost couplers were and how with one push they pop loose enough to blow off the air without ejecting but until I used them last night I couldn't imagine just how nice they really are. I am also very pleased how little pressure to connect they require as that was my other complaint about the Milton couplers. I'm excited to get more time with them but I'll admit, I let price and price alone keep me from trying them all these years. I kick myself for not buying them years ago and suffering through using an inferior coupler. Even my son commented a few weeks ago when we were working on his truck how big of a PITA the air couplers were to connect as well as disconnect. I think what pushed me over the edge was just after finishing my son's truck I was welding a small project and grabbed the 90-degree die grinder to blend an area and when I went to pop the hose free it slipped from my hand and it damn near smacked the "wife's" (said with tongue in cheek) Camaro. That was when I had an aha moment and went shopping for the Prevost couplers. :oops:
 
OP
Z

zmotorsports

ALLIANCE MEMBER
Joined
Oct 20, 2009
Messages
21,478
Location
Northern Utah
I don't need to switch air couplers but your not helping with your fancy new ones either.
V's need to be oiled to operate smoothly but, yes quite the POP! when released.

I'll admit Justin, even with normal oiling and general use the Prevost connect as well as disconnect soooooo much nicer than the Miltons. It's just hard to justify nearly a $17 difference between the two. Until you use one that is...;)
 

Bob Heine

ALLIANCE MEMBER
Joined
Oct 24, 2009
Messages
10,709
Location
Boca Raton, Florida
Mike, I'm sold. I ordered two 3/8" couplers from Walmart Industrial for $31 each (including tax and free delivery). I'm starting with two couplers to do the hose reels first. My air system is all 1/2". Hard lines are 1/2" galvanized and main hoses are 1/2" Flexzilla (with 3/8" MNPT ends) so the couplers are slightly more expensive. The 1/2" Flexzilla hoses have thinner walls so I can fit 50 or 25 feet on hose reels designed for that length 3/8" rubber hose. When I need high volume air, it makes a huge difference. Of course, I rarely need the high volume but when I do it's great to have. At 20 psi, air hose size limits the Cubic Feet per Minute (CFM) it can flow. A 1/4" air hose delivers 3.0 CFM, a 3/8" air hose delivers 6.6 CFM and a 1/2" air hose can deliver 13 CFM. With more pressure, things change; 1/4" flows 5.8 CFM, 3/8" flows 13 CFM and 1/2" flows 29 CFM. High volume isn't that important for an air gun but a big deal for a HVLP spray gun. My Iwata LV400 requires 10.5 CFM at 20 psi to lay down a smooth coat of polyurethane clear. It'll still work at higher pressure but that means wasting a lot of paint with the cloud the gun produces.

Most of the time I hook up tools to the hose reels (or a triple coupler whip). If I can connect three tools to the Milton V couplers on the whip before there's pressure in it, it's pretty easy. My problem is connecting the tools to a pressurized line so having the Prevost coupler as the final connection, my life will improve dramatically.

Here's how a 50 foot hose reel with 3/8" hose looks compared to 1/2" Flexzilla (chartreuse). The triple coupler whip can be moved from one hose to another as long as it has Milton V-style or compatible fittings.
50-foot Hose Reel Original Hose.jpg 50-foot Hose Reel Flexzilla Hose.jpg
 
OP
Z

zmotorsports

ALLIANCE MEMBER
Joined
Oct 20, 2009
Messages
21,478
Location
Northern Utah
@Bob Heine , I agree, my two reels take 3/8" NPT couplers even though my hoses are only 3/8" compared to your 1/2" hoses. I do have a 50' and a 25' hose that are 1/2" for extra volume of air but the only time I use those is on large equipment and/or RV's where I need that extra oomph from the tools. Even at that though, the vast majority of times I can get accomplished what I need to on the larger fasteners with the 3/8" hose since switching over to the hi-flow couplers and plugs years ago as that was a game changer on the larger fasteners, especially with my IR 1/2" or even the IR3/4" gun. To be honest once I switched over to the hi-flow fittings and couplers I seldom require the larger 1/2" hoses as that made just enough of a difference using 3/8" hoses, even my 1/2" and 3/8" guns and impacts. I can't even tell you the last time I had to grab the 3/4" gun. I even switched over the coiled hose near my rollup door that I keep a blow gun on for blowing off lawn equipment with but I use it out of convenience to connect to the glass beading cabinet right next to it, which is a heavy air consumer and I seldom ever grab the 1/2" hose for the blasting cabinet any more.

Just for reference if anyone is curious, I purchased all of my Prevost couplers from compressor-source on eBay. The 3/8" FNPT (# 071202) ones were $28.95/ea. and the 1/4" FNPT (# 071201) were $23.51/ea.

Bob, it also looks like you either have two separate compressors or you switch out the hose reel? Looks like in both pictures the reel is very close to the cylinder head of your compressor(s).
 
OP
Z

zmotorsports

ALLIANCE MEMBER
Joined
Oct 20, 2009
Messages
21,478
Location
Northern Utah
Great job mike! Clean and detailed as always

Thanks Dave. It took a bit longer than initially expected but I feel good about the outcome. The little bit of extra cleaning and paint work to brackets and battery trays wasn't planned but I am glad I did it now.


Sure wish I had the service manual for working on wife’s car. I agree with having hard copy. Where did you purchase yours?

If you are referring to the FSM's for the wife's Acura TL, if memory serves I bought them off eBay. They are actual factory manuals and not generic but I've found most are going digital and finding hard copied FSM's is getting harder and harder for newer stuff. I guess I'll just have to keep my old **** running if I can't get factory service manuals for newer cars. :unsure:
 
OP
Z

zmotorsports

ALLIANCE MEMBER
Joined
Oct 20, 2009
Messages
21,478
Location
Northern Utah
Finally had some time to take the truck out for a road test last night. It was later than I liked being dark but the road test went well and everything ran great, temps looked good, vane positions looked good and upon arriving back at the shop I found nothing leaking. Another successful repair. I think I'll drive it over the weekend a bit if it doesn't snow before I move on to the next modification on it.
roadtest.jpg


Here is the next item to address on the Duramax. I've had this sitting on the bench for over a year now and I would like to finally get it installed.
fass1.jpg


After the road test, I had some housekeeping items to address in the shop last night, like transferring all of my used oil into my 5-gallon buckets so I can dispose of it at my local NAPA tomorrow. I also went through my coach records as I know I have some maintenance items to address and would like to work on them over the next month or two in between other items so I made some notes on parts/supplies that I need to purchase.

Thanks for looking.
 

OutlawDrifter

Well-known member
Joined
Jan 20, 2015
Messages
3,903
Location
KS
Mike my 5gal buckets need dumped too, thanks for the reminder. My new 20gal oil catch is about half full, so I'll be needing the space soon enough.

Glad to hear you had a successful no leak run after the repairs, that's always a satisfying end result!
 
OP
Z

zmotorsports

ALLIANCE MEMBER
Joined
Oct 20, 2009
Messages
21,478
Location
Northern Utah
Mike my 5gal buckets need dumped too, thanks for the reminder. My new 20gal oil catch is about half full, so I'll be needing the space soon enough.

Glad to hear you had a successful no leak run after the repairs, that's always a satisfying end result!

Marc, my oil drain container has never been this full and it was driving me nuts watching the level rise in the little clear level tube. :oops: I generally transfer the oil at half way (which is just under 10-gallons and easily fits in two 5-gallon buckets for transporting) however, with as busy as I've been, the truck being down and just previously my son had serviced all 3 of his vehicles, it had gotten very full.

Yes, a successful test drive is always a satisfying feeling. It actually felt good to be driving the truck again as I haven't been driving it much over the past several months knowing it was needing some attention and not having the time to delve into it back then. I don't like letting my own vehicles go knowing there is something that needs attention. That's NOT why I became a mechanic but sometimes life seems to get in the way of us doing what we want.
 

signcrafter

Well-known member
Joined
May 9, 2012
Messages
12,532
I don't like letting my own vehicles go knowing there is something that needs attention. That's NOT why I became a mechanic but sometimes life seems to get in the way of us doing what we want.
Isnt that the truth Mike. My stuff always seems to come last. Then when I'm finished with everyone elses stuff I'm too tired for my own so it gets put off longer. Or something else pops up, like my furnace going out last night. Then my lift arm on the tractor breaks and needs welded up so I can clear the snow. I have a whole shelf of parts waiting for time. Life keeps things interesting otherwise it would be boring. Lol.

I put a fass system on my BIL dodge and they are really nice kits.
 
OP
Z

zmotorsports

ALLIANCE MEMBER
Joined
Oct 20, 2009
Messages
21,478
Location
Northern Utah
Isnt that the truth Mike. My stuff always seems to come last. Then when I'm finished with everyone elses stuff I'm too tired for my own so it gets put off longer. Or something else pops up, like my furnace going out last night. Then my lift arm on the tractor breaks and needs welded up so I can clear the snow. I have a whole shelf of parts waiting for time. Life keeps things interesting otherwise it would be boring. Lol.

I put a fass system on my BIL dodge and they are really nice kits.

Scott, I have been very fortunate in the respect that I don't generally put my own stuff off. However, I didn't come to this conclusion by happenstance. There was a time early on after opening my speed shop back in the late 90's where I was so busy with customer jobs that I put off a few repairs on my truck and my wife's Jeep. To be perfectly honest, I think it was more about me chasing that almighty dollar and when I started seeing green it clouded my judgement. Unfortunately, it came to a head one day when both our daily's needed attention that really couldn't be put off. I kept going over the old saying in my head that a good mechanics car is always the one not running because he's so busy working on everyone else's vehicles. Well I had enough and I guess I wasn't that good of a mechanic because our stuff not running up to par was NOT an acceptable plan.

I had an epiphany one day that the WHOLE reason why I became a mechanic wasn't just about making money, it was because I had big dreams of having a nice home with a fully outfitted shop and even a few toys and I knew that would require a **** ton of money, money that was more than likely going to be beyond my salary. My wife asked me why I became a mechanic and I simply told her "because I want to drive the nicest stuff on the road and keep it running perfectly WITHOUT having to take them to someone else and being held hostage by repair shops and high maintenance or repair bills". As the words were coming out of my mouth it hit me, what the HELL am I doing putting my stuff off to make sure someone else's **** is running perfectly. Yes money makes the world go around but I also had a full-time job and this was supposed to be my "extra" or "side" money gig. I then realized that many repairs only get more expensive the longer you let them slip by so I made a commitment to my wife as well as myself that from then on our **** comes first, period.

Now that was a long, long time ago but I still try to enforce that mindset. The only reason my truck's turbo repair got pushed off was because my son and DIL had some items that needed to be addressed and their stuff is just as important as mine and I figured I had another vehicle to drive so I'd get their stuff done first and then tackle ours. Had I really needed the truck or if I was in dire need of another vehicle I am sure my son wouldn't have minded if I was to bump my truck up in line, but it worked out fine and by helping my son to get their stuff done first I was able to take my time doing my truck and enjoy the repair rather than just plow through it with the only objective being to hurry and get it done. I hate rushing through my own vehicle repairs as I like to detail things as I go.

As I have gotten older I think I have been able to find a decent balance between keeping our fleet running as well as bringing a few side jobs in as time allows. That being said, I had two jobs on my list over the past few weeks that unfortunately the people couldn't wait any longer as they have text to cancel because I was taking so long getting to their vehicles. I didn't drag things out intentionally but that's the way it goes sometimes. I am very upfront with people that I work a stressful full-time job and I do the side thing if and when I have time and if that changes there are no guarantees. Most people understand that or at least are willing to agree because they want me to work on their stuff and for that I am flattered. People calling to cancel or reschedule because of MY timeline used to really bother me but nowadays it simply doesn't. Maybe it's because I no longer have my business and have the option to say yes or no to any job or maybe it's because I told myself all those years ago that I will not let my stuff go just to bring someone else's stuff into the shop but for whatever reason, I plan on continuing that mindset.

Sorry for the long diatribe Scott, I just went off on a tangent due to my past experiences. That old saying about being able to tell a good mechanic because his stuff isn't running due to being so busy working on everyone else's cars just popped in my head and I refuse to accept or believe that.


Beautiful truck Mike and as always, nice attention to detail during the entire process.
Looking forward to follow the liftpump project. 👍🏼

Thanks Anders. I appreciate the kind words and for your continued support, both here and on my YouTube channel.

I will be sure to post up pics of the FASS installation although it's pretty straight-forward and not really hi-techie, techie. :ROFLMAO:
 
OP
Z

zmotorsports

ALLIANCE MEMBER
Joined
Oct 20, 2009
Messages
21,478
Location
Northern Utah
Last night I had a "hey man" job come through the shop door. I really like the quick "hey man" jobs, especially when they are small and/or off the vehicle more like a job shop repair. A past client and fellow Garage Journal member called to ask if I could help him out with some broken fasteners and I had some time so bring them by.

I started doing work for this gentleman clear back in the early 2000's on various GM vehicles and I think there was even a duck boat in there somewhere. :unsure: He has done some nice work on various engine builds and some engine swaps in various GM vehicles over the years and a few weeks back he text me to ask a few questions about Jeeps so naturally I was all ears and willing to help to answer any questions he had. Well he ended up buying a 2007 Wrangler JKU that had a horrible rod knock. He bought it as a project vehicle and one he and his wife could enjoy after rebuilding.

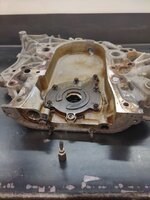
The heads each had a couple fasteners broken off and the front cover had one fastener that didn't want to come out on the oil pump cover.
jk1.jpg

The lower bolt on the oil pump cover just didn't want to come out and he said the head stripped out before it released. I was able to sneak up on it with a drill bit and then a screw extractor was able to persuade it to yield.
jk2.jpg

jk3.jpg

Fastener removed, cover cleaned and done.
jk4.jpg

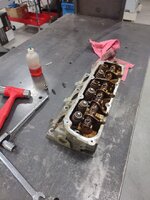
Next I moved on to the heads which each had two exhaust bolts broken off. With a little heat from my MAPP gas torch and some Kroil two of them came out with relative ease, one was a little more stubborn and one I fought to the point that I had to break out the oxy/acetylene torch.
jk5.jpg

jk6.jpg

Overall a relatively easy job taking about 45-minutes in all and I think the owner was happy it was completed so quickly so he could proceed with the rest of the repair.

Thanks for looking.
 

signcrafter

Well-known member
Joined
May 9, 2012
Messages
12,532
Scott, I have been very fortunate in the respect that I don't generally put my own stuff off. However, I didn't come to this conclusion by happenstance. There was a time early on after opening my speed shop back in the late 90's where I was so busy with customer jobs that I put off a few repairs on my truck and my wife's Jeep. To be perfectly honest, I think it was more about me chasing that almighty dollar and when I started seeing green it clouded my judgement. Unfortunately, it came to a head one day when both our daily's needed attention that really couldn't be put off. I kept going over the old saying in my head that a good mechanics car is always the one not running because he's so busy working on everyone else's vehicles. Well I had enough and I guess I wasn't that good of a mechanic because our stuff not running up to par was NOT an acceptable plan.

I had an epiphany one day that the WHOLE reason why I became a mechanic wasn't just about making money, it was because I had big dreams of having a nice home with a fully outfitted shop and even a few toys and I knew that would require a **** ton of money, money that was more than likely going to be beyond my salary. My wife asked me why I became a mechanic and I simply told her "because I want to drive the nicest stuff on the road and keep it running perfectly WITHOUT having to take them to someone else and being held hostage by repair shops and high maintenance or repair bills". As the words were coming out of my mouth it hit me, what the HELL am I doing putting my stuff off to make sure someone else's **** is running perfectly. Yes money makes the world go around but I also had a full-time job and this was supposed to be my "extra" or "side" money gig. I then realized that many repairs only get more expensive the longer you let them slip by so I made a commitment to my wife as well as myself that from then on our **** comes first, period.


Sorry for the long diatribe Scott, I just went off on a tangent due to my past experiences. That old saying about being able to tell a good mechanic because his stuff isn't running due to being so busy working on everyone else's cars just popped in my head and I refuse to accept or believe that.
No reason for apologies Mike. I agree with everything you said. And it's TRUE for me also. It's much easier to work on someone elses stuff when you know you are making decent money doing. Much harder to make time for your stuff that you dont get paid for and that cost you money. I've started to get to your perspective over the last few years, but I'm a slow learner. Ive always put myself last, just the way I grew up wanting to help everyone else. But when one of our vehicles goes down I'm starting to realize that I've been putting my family last also and that isnt right.

I almost used that saying of never buy a car from a mechanic in my last post but refraned for the simple reason I see how good you take care of your personal vehicles and didnt want to offend you.
Like you I became a mechanic to fix my own stuff. Mainly because I didn have money to pay for repairs on the beaters I drive when I was young. Funny how things change over time and it got to the point I was working on cars for others to make money and put my repairs off. So ya your post hits home and I need to fully grasp your concept. Thanks for the encouraging words to motivate me.
 
OP
Z

zmotorsports

ALLIANCE MEMBER
Joined
Oct 20, 2009
Messages
21,478
Location
Northern Utah
No reason for apologies Mike. I agree with everything you said. And it's TRUE for me also. It's much easier to work on someone elses stuff when you know you are making decent money doing. Much harder to make time for your stuff that you dont get paid for and that cost you money. I've started to get to your perspective over the last few years, but I'm a slow learner. Ive always put myself last, just the way I grew up wanting to help everyone else. But when one of our vehicles goes down I'm starting to realize that I've been putting my family last also and that isnt right.
I almost used that saying of never buy a car from a mechanic in my last post but refraned for the simple reason I see how good you take care of your personal vehicles and didnt want to offend you.
Like you I became a mechanic to fix my own stuff. Mainly because I didn have money to pay for repairs on the beaters I drive when I was young. Funny how things change over time and it got to the point I was working on cars for others to make money and put my repairs off. So ya your post hits home and I need to fully grasp your concept. Thanks for the encouraging words to motivate me.

Scott, you mentioned something in your post (bold) that just struck a cord with me. My wife and I had this discussion and used this EXACT philosophy in our discussion late last fall when I was slowly climbing out of my backlog of personal projects. Earlier last spring I had a minor health issue, lost the rear end in the Jeep as well as a mishap with our coach all in the same month of each other which caused a bit of a disruption to my scheduled work (personal and paying jobs). I had several jobs that I wanted to help my son with on his truck and Jeep (paint work) as well as a couple of smaller personal projects I wanted to accomplish over the summer. The health issue, our Jeep rear end and then the coach paint touchup forced me to have to tell people I wouldn't be able to get to their vehicles even though I was planning on using those paying jobs as "fillers" to fit in between the few personal projects I was planning. Life threw me a curve ball and it took the better part of the year to recover and get everything accomplished.

Last fall when I mentioned to my wife that I was finally feeling like I was getting my feet under me she asked if I was going to continue doing side jobs. I told her when and if I had time yes, I would continue to do side jobs but only when our stuff was up to par. Our conversation then turned to something my wife mentioned that may have been part of why I was so dead set on making money in our last shop vs. enjoying the time in our new shop doing jobs I "wanted" to do. She said when we were building our last shop that I had made the comment that as soon as the shop was done I could get right in there and start to recoup the money we invested in building it. Ever since then I had the mindset that if I was in the shop working then I needed to be making money. She thinks that mindset stemmed from my statement of having to recoup the money and to make money and that it drove and yet haunted me the entire time we lived there. I told her that had I not pushed myself and made that money then we wouldn't be where we are now, nor would I have the tools or equipment in which I am very grateful for, which she agreed, however, with this shop it was a different mindset. I want to enjoy the shop and tools vs. worrying about acquiring them.

When we were looking at houses to move and trying to find the wife and I's dream home with the correct layout on which to build my dream shop it was never about making money or recouping the money spent on the shop. Maybe it was because we had been so blessed years earlier that we could afford our dream home and we could afford to be picky when looking, but I think we were definitely in a different place in life and definitely in a different mindset when looking for our forever home, even though we didn't think our previous home was temporary by any means. Our last shop was nice but it was used to make money primarily and maintain our fleet secondary if I'm being honest. Now I am of the mindset that I want to enjoy my shop time by maintaining our fleet, helping my son to maintain his and keep his living expenses as low as possible and eventually to be able to spend time with my grandson in the shop. I don't EVER want my son or grandson to think I don't have time for them because I am working in the shop on someone else's stuff. Working on someone else's stuff is just the dessert, my family is the meat and potatoes of my life and I think I have a different mindset here in our new home and new shop. I also must say it has been so rewarding to see my son's own opinions of having older well maintained vehicles vs. new come to fruition. Watching him lately take a deeper dive into his own vehicle maintenance and seeing the pride he has in his home and vehicles makes me proud and I want to be there to help and support him in those endeavors.

Looking back over the past six months or so of helping my son do the paint correction on his truck, the rust repair on his Jeep and even the oil cooler project on his truck I don't feel or think we rushed through those jobs like I would have in our previous shop. Beside being at a different place literally, I feel as though I am at a different place mentally. I REALLY enjoyed those days and nights hanging out with my son and never did I feel like we rushed anything. We just took our time and enjoyed our time in the shop together.

Like you Scott, I think I may have been a slow learner in life sometimes because it's taken me so long to get to this realization.
 
To avoid these ads, REGISTER NOW!
Top Bottom