
You are using an out of date browser. It may not display this or other websites correctly.
You should upgrade or use an alternative browser.
You should upgrade or use an alternative browser.
Between 485 & 705 SQ/FT Mid-Century Moto Mecca Makeover
- Thread starter sakurama
- Start date
Workspaces between 485 and 705 squarefeet.
zmotorsports
ALLIANCE MEMBER
I don't know how you do it Gregor. I made the mistake of making some routered edges on some trim pieces in my shop last week and as soon as wood chips were flying I was kicking my own *** for not taking that job outside. What a mess it made in the shop in a very quick time frame. Took much, much longer to clean up that's for sure. 
I'm not sure why I'm burning the corners, I suppose it's because I'm slowing down and trying to not to mess up the returns but part of me isn't actually that bothered by it.
Usually partly caused by travel speed and partly caused by the shavings not ejecting very well in the corners as there is material in the way for 90° of the cutter perimeter.
")
Just want to throw my version of that depth stop out there:

I've been known to wrap a couple layers of tape on the cutter bearing to 'rough' the cuts, then remove it for the finish passes...
Festool Domino Metric and Nominal Presetter by Bakafish | Download free STL model | Printables.com
Replaces the factory part with one that has presets for common (metric and nominal imperial) plywood thicknesses. | Download free 3D printable STL models
www.printables.com
Usually partly caused by travel speed and partly caused by the shavings not ejecting very well in the corners as there is material in the way for 90° of the cutter perimeter.
I've been known to wrap a couple layers of tape on the cutter bearing to 'rough' the cuts, then remove it for the finish passes...
Just want to throw my version of that depth stop out there:
Festool Domino Metric and Nominal Presetter by Bakafish | Download free STL model | Printables.com
Replaces the factory part with one that has presets for common (metric and nominal imperial) plywood thicknesses. | Download free 3D printable STL modelswww.printables.com
I've been known to wrap a couple layers of tape on the cutter bearing to 'rough' the cuts, then remove it for the finish passes...
Of course someone here has already modeled that. I've downloaded it and will print it out after the Griffinity cable organizers have printed. How hard is it to print the numbers in a different color? Or is the better way to just infill with paint?
I can see that printing Gridfinity organizers is going to be a full time operation. Also, with the depth of these drawers, I think I'm going to need to do two layers for some of them and I'm not quite sure what that will look like. I think I'll make an inset frame that is a base 42 and then route a dado to create a channel to slide a top box on.
But right now I want to finish the drawers so anything beyond that needs to go on hold.
G
Gregor,Of course someone here has already modeled that. I've downloaded it and will print it out after the Griffinity cable organizers have printed. How hard is it to print the numbers in a different color? Or is the better way to just infill with paint?
I can see that printing Gridfinity organizers is going to be a full time operation. Also, with the depth of these drawers, I think I'm going to need to do two layers for some of them and I'm not quite sure what that will look like. I think I'll make an inset frame that is a base 42 and then route a dado to create a channel to slide a top box on.
But right now I want to finish the drawers so anything beyond that needs to go on hold.
G
Sticking with the 42mm base makes sense, but @lilscorpion had a great idea a while back of using 1/2 size base standard for the bins (i.e. 21mm spacing). It adds to the flexibility of placing the bins on the grid and doesn't detract anything from the stability. Yes you have to do a little math (x2) when designing the bins, but the upside is great when you have 50 bins in a drawer.
Honestly I haven't yet got on the multifilament train, the way I do color infill is super labor intensive and involves modifying the g-code to print the infill first, then swap filament and z-hop the first few layers of the body to avoid collisions. I imagine generating and printing multi-color files is a lot easier these days, but I've never done it. Attempting to paint or color in the holes by hand has never worked well for me.Of course someone here has already modeled that. I've downloaded it and will print it out after the Griffinity cable organizers have printed. How hard is it to print the numbers in a different color? Or is the better way to just infill with paint?
And there's no need to use my version assuming the ones you have are working. I uploaded the dimensions, so just check if the ones you have seem to match as I was very fastidious about getting the offsets right. When I made this design I don't think that anyone had done it yet, and the detail really pushes the limits of a 0.4mm nozzle, the numbers require 0.2mm to have any chance. I was thinking that resin printers could do the numbers easily, which is why I included that file as well.
I'll look into what is required for generating a multicolor file and upload it at some point, or ask me for the Fusion file and I can send it to you'all.
kaymccampbell
Well-known member
I just print the letters a millimeter or two deep, then color them in with a 3D pen. Mine is a Mynt3D. It's a touch time consuming, but the result is so much better than paint or pens.Honestly I haven't yet got on the multifilament train, the way I do color infill is super labor intensive and involves modifying the g-code to print the infill first, then swap filament and z-hop the first few layers of the body to avoid collisions. I imagine generating and printing multi-color files is a lot easier these days, but I've never done it. Attempting to paint or color in the holes by hand has never worked well for me.
And there's no need to use my version assuming the ones you have are working. I uploaded the dimensions, so just check if the ones you have seem to match as I was very fastidious about getting the offsets right. When I made this design I don't think that anyone had done it yet, and the detail really pushes the limits of a 0.4mm nozzle, the numbers require 0.2mm to have any chance. I was thinking that resin printers could do the numbers easily, which is why I included that file as well.
I'll look into what is required for generating a multicolor file and upload it at some point, or ask me for the Fusion file and I can send it to you'all.

Grant Gunderson
Well-known member
I picked one of those up for my son at Christmas. He loves it and for the $20 I paid for it im pretty impressed. He did have one jam, so he got to learn how to properly pry the cover off and get it going again. We have a more expensive wireless one for Evelina and it just eats through the batteries so the one above is way better. It’s pretty impressive some of the 3D structures they have made with the pens.I just print the letters a millimeter or two deep, then color them in with a 3D pen. Mine is a Mynt3D. It's a touch time consuming, but the result is so much better than paint or pens.
Both kids are excited about me picking up an H2C for the shop, but when I tried to get them to watch a YouTube video on fusion 360 for kids it was a bit much. Need to find a more kid friendly program for them so they are not limited to what they can download to print.
My interest in a z3d printer fit the shop is mostly tool
Storage but I can already see a lot of uses for custom tooling etc, so I have a feeling it will be a deep rabbit hole with multiple printers soon.
kaymccampbell
Well-known member
I can recommend Tinkercad for beginners. It's a reasonably responsive web based CAD engine.I picked one of those up for my son at Christmas. He loves it and for the $20 I paid for it im pretty impressed. He did have one jam, so he got to learn how to properly pry the cover off and get it going again. We have a more expensive wireless one for Evelina and it just eats through the batteries so the one above is way better. It’s pretty impressive some of the 3D structures they have made with the pens.
Both kids are excited about me picking up an H2C for the shop, but when I tried to get them to watch a YouTube video on fusion 360 for kids it was a bit much. Need to find a more kid friendly program for them so they are not limited to what they can download to print.
My interest in a z3d printer fit the shop is mostly tool
Storage but I can already see a lot of uses for custom tooling etc, so I have a feeling it will be a deep rabbit hole with multiple printers soon.
There is a fairly crude lettering function built into Bambu Studio. - But it makes it easy to change the color of the letters themselves. If I need lettering, I usually build my part in Fusion 360 without letters and add them in Bambu studio.
kaymccampbell
Well-known member
OrcaSlicer, which I believe Bambu is a fork of, also has a lettering function that, to me, is more well behaved than many CAD program lettering components.There is a fairly crude lettering function built into Bambu Studio. - But it makes it easy to change the color of the letters themselves. If I need lettering, I usually build my part in Fusion 360 without letters and add them in Bambu studio.
elvee
Well-known member
I was about to make the same recommendation.I can recommend Tinkercad for beginners. It's a reasonably responsive web based CAD engine.
LeonardY
Well-known member
All routers are sawdust cyclones. They throw sawdust everywhere.Festool is famous for its dust collection but I've found the both the router table and the router itself are pretty bad at collecting the sawdust
I made an attempt to design dust collection for my PC router.
It was marginal at best. A friend loaned me his Festool setup. Slightly better.
I found the best dust collection was the driveway.
If you're curious.
Uncle Lenny's house of toys and tools
Nice. Yes, much better resolution. That would be a great hobby. I have found a semi temporary home for it. Need to test it this week. I built models are part of my profession. It was to realize a design. Help others see what I was seeing. When I started it was full scratch building. CAD had...
 www.garagejournal.com
Hmm, I just spent an hour trying to figure out how to add text to the depth stop without much luck. I can add it over the embossed letters of the model but the type doesn't line up and it feels sloppy. I'll go back but it's not important at the moment.
I finally got time between everything else to get the domino mortises cut. Depth was perfect...


but the finality of cutting these after all the work was a bit scary. I didn't want to make any mistakes.

Centered on the 18mm birch. I centered the middle domino and then just used the pin stops from the edges to do the other two.


Brushed the dominos with a thin coat of glue and then tapped them home with the baltic birch hammer that I made several of years ago. One stays in the kitchen to pound chicken breasts into thin cutlets and two stay in the shop for this sort of thing. I am never sure about leaving glue or wiping off and the last two drawers I left it but didn't like scraping it out so I used a wet rag to wipe the glue off these.

It was all going well until the domino didn't look centered anymore and I realized the depth stop clamp had come loose and slipped so the the mortise was just starting to punch through. There's the mistake! Since these are an extra element I just reset and continued on. You'll never see any of them next to each other...

...if you look closely you can see the ones that slipped. Bummed I didn't catch that but I'm learning to live with mistakes. It will be less noticeable when they're cut and sanded flush.


My saw doesn't have a zero offset so I used a piece of tape to push the blade out so they'd stay proud for sanding.

But I found sanding to not be very precise so I used a small block plane to shave them flush along with the ends of the rabbeted boards. That got everything nearly perfect and since the boards had already been given two coats of poly they were pretty protected.

A light sanding on the edges and sides to smooth out any areas that were proud. The bottoms are shop grade prefin so the edges are captured - no need to worry about seeing them.

This was Friday - our last day of sun for the week so I was in a hurry to get these poly'd and dried while the sun was out. Katie was helping clean up around the house and when she saw the poly go on she said, "You make such pretty things" and it was nice to hear since I generally only see the mistakes. Then again, that final coat of poly always brings it all together. Plus I just love the warmth and simplicity of baltic birch.


Next is to work out hanging them in the cabinets...
G
I finally got time between everything else to get the domino mortises cut. Depth was perfect...
but the finality of cutting these after all the work was a bit scary. I didn't want to make any mistakes.
Centered on the 18mm birch. I centered the middle domino and then just used the pin stops from the edges to do the other two.
Brushed the dominos with a thin coat of glue and then tapped them home with the baltic birch hammer that I made several of years ago. One stays in the kitchen to pound chicken breasts into thin cutlets and two stay in the shop for this sort of thing. I am never sure about leaving glue or wiping off and the last two drawers I left it but didn't like scraping it out so I used a wet rag to wipe the glue off these.
It was all going well until the domino didn't look centered anymore and I realized the depth stop clamp had come loose and slipped so the the mortise was just starting to punch through. There's the mistake! Since these are an extra element I just reset and continued on. You'll never see any of them next to each other...
...if you look closely you can see the ones that slipped. Bummed I didn't catch that but I'm learning to live with mistakes. It will be less noticeable when they're cut and sanded flush.
My saw doesn't have a zero offset so I used a piece of tape to push the blade out so they'd stay proud for sanding.
But I found sanding to not be very precise so I used a small block plane to shave them flush along with the ends of the rabbeted boards. That got everything nearly perfect and since the boards had already been given two coats of poly they were pretty protected.
A light sanding on the edges and sides to smooth out any areas that were proud. The bottoms are shop grade prefin so the edges are captured - no need to worry about seeing them.
This was Friday - our last day of sun for the week so I was in a hurry to get these poly'd and dried while the sun was out. Katie was helping clean up around the house and when she saw the poly go on she said, "You make such pretty things" and it was nice to hear since I generally only see the mistakes. Then again, that final coat of poly always brings it all together. Plus I just love the warmth and simplicity of baltic birch.
Next is to work out hanging them in the cabinets...
G
hewey
Well-known member
Ducati shoot looks killer, as does the shelf work.
The very useful Japanese pull saws for flush cutting (zero set so they don't scratch the surface) are called Kugihiki (釘引) and can be found at specialty Japanese woodworking shops or online from Lee Valley (Veritas) or Woodcraft. I once got a measurement wrong on a complex bit of cabinetry where a vertical dividing panel's bottom edge was off by 5mm compared to the top and didn't notice it until after glue-up, finishing and installation. So when I lined up the door it was clearly not straight (baltic birch stripy edges are unforgiving in making that sort of error pop out.) I used my Kugihiki to flush cut the bottom back about 300mm, through the dominoes and glue line, it is thin enough that it barely made a kerf and didn't destroy the finish. That length of cut was enough to use a spreading clamp and glue to reposition that front edge so it was vertical and on dimension in the front and the panel was deep enough that the slight curve along the depth was invisible.
nicholam77
Well-known member
Then again, that final coat of poly always brings it all together. Plus I just love the warmth and simplicity of baltic birch.
I'm sure you've probably said before somewhere in this massive thread — but do you mind sharing the poly product you are using for finish? It looks great.
I am never sure about leaving glue or wiping off and the last two drawers I left it but didn't like scraping it out so I used a wet rag to wipe the glue off these.
I also like to wipe as much as possible with a wet rag right after application, and then scrape any remainder after about 20min, when it's coagulated but not cured. Makes it much easier to scrape. Every time I've tried to scrape, chisel, or sand the squeeze out after letting it fully cure, it becomes a real chore.
The drawers turned out awesome!
Those are fancy looking coveralls. Mine came to me because someone one or two connections away stopped working somewhere and they had a ton of excess and I happened to be the same size. They say City of Greenville, wherever that might be.
It's been a busy month...

In my rediscovery of all my Festool gear I relearned that the extensions for the Kapex miter saw also attach to the MFT table and so I set them up to help me cut strips for the drawers' slides.

And I made use of all the baltic birch scraps to make jigs for the drilling.


The slides needed to be offset to clear the hinges which don't leave room for the drawers. The cabinets also are their own boxes so on a couple the sides were double width which ended up being super thick and required me to make multiple trips to the hardware store to get longer and longer post and binder screws.

It was an ordeal to get them all in but I finally did.

The shelves underneath are good for more bulk storage like camera bags and drone cases...

...and the drawers themselves are a massive improvement for all the smaller things but...

You might not be able to see but the drawers are about 3-5mm too short to be a perfect fit for the Gridfinity plates. I could have easily added that amount if I'd thought this through, which I didn't. So I suppose I'll need to make spacers or figure out a way to print them to fit. I've printed a few holders and boxes but I've discovered that there are just too many odd things to hold and unless I want to dedicate my life to making very specific holders for very specific things I'm going to need to accept some level of mess. Not sure what that level is yet but I'll figure it out as I go.
Which gets me to all these YouTube videos of all these "content creators" who have made these amazingly organized drawers... WTF?
These people clearly don't have children or jobs or maybe lives. They are making this **** up to make content - not solve problems in a real way. And honestly that's what's really starting to bug the **** out of me is the people making "content" for the sake of content. It's like talking to hear your own voice not to convey something or teach something to relate something of value.
I've occupied this "space" before some of these people were even born (get off my ******** lawn you kids!) so I find myself torn about contributing to the noise. I know, a recurring theme. So I want to show the mess as well. The reality that all of us who actually make things instead of content deal with.
If and when I manage to sort this drawer out I'll post the solution. It's much better already just to be able to see it all top down but I'm not sure about how to deal with all the chargers and cords - the actual reality here. Perhaps a hidden layer so that the cords all exist below the surface? That would make pulling a charger for a job a nightmare. Well, I'll keep thinking about it.
For now we can put a pin in this and call it done enough to move on. Finished is better than perfect.
Gregor
In my rediscovery of all my Festool gear I relearned that the extensions for the Kapex miter saw also attach to the MFT table and so I set them up to help me cut strips for the drawers' slides.
And I made use of all the baltic birch scraps to make jigs for the drilling.
The slides needed to be offset to clear the hinges which don't leave room for the drawers. The cabinets also are their own boxes so on a couple the sides were double width which ended up being super thick and required me to make multiple trips to the hardware store to get longer and longer post and binder screws.
It was an ordeal to get them all in but I finally did.
The shelves underneath are good for more bulk storage like camera bags and drone cases...
...and the drawers themselves are a massive improvement for all the smaller things but...
You might not be able to see but the drawers are about 3-5mm too short to be a perfect fit for the Gridfinity plates. I could have easily added that amount if I'd thought this through, which I didn't. So I suppose I'll need to make spacers or figure out a way to print them to fit. I've printed a few holders and boxes but I've discovered that there are just too many odd things to hold and unless I want to dedicate my life to making very specific holders for very specific things I'm going to need to accept some level of mess. Not sure what that level is yet but I'll figure it out as I go.
Which gets me to all these YouTube videos of all these "content creators" who have made these amazingly organized drawers... WTF?
These people clearly don't have children or jobs or maybe lives. They are making this **** up to make content - not solve problems in a real way. And honestly that's what's really starting to bug the **** out of me is the people making "content" for the sake of content. It's like talking to hear your own voice not to convey something or teach something to relate something of value.
I've occupied this "space" before some of these people were even born (get off my ******** lawn you kids!) so I find myself torn about contributing to the noise. I know, a recurring theme. So I want to show the mess as well. The reality that all of us who actually make things instead of content deal with.
If and when I manage to sort this drawer out I'll post the solution. It's much better already just to be able to see it all top down but I'm not sure about how to deal with all the chargers and cords - the actual reality here. Perhaps a hidden layer so that the cords all exist below the surface? That would make pulling a charger for a job a nightmare. Well, I'll keep thinking about it.
For now we can put a pin in this and call it done enough to move on. Finished is better than perfect.
Gregor
For items that need their own custom work to essentially shadow box. I just do a little bit at a time. Usually it’s 15-20 minutes of modelling a night.
It’s super slow and can be frustrating but it eventually gets done. I used to set things aside until I could finish them and they would never get done.
Moving to this model has let me accomplish more with less stress. It just takes a while.
I usually model the pocket (cutout) I need and then upload that to one of the gridfinity generators.
ptt49er
Well-known member

nicholam77
Well-known member
You might not be able to see but the drawers are about 3-5mm too short to be a perfect fit for the Gridfinity plates. I could have easily added that amount if I'd thought this through, which I didn't. So I suppose I'll need to make spacers or figure out a way to print them to fit.
You can easily add custom spacers attached to a Gridfinity baseplate — just use an online generator like this one:
Gridfinity Generator
Parametric gridfinity generator. Generate custom gridfinity bins and baseplates, openGrid components, multiboard, and honeycomb storage wall then download the STL or place an order to purchase.
gridfinity.perplexinglabs.com
You can enter your drawer's interior dimensions and it will 'pad' the grids for you.
I've printed a few holders and boxes but I've discovered that there are just too many odd things to hold and unless I want to dedicate my life to making very specific holders for very specific things I'm going to need to accept some level of mess.
Gridfinity definitely isn't right for everything. Probably need a hybrid approach for your gear. With your example drawer, you could put in a birch divider and have the left 1/3 be Gridfinity for small conforming items like batteries, small accessories, etc. And then have the right 2/3 be an open space where you could either subdivide with more dividers, or just throw some low profile boxes from IKEA or your container store or choice. It will still look more organized than in one big lump sum.
Also, for Gridfinity objects... don't feel the need to have everything be a completely custom shadow form solution — sometimes a simple box is plenty good enough and still groups 'like items'. I would also recommended leveraging the parts sites as much as you can. So many things have been already modeled for Gridfinity. They don't all have the same models, so Google or ChatGTP to aggregate results across everything can be faster, like Googling "Sony A7iii battery gridfinity".
But you're right, if you did the whole drawer and custom bins for everything, it would take forever.
Which gets me to all these YouTube videos of all these "content creators" who have made these amazingly organized drawers... WTF?
These people clearly don't have children or jobs or maybe lives. They are making this **** up to make content - not solve problems in a real way. And honestly that's what's really starting to bug the **** out of me is the people making "content" for the sake of content. It's like talking to hear your own voice not to convey something or teach something to relate something of value.
Content creation is their job, for most successful channels. From what I know, YouTube is a hard business, and anyone with a polished channel is putting in a ton of work (or has a team putting in a ton of work). Nevermind printing the bins... the concepting, filming, editing — again I'm talking the bigger channels, but it's definitely a job, if a newfangled one.
While Gridfinity might not be life-changing over a hard skill like woodworking or welding or whatever, I do think that having these YouTube channels and tutorials in existence is very valuable, and so is 3D printing. Gridfinity is somewhat of a gateway for people to create their own models. Just my .02. With Gridfinity and 3D printing in particular, there is a lot of problem solving, CAD design, printer maintenance, etc that can translate into other 'maker spaces', even if it's not as tactile or romantic as something like chiseling a dovetail. There is a lot of garbage on YouTube, but there are a lot of great channels as well.
Came out badass, Gregor. I just love those warm wood tones. Even if you don't have the final organization in place, it seems as though it was a worthwhile project and looks like it's already giving your cabinets more utility.
The cabinets look great and well thought out.
My first real boss taught me so much. Not just about engineering, but how to think. How to critical path. How to separate the noise from what you're actually supposed to be doing. He was big on organization. And he knew what organization meant. It's not pretty drawers. It's everything having a place and being put back in that place so you can find it. Organization is one of those things you can apply an 80/20 rule- it doesn't have to look perfect or even neat. Finding things and maximizing space are the goals. Looking pretty is a far distant third, though when you accomplish the first two, the third is often met.
My first real boss taught me so much. Not just about engineering, but how to think. How to critical path. How to separate the noise from what you're actually supposed to be doing. He was big on organization. And he knew what organization meant. It's not pretty drawers. It's everything having a place and being put back in that place so you can find it. Organization is one of those things you can apply an 80/20 rule- it doesn't have to look perfect or even neat. Finding things and maximizing space are the goals. Looking pretty is a far distant third, though when you accomplish the first two, the third is often met.
Grant Gunderson
Well-known member
Gregor, one of the things that drives me crazy about gridfinity, is that its based on an arbitrary number, no the classic 32mm system cabinets are designed around.... its not a standard number for my Lista or Vidmar's either. I have a shitton of specialist tooling that gridfinity makes a lot of sense for and I originally envisioned doing it for all of my drawers. I have quickly realized thats not practical as just one drawer has taken over a month as it requires at least a week of solid printing, the kids want to do their prints and I'm already fully overwhelmed in customer work and I'm not even official open yet. Not to mention all of the design time.... Maybe at some point I offer some of those prints for sale to my bike shop clients, but I just dont have the capacity for that yet.

So I'm doing gridfinity in the order of chaos it needs to solve. I started with my bearing drift drawer. It was a massive time **** searching for the correct one ( I have over 100 of them), and they needed labels to quickly find... Foam isn't a good solution for these. I'm going to do Kaizen foam for my more bulky tools, and save gridfinity for the specialty stuff that really needs labels etc.
I'd post a photo of that drawer being finished, but I'm starting to run into problems with filament lines clogging, and bed adhesion. The 3D printer isn't as push a button and print and let run in the background as id prefer it to be. Might be better once I move it to the shop.
I just spent $1K on more Schaller bins to organize all of the small parts. I had originally wanted to print bins going forward (Already own a bunch of Schallers) but it would require a full print farm and months to print that many....maybe down the road I Print label holders for those, and that will be my compromise.
Back in my photo days, I used a lot of 4X6 Schneider graduated plate filters, I would have loved to have had the ability to 3d print a carrier / organizer for those for my camera bag. That and a properly designed eye cup for my Canon 1D series... they never made one that wouldn't keep falling off. I destroyed countless sunglasses by scratching them on the bare camera as the cups would immediately disappear first time out with a camera.... my only major complaint about the 1DX series.
The entire You-tube business model is these guys get paid upfront to create videos that highlight a certain product, then when they get kickbacks from you-tube for views (peanuts in comparison) thats extra gravy on top. From all my years shooting skiing, I have learned to look at alll social media content through the eyes of who is paying for the production of the this content, and it quickly becomes obvious. why its being produced. There is a handful of guys that are producing good quality content that I find interesting and useful, but 99.5% I see straight through as marketing BS. With Photos I F#(King hated how instagram turned the business into a quantity based product with quality be damn, when it used to be all about quality and high-dollar high end output. Once it switched to a volume business I lost my desire to keep going with it. I only stayed in that game as I had some very lucrative contracts, but when those vaporized after our avalanche accident, I decided enough was enough and switched professions. I truly loved shooting skiing and still have the desire to do it when the conditions are right, but I'll never do another shoot where I have to polish a turd of conditions into something that looks like good skiing. Just so a marketing dude can hit his numbers of posts for the week. I'm grateful for the opportunities it provided me to travel the world with some of the most amazing humans there is and developed some incredible friendships, but I'm now grateful to have moved on to a new chapter in my life. Where skiing can be more about fun then work.
Gregor, one of the things that drives me crazy about gridfinity, is that its based on an arbitrary number, no the classic 32mm system cabinets are designed around.... its not a standard number for my Lista or Vidmar's either. I have a shitton of specialist tooling that gridfinity makes a lot of sense for and I originally envisioned doing it for all of my drawers. I have quickly realized thats not practical as just one drawer has taken over a month as it requires at least a week of solid printing, the kids want to do their prints and I'm already fully overwhelmed in customer work and I'm not even official open yet. Not to mention all of the design time.... Maybe at some point I offer some of those prints for sale to my bike shop clients, but I just dont have the capacity for that yet.
So I'm doing gridfinity in the order of chaos it needs to solve. I started with my bearing drift drawer. It was a massive time **** searching for the correct one ( I have over 100 of them), and they needed labels to quickly find... Foam isn't a good solution for these. I'm going to do Kaizen foam for my more bulky tools, and save gridfinity for the specialty stuff that really needs labels etc.
I'd post a photo of that drawer being finished, but I'm starting to run into problems with filament lines clogging, and bed adhesion. The 3D printer isn't as push a button and print and let run in the background as id prefer it to be. Might be better once I move it to the shop.
I just spent $1K on more Schaller bins to organize all of the small parts. I had originally wanted to print bins going forward (Already own a bunch of Schallers) but it would require a full print farm and months to print that many....maybe down the road I Print label holders for those, and that will be my compromise.
I have come to the same realization (but at only 10% of your scale
). I love the gridfinity that I have printed, but man would it be a half time job (and take at least a year) just to design and print perfect organizers for everything across the multiple tool boxes I have. Foam, metal dividers for the lista, and Schaller bins will make up 75% of my "pretty decent" organization with the rest made up with custom holders for things like my specific set of screw drivers, chisels/punches, multiple exacto knife sets, or wrenches.When I committed to Schaller bins, I wanted to print my own label holders but haven't gotten to it yet. An old business card with sharpied over details shoved into each bin is where I'm at. Which label holders did you choose to print?
Last edited:
tricksel
Member
I'm a bit torn up between all storage systems. For my tools (90% Festool, as I do most woodworking) I use Systainers, for my small parts I use Sortimo T-Boxxes. Those both already use different bin sizes (Festool even different ones between for instance SYS-StorageBox and SYS3 ORG  ), and Gridfinity adds a different size to that.
I'd like at least some interchangeability to that...
I wanted to adapt Gridfinity (42mm squares) to Sortimo (52mm squares), but it looks like it would be hellish...
I thought of a library like Gridfinity, but adapted to one of the more tool-oriented standards, but this xkcd cartoon came to mind...:
https://xkcd.com/927/
), and Gridfinity adds a different size to that.I'd like at least some interchangeability to that...
I wanted to adapt Gridfinity (42mm squares) to Sortimo (52mm squares), but it looks like it would be hellish...
I thought of a library like Gridfinity, but adapted to one of the more tool-oriented standards, but this xkcd cartoon came to mind...:
https://xkcd.com/927/
dr_clyde
Well-known member
Schaller makes a bin label holder.I have come to the same realization (but at only 10% of your scale
When I committed to Schaller bins, I wanted to print my own label holders but haven't gotten to it yet. An old business card with sharpied over details shoved into each bin is where I'm at. Which label holders did you choose to print?
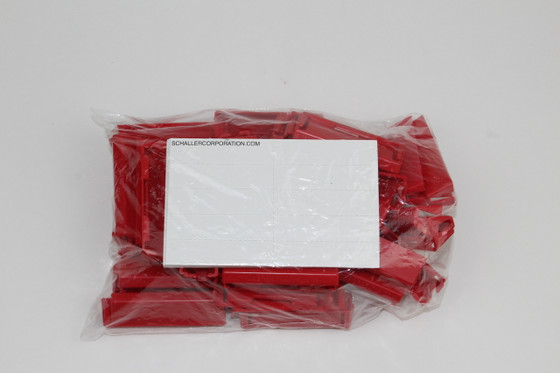
Label Holder (50 pack)
Enhance your storage system with Schaller's 50-pack red plastic label holders. Designed for easy slip-on attachment, these holders are perfect for organizing and identifying contents in Schaller boxes.
 www.schallercorporation.com
I just bought almost $600 worth of bins including a few hundred label holders to organize hardware into a Vidmar so I'll let you guys know how well I like the Schaller label holders.
Not to say I've given up on the 3d printing...

I was starting a project with the kids and my long rails used to hang on the garage door but that door is slowing falling apart and so the rails ended up, stuffed wherever I could find space.

And the sacrificial cut strips never seem to stay on but it gets worse with abuse. I've bought new ones but I'll need to wait for a really warm day to pull them off, clean the rail with acetone, then alcohol and then put the new strips on. But in the meantime.

Each of these hangers took over 10 hours to print but they're very strong.


Having long ago run out of room in the shop the ceiling is the last expanse to mine. But out of site, out of harms way.

Katie has been helping me with a lot of gardening and yard work. It's truly her happy place to just focus and weed so I wanted to repay that in some way so I packed up the Kapex and headed to her place.

Her grape arbor was falling apart so we bought some new lumber and came up with a slightly more modern and clean design using what was still good - namely the posts and one 2x6.

It's so nice to do things for people who are truly appreciative and also who aren't very mechanical or handy in the way I am because to Katie I'm a magician. You guys know I'm just a guy with a miter saw so don't say anything to her!
I have another couple of projects that I've used as a break from the computer and retouching so I'll get to those later.
G
I was starting a project with the kids and my long rails used to hang on the garage door but that door is slowing falling apart and so the rails ended up, stuffed wherever I could find space.
And the sacrificial cut strips never seem to stay on but it gets worse with abuse. I've bought new ones but I'll need to wait for a really warm day to pull them off, clean the rail with acetone, then alcohol and then put the new strips on. But in the meantime.
Each of these hangers took over 10 hours to print but they're very strong.
Having long ago run out of room in the shop the ceiling is the last expanse to mine. But out of site, out of harms way.
Katie has been helping me with a lot of gardening and yard work. It's truly her happy place to just focus and weed so I wanted to repay that in some way so I packed up the Kapex and headed to her place.
Her grape arbor was falling apart so we bought some new lumber and came up with a slightly more modern and clean design using what was still good - namely the posts and one 2x6.
It's so nice to do things for people who are truly appreciative and also who aren't very mechanical or handy in the way I am because to Katie I'm a magician. You guys know I'm just a guy with a miter saw so don't say anything to her!
I have another couple of projects that I've used as a break from the computer and retouching so I'll get to those later.
G
Brian R
Well-known member
I thought it was brilliant to hang the rails on the garage doors but leave it to you to come up with a better solution. Yeah, always nice to help someone that is appreciative. Kudos.
Brian
Brian
Vertigo Cycles
Well-known member
For those who are using Fusion, the GridfinityGenerator plugin by Lev Mishin is pretty powerful.
If you use it to generate the base grids, you can specify the size of the base width/length if you want them to be a custom division of whatever your drawer size is. You can also add "padding" to any of the sides, which is what I've opted to do.
When generating bins, in addition to the many variables you can specify, it generates a timeline which you can edit. I've found that I can add, delete or edit bin features by making edits in the timeline.
Say you have a drawer which doesn't work as a multiple of the 42mm grid and you padded the base grid by 16mm on each side. By making feature edits in the timeline, you can make custom bins that are 16mm wider than a 42mm multiple, and also have a flat base that can sit on the padded area. This enables you to use your entire drawer with no wasted space