To avoid these ads, REGISTER NOW!

Above 1200 Sq/FT Bald is Beautiful - 7k sq feet+ of Gruntledness

Wokspaces above 1200 squarefeet.
To avoid these ads, REGISTER NOW!
OP
T

tig

Well-known member
Joined
Feb 7, 2011
Messages
1,061
Location
Durango, CO
What size and brand is that one? I've been looking at them for the past couple of years since losing my paint shop option, but I keep seeing mixed reviews on the inflatable booths.

Thanks.
I believe it's this one: https://www.vevor.com/inflatable-pa...icles-large-furniture-painting-p_010119213766

This one is fairly used and shows some quality issues. There are places where duct tape has been added to stem leaks in seams. The seams around all the "windows" are leaking a bit.

Lighting inside is weak via the windows. I put stand up LED lights inside, but that was barely sufficient.

So, not perfect. But for $500?
 

bepjrfan

Well-known member
Joined
Aug 14, 2015
Messages
170
Location
North Dakota
Thank you for the follow-up. It somewhat matches some of the other things I've read. Much appreciated.
Mike, I had one as well for a couple years. They work pretty well, just have to make sure to clean up/sweep before folding them up when done. Otherwise paint dust will accumulate. Lighting, as mentioned previously, isn’t the greatest. They work great at containing a paint mess though! Used one to build 3 different kitchens before I got my new shop And never had an issue!
 

zmotorsports

ALLIANCE MEMBER
Joined
Oct 20, 2009
Messages
21,543
Location
Northern Utah
Mike, I had one as well for a couple years. They work pretty well, just have to make sure to clean up/sweep before folding them up when done. Otherwise paint dust will accumulate. Lighting, as mentioned previously, isn’t the greatest. They work great at containing a paint mess though! Used one to build 3 different kitchens before I got my new shop And never had an issue!

Thank you for the feedback. I appreciate it.
 
OP
T

tig

Well-known member
Joined
Feb 7, 2011
Messages
1,061
Location
Durango, CO
Sorry I've been remiss on updating as I've done things...

My stepson is using Penny as his HS Sr. Project, and we're on a tight timeline to get it drivable so he can take it to the last day of school on May 14th. It will not be complete/finished, but we will get it drivable!

Tons of progress. Sorry I've been remiss on updating as I've done things...

My stepson is using Penny as his HS Sr. Project, and we're on a tight timeline to get it drivable so he can take it to the last day of school on May 14th. It will not be complete/finished, but we will get it drivable!

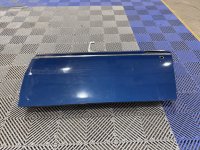
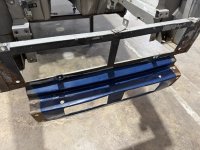
As we started prepping the body, I noticed the oil cooler intake piece was pretty mangled. One of the donor cars had a much better looking one, so I decided to try my hand at actual body work involving welding (which I've failed at before).

55238288741_3aca3a7c4b_b.jpg

Test fit:

55237384052_0b796aeca5_b.jpg

I don't weld; I grind.

55238698050_a9793d77f4_b.jpg

No good after photos, but it came out great.

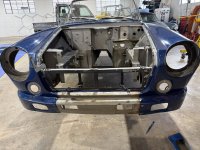
For the body; to recap the plan: I'm focusing on getting the stuff you don't normally see perfect. I will get the exterior prefect at a later phase, afgter the car is back on the road. However, while the body is disassembled, getting all the little dings and dents out is a worthy endeavor. I have a local PDW guy who is awesome, so I had him come by and spend a day straightening everything he could.

The driver's door and fender have a pretty gnarly dent/scrape. The goal was to get it so the worst of it was straight so it wouldn't bind when closing anymore and enable a real body guy to fix it later. The door may need to be replaced at that point; but I don't think so.

55238531094_bb0edc4f99_b.jpg

55238435163_b145454f80_b.jpg

55238530894_7062d15cf3_b.jpg
 
OP
T

tig

Well-known member
Joined
Feb 7, 2011
Messages
1,061
Location
Durango, CO
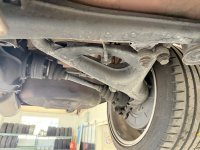
Next up was the front suspension & steering.

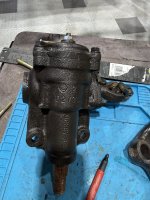
The steering box is in great shape and is of the later style. It just needed paint.

55237384017_45747ea5f8_b.jpg

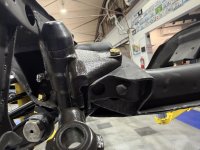
The idler box has also been replaced. Note the gap between it and the frame?
55238697985_4287337927_b.jpg

I elongated the bolt hole for the bolt you see to the right here so that it fit properly, figuring the adjustability of the steering arms would accomodate.
55237383892_4c0530cab9_b.jpg

But then, later when everything was together, I found the inner arm and bushing rubbed on the inner part of the frame, so I re-mounted it as shown in this pic (with some washers in there so that there's less stress.

55238698025_0ddce722fd_b.jpg

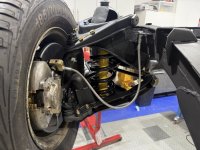
Getting the front suspension together was a two-steps-forward-one-step-back affair. Glad I resisted torquing anything down until much later, as I did need to pull things apart multiple times after realizing I had things backwards or sideways.

55238696890_c14facd332_b.jpg

55237382842_88d2ecc43f_b.jpg

55238447448_ca725cfa69_b.jpg

55238536179_f529218bd8_b.jpg

55238702550_dc5598fc9a_b.jpg

I lost count of the times I had the hubs/spindles on and off because I goofed/forgot something. For example, those locking plates were not on there originally. I only realized I had done it wrong, using lock washers, after noticing them in the parts boxes and saying "Oh ****, where do THOSE go?".

55238702555_6b381bb531_b.jpg

I also lost count of the times I had the calipers assembled and needed to disassemble because I had gotten something wrong. Turns out each piston goes in a particular location and rotation. Wish I had read the Tech Wiki first. Lol.

55237452167_0b34af23b7_b.jpg
 
OP
T

tig

Well-known member
Joined
Feb 7, 2011
Messages
1,061
Location
Durango, CO
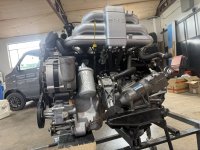
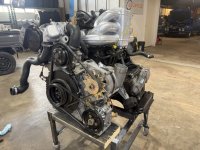
The engine...

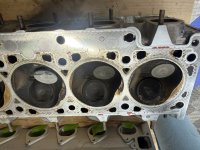
I really didn't want to pull the head. I was certain I could get the timing cover on without damaging the head gasket. I was wrong.

I'm now really glad I did. When I pulled the head bolts they were REALLY tight. And there was coolant in at least 3 of the head bolt holes. Ugh.

55238708810_9c48a5f178_b.jpg

Clearly, when I was running the car last summer, I overheated it and blew the HG. I did have a few moments where it MIGHT have gotten pretty hot
🤣.

I'm no pro at reading the tea-leaves of used HGs, but it didn't look great. I also thought I could see signs on the surface of the head and block, but nothing defnitivie.

55238708845_41be19525c_b.jpg

55237394807_959c99f735_b.jpg

Praying the head wasn't warped, I carefully cleaned it and the face of the block. Then I did the DIY "is this head warped" test and I couldn't get even a 0.0015" feeler gauge under the straight edge anywhere. Whew.

55238436198_67b7b13cb9_b.jpg

55238301536_86c6f40149_b.jpg

I had already bought a new HG. I also bought a set of ARP studs. After reading up more on the OE studs and issues with ARPs (and finding the nuts were a really tight fit with the camshaft caps), I decided to just use the OE studs.

Next up was the 93mm Denso alternator mounted on the right side. All went together nicely, as did final fitment and config of the carbs.

55237452947_851b4e6e1f_b.jpg

55237452592_6cb76fb556_b.jpg

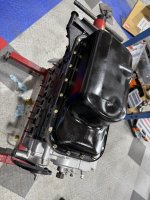
Oil pan and gasket...

55238767105_ecc8b57f86_b.jpg

55237453167_044362c57c_b.jpg

Yes, the pan has dents. I probably should have pounded them out; but it's character!
 
OP
T

tig

Well-known member
Joined
Feb 7, 2011
Messages
1,061
Location
Durango, CO
Meanwhile another Gruntled get-together happened. This beauty showed up.

55238531514_e75289faaa_b.jpg
55238300466_aa7bb1df50_b.jpg

And I went to New Zealand and hung with my buddy who has a collection of Volvos... they are building a "Classic Volvo for hire" company called The Rolling Swedes. They have a dozen or so cars including several STRETCH LIMO Volvos from the 80s.


4-x-760_orig.jpg

Matthew let me drive this.... A very cool mishmash of Volvo, Lotus, and Renault. I have first right of refusal if he ever sells. Fits my eclectic taste.

55237393552_a8926027d6_b.jpg
55238542729_405b7a1ede_b.jpg
55237393662_bb0f723c8b_b.jpg
 
To avoid these ads, REGISTER NOW!

67CarGuy

Well-known member
Joined
Feb 6, 2008
Messages
764
Location
Outside Boston, MA
Man, seeing body-on-frame cars come together is always a treat!

And that Aussie Volvo/Renault/Lotus (Volotault?) mash-up is an impressive '80s timewarp - those wheels just seal the deal.
 
OP
T

tig

Well-known member
Joined
Feb 7, 2011
Messages
1,061
Location
Durango, CO
The trusty cradle was with a friend in Seattle. He finally shipped it back to me. Still works great.

6de4cb961ce1357c_sized.jpg
0c17f675cde05e82_sized.jpg
259ae024d9c4ada0_sized.jpg

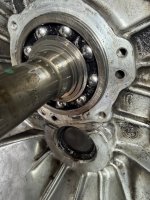
Yep, rear main seal is done. The input side of the ****** is fine, but the ****** is still toast.

7039679b23614102_sized.jpg

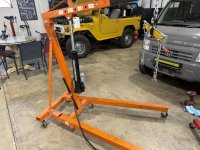
I would never admit my mistakes. Especially when I try to transfer the engine to the stand without using my hoist, because said hoist's hydraulic cylinder has decided to stop working. And, in the process the engine/cradle tip over, causing all oil and remaining fluids to Valdez across the floor, and causing the oil pump pully to get bent.

bbe5f3936c8261f9_sized.jpg
0546ee615537a324_sized.jpg

A 3-hour round trip to Farmington and Harbor Freight later....

293d543bb4f5e914_sized.jpg
 
OP
T

tig

Well-known member
Joined
Feb 7, 2011
Messages
1,061
Location
Durango, CO
Luck: When opportunity meets preparation.

5fef63645f705ad2_sized.jpg
604a834c6c7d4376_sized.jpg
5107f77397bac45c_sized.jpg

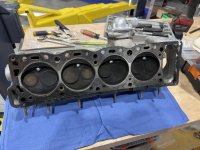
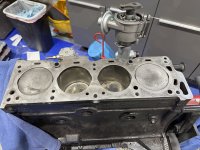
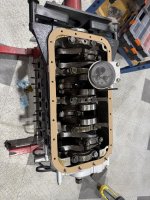
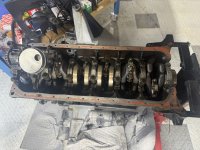
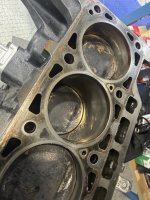
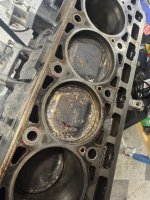
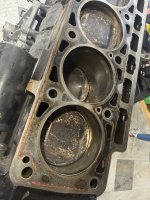
Bottom end seems fine. I am going to carefully clean off the piston tops to make double sure though.

bfe40f2dac03f832_sized.jpg
710f6b6bc74f8c58_sized.jpg
d6511e56cd6e2101_sized.jpg
b950a32f1164e3dc_sized.jpg

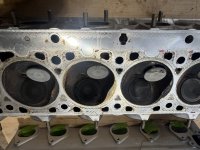
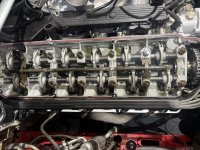
Not quite sure how all the rockers aren't broken. Until I get an "iron maiden" spring compressor (one inbound), I can't really see how the valves are bent, but I'm assuming they all are.

2a7da710c4746372_sized.jpg
577f1b0984730d1d_sized.jpg
882575e97684ffae_sized.jpg
 
OP
T

tig

Well-known member
Joined
Feb 7, 2011
Messages
1,061
Location
Durango, CO
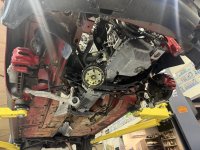
Clean, again. At least underneath.

f0f684d04ff07f61_sized.jpg
c9940866b3220a0f_sized.jpg

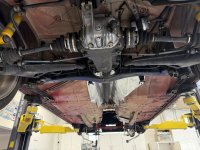
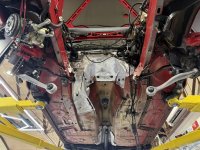
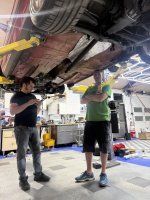
I put the subframe and steering components back in, but didn't reconnect the steering shaft. Thinking this setup would let me move the car around.

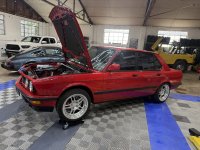
That was dumb, because now the car is basically stuck were you see it because the dolly wheels sink in. This morning's job is to rectify that so I can get another car on the lift to do some work on it while I wait for parts.

c0419d19c05a8d1b_sized.jpg
 

cccoltsicehockey

Well-known member
Joined
Apr 3, 2014
Messages
1,442
Location
Charlotte, NC
Looks like you are making some good progress.

Yikes on the dolly wheels sinking in. I was planning to store a car that way in my garage with Swisstrax, but apparently that won't be happening. Thanks for the unfortunate test.
 

kmcteer

Active member
Joined
Jan 5, 2022
Messages
26
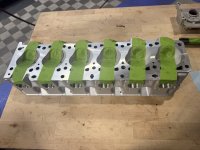
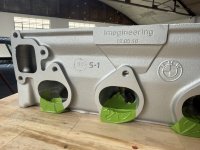
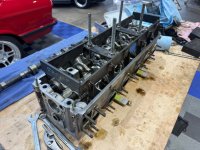
A Paul Burke Head. What cam are you going to run on this? I also see that increased compression is worth a consideration :devilish:.

-Kelly
 
To avoid these ads, REGISTER NOW!
Top Bottom