
You are using an out of date browser. It may not display this or other websites correctly.
You should upgrade or use an alternative browser.
You should upgrade or use an alternative browser.
Building a buggy: nobggrnchvy
- Thread starter bggrnchvy
- Start date


Lot of small tasks, nothing major.
Engine wiring harness is in, only thing that needs to modded is the throttle body connector which I assumed since it's on the wrong side now.
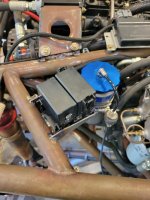
Made a mount for the harness relay/fuse block even if half of the ciruits are dead/unecesary. I may unloom and depin all the extraneous **** when I tear it all down for paint...then again I might not:laughing:


Finally chucked up and turned down the 1350CVs for the 2-1/8" x 3/16" wall tube. They needs ~.020 turned off for a nice fit.


Started reassembling the front axle, it needs to go in for mockup one more time.

I had some concerns about getting any airflow through the oil cooler, so I modeled some scoops and printed them. After working out the protoype issues in PLA I did them in PETG. The center support interference isn't right and it cracked at the weakest point. I'm fixing that this morning hopefully.


Engine wiring harness is in, only thing that needs to modded is the throttle body connector which I assumed since it's on the wrong side now.
Made a mount for the harness relay/fuse block even if half of the ciruits are dead/unecesary. I may unloom and depin all the extraneous **** when I tear it all down for paint...then again I might not:laughing:
Finally chucked up and turned down the 1350CVs for the 2-1/8" x 3/16" wall tube. They needs ~.020 turned off for a nice fit.
Started reassembling the front axle, it needs to go in for mockup one more time.
I had some concerns about getting any airflow through the oil cooler, so I modeled some scoops and printed them. After working out the protoype issues in PLA I did them in PETG. The center support interference isn't right and it cracked at the weakest point. I'm fixing that this morning hopefully.
The engine relay/fuse block got mounted. put some rivnuts intot he backside so it's easily installed/removed.
Then I put the front axle back in so I could remeasure driveshafts.
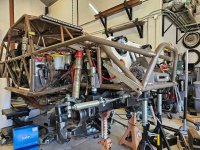
A little math and I ended up with a cut length leaving me 1/2" of compression at full bump on the shortest (rear) and 3-1/2" of 1-1/2" dia spline engagement at full droop.

Tacked them up, I'll spin them on the lathe and check round before I finalize them.

Right on the money at the prescribed compressed length.
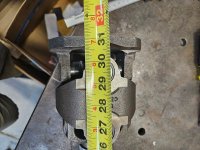
It was going really well until this.

Not snaking a driveshaft in there. Exhaust will have to be modified. To be continued.
Then I put the front axle back in so I could remeasure driveshafts.
A little math and I ended up with a cut length leaving me 1/2" of compression at full bump on the shortest (rear) and 3-1/2" of 1-1/2" dia spline engagement at full droop.
Tacked them up, I'll spin them on the lathe and check round before I finalize them.
Right on the money at the prescribed compressed length.
It was going really well until this.
Not snaking a driveshaft in there. Exhaust will have to be modified. To be continued.
Bambu P1S, thanks.What 3d printer do you have? Those scoops are sweet.
Engine bay room is at a premium, but I still needed to mount the engine oil catch can. The only reasonable spot I had of course needs a custom mount, so I trimmed one out of some 2x1 box tubing I welded a return to and drill a bunch of holes in.

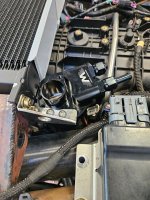
Now with it bolted in the second half of the placement issue becomes more clear. The air filter isn't going to fit on top. It hits both the oil cooler and the hood.

Solution?

Test peice in PLA, final in ASA with a relief to allow a band clamp to tighten the adapter to the top of the catch can.
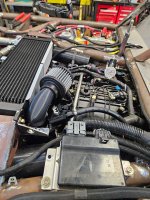
Solved, just need to go back and add clamps.
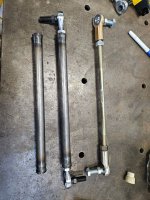
Last item was building some 4130 sway bar end links to replace the solid rod units that came with the bars. There's plenty of room in my application for 1in tubes and I didn't like the compromises the solid rods made.
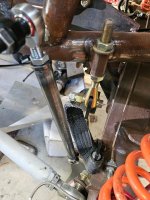
So just letting us see more of the skills....The modeling side has been all/part of the day job for 20 years, so I hope I have a good handle on that

Last edited:
PhantomEB
Well-known member
Buggys are cool, I prefer full bodies or what I have left….
chicks dig body damage eh?

chicks dig body damage eh?
Buggys are cool, I prefer full bodies or what I have left….
chicks dig body damage eh?
I tried that once!

It didn't end well

Weekend was full activities that weren't buggy related, but I started tackling the driveline interference issue.
I started by unbolting and then cutting the flanges off the current exhaust and mocking it up. Then I tapped in the concentric drievline spacers to make all of my flanges, front and rear, match. Finally I tried to see if a 45 immediately off the manifold would work.


Not even close.
I texted with a friend about maybe making an LS truck manifold work and he suggested just chopping this manifold up and trying to make a V-band work. Well, I do have an extra V-band sitting here and I've got nothing lose, ok.
I chopped the manifold collector off at an angle, squeezed a fitting to narrower it a bit to fit and tacked and mocked up a 45 with a v-band, then burned the 45 on the manifold with some 308 rod I had laying around. Thick cast to thin 304 resulted in really oxidized weld joint, but oh well.

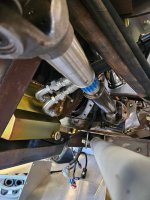
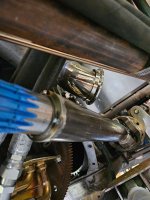
This will work out, as long as the fitting doesn't break off the manifold...
Last edited:
zmotorsports
ALLIANCE MEMBER
Nice modification of the manifold. The only think I can think of is fatigue cracking over time being **** welded to cast, but time will tell. You'll have to keep us posted once she's in service.
Thanks. We will have to see. I might grab some more ni99 and wash the weld with more nickle to add some more ductiity and resistance to differential thermal expansion.Nice modification of the manifold. The only think I can think of is fatigue cracking over time being **** welded to cast, but time will tell. You'll have to keep us posted once she's in service.
zmotorsports
ALLIANCE MEMBER
Thanks. We will have to see. I might grab some more ni99 and wash the weld with more nickle to add some more ductiity and resistance to differential thermal expansion.
When welding dissimilar metals, I have had excellent results using ER309L. It's not as specific to cast as ni99 or ni55, but it welds nicely and has a good amount of elongation to allow for a long lasting repair. Just as FYI.
I think if I had initially done the weld in 309 I would leave it alone, but now with it in 308 it's already got 80% the nickel of 309. If I add some ni99 or even some 55, the wall on the 304 tube will probably fail before anything else.When welding dissimilar metals, I have had excellent results using ER309L. It's not as specific to cast as ni99 or ni55, but it welds nicely and has a good amount of elongation to allow for a long lasting repair. Just as FYI.
zmotorsports
ALLIANCE MEMBER
I think if I had initially done the weld in 309 I would leave it alone, but now with it in 308 it's already got 80% the nickel of 309. If I add some ni99 or even some 55, the wall on the 304 tube will probably fail before anything else.
Agreed. IF it fails it will probably be in the HAZ, not the actual weld with the wall thickness being so thin. Just thought I'd throw the ER309L option out there as I have used it successfully on similar jobs. You may never have an issue so no need to worry until (or if) there is.
Other items needed attention. I'm part way through assembling this thing.

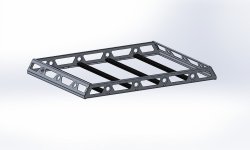
One item that I hadn't tackled and lead me down a rabbit hole was a roof rack or something to hold and specifically tie down **** up top for Con or Fordyce trips. I wanted something light, something robust, I loved my old con-Ferr rack on my Chevy but obviously those aren't an option and most of the stuff on the market I dislike the look of. If I don't hate it, it's $1,200+. A friend mentioned just getting some extruded aluminum and getting end plates cut and I almost discounted it just because I didn't want to build something else, but after seeing what I was up against have migrated back that way.
Now to be clear, I don't know anything about overlanding or making roof top baskets except what my limited experience has taught me.
I modeled this up to use 1/8" 5052 al as plates and some knockoff 1020 80/20 like extrusion. The rails bolt in from the ends and underneath. Front and back bolt in from the front, top and bottom. I tried making a nod to the old Con-Ferr style with the dimple bulkhead design. Planning to add some under roof tabs to the buggy halo and make some very low profile mounts to land on the perimeter tubes. It's 42" wide and 56" long, and 5" tall plus maybe a half inch from the future mounts. I'm still on the fence about it and need to do more mapping of the chassis mounts.


One item that I hadn't tackled and lead me down a rabbit hole was a roof rack or something to hold and specifically tie down **** up top for Con or Fordyce trips. I wanted something light, something robust, I loved my old con-Ferr rack on my Chevy but obviously those aren't an option and most of the stuff on the market I dislike the look of. If I don't hate it, it's $1,200+. A friend mentioned just getting some extruded aluminum and getting end plates cut and I almost discounted it just because I didn't want to build something else, but after seeing what I was up against have migrated back that way.
Now to be clear, I don't know anything about overlanding or making roof top baskets except what my limited experience has taught me.
I modeled this up to use 1/8" 5052 al as plates and some knockoff 1020 80/20 like extrusion. The rails bolt in from the ends and underneath. Front and back bolt in from the front, top and bottom. I tried making a nod to the old Con-Ferr style with the dimple bulkhead design. Planning to add some under roof tabs to the buggy halo and make some very low profile mounts to land on the perimeter tubes. It's 42" wide and 56" long, and 5" tall plus maybe a half inch from the future mounts. I'm still on the fence about it and need to do more mapping of the chassis mounts.
mike528
Well-known member
something else to consider for the cross bars, not aluminum but fairly strong and lightweight. Unistrut, the thinner stuff works well for this.
PhantomEB
Well-known member
I am planning a rack for attaching to the cross bars(front to back) in the back of the bronco. Will be on hinges just need to figure out the latch. Underneath will be fuel cell, rotopax, extra fluids and dual batteries. Probably a tarp or two. Up top will be Extra fuel if need be, chainsaw, and a place to carry firewood or gear.
something else to consider for the cross bars, not aluminum but fairly strong and lightweight. Unistrut, the thinner stuff works well for this.
Strut has a lot of uses, I'm using the stuff as track for me garage doors even, but I'm really trying to make sure the rack is light enough I can pull it off myself (even though the crane is always an option) and not add any more weight than needed. Even though aluminum strut exists, I think the 80/20 might have one up on it in this app with the ability to end tap.
I am planning a rack for attaching to the cross bars(front to back) in the back of the bronco. Will be on hinges just need to figure out the latch. Underneath will be fuel cell, rotopax, extra fluids and dual batteries. Probably a tarp or two. Up top will be Extra fuel if need be, chainsaw, and a place to carry firewood or gear.
That's a different problem I have to solve next, a mount over the fuel cell for cooler/gear. Thinking it might make sense to even hang the cooler off the back cantilever to drop it down a little for access and make more space for 5 day Rubicon trips. I used to have a fullsize, so I'm used to overhang to watch for and I can drop the mount at camp after the first day in.
I finished and painted the cart.

Went so far as loading up the welder with a 25' CK 20 series torch and a new 25' 1/0 ground. Had to wait on coolant adapters for the torch naturally.
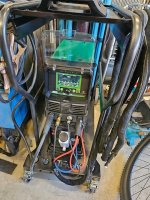
Then decided I hated not having a drawer on top like my last setup. Of course it's too narrow to fit the drawer I had and all the options I could find weren't very deep if they were narrow enough. I stared at the drawer kit ZT makes and it's designed to go below, but figured I could modify it. It needed some notches cut to clear the cord hanger brackets, but other than that it pretty easily fit in. Nice to have a full length drawer to hold both consumables, as well as stick stinger, spare hoses, pedal and spare air cooled and water cooled torch sets. Of course I had to tear it all the way down, remove a paint, weld, repaint and reassemble but it was worth it.
Lets ignore the DCEP configuration here, I figured it out when I actually started it up.

I printed a pile of holders that clip onto the side to hold the rod tubes, an opper and lower. 4 in the back weren't enough.

Then I immediately put it to use Sunday fixing the exhaust routing debacle.

I love the fingertip button, makes tacking so much nicer. I can't say I like it for welding though. The way I hold a torch makes the button a pain, but maybe something I will get used to or maybe I go back and forth fingertip to pedal.

I should not have chosen thin stainless to start my education on pulse tig welding. I got there, but it's not the prettiest. I was able to control heat in most of it, but the actual beads are ugly. By the end I think I got alot of it figured out and a friend gave me some baseline settings to play with from his 255EXT I can try next time.
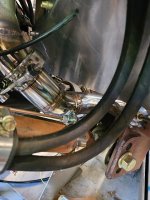
At least it fits well. Clearance is clearance. Hopefully it doesn't touch in reverse.

Also got the rails for the roof rack and chopped them down to size. Also end tapped them to 10-24. A tap guide makes power tapping easy and short work of the job.


Last edited:
stinkity stoink
Well-known member
Great work you got going on here. is that blue stuff at tap lube?