To avoid these ads, REGISTER NOW!

Between 705 & 1200 SQ/FT My Mini Garagemahal

Workspaces between 705 and 1200 squarefeet.
OP
F

fouckhest

Well-known member
Joined
Jul 24, 2013
Messages
1,908
Location
Greer, SC
Hope everyone had a good weekend, I didn't get as much shop time as I wanted this weekend, but still got a little work done.

Pulled the fuel cell cage back out to start prepping for permanent install, first step was to weld a plate on the bottom so once it is permanently installed it will be able to be sealed from the outside. Then I wanted to drill all the holes for the lid to attached, there is no way I wanted to deal with that in the car! LOL

Marked out the bottom plate for some plug and stitch welds
55363465827_19caab76a5_c.jpg by fouckhest, on Flickr

All burned in and smoothed out, I'll seam seal the edges once paint/undercoating time comes around
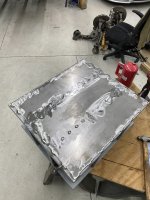
55364406726_9204102eb7_c.jpg by fouckhest, on Flickr

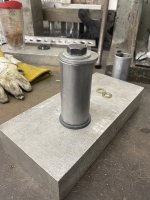
Next up was laying out for the lid holes, I have to admit, this little tool is worth every penny!
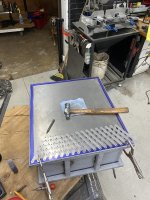
55364597429_dfc867f615_c.jpg by fouckhest, on Flickr

Mark, punch, drill, then more drilling....in a holding pattern now until nutserts arrive along with the final size drill bit
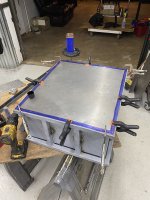
55364813735_610c1c30a1_c.jpgUntitled by fouckhest, on Flickr

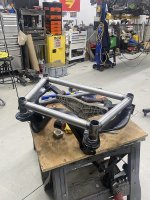
Wrapped up the weekend by welding up the turns for the back of the z-pipe so the straight sections will fit nicely into the rear subframe.
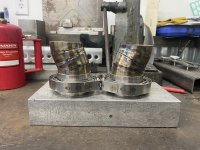
55363465817_4f1274f74a_c.jpg by fouckhest, on Flickr

Hopefully keep plugging away this week.
 
To avoid these ads, REGISTER NOW!
OP
F

fouckhest

Well-known member
Joined
Jul 24, 2013
Messages
1,908
Location
Greer, SC
Been chipping away at some less than glamorous work the past couple days, but its all good progress towards starting on the floor, tunnel and floor panels.

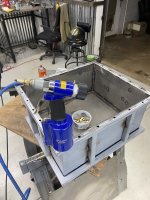
Yesterday my nutsert order showed up from mcmaster, I wanted to ensure these are good quality, so it was worth the wait. First I got out one of my favorite tools in the quiver

Astro pneumatic nutsert tool
55368550655_b596bfdfa2_c.jpgUntitled by fouckhest, on Flickr

Ran a couple tests to make sure settings were dialed
55368336039_06f5c5cb59_c.jpgUntitled by fouckhest, on Flickr

Check that off the list, my fasteners show up today, so other than paint and cutting the lid for the fill plate, its basically done
55367208207_0cc8276a65_c.jpgUntitled by fouckhest, on Flickr


For the less than glamourous work, I finally decided to cut the old rear flat floor pan/plate out, this was welded in years ago to cover the old spare tire well, the shop that did the work years ago did an "okay" job, but it was full of bondo, it had holes from the old fuel cell and other things, so trying to fix that around bondo made the decision to cut it out simple....i hate bondo lol

So much room for activities!
55365325897_64c75e0fd6_c.jpg by fouckhest, on Flickr

This also gives me the opportunity to access all the subframe mounting points, which means now I can tie those into the cage, which will be both functional and much better looking in my opinion
55368294213_7529a0e963_c.jpgUntitled by fouckhest, on Flickr

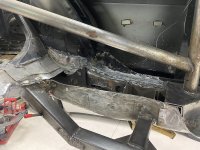
Also spent some time cleaning up this area, which had some different shapes in it as it was the edge of where the rear seats would be, so it needed cleaned up so when the cell cage is mounted it will make building the floor much easier and cleaner
55368143261_b3039f95e4_c.jpgUntitled by fouckhest, on Flickr
55367208287_defe4799f2_c.jpgUntitled by fouckhest, on Flickr

Hope to start making some templates tonight, maybe start working on the subframe mounts, will see how I am feeling after work.
 
OP
F

fouckhest

Well-known member
Joined
Jul 24, 2013
Messages
1,908
Location
Greer, SC
Hope everyone had a good 4th, rather busy in our world, but managed to find some shop time here and there.
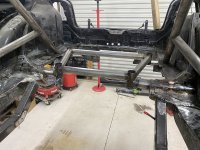
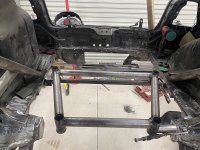
After cutting out the rear floor, I opened pandoras box and decided to tackle building a new mount for the rear subframe, which well, took WAY longer than I intended, but I decided to TIG it since it will be very visible in the back of the car.

Started off by making the attachment point(s)

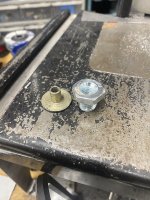
Beefy washer and M14x 1.5 nut w/1-3/4 0.090 wall tubing to match the cage
55378704009_1a37311fe9_c.jpgUntitled by fouckhest, on Flickr

secured for welding
55378525121_0e0a3ed523_c.jpg by fouckhest, on Flickr

Burned together
55378704079_9e8ea76e45_c.jpg by fouckhest, on Flickr

Repeat that 3x more times, then start cutting/fitting
55378923040_fa8c52467f_c.jpg by fouckhest, on Flickr

Made a couple tubes a few too many times, but I wanted good fit and welds
55378922955_1321a90ce1_c.jpg by fouckhest, on Flickr

Got a little time in before work and just got it finished up, its currently cooling so I can working on getting it final welded into the car, debating a removable panel over the diff using some push button quick disconnects, but still TBD on that.
55378525176_7f7b91e577_c.jpg by fouckhest, on Flickr
55378704084_185e567617_c.jpg by fouckhest, on Flickr
 

fourmotioneer

Well-known member
Joined
Mar 19, 2015
Messages
238
Location
Ann Arbor, MI
Curious why the subframe is necessary. Sure there is a reason, but what stands out is that you could mount diff directly to chassis and eliminate subframe, which is a design for manufacturing concession
 
OP
F

fouckhest

Well-known member
Joined
Jul 24, 2013
Messages
1,908
Location
Greer, SC
Curious why the subframe is necessary. Sure there is a reason, but what stands out is that you could mount diff directly to chassis and eliminate subframe, which is a design for manufacturing concession

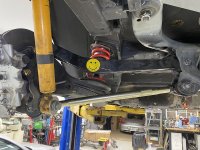
I assume you mean the "black subframe," that is where the control arms (upper & lower) connect, so in theory, that entire unit, the piece I just made and the black subframe, certainly could have been merged into one larger unit.
53334696032_bc693e150f_c.jpgUntitled by fouckhest, on Flickr

That was more of an undertaking than I was willing to do for right now. This was a way to upgrade/update the black subframe mounting points b/c the way it was attached previously was not my favorite, but it was a way to do the all wheel drive swap years ago, plus now I can tie the new piece into the cage.

A big part of this was to make a better mounting point and redo the floor in the back, not the best photo, but previously the fuel cell was mounted on top of the hatch floor, along with the air tanks. So there were lots of holes and that panel was full of bondo, so it was just easier to start over (in my mind lol).

fuel-cell-vw-mk4-gti.jpg
 
OP
F

fouckhest

Well-known member
Joined
Jul 24, 2013
Messages
1,908
Location
Greer, SC
Hope everyone had a good weekend, after being out of town for work last week, mine was filled with catching up on house chores and trying to find some shop time.

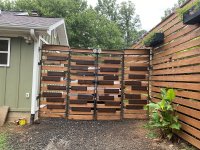
The wife got the accent panels stained for the gate, since they were done I got those installed followed by yard work in between rain, womp womp, but hurray!
55392941013_48fde44a4b_c.jpgUntitled by fouckhest, on Flickr
55392810536_2bba8b6ce8_c.jpgUntitled by fouckhest, on Flickr

The rain is doing the lawn some good, and this was from Friday and its rained on/off every day since, so might get into the twice a week mowing sooner than later, womp.
55392812271_bbd22e0b5f_c.jpgUntitled by fouckhest, on Flickr

Been plugging away at the project car. I wanted to try and get the new rear subframe mount mocked up/get the old mount bar out of the way b/c it makes working in the back area of the car difficult while it "tidy" everything back up.

Started by lopping off the center section, leaving only these little ears and marked them up to noodle on how to cut them out...hole saw or grinder/flap wheel....
55392942189_dd6349de11_c.jpgUntitled by fouckhest, on Flickr

Decided to try to hole saw them, so whipped up a makeshift drill bushing out of some scraps I had laying around
55391828342_408df839e2_c.jpgUntitled by fouckhest, on Flickr

Melted together and drilled for pilot hole bit size that is on the arbor
55391824052_c7181be690_c.jpgUntitled by fouckhest, on Flickr

Success!
55392891973_ee9fc5f8df_c.jpgUntitled by fouckhest, on Flickr
55392942474_b4b64f6e56_c.jpgUntitled by fouckhest, on Flickr

Then went to fit the subframe mount and it was a touch narrow, so put that aside to keep focus on other tasks that are more important to drive to tunnel/floor fab. These areas on the side I noted on a couple posts above, make some tape templates, transferred them to metal, then used some wood blocks and clamps, with my knee to form them into shape
55392896578_43f5e57d6f_c.jpgUntitled by fouckhest, on Flickr

Tacked in place
55392891603_1ba9e5f589_c.jpg by fouckhest, on Flickr

Then burned them in and metal worked the edges/seams
55393160440_8f6104859d_c.jpgUntitled by fouckhest, on Flickr
55392761661_f9e729b615_c.jpg by fouckhest, on Flickr

Next steps will be to plate off the area at the base of the main hoop for the cage, then move on to the hatch area to continue clean up on where I cut out the floor pan to make sure its ready for the subframe mount to get welded in and then start driving towards some sheet metal work.
 
OP
F

fouckhest

Well-known member
Joined
Jul 24, 2013
Messages
1,908
Location
Greer, SC
Its been longer than normal since my last post, but kind of like @cccoltsicehockey after his little hiatus, I've been trying to not be so focused on doing a daily blog and more about substantial updates. My new job has been keeping me very busy, combined with normal house work and summer time yard work, well, its been a nice break to just keep up with everyone elses adventures!

However, I've grinding away, literally and figuratively....So here we are with project car updates.

Finalized capping off the last of the unibody areas so I have a good landing pad for the front of the fuel cell
55397390564_dd84b2aa68_c.jpgUntitled by fouckhest, on Flickr
55397340328_c6ec672dd8_c.jpgUntitled by fouckhest, on Flickr


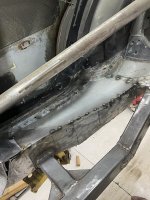
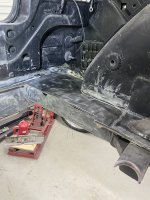
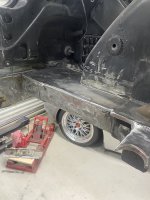
Kept on with cleaning up, smoothing out and welding up the remaining rear area, this was trimmed flush, then pulled it down to give a nice corner weld
55397214416_fa5fc28c3b_c.jpgUntitled by fouckhest, on Flickr

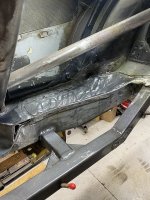
All cleaned up
55405414934_9627f35f65_c.jpgUntitled by fouckhest, on Flickr


Next up was to fix these areas, which are the OEM rear strut bracing/where the rear seats lean against. Had to do a lot of clean up around these areas due to when the car got AWD converted and we had to make provisions to mount the bags. Cleaned up and coated with weld through primer
55405415444_9af8805f42_c.jpgUntitled by fouckhest, on Flickr
55405240671_f189580aa5_c.jpgUntitled by fouckhest, on Flickr


Lots to CAD and fitting later, capped off
55405631480_1d9884b069_c.jpgUntitled by fouckhest, on Flickr
55405241091_66fd734e08_c.jpgUntitled by fouckhest, on Flickr


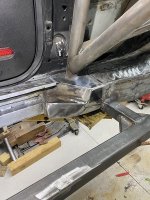
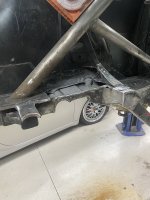
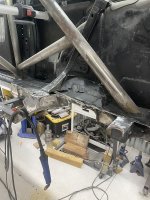
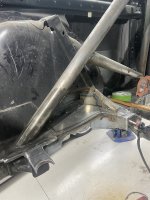
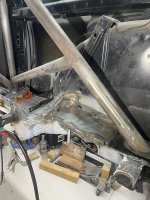
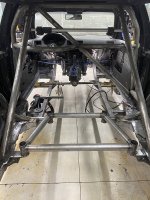
With that cleaned up, I bit the bullet and started working on mounting the new rear subframe mount/brace.

Quick fit/mock up
55410977001_67da62e1c7_c.jpgUntitled by fouckhest, on Flickr


Lots of trimming on these tubes to get them to fit, but I really like this concept, I think it ties things together really well. I need to figure out another tube to tie into the node where the chassis bar and the frame meet, but thats a future me problem
55411363370_e713422dfb_c.jpgUntitled by fouckhest, on Flickr
55411153454_224347e433_c.jpgUntitled by fouckhest, on Flickr
55411221099_eb7d0f9a57_c.jpgUntitled by fouckhest, on Flickr


Hopefully get back out there tonight for some more work, luckily I got yard work done last week b/c it looks like we might get some love from Bertha as she rolls across the southeast, which usually means shop time!

In other news, between some decent rain, consistent watering and fertilizers finally kicking in, the yard is looking okay. Also, thanks to @Cdubu52 for the suggestion on that herbicide, that stuff worked/(s) really well!
55411260444_569ea21f8a_c.jpgUntitled by fouckhest, on Flickr
 

cccoltsicehockey

Well-known member
Joined
Apr 3, 2014
Messages
1,449
Location
Charlotte, NC
Glad to see an update and hear the project is still coming along well when you find time. The lawn looks fantastic. Even more so when you consider the conditions this summer. Mine has gone half dormant at this point with all the heat, even with watering, so I have stopped working on it as much.
 
OP
F

fouckhest

Well-known member
Joined
Jul 24, 2013
Messages
1,908
Location
Greer, SC
Glad to see an update and hear the project is still coming along well when you find time. The lawn looks fantastic. Even more so when you consider the conditions this summer. Mine has gone half dormant at this point with all the heat, even with watering, so I have stopped working on it as much.

Thanks on both!

....keep in mind, my front yard is tiny, its much easier to water, I don't know how I'd deal with the amount you have
 

OutlawDrifter

Well-known member
Joined
Jan 20, 2015
Messages
3,908
Location
KS
In other news, between some decent rain, consistent watering and fertilizers finally kicking in, the yard is looking okay. Also, thanks to @Cdubu52 for the suggestion on that herbicide, that stuff worked/(s) really well!
55411260444_569ea21f8a_c.jpgUntitled by fouckhest, on Flickr

Enjoying the fab work, but man...those straight lines in the yard make me happy :thumbup:
 

madison069

Well-known member
Joined
Nov 5, 2010
Messages
4,314
Location
Monroeville, PA
Looking good Mike! Nice welds in that VW!

Yard is looking good too! I've put off any serious yard scaping until after the concrete work gets done, so it looks like it will be next spring before I do any serious yard work. What herbicide did you use?
 
To avoid these ads, REGISTER NOW!
OP
F

fouckhest

Well-known member
Joined
Jul 24, 2013
Messages
1,908
Location
Greer, SC
Looking good Mike! Nice welds in that VW!

Yard is looking good too! I've put off any serious yard scaping until after the concrete work gets done, so it looks like it will be next spring before I do any serious yard work. What herbicide did you use?

Cody - I can related on waiting on, we have some pending projects to clean up the driveway and parking spots and I know that will snowball and likely encroach on my front lawn, but the silver lining is, maybe I'll use that as an excuse to do some irrigation so I can get out of the manual watering game

This is what @Cdubu52 recommended

This is the herbicide

Along with this surfactant
 

madison069

Well-known member
Joined
Nov 5, 2010
Messages
4,314
Location
Monroeville, PA
Cody - I can related on waiting on, we have some pending projects to clean up the driveway and parking spots and I know that will snowball and likely encroach on my front lawn, but the silver lining is, maybe I'll use that as an excuse to do some irrigation so I can get out of the manual watering game

This is what @Cdubu52 recommended

This is the herbicide

Along with this surfactant
I added those to my amazon shopping list so I'll be sure to get it after yard scaping!
 
OP
F

fouckhest

Well-known member
Joined
Jul 24, 2013
Messages
1,908
Location
Greer, SC
Yard is looking good!

Im with triple c, my yard is barely hanging on. It stayed green until the last few weeks. I stopped watering and decided to let it go dormant and see what happens over the next month.

Maybe big Bertha will bring you NC guys with big yards some natural hydration!
 
OP
F

fouckhest

Well-known member
Joined
Jul 24, 2013
Messages
1,908
Location
Greer, SC
Hope everyone had a good weekend, rather productive in our world in spite of the hit/miss weather.

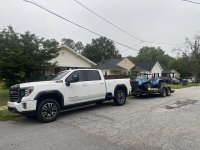
One looming side project has been some sun shades to park cars under and help with sap and things falling out of the tree in the front yard. Since the wife and I have both recently upgraded vehicles, I finally got a couple on order. The unit where she parks was a bit of a challenge due to not having any consistent lengths, custom made sails were rather pricey, so I opted to buy an equilateral 20ft triangular shaped shade and see how it would work....not the greatest, but should help...it was a bit of a struggle to get right, but finally got it up

Kind of hard to see, but it is there!
55418644603_546a8c4a79_c.jpgUntitled by fouckhest, on Flickr
55418519046_4c28cdc0f4_c.jpgUntitled by fouckhest, on Flickr

The other was to go in between the privacy fence and the laundry room addition, went up much easier, unfortunately there is not enough fall to let the rain drain off b/c this one is water proof...so need to revisit mounting this one next weekend...womp womp. I am hoping I can drop down that front right corner and that will allow water to drain
55417550022_64a7803d53_c.jpgUntitled by fouckhest, on Flickr
 
OP
F

fouckhest

Well-known member
Joined
Jul 24, 2013
Messages
1,908
Location
Greer, SC
With that done, the rest of Saturday was spent relaxing. Sunday we had plans in the afternoon with some friends to do a last pool hang day with a German friend that has been in SC for 2yrs working for BMW on a rotation, so he and his wife wanted one last pool day. Before that I found some garage time to get back on the project car.

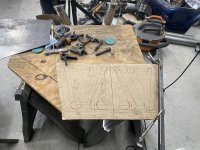
I had made a template and drawn out a panel for the subframe mount last week, decided to transfer that to metal.

Template with my bead roll pattern, 20ga cold rolled sheet behind it, trusty 1x1 angle straight edge and a cut off wheel for nice cuts since I don't have a shear
55423030499_afa0436ccb_c.jpgUntitled by fouckhest, on Flickr

Got focused and forgot to snap a photo of transferring the pattern to the sheet....I cut the corners off the template, extended my straight lines to the sheet, connected the dots and re did the radii and was in business
55422847486_b442349cdd_c.jpgUntitled by fouckhest, on Flickr

Pattern transferred
55422847546_be437117dd_c.jpgUntitled by fouckhest, on Flickr

With that done and not feeling confident in my bead rolling skills, I whipped up a practice piece, drew out a similar pattern, looked up some tips/tricks on the tubes, which I am stoked I did b/c I realized I had the wrong tooling on the bead roller. I had a thin step tool on there, not the wide 1/4" step die, swapped that out, ran one small piece of scrap, then grabbed my practice piece, which I think came out pretty decent ...other than the shapes not being even, but it was for practice
55423250740_45298d5b95_c.jpgUntitled by fouckhest, on Flickr

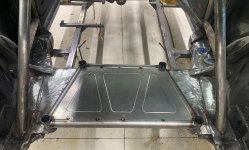
With a little confidence built, it was go time! Its not perfect, but for something that will essentially be a floor pan, I am happy!
55421880427_2407f0e4fd_c.jpgUntitled by fouckhest, on Flickr

Once that was done I couldn't walk away and had ~30min before we needed to leave, so grabbed the welder and tacked it in place
55423030119_84971be9ab_c.jpgUntitled by fouckhest, on Flickr

Hoping to get a little work in tonight, unfortunately have to travel this week for work, so loosing my Tues-Thurs shop time, hopefully back at it next weekend.
 

madison069

Well-known member
Joined
Nov 5, 2010
Messages
4,314
Location
Monroeville, PA
With that done, the rest of Saturday was spent relaxing. Sunday we had plans in the afternoon with some friends to do a last pool hang day with a German friend that has been in SC for 2yrs working for BMW on a rotation, so he and his wife wanted one last pool day. Before that I found some garage time to get back on the project car.

I had made a template and drawn out a panel for the subframe mount last week, decided to transfer that to metal.

Template with my bead roll pattern, 20ga cold rolled sheet behind it, trusty 1x1 angle straight edge and a cut off wheel for nice cuts since I don't have a shear
55423030499_afa0436ccb_c.jpgUntitled by fouckhest, on Flickr

Got focused and forgot to snap a photo of transferring the pattern to the sheet....I cut the corners off the template, extended my straight lines to the sheet, connected the dots and re did the radii and was in business
55422847486_b442349cdd_c.jpgUntitled by fouckhest, on Flickr

Pattern transferred
55422847546_be437117dd_c.jpgUntitled by fouckhest, on Flickr

With that done and not feeling confident in my bead rolling skills, I whipped up a practice piece, drew out a similar pattern, looked up some tips/tricks on the tubes, which I am stoked I did b/c I realized I had the wrong tooling on the bead roller. I had a thin step tool on there, not the wide 1/4" step die, swapped that out, ran one small piece of scrap, then grabbed my practice piece, which I think came out pretty decent ...other than the shapes not being even, but it was for practice
55423250740_45298d5b95_c.jpgUntitled by fouckhest, on Flickr

With a little confidence built, it was go time! Its not perfect, but for something that will essentially be a floor pan, I am happy!
55421880427_2407f0e4fd_c.jpgUntitled by fouckhest, on Flickr

Once that was done I couldn't walk away and had ~30min before we needed to leave, so grabbed the welder and tacked it in place
55423030119_84971be9ab_c.jpgUntitled by fouckhest, on Flickr

Hoping to get a little work in tonight, unfortunately have to travel this week for work, so loosing my Tues-Thurs shop time, hopefully back at it next weekend.
I don't know what you're talking about, looks like a professional did that bead rolling to me!
 
To avoid these ads, REGISTER NOW!
Top Bottom