To avoid these ads, REGISTER NOW!

4 Barrel barn build.

To avoid these ads, REGISTER NOW!
OP
W

Woodboxkiwi

Well-known member
Joined
Jun 10, 2026
Messages
66
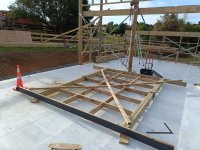
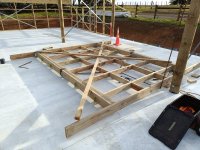
After yesterday's debacle I was happy to get the high wall fabricated on the deck.IMG20260826164202.jpg
I braced it up temporarily to move it into position.
IMG20260826164220.jpg
I then set about standing it up against the existing wall with a chain hoist.
IMG20260826170353.jpg
I added more bracing to hold it upright while moving it into its final position.
IMG20260826174519.jpg
I pulled it sideways with a load strap and a bit of good old leverage.
IMG20260826174632.jpg
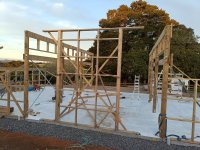
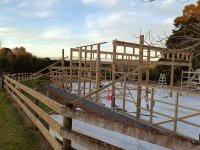
In position ready for the top and bottom plate extensions to tie it all in, along with a couple of permanent braces at the top back onto the other walls.
IMG20260826174607.jpg
Another pile of sticks closer to the finish line!
 
OP
W

Woodboxkiwi

Well-known member
Joined
Jun 10, 2026
Messages
66
It was a funny old day today, equinox weather is kicking in. Every time I headed out to get something done a rain squall would blow through and get everything wet and cold.
I did manage to get the diagonal strap bracing onto the high wall that I finished framing last week.
IMG20260901165540.jpg
The rest of the day was spent writing a list of and doing sketches of all the flashings that we will be needing soon, also doing some research on dimensions for the roller doors. I will be framing up the walls that the doors hang off next, so better be sure of sizings before we start chopping up lengths of timber.
I also made contact with the guy that will be manufacturing the continuous spouting for us. He will be here later in the week. I figured that I would rather have the spouting made and sitting around until I need it, rather than have water running all over the ground making a big muddy puddle.
 

Prospecter

Well-known member
Joined
May 16, 2015
Messages
2,547
Location
Maine
Nice work! I like that style barn. Around here we call that a "Monitor Barn." Great design for a one man construction crew. For all the hassle, I still much prefer working alone. Always have.

Looks like you might be mostly finished with the heavy work before your hot weather sets in.
 
OP
W

Woodboxkiwi

Well-known member
Joined
Jun 10, 2026
Messages
66
Nice work! I like that style barn. Around here we call that a "Monitor Barn." Great design for a one man construction crew. For all the hassle, I still much prefer working alone. Always have.

Looks like you might be mostly finished with the heavy work before your hot weather sets in.
We are hoping to have a roof on within the next month. Once the trusses and rafters go on things will speed up.
Thanks for the support.
 
OP
W

Woodboxkiwi

Well-known member
Joined
Jun 10, 2026
Messages
66
Another day, somewhat interrupted by a trip to town for hardware, but some progress all the same.
The front wall has a pair of manufactured studs made from 3 8x2 bolted together. Yesterday I made the first of the pair and stood it up. Today I added the girts and noggs, then made the second stud for tomorrow.IMG20260903170834.jpg
 
OP
W

Woodboxkiwi

Well-known member
Joined
Jun 10, 2026
Messages
66
In today's episode we stood up the second manufactured post and framed in the gaps. IMG20260904152739.jpg
Coming up after the break, we elevate the top plate into position, followed soon after by a pair of under studs and door opening lintel with in-fill framing......stay tuned!
 
OP
W

Woodboxkiwi

Well-known member
Joined
Jun 10, 2026
Messages
66
On today's episode, we review what happened yesterday, then look ahead to what might happen tomorrow and maybe even cover something that did happen today!
Most of the day was spent on one single piece of wood!
The top plate across the front of the high roof section was a mission to get into position. Persistence paid dividends though in the end.


IMG20260905173425.jpg
I also took some time to clamber about and took some diagonal measurements across the highest points of the center part of the structure.
Happy to report that the results were less than 5mm different over 12 meters!
IMG20260905173431.jpg
The lintel for the big door opening is in, with a little bit of framing left to finish it.
 

Attachments

  • IMG20260905173403.jpg
    IMG20260905173403.jpg
    887.4 KB · Views: 6
To avoid these ads, REGISTER NOW!
OP
W

Woodboxkiwi

Well-known member
Joined
Jun 10, 2026
Messages
66
We had a visit today from the continuous spouting guy. He rocked up with the dies and rollers to manufacture our 4 lengths of spouting.
IMG20260907140118.jpg
The lengths are all made with ends and drain holes ready to hang on the building when the time comes.
IMG20260907140141.jpg
I even started the lawns between the showers.
 
OP
W

Woodboxkiwi

Well-known member
Joined
Jun 10, 2026
Messages
66
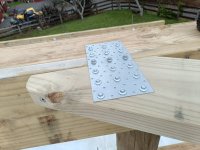
Today I added the second 2 braces required for the top of the high roof to walls. They are 8x2s on the flat that tie the end wall to the sides.IMG20260909150829.jpg
Each end is held with a 150mm 14 gauge screw and nail plates both sides.
IMG20260908134717.jpg
IMG20260908134708.jpg
IMG20260908134712.jpg
On that note, I am running out of walls to build, so tomorrow we order the steel beams and trusses.
 
OP
W

Woodboxkiwi

Well-known member
Joined
Jun 10, 2026
Messages
66
A trip to town today to grab some more sticks of wood and order steel beams and trusses.
IMG20260910172831.jpg
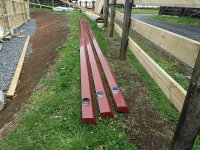
First up was the 2 x 250 UB37 steel beams. They will arrive overnight to the yard probably then I will organize hiab transport to deliver them to me.

IMG20260910172944.jpg
Next stop was at the truss manufacturer to place an order for 14 trusses. They will be available in a couple of weeks for me.

IMG_20260910_173616.jpg
Last stop for the day was to pick up more lumber, 6x2s and 8x2s, then home to start chopping it up and screwing it on.
I have added a 6x2 on edge on top of the top plate for the rafters to finish up against.

IMG20260910120544.jpg
 
OP
W

Woodboxkiwi

Well-known member
Joined
Jun 10, 2026
Messages
66
A bit of a tidy up on site today. I have the trailer loaded with waste to go to the dump tomorrow. I also moved the roller doors onto the floor from the driveway to make room for the steel beams when they arrive next week.
 
OP
W

Woodboxkiwi

Well-known member
Joined
Jun 10, 2026
Messages
66
A trip to the dump this morning, then this afternoon I set about chopping big bits of steel into smaller bits, so I can weld them together into a couple of big bits.
IMG20260912145019.jpg
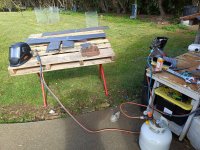
My out door work bench is highly technical but oddly effective!
IMG20260912162851.jpg
I will tack weld these stacks together to drill a bunch of holes at once. These are the upstands that the rafters will bolt to. They are going to be welded to the steel beams.
IMG20260912162958.jpg
These longer ones are the ends of the beams, incorporating the rafter plate above and the pole attachment below and the end cap of the beam in the middle.
 
OP
W

Woodboxkiwi

Well-known member
Joined
Jun 10, 2026
Messages
66
A bit of a miserable rainy Sunday here, so I thought I would do a quick review of the last 8 months of work since we started on the project.
IMG20251110143135.jpg
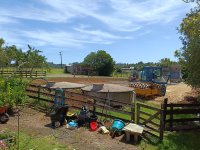
In the paddock we had a few fruit trees and the water tanks.IMG20260112135950.jpg
Sprayed the grass.IMG20260114090043.jpg
Excavation begins.
IMG20260128094504.jpg
More excavation and filling.IMG20260224130724.jpg
Compacting fill and driveway.
IMG20260618151133.jpg
Drilling holes and standing poles.
IMG20260808123007.jpg
Floor down, first coat of epoxy on, walls started.
IMG20260913124856.jpg
Today, walls nearly all done ready for trusses and steel beams to be lifted into place.
 
OP
W

Woodboxkiwi

Well-known member
Joined
Jun 10, 2026
Messages
66
I spent a few hours yesterday standing at a pillar drill, boring holes in stacks of 10mm plates. After which I knocked the tack welds off each stack and tidied up the edges before painting them with a single pot steel primer.
Today I am waiting for the delivery of two 12m lengths of 250 UB to which I will be welding the 10mm plates after a quick coat of primer.
Until it arrives I guess that I will have to hurry up and wait!
IMG20260916170225.jpg
22 rafter attachment plates and 4 end plates, primed and ready for action.
 
OP
W

Woodboxkiwi

Well-known member
Joined
Jun 10, 2026
Messages
66
A few moments later.........

IMG20260917144308.jpg

The truck arrived carrying the steel beams.
IMG20260917145308.jpg
Lucky he has a nice long reach on the hiab...IMG20260917145356.jpg
...so he could place them at the opposite end of the shed for me to work on.
IMG20260917151306.jpg
Placed on the dunnage ready to start work....
IMG20260917162610.jpg
.....a few moments later! First coat of primer on and protection from the rain.
The delivery may have been later than I was told, but on the plus side of the ledger....
...I got the lawns mown while I waited!

Tomorrow we cut, grind and weld, so long as the weather plays ball!
IMG20260917162855.jpg
 
To avoid these ads, REGISTER NOW!
Top Bottom