To avoid these ads, REGISTER NOW!

Below 265 SQ/FT 10' x 22' Project – ‘Officina di Attrezzi Veloce’

All workspaces below 265 squarefeet.

fourmotioneer

Well-known member
Joined
Mar 19, 2015
Messages
217
Location
Ann Arbor, MI
Re: 10x22 Project - Operation 'Officina Desmo'

Great build here, and I like the Ducatis. I work on four-wheeled Italians here in Detroit area.

I just got a place where the existing garage has a similar setup. 3 cars worth of space but with a wall between the 20' wide section and the 12' wide section. Previous owner used the smaller space for motorcycles like you do. Unfortunately, I'm thinking that I'll need to remove that wall to make room for an Alfa or two.
 
To avoid these ads, REGISTER NOW!
OP
T

Trapps

ALLIANCE MEMBER
Joined
Feb 10, 2017
Messages
2,002
Location
The Detroit Zoo
Re: 10x22 Project - Operation 'Officina Desmo'

Great build here, and I like the Ducatis. I work on four-wheeled Italians here in Detroit area.

I just got a place where the existing garage has a similar setup. 3 cars worth of space but with a wall between the 20' wide section and the 12' wide section. Previous owner used the smaller space for motorcycles like you do. Unfortunately, I'm thinking that I'll need to remove that wall to make room for an Alfa or two.


Thanks Graham! How's your GTV6 these days? I absolutely love those...
 

fourmotioneer

Well-known member
Joined
Mar 19, 2015
Messages
217
Location
Ann Arbor, MI
Re: 10x22 Project - Operation 'Officina Desmo'

Thanks Graham! How's your GTV6 these days? I absolutely love those...

I'm down to just the Milano! Sold the GTV6 to a buddy at work. Should be driving my Milano to work in Ferndale once this all blows over.

Dry clutches and desmo :bowdown:
 

nicholam77

Well-known member
Joined
Dec 18, 2016
Messages
2,669
Location
Minneapolis, MN
Re: 10x22 Project - Operation 'Officina Desmo'

After:
medium800.jpg

Looking so tidy. Your space always makes me wish I had done a similar thing with the HF chests.

:thumbup:
 
OP
T

Trapps

ALLIANCE MEMBER
Joined
Feb 10, 2017
Messages
2,002
Location
The Detroit Zoo
Re: 10x22 Project - Operation 'Officina Desmo'

Looking so tidy. Your space always makes me wish I had done a similar thing with the HF chests.

:thumbup:


Lol, timely photos. I assure it is not always tidy!

I picked up some used flooring tiles at a solid bargain:
51156927749_36b55fbef8_h.jpg

51156372203_c8f2c6afd2_h.jpg
51155475402_4b666c3f43_h.jpg


I now have some time on my exceedingly well washed hands and have started to lay them:
51107116609_b7601f349c_h.jpg


Not all were in perfect condition:

51106874797_9f2167a6ad_h.jpg


But a minute with a Dremel and the tabs can be cleaned up enough to sit properly. I figure if at least 3 tabs per side are good, the floor should remain stable in my non commercial environment.

Color is more variable than I'd like, but at $1 per tile + all the edging I'd need for free, I can't, won't complain. I'm using the Dremel to grind off the tabs. I am using a jig saw on a medium-slow speed with a fine cut wood blade to make shaped / larger cuts. So far so good.
 
Last edited:

mike93lx

ALLIANCE MEMBER
Joined
Dec 9, 2013
Messages
37,617
Location
Richmond, VA
Re: 10x22 Project - Operation 'Officina Desmo'

Is the color variation just dirt? Have you tried cleaning them?
 
OP
T

Trapps

ALLIANCE MEMBER
Joined
Feb 10, 2017
Messages
2,002
Location
The Detroit Zoo
Re: 10x22 Project - Operation 'Officina Desmo'

Is the color variation just dirt? Have you tried cleaning them?

Funny you should ask :thumbup:

About 75% dirt & 25% different lots is my completely unprofessional opinion...more on that below.

After installing the bulk of the remaining tiles I ended up here:
51107411926_e54736cba7_h.jpg

The edging strip was nearly a perfect fit to the garage door without trimming. :bounce:

51157988321_da7ee7f645_h.jpg

I still have the strip down the east edge to do; each piece needs to be cut so I'll need some time.

Then I cleaned them in a 3 step process:

1. 409 and a scrub brush
2. Hot water and a scrub brush
3. Hot water and a clean rag (rinsed often)

The test:
51106797217_43a4a6f320_h.jpg

And the result:
51159099350_7f4d105679_h.jpg

:beer:
 
Last edited:
OP
T

Trapps

ALLIANCE MEMBER
Joined
Feb 10, 2017
Messages
2,002
Location
The Detroit Zoo
Re: 10x22 Project - Operation 'Officina Desmo'

Sidebar

I am a fan of https://www.motoart.com/ and have toured their new (ish) facility once and the old one in El Segundo several times. Once I was fortunate enough to have a tour from one of the owners, Dave Hall. A super nice guy, he really provided an in depth look at the facility and product they had accumulated over the years - impressive is an understatement. His business card is laser cut aluminum:
51158310263_b4d24b1853_h.jpg


10 years ago I bought a propeller off of eBay. It sat untouched for a long time. Lately I have begun the simple task of turning into a sort of conversation piece.

medium800.jpg

large.jpg


And the process so far...

Front as received:
51106866267_c6a7752077_h.jpg


Rear as received:
51107340268_87e49f85b3_h.jpg


The ****:
51107446186_73456ae4cf_h.jpg


I had to cut off the piston rod (had to look that one up); I used a Hackzall, then a Dremel followed by a random orbit sander w/ 220 and finally a wire wheel:

51157234155_97ccab1dc7_h.jpg

51157234190_0abf772b74_h.jpg

51107195004_6f40f6e0f7_h.jpg


Then I began a series of sanding on the back side (the front remains un touched) 220, 320, Scotch-Brite:
51158871849_0026658c7d_h.jpg

51107371961_0e87b7084f_h.jpg


So now we have to decide a couple of things:

1. Keep a matte finish or go full mirror polish?
2. Paint the tip a high contrast color. If yes which one?

Notes: the blade is pitted pretty good near the tip, but I don't think you see it from 5 feet away. Paint would certainly help here. It will live on the mantle so that's the color environment (natural black walnut and field stone).
51158070226_1b6397035a_h.jpg


Time to have a few cocktails and then have my wife tell me what I decided :lol:.
 
Last edited:

bj383ss

Well-known member
Joined
Sep 29, 2011
Messages
3,166
Location
TX
Re: 10x22 Project - Operation 'Officina Desmo'

That is going to be sweet. I vote for a bright color on the tip.

Bret
 

nicholam77

Well-known member
Joined
Dec 18, 2016
Messages
2,669
Location
Minneapolis, MN
Re: 10x22 Project - Operation 'Officina Desmo'


Damn, that looks cozy. :D

That mantel is really cool!

Garage floor tiles are looking good. I enjoyed the sidebar. Not that it really matters but my vote would be to keep the matte finish on the propeller v.s. polish to a shine. Is it going to stay on the mantel? I think a high-contrast color would be cool, not sure what to suggest, maybe just that it isn't too intense or in that room it might steal too much of your eye and put all the focus on it vs. just being interesting (if it was a really bright red for example). Maybe this is boring, but I think even an off-white could look good like the original?

Excited to see how it turns out whatever direction you choose.
 
OP
T

Trapps

ALLIANCE MEMBER
Joined
Feb 10, 2017
Messages
2,002
Location
The Detroit Zoo
Damn, that looks cozy. :D

That mantel is really cool!

Garage floor tiles are looking good. I enjoyed the sidebar. Not that it really matters but my vote would be to keep the matte finish on the propeller v.s. polish to a shine. Is it going to stay on the mantel? I think a high-contrast color would be cool, not sure what to suggest, maybe just that it isn't too intense or in that room it might steal too much of your eye and put all the focus on it vs. just being interesting (if it was a really bright red for example). Maybe this is boring, but I think even an off-white could look good like the original?

Excited to see how it turns out whatever direction you choose.

The mantle was a project for sure, but both the Mrs. and I are very happy with it.
Before:
51087995397_5d400cc302_h.jpg
At 10' long, 2" thick and ~14" tall, it is heavy. I built a fixture to hold it steady during mounting:
51158909524_2f51357a23_h.jpg

51158909534_85ee1a88aa_h.jpg

51159234265_d236bf21c1_h.jpg

51002970284_a7bd52643c_h.jpg

51158909509_b46316d3fd_h.jpg

To mount it I stripped the face off of the original mantle, reinforced it with some heavy cabinet screws through to studs and then sunk some hefty lag screws into pre drilled holes from the back side.

On the prop, matte it is. Colors for tips include White, Yellow, Red, and perhaps a navy/cobalt blue (think WWII F4U Corsair). We'll mock them up and try before actual painting.


Title changed.

Thank you very much!
 
Last edited:

amkluttz

Well-known member
Joined
Sep 8, 2014
Messages
279
Location
Concord, NC
I was going to say yellow or orange for the tip.

I'm liking the floor tiles in the garage. Did you ever finish the small strip closest to the house?
 
OP
T

Trapps

ALLIANCE MEMBER
Joined
Feb 10, 2017
Messages
2,002
Location
The Detroit Zoo
I was going to say yellow or orange for the tip.

I'm liking the floor tiles in the garage. Did you ever finish the small strip closest to the house?

Yellow is on the sort list. Not yet on the tiles, but I've been distracted...:)

The south end of the work bench was planned with an eye towards specific items and a way to preserve a bit of width in a narrow place. After I relocated the HF44's, I looked again at my plans and revised them. Originally I had planned on the Small Parts Storage Boxes (SPSB) being housed in a rack on casters. That would have meant a 'garage' for the cart would need to be located somewhere. I considered use and decided I'd really only be using them in close proximity to the garage, and if I needed to move I could take an insert or a whole box easily enough. Looking at a more dedicated layout (specific spaces for specific items - like the L-Boxxes) I decided to create a tall-ish cabinet at the end of the bench to mount the SPSBs in.

Before:

51107116599_e824a5b672_h.jpg

51172419513_9d621f9250_h.jpg


First step was to remove the 45° end and then extend the base:

51172419513_9d621f9250_h.jpg

51158239488_91221eafbd_h.jpg

51108142750_4f1017b705_h.jpg


I keep looking at track saws, and what other GJers are doing with and saying about them, but just cant go there on cost benefit analysis. Yet. So it's old school for me when ripping plywood:

51158788219_0a5fafaa5b_h.jpg


I'm sticking with 23/32 BC ply over carefully selected lumber, treated on floor, non-treated above. I'm also adding jack studs at key points to manage the load. That Matco box weighs a ton and it's currently empty!

51158000801_0972a3f056_h.jpg

51157338997_693acdbdd3_h.jpg


Here you can see where the SPSBs will go:
51158787939_62cdc38082_h.jpg


Imagine a similar but thinner wall on the left forming the cabinet. There will be 9 SPSBs from the bottom up, then 2 shelves above. The slides are 14" over-travel medium duty 100Lbs. from Rockler (currently back-ordered :sad: ) which means the drawers will pull out far enough to open the container lids completely without having to remove the SPSB from the slider drawers.

large.jpg


Hope all y'all are safe and well. :beer:
 
Last edited:

setup

Banned
Joined
Apr 10, 2020
Messages
9
Location
Portugal
Re: 10x22 Project - Operation 'Officina Desmo'

For years I wanted a wood propeller for my living room, but now I think I want a metal one! This looks so cool!!
 

Jeff Ivers

Well-known member
Joined
Apr 9, 2010
Messages
2,557
Location
Oklahoma
That is a beautiful work space you have created. I really like the brick wall and wood ceiling. How do you access the trundles now? Didn't they roll out from behind the red tool boxes?
 
OP
T

Trapps

ALLIANCE MEMBER
Joined
Feb 10, 2017
Messages
2,002
Location
The Detroit Zoo
That is a beautiful work space you have created. I really like the brick wall and wood ceiling. How do you access the trundles now? Didn't they roll out from behind the red tool boxes?

Tool Trundles remain but will now be accessed only from the left side. My (as yet unproven :headscrat ) idea is to connect them like a train with a hook and eye configuration. What I have not determined yet is if I'll have to disconnect the 'Engine' and remove it to get the 'Caboose' out all the way. A bit of a PITA, but the items in the 'Caboose' will be infrequently used items so I cant imagine accessing it more than a handful of times a year.
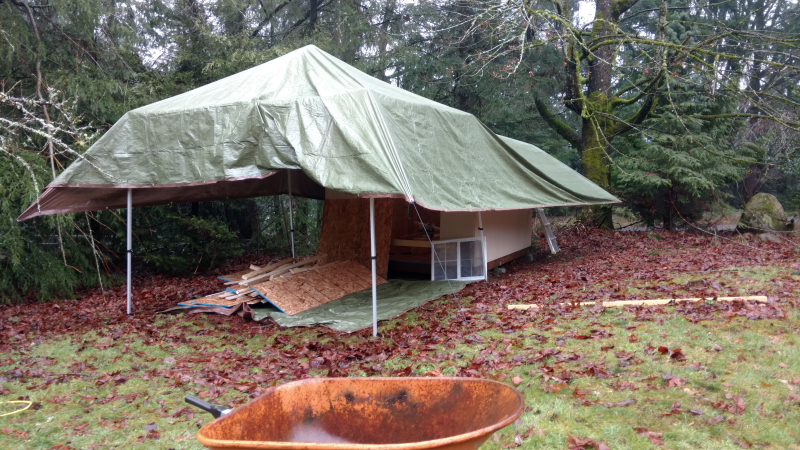
I'll take pics once completed. :beer:
 
To avoid these ads, REGISTER NOW!

bikerneil

Well-known member
Joined
Feb 20, 2016
Messages
71
Location
Carlsbad
Very nice space and great documentation along the way.

If you have any stubborn stains on that red floor, try a spray bottle with Purple Power. It is the BEST for cleaning that floor.

Keep up the great work!
 

GeddyT

Well-known member
Joined
Jun 17, 2015
Messages
1,241
Location
Bellingham, WA
Just finished the whole thread (couldn't sleep last night for some reason), and I've been taking notes along the way:

1.) I have the same HF44 roller cab, and that's a really cool idea building them into a workbench. I'm always impressed with how people on this forum make use of every inch of space that they have. That exposed brick is awesome, too.

2.) Cool bikes! I've owned a few Ducatis that weren't my favorite, but I rode a friend's newer one, and it was amazing. They've really come a long way.

3.) Early in the thread, there's a Monster tank hanging from the wall. What was the plan with that?

4.) I have one of those DeWalt organizers, too, and each bin is filled with a different kind of leftover screw, just like yours. I hadn't thought of turning them into drawers, but I think I'm going to steal that idea from you.

5.) We have one shed-building trait in common: EZ-Up canopies to keep the rain out during construction!

2020-04-12+shed.jpg


Once I got three walls up, I took it further and covered the whole build site in a tarp. It was absolutely pouring down rain the entire weekend I built mine.

I've hated my shed since the day it arrived. I ordered a shed kit from Costco because I needed to get the shed up quickly and figured "kit" denoted a fast build. I quickly found out that it did anything but, and had I just built it from scratch, it would have been bigger, WAY more durable, cheaper, and probably have gone up quicker, too. I could frame a whole shed in less time than it took to unpack all of the boxes and figure out what was what. Anyway, I'm envious of how much bigger and nicer your shed is looking like it's going to be and regret not doing something similar!

6.) I, too, have a truck with a 6.5' bed. I've hauled 20' FJ fascia boards home in it without a trailer. That's what the back window is for!...

7.) Floor tile looks great. Question, though: How do you handle liquid spills with that kind of flooring? Seems like you wouldn't be able to just mop up.

Anyway, keep up the great work. I'll be following along.
 
OP
T

Trapps

ALLIANCE MEMBER
Joined
Feb 10, 2017
Messages
2,002
Location
The Detroit Zoo
Very nice space and great documentation along the way.

If you have any stubborn stains on that red floor, try a spray bottle with Purple Power. It is the BEST for cleaning that floor.

Keep up the great work!

Thanks for props and the suggestion; I just ordered a gallon from Amazon for $16.27!

Just finished the whole thread (couldn't sleep last night for some reason), and I've been taking notes along the way:

1.) I have the same HF44 roller cab, and that's a really cool idea building them into a workbench. I'm always impressed with how people on this forum make use of every inch of space that they have. That exposed brick is awesome, too. Several threads and builds here using HF44's built into a bench. Look for SteveO, Beepinajeep, Lucky13 and several others...I regret not building it with a toe kick, and I've revised the layout, but it's working well for me. I lack metal working tools and skills but would go that route for many things if possible.

2.) Cool bikes! I've owned a few Ducatis that weren't my favorite, but I rode a friend's newer one, and it was amazing. They've really come a long way. I have not had any bad experiences. Maintenance is key and can be costly compared to others options, but the performance is stunning and there is an emotional element that is very satisfying

3.) Early in the thread, there's a Monster tank hanging from the wall. What was the plan with that? It was a short lived artistic concept. I've since passed it on.

4.) I have one of those DeWalt organizers, too, and each bin is filled with a different kind of leftover screw, just like yours. I hadn't thought of turning them into drawers, but I think I'm going to steal that idea from you. In all fairness you'd be inspired by this thread cabinet for small parts storage cases which is where I stole, ah, was inspired, to design my set up

5.) We have one shed-building trait in common: EZ-Up canopies to keep the rain out during construction! anything to keep progress rolling when I'm in the zone, also works for snow:)

2020-04-12+shed.jpg


Once I got three walls up, I took it further and covered the whole build site in a tarp. It was absolutely pouring down rain the entire weekend I built mine.

I've hated my shed since the day it arrived. I ordered a shed kit from Costco because I needed to get the shed up quickly and figured "kit" denoted a fast build. I quickly found out that it did anything but, and had I just built it from scratch, it would have been bigger, WAY more durable, cheaper, and probably have gone up quicker, too. I could frame a whole shed in less time than it took to unpack all of the boxes and figure out what was what. Anyway, I'm envious of how much bigger and nicer your shed is looking like it's going to be and regret not doing something similar!

6.) I, too, have a truck with a 6.5' bed. I've hauled 20' FJ fascia boards home in it without a trailer. That's what the back window is for!... I've done this too.

7.) Floor tile looks great. Question, though: How do you handle liquid spills with that kind of flooring? Seems like you wouldn't be able to just mop up. My plan, ill conceived as it is, is to not spill anything.:lol:

Anyway, keep up the great work. I'll be following along.

Thanks for the positive comments!:beer:
 

grease_monkey

Well-known member
Joined
Jun 13, 2010
Messages
88
Location
Mass.
Glad I found your thread! I'm getting some inspiration from your built-in work bench setup in a small garage. Looks like a really clean setup.
 
OP
T

Trapps

ALLIANCE MEMBER
Joined
Feb 10, 2017
Messages
2,002
Location
The Detroit Zoo
Glad I found your thread! I'm getting some inspiration from your built-in work bench setup in a small garage. Looks like a really clean setup.

Thanks grease_monkey!

Update finally:

The Tool Trundles are important for the ‘Space Planning & Utilization Directive’ in my shop, (220ft^2 or ~0.4m^2). 'SPUD' really means my goal is to find a balance of maximum space utilization against cost, simplicity and my skill set. I was able to develop the previously mentioned ‘train’ configuration which does embrace SPUD. The train is only accessible from the south side now, so only one handle. For the purpose of discussion, the larger trundle is the ‘engine’ and the smaller one is the ‘caboose.’

51046886901_1c8284e5e2_h.jpg


Some eye lag bolts and screw links act as the coupling device. I used 3 to ensure load was distributed as the weight is not insignificant once loaded up.

51061510047_efaf908ae1_h.jpg

51158248338_9a60516c99_h.jpg

51159120220_ed7b698148_h.jpg

51158008946_dede337ea2_h.jpg


A rigid coupling would work better for entry as the eye/link combo flops around a bit:

medium800.jpg


Something I'll think about over time, and Scotch.:thumbup:

I also completed the ‘prototype’ phase of some L-Boxx Ports I’ve been planning for a while. They are not pretty or super-efficient, but they are functional. I do have a plan to redo them once I get a Router Table. Being honest, it’ll be some time as I often trade focus from one project to another once a certain level of functionality is obtained (ask my wife about bathroom trim; on second thought, please don’t :lol_hitti).

Bosch / Sortimo updated the design of the L-Boxxes recently. The new ones are 100% reverse compatible, so no real issues other than my Closeted OCD being triggered. New on the left, old on the right:

51158001431_447f9a7521_h.jpg

51107364648_e17c2befa9_h.jpg

51158240078_4f0834b12f_h.jpg


They also have the same exterior dimensions so I’m able to use the same sizing for the ports which was my biggest concern upon receipt of the newest Boxx. Here are the Boxxes in their ports:

51157339682_aac7938ca9_h.jpg

51046947881_14bfbd1378_h.jpg

51159120930_cc63b8ff4a_h.jpg

51158796339_b4904834dd_h.jpg


Each of the upper L-Boxxes sits on a pair of clear pine 1x rails with a 45° mitre at the entrance. I have zero explanation for this. It just seemed aesthetically logical. :tard: The bottom L-Boxx simply sits on the plywood base. The 1x is stacked on 2x, and they are only ~14" deep, so sag should not be a concern. I also store less frequently used items behind the portal, in front of the Trundle Engine. That space is about 10" wide, so it is quite useful. Yes, I do have to remove those things (L-Boxxes and anything stored behind them) to access the Trundle Train (TT). But, since the TT is only needed infrequently it shouldn’t be a problem.


Completing this phase allowed me to move in the DeWalt Tough Boxes, freeing up even more floor space. I'm currently wrestling with the value of developing ports for those as well....


:beer:
 
Last edited:

bj383ss

Well-known member
Joined
Sep 29, 2011
Messages
3,166
Location
TX
Man this is just fantastic. Someday I will get all my space used to this next level space usage you are achieving.

Bret
 

amkluttz

Well-known member
Joined
Sep 8, 2014
Messages
279
Location
Concord, NC
Bosch / Sortimo updated the design of the L-Boxxes recently. The new ones are 100% reverse compatible, so no real issues other than my Closeted OCD being triggered. New on the left, old on the right:

medium800.jpg


The Bosch logo being in the opposite orientation would bother me more than the differences in the boxes. The nice thing is they aren't seen when they are stored.


I may have missed this but have you ever thought of finishing the raw wood of the work bench? I'm curious if you could get ebony stain to be dark enough to appear black instead of dark brown and still enjoy some of the grain in the wood. Minwax makes ebony in their Polyshades line which is supposedly a stain and poly all-in-one. That or painting them black, gray or white would fit nicely with the red.
 

mfg0772

Well-known member
Joined
Aug 8, 2018
Messages
146
Location
Northeast CT
Just caught up on your thread. Your making good use of limited space. And love the shed. I'm looking to replace mine prefab shed in the future with something that can be both storage and pool changing area.

Keep on posting!
 
OP
T

Trapps

ALLIANCE MEMBER
Joined
Feb 10, 2017
Messages
2,002
Location
The Detroit Zoo
The Bosch logo being in the opposite orientation would bother me more than the differences in the boxes. The nice thing is they aren't seen when they are stored.

I may have missed this but have you ever thought of finishing the raw wood of the work bench? I'm curious if you could get ebony stain to be dark enough to appear black instead of dark brown and still enjoy some of the grain in the wood. Minwax makes ebony in their Polyshades line which is supposedly a stain and poly all-in-one. That or painting them black, gray or white would fit nicely with the red.

Long term, all the raw wood will get a clear, matte polyurethane. The exposed 2x and ply edges will all be concealed with hardwood (probably maple) trim. The goal is to keep it on the bright side to help make the space 'feel' larger.

Moving on to three new projects before finishing the one you're on?

Never heard of it...

Amen to that... :beer:

Just caught up on your thread. Your making good use of limited space. And love the shed. I'm looking to replace mine prefab shed in the future with something that can be both storage and pool changing area.

Keep on posting!

It is a small space; I'd love to have a place big enough to have fully stocked separate a wood shop, a bike house/lounge AND park 3 cars inside. Not going to happen, so here I sit trying to fit the proverbial 10Lbs of S%$T in a 5Lb bag...


On the plus side this afternoon I was able to finally finish the floor tile!

51159120835_bf460d057f_h.jpg
51174721259_e68bafd26a_h.jpg
51174155943_c0c4af1d6c_h.jpg
51158009526_367fe5e5e8_h.jpg
51174155923_f7b2860f2f_h.jpg
51174155953_ec55743945_h.jpg
51173924941_4406652af0_h.jpg


Thanks all for the positive comments. I feel like I'm finally getting somewhere with this project. And, with weather breaking finally here in Michigan, I can get back to the shed which really only needs a roof (currently tarped), siding and electrical.
 
Last edited:

mike93lx

ALLIANCE MEMBER
Joined
Dec 9, 2013
Messages
37,617
Location
Richmond, VA
It is amazing how good it feels to get a space clean and organized.

My garage is an absolute **** show right now and I need to fix that. No time to build benches and cabinets, so I think I need to **** it up and buy something like a new age setup
 

nicholam77

Well-known member
Joined
Dec 18, 2016
Messages
2,669
Location
Minneapolis, MN
I also completed the ‘prototype’ phase of some L-Boxx Ports I’ve been planning for a while. They are not pretty or super-efficient, but they are functional. I do have a plan to redo them once I get a Router Table. Being honest, it’ll be some time as I often trade focus from one project to another once a certain level of functionality is obtained (ask my wife about bathroom trim; on second thought, please don’t :lol_hitti).


You are not alone! I've left unfinished areas of trim in my house, I'll admit (this is a safe space, right?), for almost a year just because every time I had an opportunity, there was something else more exciting to work on.

I think the L-Boxx ports look great. Nice and tidy.

Bosch / Sortimo updated the design of the L-Boxxes recently. The new ones are 100% reverse compatible, so no real issues other than my Closeted OCD being triggered. New on the left, old on the right:

medium800.jpg

Woah, that is almost worse than the Systainer redesign! Are there functional differences or did they just switch up the looks for no reason? At least the fronts look pretty similar. It would bother my "OCD", too, but at the end of the day it's a tool box and at least it's the same colors.

If you're looking for L-Boxx's -- this deal is sold out at the moment, but if you're interested maybe keep an eye on this? Great price for an L-Boxx 4 + an otherwise quite expensive Bosch anti-static vacuum hose.

:beer:
 
OP
T

Trapps

ALLIANCE MEMBER
Joined
Feb 10, 2017
Messages
2,002
Location
The Detroit Zoo
Looking really great. Such a cool space and so well designed and implemented!
m.

Thanks for the kind words. Learning as I go here which means revisions and changes, but it's definitely moving in a direction I am happy with!

It is amazing how good it feels to get a space clean and organized.

My garage is an absolute **** show right now and I need to fix that. No time to build benches and cabinets, so I think I need to **** it up and buy something like a new age setup

I do enjoy having a place for every thing and every thing in its place. I have not posted pics of the craziness but rest assured, there are days I walk in and have to clean up just to see the mess I've created.

...

Woah, that is almost worse than the Systainer redesign! Are there functional differences or did they just switch up the looks for no reason? At least the fronts look pretty similar. It would bother my "OCD", too, but at the end of the day it's a tool box and at least it's the same colors.
...

:beer:

The biggest difference is that the connection point was moved from the sides of the box to the lid. This allows a box to be opened even if another is mated to its top. Not sure I would ever do this, unless perhaps the top box was quite light. It does now place the load on the hinges and hasps instead of the 'frame' of the box itself. Some reviewers say the structure of the new box in the corners is not as structurally sound as the earlier generation. I have yet to see a difference, but I'm still limited in use with the new one. I've had it for a few weeks now and I'm done losing sleep over it. Almost. :(


Cheers all!
 
OP
T

Trapps

ALLIANCE MEMBER
Joined
Feb 10, 2017
Messages
2,002
Location
The Detroit Zoo
I've been busy. At home, at work and finally, in the ongoing, evolving and slooooooowly progressing project that is my garage.

I've been planning the small parts storage boxes for a while now (see post #33 from Dec/18). Garage Journal has provided so much inspiration. I had time to plan as I added parts over time. I wanted something sturdy as the boxes get heavy (I weighed the heaviest and it's tipping in at just over 22Lbs.). There are 9 storage boxes, each riding on a fairly solid drawer. There is a decent sized cubby at the top and some storage potential behind the drawers I have not yet planned out.

Before:

51159120815_085a673169_h.jpg

After:

51041230273_d438634624_h.jpg


Over Travel slides allow the lids to fully open and stay up while I am digging...

51046894671_5f5c9a0428_h.jpg

Drawer bottoms are 1/2" baltic birch, rails are poplar. Screwed and glued.
I used Titebond III and some 1.25" construction screws, each with a pilot hole and countersunk.

51174788914_cba1641e59_h.jpg

51175091190_4c55bca77e_h.jpg

51175091275_5840b29c1c_h.jpg

51175091190_4c55bca77e_h.jpg

Slides are 14" Over travel Medium Duty units from Centerline (sourced from Rockler)

I grooved the rails to accept 'flanges' on the sides of the DeWalt Deep Pro Organizers

51046103953_b7c7e7355c_h.jpg

51173994606_a9f85810f2_h.jpg

51173994506_9940f30529_h.jpg

I cut the 'grooves' with a mitre saw. I realized afterwards I could have set a stop to control depth. So, some of the cuts are not perfect. For depth or placement. A jig would have helped here...Still they work well, hold the boxes in place and release easily if I want to take it with me.

The handles are situated so that you never actually touch the drawers. Still, all the rough and sharp edges got a once over with 150 grit.
Thanks to all who posted and inspired! I love this place! :beer:
 
Last edited:

mike93lx

ALLIANCE MEMBER
Joined
Dec 9, 2013
Messages
37,617
Location
Richmond, VA
Looks great. My setup is much simpler, but adding storage for those parts bins has been super helpful in my garage. More would be great.
It's well worth a couple hundred bucks for the organization it all offers
 
OP
T

Trapps

ALLIANCE MEMBER
Joined
Feb 10, 2017
Messages
2,002
Location
The Detroit Zoo
Got the place tidied up enough so that I do not go too far into my OCD stress zone when I walk in. I completely reorganized the inside of the black storage cabinet to accommodate the router table.

51159120835_bf460d057f_h.jpg


I can now return to other unfinished projects, namely, the shed. I borrowed that big flatbed trailer again to pick up the roofing for the shed. Pro Rib from Menards, 14' off the shelf in Charcoal Grey. Pretty cool they stock this stuff. J-Channel too.

51041233598_b38493face_h.jpg

Note the saw chips on the ground. I dropped a couple of large-ish (55' & 60') pine trees and ripped out a section of Buckthorn about 15' deep and x 75' long across the back of the lot. Enough debris to fill a 30 yard roll off after I sliced and diced the contents 11 times by climbing into the container, standing on top of the pile and carving it up with the small saw.

The debris pile:

51237030504_3a704da486_h.jpg

The roll off at about 1/3 full:

51046834121_8dc72db2d1_h.jpg

Missed my targets by 6":

51158021781_2f2e5f8b53_h.jpg

51158809454_858e6f45d7_h.jpg

The larger pine:

51237039229_7fe748dc32_h.jpg

The noisy bits (I frikin' love these saws! :bounce: ):

51107358888_889176a7f3_h.jpg

51235530372_15317d3e4c_h.jpg


Gratuitous action shot:

51237046689_18c37a90bb_h.jpg

:beer:
 

Attachments

  • 51046980657_95f915c130_h.jpg
    51046980657_95f915c130_h.jpg
    465.9 KB · Views: 7
Last edited:

nicholam77

Well-known member
Joined
Dec 18, 2016
Messages
2,669
Location
Minneapolis, MN
The workshop is looking really, really tidy. Great job on those organizer boxes. Seeing a bunch of uniform built-in boxes on drawer slides makes me very happy for some reason. Smart with the grooves, too.

Looking forward to more progress on the shed!
 
OP
T

Trapps

ALLIANCE MEMBER
Joined
Feb 10, 2017
Messages
2,002
Location
The Detroit Zoo
Great job!

Thanks!!!

Looks great. My setup is much simpler, but adding storage for those parts bins has been super helpful in my garage. More would be great.
It's well worth a couple hundred bucks for the organization it all offers


Thanks Mike! Small space + Marginal (overbearing?) OCD means it must be organized in there. I lived with the boxes simply stacked for 9+ months. That took up 1/2 the physical space, but was a PITA if I needed to access the 3rd box down. In this case I traded space for functionality.

I have plans, concepts really, still floating around my head, to make it better with regard to the L-Boxx ports.

The workshop is looking really, really tidy. Great job on those organizer boxes. Seeing a bunch of uniform built-in boxes on drawer slides makes me very happy for some reason. Smart with the grooves, too.

Looking forward to more progress on the shed!

Thanks Nick! I am very happy with the Small Parts Storage Box rig. Tidy is easy. Organized is what takes time...Now reloading the HF44 drawers to improve efficiency. Shed materials are accumulating on site so that when the time becomes available I can move quickly.

:beer:
 
To avoid these ads, REGISTER NOW!
Top Bottom