To avoid these ads, REGISTER NOW!

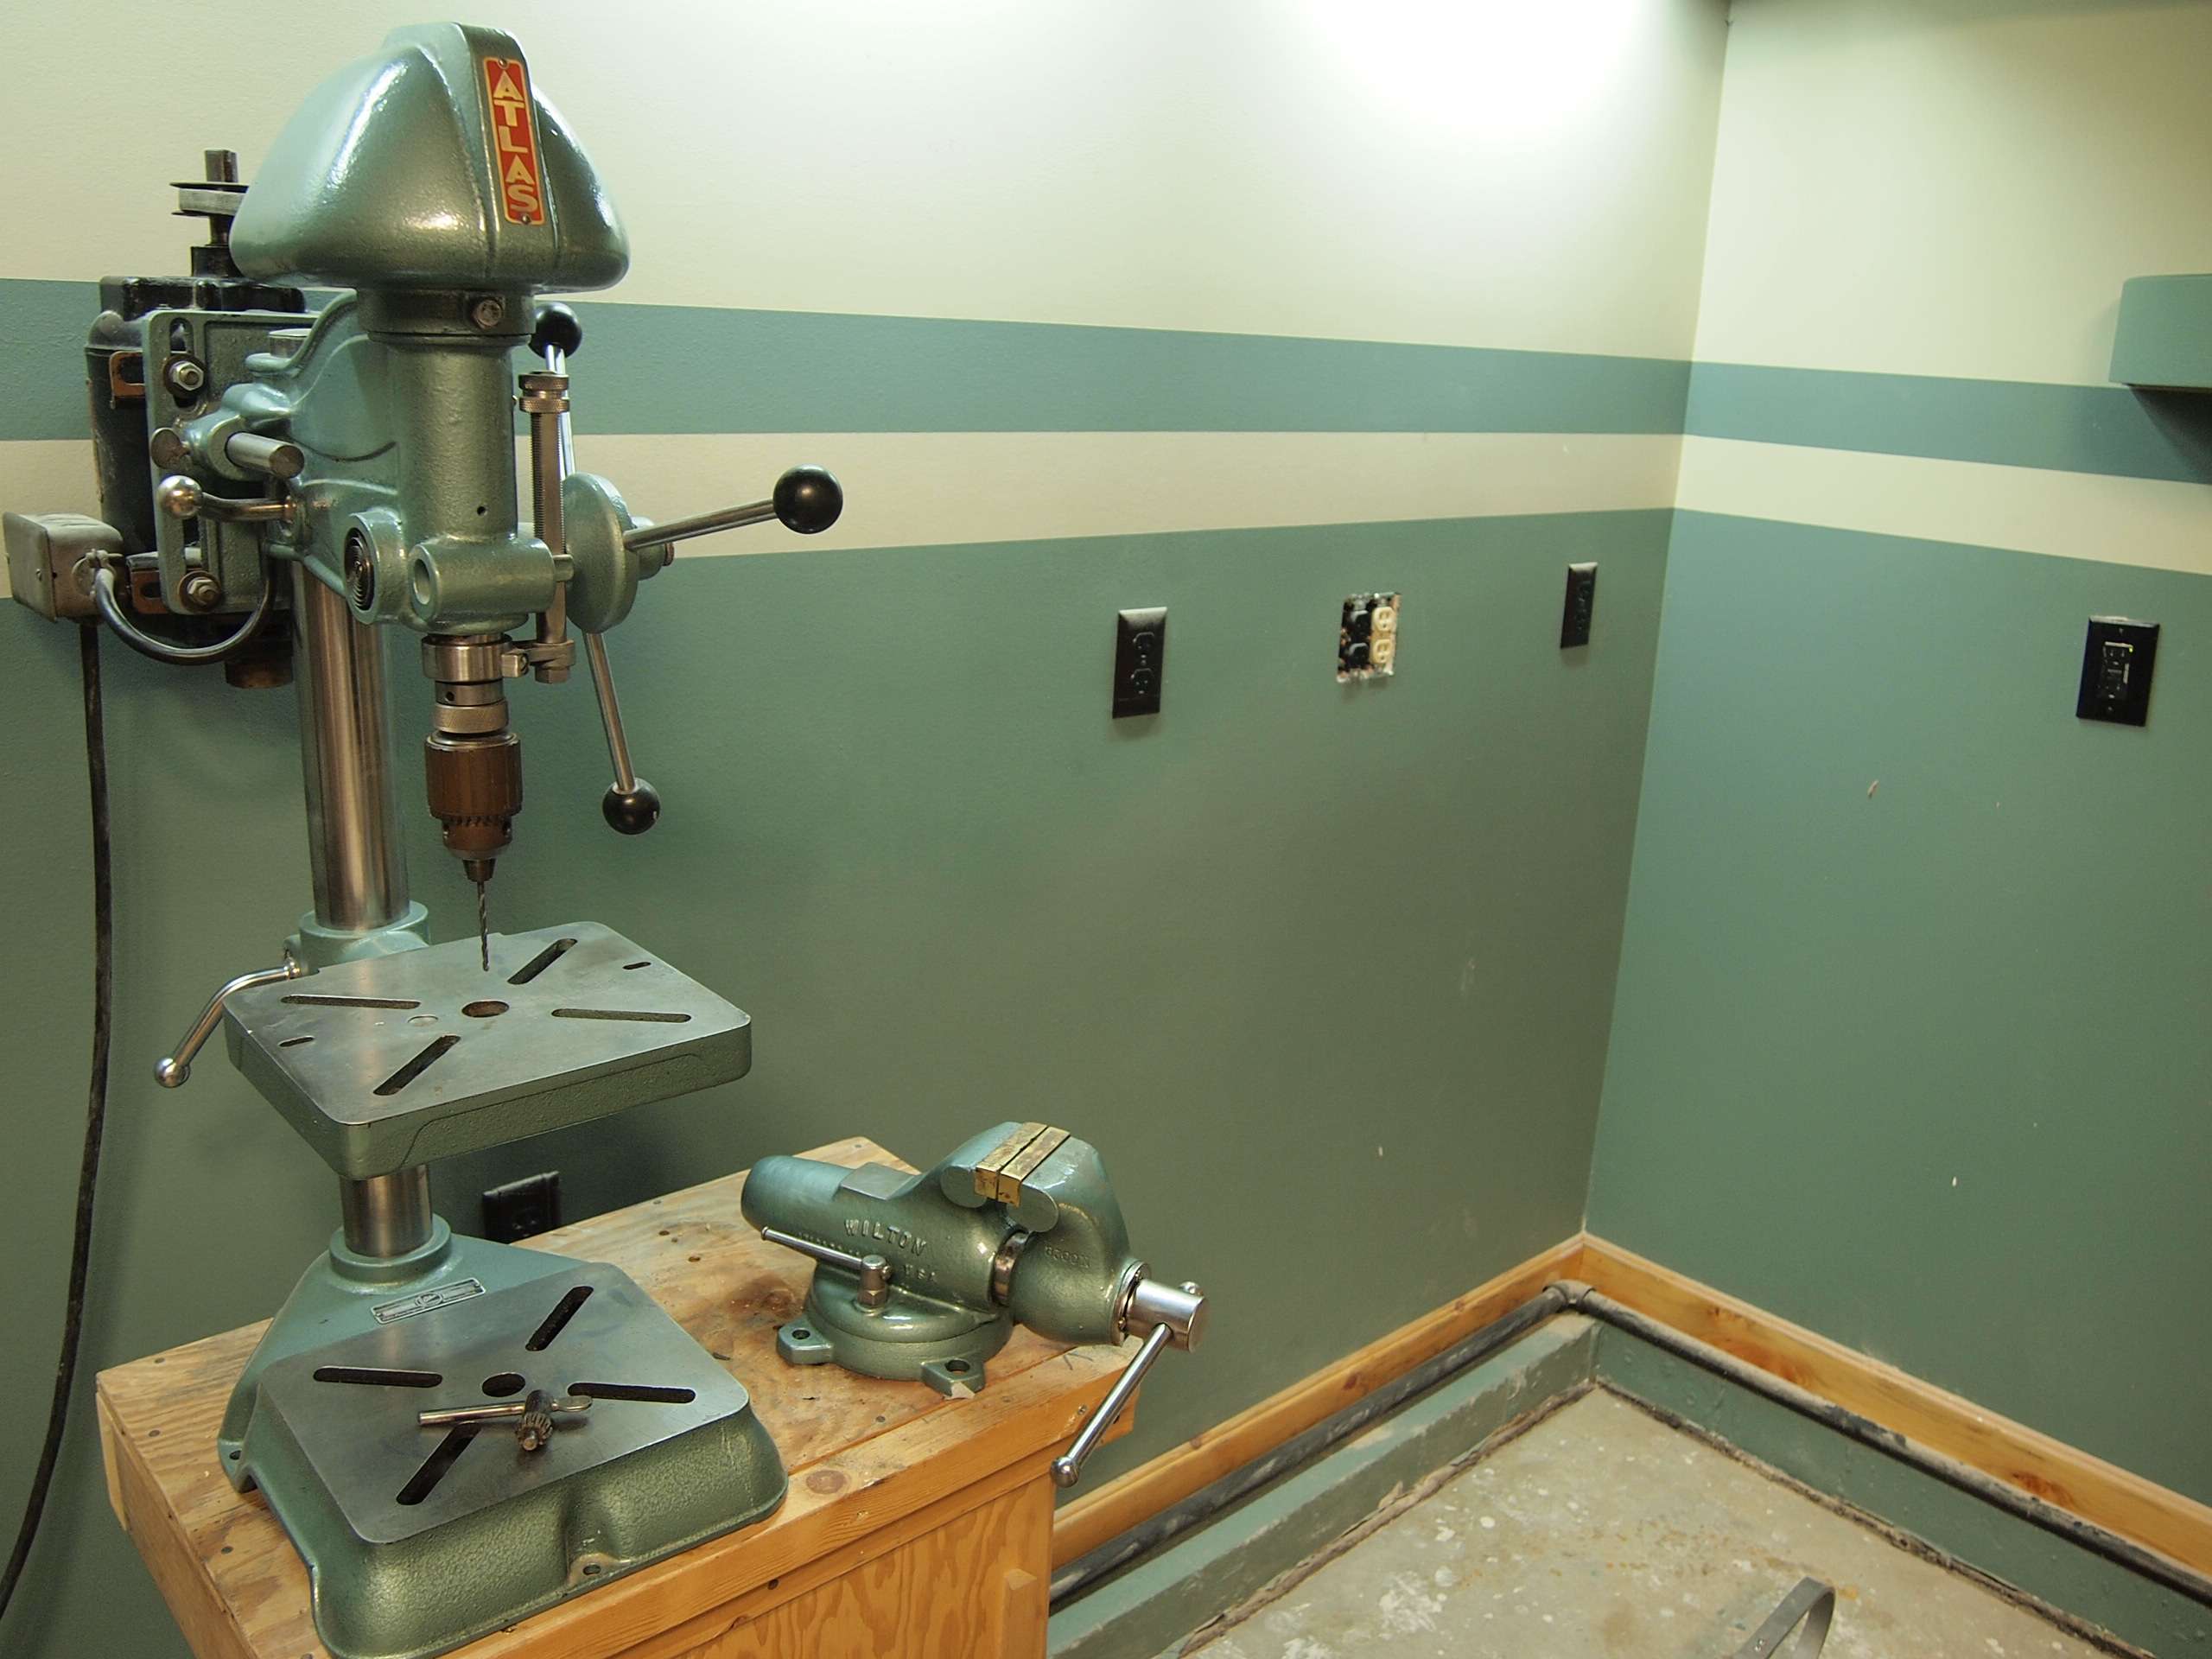
Between 265 & 485 SQ/FT 1950s Craftsman Garage retro remodel

Workspaces sized between 265 and 485 squarefeet.
OP
R

Red Leader

Well-known member
Joined
May 15, 2011
Messages
2,689
Location
Denver, CO
Well guys,

We had a successful 'old tool enthusiast' gathering at the 1950s Craftsman Garage! I wish I had gotten more pictures, but there will always be another time. We had food, fun, and filth (that is, if you count the grease and grime on the old tools!) :D
We also had a little tool 'swap' where folks brought some stuff and traded/sold/donated it. Now I know you are all wondering, but nope, no new additions to the Craftsman garage, sorry:D. Although I did get some good leads on some table extensions for the Atlas cabinet saw I have.

Here are some of the highlights:

p9174185.jpg


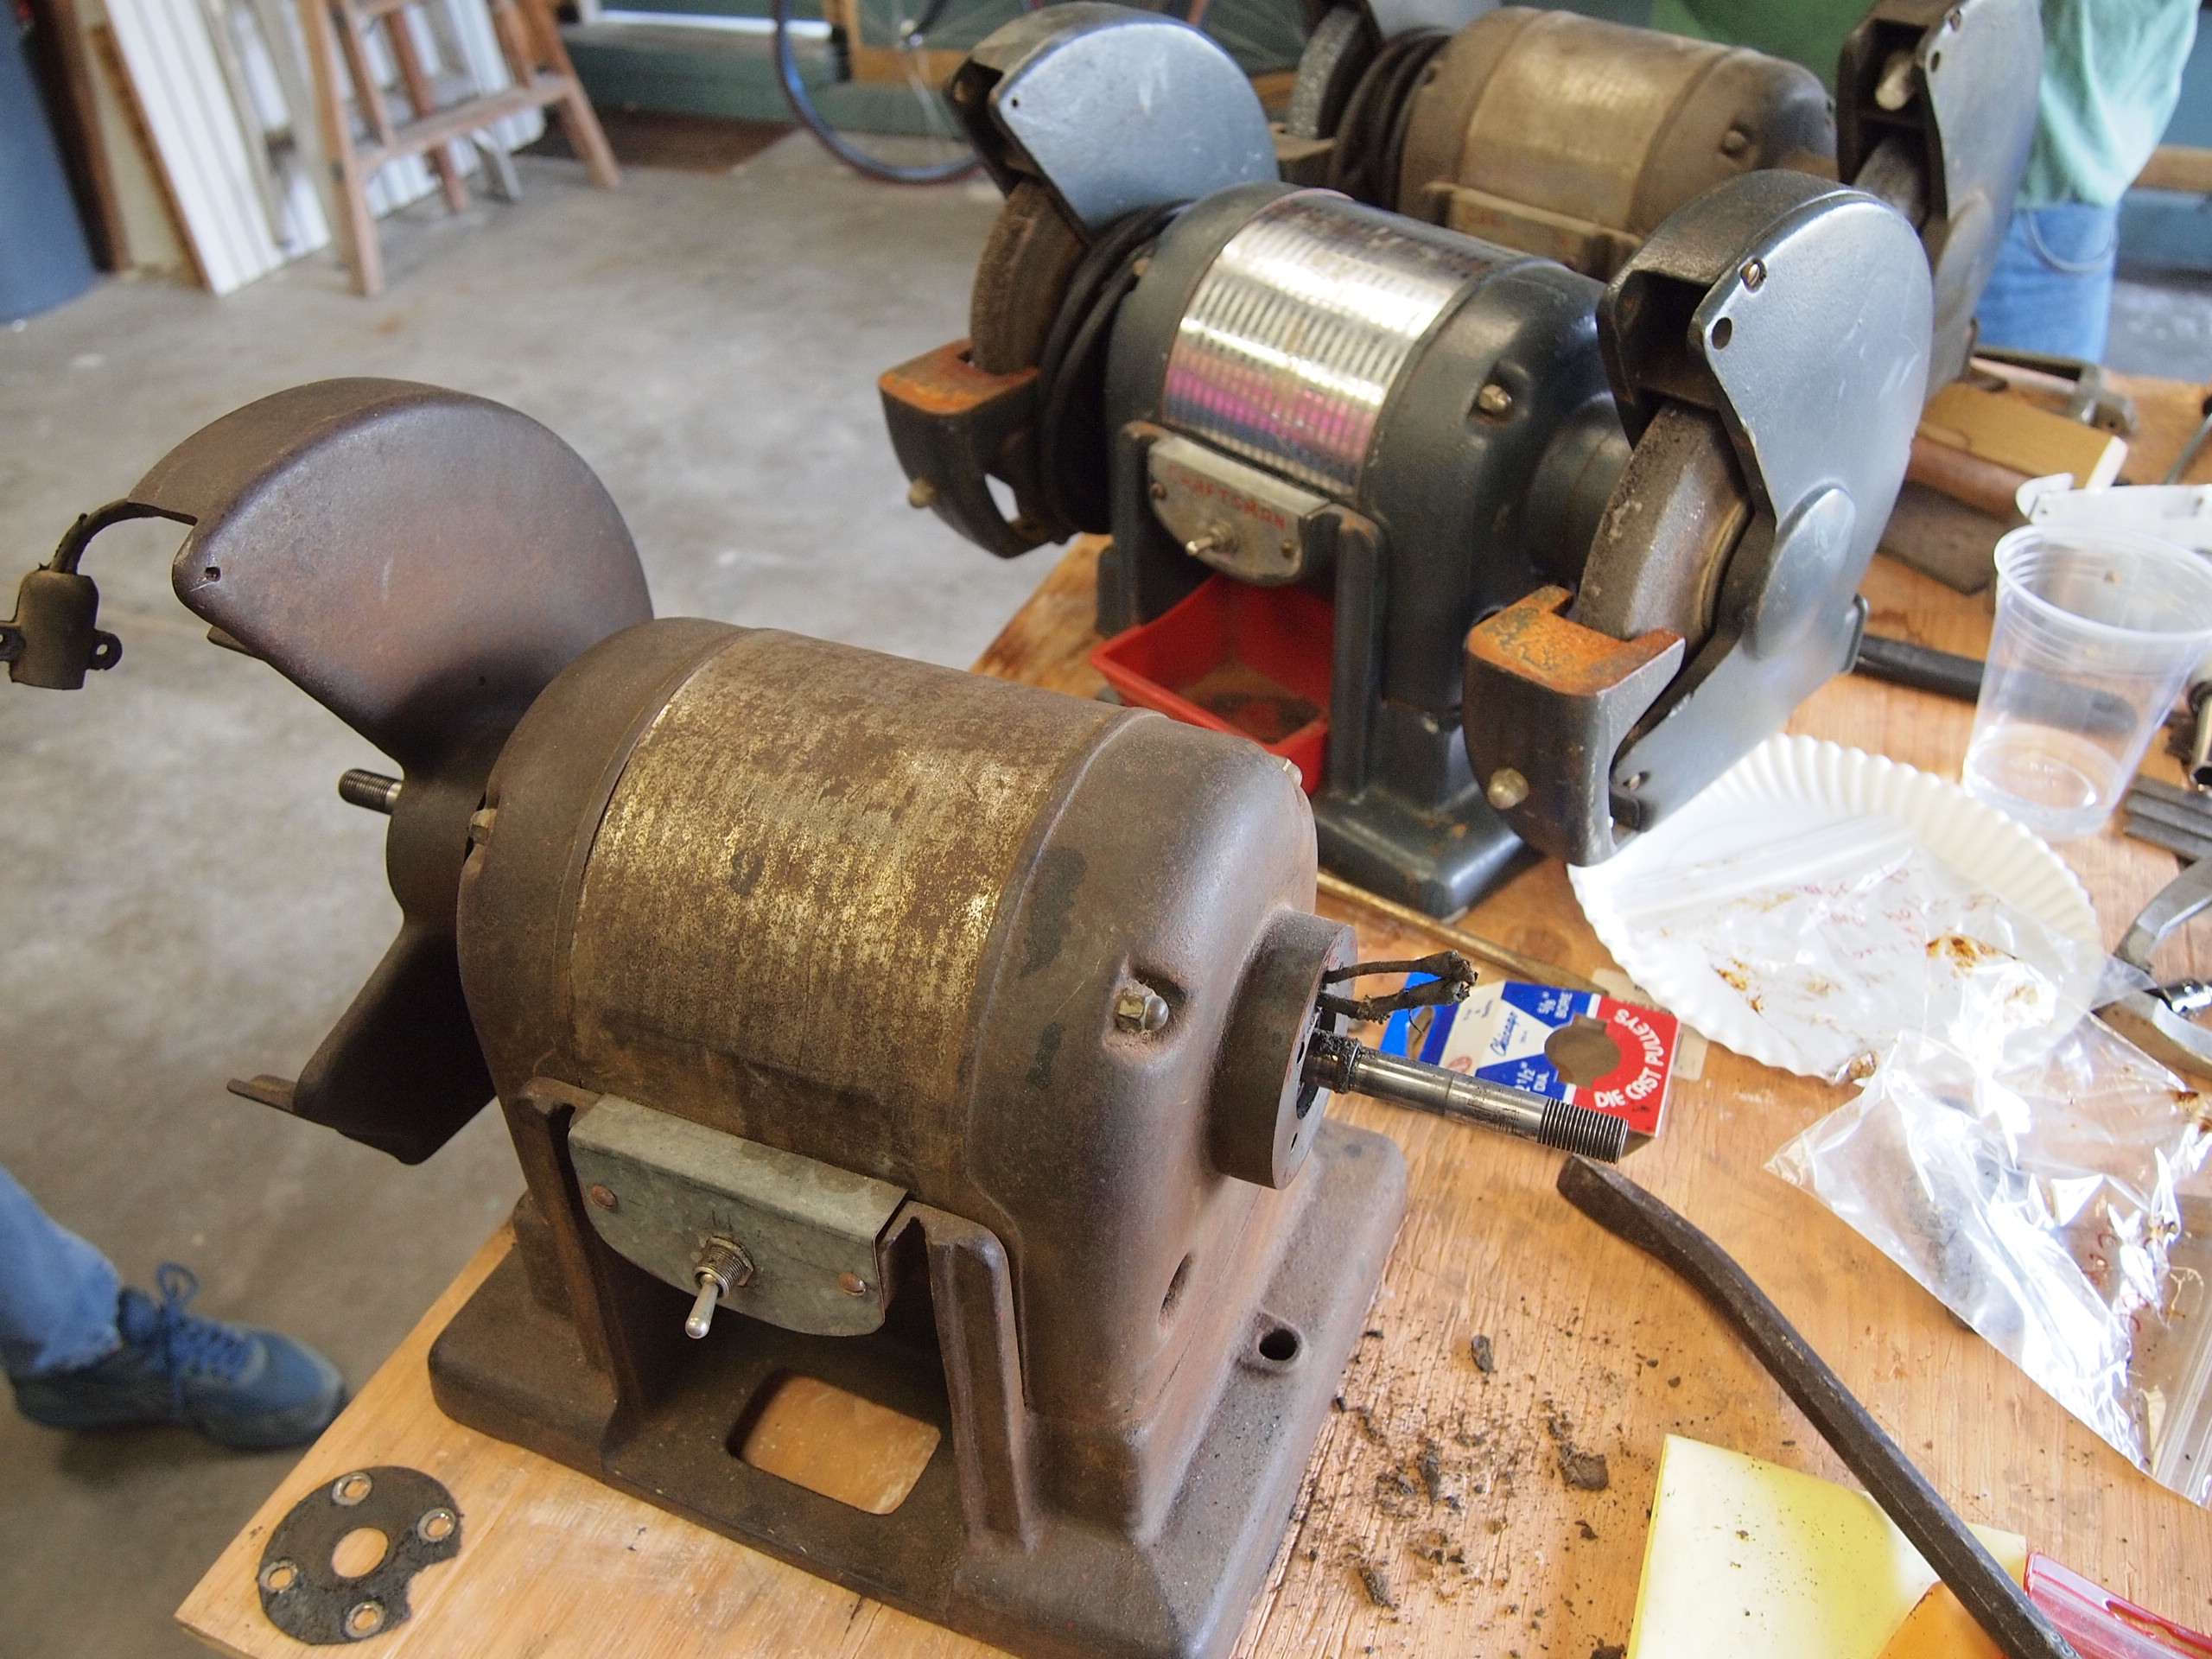
Its a small world. Hows for 3 of one of the rarest Craftsman grinders to be all in one location? We have a 1948, a 1949 (mine) and a 1951. I let the owner of the '48 and '51 take one of my eyeshields so that they can send it off to get some reproductions cast.

p9174182.jpg


Here is some work being done on one of the grinders:

p9174193.jpg


p9174207.jpg


We also worked a little bit on my Yaeger K-Line planer and got it up and running:

p9174197.jpg


p9174202.jpg


We tried installing the knives and gibs but found out that neither was factory or correct so out of safety we opted to not install them. I will be chatting with the resident Yaeger guru over at the OWWM forum to see if I can get a little info about the original parts.

And some general shots:

p9174200.jpg


p9174189.jpg


One of the attendees took some pictures of the whole group so if I get some pictures from them I'll post them.

Hopefully we'll have the next one in the spring. Had a great time!
 
To avoid these ads, REGISTER NOW!
OP
R

Red Leader

Well-known member
Joined
May 15, 2011
Messages
2,689
Location
Denver, CO
Here Dave heres another push for a metal lathe . :D I was playing with the lathe earlier and made a forming die . Not a perfect radius but perty dang close without a ball turning attatchment :D.


Rick

Rick,

Those are pretty sweet! I know, I can do a ton of stuff with a lathe!

So when are you gonna buy one for me?:D
 

rickairmedic

Well-known member
Joined
May 31, 2005
Messages
4,165
Location
louisville ,Ky
Dave looks like yall had a good day playing with the old machines :D. I do find it funny how some of the parts on my early 60's Craftsman grinder look just like the parts on yalls late 40's early 50's models .

Rick
 

rickairmedic

Well-known member
Joined
May 31, 2005
Messages
4,165
Location
louisville ,Ky
Rick,

Those are pretty sweet! I know, I can do a ton of stuff with a lathe!

So when are you gonna buy one for me?:D


Just think of all the parts you could make for those old woodworking tools with a small lathe and mill :D. I am still saving up for my " final lathe " myself preferably an older Southbend or Leblonde :D.


Rick
 

atl_architect

New member
Joined
Sep 12, 2010
Messages
2
These products look great, but at the end of the day they seem to be extremely expensive as well. With the budget of the garage that I am working with, it would be kind of pointless to get $500 worth of free epoxy just to have to spend $500 on something to go under the concrete.

I don't mind if it takes me a while...I'll go out there and grind a little each day over winter:)

I just need it done on the cheap. Do I need it to be absolutely 100% professional and perfect? No, it will be a working garage. It if is a little un-level, that is okay. If I can get it close to being near flat or blended in so it is real hard to tell, then I'll be okay with it. I figure I'll do the best I can given the budget I have for the floor (right now, pretty much $0 haha) and we'll just see how things progress!

Really, the big question for me is...is it even possible to grind 1/3" off of concrete?:D

Yeah, unfortunately the Ardex stuff isn't cheap.

To answer your question, yes it is possible to grind 1/3" off the concrete slab. It may take a long time, depending on the equipment you are able to rent, but it can be done.
 

Wingnut65

Well-known member
Joined
Apr 21, 2010
Messages
3,170
Location
Tampa Bay, FL
Dave, Isn't 1/3" within construction tolerances? Then its considered Flat! :bounce:

Looks like the old tool get together was a success. :thumbup: I guess the Bronco's win just pushed you weekend over the top. :lol:
 

TONE

Well-known member
Joined
Jun 5, 2006
Messages
1,866
Looks great but isnt all that woodworking gonna destroy the paint and finish of the garage?
 
OP
R

Red Leader

Well-known member
Joined
May 15, 2011
Messages
2,689
Location
Denver, CO
Looks great but isnt all that woodworking gonna destroy the paint and finish of the garage?

Tone,

Your garage build looks fantastic. Very polished and I love the wall of nuts and bolts.

Not too sure what you mean by destroy. I can guarantee it will get a little dusty:thumbup:


...but even that will be cut down significantly once I get a dust system installed. Ahh, future plans, future plans...:beer:
 

N312RB

Member
Joined
Jan 16, 2008
Messages
9
Location
KIIB, USA
Just checking in to say that I have been scrolling through this thread for the better part of a day off and on. This is an E-X-C-E-P-T-I-O-N-A-L workshop/shrine to Craftsman!

<--------------Oh look another Colorado GJ'er :D

And...
craftsmangarage-1.jpg


Since Jack didn't have Ps, I filled the void :beer:
 
Last edited:

shopnut

Well-known member
Joined
Feb 22, 2006
Messages
4,237
Location
Florida
Good food for thought remingtonbox.

Now seeing it, I have to say I don't really like the black/white floor with those wall colors. It just doesn't work for me, but then again, I have lousy color sense (I would be better off wearing garanimals, if they made them in adult sizes :)). And I think if a checkered pattern IS used, It should be bigger squares.

Oh wait - nobody asked. I better retract these statements :)
 
Last edited:

TONE

Well-known member
Joined
Jun 5, 2006
Messages
1,866
I kinda agree. The garage is terrific but the white black concept doesn't seem to fit. I know it's era correct but the old tools and colors don't seem to mesh well. Looks dirty and dingy to me. The paint choice along with the natural wood and old powertools seems to be washing itself all out. I think all the stripes on the walls and designer shelves are to busy with that floor.

I almost would like to see a really clean polished and sealed concrete floor. Or maybe somesort of lightly colored stain and seal. Keep it really brite!

If the checkerboard is a must, how about running the pattern on a 45 degree angle?
 

shopnut

Well-known member
Joined
Feb 22, 2006
Messages
4,237
Location
Florida
I kinda agree. The garage is terrific but the white black concept doesn't seem to fit. I know it's era correct but the old tools and colors don't seem to mesh well. Looks dirty and dingy to me. The paint choice along with the natural wood and old powertools seems to be washing itself all out. I think all the stripes on the walls and designer shelves are to busy with that floor.

I almost would like to see a really clean polished and sealed concrete floor. Or maybe somesort of lightly colored stain and seal. Keep it really brite!

If the checkerboard is a must, how about running the pattern on a 45 degree angle?
^^^ Sounds like a professional to me! I agree with keeping the floor as brite as possible - it will take less light to get the room to an acceptable working level.

On a related subject, I would have to recommend against color chips in the floor, even though they look nice. I think they would compel me to sweep the floor even when it doesn't need it. On the other hand, maybe you want them to hide the blemishes or dirt :dunno: I still like a clean look on the floor.

And small items dropped on the floor are harder to find with the flakes. With my solid light gray floor, I can spot dropped items easily from way up on my scaffold, even with these slightly aged eyes.
 
OP
R

Red Leader

Well-known member
Joined
May 15, 2011
Messages
2,689
Location
Denver, CO
Guys,

Thanks so much for your interest and feedback with the floor.

Remingtonbox THANK YOU for spending the time to mock up what the floor would look like with the squares. I agree with others that it would be a little overwhelming.

Here are the two designs I'm toying around with. Either the tan with a single stripe or a tan + border with a single stripe.

What do you guys think?


#1
garagefloor1.jpg


#2
garagefoor2.jpg


I am planning on talking to Christine from Epoxy-Coat today and also sending her some pictures of the worst part of my floor to get her take on it.

I may have to end up using a hand grinder with a diamond cup wheel on those high spots because that is the only thing in my budget right now. I would consider one of those rental units, but I have heard some seriously mixed reports on them, with some not really working well at all. If I do it myself without a rental, I won't be under a time crunch and can do it right, even if it takes forever, as I'd imagine grinding 1/3 concrete would.

Also, I looked more closely at my floor yesterday with the unevenness. It looks like the concrete slabs 'even out' about 3.5 ft or so from the worst area...so at some point, then do come back together, however, the lower two pads (closest to the garage door) slope down slightly at an angle at the expansion joint, so while I could get the joints level, the floor angles down slightly at the center.

While I like the idea of not using the flakes as well, I'm thinking they might be really able to help hide some of these imperfections that will be impossible to get around. I'll see if I can dig up a picture to show what I'm talking about.

Thanks all!
 

Wingnut65

Well-known member
Joined
Apr 21, 2010
Messages
3,170
Location
Tampa Bay, FL
#2 :thumbup::thumbup:

I agree with the 'too busy' thought for the 12x12 pattern. It may be different with 24x24, but still the colors don't blend. (great work Remingtonbox)

#1 would put the stripe under yoru equipment. #2 will make it stand out!
 
OP
R

Red Leader

Well-known member
Joined
May 15, 2011
Messages
2,689
Location
Denver, CO
Okay this picture sums up my floor


garagefloorangle1.jpg


On the far 1/2 side of the garage floor, the expansion joint is intact and instead a crack formed about 1.5ft down from it, and that is where the floor tapers down slightly.

On the closer side of the garage floor, the expansion joint cracked and the lower half slightly tapers down at the expansion joint.

The lower pad sticks up about 1/3" in its center corner and the unlevelness tapers off about 3.5ft out from that corner.

The house was built in '93 so I think the slab has already gone through its major movements.

So this is what I'm working with, and what I now want to epoxy.

Am I hopeless yet? :D

Creative (and cheap) ideas are appreciated.:thumbup::beer:
 

TONE

Well-known member
Joined
Jun 5, 2006
Messages
1,866
I like the designs of the floor you have mocked up. The one thing to remember is that with your garage having so many tools along the outside perimeter that much of your design will be lost.
 

rickairmedic

Well-known member
Joined
May 31, 2005
Messages
4,165
Location
louisville ,Ky
Dave I like the second desighn better although. I think that stripe will be fun to pull off . I would talk to Christine about the ? sikaflex stuff . I think it would smooth your joints well enough to pass muster . I dont think with everything going on in your garage eyes are going to be drawn to the floor " as long as it isnt to busy " . I dont think 1/3" is enough to go to the work of grinding on.


Rick
 
To avoid these ads, REGISTER NOW!
OP
R

Red Leader

Well-known member
Joined
May 15, 2011
Messages
2,689
Location
Denver, CO
So it looks like #2 it is, which is great, because when I place my order I can get 1 tub of the tan color and 1 tub of the blue color, then do some math (ouch!) and make sure that the blue parts equate to about half of the floor area.

The only question now is...what do you think matches the walls better?

The beige, or the taupe?


Beige:

beige_basecoat.jpg


Taupe:

taupe_basecoat.jpg


Wall samplings:

p9154146.jpg


p9114130.jpg


p8223760.jpg


p7313181.jpg


What do you guys think?
 
Last edited:

Wingnut65

Well-known member
Joined
Apr 21, 2010
Messages
3,170
Location
Tampa Bay, FL
1.jpg


I think Beige would match better. Its the Blue that I am not convinced at. I'm afraid it may actually be Light Blue, instead of whatever off green color your monitor is showing. Can she send you color ships to compare? Or, better yest, send a piece of cardboard with your JO Green on it for her to compare to their product. Or, send both colors to her... But if chips are available, get them.
 

shopnut

Well-known member
Joined
Feb 22, 2006
Messages
4,237
Location
Florida
Well, I was going to say .334, but I knew you'd be reading this thread:D
What? Only 3 decimal places? Such low precision for a Craftsman garage! :)

With regards to taupe or beige - I don't even want to venture a guess, considering differences in monitors. (but I'd say beige)
 
OP
R

Red Leader

Well-known member
Joined
May 15, 2011
Messages
2,689
Location
Denver, CO
Hey Dave........Here's that Unisaw I mentioned on my thread the other night. I guess it's still there (the ad is anyway). I can't swing it this time but would it be a good deal if I could? The 3-phase motor wouldn't work so there would be that expense. Just wonderin':)


http://seattle.craigslist.org/see/tls/2596762258.html

Paul,

That is a nice Unisaw but does have several issues. The cut in the cabinet by the motor opening is one. 4 holes in top of extension. It is missing a throat plate. It is 3 phase and the motor sounds like it needs overhauling.

However, there is some good. Comes with fence/miter gauge/rails. Actually said it came with 2 fences. The starter adapter plate is somewhat rare.

You could offer $150, then sell the starter adapter plate for $20, the 3 phase motor for $30, and the fence for $20 and you'd have a good start on a Unisaw for $80. I'd send you an extra throat plate I have (nice condition, too!), you'd pick up a used Unisaw motor for $50-$100 and a starter switch for $50, and have a real nice table saw for about $200-$250 or so.

Or, you could join OWWM and post a WTB in the classified section saying that you are looking for a Unisaw on the cheap and I guarantee someone would probably hook you up. You seem to be good at saw restorations:), and on top of that your a metal guy, so you might even be able to do some repair work if needed.
 
OP
R

Red Leader

Well-known member
Joined
May 15, 2011
Messages
2,689
Location
Denver, CO
What? Only 3 decimal places? Such low precision for a Craftsman garage! :)

With regards to taupe or beige - I don't even want to venture a guess, considering differences in monitors. (but I'd say beige)

I would have added the other decimals, but...I didn't want to embarrass you:D
 
Last edited:

onewaydave

Well-known member
Joined
Sep 28, 2009
Messages
961
Location
Down the road from Dorothy and Toto
Temporary hijack:

Paul, that Unisaw would be a good deal. Figure to replace the arbor bearings (they are 40+ years old). The 3 phase can be run on single phase with either a VSD, static converter or a rotary converter for way less and with a lot more power than a single phase replacement.

Hijack over.

Dave, your shop will look great (does look great) regardless of which you choose.

Dave.
 

Jack Olsen

Super Moderator
Staff member
Joined
Mar 22, 2009
Messages
6,678
Location
Los Angeles
Are you able to get any kind of color chip from the epoxy maker? I'd like to see the beige and the taupe (sp?) in the same snapshot as the walls -- since color fidelity is not something photographs excel at.

In fact, get every color chip they offer if you can. I'm not good at pre-visualizing how colors will look, but it could be that some shade of red for the floor would look awesome in a way we can't imagine in advance.

Also, I'll run counter to the main current and say a single color for the floor would do the best to feature the work you've done on the walls (and not 'fight' with it). And you COULD always repaint the creme color to match the floor (or to match with it better). It's not a perfect solution, in terms of the extra time it would take, but the blue/taupe on your walls matches some of your tools, right? To me at least, you don't want to mess with that.
 
OP
R

Red Leader

Well-known member
Joined
May 15, 2011
Messages
2,689
Location
Denver, CO
1.jpg


I think Beige would match better. Its the Blue that I am not convinced at. I'm afraid it may actually be Light Blue, instead of whatever off green color your monitor is showing. Can she send you color ships to compare? Or, better yest, send a piece of cardboard with your JO Green on it for her to compare to their product. Or, send both colors to her... But if chips are available, get them.

Jeff this is an excellent point you make about the blue.

Let's do a little experiment. I'll call it Adventures in White Balance

So how do you know when 'white', is really 'white'?

When you take a pictures, there is a lot that can influence the colors in a photo (not including any custom filters or settings). These include exposure and lighting. Lighting is probably the biggest. Ever notice how some photos turn really yellow around incandescent lights? The camera isn't adjusting for the way the lighting effects what should be white and so when what should be white is more of a yellow, I think it tricks the camera and you end up with a weird, yellowed shot.

Hence, the Auto White Balance control in cameras - which is designed to sense the 'true white' given whatever lighting and adjust the camera settings around that. Some cameras do a better job than others. If you feel your white balance is off, you can custom capture it. Here's how:

Turn on your lights so that the lighting is set for the shots you want. Then throw down a piece of paper:

p9194221.jpg


You set the camera to 'capture white balance' and your white piece of paper becomes the control. Professionals use a gray card and other fun stuff, but a piece of paper does the trick in a pinch. Things should be pretty accurate now. Here is the shot I took right after I set the white balance using this method:

p9194222.jpg


You're absolutely right, though. You have to be careful with the camera settings, because if you are not paying attention, you could end up with any one of these:

p9194228.jpg

p9194229.jpg

p9194230.jpg

p9194231.jpg

p9194232.jpg

p9194233.jpg


After playing around with it, here are two pictures-the first is using the custom 'capture white balance' setting, and the second was adjusted using my natural eyesight to best balance out the colors in the camera with the colors I was was seeing on the wall:

p9194222.jpg

p9194238.jpg


After comparing several times, this last picture is the picture I believe comes closest to the colors viewed on the wall. Again, for reference:

p9194238.jpg


It can't quite decide if it's green and can't quite decide if its blue. The closest color that Epoxy-Coat has is the power blue:

smoke_blue_basecoat.jpg
 
Last edited:
OP
R

Red Leader

Well-known member
Joined
May 15, 2011
Messages
2,689
Location
Denver, CO
I just tried another quick experiment.

In one type of light, the color is definitely this:

p9194251.jpg


Well, in another type of light (much cooler), I get this:

p9194255.jpg


Much more of a bluish teal. Go figure.

I think I'll try and take some daylight shots with the garage door open and see how the colors change. Regardless, that light blue color is still the closest Epoxy-Coat has to offer. My next choice would be to go to something completely different, like exchange the blue for a black border and stripe, but that might just be too weird.
 
OP
R

Red Leader

Well-known member
Joined
May 15, 2011
Messages
2,689
Location
Denver, CO
Are you able to get any kind of color chip from the epoxy maker? I'd like to see the beige and the taupe (sp?) in the same snapshot as the walls -- since color fidelity is not something photographs excel at.

In fact, get every color chip they offer if you can. I'm not good at pre-visualizing how colors will look, but it could be that some shade of red for the floor would look awesome in a way we can't imagine in advance.

Also, I'll run counter to the main current and say a single color for the floor would do the best to feature the work you've done on the walls (and not 'fight' with it). And you COULD always repaint the creme color to match the floor (or to match with it better). It's not a perfect solution, in terms of the extra time it would take, but the blue/taupe on your walls matches some of your tools, right? To me at least, you don't want to mess with that.

Jack,

This is great advice. When I call up Epoxy-Coat tomorrow (missed them today), I'll ask and see what I can get, then once I get them, I'll take some shots up against the wall in some different lighting. I'd at least want to try the beige/taupe and the blue. But I also dig your idea with the red. Who knows? Half the fun is trying to figure it all out!:D
 

Grandad

Active member
Joined
Jul 3, 2011
Messages
44
Location
My little piece of heaven in Australia
RL, This may not be something you wish to hear as it could just complicate things....But!
Many years ago I had the privledge of working with a very talented interior designer.
She taught me many things but one keeps coming into my head whilst reading these latest posts.
Regarding colour on walls and floor she would say.....

If an exact match is not possible, then contrast or compliment it. Never try for "nearly" the same.
 

Wingnut65

Well-known member
Joined
Apr 21, 2010
Messages
3,170
Location
Tampa Bay, FL
Wow, Dave, you must have been in my Photography 201 class with me. Most of the time we all get lazy and use the 'automatic' settings on a camera. But even with these pocket digitals, many have some sort of White Balance settings. I love it on my big Nikon. But I don't use it enough to not have to expiriment a few shots to get it right before I forget the settings for next time. Great documentary and great shots.

Like Grandad mentioned, a miss is as good as a mile. A color that is 'close' will always be 'off'. Ever notice a car that has had a fender painted an 'off' color? It will always be 'off'. I often use that concept, if it can't be matched exactly, accent it.

The single solid color may be the way to start... I don't see a brick paver color in their pallete for a base color. 'Tile Red' is too red. But, here is Epoxy Coat's 'Tan' base coat with Flakes of Crest Green, Evergreen and Fawn.
crestgreen_evergreen_fawn.jpg
(Link to other flake colors)

FYI, for the 'Smoke Blue' is a light teal on one of my monitors, but goes to Light Blue on the other. Get samples before you order it
 
OP
R

Red Leader

Well-known member
Joined
May 15, 2011
Messages
2,689
Location
Denver, CO
I hear you guys on the color matching.

So with that...I'm going to try to get some samples.

What would you guys consider to be good 'accent' colors, given the existing colors of the garage?

I was thinking one could be black, since black is my accent color for all the metal work in the garage. What about a stripe of black around the beige floor?

Ahh...losing my head! :lol:

Gonna give Christine a call in just a little bit.
 

rickairmedic

Well-known member
Joined
May 31, 2005
Messages
4,165
Location
louisville ,Ky
Dave heres a good question to ask Christine :D. Can their epoxy be tinted ? I know some can which would make life simple . Get 2 white kits and take them to where you got your paint and have them tint them to match the colors you already have :D.


Rick
 

gts340

Well-known member
Joined
Apr 27, 2007
Messages
60
First off I want to say I love the look of your Craftsman garage!

Just got done going through the thread. Love the tools too.
My opinion on the floor, keep it simple. Go with a machine grey paint or epoxy of some sort. Any old shop or factory with any old tools back then just had a plain painted floor. Grind the high spot down to even the floor out a bit and let the grain show to add some character.
 
To avoid these ads, REGISTER NOW!
Top Bottom