OccupantRJ
Well-known member
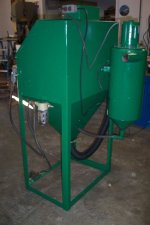
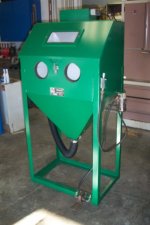
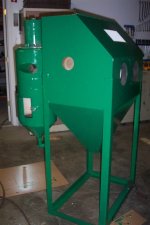
My bead blast cabinet went underwater for several days in a flood 12 years ago, and afterwards, due to priorities of life, it had to be put in storage in a semi trailer I own, for an eventual move.
It sat in the trailer untouched for several years, then my BIL borrowed it until recently, when I brought it home along with my other machinery, which just so happens to be in about the same shape.
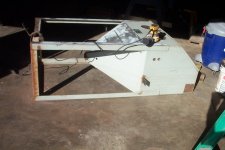
I decided to refurbish the glass bead cabinet first, as it is so critical to the refurb of the rest of the tools. In another thread, someone suggested painting shop equipment and cabinets with a foam roller to avoid overspray, so after trying my hand at painting a few cabinets, I decided to paint the blast cabinet in the same manner.
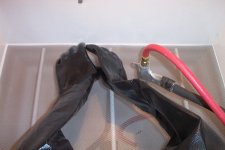
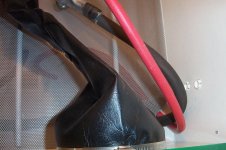
The blast cabinet was sanded with a Dewalt random orbit sander and the lower frame was power wire brushed with a 4-1/2 inch grinder before paint materials were applied. I am still waiting on an upholsterer friend to finish the filter bag I am having made for the unit, and still have to mount the gloves, gun, and a short section of air hose.
A new steel mesh floor and rubber seals were ordered from Trinco. Here's a few pics of the progress, with the cabinet ending up in it's final position across the aisle from it's big brother, which can be seen in this thread link.
http://www.garagejournal.com/forum/showthread.php?t=61583
A blast gun I built can also be seen in this thread.
http://www.garagejournal.com/forum/showthread.php?t=91606
The paint for the blast cabinet was acquired from Habitat for Humanity Restore for $8 a gallon. Sherwin Williams industrial enamel, normally $38. A Kangaroo convenience store down the street from me was remodeled, and the left over paint was donated.
The color is an almost match for Empire blasting cabinets, so I chose it for my Trinco.") The inside of the cabinet was painted pure white for light reflectivity. This makes seeing what you are blasting much easier.
The inside of the cabinet was painted pure white for light reflectivity. This makes seeing what you are blasting much easier.
It sat in the trailer untouched for several years, then my BIL borrowed it until recently, when I brought it home along with my other machinery, which just so happens to be in about the same shape.
I decided to refurbish the glass bead cabinet first, as it is so critical to the refurb of the rest of the tools. In another thread, someone suggested painting shop equipment and cabinets with a foam roller to avoid overspray, so after trying my hand at painting a few cabinets, I decided to paint the blast cabinet in the same manner.
The blast cabinet was sanded with a Dewalt random orbit sander and the lower frame was power wire brushed with a 4-1/2 inch grinder before paint materials were applied. I am still waiting on an upholsterer friend to finish the filter bag I am having made for the unit, and still have to mount the gloves, gun, and a short section of air hose.
A new steel mesh floor and rubber seals were ordered from Trinco. Here's a few pics of the progress, with the cabinet ending up in it's final position across the aisle from it's big brother, which can be seen in this thread link.
http://www.garagejournal.com/forum/showthread.php?t=61583
A blast gun I built can also be seen in this thread.
http://www.garagejournal.com/forum/showthread.php?t=91606
The paint for the blast cabinet was acquired from Habitat for Humanity Restore for $8 a gallon. Sherwin Williams industrial enamel, normally $38. A Kangaroo convenience store down the street from me was remodeled, and the left over paint was donated.
The color is an almost match for Empire blasting cabinets, so I chose it for my Trinco.
The inside of the cabinet was painted pure white for light reflectivity. This makes seeing what you are blasting much easier.Attachments
-
 Trinco blaster 001.jpg67 KB · Views: 579
 -
 Blast cabinet 026.jpg110.4 KB · Views: 536
 -
 Blast cabinet 025.jpg121.6 KB · Views: 545
 -
 Blast cabinet 024.jpg119.9 KB · Views: 522
 -
 Blast cabinet 012.jpg113 KB · Views: 552
 -
 Blast cabinet 003.jpg107.9 KB · Views: 522
 -
 Trinco blaster 005.jpg66.9 KB · Views: 553
Last edited: