To avoid these ads, REGISTER NOW!

Between 265 & 485 SQ/FT 1950s Craftsman Garage retro remodel
Workspaces sized between 265 and 485 squarefeet.

Grandad

Active member
Joined
Jul 3, 2011
Messages
44
Location
My little piece of heaven in Australia
Also, I'm seriously thinking about moving to the square bit screws - anyone have experience with them?

Dave, refresh my memory. Aren't they referred to as a Robertson head?
Anywho...they were common as when I was growing up in Canada. Mostly in furniture.
And I have never understood why they didn't take off. They are unheard of here in Australia.
They have recently introduced a hex head screw which is as good I suppose.

In my opinion, they are gold. Like I said, never understood why they never became the worldwide standard.
Cheers
Jim
PS...somewhere deep in what is left of my brain is a memory that Phillips head screws were originally designed in Detroit for the motor industry because they were more attractive than the usual slotted. Not 100% certain if that is accurate though
 
To avoid these ads, REGISTER NOW!

shopnut

Well-known member
Joined
Feb 22, 2006
Messages
4,237
Location
Florida
I've got one word for you concerning those screws - impact driver (well, I guess that's two) - it changed my (garage) life because the entire Asylum is held together with screws. Of course there are a few "loose" ones around here yet, if you know what I mean! :)
 
Last edited:

carbons4

Well-known member
Joined
Jan 19, 2012
Messages
92
I would give a positive vote to the square head screws. Did the exterior of my barn with them with no problems. Less than I would have with phillips.
 

peelman

Well-known member
Joined
Jan 13, 2011
Messages
198
Location
Seymour, Indiana
Another vote for square head. Almost no slippage compared to phillips. Torx headed screws aren't bad either; i haven't used a hex head, but I can still see it being better than phillips.

I think Phillips was necessary for some of the automated tooling? Checking....Yep. Self-centering and more forgiving for automatic drivers.
 

takeiteasy

Active member
Joined
Dec 15, 2011
Messages
40
Location
WA
Robertson's are great. They are a Canadian invention I believe and are the standard. We figured out the US doesn't use Robertson after making a truckload of wooden shipping crates and had to replace all the screws after we were finished! America is just stubborn and doesn't want to admit to great Canadian inventions! :)
I can second using higher quality bits though: standard cheap bits that came with my drill vs. DeWalt bits from a 'bit kit' = a world of difference!
Oh yeah...when doing my shelves and driving 3 1/2" screws, I kept a bar of soap handy and scraped some soap off with each screw into the threads - makes a huge difference!
 
Last edited:

american3.14guy

Active member
Joined
Nov 18, 2011
Messages
44
Location
Southwest Kansas
I prefer torx-head screws. GRK makes an awesome screw that is made of case-hardened steel and has a "self-drilling" tip for wood. They are around $10 a pound, expensive, but worth it.
 
OP
R

Red Leader

Well-known member
Joined
May 15, 2011
Messages
2,689
Location
Denver, CO
Guys,

Thanks for all the well wishes and the recommendations. I think next time I'm at the Habitat Re-Store, I'm going to look for either the torx or the square head screws - I'm not picky, I'll just go with what I find. Its nice to know that both are thought of a little better than the phillips head.

In my very limited opinion, it seems to be an improvement upon the slotted/standard screw heads (ever try to screw one of those in with your cordless?), but still antiquated and out of date. There are different sizes, but many times it is a 'which one fits best' and usually it is still not a perfect fit. This is in contrast to having a very specific size, like say a square or torx bit. I suppose there are the drywall screws that have a certain size and the replaceable bits that you can get that are designed for them, but also taking into account the phillips head screws of anything from drywall screws to a 60 year old tool to a computer, you run into everything.

Okay, just so I won't bore you all to death with a mindless rant on screw heads, I do actually have an update. Unfortunately the wife is sick:( so she went to bed early. I thought if anything, that might be a good time to just putter out there while she's resting, so I got a few things done.

Trim up on left side of lower shelf:
P4093061-vi.jpg

P4093062-vi.jpg


Slowly but surely its getting there. Just the last strip around the curve-a-round left shelf and then it will be on to touching up and polishing the aluminum.

A few days ago I coated one of the (not-yet-glued) shelf post trim facings with clear gloss to see what kind of a difference it would make. It was slightly windy day so of course it got covered in little bugs and dirt but I got to see a good comparison effect:

P4093072-vi.jpg


Once I do them all I think it will really make the shelves 'pop'.


On to other, more important things.


I cut corners on the workbench. No, I really did cut the actual corners:D But I probably did both:lol:

Here is a picture of the handy dandy tool used to cut them. I took the picture just to make bluebolt drool:D
P4093049-vi.jpg


Then, onto the 'doing'...


The outline...

P4093053-vi.jpg


The taping...

P4093056-vi.jpg


And the cutting!

P4093057-vi.jpg


P4093063-vi.jpg


And then I also went ahead and measured about 50 times and attached the second vertical support for the workbench:

P4093070-vi.jpg


And nope I didn't use my back to drive in the screws or anything. I was very conscious about not using my back of any of this stuff. Still, I might give it a rest out there for a few days now just to make sure.

I was also able to grab a fun shot of the drill press. Love that tag!

P4093071-vi.jpg


That's all for now. Up next: more work on the vertical supports, attaching the back table around the supports, then sanding the table flat. Also working on getting the last of the shelving trim up.

Keepin' it real in the 1950s Craftsman Garage:cool::thumbup:
 
Last edited:

machine_punk

Well-known member
Joined
May 14, 2011
Messages
2,540
Location
Napa Valley, California
Looking good, as usual!

I've really been waiting to see this workbench (I remember the drawings from months ago--then you spent months on machines, instead of moving forward with the garage. I know, I know...winter time).

I agree with the square-drive screws (of course, they aren't rivets, but I suppose that if you HAVE to attach something with a fastener which isn't a rivet, you should use a square-drive screw). My actual, all-time favorite fastener, aside from solid rivets, is the socket-head cap screw. Of course, that really doesn't jive well with woodworking...but anywhere I need a 'machine' screw, I use socket-head cap screws, if possible. I even found some 1/2" socket-head cap screws to mount my vise.

Anyway, happy to see more progress on the garage fittings and your bench! I'm building a bench right now too, but it is a massive beast, built to the roll/shear/brake which should be arriving soon. That monster is about 1200 pounds. Of course there will be pics in my thread, when I have something to show.

M_P
 
OP
R

Red Leader

Well-known member
Joined
May 15, 2011
Messages
2,689
Location
Denver, CO
I've really been waiting to see this workbench (I remember the drawings from months ago--then you spent months on machines, instead of moving forward with the garage. I know, I know...winter time).

Ha! You and me both! Thanks for your kind words and compliments.

I am totally looking forward to it as well. Right now it is just all the boring stuff...attaching 2x4s, standing stuff down. I can't wait to start attaching on some wild looking wood, putting on the ribbed table edging, getting the art deco lines going. The 'finale' will be the headboard, since I've got a design going that I am going to do that nobody has seen yet...I haven't put it on paper but it is going to be awesome. I'm so excited to do it. I figured out that I am going to do the head board in MDF. It will actually be a breath of fresh air to work with actually because so far in this whole garage thing all I'm used to are bent up, crazy and warped (and low cost:D) boards.

Hopefully this summer I'll start getting to the fun stuff. But...it is happening...


Slowly, but surely. <--- (new garage motto:lol:)
 

bluebolt

Well-known member
Joined
Dec 28, 2008
Messages
5,447
Location
Benton LA
Guys,

[
I cut corners on the workbench. No, I really did cut the actual corners:D But I probably did both:lol:

Here is a picture of the handy dandy tool used to cut them. I took the picture just to make bluebolt drool:D
P4093049-vi.jpg


:drool:

LOL guess next time we swap some tools we may have to exchange sabre saws LOL

I know where there is one of those saws, looks nice but missing the blade holder which is not available from Sears Parts.
 

zuk123

Well-known member
Joined
Mar 25, 2012
Messages
957
Location
Houston TX via Chicago, Phoenix, LA, and San Diego
Hi Red Leader,

SERIOUSLY take care to heal fully! I broke a vertebrae in a fall from an extension ladder 10 years ago, and I still have pain every day. Your back is nothing to mess around with. Once hurt, it will never be fully the same. Likewise your hearing, wear protection EVERY time! Even banging on stuff with a hammer, particularly metal, can cause losses. And they add up and never get better. With a little bit of care and planning, and the right safety gear, we'll be enjoying your posts for a long time!

Square drive (Robertson) screws have their place and drive well. You'll go nuts if you use a magnetic bit holder and a driver tip though. Every screw will pull your tip out of your driver! Get a long (6") driver bit. You don't really need the magnet tip with the squares.

Phillips bits were designed to cam out and slip, so no surprise that they do. Quality bits and an impact driver will solve the cam out 99% of the time.

If you are still having a tough time driving any screws, an old trick is to lube the screw by dragging it against a bar of soap, (or paraffin wax if you have it.) It works wonders.

One last (pedantic) point is that drywall screws are not meant to be structural. They are brittle and snap easily. I know we all use them all the time for EVERYTHING but there are other screws that are a better choice. (SPAX, deck screws, etc.) Look at http://www.mcfeelys.com/tech for way more info than you ever wanted on screws ;-)

Keep up the good work!

thanks,

zuk
 
OP
R

Red Leader

Well-known member
Joined
May 15, 2011
Messages
2,689
Location
Denver, CO
And now for a completely non-Craftsman post


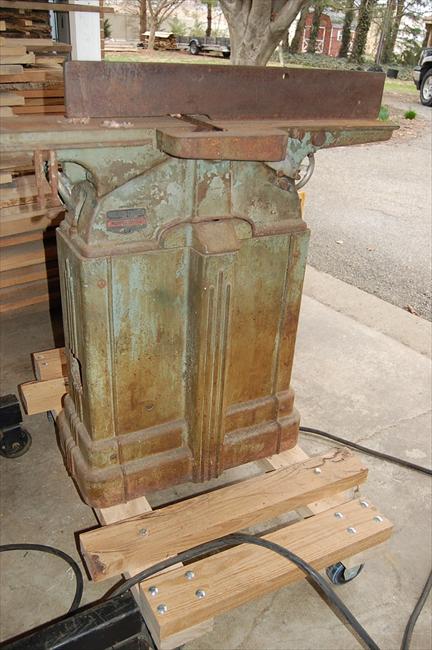
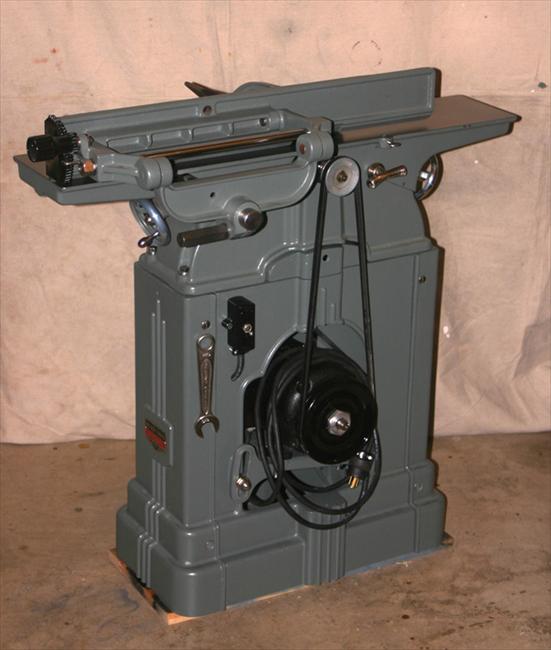
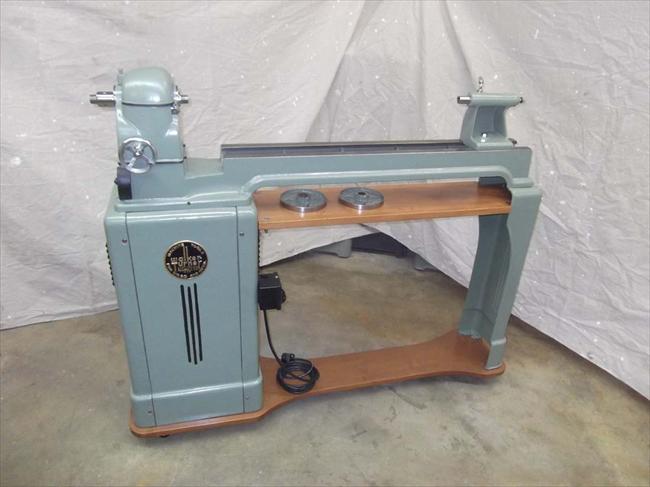
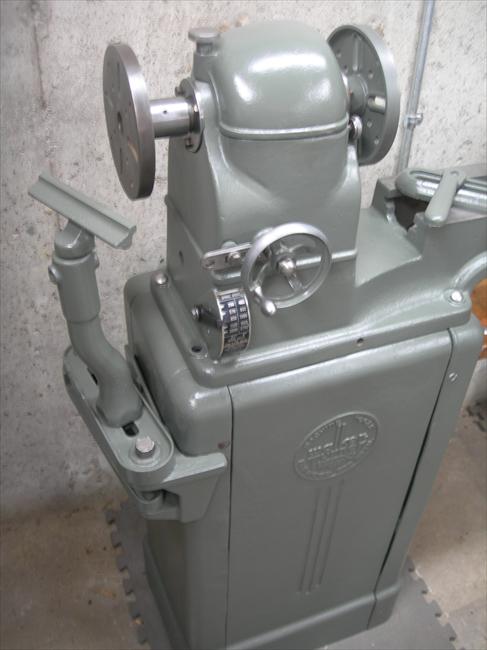
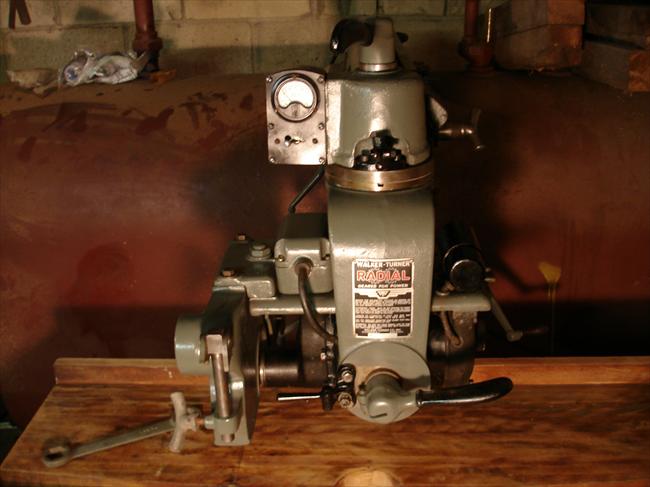
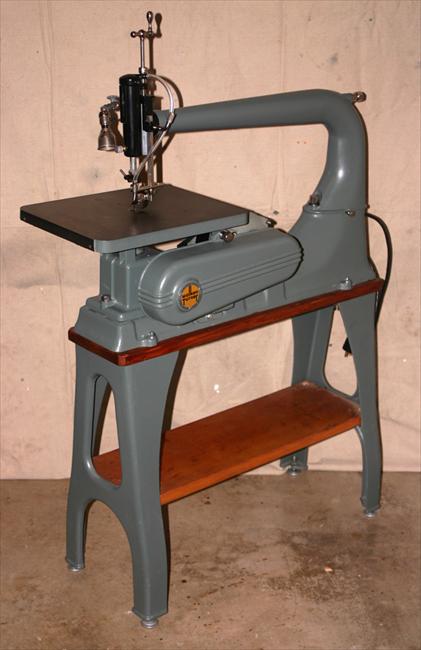
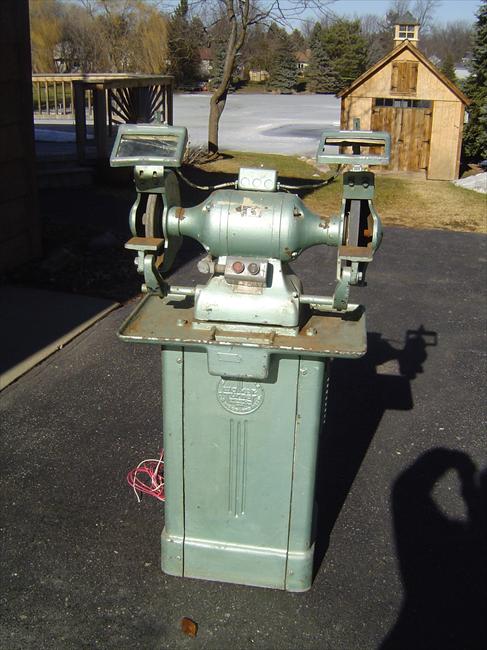
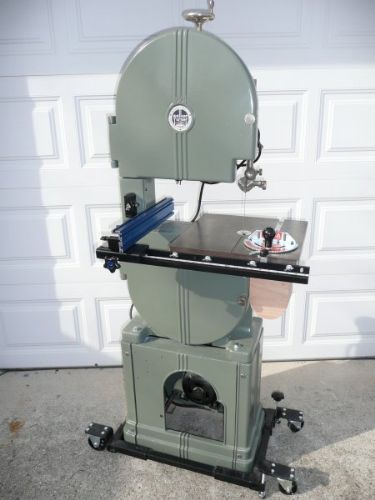
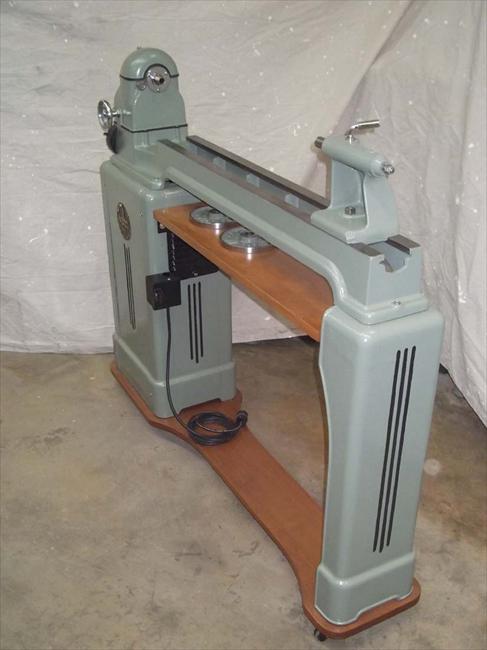
1939 was a special year for tools. It was the year of the cast iron stand. Delta introduced their first cast iron stands, as well as Walker Turner. The Delta stands lasted throughout the years, the last one being made available up until the 1960s I believe.

Walker Turner, on the other hand, basically made them for 1 year for certain models and then never again: 1939. These are some of the most sought after vintage machinery and there is no question as to why. They are drop dead gorgeous and a fascinating study for those who are really into the art-deco period of architectural design.

I recently saw this thread pop up on the OWWM forum and thought it was too cool to pass up. Check it out here:

http://www.owwm.org/viewtopic.php?f=1&t=113578

Everyone knows Delta, but it is easy to overlook some of the smaller manufacturers like Walker Turner who really had their heyday in the golden era and, if you were to ask me, is the undisputed king of the art deco tooling:

12183-A.jpg

8298-D.jpg

12405-A.jpg

12405-D.jpg

9070-B.jpg

10467-C.jpg

7141-A.jpg

8151-B.jpg

8278-A.jpg

12001-A.jpg

7322-A.jpg


I know I'm a Craftsman guy at heart, but just look at those machines. I know I might be disowned for saying this, but the 'perfect' vintage tool workshop might just be to have a complete collection of all 1939 Walker Turner tools. I think some folks are trying to do it. It is not impossible, but a lot guys really snap up quick the W/T stuff...and who can blame them? :D

-Dave, who thinks it would be cool to have some sort of 1939 Walker Turner tool in the garage, just not a table saw, because he has too many table saws:D
 
Last edited:

Shoottx

Well-known member
Joined
Jan 30, 2011
Messages
314
Location
Plano Tx
Yup

I have a Walker Turner Table saw, Shaper and Dill Press in line for restoration after I finish the Unisaur! It will be hard to decide on which ones i will keep! :wtf:
 
OP
R

Red Leader

Well-known member
Joined
May 15, 2011
Messages
2,689
Location
Denver, CO
Was at the local Hab when I spotted these:

p4113093-vi.jpg

p4113094-vi.jpg


Picked up two and will use as the door handles on my workbench cabinets. $1 a piece, made in USA.
 

bluebolt

Well-known member
Joined
Dec 28, 2008
Messages
5,447
Location
Benton LA
Hey Red Leader have you come across one of these 50's ''builders" saws model #109.22620 that acts as both a table saw and a radial arm saw? One of Craftsman's bad ideas?
 

Attachments

  • 5F25He5M73Gc3Ne3Hac478e4545783cc8168d.jpg
    5F25He5M73Gc3Ne3Hac478e4545783cc8168d.jpg
    34.9 KB · Views: 78

american3.14guy

Active member
Joined
Nov 18, 2011
Messages
44
Location
Southwest Kansas
Red Leader,
The aluminum trim looks great. Where did you get it? Is it already cut into strips?
I also think the gloss on the trim fits the style of the support covers. Great job! The style you are capturing does not have satin finish. :)
 
OP
R

Red Leader

Well-known member
Joined
May 15, 2011
Messages
2,689
Location
Denver, CO
Hey Red Leader have you come across one of these 50's ''builders" saws model #109.22620 that acts as both a table saw and a radial arm saw? One of Craftsman's bad ideas?

Not in person but I had the chance to buy one when the (AWESOME) guy who picked up my 110.24561 scroll saw found one for sale. Thing is, it was missing every accessory save for the fence rail.

I would call the Builder's saw rare, not exceedingly, but still. A good way to judge rarity is trying to find parts. If you can easily find multiple people with multiple parts, then rarity is not much of a factor. However, if you have to search for months, even years, for something to turn up, that is probably a little bit more so:) That scenario definitely doesn't cover all the bases, but it is close. I would say it definitely doesn't cover dumb luck in finding a super rare accessory very quickly. I've heard stories of stumbling upon a part/accessory someone needed for a tool instantly after they get it, then not see another one for 5 years. Heck, I had just picked up that Craftsman cabinet saw and not a week later I had found a motor mount for it. That was several months back and every now and then I check and I still haven't seen another one. I'm on the hunt now for a belt cover!:)

The thing with the builders saw is that if you get one that is without parts/accessories, you might be waiting a while to find the missing ones and when you do, they'll probably just be attached to another builder's saw. I've never seen their parts offered separately - I'm sure it's happened, but I haven't seen it.

Bottom line - that saw looks like it has the fence and fence rail, which is a good start. But I don't see the miter gauge, the angle quadrant, or the blade cover/pull handle. Those are pretty important accessories, especially in the use of the saw. Take a look over at the owwm.com (or vintagemachinery.org) website and search for 'builders' (edit -> find) in the table saw directory of the Craftsman photo index to see what the accessories look like. Ask the seller if he has the accessories. If so, why not try the saw out to see how you like it? I've heard that they are a creative, 'ingenuitive' design, will so-so implementation. I've not used one personally but I'd like to at some point. Also, keep in mind that the most I've ever seen anyone pay for one was $50 I think - most go between $25 and free. They are probably the highest 'rarity:cost' ratio tool Craftsman ever made.

If he doesn't have the accessories, then it will probably still be usable as a table saw, but not much else, and not for the saws more flexible capabilities. By the time you find those other accessories, they are on another saw for probably even cheaper than you paid for the first one:)

However, don't let me or what I say get in the way of a man wanting to buy a cool tool! I say if you want it, even just to have fun with it, and the price is right - get it!


Better yet...save it.


I'm not helping, am I? :D
 
Last edited:
OP
R

Red Leader

Well-known member
Joined
May 15, 2011
Messages
2,689
Location
Denver, CO
Red Leader,
The aluminum trim looks great. Where did you get it? Is it already cut into strips?
I also think the gloss on the trim fits the style of the support covers. Great job! The style you are capturing does not have satin finish. :)

The aluminum trim I got from a Lowe's that was going out of business and everything was 1/2 off I think. 8' lengths of 1/16" x 1.5". They have a bunch of different sized. Honestly that is probably not the best/cheapest place to get it normally, but the sale made it worth it.

Thanks for your compliments! I'm hiding all my rough hacksaw/dremel cuts behind other trim:D

I agree, that trim needs to have a good shine to it!
 
To avoid these ads, REGISTER NOW!

SpeedinLemon

Well-known member
Joined
Oct 23, 2011
Messages
307
Location
North Texas
I think next time I'm at the Habitat Re-Store, I'm going to look for either the torx or the square head screws - I'm not picky, I'll just go with what I find. Its nice to know that both are thought of a little better than the phillips head. FWITW - I've had good luck with the square head screws. I think I first started using them when I bought a buch of Kreg screws.

I cut corners on the workbench. No, I really did cut the actual corners:D But I probably did both:lol:

Good to see the bench coming along!

Here is a picture of the handy dandy tool used to cut them. I took the picture just to make bluebolt drool:D
P4093049-vi.jpg

Question on the jig saw (sabre saw?).... In the pic above...which way is your arrow pointing on the "Auto Scroller" knob on top of the saw? I have the exact same saw (a little rusty from the fire) and when I used it briefly this weekend, it seemed to evertything right, but didn't cut very well. My first thought was the blade I had in it is the newer type made for the spring loaded blade holder (Rigid). But in your picture, the blade holder itself is 180 degrees opposite mine. i don't know if that would make a difference:

View media item 18491
What do you think? Do think the blade holder has been taken off mine and replaced incorrectly? I'm assuming yours is correct since you used it successfully. Mine would cut, but seemed to be fighting it the whole time.

Check my last post in my thread for the matching circular saw to this jig saw when you get a chance.

Hope the back is coming around and turns out not too serious! I hear a cold beverage or two can ease the pain:beer:
 

smschriefer

Well-known member
Joined
May 28, 2009
Messages
842
Location
Yorktown, VA
What do you think? Do think the blade holder has been taken off mine and replaced incorrectly? I'm assuming yours is correct since you used it successfully. Mine would cut, but seemed to be fighting it the whole time.

Check my last post in my thread for the matching circular saw to this jig saw when you get a chance.

Hope the back is coming around and turns out not too serious! I hear a cold beverage or two can ease the pain:beer:
\
Yours is correct and Red Leader has his on backwards. I guess if it works, don't mess with it! :lol_hitti
Here is a link to the parts breakdown and it shows the setup in the same manner as yours.
http://www.k-mart-parts.com/partsdi...7/0744440/00027868/00001?blt=06&prst=&shdMod=
 
Last edited:

Bob Heine

ALLIANCE MEMBER
Joined
Oct 24, 2009
Messages
10,708
Location
Boca Raton, Florida
\
Yours is correct and Red Leader has his on backwards. I guess if it works, don't mess with it! :lol_hitti
Here is a link to the parts breakdown and it shows the setup in the same manner as yours.
http://www.k-mart-parts.com/partsdi...7/0744440/00027868/00001?blt=06&prst=&shdMod=
I think both positions are correct. The Auto-Scroller saw allows the blade holder to be rotated 180-degrees. Red Leader has the holder set for flush-cutting (special off-set blade). SpeedinLemon has the holder set for scroll cutting (standard straight blade). I don't think the position of the holder affects the cutting action but it looks like SpeedinLemon's blade is worn out.
 

smschriefer

Well-known member
Joined
May 28, 2009
Messages
842
Location
Yorktown, VA
I think both positions are correct. The Auto-Scroller saw allows the blade holder to be rotated 180-degrees. Red Leader has the holder set for flush-cutting (special off-set blade). SpeedinLemon has the holder set for scroll cutting (standard straight blade). I don't think the position of the holder affects the cutting action but it looks like SpeedinLemon's blade is worn out.
:lol_hitti I didn't even look at the blade condition. Yeah, that one is worn out!
 

SpeedinLemon

Well-known member
Joined
Oct 23, 2011
Messages
307
Location
North Texas
I think both positions are correct. The Auto-Scroller saw allows the blade holder to be rotated 180-degrees. Red Leader has the holder set for flush-cutting (special off-set blade). SpeedinLemon has the holder set for scroll cutting (standard straight blade). I don't think the position of the holder affects the cutting action but it looks like SpeedinLemon's blade is worn out.

Thanks for the info Bob and Steve! I picked up a couple of brand new blades during lunch today. I got the correct type "U" shank for that saw rather than the "T" shank style I had in there. Don't know if that will make a difference, it's probably more the fact the previous was worn out.

Hijack of Red Leaders thread is now over....back regularly scheduled greatness! :beer:

Chris
 
Joined
Mar 6, 2012
Messages
6
Location
Eastern Canada
Token Canadian weighing in here. Robertson head screws are fantastic. Though not originally conceived in Canada (according to wiki), Robertson perfected and patented them here. The cam out reduction alone should be reason enough to switch over. Plus, you can paint over the damn things and still get them out later!

Also, I use beeswax to lube screws. Helps to prevent splitting and makes for a smoother drive. Of course... I live close to a bee keeper so that helps. Commercially, not sure where you might get some stateside.
 

shopnut

Well-known member
Joined
Feb 22, 2006
Messages
4,237
Location
Florida
(voice over PA system...) "Attention. Attention. Red Leader, please report back to your thread. An update has been requested by one of the GJ members"
 

mdbeck1

Well-known member
Joined
Mar 7, 2010
Messages
2,297
Location
Norman, OK
(voice over PA system...) "Attention. Attention. Red Leader, please report back to your thread. An update has been requested by one of the GJ members"

Uhmmm.....If you haven't figured it out yet look at post 2187... That's probably where he is.
 

bggrnchvy

Well-known member
Joined
Nov 14, 2011
Messages
589
Location
Pleasant Hill, CA
-Dave, who thinks it would be cool to have some sort of 1939 Walker Turner tool in the garage, just not a table saw, because he has too many table saws:D

I just recently found a '39 16" W-T bandsaw with the back gearing for metal work myself. It's going to be a huge labor to bring back, but I'm excited.

On the same note, W-T got rid of the art deco motif after '39 on it's whole line...except bandsaws. The art deco style stuck until '48 even on the cast iron bases.

I'll find one of those W-T radial arm drill presses at some point. Awesome tool.
 
OP
R

Red Leader

Well-known member
Joined
May 15, 2011
Messages
2,689
Location
Denver, CO
Hey guys! I'm back! :beer:

Unfortunately, I have no real updates garage-wise, other than I need to get rid of several tools for cheap. Let me know if you can pick up:D

The wife and son and I went up to her parent's land (bout 2 hours from here) and just had a nice relaxing weekend. Helped the FIL with some projects around the place, ate some steak, and worked on some bushcraft stuff.

One item on my 'bucket list' is to be able to make fire from the bow drill method, and eventually from most all methods. There is a really cool website about this:

http://www.wildwoodsurvival.com/survival/fire/bowdrill/index.html


I came just a little bit closer this weekend when I was reliably able to get fire from a business card-size magnifying lens. I tried the bow method after that, but no dice:D It will come eventually, and the way I figure it is that it gives me something to look forward to.

In other news, We've been baby-proofing the house which included a new entertainment center. Instead of buying a 'normal' one, we went to Ikea (wow, big) and bought some kitchen cabinets (that normally go up on the wall) for the 2 speaker towers and then a bottom cabinet, using then a butcher block style counter top (of Jack Olsen fame) as the main surface. It is actually getting its final coat of boiled linseed oil (yes, the rags are outside away from combustibles!) and looks pretty good. I'll snap a picture when it is all together.

I wanted to build my own, but that would have taken a LONG time from now since not all the tools in the garage are in working shape right now, and I didn't want to just buy a cheapie pre-fab one, so this is a great compromise.


Next up on the garage list is:

1. Getting some art-deco hinges for the cabinet bases
2. Attaching rest of table top around vertical stringers
3. Sanding bench top
4. Finishing bench top (I'm now sold on BLO...you just need to just get the wood extremely smooth and keep polishing it to make it age nicely)
5. Cut and joint (on the jointer) the trim faces for the 4x4 legs
6. Make the art deco lines from wooden dowels and install patten on cabinet faces
7. prime cabinet
8. Paint cabinet!!!

As you can see, there is a lot to do and that is not even close to being done. The workbench will take me just about all year, if not longer. I just need to go ahead and order the hinges so I can get them because that is what is stopping my right now. Also, I did buy more wooden dowels to make the art deco lines out of.

Stay tuned! A lot of work will be coming soon!

-Dave
 

carbons4

Well-known member
Joined
Jan 19, 2012
Messages
92
Red Leader, your shop is about the classiest one on here. Glad your taking the time to do it right.I have not seen anything you have posted that did not make me go WOW!!! Just keep posting as you can.
I have one question for anybody, the dark charcoal grey paint sears used on a lot of equipment from at least mid 70's up, what is a match for that? I have a mid/late 70's 6 x 48 belt/disc sander I need to touch up/repaint after the previous owner spilled paint all over it.
 
OP
R

Red Leader

Well-known member
Joined
May 15, 2011
Messages
2,689
Location
Denver, CO
The 'Unicorn' makes it home!

A cherished member of the Denver OWWM/vintage woodworking tool community returned from a vintage tool get-together in Missouri and picked up my 20" Craftsman scroll saw, which was given to them by the incredible gentleman who picked it up for me who also came to this event, traveling from Illinois. A HUGE shout out to both of you - you know who you are! And thank you.

The saw is home! And now...obligatory pics:

P4243541-vi.jpg


Tilt mechanism for tilting the entire arm, as well as the on off rotary switch:
P4243542-vi.jpg


The head badge, in great shape:
P4243543-vi.jpg


The backside:
P4243544-vi.jpg


A 1/2" standard wrench for size comparison (this thing is deceptively big!):
P4243545-vi.jpg


What is cool about this tool is that Synco (the true manufacturer, designated by the 110 source code) dated many of their tools. This one, as evidenced by the head badge, comes from January of 1956. That is the very start of when this tool was offered, so this example could be one of the earliest ones made. How cool is that? :)

The saw is complete, minus a bakelite/plastic knob on the metal handle above. Any guesses as to what that handle does? :D I'm thinking one day I might fashion a rosewood knob for it.

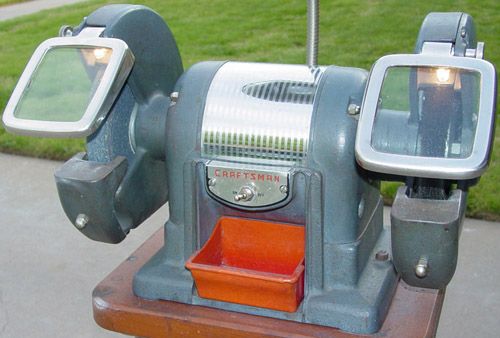
Also, the same awesome member of our tool group a while back borrowed some parts from my 1949 art deco Craftsman grinder (eye shield, eye shield bolt) to get a copy of the shield cast at a foundry for their missing ones and to look for a similar bolt. Well, they also had the water pot from theirs cast as well, which mine was missing. So guess what I also picked up from them?


P4243546-vi.jpg


Oooohhh yeah!!!! Cast aluminum, baby! I will clean this up and then it will get painted. The original water pot was plastic, and I was astounded when I saw the original from their grinder which was in near perfect shape. I'm thinking a gloss red, as the original was an orange/red:

6129-A.JPG


I will be slowly continuing on the workbench build, so keep an eye on the thread. I'm thinking about pulling a late night tonight and doing some organizing out there. Heaven knows, I need to.
 
OP
R

Red Leader

Well-known member
Joined
May 15, 2011
Messages
2,689
Location
Denver, CO
Red Leader, your shop is about the classiest one on here. Glad your taking the time to do it right.I have not seen anything you have posted that did not make me go WOW!!! Just keep posting as you can.

:thumbup:

:beer:
I LOVE this garage man. Seriously, I really look forward to the updates.


Thanks guys, I am both humbled and amazed at your kind and encouraging words. Humbled because I feel like I don't deserve them and amazed because if anyone saw the garage 95% of the time, I'm sure they'd be horrified:lol:

It has quickly turned into a labor of love. I have made plenty of mistakes along the way (ripples in the tool board anyone?) but have learned a ton and the little things that aren't quite right will get some attention again when the big stuff moves out of the way.

Thinking about the workbench really gets me going, although I'm also saddened by just how long it is taking. If I could freeze time I could probably dedicate an entire week to it and get it done, but as anyone with children knows, that ain't gonna happen:D

The good news is that the family and I are going to be going on a trip in the summer and I will be doing some prep work out there to get it ready for my return several days ahead of the family - it will be getting the epoxy flooring done and I'll probably get to hammer out a lot of the work bench stuff. I think there will be a few all nighters in that brief window of time:D
 
OP
R

Red Leader

Well-known member
Joined
May 15, 2011
Messages
2,689
Location
Denver, CO
I have one question for anybody, the dark charcoal grey paint sears used on a lot of equipment from at least mid 70's up, what is a match for that? I have a mid/late 70's 6 x 48 belt/disc sander I need to touch up/repaint after the previous owner spilled paint all over it.

Check these threads out:

http://www.owwm.org/viewtopic.php?f=1&t=93811

http://owwm.org/viewtopic.php?f=1&t=93811&p=640663&hilit=craftsman+paint+color+gray#p640663

http://owwm.org/viewtopic.php?f=1&t=86804&hilit=craftsman+paint+color+gray

I'm not sure about slightly newer Craftsman machines, but those threads above may get you close.
 
OP
R

Red Leader

Well-known member
Joined
May 15, 2011
Messages
2,689
Location
Denver, CO
To avoid these ads, REGISTER NOW!
Top Bottom