To avoid these ads, REGISTER NOW!

VISE REPAIR 101 all vise repairs, lubricants, sources for parts and the tricks to fix

Retrosmith

Well-known member
Joined
Mar 31, 2011
Messages
139
Location
Texas
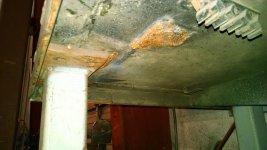
On the 5" Machinist, Wilton made the channel car independent from the jaw housing. Right where that orange mark is, it the dowel from the channel bar. It looks as it its not flush. Tightening the vise once its mounted may press it in. if not you may have too put it in a press

Thanks! I played around with it last night. It'll definitely take a press (after I weld it.)

Are the slide and front jaw two completely separate castings with the Wiltons then?
I think it's only the 5" (and up?) based on autopts's comment. Mine is from '79. My 4.5" ('46) seems to be 1 piece. Anyone know if the larger Wiltons were always made in two pieces?
 
Last edited:
To avoid these ads, REGISTER NOW!

fury413rb

Member
Joined
Dec 2, 2014
Messages
9
https://scontent-b-lga.**.fbcdn.net/hphotos-xfp1/v/t1.0-9/1908473_10104406437885088_1974315746440122200_n.jpg?oh=c64541a7a0afbe41e0b12e94ea233fff&oe=550480D5

She's done. Safely boxed up for transport back to Oklahoma. Anyone know how old a Reed 204 R would be? I found it in the attic. I have a Reed 204 B and now a R. Or is the R a poor cast B? It definitely looks like an R.

I dragged it over to my buddy's place in Ohio. Going to tear it down and pack it up too since it isnt attached to a bench. You never know what you will find under some garbage.

551442_10104409247195208_8040921978588878601_n.jpg


10628335_10104409247299998_3569763196778338695_n.jpg
 
Last edited:

EOC_Jason

Well-known member
Joined
Jun 25, 2012
Messages
11,388
Location
Bentonville, AR
Poorly cast R... There was never a "B"...

Round nose R model... Mmmm... Late 30's to Mid 40's....

She's done. Safely boxed up for transport back to Oklahoma. Anyone know how old a Reed 204 R would be? I found it in the attic. I have a Reed 204 B and now a R. Or is the R a poor cast B? It definitely looks like an R.
 
OP
D

drivesitfar

Well-known member
Joined
Oct 23, 2013
Messages
36,174
Location
Pacific Northwest
Fury: do tell how you got the jaws and dynamic slide on that Columbian so shiny. deburring wheel on a bench grinder, scotch brite pad on a hand grinder?

awesome job and the paint really pops especially with the lettering.

Also i'd listen to JasonEOC because the man does know his Reed vises and history.

ALL: anybody restore a Reed "C" series vise lately or ever that would like to put up a detailed before and after restoration on this thread. i'm looking to take my Reed 2C apart this weekend and if i run into any issues it would be nice to only search one thread for the answer.
 
OP
D

drivesitfar

Well-known member
Joined
Oct 23, 2013
Messages
36,174
Location
Pacific Northwest
ALL: i think my plans changed for this weekend. I've been wanting to find or build a stand for my Reed 4C and i think i found it. it's a 6 foot wide 3 foot deep steel bench. it has 1/4 inch plate on top and i'm guessing it weighs close to 1000 pounds. should i still bolt it to the ground to keep the 4C from tipping it over.

seriously i think i won't have to, but i do need to drill some holes. while i have many good size hand drills and bits i don't have a mag tite one. what is some of your favorite methods for drilling a few holes in thick steel? any tips or tricks to share please do because i'll have some 3/4 inch plate to drill holes in my welding table i'm making this winter or spring.

if i get the 4C mounted without much ado i still want to tear down my Reed 2C and strip it and put on some boiled linseed oil. so any restores of those Reed C series vises on this thread might make searching for a quick fix a lot easier for me on this restoration and all the other members in the future.
 

Attachments

  • workbench.jpg
    workbench.jpg
    144.6 KB · Views: 64
  • WB 3.jpg
    WB 3.jpg
    143.7 KB · Views: 54
  • WB 2.jpg
    WB 2.jpg
    148.2 KB · Views: 49
  • WB 1.jpg
    WB 1.jpg
    147.1 KB · Views: 50
  • P1030396%20(Large).jpg
    P1030396%20(Large).jpg
    119 KB · Views: 72

Outlawmws

Well-known member
Joined
Aug 9, 2011
Messages
39,479
Location
The Badlands
Drives, drilling plate depends on what the plate is made of. Are there any holes in it already? I'd try a test drill with a pilot drill where you need it and see what it reacts like. if that goes eel go another about 1/2 of what you need son a third to finish the size.

If it does not like the hand drill efforts, then maybe rent a amy base drill and go at it with carbide.
 
OP
D

drivesitfar

Well-known member
Joined
Oct 23, 2013
Messages
36,174
Location
Pacific Northwest
Outlaw: the top already has a few holes in it where the Chinese wonder vise was mounted. i really doubt it has the same hole situation as my Reed 4C.

I'll try the small hole to bigger hole theory unless i hear something better because i think i'm planning on using 5/8 or 3/4 inch bolts to hold down my Reed.

thanks
 

bluebolt

Well-known member
Joined
Dec 28, 2008
Messages
5,462
Location
Benton LA
Drivesitfar, when I drilled my 1" plate for my Reed 206 I used an old low speed big Craftsman 1/2 drill. And I threaded the holes too so I did not have to use nuts.
 
OP
D

drivesitfar

Well-known member
Joined
Oct 23, 2013
Messages
36,174
Location
Pacific Northwest
BB: sounds good. yes i agree threading the holes on half inch or thicker would be a good plan, but 1/4 inch plate i'm looking to bolt it onto the table with a bolt and nut.

do you have any pictures of your Reed 206 bolted to the inch table you can post either here on the HUGE tool thread i started? i (maybe we) would like to see that.
 

91bronc300

Well-known member
Joined
Oct 19, 2009
Messages
2,559
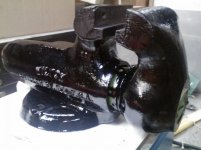
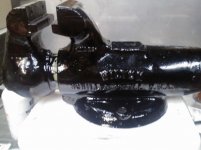
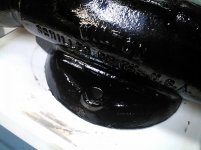
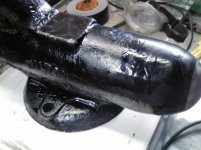
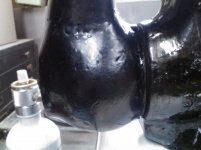
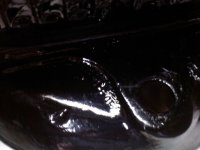
Here are my results of painting a 4 inch Wilton with some Gilsonite based Japan black varnish.

First coat

IMG354.jpg

IMG355.jpg

IMG356.jpg

IMG357.jpg

Second coat

IMG358.jpg

IMG359.jpg

IMG360.jpg
 

91bronc300

Well-known member
Joined
Oct 19, 2009
Messages
2,559
IMG361.jpg

IMG362.jpg

IMG363.jpg

IMG364.jpg

A carburetor adapter that was the first thing I painted.

IMG365.jpg

IMG366.jpg


I think that the reason the second coat is such a boogery mess is because 1) the paint is way too thick 2) I only waited 18 hours after painting the second coat to bake it instead of the 3.5 days I waited before baking like I did for the first coat.

You'll notice that even on the flat surface of the carburetor adapter that there are surface irregularities because the paint was just so overly thick. And also that I didn't protect the carb adapter from dust while it was drying. I waited over a week from painting the adapter before I cooked it.

Considering how the vise turned out after the second coat and that I do not have a good way of cleaning the varnish off I think I have to consider it a failure. Still a useable vise, but an aesthetic failure.

What I plan to do differently next time is 1) thin the paint considerably with something very volatile, probably acetone 2) wait as long as possible between application and baking, this would probably become less necessary the thinner the paint is, and 3) do the baking in steps, probably something like just bringing the BBQ to 300 degrees then shutting off until cool, then up to 400 degrees and then cool, and then finally bringing it up to 400 degrees again and holding that temp for an hour. That might also become less necessary if a thinner coat is used.
 

bluebolt

Well-known member
Joined
Dec 28, 2008
Messages
5,462
Location
Benton LA
BB: sounds good. yes i agree threading the holes on half inch or thicker would be a good plan, but 1/4 inch plate i'm looking to bolt it onto the table with a bolt and nut.

do you have any pictures of your Reed 206 bolted to the inch table you can post either here on the HUGE tool thread i started? i (maybe we) would like to see that.

Yea thought your table was thicker, 1/4 inch needs to be nut and bolted.

You have seen the vise table and even commented on it LOL.

http://www.garagejournal.com/forum/showthread.php?t=229092

Here's a few pics of it holding the Reed/Columbian 8" monster dynamic and static jaws while I cleaned them up.
 

Attachments

  • 2014 11 06 Columbian vise 001.jpg
    2014 11 06 Columbian vise 001.jpg
    146.4 KB · Views: 53
  • 2014 11 06 Columbian vise 005.jpg
    2014 11 06 Columbian vise 005.jpg
    144.7 KB · Views: 54

McBrownie

Well-known member
Joined
Mar 27, 2014
Messages
1,827
Location
Cleveland, OH
What I plan to do differently next time is 1) thin the paint considerably with something very volatile, probably acetone 2) wait as long as possible between application and baking, this would probably become less necessary the thinner the paint is, and 3) do the baking in steps, probably something like just bringing the BBQ to 300 degrees then shutting off until cool, then up to 400 degrees and then cool, and then finally bringing it up to 400 degrees again and holding that temp for an hour. That might also become less necessary if a thinner coat is used.

My first go around with barbecuing a gisonite/linseed oil mixture on my Prentiss base cured very well. The second attempt on my static jaw did not cure as hard and almost stayed sticky. It think a thicker coat was a contributing factor to the problems on the static.
I also wanted to copy this content from page 1144 of the Vises thread over here because there is some good info on the Ford F-102 spec and the details of what went into Broncs japanning.

Originally Posted by 91bronc300
The same as you. Gilsonite and linseed oil and solvent. I'm using a mix of D-limonene and naphtha for solvent and boiling lead oxide as a dryer into raw linseed oil. I'm guessing your results are in the thread drivesitfar referred me to?

Edit: I found it on page 17. So you baked immediately after painting it on? My thinking was to wait a few days to let the linseed oil polymerize before the heat but you are getting a nice hard coating with baking immediately apparently. The finish of your swivel base is more matte than mine, I wonder if that is more because of the immediate baking or something with the mix.

Originally Posted by McBrownie:
That could very well be. Yours is much glossier. I started with the F-102 spec as described in here:
http://www.mtfca.com/encyclo/P-R.htm

I was going for a coating that was period correct for the vise. On second look, I didn't add a thinner as listed in the spec! Don't know how i missed that and I'm going to try that next. Can you explain what "boiling lead oxide" is? They seem to refer to something like that in the above link.

Originally Posted by 91bronc300
I think one of my issues is that I made my solvent too heavy with the D-limonene (syrupy) and too light with the naphtha (more volatile) so it doesn't thicken up much or quickly once applied. Although I did cook the paint itself down to a pretty thick consistency.

For the linseed oil I used Sunnyside raw linseed oil and then measured 1 part to 20 by weight of lead oxide AKA litharge and then boiled the linseed oil until most of the lead was taken up by the oil. From what I have read (which was scant) boiling linseed oil should be a long process, approaching a day in length, but I only boiled mine for about an hour. I did two batches of oil both being about 2 lbs of oil by weight. 1 part to 20 by weight is about 45 grams of litharge to 2 lbs of oil. The first time I tried keeping the oil under a low heat and deep vacuum in a vacuum chamber for days but this seemed to be a waste of time, so for the second batch I just boiled it openly for an hour and stirring occasionally (holding my breath near the pot!).

There was also a second difference between these batches, the first batch of oil was 'washed' with salt water and sand to remove mucilage and phospholipids before cooking in the litharge. With the second batch, the non-vacuum batch, I did not wash the oil with salt water and sand.

So far I have only used the Japan black that came from the first batch of oil.
 

91bronc300

Well-known member
Joined
Oct 19, 2009
Messages
2,559
McBrownie, I think with just a little more playing around this stuff could look really great. Most of the hard work is already done I think the trick is just going to be finding the right consistency for the paint and getting the baking right.

Are you going to be posting more pictures and results of your efforts? You might try a second cooking on the static jaw of your Prentiss and see what happens. Also, once your paint is mixed you might try to mellow it with heat, I think this takes the place of the aging that I've read elsewhere improves the quality of this stuff.

I don't want to give up on this stuff yet because, even though you can't see it in the pictures, there is a beautiful soap-on-water iridescence effect you get when you move the object around a light source. And if you bring a strong light source close to the painted surface there is a depth to it. I would love to find a way to make the paint cure smooth and glossy all over because all indications seem to point to a really beautiful finish.

Anyway, I'd be interested in any more results you might have and I'll post pictures of my results whenever I have them, whatever they are :lol:
 
Last edited:

fury413rb

Member
Joined
Dec 2, 2014
Messages
9
Fury: do tell how you got the jaws and dynamic slide on that Columbian so shiny. deburring wheel on a bench grinder, scotch brite pad on a hand grinder?

awesome job and the paint really pops especially with the lettering.

Also i'd listen to JasonEOC because the man does know his Reed vises and history.

ALL: anybody restore a Reed "C" series vise lately or ever that would like to put up a detailed before and after restoration on this thread. i'm looking to take my Reed 2C apart this weekend and if i run into any issues it would be nice to only search one thread for the answer.

i used green scotch brite pads in 4.5 dewalt grinder
 

EOC_Jason

Well-known member
Joined
Jun 25, 2012
Messages
11,388
Location
Bentonville, AR
Your first post you said 3/4... But below you said 1/4, and I think the email you said 1/4...

The bigger the drill the better, but even a regular 3/8" corded drill should work fine for 1/4" steel... Like I said before, a good sharp bit and some WD40 or other oil is what makes the difference between easy drilling or having to fight with it.

As for bolting down the table, that really depends on how tippy / top heavy it is... If you think it will tip then you might want to bolt it down in a couple spots, or if it's against a wall drive some lag bolts into some studs.

BB: sounds good. yes i agree threading the holes on half inch or thicker would be a good plan, but 1/4 inch plate i'm looking to bolt it onto the table with a bolt and nut.
 

sz0k30

Well-known member
Joined
Feb 12, 2014
Messages
890
Location
SE Michigan
SUCCESS! :rocker:

This is an update on the Prentiss vise I bought on pg 1138 post #22752
and gave more details on pg 1147 post #22929.

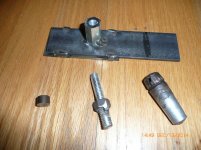
I finally removed the swivel jaw pin. Attached are photos of the tool I made
to get it done.

I made a screw jack from some flat plate, a 3/8" coupling nut that I cut down
to @ 1-1/4" long, a 1/2" dia x 5/16" spacer and a 3/8" x 2-1/4" threaded rod with a nut welded to it. The spacer was to fill the gap where the pin was short of the vise body.

I placed the spacer in the pin recess, put a box wrench on the jack assembly
before inserting it into the vise body. A few rotations of the nut and the pin
popped out!

A ratcheting box wrench might have been easier, but caution. A buddy has ratcheting box wrenches that have a reversing lever. My ratcheting box wrenches have to be physically rotated. So while it may have been a little easier to raise the rod, it would have been impossible to lower it.

The jaw swivels, but it is a real *****, have to keep whacking it with a mallet.
The swiveling jaw has 2 @ 1/8" dia holes? offset on opposite sides. What are they for? Will the jaw loosen up if I just keep working it? How hard is the swiveling supposed to be?
 

Attachments

  • P1040069.jpg
    P1040069.jpg
    145.5 KB · Views: 61
  • P1040067.jpg
    P1040067.jpg
    137.6 KB · Views: 55
  • P1040066.jpg
    P1040066.jpg
    145.8 KB · Views: 62
  • P1040065.jpg
    P1040065.jpg
    144 KB · Views: 82

McBrownie

Well-known member
Joined
Mar 27, 2014
Messages
1,827
Location
Cleveland, OH
The jaw swivels, but it is a real *****, have to keep whacking it with a mallet.
The swiveling jaw has 2 @ 1/8" dia holes? offset on opposite sides. What are they for? Will the jaw loosen up if I just keep working it? How hard is the swiveling supposed to be?

SZ,

Good news and a good solution. KMScott did a little welding on my No. 19 swivel jaw and he thinks those holes were used in a jig to hold the jaw for machining and then filled with lead when finished. Makes sense to me.

My swivel jaw is tight too. I've seen Tool and Die makers use Prussian Blue to check for interference when fitting parts. The stuff is messy, but makes it easy to see what is hitting. Spread some compound on one part, put it together with the other part, take them apart and see where the has transferred (from one part to the to the other). Wipe it off, file and or grind as necessary, reapply and repeat until you get it right. Take your time and only take off a little metal at a time. Here is the stuff I'm talking about:

http://www.amazon.com/dp/B000HBM86Q/?tag=atomicindus08-20

If anyone has a better method, please let me know as I need to do this to mine as well.
 
OP
D

drivesitfar

Well-known member
Joined
Oct 23, 2013
Messages
36,174
Location
Pacific Northwest
Jason: thanks for the tips and find some sharp drill bits and keep you posted.

BB: i probably did see your pictures of your steel bench with your big vise on it, but can we really see too many steel benches with vises on them?

91 and McB: thanks for bringing the Japanning process back over here to this thread from the Vise thread.

SZ: like your idea about the ratcheting closed end wrench for tightening up the bolt and popping the pin out with your cool little screw jack. just a thought couldn't you drop the ratchet wrench down to the base bolt and loosen the upper bolt with a box end wrench? thanks for sharing your tips and happy to see you got that stubborn buggar out. have you also got the swivel jaw loose or is that next?
 

EOC_Jason

Well-known member
Joined
Jun 25, 2012
Messages
11,388
Location
Bentonville, AR
Those holes are on all of them, I think they used them as alignment or something when milling the parts.

If the swivel is really stuck, you can use some marking spray to see where it is rubbing and sand down those spots a hair. I would clean off all the rust first and see how much that help. It should be bare metal to bare metal (with oiled surfaces).

The jaw swivels, but it is a real *****, have to keep whacking it with a mallet.
The swiveling jaw has 2 @ 1/8" dia holes? offset on opposite sides. What are they for? Will the jaw loosen up if I just keep working it? How hard is the swiveling supposed to be?
 
To avoid these ads, REGISTER NOW!

sz0k30

Well-known member
Joined
Feb 12, 2014
Messages
890
Location
SE Michigan
like your idea about the ratcheting closed end wrench for tightening up the bolt and popping the pin out with your cool little screw jack. just a thought couldn't you drop the ratchet wrench down to the base bolt and loosen the upper bolt with a box end wrench? thanks for sharing your tips and happy to see you got that stubborn buggar out. have you also got the swivel jaw loose or is that next?

DIF If you look at my pictures, the only moving part is the threaded rod with the nut welded to it. The coupling nut is welded to the base plate & doesn't move.
 

autopts

Well-known member
Joined
Jul 4, 2009
Messages
2,268
Thanks! I played around with it last night. It'll definitely take a press (after I weld it.)


I think it's only the 5" (and up?) based on autopts's comment. Mine is from '79. My 4.5" ('46) seems to be 1 piece. Anyone know if the larger Wiltons were always made in two pieces?

Yes, its the 500, 600, C2. I think some of the C3's also. I'm not sure on the 800. The only one I ever had was one piece.
 

mtesh73

Well-known member
Joined
May 19, 2013
Messages
185
Location
Colts Neck, NJ
nick,
hope all is well. i saw your post a few pages back about the dowel in the dynamic jaw. can you elaborate more on what and how that works for the uninformed amongst us, myself included. i would like to play around with the C2 i emailed you about a few weeks ago to see first hand. i am not sure if i emailed you the completed pictures, but i posted them in this thread a few pages back (page # 25) as well. thanks in advance.
michael


Yes, its the 500, 600, C2. I think some of the C3's also. I'm not sure on the 800. The only one I ever had was one piece.
 
Last edited:

taumac

Well-known member
Joined
Aug 30, 2011
Messages
8,104
Location
Brooksville, Fl
I know there are many many people on the GJ with years of experience and knowledge on here. While in the process of doing this little vise restore I found one small tip I can add to someone doing a paint job.
76bd2015fb8ac882e1c9874344a17fac.jpg

To get perfect mask lines tapping off a vise I use a small file to cut the tape to the contoured edges I want to mask off.

Have a good one, Gerard
 
OP
D

drivesitfar

Well-known member
Joined
Oct 23, 2013
Messages
36,174
Location
Pacific Northwest
Taumac: that tape looks different than the blue tape I (we) use. care to share the brand and cost of it or best place to buy some. it looks a little stiffer so your file idea might work better on it than the softer style. also i wish i had sunshine and Bermuda grass in my pictures today. i'm searching for an oven for my shop so i can cook vises.

SZ: i know you had the nut welded to the threads and i was only mentioning a method to use the ratchet style closed end wrench (put over threads and on nut before placing inside static under pin) to tighten and then sliding it down onto the other nut to sit there while taking another end wrench to loosen the little screw vise to pull it all out. no big deal if i'm not quite explaining it correctly and wanted to say i like your little tool you made even though i'd use something different since i don't weld (yet).

AutoPTS: thanks again for your wisdom on how those Wilton vises are made.
 

taumac

Well-known member
Joined
Aug 30, 2011
Messages
8,104
Location
Brooksville, Fl
I could use a oven to speed up this process cause it hasn't been exactly " painting weather". Im in a time crunch with this project. This is what I use.
9ccba2cfb5b32b7b033b5a293e387583.jpg

It works well and learned that the cheapy tape works but not as well. I think I picked it up at HD or Lowes.

Have a good one, Gerard
 
Last edited:

Outlawmws

Well-known member
Joined
Aug 9, 2011
Messages
39,479
Location
The Badlands
Taumac, you can get a large box and a heat lamp and improve things greatly for drying times if that is the issue. just be careful with the fumes, cardboard and the hot part of the heat lamp...

I used a Cardboard box "paint booth" for YEARS for small parts.
 

BJ42LX

Well-known member
Joined
Dec 29, 2010
Messages
2,811
Location
WNY
To get perfect mask lines tapping off a vise I use a small file to cut the tape to the contoured edges I want to mask off.

Have a good one, Gerard

Another method is to use a fine file. Gently run the file along the masked edge of the workpiece. This works best when the edge is well defined, like the edge of the anvil portion of a vise. On light pass is all it takes.
 

jakemac

Well-known member
Joined
May 21, 2013
Messages
9,035
Location
New England
I've been leaving freshly painted items in the furnace room to dry. It's the warmest room in the house all year round (hot water is pre-heated by the furnace before being stored in the hot water tank).
 

taumac

Well-known member
Joined
Aug 30, 2011
Messages
8,104
Location
Brooksville, Fl
Another method is to use a fine file. Gently run the file along the masked edge of the workpiece. This works best when the edge is well defined, like the edge of the anvil portion of a vise. On light pass is all it takes.
that's the idea I was saying but I might not of said it right.

Have a good one, Gerard
 

BJ42LX

Well-known member
Joined
Dec 29, 2010
Messages
2,811
Location
WNY
that's the idea I was saying but I might not of said it right.

Have a good one, Gerard


Doh! I just went back and re-read your post. For some reason I read it as, "used a fine knife to cut..."

My apologies.

Dyslexia rules!
 

taumac

Well-known member
Joined
Aug 30, 2011
Messages
8,104
Location
Brooksville, Fl
Doh! I just went back and re-read your post. For some reason I read it as, "used a fine knife to cut..."

My apologies.

Dyslexia rules!
OH, no problems. I had to go back myself and read my post. I tend to ramble stuff off quicker than my fingers can type. LOL

Have a good one, Gerard
 

gregthor

Well-known member
Joined
Feb 24, 2010
Messages
267
Location
MICHIGAN
Hi Guys and Gals,

I was doing a Chas Parker 974 1/2 tonight and it needed a new handle spring, plunger and set screw for the spindle. I know several threads have covered this in the past but the camera was handy and I thought I would add it to this thread even if it is a duplicate. This is a method you can do without a lathe.

The handle (actually spindle)was missing all three parts so pinched fingers were in the future for this vises operator.
View media item 46097
So I needed a 7/16 - 14 slotted set screw, a small spring and a plunger. I had to make all three. I used a grade 5 bolt so I could saw it, a spring I found in my spring drawer and a solid brass wood screw with the threaded section sawed off.
View media item 46098
I needed to make my own slotted set screw and it is difficult to get the saw cut in the middle of the bolt. I found a plastic plug that fit perfect over a 7/16 bolt. With the square head it was easy to start the saw in the center. Then by the time the saw got down to the bolt it had a "guide" to help the saw put the slot right in the center of the bolt.
View media item 46099
I sawed until I was happy with the depth of the slot.
View media item 46100
Then some touch up on belt sander. It was easy to hold with the bolt head still attached.
View media item 46101
Next I sawed the set screw to length.
View media item 46102
The three new parts ready to be installed.
View media item 46103
Bad photo but brass screw installed with head down and spring.
View media item 46104
The set screw was a little high. I wanted the set screw flush.
View media item 46105
That's better with a little trial and error the feel was right and the screw flush.
View media item 46106
Take Care, Greg
 
OP
D

drivesitfar

Well-known member
Joined
Oct 23, 2013
Messages
36,174
Location
Pacific Northwest
Greg: awesome pictures of your home made fix. Yes we've talked about this at least once on here and maybe a couple times, but i'm pretty sure your pictures are the first with the hack saw in action. some of the guys use a small metal ball bearing instead of the brass screw head, but if yours works that's all that counts.

ALL: anybody doing a vise restoration please post before and after here or if you did one and took pictures please post it even if it happened years ago so we can have a lot more vises on this thread. thanks as always.
 

QtrHorse13

Well-known member
Joined
Dec 16, 2014
Messages
181
Location
TX
Hello everyone.....

I posted the below info/ questions in the general questions forum and was asked to move them here. I should have done more research before starting another vise thread. Any info would be greatly appreciated and after reading this thread and others on this forum, some of my questions have been answered. I spent hours last night looking at some of the great restored vises on this forum.


I have some questions about a Columbian 204 1/2, non M3 vise I bought today. I have wanted a heavy duty vise for awhile now but did not want a cheap model and could not find an older model I wanted locally that someone did not want a ridiculous amount for. I finally got serious about looking last week and found this vise on Craigslist yesterday. They wanted $30 for it and it was 5 minutes from my work. I figured that was a decent price if it was in okay shape. The only real issues I saw was the surface rust and the bent handle. The jaw moves in out out easily, the jaws evenly / squarely align when closed and there is hardly any play in the arm when it's adjusted out so I assumed there was no damage. There are some great vise restorations on this forum. Now on to to questions.

I Could not find any info or pics of this model with this type of swivel/ moveable base. It seems like it would be sturdy/ lock up tightly but more time consuming to adjust because of the notches and having to loosen that wing nut under neath every time I wanted to adjust it.

Can I remove/ cut off the bent handle and replace it with most any strong steel? I have a machinist friend and he said that he could make me a new handle with new ball ends.

The jaws are in good shape other than surface rust. There is no damage to the jaws at all. If it was not for the bent handle, I would have thought the vise was almost unused in its prime. I can see the pins that hold the jaws in. I assume the best way to remove them is to drive out the pins and push/ hammer the jaws out? I imagine they are seized in there pretty good.

What is the best way to remove all the surface rust; media blasting, wire wheel or another way?

What is the best coating to use; powder coat, cerakote, anodize or paint?

Is it best to leave the tube unfished so it moves in and out more freely?

Below are some pictures of the vise I bought. Sorry for the poor cell phone pics, I was in a hurry to take some pictures of it when I got it home.


OP
D

drivesitfar

Well-known member
Joined
Oct 23, 2013
Messages
36,174
Location
Pacific Northwest
Qtr: thanks for reposting over here on the Vise Repair 101 thread. your vise looks like it has normal rust so you have a few options for removing it.

1) Electrolysis would be my first choice and here is a great thread to show you how to do that if you want to learn and don't already know how.http://www.garagejournal.com/forum/showthread.php?t=237752&highlight=electrolysis

2) Wire wheeling off all that rust and with a vise that big hopefully you have eaten your Wheaties

3) WD 40 on a rag might even remove most of it if it's just surface rust

Now as far as the handle i would try to save the original and take your time on a little press. i'd remove the main screw from the vise first and if you have any questions on how to do that do a quick search and if you don't find your answer just ask how.

that old Columbian vise will work great without the pipe jaws that are missing and if you know anybody that has that vise with the pipe jaws maybe you can get the measurements and have your machinist friend make some if you are not able to. here's my Columbian 205 M2 that should have pipe jaws and works fine and it has the more modern swivel than yours. I like that you have the original wing nut with your old swivel that is usually missing or broken.
 

Attachments

  • WP_20140529_010.jpg
    WP_20140529_010.jpg
    117.1 KB · Views: 59
  • WP_20140616_016.jpg
    WP_20140616_016.jpg
    144.4 KB · Views: 45

Outlawmws

Well-known member
Joined
Aug 9, 2011
Messages
39,479
Location
The Badlands
SNIP

I Could not find any info or pics of this model with this type of swivel/ moveable base. It seems like it would be sturdy/ lock up tightly but more time consuming to adjust because of the notches and having to loosen that wing nut under neath every time I wanted to adjust it.

Can I remove/ cut off the bent handle and replace it with most any strong steel? I have a machinist friend and he said that he could make me a new handle with new ball ends.

I can see the pins that hold the jaws in. I assume the best way to remove them is to drive out the pins and push/ hammer the jaws out? I imagine they are seized in there pretty good.

What is the best way to remove all the surface rust; media blasting, wire wheel or another way?

What is the best coating to use; powder coat, cerakote, anodize or paint?

Is it best to leave the tube unfished so it moves in and out more freely?

Below are some pictures of the vise I bought. Sorry for the poor cell phone pics, I was in a hurry to take some pictures of it when I got it home.


That's an oldie! Turn of the last century, or so. That you have the base with the cogs is good; no slippage when you crank sideways on it. And truthfully how often do you actually need to swivel a vise?

Second the pressing the handle straight as the first choice.

While it would be nice to get the jaws out, don't tear up the thing doing it. they are likely seized, both pins an jaws.

rust removal: Second the E-Tank. if that's a no go, 4" mini grinder with a braided cup wire wheel. But an E-Tank is easy...


Finish: paint: its a vise. if you want to go whole hawg, a couple of guys have been doing Japanning, and that looks interesting. lots of notes available in their posts.

Yes, Leave the slide and the jaws bare.


Great find! :beer:
 
To avoid these ads, REGISTER NOW!
Top Bottom