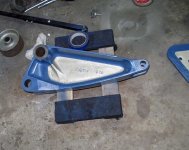
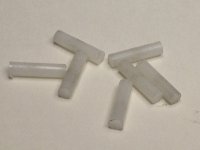
Awesome! Thanks for the photos. That helps a lot actually seeing one. The nylon I have a bit smaller diameter but I think it will be just fine once I shorten it a bit. Oh and yes - the cross bar(s) were bent and I have straightened them out. The other end of the stem was also bent a little which is also now straight. Still a good bit to go. When I got this jack it had sat outside for some time and apparently had been neglected. The grease in the wheels, etc is more akin to an adhesive than a lubricant. All thick, hard, and nasty. Fortunately the inside of the hydraulic unit was pretty clean. After the last of the oil was out there was some gooey black gunk but not much. Once I get it all finished up I'll post some new photos of it.
Many thanks to you and Edgar for all of your knowledge and help. Without the resources on here that you all have put together and posted over time this would have been a far more challenging project to figure out and get done.
Edit to add.... another small update. Hot my bigass draglink socket bit in this morning. A bit of filing and fiddling and hammered into the head of one of the big slotted caps and it came right on out.
")
Went onto the next big one and it took a big chunk of material off of the slot of the cap.

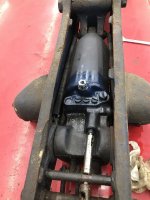
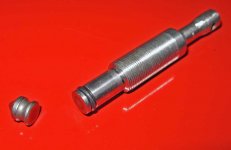
Well..... that one is stuck for a bit longer. Its going to come down to taking a rotary tool with a tiny wheel and cutting the slot deeper (the slot was not nearly as deep on this one which is why it would not work). Also got the smaller of the three off as well as the freeze plug over the safety and that out as well (carefully noted exactly 1.5 turns from full in to reinstall). Just gotta get that last ****** out and I can finally get everything truly all cleaned out and back together.
Edit again to add more.... cut the slot in the last cap about 1/16th deeper and that did the trick. Then the drag link socket was able to set in deep enough for good purchase and it came right out.
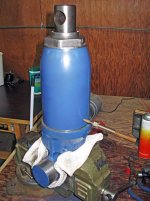
Now onto the parts washer (and hope it does not bend the flimsy tray in half) and start on the road to recovery.
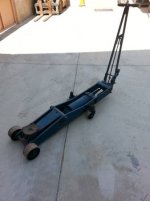
I realize this one is not an antique. Maybe I'll come across on like eventually. This is is just a bigass vintage(ish) jack. Probably late 70's to early 80's would be my guess. Either way it deserved a new lease on life. I'll bump this eventually with some photos and whatnot.

 Got to where it would leak down faster then I could jack something up and it was starting to dribble on the floor a good bit.
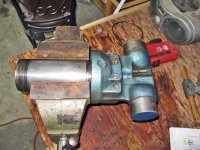
 I cannot even get that to unscrew. Tried clamping the body in a 6" vise and taking a 20" pipe wrench to it with no luck. The seal kit did come with new seals for that and I'd prefer to replace them but I do not want to damage anything so I'm a bit stuck on that one.


 Not sure if the springs might just be a bit worn or if the new seals are just so tight that it needs a little bit of time. I can put a couple of pounds of weight on the saddle and it will slowly go on down though.