To avoid these ads, REGISTER NOW!

Above 1200 Sq/FT The Lone Beech Garage (60x46x16)

Wokspaces above 1200 squarefeet.
OP
S

sbosecker

Well-known member
Joined
Sep 25, 2012
Messages
3,539
Location
Peachtree City, GA
Re: The Lone Beech Garage Build Thread (60x46)

Monday - May 8, 2017

As I mentioned in my response to DrivesItFar, I had used the incomplete Miter Saw Station to trim imperfections from one of the poplar planks.


20170505-01.jpg 20170505-02.jpg

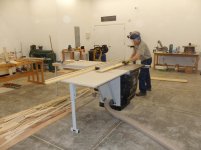
The station performed as I had hoped, allowing a pretty unwieldy plank to be cut without a fuss. The 12 inches wide board was just barely within the limits of the saw's capacity.


20170505-03.jpg

On Saturday I jointed the plank and ripped it into 1-1/2 inch wide strips. This will be the start of the station's face frame.

At this point I realized that there was a reason the author of the plans had used pocket screws to construct the face frame. I had assumed my smallest biscuits (size 0 - I hadn't measured them) & the biscuit joiner would be able to hold the various pieces of the Face Frame together. When I actually measured these smallest biscuits I found them to be too large.

The upside - I get to buy a new tool. Ha!


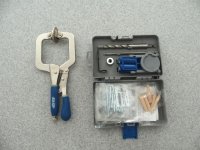
20170508-01.jpg 20170508-02.jpg

My Kreg R3 Pocket Screw Jig has arrived. I also bought the Kreg Face Clamp. I'll be familiarizing myself with this tool and then I'll start assembling the Face Frame.

...but that will be at least a week away as life will keep me out of the Lone Beech Garage for a while. Non-Garage related events are calling.


Scott
 
Last edited:
To avoid these ads, REGISTER NOW!
OP
S

sbosecker

Well-known member
Joined
Sep 25, 2012
Messages
3,539
Location
Peachtree City, GA
Re: The Lone Beech Garage Build Thread (60x46)

Tuesday - May 9, 2017

Late last week, in addition to getting a few items done on the Miter Saw Station, I acquired a tool necessary for a future automotive project mentioned earlier in this thread.

Post 1743


20170509-01.jpg

A Snap-On SADM10E #10 Double-Hex Bit Socket was purchased via eBay. This tool is specified for an early 21st century Toyota Corolla engine's head bolts. In the not too distant future I am hoping to do a repair that will fix the oil consumption issue that the 2002 Toyota Corolla my son uses to go to Georgia Tech is afflicted with.
This was only the second time I've seen this tool listed on eBay since I started watching over 6 months ago.


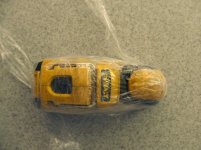
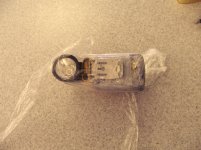
20170509-02.jpg 20170509-03.jpg

Here's the story on the first time I saw it listed. Back in January I thought I'd taken care of this need when I won a different eBay auction. Imagine my surprise when I opened the package and found a DeWalt Flashlight.

Ha!


Scott
 
Last edited:

shortykorte

Well-known member
Joined
Sep 1, 2014
Messages
8,039
Location
Tallahassee, Fl
Re: The Lone Beech Garage Build Thread (60x46)

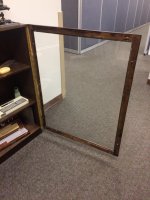
I purchased the same Kreg tool you did. After a year or two, I finally found a project to use it on. This door frame is 36" wide, 43" tall. I was greatly impressed with how strong the frame was using glue and the pocket screws.
 

Attachments

  • image.jpg
    image.jpg
    147.3 KB · Views: 92
OP
S

sbosecker

Well-known member
Joined
Sep 25, 2012
Messages
3,539
Location
Peachtree City, GA
Re: The Lone Beech Garage Build Thread (60x46)

I purchased the same Kreg tool you did. After a year or two, I finally found a project to use it on. This door frame is 36" wide, 43" tall. I was greatly impressed with how strong the frame was using glue and the pocket screws.

shortykorte,

Thanks for the testimonial! I look forward to using this thing.

I've spent the last week in southwestern Colorado (Durango & Mesa Verde National Park) and returned home today. I hope to get back to projects in the LBG soon.

Best regards,

Scott
 

drivesitfar

Well-known member
Joined
Oct 23, 2013
Messages
36,096
Location
Pacific Northwest
Re: The Lone Beech Garage Build Thread (60x46)

SB: i so wish i had your space to work and store my cool stuff. i know that Toyota engine rebuild will be a cool project and i bet you are filling your head with all sorts of video and cool stuff you've learned on how to do it.

1/2 cup just rebuilt an engine for his son's race car so you might want to take a gander at his thread and maybe ask him a few questions on what he might do when rebuilding an engine cause he seemed to always be under control. here's the link to his thread if you haven't already seen it:

http://www.garagejournal.com/forum/showthread.php?t=225061&highlight=shed+downunder

also on the really high end here's a thread about a guy (madhatter) that spiffs up high performance engines for himself and his friends and he's currently making a 700 or maybe it's a 1000 HP engine for an old Lamborghini that he bought.

http://www.garagejournal.com/forum/showthread.php?p=6511589#post6511589

the miter station looks like it will work well in your space and be a joy to work on for you.

cheers
 
OP
S

sbosecker

Well-known member
Joined
Sep 25, 2012
Messages
3,539
Location
Peachtree City, GA
Re: The Lone Beech Garage Build Thread (60x46)

Checking in. Hope all is ok around LBG.

shortykorte,

Thank you for checking in and for your words of concern.

The Lone Beech Garage is OK but the Lone Beech Melon Farm is not.

My mother passed away unexpectedly and I am in southern Indiana assisting with that transition.

Best regards,

Scott
 

smsteve

Well-known member
Joined
Aug 28, 2008
Messages
111
Location
Montrose, Kalifornia
Re: The Lone Beech Garage Build Thread (60x46)

Scott,

So sorry to hear of your loss. I lost my mom last year unexpectedly as well so I can definitely feel your pain. Best to you and your family.
 

drivesitfar

Well-known member
Joined
Oct 23, 2013
Messages
36,096
Location
Pacific Northwest
Re: The Lone Beech Garage Build Thread (60x46)

Scott, so very sorry to hear this news about your mom. I'm sending sympathy and prayers to you and your family. I know she was a great lady cause her son is a great guy.

I can't recall if your dad is still here, but in any case I know its hard and I know one day my 85 year old parents wont be there to visit or call.

Take care
 

Bob Heine

ALLIANCE MEMBER
Joined
Oct 24, 2009
Messages
10,709
Location
Boca Raton, Florida
Re: The Lone Beech Garage Build Thread (60x46)

Scott, so sorry for your loss. My mother passed away 9 years ago and it is a hole in your heart that doesn't go away. The blessing is that she lives on in your memories.
 

C_F

ALLIANCE MEMBER
Joined
Jan 21, 2005
Messages
9,675
Location
Utah...SNOW BLOWS!
Re: The Lone Beech Garage Build Thread (60x46)

Heartfelt condolences to you and your family. I hope all goes as well as can be, during this time.
 
OP
S

sbosecker

Well-known member
Joined
Sep 25, 2012
Messages
3,539
Location
Peachtree City, GA
Re: The Lone Beech Garage Build Thread (60x46)

Thanks to all for the expressions of sympathy - they are much appreciated.

I spent 8 days at the Lone Beech Melon Farm trying to be of assistance to my father during this time of transition.

Although I will be visiting Indiana often, I should be back in the LBG doing stuff soon.

Best regards,

Scott
 
OP
S

sbosecker

Well-known member
Joined
Sep 25, 2012
Messages
3,539
Location
Peachtree City, GA
Re: The Lone Beech Garage Build Thread (60x46)

Saturday - June 24, 2017

A few weeks ago my daughter, who lives about 2 hours away, visited. While she was here, I changed her oil and I installed a new air filter. When I told her that the air filter was pretty dirty she asked if the change would improve the performance of her car, a 2007 Nissan Versa with about 165,000 miles. She indicated it seemed a bit sluggish.

Hmmm... she bought the car used with about 84,000 miles. I hadn't changed the spark plugs for her and I was pretty sure the previous owner would not have either. The spark plugs should have been changed at 105,000 miles so this car was well overdue for a new set of spark plugs.

I had also noted that she needed new windshield wipers. I started the process of collecting the various needed parts via on-line sources.

All parts are Nissan OEM:

28890-ZN90A - Driver's Side Windshield Wiper
28890-EM31A - Passenger Side Windshield Wiper
28795-EL00A - Rear Window Windshield Wiper
22401-JD01B - Denso FXE20HR11 Spark Plugs (4)
14035-EL00A - Intake Manifold Gasket
16175-JA00A - Throttle Body Gasket

So today my daughter arrived to celebrate a belated Father's Day. The plan was for her to get here somewhat early and I'd start working on her car. In the evening my wife, children and myself would all go to have a nice family dinner at a local sea food restaurant after which my daughter would drive back to her house.


20170624-01.jpg

When she arrived it was raining so we pulled the Versa into the LBG. After 2 hours of driving the engine was hot so I didn't want to start on the spark plugs. Instead I started with the rear windshield wiper.


20170624-02.jpg 20170624-03.jpg 20170624-04.jpg

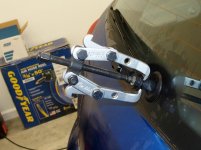
The owner's manual for this car indicates that the replacing the rear wiper is a job for a Nissan Service Department. It is difficult to replace the this item without damaging something if you don't have the right tools. I opened the cover that protects the Wiper Blade bolt/nut and used a impact tool to free the nut. Then I used a puller to remove the wiper blade from the splined shaft.


20170624-05.jpg

I removed the old blade and attempted to install the new blade... then I discovered that the new blade had a piece of plastic that was interfering with the installation.


20170624-06.jpg 20170624-07.jpg

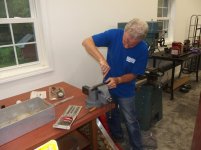
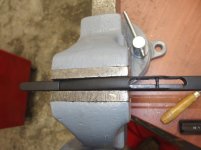
I mounted the new blade into a vise, got a small flat file and a round file and began working on the plastic that was interfering. After about 10 minutes of work the plastic had been removed and I was able to install the new blade.

I will be calling the Nissan parts department that I obtained this part from and see if I somehow ordered the wrong part.


Continued in next post...View attachment 660862
 
Last edited:
OP
S

sbosecker

Well-known member
Joined
Sep 25, 2012
Messages
3,539
Location
Peachtree City, GA
Re: The Lone Beech Garage Build Thread (60x46)

Continued....

With the Rear Windshield Wiper installed, I started working on replacing the spark plugs. Changing the spark plugs on this car is a bit of a drill. When the Engine Cover on this 1.8 L engine is removed the person working on the car discovers that the Intake Manifold must be removed to get to the spark plugs.

A couple of videos I watched were useful in preparing for this procedure.


Video 1


Video 2

Video 1 rambles quite a bit but follows the Service Manual quite closely. It also uses a technique to remove the spark plugs (telescoping magnet) that I found very useful. Video 2 is concise and offers a procedure that reduces the amount of work involved for this project.

A Trick of the Tail by Genesis was inserted into the music box and the work began.


20170624-11.jpg 20170624-12.jpg 20170624-13.jpg

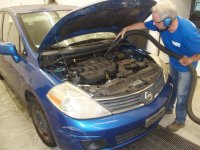
This procedure was going to be opportunities for debris to get into engine openings, I got out a shop vac and cleaned the loose road grime from the engine bay.


20170624-14.jpg 20170624-15.jpg

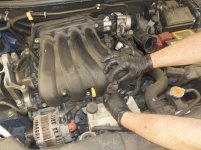
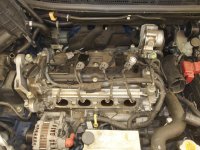
I then loosened the two bolts securing the engine cover. With the cover off, the task ahead is clear. The Intake Manifold needs to be moved to get to the spark plugs.


Continued in next post...
 
Last edited:
OP
S

sbosecker

Well-known member
Joined
Sep 25, 2012
Messages
3,539
Location
Peachtree City, GA
Re: The Lone Beech Garage Build Thread (60x46)

Continued...


20170624-21.jpg 20170624-22.jpg 20170624-23.jpg

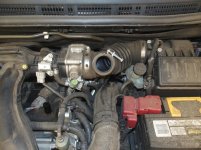
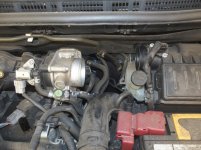
The first order of business is to remove the plumbing from the Air Filter Box to the Throttle Body.


20170624-24.jpg

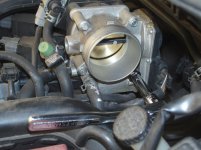
Next the 4 bolts holding the Throttle Body to the Intake Manifold need to be removed.


20170624-25.jpg

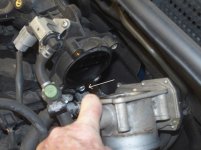
The Throttle Body needs to be moved to access - believe it or not - a bolt that secures the Intake Manifold to the engine. White arrow points to the bolt. A second person is useful for pulling the Throttle Body away from the Intake Manifold to provide access to this bolt. My daughter helped me with this.


20170624-26.jpg

It is my recollection that removing the electrical connection and the rubber tube (white lines show disconnected items) helps a bit with getting the Throttle Body away from the Intake Manifold so this picture was probably taken before actually taking out the previously mentioned bolt.


Continued in next post...
 
Last edited:
To avoid these ads, REGISTER NOW!
OP
S

sbosecker

Well-known member
Joined
Sep 25, 2012
Messages
3,539
Location
Peachtree City, GA
Re: The Lone Beech Garage Build Thread (60x46)

Continued...

20170624-31.jpg 20170624-32.jpg 20170624-33.jpg

On the upper left side of the Intake Manifold is another bolt that needs to be removed.


20170624-34.jpg

In order to access one of the 5 bolts securing the Intake Manifold along the lower part of the manifold, this piece of plastic air intake needs to be removed.


20170624-35.jpg

These mounting brackets receive a couple of "plastic prongs" on the engine cover. Removing them makes access to a couple more bolts securing the Intake Manifold easier.


20170624-36.jpg 20170624-37.jpg

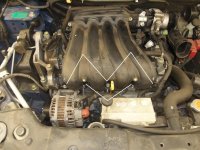
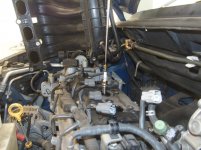
The left picture shows the 5 remaining bolts securing the Intake Manifold. They are numbered and the Service Manual indicates they should be removed in reverse order and installed in numerical order. The picture on the left is the beginning of removing these bolts. Note that the Dipstick interferes with access to the #1 bolt as well as removal and installation of the Intake Manifold. I would remove the Dipstick, do whatever procedure needed to be done, and then quickly re-install the Dipstick to prevent any debris from finding its way into the Dipstick Tube.


Continued in next post...
 
Last edited:
OP
S

sbosecker

Well-known member
Joined
Sep 25, 2012
Messages
3,539
Location
Peachtree City, GA
Re: The Lone Beech Garage Build Thread (60x46)

Continued...

Just a few more items to be dealt with before the Intake Manifold can be moved out of the way.


20170624-41.jpg

There is a wire bundle secured to the Intake Manifold in the lower front. A pliers easily releases the wire bundle from the bracket.


20170624-42.jpg 20170624-43.jpg

The rubber hose that is found on the left side and rear of the Intake Manifold needs to be released. I used a pliers to move the clamp on the side and a screwdriver to release the hose from brackets on the rear.


20170624-44.jpg 20170624-45.jpg

The Intake Manifold is not completely free but it is now free enough to rotate it away from the engine. I secured it to the Hood Post with a large twist tie.

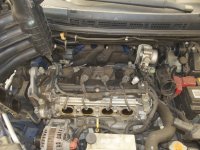
Our goal is now in sight!


Continued in next post...
 
Last edited:
OP
S

sbosecker

Well-known member
Joined
Sep 25, 2012
Messages
3,539
Location
Peachtree City, GA
Re: The Lone Beech Garage Build Thread (60x46)

Continued....

20170624-51.jpg 20170624-52.jpg

I used a ratchet wrench to loosen the bolts holding the Coil Packs. Then I unfastened the electrical connection to the Coil Packs.


20170624-53.jpg 20170624-54.jpg

After I removed the Coil Packs, I used a 14mm Deep Well socket and a 6-inch extension to loosen a spark plug. I then used the magnet to removed the spark plug.


20170624-55.jpg

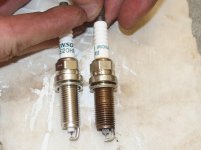
Here's a comparison of the old and new spark plug.


20170624-56.jpg 20170624-57.jpg

I used the magnet to position and install the spark plug. The magnet was strong enough to allow me to start threading the plug and then I could pull the magnet out. I then used the 14mm deep well socket and a torque wrench to tighten the plugs to 14 Ft-lbs.


Continued in next post...
 
Last edited:
OP
S

sbosecker

Well-known member
Joined
Sep 25, 2012
Messages
3,539
Location
Peachtree City, GA
Re: The Lone Beech Garage Build Thread (60x46)

Continued...


20170624-61.jpg

With all of the new spark plugs installed, a new gasket was installed in the Intake Manifold and it was then bolted down. A new gasket was also installed in the Throttle Body. All the plumbing was reassembled and we started the engine.

It sounded good!

My daughter and I shut the car down and cleaned up. We then hopped into the car for a test drive.

This did not go well.

As we drove out onto the street we noticed that that the engine was occasionally missing. Stepping hard on the accelerator made things worse. We drove to a nearby AutoZone to get them to hook up to the OBD. The reading came back as a misfire on the #2 cylinder.

It was now about 4:30 pm. AutoZone was open until 10:00 pm. We returned back home and parked the car in the LBG. The engine was hot again and we decided to go have our Father's Day Dinner and we would return to the Versa afterword.

A bit over 2 hours later we returned to the LBG and went through the procedure of removing the Intake Manifold. It went a lot faster this time. Ha!

I carefully inspected the connections going to the #2 cylinder. I removed the Coil Pack and the Spark Plug. The Spark Plug looked perfect.


20170624-62.jpg 20170624-63.jpg

I drove to AutoZone and purchased a new Coil Pack.


20170624-64.jpg

Old and new Coil Pack side by side.


20170624-65.jpg

New Coil Pack installed in the #2 Cylinder.


The Intake Manifold and plastic plumbing were all reinstalled. My daughter and I hopped in the car for another test drive.

The first couple of miles were an improvement over the missing we had experienced earlier but the engine still wasn't happy. I was very disappointed and we turned the car around to head back home.

From that point on the car ran perfectly. We continued on past my house and drove for about 8 miles. I exercised the engine with hard acceleration followed by cruising at a steady highway speed: The Versa's engine purred throughout the rest of the drive.

We returned to my house and let the car sit for about a half an hour. While we waited I installed the two front windshield wipers. Then we took it for another test drive. Again a flawless response from the engine.

Before allowing my daughter to leave on her 2-hour drive to her home, she was admonished to stop the car and call us if she experienced any issues with the engine. We would go get her if she needed help. Two hours later she called from her home and let us know the engine had done great the whole trip.

I have no idea why the engine behaved oddly that first couple of miles but all seems well now.

Scott
 
Last edited:
Ole Slewfoot

Well-known member
Joined
Feb 22, 2016
Messages
5,098
Location
Freedom, CA
Re: The Lone Beech Garage Build Thread (60x46)

at least you had a comfortable place to do it twice.

I just finished a job replacing an electronic throttle body followed by a coil pooping its bed on the test drive. Store was out of coils though, i'll try again tomorrow.
 

jbmatth

Well-known member
Joined
Jun 3, 2013
Messages
5,694
Location
Northern Ok.
Re: The Lone Beech Garage Build Thread (60x46)

Good job on the repair, sometimes you just can't explain why things go wrong. At least the part was available and the repair was simple enough.
JB
 

Bob Heine

ALLIANCE MEMBER
Joined
Oct 24, 2009
Messages
10,709
Location
Boca Raton, Florida
Re: The Lone Beech Garage Build Thread (60x46)

Scott, I am just a hack backyard mechanic with no training. If the coil wasn't firing, 25% of the engine's fuel was passing un-burned into the exhaust where the O2 sensor would be fouled. It would take a little time for the engine to burn the fouling off the O2 sensor, which would then provide an accurate signal to the engine management computer so it could adjust the fuel delivery. I could be wrong but if I'm close, you should have peace of mind that your daughter's car is going to continue to perform properly.
 
OP
S

sbosecker

Well-known member
Joined
Sep 25, 2012
Messages
3,539
Location
Peachtree City, GA
Re: The Lone Beech Garage Build Thread (60x46)

Good job on the repair, sometimes you just can't explain why things go wrong. At least the part was available and the repair was simple enough.
JB

Scott, I am just a hack backyard mechanic with no training. If the coil wasn't firing, 25% of the engine's fuel was passing un-burned into the exhaust where the O2 sensor would be fouled. It would take a little time for the engine to burn the fouling off the O2 sensor, which would then provide an accurate signal to the engine management computer so it could adjust the fuel delivery. I could be wrong but if I'm close, you should have peace of mind that your daughter's car is going to continue to perform properly.


JB & Bob,

Thanks for the kind words and the insight. I'm not a mechanic so I'm feeling my way along on these things.

Unfortunately my daughter called today and she thinks the car is missing occasionally. She was driving home from work so I asked her to stop into an AutoZone and have them read the OBD computer again.

AutoZone's reader had #2 cylinder misfire.

OK, that's the same cylinder but... in my experience AutoZone's reader only reads, it doesn't clear codes.

She's two hours away and really doesn't have a place to work on the car. Delta called me and I'm going to Lima Peru tomorrow.

So, she's going to monitor the situation for the next couple of days. When I get back from my trip I may take the beater Corolla my son used to get back & forth from GA Tech up to my daughter's place. Then I'd drive her Nissan back to the Lone Beech Garage and do some trouble shooting.

I'd probably swap the new #2 coil pack into the #1 cylinder and the #2 spark plug into the # 3 cylinder and then see what happens. If we get a misfire I'd expect the code to indicate a different cylinder, if not... well then something else is probably going on.

One other possible item, I couldn't get my torque wrench onto Bolt #1 of the 5 bolts holding the Intake Manifold to the engine intake ports. Bolt #1 lives between the #2 Cylinder and the #3 Cylinder... Could it be that there's a very small, intermittent leak due to improper torque? Another thing to check if I can find an extension that allows me to apply the required 20 Ft-lbs of torque to Bolt #1.

We'll see what happens the next couple of days.

Scott
 
Last edited:
AZpilot

Well-known member
Joined
Sep 29, 2012
Messages
413
Location
Mesa, AZ
Re: The Lone Beech Garage Build Thread (60x46)

First, Condolences on your loss.


On the Toyota, is it possible to swap the harness and wire to the spark plug?
 

drivesitfar

Well-known member
Joined
Oct 23, 2013
Messages
36,096
Location
Pacific Northwest
Re: The Lone Beech Garage Build Thread (60x46)

SB: i'm behind you all the way on this engine rebuild and while i won't be much help i'll try to follow along and give you some support.

I LOVE THE OLD PRE LONE BEECH GARAGE PICTURE WITH THE TARP OVER THE TOYOTA'S ENGINE!! :thumbup::thumbup:

best of luck on your troubleshooting your daughter's car issue and on your flight to Peru.

I'm heading up to one of our daughter's condo tonight to clean out their tub's drain that probably has a big hair ball in it.

cheers
 

jbmatth

Well-known member
Joined
Jun 3, 2013
Messages
5,694
Location
Northern Ok.
Re: The Lone Beech Garage Build Thread (60x46)

Scott,
If you couldn't get that bolt to torque and think you might have a vacuum leak there try spraying carb cleaner in that area, if it is pulling a vacuum it will **** the cleaner in and the engine will run differently, probably faster. You won't have to take the whole manifold off just tighten that bolt more.

Did you check the gap on all of the new plugs? Even though they are supposed to be pre-gaped I've never bought a full set that were the same and some engines may need different gaps than what the plugs come as.

Also if you have the manifold off make sure to get good contact on all wire connections, and use electrical parts cleaner to clean them out.

Hope this helps, if not please don't blame me. :)
JB
 

BIGBAUM83

Well-known member
Joined
Jan 4, 2016
Messages
274
Location
Nebraska
Re: The Lone Beech Garage Build Thread (60x46)

I'm probably going to get flamed for recommending something from harbor freight, but they sell a few different OBDII scanners that actually work really well for the do-it-yourselfer. I have the Professional model. It will read and clear codes, even works in my duramax. Beats relying on the parts store.
 
OP
S

sbosecker

Well-known member
Joined
Sep 25, 2012
Messages
3,539
Location
Peachtree City, GA
Re: The Lone Beech Garage Build Thread (60x46)

First, Condolences on your loss.


On the Toyota, is it possible to swap the harness and wire to the spark plug?

AZpilot,

Thank you.

Just to be clear, my daughter's car (that I'm working on) is a blue 2007 Nissan Versa.

To your question... No, I don't think so.

Best regards,

Scott
 
OP
S

sbosecker

Well-known member
Joined
Sep 25, 2012
Messages
3,539
Location
Peachtree City, GA
Re: The Lone Beech Garage Build Thread (60x46)

SB: i'm behind you all the way on this engine rebuild and while i won't be much help i'll try to follow along and give you some support.

I LOVE THE OLD PRE LONE BEECH GARAGE PICTURE WITH THE TARP OVER THE TOYOTA'S ENGINE!! :thumbup::thumbup:

best of luck on your troubleshooting your daughter's car issue and on your flight to Peru.

I'm heading up to one of our daughter's condo tonight to clean out their tub's drain that probably has a big hair ball in it.

cheers


DrivesItFar,

Thanks for the support.

I had to chuckle about your daughter's tub drain... I remember disassembling some plumbing - OK, it was the toilet - in my daughter's bathroom when she was little and finding a red Barrel-Full-Of-Monkeys monkey caught in a choke point.

Best regards,

Scott
 
OP
S

sbosecker

Well-known member
Joined
Sep 25, 2012
Messages
3,539
Location
Peachtree City, GA
Re: The Lone Beech Garage Build Thread (60x46)

Scott,
If you couldn't get that bolt to torque and think you might have a vacuum leak there try spraying carb cleaner in that area, if it is pulling a vacuum it will **** the cleaner in and the engine will run differently, probably faster. You won't have to take the whole manifold off just tighten that bolt more.

Did you check the gap on all of the new plugs? Even though they are supposed to be pre-gaped I've never bought a full set that were the same and some engines may need different gaps than what the plugs come as.

Also if you have the manifold off make sure to get good contact on all wire connections, and use electrical parts cleaner to clean them out.

Hope this helps, if not please don't blame me. :)
JB


JB,

Thanks for your thoughts!

I would like to do some more troubleshooting but - as I'll explain in a future post - currently the Versa's dilemma is moving along without me.

I've heard of the carb cleaner trick and I'll use it if I get a chance.

I did check the spark plugs gap. The Nissan's specification was for a gap of .043 inch and most of the plugs were about 10 thousands less than that and one was more like 20 thousands. I carefully re-gapped them to as close as .043 as I could get them.

I didn't use any electrical parts cleaner... something else to try in the future.

Best regards,

Scott
 
OP
S

sbosecker

Well-known member
Joined
Sep 25, 2012
Messages
3,539
Location
Peachtree City, GA
Re: The Lone Beech Garage Build Thread (60x46)

I'm probably going to get flamed for recommending something from harbor freight, but they sell a few different OBDII scanners that actually work really well for the do-it-yourselfer. I have the Professional model. It will read and clear codes, even works in my duramax. Beats relying on the parts store.

BIGBAUM83,

I'll look into the Harbor Freight OBDII scanner... I need something.

I had started researching some Bluetooth OBD dongles that would "talk" to some software on a laptop and give you all kinds of real time information. This was a while ago but my recollection is that these devices were somewhat brand specific. I'm thinking that Ford was somewhat proprietary - I have a 2000 Ford F150 - and the devices I was looking at wouldn't work on every vehicle I had.

I think during my research life distracted me in some way and I had not gotten back to my search for a universal solution.

Best regards,

Scott
 
Last edited:
LutzTD

Well-known member
Joined
Dec 31, 2011
Messages
3,673
Location
Lutz, Florida
Re: The Lone Beech Garage Build Thread (60x46)

I have the HF scanner and it's tolerable. Also, Autozone or the like can read the codes but I do not believe they are allowed to clear any, whole lotta liability exposure there.
 
OP
S

sbosecker

Well-known member
Joined
Sep 25, 2012
Messages
3,539
Location
Peachtree City, GA
Re: The Lone Beech Garage Build Thread (60x46)

Friday - June 30, 2017

I returned from Lima, Peru yesterday morning. The pickup at our hotel was at about midnight Atlanta time and we arrived in Atlanta at about 9:00 am. Needless to say I was a bit fuzzy from the trip and took a good nap when I got home. I thought I'd call my daughter around supper time to see how her Versa had been behaving.

At about 4:30 pm my daughter called and the news was not good. Over the past couple of days the car was getting worse and now, as she drove home from work, it was misfiring badly enough at times to cause the "Engine Service Required" light to blink a bit. She indicated she was going to drop it off at a Tires Plus location and have them look at it.

Obviously - if nothing changed - the car shouldn't be driven 2 hours in this condition (to get to the LBG) so letting the guys at Tires Plus location have a crack at it seemed the best option.

I didn't get a chance to talk to the Tires Plus mechanic today but as best as I can tell, they "tested" the coil pack and the spark plug and the misfire remained in the #2 cylinder. I am assuming by "testing" they meant that they swapped these components into different cylinders and the problem remained in the #2 cylinder.

Tires Plus gave up on the project at that point, suggested that it be taken to the local Nissan dealership, and returned the Versa to my daughter without charging her anything.

Oh to be a good looking young woman instead of a hairy-legged old man. Ha!

She's taking it to Nissan on Saturday morning. While I'm anxious to hear the diagnosis, I'm flying to Indiana on Saturday to check on my dad. He's also having some computer issues and I think I have a fix for that as well. I'm hoping my daughter will let me when know when she gets a phone call from Nissan with what they have discovered.

I hope to be back in Georgia on Sunday afternoon.

Scott
 
Last edited:

Ole Slewfoot

Well-known member
Joined
Feb 22, 2016
Messages
5,098
Location
Freedom, CA
Re: The Lone Beech Garage Build Thread (60x46)

My $13 Bluetooth OBD thingy lived in my service truck 4ish years before it died. It connected to anything with a working OBDII port.
 
To avoid these ads, REGISTER NOW!
Top Bottom