What kind of Frankenfix have you done or seen done to a machine that ended up working?
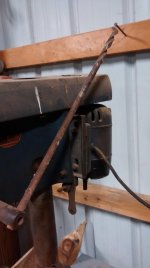
I have an old 17" Delta drill press that's sort of a franken/drill-press, It's a customized bench model made from several machines. It also has a shop-made threaded drill-chuck mount & not the normal Morse Taper or Jacobs Taper style chuck mount.
Being the chuck is threaded on & not a taper style mount (which is not recommended for side forces, I have used the drill press like a mill before for light milling of slots etc.
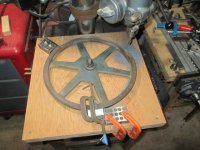
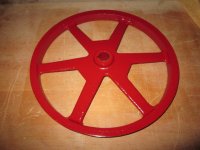
My biggest surprise so-far using this drill press, Was being able to use it to mill out a repair section on a 14" cast-iron bandsaw wheel.
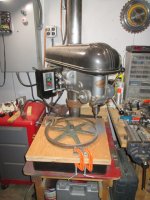
Being I don't have a Bridgeport & a rotary-table (proper equipment for the job) I tried the backyard engineering approach.

I mounted the wheel to the center point of the base using a 1/2" bolt, With the center point established I swung the head to align with the outside of the wheels lip that needed to be milled. Now that the center of the wheel & center of the milling area were set, All I needed to do was slowly lower the quill to the wheel & then manually rotate the wheel into the cutter. I naturally had to take very light passes & take my time, But all in all it turned out pretty good for backyard engineering!
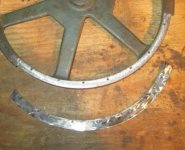
I roughly cut out a matching repair piece using a angle grinder, Then using the same set-up as before I drilled & tapped the repair piece & wheel. Now with the rough cut repair piece held in place I was able mill the inside & outside edges to match the original wheel.
I drilled & tapped the wheel & repair piece from the backside of the wheel adding an additional means of securing the repair piece in place. Lastly to finish everything off I used JB-Weld to fill-in any gaps & smooth out the repaired area.
Doug