arkangel06
Banned
awesome updates you will love those lock line coolent hoses

awesome updates you will love those lock line coolent hoses


How did you mill the slot in the screwhead?
(And you probably should have made a couple spares while you were set up!)
I slotted the screw freehand with a Dremel.
A few more things arrived in the mail today to wrap up some details:
A new grinding wheel for the blade welder and 1/4" Loc-Line for the chip blower are the highlights.


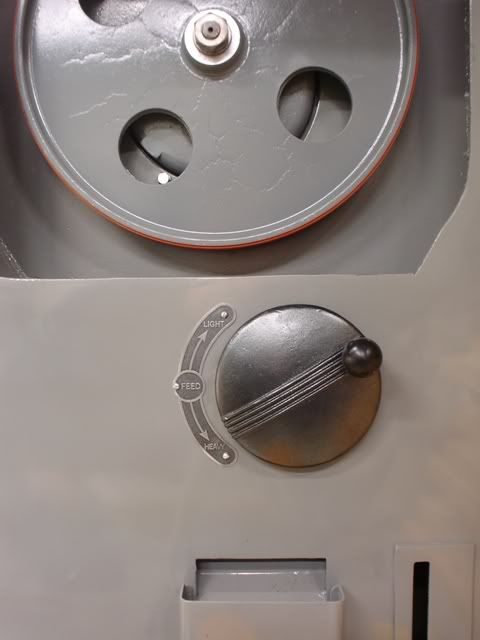
I like how you strayed from the original and centered "Fast" between the arrowhead and the mounting hole...hardly noticeable to most but still, it makes the plate look more balanced.
Aluminum placards are very nice for 'showroom correct' but you already have the artwork necessary for a decal that will convey the message. Get a few sheets of decal paper for your printer and have at it or have vinyl cut. Or not.
That is so neat.
Do you happen to have any books you'd recommend on the subject?
wyndycity said:I like how you strayed from the original and centered "Fast" between the arrowhead and the mounting hole...hardly noticeable to most but still, it makes the plate look more balanced.
Steve in MI said:Aluminum placards are very nice for 'showroom correct' but you already have the artwork necessary for a decal that will convey the message. Get a few sheets of decal paper for your printer and have at it or have vinyl cut. Or not.
If you mount the decal/vinyl to a styled aluminum backer this then can be clear-coated before mounting on the saw.
Mickey O said:Glad too see another update, this and the '30's auto shop are some of my favorite ongoing threads, coincidentally two guys from Illinois, must be something in the water. I'd say that saw should go in the Smithsonian when completed but I'd rather see it used. I actually have a few of those left-handed thread 1/4-20 flat heads somewhere but you made one faster than I could find them.
cdrewferd said:Utterly amazing. I've been in awe of some shops on here, but what you are doing is inspiring. I've thought about getting a small mill, then I see the size you have and don't know if I'll ever get there.
Awesome build.

A_PMech, great job, as I have said before!
Do you have any plans on releasing the finished artwork as a creative commons type license for others to use in their restoration?
For anyone interested in the etching process, here is an article I saved a few years ago which details it for brass nameplates.
Making Antique Brass Nameplates

Once again, nice!
Why are the mounting holes slightly different sizes?


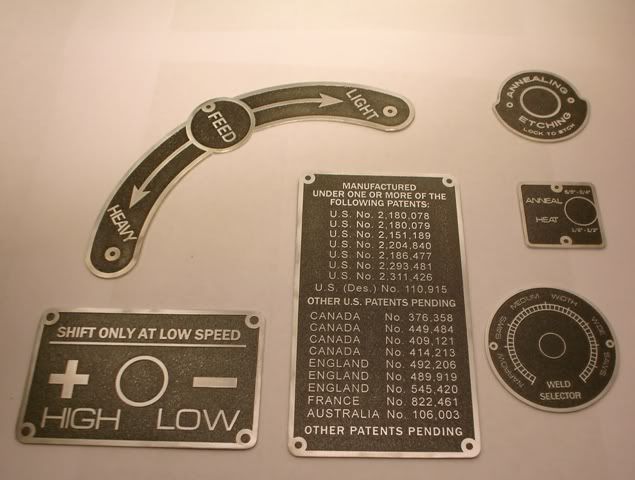
If you only had a nice running bandsaw to cut these out with, you would be set.Here the resist has been stripped and the plate is ready to be cut out and painted:


This is far above and beyond what most would do. And that is why it is such an incredible restoration to follow. Good work John.
Have you aver considered getting into aircraft restoration? I'd feel safe in any old plane restored to this level of detail.
Medwards said:If you only had a nice running bandsaw to cut these out with, you would be set.
When I bought my lathe it needed work, so I stripped everything but the headstock from the machine. I had to ream some bronze bushings for the apron while it was apart and only the a lathe would do. I was able to rig some stuff together and turn the input on the headstock with my drill. It was just enough power to ream the bushings. Having a machine make it's own spare parts is a pretty gratifying experience.

I have an old Clausing Colchester. I did a rebuild of the apron and feed gearbox when I bought it over a year ago. Luckily it came with most all the spare parts I needed I just had to make a new crossfeed screw and some bushings.
Wow!! Those data plates look fantastic. I read this the other day. "A craftsman is someone who builds things better than anyone else thinks they need to be. When everyone else thinks it's good enough, a craftsman still looks for ways to perfect it further." You are truly a craftsman.

Steve in Socal said:John,
The data plates are fantastic!!! The patent plate is amazing. For what its worth many of the plates on my saw and the later ones are silk screens.
Steve
Chad Pickens said:A_Pmech
Ive been away for a while and you've been BUSY, It looks wonderful. I got my metalmaster finished and am in heaven theres nothing like a Good OLD piece of machinery. My hats off to you I dont think it would be possible to do a better job