To avoid these ads, REGISTER NOW!

Above 1200 Sq/FT The Lone Beech Garage (60x46x16)

Wokspaces above 1200 squarefeet.
OP
S

sbosecker

Well-known member
Joined
Sep 25, 2012
Messages
3,539
Location
Peachtree City, GA
Continued...


20190912025-41.jpg 20190912025-42.jpg

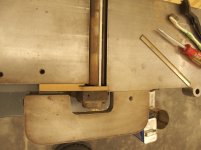
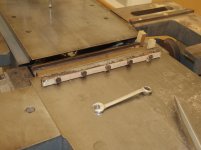
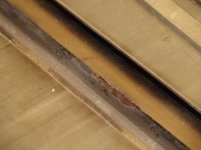
With a knife removed, it was necessary to thoroughly clean that area in the cutterhead. Mostly it was caked on sawdust but here was some baked on resin or something. I used a piece of 1/8 thick copper to scrape this baked on material off the cutterhead.


20190912025-43.jpg

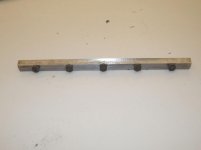
The Lock Shim & Screws needed to be cleaned up. I used acetone to wipe down the cutterhead and to clean up the screws. Some Scotch Brite was used on the Lock Shim to brighten it up.

With everything cleaned up, I installed the first knife. This is a somewhat tedious job requiring a lot of fussing with the knife and measuring things with a Dial Indicator.

I got the first knife installed yesterday afternoon and then came in for supper. We were having our son over for that meal and we will be exchanging presents at my daughter's house on Saturday.


20190912026-44.jpg 20190912026-45.jpg

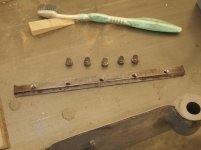
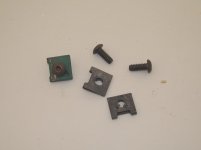
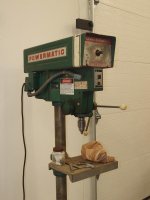
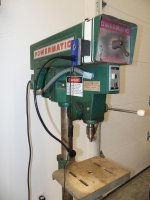
This morning I removed the Kant-Twist Clamps from the Drll Press's belt guard and made a quick trip to a hardware store for some Speed Nuts and a couple of Machine Screws.


20190912026-46.jpg

The belt guard still needs some work done to it so there was a bit of a fight to get all the holes aligned ...but I persevered and the belt guard is off the floor.

Should the Stomp Shear quest work out, I will have a spot to put it now.


Continued in next post...
 
Last edited:
To avoid these ads, REGISTER NOW!
OP
S

sbosecker

Well-known member
Joined
Sep 25, 2012
Messages
3,539
Location
Peachtree City, GA
Continued...


20190912026-51.jpg 20190912026-52.jpg 20190912026-53.jpg

Having already installed the first knife, I belatedly realized it would probably be a good idea to have all the knifes lined up on the cutterhead. I made a jig based on the installed knife's position to allow the remaining two knives to line up with the first.


20190912026-54.jpg 20190912026-55.jpg 20190912026-56.jpg

The rest of the afternoon was spent removing, cleaning and installing the last two knives. It took a while but I think they are properly installed now.

I may need to lower the outfeed table just a few thousands. I have just learned that it is better to have the knives slightly above the outfeed table. I had assumed the knives should be right on or a little low.


20190912026-57.jpg

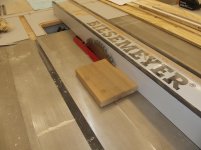
I did run a length of 4x4 cherry through the jointer to test it. That seemed to go very well.


Scott
 
Last edited:

shortykorte

Well-known member
Joined
Sep 1, 2014
Messages
8,039
Location
Tallahassee, Fl
Scott,

Having owned a pawnshop, I think I can answer your question about Saturday hours.
After working 5 days, nice to have a little time off.
Very few customers on Saturday afternoon. Most got their pay check Friday so they’re weekend rich. Smart ones will come in Friday afternoon or Saturday morning to pay on or pick up their stuff.

I closed at 1pm on Saturday. Usually busy from 8-10 then slow but might pick up from 12-1pm.
Unfortunately the only time I’d be at the shop between midnight and 4am is because someone drove a car into the building so they could steal handguns.


Shorty Korte
Always remember quality in QST

Sent from my iPhone using Garage Journal
 

drivesitfar

Well-known member
Joined
Oct 23, 2013
Messages
36,092
Location
Pacific Northwest
SB: I took a little time away from GJ thinking the extra time would help my FSD, but instead I think I spent most of the extra time in the kitchen eating my bride's goodies she makes during the holiday season.

so i'll try to get back to posting a bit in the early morning since i'm an early riser and it seems to start my day with a good feeling and a purpose.

i'll make time to read your posts as soon as i can, but wanted to wish you and your family a very happy 2020 and hope your LBG keeps gathering more tools as you gather more knowledge on how to use and repair them.

CHEERS!!!
 

LutzTD

Well-known member
Joined
Dec 31, 2011
Messages
3,673
Location
Lutz, Florida
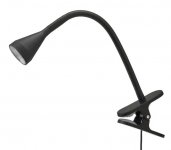
I love those OKEA LEDs too. the magnet is a great touch. I bought a few of the clamp on style the last go around, but I may have to pick up some magnetic bases and make a couple of magnetic ones for where there isn't purchase for a clamp
 

Attachments

  • ikea clamp.JPG
    ikea clamp.JPG
    22.7 KB · Views: 37

matt_i

Well-known member
Joined
Mar 14, 2008
Messages
10,760
Location
SE Michigan
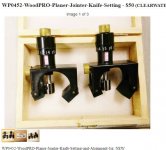
Hi Scott, hope your New Year is going very well! I was looking at your jointer...I had a Delta 6" some years ago and it had the springs under the blade. It also had a simple metal jig (sort of a very shallow "U" shape with a flat bottom) which touched on the OD of the cutterhead body at 2 points and the knife edge on one point. So one basically just set the knife in its pocket, loose but on the springs, pushed down until the jig bottomed on the cutterhead body's OD, then tightened the screws. I believe there were two of the "U" shaped metal guides attached to a round bar that kept them standing up and spaced out.

It seemed to me very crude, being the "u" shaped parts were just punched/stampings but it was pretty fast to setup. I see just by searching jointer knife setting jig there are some new designs which appear to use rare earth magnets. I feel certain the dial indicator is the absolute best way but might not be the fastest :)

Hope your quest for the jump/stomp shear ends in success!
 
Last edited:
OP
S

sbosecker

Well-known member
Joined
Sep 25, 2012
Messages
3,539
Location
Peachtree City, GA
Scott,

Having owned a pawnshop, I think I can answer your question about Saturday hours.
After working 5 days, nice to have a little time off.
Very few customers on Saturday afternoon. Most got their pay check Friday so they’re weekend rich. Smart ones will come in Friday afternoon or Saturday morning to pay on or pick up their stuff.

I closed at 1pm on Saturday. Usually busy from 8-10 then slow but might pick up from 12-1pm.
Unfortunately the only time I’d be at the shop between midnight and 4am is because someone drove a car into the building so they could steal handguns.

Shorty Korte
Always remember quality in QST

Over here, traditionally most pawnshops were owned and run by Jewish people so were closed on Saturdays.
Pete

Shorty Korte & stillp,

My remark about the Pawn Shop's short hours on Saturday being caused by manning the store late that same night was an attempt at humor...

...my wife has suggested I should keep my day job after witnessing similar efforts. Ha!

I certainly understand folks needing some time off.

I do think I will get some use out of those Lifting Magnets.

Best regards,

Scott
 
OP
S

sbosecker

Well-known member
Joined
Sep 25, 2012
Messages
3,539
Location
Peachtree City, GA
SB: I took a little time away from GJ thinking the extra time would help my FSD, but instead I think I spent most of the extra time in the kitchen eating my bride's goodies she makes during the holiday season.

so i'll try to get back to posting a bit in the early morning since i'm an early riser and it seems to start my day with a good feeling and a purpose.

i'll make time to read your posts as soon as i can, but wanted to wish you and your family a very happy 2020 and hope your LBG keeps gathering more tools as you gather more knowledge on how to use and repair them.

CHEERS!!!

DrivesItFar,

...and a very Happy, Healthy & Prosperous New Year to you and yours!

Eating homemade holiday goodies sounds great to me!

Best regards,

Scott
 
OP
S

sbosecker

Well-known member
Joined
Sep 25, 2012
Messages
3,539
Location
Peachtree City, GA
I love those OKEA LEDs too. the magnet is a great touch. I bought a few of the clamp on style the last go around, but I may have to pick up some magnetic bases and make a couple of magnetic ones for where there isn't purchase for a clamp


LutzTD,

I wish I could claim the idea for the IKEA LED lamp magnetic base modification. I find it to be an extremely handy addition to the shop!

Thanks for stopping by!

Best regards,

Scott
 
OP
S

sbosecker

Well-known member
Joined
Sep 25, 2012
Messages
3,539
Location
Peachtree City, GA
Hi Scott, hope your New Year is going very well! I was looking at your jointer...I had a Delta 6" some years ago and it had the springs under the blade. It also had a simple metal jig (sort of a very shallow "U" shape with a flat bottom) which touched on the OD of the cutterhead body at 2 points and the knife edge on one point. So one basically just set the knife in its pocket, loose but on the springs, pushed down until the jig bottomed on the cutterhead body's OD, then tightened the screws. I believe there were two of the "U" shaped metal guides attached to a round bar that kept them standing up and spaced out.

It seemed to me very crude, being the "u" shaped parts were just punched/stampings but it was pretty fast to setup. I see just by searching jointer knife setting jig there are some new designs which appear to use rare earth magnets. I feel certain the dial indicator is the absolute best way but might not be the fastest :)

Hope your quest for the jump/stomp shear ends in success!


matt_i,

It has been a good year so far! Hope you are having the same.


Rockwell Jointer Knife Stop.gif

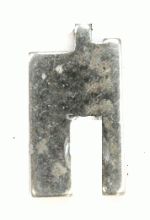
The Rockwell 8-Inch Jointer was supplied with a small sheet-metal "tool" to help with the knife setup chore. The small "prong" facing up engages a hole on the side of the cutterhead and a screw through the slot fastens the tool to the Jointer. These "tools" are commonly missing and their actual usefulness is debated on woodworking forums.

The manual explains how to use the tool but mine was missing so I went with the Dial Indicator method and some YouTube video guidance.

...as to the "Stomp Shear" acquisition. That saga ended this morning and will be detailed in a post later today.


Best regards,

Scott
 
Last edited:
OP
S

sbosecker

Well-known member
Joined
Sep 25, 2012
Messages
3,539
Location
Peachtree City, GA
Thursday - January 2, 2020


After I had gotten the Jointer Knives set up I learned that I positioned them a little low. The easiest way to resolve this was to...


20191229-01.jpg 20191229-02.jpg 20191229-03.jpg

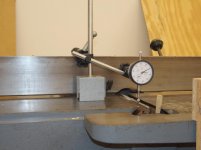
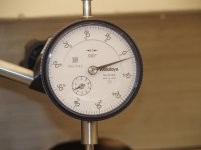
...lower the Outfeed Table a few thousands. On Sunday I zeroed my Dial Indicator or the Outfeed Table, moved the Cutterhead to top-dead-center and sat the Dial Indicator on the Knife's edge. The next steps were to release the Outfeed Table's Locking Knob and then lower the Outfeed Table until I had the Knife's edge 3 thousands above the Outfeed Table.

A test cut seemed to work better on the 2x8 test piece I had. The cherry 4x4 was happier with a lower knife setting. So tweaking this setting depending on the material seems to be an appropriate technique.


20200101-04.jpg

New Year's Day I was doing the usual 1st of the month fluid level & tire pressure checks on my fleet of vehicles ...including the tractors. The tractors also get their batteries charged.


20200101-05.jpg 20200101-06.jpg

Later that same day I was brainstorming on what to do with my collection of Pipe Clamps. I need to get them organized in some fashion. Some time ago I wrote about coming up with a plan for storage in the Woodshop and then realizing that my planned dust collection ductwork would interfere with my imaginary pipe clamp storage.

I think the place to install my Pipe Clamp storage racks is just outside the Woodshop above my Cubicle Cabinets.


20200102-07.jpg

Today the Stomp Shear saga came to an end.

An ad on Craigslist – with no pictures – for a “4-foot metal shear in Newnan” at an attractive price showed up about 11 days ago. I sent an email that I was interested and that I lived pretty close to Newnan (about 15 miles away).

I got a call back from a gentleman who indicated that it was his brother’s machine but the brother was not a computer guy. So the guy (M) who called me was helping his brother (R) out by posting the ad. M sent me a picture of a Tennsmith T52 metal shear.

However his brother was going through chemotherapy and could I wait until Friday to come look at it. I told M I was in no hurry and that his brother's wellbeing trumped everything else.

Friday morning came and I was expecting a call from R but I got a call from M, the same guy I’d talked to a few days earlier. M told me R wasn’t doing well and was making a trip to the Emergency Room. I told M I would stand by for updates as he could give them to me and I was OK with that. Again, I stressed that R's situation was the priority.

Monday morning I got a call from M again. R was not expected to leave the hospital for a while. In order to move this forward M said R’s son, B, would now be the guy I needed to work with. M said he would try to set up a visit for me to see the machine with B sometime that same day.

About 4:30 pm I got a text from M with B's contact information. I called B and he asked if I could meet him at the house at 5:30 pm. I said I thought so but I needed the address. B said he would text it to me. A few minutes later I got a text from B that indicated he wouldn’t be able to meet me this evening and would Thursday morning be OK.

I let him know that Thursday morning would work.

This morning I went to meet B at his father's house. B led me downstairs to where the machine was sitting. It appeared to be in good condition and we cut a test piece of metal with it.

...then I started looking at the logistics of moving the thing outside. I am fairly sure that the Shear had been placed on the basement floor and the house had been built around it. The room it was in had no door to the outside and the only way to walk in was through the door I had just came through.

In order to get it outside the Shear was going to have to be moved through that interior door, rotated 90 degrees horizontally in a somewhat constricted space, pushed through another interior door into a second room and then through an exterior door outside. This would not be the end of the fun...

Once outside the machine would basically go out into the back yard. There was no driveway or solid surface to work on once away from the house. Did I mention that it started raining this morning and it’s forecast to rain over 2-inches? ...did I mention that the Shear weighs about half a ton?

We went back inside and returned to the Shear. I asked about how long I would have to get it out of the house. B indicated that there was no deadline but other people were interested in the Shear. I had been mentally hesitating due to the effort it was going to take to extract it but if there wasn’t a time limit well...

I indicated I had the agreed-to-price money with me and I started to head for the truck to get it. That’s when B mentioned there were several interested parties and there was some guy who was offering 50% more than the price in the ad for the Shear. He paused for a moment and then said he could let me have it for $100 less than that price – about a 40% increase in the listed price.

I turned away from him and started walking up the stairs. I said something the effect that he could have at least not wasted so much of my time. I heard “I’m Sorry”, as I got to the top of the stairs.

So no Shear today. I do think the guys that are so excited about this tool are going to be in for a surprise when the see what is going to be required to get the thing on a truck or a trailer. My guess is that they are going to be in a hurry and there may be no substitute for several guys wrestling with this thing for quite a while until it is outside. Even then the fights not over. Getting it onto something to transport it home is going to be very interesting after about 2 inches of rain on that soft ground.

I should have told B that I would forgive him for jerking me around if he would let come over and watch “buyers” trying to extract the Shear from the house and load it. Either it would be very entertaining and/or I would learn quite a lot about moving a half-ton of top-heavy machinery.

I know, sounds like sour grapes doesn’t it. Ha!

I do think if there was no deadline I could have gotten it out of there eventually but the stars were going to have to align with the weather and probably the Shear would have had to be partially disassembled.

B probably did me a favor by raising the price. Ha!


Scott
 
Last edited:

shortykorte

Well-known member
Joined
Sep 1, 2014
Messages
8,039
Location
Tallahassee, Fl
Not a problem. Being single, I had to have time to meet the future ex Mrs Korte and it was great having cash to party.

Thanks for sharing video on light. Nice setup.


Shorty Korte
Always remember quality in QST

Sent from my iPhone using Garage Journal
 

LutzTD

Well-known member
Joined
Dec 31, 2011
Messages
3,673
Location
Lutz, Florida
Thursday - January 2, 2020


After I had gotten the Jointer Knives set up I learned that I positioned them a little low. The easiest way to resolve this was to...


20191229-01.jpg 20191229-02.jpg 20191229-03.jpg

...lower the Outfeed Table a few thousands. On Sunday I zeroed my Dial Indicator or the Outfeed Table, moved the Cutterhead to top-dead-center and sat the Dial Indicator on the Knife's edge. The next steps were to release the Outfeed Table's Locking Knob and then lower the Outfeed Table until I had the Knife's edge 3 thousands above the Outfeed Table.

A test cut seemed to work better on the 2x8 test piece I had. The cherry 4x4 was happier with a lower knife setting. So tweaking this setting depending on the material seems to be an appropriate technique.


20200101-04.jpg

New Year's Day I was doing the usual 1st of the month fluid level & tire pressure checks on my fleet of vehicles ...including the tractors. The tractors also get their batteries charged.


20200101-05.jpg 20200101-06.jpg

Later that same day I was brainstorming on what to do with my collection of Pipe Clamps. I need to get them organized in some fashion. Some time ago I wrote about coming up with a plan for storage in the Woodshop and then realizing that my planned dust collection ductwork would interfere with my imaginary pipe clamp storage.

I think the place to install my Pipe Clamp storage racks is just outside the Woodshop above my Cubicle Cabinets.


20200102-07.jpg

Today the Stomp Shear saga came to an end.

An ad on Craigslist – with no pictures – for a “4-foot metal shear in Newnan” at an attractive price showed up about 11 days ago. I sent an email that I was interested and that I lived pretty close to Newnan (about 15 miles away).

I got a call back from a gentleman who indicated that it was his brother’s machine but the brother was not a computer guy. So the guy (M) who called me was helping his brother (R) out by posting the ad. M sent me a picture of a Tennsmith T52 metal shear.

However his brother was going through chemotherapy and could I wait until Friday to come look at it. I told M I was in no hurry.

Friday morning came and I was expecting a call from R but I got a call from M, the same guy I’d talked to a few days earlier. M told me R wasn’t doing well and was making a trip to the Emergency Room. I told M I would stand by for updates as he could give them to me and I was OK with that.

Monday morning I got a call from M again. R was not expected to leave the hospital for a while. In order to move this forward M said R’s son, B, would now be the guy I needed to work with. M said he would try to set up a visit for me to see the machine with B sometime that same day.

About 4:30 pm I got a text from M with B's contact information. I called B and he asked if I could meet him at the house at 5:30 pm. I said I thought so but I needed the address. B said he would text it to me. A few minutes later I got a text from B that indicated he wouldn’t be able to meet me this evening and would Thursday morning be OK.

I let him know that Thursday morning would work.

This morning I went to meet B at his father's house. B led me downstairs to where the machine was sitting. It appeared to be in good condition and we cut a test piece of metal with it.

...then I started looking at the logistics of moving the thing outside. I am fairly sure that the Shear had been placed on the basement floor and the house had been built around it. The room it was in had no door to the outside and the only way to walk in was through the door I had just came through.

In order to get it outside the Shear was going to have to be moved through that interior door, rotated 90 degrees horizontally in a somewhat constricted space, pushed through another interior door into a second room and then through an exterior door outside. This would not be the end of the fun...

Once outside the machine would basically go out into the back yard. There was no driveway or solid surface to work on once away from the house. Did I mention that it started raining this morning and it’s forecast to rain over 2-inches? ...did I mention that the Shear weighs about half a ton?

We went back inside and returned to the Shear. I asked about how long I would have to get it out of the house. B indicated that there was no deadline but other people were interested in the Shear. I had been mentally hesitating due to the effort it was going to take to extract it but if there wasn’t a time limit well...

I indicated I had the agreed-to-price money with me and I started to head for the truck to get it. That’s when B mentioned there were several interested parties and there was some guy who was offering 50% more than the price in the ad for the Shear. He paused for a moment and then said he could let me have it for $100 less than that price – about a 40% increase in the listed price.

I turned away from him and started walking up the stairs. I said something the effect that he could have at least not wasted so much of my time. I heard “I’m Sorry”, as I got to the top of the stairs.

So no Shear today. I do think the guys that are so excited about this tool are going to be in for a surprise when the see what is going to be required to get the thing on a truck or a trailer. My guess is that they are going to be in a hurry and there may be no substitute for several guys wrestling with this thing for quite a while until it is outside. Even then the fights not over. Getting it onto something to transport it home is going to be very interesting after about 2 inches of rain on that soft ground.

I should have told B that I would forgive him for jerking me around if he would let come over and watch “buyers” trying to extract the Shear from the house and load it. Either it would be very entertaining and/or I would learn quite a lot about moving a half-ton of top-heavy machinery.

I know, sounds like sour grapes doesn’t it. Ha!

I do think if there was no deadline I could have gotten it out of there eventually but the stars were going to have to align with the weather and probably the Shear would have had to be partially disassembled.

B probably did me a favor by raising the price. Ha!


Scott
I hate when people do that, but it happens more and more. those only come apart so far easily, then it's a real chore to go further, and those pieces are still quite heavy.

I have the same one without the squaring edge, I would encourage you to wait for a powered one if you want a shear. I found speed is key to shear and its tough with a stomp shear, even set up correctly if you don't really slam it, it pulls the metal down into the shear instead of cutting it, ruining your piece. Tennsmith is not the best name, maybe the older thicker built ones work better.
 
OP
S

sbosecker

Well-known member
Joined
Sep 25, 2012
Messages
3,539
Location
Peachtree City, GA
I hate when people do that, but it happens more and more. those only come apart so far easily, then it's a real chore to go further, and those pieces are still quite heavy.

I have the same one without the squaring edge, I would encourage you to wait for a powered one if you want a shear. I found speed is key to shear and its tough with a stomp shear, even set up correctly if you don't really slam it, it pulls the metal down into the shear instead of cutting it, ruining your piece. Tennsmith is not the best name, maybe the older thicker built ones work better.


LutzTD,

What do you do? Once the actual owner was no longer in charge and the son was "the man" all bets were off. The only thing that was really annoying was the son could have informed me of the price hike several days earlier and kept me from spinning my wheels those days trying to get ready for the move.

I don't have a pressing need for the shear. It was just like most my tool acquisitions: It was nearby at an attractive price. At some point I would have made use of it.

I'm pretty sure the sun will still come up tomorrow morning. HA!

Best regards,

Scott
 
OP
S

sbosecker

Well-known member
Joined
Sep 25, 2012
Messages
3,539
Location
Peachtree City, GA
Saturday - January 4, 2020


At this time of the year I have several "real world" things going on that have priority over noodling around in the shop. Still, I needed a sanity break this evening and I got in a couple of hours of Quality Shed Time.

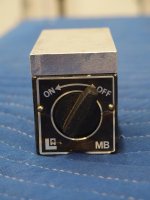
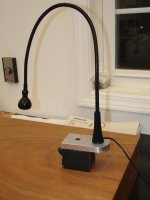
I had recently acquired a used Magnetic Base and I wanted to attempt to replicate the machined IKEA LED Light adapter that Clickspring made in this YouTube Video.

I had previously made a plywood prototype and found it to be extremely useful as a task light.

Although I really don't have a clue as to what I'm doing, I figure a good way to learn about machining is to try to make something.


20200104-01.jpg 20200104-02.jpg

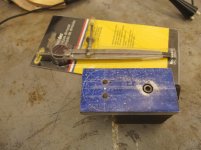
I had a length of 1/2-inch thick 6061 Aluminum that I picked up at an Estate Sale. Something had happened to one end and that was a good place to cut what I needed for the Clickspring Adapter. I put a little red Dykem layout dye on the aluminum and used a scribe to trace the outline of the plywood prototype.


20200104-03.jpg 20200104-04.jpg

I used the Harbor Freight 4x6 Horizontal Band Saw to cut the aluminum to a useful size. I used a piece of scrap plywood as a push stick for the second cut.


20200104-05.jpg 20200104-06.jpg 20200104-07.jpg

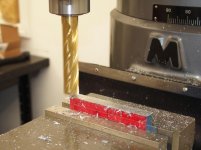
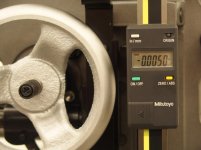
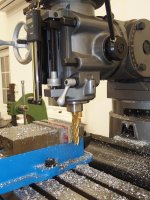
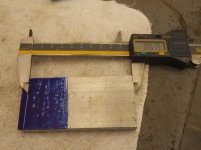
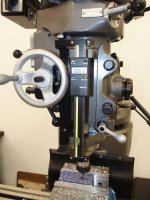
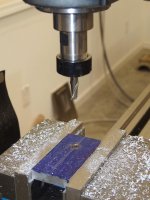
I already had a 3/4-inch End Mill mounted in the JET Mill so I used that to being the aluminum's width to proper dimension. I used the Mitutoyo Quill DRO to keep track of my progress. The last pass was a 5 thousands finishing operation and that brought the width of the stock to the width of the Magnetic Base.

Continued in next post...
 
Last edited:
OP
S

sbosecker

Well-known member
Joined
Sep 25, 2012
Messages
3,539
Location
Peachtree City, GA
Continued...

With the Adapter's width established, it was time to work on the length.


20200104-11.jpg

I set up the Adapter in the vise to square one end.


20200104-12.jpg

Then I measured the length of the plywood prototype and scribed it onto the Aluminum Adapter.


20200104-13.jpg 20200104-14.jpg

Then I machined the Adapter to the scribed line.


20200104-15.jpg20200104-16.jpg

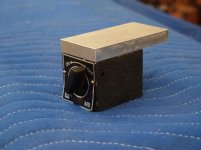
I cleaned the layout dye off of my part and checked out how it looked on the Magnetic Base. I think this will work!

That was all I had time for this evening. I now have to decide how far do I want to take this. I would like to replicate the Clickspring adapter but that will take some time. I could drill a few (inaccurate but adequate) holes and have a workable Task Light.

We'll see how much time I have available this coming week.


Scott
 
Last edited:
To avoid these ads, REGISTER NOW!
OP
S

sbosecker

Well-known member
Joined
Sep 25, 2012
Messages
3,539
Location
Peachtree City, GA

LutzTD

Well-known member
Joined
Dec 31, 2011
Messages
3,673
Location
Lutz, Florida
LutzTD,

Interesting...

It doesn't appear to be for sale via normal retail outlets at this time and I didn't see any reviews either.

It looks like it uses magnets...?

Best regards,

Scott

looks like magnets to hold it on, but not sure. I had never seen one until the craigs ad popped up. Maybe someone will chime in now that the picture is there to jog a memory. I searched this morning and looks like there are other versions but not that particular one.
 

drivesitfar

Well-known member
Joined
Oct 23, 2013
Messages
36,092
Location
Pacific Northwest
Lutz & ALL: when you post links to Craigslist ads that get posts talking about them if you could take the time to post the picture (I download them to my laptop and download to GJ, but there are maybe easier methods) then anybody looking at our threads can see what we are talking about a week later after the ads get deleted.

SB: carry on and always fun checking in on you and watching and learning.
 

LutzTD

Well-known member
Joined
Dec 31, 2011
Messages
3,673
Location
Lutz, Florida
Lutz & ALL: when you post links to Craigslist ads that get posts talking about them if you could take the time to post the picture (I download them to my laptop and download to GJ, but there are maybe easier methods) then anybody looking at our threads can see what we are talking about a week later after the ads get deleted.

SB: carry on and always fun checking in on you and watching and learning.

see post 3298

https://www.garagejournal.com/forum/showpost.php?p=8274440&postcount=3298
 
OP
S

sbosecker

Well-known member
Joined
Sep 25, 2012
Messages
3,539
Location
Peachtree City, GA
Tuesday - January 7, 2020


20200106-01.jpg 20200106-02.jpg

Yesterday I used some Transfer Punches to transfer the location of the holes in the plywood prototype to the aluminum part.

This would probably work fine but... I decided that trying to attempt to accurately measure and machine the aluminum part would be a good exercise for me.


20200106-03.jpg

...but first I needed to clean up the chips from the previous operations.


20200107-04.jpg

I made some measurements of the location of the threaded hole in the Magnetic Base and scribed lines to represent that point.


20200107-05.jpg

I used an Edge Finder to locate the edge of the part and I zeroed the Y-Axis Dial on the JET Mill. I did the same for the end of the part and Zeroed the X-Axis Dial. I moved the table the amounts I had calculated for both the X & Y-Axis (plus 100 thousands for the radius of the Edge Finder) and locked all of the Table Locks.


20200107-06.jpg 20200107-07.jpg

I used a spotting drill to give my 1/4-inch drill bit something to follow, then I drilled a 1/4-inch hole.


Continued in next post...
 
Last edited:
OP
S

sbosecker

Well-known member
Joined
Sep 25, 2012
Messages
3,539
Location
Peachtree City, GA
Continued...


20200107-11.jpg 20200107-12.jpg 20200107-13.jpg

I followed the 1/4-inch through-hole with a 7/16-inch End Mill. I had measured the head of the machine screw as 3/8-inch in diameter and about 1/4-inch "tall". I milled a 261-thousands deep countersink and then tested the machine screw in the hole. It looked good.


20200107-14.jpg

I removed the part from the vise and made some more measurements followed by some scribe lines. I put the part back into the vise and repeated the edge finding and table positioning routine that I had used for the previous hole. I had measured the "studs" the LED light uses to mount the arm to the base at just a hair over 5.5 mm. I drilled two 6 mm holes for the Lamp Studs. I also made a small spot drill mark in the center of the part to locate a radius point for machining the half-circle end.


20200107-15.jpg 20200107-16.jpg

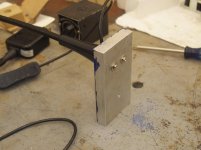
The part was removed from the vise and the IKEA LED lamp was mounted onto the part; followed by mounting all of that onto the Magnetic Base. I tried it out on the Drill Press and it worked as expected.


20200107-17.jpg

The final operation for the evening was scribing a half-circle onto the part. I hope to eventually machine a half-circle using my Rotary Table.

That will be a real first for me!


Scott
 
Last edited:
OP
S

sbosecker

Well-known member
Joined
Sep 25, 2012
Messages
3,539
Location
Peachtree City, GA
Wednesday - January 8, 2020


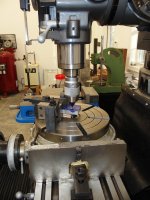
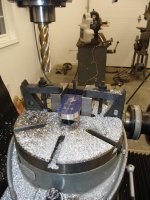
Today I wrestled the Rotary Table onto the JET Mill's table. The first order of business would be to locate the Rotary Table's center of rotation under the center of the JET Mill's spindle.


20200108-01.jpg 20200108-02.jpg

I don't have an InDicol setup so I came up with this cockamamie approach. A bit of time monkeying around with the X-Axis & Y-Axis Handwheels and eventually I had the Rotary Table where it needed to be.


20200108-03.jpg 20200108-04.jpg

Now I needed to find something that would allow me to locate the divot I left on the part. That mark represented the center of the radius I would be trying to mill. The point I used was an accessary in Machinist Jack set. It did the job to the accuracy required for this operation.

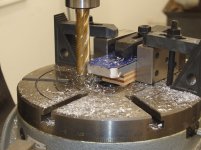
I needed to have something to hold the part off the top of the Rotary Table. I used some plywood for that task. I wasn't happy about that but I thought it would do for this situation. I used some 1-2-3 blocks and Strap Clamps to secure the part in position.

I put a 3/4-inch End Mill into a 3/4-inch R8 Collet and was ready to start milling.

At this point I noticed the Rotary Table has a recessed area in the center of the table...

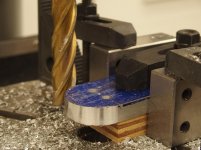
...actually I had noticed the recessed area prior to this point, it was just now that I realized that recessed area had caused an issue. I had used a long clamp to secure the part and due to it's length this clamp was pushing the end of the plywood block down into the recessed area. The end of the part that I was going to be milling wasn't perpendicular to the table. I thought that moving the clamp back a bit would solve this problem.

I REALLY didn't want to take all of this setup apart and redo it. The amount of perpendicular error was small and wouldn't affect the part's function. I elected to proceed with the milling procedure.


20200108-05.jpg 20200108-06.jpg 20200108-07.jpg

I took my time and chewed away at the aluminum in small increments.


Continued in next post...
 
Last edited:
OP
S

sbosecker

Well-known member
Joined
Sep 25, 2012
Messages
3,539
Location
Peachtree City, GA
Continued...


20200108-11.jpg

My last pass was climb milling a 5 thousands cut - the resulting surface finish was nice. Note the "parabola" at the front of the part that resulted from the non-perpendicular setup.


20200108-12.jpg

This milling operation was complete. I started breaking down the clamps.


20200108-13.jpg

I deburred the edges, cleaned the part with some acetone and then wet-sanded it to improve the appearance of the flat areas.


20200108-14.jpg 20200108-15.jpg

Project complete: I learned a lot!


Scott
 
Last edited:

drivesitfar

Well-known member
Joined
Oct 23, 2013
Messages
36,092
Location
Pacific Northwest
SD: i've heard making chips on a mill and or lathe is great and guessing other than the mess you agree?

thanks for taking the time to show us and good luck.

LUTZ: sorry if I didn't see the picture you posted with your Craig's ad or maybe cause when I see those links with no picture and I go to the link and it's gone it's very frustrating. SO it wasn't directed at you if you posted the picture with the link so thanks for doing that.

is that a 69 mach 1 in your avatar? still own it?
 
OP
S

sbosecker

Well-known member
Joined
Sep 25, 2012
Messages
3,539
Location
Peachtree City, GA
excellent, no simple task to get a nice radius on a turntable.

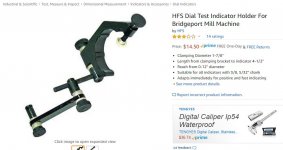
for the indicator, I have this mount for clamping on the spindle

https://www.amazon.com/dp/B019J226JM/?tag=atomicindus08-20

LutzTD,

Thanks for the kind words. This was the first time I was trying to make something that had some dimensional considerations so that was interesting. ...and of course the Rotary Table adventure was a completely new thing.

Thanks for the link to the Mount... are you happy with this one? That sort of a setup is the way to go! I thought I had a way to accomplish sweeping the Rotary Table other than the Magnetic Base I used but, as I set it up, I didn't think the other method was going to work.

Best regards,

Scott
 
OP
S

sbosecker

Well-known member
Joined
Sep 25, 2012
Messages
3,539
Location
Peachtree City, GA
SD: i've heard making chips on a mill and or lathe is great and guessing other than the mess you agree?

thanks for taking the time to show us and good luck.


DrivesItFar,

Thanks for stopping by! It is fun to make things and making things is also a good way to learn stuff. Simple as it was, this project was a true learning experience!

You're right about the mess - the chips get everywhere.

I don't have a DRO (I plan to get one soon!) so I was using the dials manually to get set up. Quite a bit of cyphering ...a geezer doing math; what could possibly go wrong?

HA!

Best regards,

Scott
 

LutzTD

Well-known member
Joined
Dec 31, 2011
Messages
3,673
Location
Lutz, Florida
LutzTD,

Thanks for the kind words. This was the first time I was trying to make something that had some dimensional considerations so that was interesting. ...and of course the Rotary Table adventure was a completely new thing.

Thanks for the link to the Mount... are you happy with this one? That sort of a setup is the way to go! I thought I had a way to accomplish sweeping the Rotary Table other than the Magnetic Base I used but, as I set it up, I didn't think the other method was going to work.

Best regards,

Scott
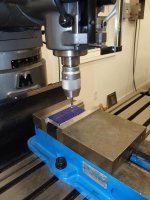
yes. I used that type clamp all the time during my apprenticeship, you can also change the mill collet to fit the indicator stalk, but I had a last word mounted in this clamp all the time so it was very easy to clamp it on the spindle, indicate center then take it back off without disturbing the cutter setup, you can indicate your vise or if you extend it out to it far reach you can also tram the head
 

LutzTD

Well-known member
Joined
Dec 31, 2011
Messages
3,673
Location
Lutz, Florida
SD: i've heard making chips on a mill and or lathe is great and guessing other than the mess you agree?

thanks for taking the time to show us and good luck.

LUTZ: sorry if I didn't see the picture you posted with your Craig's ad or maybe cause when I see those links with no picture and I go to the link and it's gone it's very frustrating. SO it wasn't directed at you if you posted the picture with the link so thanks for doing that.

is that a 69 mach 1 in your avatar? still own it?

yeah sorry, I was pointing you back but as I read it I came across very harsh, not intentional. yes I still have the mach 1 thats my baby.
 
OP
S

sbosecker

Well-known member
Joined
Sep 25, 2012
Messages
3,539
Location
Peachtree City, GA
yes. I used that type clamp all the time during my apprenticeship, you can also change the mill collet to fit the indicator stalk, but I had a last word mounted in this clamp all the time so it was very easy to clamp it on the spindle, indicate center then take it back off without disturbing the cutter setup, you can indicate your vise or if you extend it out to it far reach you can also tram the head

LutzTD,

Thanks! I'll be investing in something like that clamp soon.

Best regards,

Scott
 

drivesitfar

Well-known member
Joined
Oct 23, 2013
Messages
36,092
Location
Pacific Northwest
SB: so tell us have you SOLD A TRACTOR LATELY (I know blasphamy) or maybe BOUGHT ONE or just quit looking for a while as you get new machines and benches and sklls finely tuned in the LONE BEECH?

keep up the great work.

Lutz: no worries. I read or let's say skim read a lot of threads (i've deleted some from my list and i've still got 4100 on it) so I do miss stuff like a pic with a craig's link. I tend to see a lot of threads that either are missing links or had the PB pictures removed so I tend to put some of my posts on REMOTE CONTROL.

i know i'm old, but i'm still learning and trying to get better.

that said I did buy a 1970 Mach 1 with a 428 cobra jet and 36,000 miles on it with an automatic for $3000 in 1977 and drove it around the west coast and not slow, but sadly I don't own it anymore. it wasn't really comfortable for me at 6'3 when I went from 150 pounds to 190 when i discovered guacamole so i sold it cheap and bought a 1966 International 4speed truck.

cheers and keep that old Mustang purring cause it's still a LOOKER.
 

matt_i

Well-known member
Joined
Mar 14, 2008
Messages
10,760
Location
SE Michigan
Hi Scott

Sorry to hear about the shear. There are a ton of squirrelly sellers out there, I've found a significant population who believe their machines are worth their weight in solid gold...just keep your feelers out and you'll find something else good that will do the job. I happen to like Tennsmith, I've owned 4 of their machines and all did the job that I expected them to do up to the advertised capacities.

My favorite test indicator is an Interapid, I just chuck the stem in the 3 jaw drill chuck and put the spindle in "neutral" on the head so the belt doesn't have to be turned and rotate around by hand. Because the indicator revolves with the spindle bearings it does not matter if the stem is held concentrically, only that it is solid and doesn't deflect. The Interapid brand has a reputation for being both sensitive and fairly bulletproof you'd almost have to throw it across the shop to damage it !!

I usually do a "rough" indication with the point hanging in midair and try to center it as best by eye relative to a visual target like the center hole in the rotab, in both X and Y directions first. That takes some time and confusion away from the wildly spinning dial if you are way off at first.
 
OP
S

sbosecker

Well-known member
Joined
Sep 25, 2012
Messages
3,539
Location
Peachtree City, GA
SB: so tell us have you SOLD A TRACTOR LATELY (I know blasphamy) or maybe BOUGHT ONE or just quit looking for a while as you get new machines and benches and sklls finely tuned in the LONE BEECH?

DrivesItFar,

HA! No tractor sales or purchases...

I do want to acquire the Ford 801 Powermaster that my dad bought new in the early 60's. It is currently owned by a fellow back home and he knows that I am interested in it when he no longer needs/wants it.

Best regards,

Scott
 
OP
S

sbosecker

Well-known member
Joined
Sep 25, 2012
Messages
3,539
Location
Peachtree City, GA
Hi Scott

Sorry to hear about the shear. There are a ton of squirrelly sellers out there, I've found a significant population who believe their machines are worth their weight in solid gold...just keep your feelers out and you'll find something else good that will do the job. I happen to like Tennsmith, I've owned 4 of their machines and all did the job that I expected them to do up to the advertised capacities.

My favorite test indicator is an Interapid, I just chuck the stem in the 3 jaw drill chuck and put the spindle in "neutral" on the head so the belt doesn't have to be turned and rotate around by hand. Because the indicator revolves with the spindle bearings it does not matter if the stem is held concentrically, only that it is solid and doesn't deflect. The Interapid brand has a reputation for being both sensitive and fairly bulletproof you'd almost have to throw it across the shop to damage it !!

I usually do a "rough" indication with the point hanging in midair and try to center it as best by eye relative to a visual target like the center hole in the rotab, in both X and Y directions first. That takes some time and confusion away from the wildly spinning dial if you are way off at first.


matt_i,

One thing I have learned is that reasonable men can disagree on the value of used machinery. Once the son was running the show I can't say that I was surprised that everything changed. I WAS surprised it took 3-1/2 days for him to tell me everything had changed. Ha!

I have to say I was a bit surprised that I managed (apparently) to use the Dial Test Indicator to get the Rotary Table centered under the Spindle.

When I saw the IKEA LED lamp adapter project video on YouTube, it struck me as a perfect project to stretch my meager machining skills.

My biggest fear was that something would interrupt the project about 75% of the way to completion and I would never get back to finishing it.

Thanks for stopping by!

Best regards,

Scott
 
To avoid these ads, REGISTER NOW!
Top Bottom