To avoid these ads, REGISTER NOW!

Above 1200 Sq/FT The ASYLUM - Happy 40th Birthday to Me! (Est. 2005)

Wokspaces above 1200 squarefeet.
OP
S

shopnut

Well-known member
Joined
Feb 22, 2006
Messages
4,237
Location
Florida
I have a modest 20X21 two car garage. Six to nine months ago I decide that I had had enough. The bathroom/utility room remodel was finished and I had to get my garage back. I hauled, organized, and straightened. Along the way I've had to stop working on the garage and get some "projects" done. I can now get a car (my hunting jeep) in to work on it (another project) for some emergency repairs before hunting season. The garage isn't finished but then again it probably NEVER will be.

All of this is to say that the garage construction/arrangement/upgrades are neat but we have them for a reason. Once in a while we need to work on a project to remind ourselves that we aren't building the garage just to look at. It's supposed to have a use. Take a break from the garage construction and just "enjoy" what you already have. The garage will still be there.

Yep, the garage plays second fiddle to the home remodel jobs. My city garage was much like you describe about 2 years ago during a major home reno. Down right nasty - but I got it straightened out and that's what prompted me to create my City Garage thread. It's still tough to keep it clean though, because of all the other projects aways going on.

The library ladder is looking great I like the idea :D. I also agree with Md. Time to put the construction tools down for a little bet and get that Chevelle in there for some Love :D.


Rick

Thanks Rick, I think the ladder will really come in handy as the years go on. Besides serving as a ladder, It will be a makeshift perimeter hoist. And the rail may serve as mount for a "shower curtain" type of room divider between the side and main bays. Who knows what else can be done with that sturdy rail up there.

I agree with both you and mdbeck1 about taking a break from it and rest assured I do. I don't really discuss it here too often as I try to keep this thread on topic, but the cars and bikes have received plenty of attention here over the years in the Asylum.

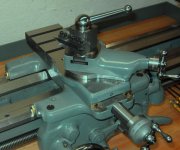
The Chevelle now has new front coil springs and shocks. It's transmission had all it's leaking seals replaced, fixing drips that have plagued the car since I was 15 years old. The power steering and exhaust has also had some attention. The Corvette doesn't really need too much, but I recently rebuilt all the brakes. Of course, there is always some repair needed on one of the old bikes or a new accessory to add to one of the newer ones

My plan, however, is to not start a major restoration project until this place is all in order. I will keep the cars in running order until the major construction work is done in here. Since I ride a bike out the Asylum a majority of the visits, its nice to have a car in working order to run into town for some big supplies. I do get some looks when people see the old Chevelle with 2x4s hanging out the window :wtf:

Yep, that's what I was thinking, and by 'group' I meant 'ground', but you probably already figured that out. One side could be the 'engaging' side, and the other side could disengage it. You could tie knots along the way up the side of the ladder so whenever you remember it is still locked (all the way on the ground or halfway up headed down:D) you can just pull on it from wherever you and and whala, unlocked!

I think the biggest reason why I think it would be good to do it was that you could lock it from the ground before you ever set foot on the ladder which would decrease the risk of the temptation to not go through the 'hassle' of locking it with a pin or whatever once you're at the top since you're 'just going to be up there for 1 second' like all of us are, but that 1 second is all it takes for things to get shaky.
Great ideas! Yeah, people get lazy, me included. You idea reminds me of the roll-around stairs you might find in warehouses. They are on casters, but as soon as you step on them, they set their feet down on the ground. Then you have to step on a lever to raise it back up on casters again.

I may be overanalyzing this, however :dunno: In reality, having the top actually attached securely to something up there, even tough it can sway a couple inches, still probably makes it 100% safer then any normally used extension ladder out there. I'm still thinking this one over.
 
To avoid these ads, REGISTER NOW!
OP
S

shopnut

Well-known member
Joined
Feb 22, 2006
Messages
4,237
Location
Florida
THE LIBRARY LADDER HANGER IS STRENGTHENED…

First of all, I added some additional pictures in Reply#795 with the carriage coming around the bend in the rail if you are interested.

Ok, on to the hanger details. With everything looking like it will work fine, it’s on to making this thing robust enough to handle everyday use and abuse.

Here are some overall shots:

893-Library-Ladder-265.JPG 894-Library-Ladder-267.JPG

I had to keep the I-beams clear on both the front side where the ladder would rest and on the back side so the hinge could lay flat. No screw heads could be protruding into these areas and I avoided this by countersinking and tapping the mating pieces. I used some 2 x 1/4” stock to tie between the hinge and the cross-member and give me something to tap into. The red rectangles on one of the pictures show the location of some future wear pads. They will most likely be made of leftover scraps of white vinyl siding.

895-Library-Ladder-266.JPG 896-Library-Ladder-270.JPG
897-Library-Ladder-277-mod.JPG 898-Library-Ladder-276.JPG

Lastly, I made some little spacer blocks to fill the void when attaching the hinges to the carriage. These were tapped and fastened directly to the hinge to hold them in place. This picture shows it set on the end of a piece of scrap channel for reference.

899-Library-Ladder-278.JPG

When finished, all these parts will be painted blue, as will the entire carriage structure.
 
Last edited:
OP
S

shopnut

Well-known member
Joined
Feb 22, 2006
Messages
4,237
Location
Florida
USING THE DRILL PRESS OR LATHE AS A TEMPORARY MILL…

I posted a separate thread over in the General Tool Discussion forum requesting opinions about which method to use, but perhaps one of my 10 readers here might have an opinion. Here’s a link: Drill Press or Lathe as Temporary Mill? - Your opinions please.

I won’t bog this thread down with all the details, but I’m trying to use the cross-slide table on either the drill press or the lathe to do some small jobs.

901-Mill-Table-07.JPG 904-Mill-Table-14.JPG 905-Mill-Table-18.JPG
 
Last edited:

tinbender 66

Well-known member
Joined
Mar 23, 2011
Messages
2,294
Location
Western Washington State
I don't know much about machining so I can only offer an opinion. It just seems to me that working horizontally would be better than vertically. But then maybe you can hold closer tolerances with the lathe. See. I told you I didn't know much.
 

Wingnut65

Well-known member
Joined
Apr 21, 2010
Messages
3,170
Location
Tampa Bay, FL
I do get some looks when people see the old Chevelle with 2x4s hanging out the window

Now that is a photo that should be posted as part of the history of the making of The Asylum!

For the machining, no experience, but thoughts... It looks like it should work, just so long as the DP is for vertical plunge machining. I don't think a DP would be able to take undue lateral loads if you wanted to turn the table to machine the top of a piece to be level. A lathe is designed for those pressures on the bit and internals. Just a thought...
 

flybefree

Well-known member
Joined
May 18, 2008
Messages
1,111
Location
Ohio/Kentucky
Shopnut....in my shop the DP is a HF Piece O' Poop (I am so ashamed) so I would go with the lathe for simple milling jobs since my DP has a runout of about 30 thou.

Shaun
 

rickairmedic

Well-known member
Joined
May 31, 2005
Messages
4,165
Location
louisville ,Ky
Now that is a photo that should be posted as part of the history of the making of The Asylum!

For the machining, no experience, but thoughts... It looks like it should work, just so long as the DP is for vertical plunge machining. I don't think a DP would be able to take undue lateral loads if you wanted to turn the table to machine the top of a piece to be level. A lathe is designed for those pressures on the bit and internals. Just a thought...


Oddly the owners manual for my new 1959 Craftsman floor model actually mentions " light milling " . I would still try the trick I showed first though . There are actual milling attatchments made specifically for many lathes including the Southbend and Atlas . The problem with most of them is they are ungodly expensive when you find them on evilbay :D. I have seen one listed recently on the Indiana statewide craigslist search for under $200.00 but it was for a southbend . The 12" Atlas I am planning to pick up actually has one with it .


Rick
 
OP
S

shopnut

Well-known member
Joined
Feb 22, 2006
Messages
4,237
Location
Florida
Guys, I got a lot of good replies, so if interested, go check that other thread out. And thanks for all of yours here!

I don't know much about machining so I can only offer an opinion. It just seems to me that working horizontally would be better than vertically. But then maybe you can hold closer tolerances with the lathe. See. I told you I didn't know much.

That was my thought too. I do so much drilling on the press that using an end mill on the lathe would be weird, at first, at least. I suppose I would get use to it if it was an overall better solution.

Shopnut that would work for the drill press but looks a little large for the lathe :D. Do you have a quick change tool post if you do I will dig back up a nifty little idea I found tonight :D.


Ok heres a link to a picture that is pretty easy to figure out :D.

http://www.gadgetbuilder.com/PostMiller.jpg


Rick
Actually I DO have a QCTP much like the one shown in your link. AND, after a little searching through Grandpa's stuff, I have a mini vise too! So that little gadget would be perfect (and no cost) for me making simple grooves, slots, keyways. Thanks a lot! I'm going to rig somthing up for small quick jobs.

907-Mini-Machinist-Vise.JPG

Now that is a photo that should be posted as part of the history of the making of The Asylum!

For the machining, no experience, but thoughts... It looks like it should work, just so long as the DP is for vertical plunge machining. I don't think a DP would be able to take undue lateral loads if you wanted to turn the table to machine the top of a piece to be level. A lathe is designed for those pressures on the bit and internals. Just a thought...

LOL - I’ll have to take a picture next time the rare Chevelle hauling experience happens. Generally I plan out supply delivery pretty good, but sometimes I just want to finish a project and one part is keeping me from doing it. That’s when I have to resort to drastic measures!

Your point about the deficiencies of the DP seems to be the general consensus in past and present threads. If I do this I will have to make my cuts slooooooowwww - but that is alright. Thanks.

Shopnut....in my shop the DP is a HF Piece O' Poop (I am so ashamed) so I would go with the lathe for simple milling jobs since my DP has a runout of about 30 thou.

Shaun

Both of my DPs are HF, but they have served me well over the years. I guess it’s time to set up the dial indicator now that you mention it, however, and find out what they’re running. It’s probably a good idea to check the lathe while I’m at it too.

Thanks, good point.

Oddly the owners manual for my new 1959 Craftsman floor model actually mentions " light milling " . I would still try the trick I showed first though . There are actual milling attatchments made specifically for many lathes including the Southbend and Atlas . The problem with most of them is they are ungodly expensive when you find them on evilbay :D. I have seen one listed recently on the Indiana statewide craigslist search for under $200.00 but it was for a southbend . The 12" Atlas I am planning to pick up actually has one with it .


Rick
I've been seeing the Atlas milling attachments going for $300-500 so if you are getting one with the lathe - you OFFICIALLY ****!

What did come up in the other thread was that these attachments are general designed to cut keyways in shafts. Maybe more can be done with them, however.


So, what's my plan of attack?

I'm going to rig up that little QCTP vise like Rick suggested - it's basically free so why not.

Next I will give the DP method a try (after looking my DP over good), For less then $50, I might have an acceptable solution for my occasional aluminum jobs. I actually tried it years ago on some hardwood and it worked pretty good -although aluminum/steel is much, much different. Plus I can cut those arc-shaped slots!

If neither of these work, its probably a long wait until I find a little dedicated benchtop model.

The attached image below was something interesting that got posted in the other thread for a lathe modification. They provided a link with all the details on how to make it.
 

Attachments

  • 908-Lathe-Compound-Rest-Adapter.jpg
    908-Lathe-Compound-Rest-Adapter.jpg
    69.9 KB · Views: 65
OP
S

shopnut

Well-known member
Joined
Feb 22, 2006
Messages
4,237
Location
Florida
THE CRAFTSMAN AND JOHN DEERE TRACTORS GO HEAD-TO-HEAD…

Just kidding - I don’t really think it’s fair to compare a 1974 JD to a 1999 C-man. I will make these comments, however, after mowing the entire yard around the Asylum:

- Turning radius is much tighter on the C-man and this makes navigating around trees MUCH easier.
- It used 1.5 gallons of gas to mow the entire place, the same as the JD. Thought it might be more fuel efficient but that really doesn’t matter.
- The C-man really needed a 4.5 gear since 4th didn’t seem quite fast enough, while 5th was too much. I missed the variator lever on the JD that let me dial in the perfect speed.
- The shorter backrest on the C-man was not quite as comfortable as the JD.
- The C-man seemed to do a bit better in the loose sand close to the beach - can’t explain that one.
- I definitely need to disable that seat safety switch on the C-Man. I can’t have the engine cut out every time I jump off to move a fallen limb, can I?
- The C-man was much quieter, but the interior of the JD muffler is probably completely blown out
- The C-man generated much less dust while mowing. This can be explained by the mulching featured with a closed deck.

Here are a couple side-by-side shots for fun:

909-Craftsman-Tractor-44.JPG 910-Craftsman-Tractor-47.JPG

And here are some shots after doing the mowing chores for the first time with the Craftsman.

911-Craftsman-Tractor-33.JPG 912-Craftsman-Tractor-31.JPG 913-Craftsman-Tractor-34.JPG
914-Craftsman-Tractor-29.JPG 915-Craftsman-Tractor-24.JPG

All-in-all, the Craftsman tractor is going to work great, and hopefully its current trouble-free condition will allow me to work on my many other projects.
 
Last edited:
OP
S

shopnut

Well-known member
Joined
Feb 22, 2006
Messages
4,237
Location
Florida
TIME TO STORE THE POWER EQUIPMENT AWAY…

This 12x20 shed was the first structure to be built on the property about 15 years ago, storing all the lawn and garden equipment. My little utility trailer got the boot to make room for the new-to-me Craftsman. It was also a good time to do a little cleaning. Here’s a rather old shot of the shed with the travel trailer still parked down by the lake, but it still basically looks the same now. I have a bunch of tan metal siding left over from the Asylum build and when this wood siding needs to be replaced, it may go on there.

916-Avalanche01.JPG

This is what the right side looked like after clearing it out and filling it back up with two tractors, a chipper/shedder, and a tiller.

917-Lawn-Shed-01.JPG 918-Lawn-Shed-04.JPG

A WAY TO STORE KAYAKS (AND MAYBE OTHER LONG THINGS)…

Years ago, we needed a way to store Mrs Shopnut’s 14’ kayak inside the shed out of the weather, so I went overhead with it. I had an old 1-1/4 pipe that was pulled out of the water well and it was used to create a simple overhead track system.

The pipe extends nearly to the back wall of the shed. The trolley utilizes the green plastic sheaves from a garden hose guide that you can find at Lowes/HD. One end of the kayak gets attached to the trolley. You then pick up the other end so it is level, and just push it back in there while it hovers over the tractors below. The other end then gets hung on the short stub of pipe hanging out from the front wood support. It’s been working great for about 12 years now.

919-Lawn-Shed-06.JPG 920-Lawn-Shed-08.JPG 921-Lawn-Shed-09.JPG

And of course, this place NEEDED a cord reel. Not for 110V power this time, but to charge batteries in all the stored equipment. You can see the battery tender in the background.

922-Lawn-Shed-12.JPG
 
Last edited:

Red Leader

Well-known member
Joined
May 15, 2011
Messages
2,688
Location
Denver, CO
I really need some storage for all the lawn & garden stuff that keeps wanting to take over the garage...


Maybe you can come build me a shed:D
 

flybefree

Well-known member
Joined
May 18, 2008
Messages
1,111
Location
Ohio/Kentucky
Shopnut,

Two things:

1. Mowing near the beach...that's cool.
2. Love the Kyak storage idea...we have a canoe and are always manhandlig that thing.

Shaun
 
OP
S

shopnut

Well-known member
Joined
Feb 22, 2006
Messages
4,237
Location
Florida
Ok...that kayak storage is just neat on a stick...(or pulley) in this case!! Great idea!
Shopnut,

Two things:

1. Mowing near the beach...that's cool.
2. Love the Kyak storage idea...we have a canoe and are always manhandlig that thing.

Shaun

Thanks guys. I'm sure someone can put that Kayak idea to good use.

I really need some storage for all the lawn & garden stuff that keeps wanting to take over the garage...


Maybe you can come build me a shed:D
A yard barn is great to have for stashing all the junk. I heard Wingnut's floor krewe is currently looking for a big construction job to start on - I'm currently locked up in the Asylum! :)
 
OP
S

shopnut

Well-known member
Joined
Feb 22, 2006
Messages
4,237
Location
Florida
IT WAS TIME TO KNOCK OUT THE VINYL ON THE NORTH WALL…

Even though it was only a 3’ high section, there still were quite a few obstacles to cut around. Four windows, five library ladder hangers, and one in-wall speaker slowed things down a bit.

923-Main-Bay-North-15.JPG 924-Main-Bay-North-19.JPG

Since the miter saw had the blade reversed, it was on to the 18” wide section surrounding the light boxes in the ceiling.

925-Main-Bay-North-22.JPG 926-Main-Bay-North-23.JPG

Here’s a shot of the in-wall speaker, the last of six to install :beer:

927-Main-Bay-North-45.JPG

That north wall is getting close!
 
Last edited:

Wingnut65

Well-known member
Joined
Apr 21, 2010
Messages
3,170
Location
Tampa Bay, FL
Those detailed cuts around the ladder hangers are just sick. And to think you had to do that everywhere. Man, I am tired just thinking about all the work. Awesome :thumbup:
attachment.php


It looks great. Congrats on scratching that one off the list! :beer:
 
Last edited:

nkachur

Well-known member
Joined
Jun 29, 2008
Messages
798
Location
Manitoba Canada
I must say your storage ideas and attention to detail never cease to amaze. I may find a use for the kayak storage even though I don't own a kayak.

:thumbup:
 

Red Leader

Well-known member
Joined
May 15, 2011
Messages
2,688
Location
Denver, CO
Lots of attention to detail. I like the built-in speakers. Very nice touch. Reminded me of some built-in gas heaters from the 1940s. I dunno how safe there are/were, but they look incredibly cool.

bathroom-300x199.jpg


Still thinking of heating options...


-RL
 
To avoid these ads, REGISTER NOW!

mdbeck1

Well-known member
Joined
Mar 7, 2010
Messages
2,297
Location
Norman, OK
Lots of attention to detail. I like the built-in speakers. Very nice touch. Reminded me of some built-in gas heaters from the 1940s. I dunno how safe there are/were, but they look incredibly cool.

bathroom-300x199.jpg


Still thinking of heating options...


-RL

I grew up with one of those in the bathroom.

A couple of years ago some "energy experts" came into my parents home and said that it would have to be removed as it was no longer safe. I would guess that some kid somewhere burned the house down and now they're taking them away from all of us.
 
OP
S

shopnut

Well-known member
Joined
Feb 22, 2006
Messages
4,237
Location
Florida
Those detailed cuts around the ladder hangers are just sick. And to think you had to do that everywhere. Man, I am tired just thinking about all the work. Awesome :thumbup:

It looks great. Congrats on scratching that one off the list! :beer:

Thanks Wingnut65 - I'd be lying if I said it was a piece of cake. I really struggled with the original 2 cutouts I made in the back wall for the ladder brackets before settling on this method which has worked nicely each and every time since:

1. Measure X/Y coordinates of bracket WRT adjacent installed plank and mark this point on the new vinyl plank (green)
2. Use spare bracket to trace outline onto plank (blue)
3. Drill six 3/8” holes at corners (red)
4. Trim out remaining material between holes with tin snips or utility knife (red)
5. Install plank and cross fingers :wtf:

The vertical ribs in the vinyl still caused a little grief if they landed in the wrong spot. The bracket material was 10ga (.135”) and my 3/8” cutout left plenty of clearance around the bracket in case my measurements were slightly off :)

928-LL-Bracket-Detail.JPG
 
OP
S

shopnut

Well-known member
Joined
Feb 22, 2006
Messages
4,237
Location
Florida
I must say your storage ideas and attention to detail never cease to amaze. I may find a use for the kayak storage even though I don't own a kayak.

:thumbup:
nkackur - Thanks a bunch, hopefully you will get some walls up soon and start using some of the ideas you're finding here on this great garage forum!
 
OP
S

shopnut

Well-known member
Joined
Feb 22, 2006
Messages
4,237
Location
Florida
Lots of attention to detail. I like the built-in speakers. Very nice touch. Reminded me of some built-in gas heaters from the 1940s. I dunno how safe there are/were, but they look incredibly cool.

bathroom-300x199.jpg


Still thinking of heating options...


-RL

I grew up with one of those in the bathroom.

A couple of years ago some "energy experts" came into my parents home and said that it would have to be removed as it was no longer safe. I would guess that some kid somewhere burned the house down and now they're taking them away from all of us.

Thanks RL. I really like the space savings offered by recessing items in the wall. Plus it has a “clean” look. With the proper insulation to prevent a fire, that heater is a great idea and maybe one or two of those would be sufficient to heat you 2-car.

Besides all the recessed fluorescent and can lights installed, here are some other places I tried to save some precious space by utilizing dead space in the interior walls...

Fire extinguishers:
929-26-nook.JPG

Cordless drill charger cabinet:
930-294a-Back Wall-123.JPG

Hidden cord and hose reels (lots of those):
931-325-Office-595.JPG

Flat file, roll file, and wall mounted radio in upstairs office:
932-602-Office-570 Stitch.jpg

Garbage can:
933-Sink-Nook-169.JPG

Tissue and latex glove dispensers:
934-Sink-Nook-180.JPG
 
OP
S

shopnut

Well-known member
Joined
Feb 22, 2006
Messages
4,237
Location
Florida
Shopnut...do you think that your vinyl soffit idea would work on the back of my bi-fold door?

Shaun
Shaun, I think the vinyl would be a great solution for the inside of your hangar door, both from a weight and looks standpoint. I will reply with some additional info and cautions in your build thread asap.
 

tinbender 66

Well-known member
Joined
Mar 23, 2011
Messages
2,294
Location
Western Washington State
Thanks RL. I really like the space savings offered by recessing items in the wall. Plus it has a “clean” look. With the proper insulation to prevent a fire, that heater is a great idea and maybe one or two of those would be sufficient to heat you 2-car.

Besides all the recessed fluorescent and can lights installed, here are some other places I tried to save some precious space by utilizing dead space in the interior walls...


You kill me shopnut:beer:
 
OP
S

shopnut

Well-known member
Joined
Feb 22, 2006
Messages
4,237
Location
Florida
LIGHTS, WINDOW JAMBS, AND POWER WINDOW ACTUATOR COVERS…

Four more fluorescent fixtures were installed above the windows. The library ladder brackets sticking out of the wall made a perfect spot to rest the fixtures while the wiring connections were being made. Some towels protected the paint on both parts.

935-Main-Bay-North-29.JPG 936-Main-Bay-North-32.JPG

Next, I installed the window jamb material and made the covers for the power window actuators. I also installed the flow control fittings on the actuators and tuned them to slow the windows down a bit. It now takes 3 seconds to slide the windows open or closed, but it is in a much more controlled manner (meaning - “smoooooooth”). I ordered more to do the other 4 windows and will install them the next time I have the scaffold over there. Mrs. Shopnut got to operate them for the first time and said I NEED to create a video of it - I’ll have to figure out how to post them here on the forum. Even though she seemed pretty impressed with the windows, that still didn’t stop her from calling me “garage geek” later on. In fact, I think it just reinforced it.

937--Main-Bay-North-25.JPG 938-Main-Bay-North-47.JPG

And here is the final result; the north wall is completely done :bounce: Well, maybe there is a small amount to complete near the front wall, but I’ll save that for after the new loft is built.

939--Main-Bay-North-40.JPG 940-Main-Bay-North-36.JPG 941-Main-Bay-North-52.JPG

So now it’s on to the ceiling insulation and vinyl, which are already on hand. Luckily, the temps are finally dropping a bit so the job won’t be so miserable. There’s nothing stopping me from doing the section closest to the office, but I will need to work out the details on the front hoist track before I can finish the forward section.
 
Last edited:

Vernmotor

Well-known member
Joined
Jan 12, 2008
Messages
1,318
Location
Mt.vernon oh
Garage Geek that's a honor ! And could not be more fitting.. We should a have a award around here Garage geek of the month ! LOL
 

Red Leader

Well-known member
Joined
May 15, 2011
Messages
2,688
Location
Denver, CO
Thanks RL. I really like the space savings offered by recessing items in the wall. Plus it has a “clean” look. With the proper insulation to prevent a fire, that heater is a great idea and maybe one or two of those would be sufficient to heat you 2-car.

Besides all the recessed fluorescent and can lights installed, here are some other places I tried to save some precious space by utilizing dead space in the interior walls...

Fire extinguishers:
929-26-nook.JPG

Cordless drill charger cabinet:
930-294a-Back Wall-123.JPG

Hidden cord and hose reels (lots of those):
931-325-Office-595.JPG

Flat file, roll file, and wall mounted radio in upstairs office:
932-602-Office-570 Stitch.jpg

Garbage can:
933-Sink-Nook-169.JPG

Tissue and latex glove dispensers:
934-Sink-Nook-180.JPG

Wow, all of these are fantastic - and are the type of thing that you see when someone has really done their homework and taken the time to plan and prep instead of just haphazardly throwing things together. You can tell those details aren't afterthoughts. It says a lot about the person doing the work - that they time their time and really think about things. It is in the little details that separate just your average ho-hum joint (50s C-mag garage, no recessed anything:lol:) from the truly discriminating build:) I think I speak for all of us when I say that we are all admirers of your attention to detail and fantastic execution.

Keep rockin:thumbup:
 
Last edited:

Red Leader

Well-known member
Joined
May 15, 2011
Messages
2,688
Location
Denver, CO
I grew up with one of those in the bathroom.

A couple of years ago some "energy experts" came into my parents home and said that it would have to be removed as it was no longer safe. I would guess that some kid somewhere burned the house down and now they're taking them away from all of us.

I would have asked if they were from the govt and if they said 'yes', then as soon as they left I would have run out and bought/installed second one:D
 

Omphaloskeptic

Well-known member
Joined
Oct 11, 2008
Messages
2,346
Location
Ultima Ratio, Wa.
Garage Geek! - That's a good one, but if you need a rebuttal quip, just call the Mrs. a "Guitar Geek". lol We've all seen her 'shop collection' and I'll bet a dollar to a donut that she has a bunch more squirreled away at home. The only instruments I didn't see was a banjo and a sitar! :bounce:

When you do the video of the S.W.E.A.T. 'Shop Window Evolution Activation Test', be sure to include an original soundtrack provided by Mrs. 'Guitar Geek' Shopnut herself. :lol_hitti

Speaking of guitars, ask her to test the acoustics of the shop sometime. I'll bet she could capture some great natural reverb in there. Pretty soon, your shop will be even more unique and memorable as GJ's only shop with its' own theme song.:thumbup:

Shopnut, on second thought, it might not be a good idea to invite her to play in your shop; it might become the birthplace of the 'Asylum Garage Band'. :shocking:
 

mdbeck1

Well-known member
Joined
Mar 7, 2010
Messages
2,297
Location
Norman, OK
I would have asked if they were from the govt and if they said 'yes', then as soon as they left I would have run out and bought/installed second one:D

Yes they were from some government agency and they removed and repaired the hole for free (and capped the line). They also sealed the windows and a bunch of other cracks that I wouldn't have ever found. All in all probably a good trade.

The parents are getting older and more forgetful. I'd hate for them to leave the gas on and go hunt for a match.
 
OP
S

shopnut

Well-known member
Joined
Feb 22, 2006
Messages
4,237
Location
Florida
Garage Geek that's a honor ! And could not be more fitting.. We should a have a award around here Garage geek of the month ! LOL

Being an engineer, I’m sure many people have referred to me as a geek, nerd, or worse in the past :) It kind of grows on you after 25 years and it really doesn’t pay to fight who you are, anyways. But “Garage Geek” somehow sounds a bit better to me :dunno: Thanks for stopping by Vernmotor.

Mrs. Shopnut has you pegged:D, such as when Mrs. TB said I was a Martha Stewart fan. Seriously, that place boggles my mind.

Martha Stewart, eh. Well, that maybe explains the whole “feng shui” thing! The first time I saw you make mention of it was when you showed the matching red/black coffee cup. I thought maybe it was a new flavor of Starbucks coffee you were going to fill the cup with :D. I guess that demonstrates my lack of knowledge on both aesthetics AND coffee! Thanks for your kind comment.
 
OP
S

shopnut

Well-known member
Joined
Feb 22, 2006
Messages
4,237
Location
Florida
Wow, all of these are fantastic - and are the type of thing that you see when someone has really done their homework and taken the time to plan and prep instead of just haphazardly throwing things together. You can tell those details aren't afterthoughts. It says a lot about the person doing the work - that they time their time and really think about things. It is in the little details that separate just your average ho-hum joint (50s C-mag garage, no recessed anything:lol:) from the truly discriminating build:) I think I speak for all of us when I say that we are all admirers of your attention to detail and fantastic execution.

Keep rockin:thumbup:

Thanks RL - you guys are making me blush!

I will admit, however, a lot of thought has gone into this place, before and after it was built. I guess that is characteristic of an engineer (or maybe a curse ???). But I’m very happy with the way the Asylum is turning out - I’m glad to hear others also approve.

Being a getaway place, I have a good portion of the week to think things through, doodle in CAD, and seek/buy things that I think will fit in and make garage life more convenient and pleasurable. Of course, the limited time there also explains why I’m on my 6th year of outfitting the Asylum too. :sad: But the end of the tunnel is near!

Oh - and don’t down play that 1950s garage - that place is already looking great and will be fantastic when you’re done :thumbup:
 
OP
S

shopnut

Well-known member
Joined
Feb 22, 2006
Messages
4,237
Location
Florida
Garage Geek! - That's a good one, but if you need a rebuttal quip, just call the Mrs. a "Guitar Geek". lol We've all seen her 'shop collection' and I'll bet a dollar to a donut that she has a bunch more squirreled away at home. The only instruments I didn't see was a banjo and a sitar! :bounce:

When you do the video of the S.W.E.A.T. 'Shop Window Evolution Activation Test', be sure to include an original soundtrack provided by Mrs. 'Guitar Geek' Shopnut herself. :lol_hitti

Speaking of guitars, ask her to test the acoustics of the shop sometime. I'll bet she could capture some great natural reverb in there. Pretty soon, your shop will be even more unique and memorable as GJ's only shop with its' own theme song.:thumbup:

Shopnut, on second thought, it might not be a good idea to invite her to play in your shop; it might become the birthplace of the 'Asylum Garage Band'. :shocking:

Yes, the little “Guitar Geek” (I’m going to use that one, thank you very much) has her guitars spread out a bit. She keeps her favorites close at hand in the city house where she can play them anytime and keep an eye on them. I posted some pictures over in RL’s guitar thread a while back and you may have seen it, but I’ll link it here so I can find it easily in the future: Show us your guitar/axe/jam rig!

The little squirrel has quite a collection containing Gibson Les Paul’s, Radio Tones, Dobros, Nationals, and a few others. She’s on a Martin kick right now and says she loves the build and sound quality of them. My personal favorite is the Ovation Adamas Melissa Etheridge 12-string. I absolutely LOVE to hear her play that one, although she makes them ALL sound good. I’m not sure she has a single favorite, but I’ve been given a list of the ones I need to grab as I’m running out of the burning house! :wtf:

I guess since the Asylum is a financial joint effort between the Mrs. and I, it only seems fitting some jam sessions may take place there in the future. I would be fine with it, but the musicians may have to put up with the smell of grease and cleaning fluid :lol: Mrs. Shopnut has written a few songs so maybe I need to have her work on that Asylum theme - that would be cool. (Well, maybe only to a garage geek :dunno:)

S.W.E.A.T. = LOL. I really need to go back and make a running list of all these acronyms you’re coming up with - they just crack me up. I have half a notion to create little labels to stick on the window actuator covers in some kind of NASA font - O.V.L.C.M. (see Reply#580) It definitely would be a conversation starter!
 

Red Leader

Well-known member
Joined
May 15, 2011
Messages
2,688
Location
Denver, CO
Yes, the little “Guitar Geek” (I’m going to use that one, thank you very much) has her guitars spread out a bit. She keeps her favorites close at hand in the city house where she can play them anytime and keep an eye on them. I posted some pictures over in RL’s guitar thread a while back and you may have seen it, but I’ll link it here so I can find it easily in the future: Show us your guitar/axe/jam rig!

The little squirrel has quite a collection containing Gibson Les Paul’s, Radio Tones, Dobros, Nationals, and a few others. She’s on a Martin kick right now and says she loves the build and sound quality of them. My personal favorite is the Ovation Adamas Melissa Etheridge 12-string. I absolutely LOVE to hear her play that one, although she makes them ALL sound good. I’m not sure she has a single favorite, but I’ve been given a list of the ones I need to grab as I’m running out of the burning house! :wtf:

I guess since the Asylum is a financial joint effort between the Mrs. and I, it only seems fitting some jam sessions may take place there in the future. I would be fine with it, but the musicians may have to put up with the smell of grease and cleaning fluid :lol: Mrs. Shopnut has written a few songs so maybe I need to have her work on that Asylum theme - that would be cool. (Well, maybe only to a garage geek :dunno:)

S.W.E.A.T. = LOL. I really need to go back and make a running list of all these acronyms you’re coming up with - they just crack me up. I have half a notion to create little labels to stick on the window actuator covers in some kind of NASA font - O.V.L.C.M. (see Reply#580) It definitely would be a conversation starter!

Hey hey! Now ya got talking about guitars...I'm going to be posting much more in this thread!

I've owned a lot of guitars, including some very nice custom made axes, but I keep returning to the Gibsons. I know they cut corners and add plasticisers to the finish and use zinc for their tailpieces (USA line) and haven't done much to improve the neck/headstock joint over the last 50 years...but...I can't help myself!:)

One of my goals for the 1950s garage is to be able to start building my own guitars, one of my biggest life's dreams. I love the vibe of vintage instruments, but there is a lot of room for improvement. My dream is to keep all the good things about them (classic shapes and lines, hide glue, nitro laquer, etc), but make improvements (neck through/set through build, boutique pickups, graphite nut, solid steel/alu bridge and studs, better tolerance pots, etc).

I forgot about that thread! I'll have to check it out. I just got done installing a tusq graphite nut on the SG yesterday and it is WORLDS better:D

-Dave
 
OP
S

shopnut

Well-known member
Joined
Feb 22, 2006
Messages
4,237
Location
Florida
One of my goals for the 1950s garage is to be able to start building my own guitars, one of my biggest life's dreams. I love the vibe of vintage instruments, but there is a lot of room for improvement. My dream is to keep all the good things about them (classic shapes and lines, hide glue, nitro laquer, etc), but make improvements (neck through/set through build, boutique pickups, graphite nut, solid steel/alu bridge and studs, better tolerance pots, etc).
So we have a budding luthier in our midst! It would be cool to have a corner of that 1950s garage dedicated to guitar building. Its just an interesting process. Don't look to me for help on that one though - I only know what Mrs. Shopnut shows/tells me, and I'm reaching maximum brain capacity with all the other things I have going on right now :eyecrazy:
 

Red Leader

Well-known member
Joined
May 15, 2011
Messages
2,688
Location
Denver, CO
So we have a budding luthier in our midst! It would be cool to have a corner of that 1950s garage dedicated to guitar building. Its just an interesting process. Don't look to me for help on that one though - I only know what Mrs. Shopnut shows/tells me, and I'm reaching maximum brain capacity with all the other things I have going on right now :eyecrazy:

Absolutely! It would be awesome. I am designing things in the workshop with the guitar building in mind. Eventually I'd like to create my own jigs to do things like a compound radius fingerboard and other neat things.

For now I'll start out just buying the pre-slotted stuff from Stew Mac but eventually I will kick the standards higher when the more advanced skills are acquired.
 
To avoid these ads, REGISTER NOW!
Top Bottom