To avoid these ads, REGISTER NOW!

Above 1200 Sq/FT The ASYLUM - Happy 40th Birthday to Me! (Est. 2005)

Wokspaces above 1200 squarefeet.

Dan in Pasadena

Well-known member
Joined
Feb 18, 2009
Messages
13,106
Location
Pasadena, CA
It's a vicicous cycle, Shopnut: You need more tools - cause hey, we have a collective crack-like addiction, then you need a bigger garage to house all your tools, toys & gizmos, then you need more money to buy the TT&G's to fill up the bigger garage, then you need a yet bigger more well outfitted garage, more toys & tools, and on and on.

Finally? A better paying job to support all this!
 
To avoid these ads, REGISTER NOW!

flybefree

Well-known member
Joined
May 18, 2008
Messages
1,111
Location
Ohio/Kentucky
Congrats on the promotion, strangely it makes me feel better to know that part of the deal is you are a professional R&D guy so it might be OK that I could never make my windows remote controlled!

Shaun
 
Last edited:
OP
S

shopnut

Well-known member
Joined
Feb 22, 2006
Messages
4,237
Location
Florida
Bob Heine - Thanks for your confidence. I guess I have paid my dues. I think people at work can tell when your heart is truly in your job. Hopefully they don't read this thread and figure out just how crazy I am! :willy_nil

Dan in Pasadena - Sounds like someone that possibly talks from experience. ;) One way I've found to make that cycle acceptable is never let the expenses of the TT&G and garage get ahead of the disposable income. It takes financial discipline. If you want to collect more stuff, work harder/smarter to get it. But the most important thing is one needs to find that balance between working long hours to own all the various things and having enough free time to play with it. I'm tipped towards the "not enough free time" side of that scale more than I would like to be right now, but I really can't blame my job on that.
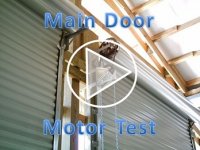
flybefree - Thanks. Yeah, I guess a little more about me has been revealed. What? No power windows? I practically gave you every detail on how to do it! :)
 
Last edited:
OP
S

shopnut

Well-known member
Joined
Feb 22, 2006
Messages
4,237
Location
Florida
POWER ASSIST FOR THE MAIN BAY DOORS (PART 2)…

Here's the completed door chain hoist ready to go back up. The assist motor has the run capacitor just hanging from its cord temporarily for this first test. Just to give you some sense of scale, the motor diameter is about 4".

1274-Main-Door-Drive-012.JPG 1275-Main-Door-Drive-015.JPG

My front loft hoist (See Reply #904) got used for the first time lifting the door hoist. It's a little hard to see here, but an olive green strap is looped through the chain wheel and it is hanging on the hoist hook. It’s headed up to the spot indicated by the arrow.

1276-Main-Door-Drive-018.JPG

Here it is mounted up in place. I added the wooden strut, not to support it vertically, but to keep it from swinging side to side. It has a slot in it for the white bracket to engage in.

1277-Main-Door-Drive-021.JPG 1278-Main-Door-Drive-022.JPG

So how did it work?
It worked rather well, but start-up was a bit more abrupt then I was expecting. When I was calculating what RPM motor to use, I estimated how fast I normally pull the chain. This, in turn, determined the RPM needed at the jackshaft. What I calculated almost matched my 95rpm motor perfectly.

What I didn't plan on was the fact that the gearmotor was going to try and hit that speed almost instantly when the voltage was applied. I guess my arms are a natural "soft start" for the door when pulling on the chain. I think it's best to build some cushion in to protect the drive parts and door, so I'm starting to research the alternatives. Choices range from using a slower motor (I have a 72rpm version to try), mechanical cushions on the power transmission parts, or electrical circuits to ease into full rpm.

The other good thing I found out in this test was that the original chain can still be used to open the door. You barely can tell a difference with the extra drag of back-driving the gearmotor. That is great because I want a backup method for operating the door in case the power is out or some drive component breaks.

Here's a quick video to show the current speed of the door. Sorry about the light levels - I wasn't expecting things to go completely dark like that when the sunshine started coming in.


If keeping the original pull chain available as backup, I want some type of wheel at the lower end to keep the chain from flinging all over the place when the door is doing its thing. I found these at the surplus store and I think I will be able to use them as the lower chain block. I would like to shorten the chains up and locate these wheels out of the way above my head. In an emergency, I could climb up the library ladder and open the doors.

1280-Main-Door-Drive-036.JPG

Another detail that still needs to be addressed is a way to lock the door at any given height (for safety reasons). So there are many more details to work out yet, but this has proved to be quite feasible.
 

Attachments

  • 1279-Main-Door-Drive-Video.JPG
    1279-Main-Door-Drive-Video.JPG
    50.8 KB · Views: 1,339
Last edited:

Wingnut65

Well-known member
Joined
Apr 21, 2010
Messages
3,170
Location
Tampa Bay, FL
Nice new title... Shopnut, GJ's R&D Manager. Where great ideas start!

Nice work on the Automated Power Assist Door Opener (APADO??).

My first thought is that if there is that much torque on first start, the plastic connections will be taking a lot of loads. If there would be some way of getting the motor into the 'soft-start' mode, it would be easier on both of you (motor and 'nut). No such thing as a clutch is there?

Another thought to throw into the R&D mindset... if the chain was still at the garage door level and the motor were separate, a third sprocket could be added to the chain loop to give it tension. But this third sprocket would be on a spring pushing into the chain loop to maintain tension. When the motor starts abruptly, the initial jerk of the movement would be taken out at this third sprocket until the whole chain and door start moving. Then the tensioner would push back in place to maintain a tight chain.

Not sure if I explained it as I picture it in my mind. If you need a sketch, I can find some paper and a crayon somewhere...


EDIT... To lock the door, add a nail to the wall to slip the chain over
 
Last edited:
OP
S

shopnut

Well-known member
Joined
Feb 22, 2006
Messages
4,237
Location
Florida
Wingnut65 - There's no way I want to manage this GJ crew, that would be a handful. Although I will admit, there are a ton of great ideas coming from the members here. I'd love to have you all on my team at work.

A.P.A.D.O. - Cool, another acronym, it's going on the list!

Yeah, I think that soft start system will probably benefit me more than the drive parts :). That plastic coupling does worry me, but it was the one designed for that motor in the hospital bed application so I'm trusting them (for now). It sure does look like the weakest link of the whole system though. Someone probably makes a clutch that would work here, but finding the right size at the right price (think used/surplus/CHEAP) might be difficult :dunno:.

If I'm understanding what you are describing, it sounds like my original plan of mounting the motors directly to those lower chain blocks (one in the last picture) and driving it from down low via the hand chain. At some point, I figured replacing the jackshaft in the existing hoist would be easy and the design gravitated that way so everything could be located high and out of the way.

The #1 mechanical cushioning method I had in mind was very similar to what you describe, but the chain tensioner would act on the short roller chain between the motor and the drum. Tensioners are readily available or can be made easily from cheap parts. I think I would need one on each side of the chain loop, however, because I see the same abrupt start in both directions. The cushioning effect only occurs while the chain is being pulled taunt on the "pull" side of the drive sprocket, right? The "slack" side will need to maintain enough tension to keep the chain from coming off the sprockets on the other side. Since you basically were thinking along the same lines as me, I liking this idea more and more.

Actually, I find it amazing that we had a very similar thought process on this whole thing and you haven't had the parts staring at you for a month. (almost scary!) :thumbup:

schwalby - Actually me up on a ladder is usually the cause of the emergencies :lol:
I was thinking more along the lines of the door drive breaking and needing to get a car out or something.
 

Wingnut65

Well-known member
Joined
Apr 21, 2010
Messages
3,170
Location
Tampa Bay, FL
Cue the Twilight Zone theme... Do I dare say that great minds think alike? :dunno:

Yes, I was referring to the shorter roller chain (bike chain), not the pull chains (trucker chains). You are correct that a tensioner on both sides would probably be needed. See what the R&D Department of the Asylum can come up with.

And, I agree with schwalby, in case of an emergence, DO NOT use the Library's PEEVED to access the APADO. We don't need any more STUNTS or WEEPs.
 
OP
S

shopnut

Well-known member
Joined
Feb 22, 2006
Messages
4,237
Location
Florida
I should take advantage of all these new acronyms you guys are coming up with for this place - and I'm a terrible typist and need all the help I can get!
 
Last edited:

Omphaloskeptic

Well-known member
Joined
Oct 11, 2008
Messages
2,346
Location
Ultima Ratio, Wa.
S.N., I've been out of town for a few days and it looks like I've missed out on some fun you've begun!

Congrats on your promotion! I'd be wary of a boss that notifies me of a promotion on April 1! Since you haven't gotten the check yet, he might have slipped you a PAY CUT with the new title.... "APRIL FOOLS - I've given you more responsibility, more hours but to make up for it, I'm giving you LESS PAY; don't thank me, you deserve it!":eyecrazy:

As to your truck chain dilemma, I was going to bring up my earlier suggestion for the chain hoist problem. Use a 'chain bag' hung on a pulley system. The bag is suspended up and out of the way, the mouth of the bag allows the chain to naturally feed into/out of the bag, and when you need to manually operate the mechanism, you undo the pulley rope, lower the chain bag, and pull away.
Sometimes the simplest solution is also the best solution or as good old Al Einstein said "Make things as simple as possible, but not simpler."!:D
 

Wingnut65

Well-known member
Joined
Apr 21, 2010
Messages
3,170
Location
Tampa Bay, FL
O, I don't think the KISS method works here. Keep It Simple Shopnut doen't leave any room for pneumatics, hydraulics or power assist anything... If it would just be Simple, the VAUD would be a nail on the wall. A BIG nail, but still s simple nail.

Not that the chain bag won't work, but we've got to keep the R&D Manager R&D'ing.
 
OP
S

shopnut

Well-known member
Joined
Feb 22, 2006
Messages
4,237
Location
Florida
Vernmotor - "The Asylum, home of Supreme Geek R&D". I'm not sure if I entirely like this whole "geek" angle Mrs. Shopnut started, but I guess you can't fight who you are if you want to be happy. :)

Omphaskeptic - Thanks. Yeah, my boss has been kind of silent lately so maybe he is just quitely waiting for me to recieve that just check and see my reaction and then yell - "APRIL FOOLS! Now get back to work sucker." :dunno::)

As for the chain - I think I have two choices. The first one is leave it in place and let it circulate as the hoist runs and door opens (keep in mind the the hand chain makes maybe 20 to 30 full circulations as the door fully opens due to the ratio in the hoist and it is zipping pretty fast). A lower sprocket would control this circulation.

The other choice is I remove the chain from the upper sprocket and just let it free wheel up there. My method for ths would be lifting the hand chain off the sprocket just slightly to disengage it and hold it hovering above. I was thinking some open loops of solid wire (think Romex cable) could hold it up, but would bend (with a good tug on the chain) and let it drop down onto the sprocket in the event the motor system stopped working and I needed to open the door. In this case, a chain bag as you describe, could store the chain when not in use. BTW, I liked you idea of keeping the chain oiled in the bag the last time you mentioned it - things rust so quickly here.

Wingnut65 - Just say "NO" to KISS! What's the fun in that! :D (Although, I do like your repurposed acronym.:thumbup:)

I'll be the first to admit that I can go overboard with the complication sometimes, but it keeps me out of trouble. I need Ompha (and the rest of you) to keep me in check when things get too out of control. Of course, he has also pushed me out side the box on occasion too, so it's actually a good balance I think.
 

Omphaloskeptic

Well-known member
Joined
Oct 11, 2008
Messages
2,346
Location
Ultima Ratio, Wa.
S.N. (aka - Shop Nut, Supreme Nerd, Senior Novice, Supervisor Nouveau),

I understand your concerns about chain speed; getting flailed while holding the power button would probably cause a STUNT and another WEEPS event! I also like your potential solutions; to them, I would offer my own. Is it possible to reduce the diameter of the 'truck chain' wheel to lower the chain's linear speed, and also, is there room to increase the diameter of the 'bike chain' driven gear to lower door speed, and add load to the motor to slow the start-up.:headscrat
 
OP
S

shopnut

Well-known member
Joined
Feb 22, 2006
Messages
4,237
Location
Florida
Ompha - I guess those initials are pretty versatile, eh?

Very feasible options you offer there to deal with the chain safety. Both ratio changes would make pulling the chain manually a bit harder, but for occasional use, that would probably be fine. Finding the smaller sized trucker chain sprocket might be tough. All portable chain hoists have one inside, but I think they are a much smaller dia than I need.

Roller chain sprockets are pretty easy to find and if changing the ratio on that set, I would opt to swap out the driver with a smaller one - it is a very common shaft mounted version. The large driven one on the drum is somewhat tough to remove because you have to unbolt the drum shaft to slide it off. There a big torsion spring inside that drum I really don't want to mess with.

Inducing a drag on the motor at start up is very intriquing. I was considering some type of brake to lock the door in any position, but this brake could provide a momentary drag at startup to possibly soften it. Bicycle brakes are a dime a dozen and I was thinking there might be a spot to attach one up there. Right on the door drum sprocket would be the safest because other parts can fail downstream without disabling the brake.

Lots of good ideas to ponder on. Thanks.

/EDIT/ I still have that other smaller/slower gearmotor to try. The one that is up there is a 1/6hp, 95 rpm unit and the alternate is a 1/9hp, 72rpm unit. It might just do the trick, but if not, I can build a hybrid unit mating the 1/6hp motor with the 72rpm gearbox. The gearbox castings are not identical, but I think I can make the swap.
 
Last edited:
OP
S

shopnut

Well-known member
Joined
Feb 22, 2006
Messages
4,237
Location
Florida
A SIMPLE DRILL PRESS CHIP GUARD YOU CAN MAKE IN 5 MINUTES…

Nobody likes to clean up do they? Why make the job tougher by flinging your chips all around? Here's a simple way to contain those flying chips while working on your drill press.

Start with the clear cap from a laundry detergent bottle. The cap shown didn't come from that exact bottle shown, but hopefully you should get the idea)

1281-Drill-Press-Chip-Guard-02.JPG

I normally use a step drill (Unibit or similar) for drilling through thin materials.

1282-Drill-Press-Chip-Guard-03.JPG

Drill two holes as shown.

1283-Drill-Press-Chip-Guard-04.JPG

Cut out the material between the holes (I used a tin snips).

1284-Drill-Press-Chip-Guard-05.JPG

Leaving a little bridge at the bottom rim keeps the cap rigid. The shape of the cutout allows you to insert it right before you start drilling.

1285-Drill-Press-Chip-Guard-06.JPG

And here it is ready to catch those chips from flying all over your workbench and floor. It will contain a majority of chips and won't cost you a dime to make. The clear plastic will allow you to keep an eye on what's happening in there.

1286-Drill-Press-Chip-Guard-07.JPG

If you feel ambitious, make a few different sizes for different diameter and length bits.
 
Last edited:

Omphaloskeptic

Well-known member
Joined
Oct 11, 2008
Messages
2,346
Location
Ultima Ratio, Wa.
S.N., slick idea for D.P. work! Nothing like doing a two-minute task and spending 20 minutes cleaning up the mess; ugh!

Your motor swap sounds like the way to go to get a slower start-up, less chain whip, and better control for stopping the door where you want it. I would like to see the bike brake incorporated just because it sounds neat, and is just what is expected of a Supreme Nerd; a little OCD and a lot of 'cool-factor'! lol

If the manual chain guide was free to rotate towards the back of the shop, I would suggest a contraption as follows to keep the manual chain up and out of the way till needed. Picture a 'Pogo Stick' tube assembly, one end yoked to the chain guide (bolted together as a unit), and the other end having another yoke holding the 'new' lower chain wheel. This 'Pogo Stick' would provide the necessary spring pressure to keep the manual chain from flailing in both directions of motion. A separate rotatable arm could be attached to the lower chain wheel axle (freewheeling); this arm would allow you to do two things. First, it would be long enough for you to reach above your head to grab it's 'D-handle' on one end of the arm, and secondly, the arm would extend high enough above the now horizontal 'Pogo Stick' to engage a screw-eye with the hook on the end of the arm. The arm being allowed to rotate about the 'new' chain wheel's axis would enable it to come parallel to the 'Pogo Stick' when you need to manually operate the door mechanism. I don't know if my verbal description is as 'clear as mud', but in my mind's eye, the mechanism would make Rube Goldberg shed a tear of joy. lol:rolleyes:
 
Last edited:
OP
S

shopnut

Well-known member
Joined
Feb 22, 2006
Messages
4,237
Location
Florida
Ompha - I had to look up this Rube Goldberg fellow. It seems I have studied his drawings many times in the past and have been marvelled at the contraptions. I'm guessing his work inspired the board game "Mouse Trap" and possibly the computer game "The Incredible Machine". :dunno:

I think I understand your idea and it seems very clever. One thing that might throw a wrench in it is the library ladder needing to travel past the doors. I picture your pogo stick device protruding back into the shop quite a ways in the stored position (hopefully I'm picturing that correctly). Now if it could store up there parallel to the door drum axis, I have plenty of room for it. Unfortunately, the joints don't lend themselves to bending in that direction. I like the whole idea though, kinda reminds me of a pulldown attic ladder or something. Pull it down, use it, push it back up when done.

Keep it up Rube! (I mean Ompha ;)) - One idea always leads to many more.
 

Omphaloskeptic

Well-known member
Joined
Oct 11, 2008
Messages
2,346
Location
Ultima Ratio, Wa.
Dang, I forgot about the library ladder! Well, maybe the 'Pogo-stick(s)' would still work; drop them into the manual position when the ladder has to roll on through. Life is a series of compromises, after all. Thanks for the 'Rube' reference; heh-heh.
 
OP
S

shopnut

Well-known member
Joined
Feb 22, 2006
Messages
4,237
Location
Florida
A VIDEO TO DEMONSTRATE THE POWER WINDOWS…

A quick recap for those just joining:

The clerestory windows are about 15’ off of the ground and I wanted a convenient way to open and close them. The system I installed is powered by air and individual actuators at each window open them. There are proximity switches sensing whether the window is fully opened or closed, and LEDs down on the switch panel display this information.
The full power window story started back here: Reply #567

Video and Extra Photos


Video Only


\/ \/ Ignore the image below \/ \/
 

Attachments

  • 1287-Video-Link-Power-Windows.JPG
    1287-Video-Link-Power-Windows.JPG
    52.2 KB · Views: 1,445
Last edited:
To avoid these ads, REGISTER NOW!

Omphaloskeptic

Well-known member
Joined
Oct 11, 2008
Messages
2,346
Location
Ultima Ratio, Wa.
"My Creation!"

IT'S ALIVE! MEIN GOTT IN HIMMEL! EGOR, BRING ME THE BRAIN OF A.B.NORMAL!


Throw the switch and watch, watch the windows, Egor!
 

Attachments

  • clivelab.jpg
    clivelab.jpg
    60.3 KB · Views: 40
Last edited:

schwalby

Well-known member
Joined
Feb 25, 2011
Messages
242
Location
New Hampshire
I like it!!!

Do they work well as locks to secure the windows? I noticed that you have the roof right below those windows so not sure if that could be a break in point.
 
OP
S

shopnut

Well-known member
Joined
Feb 22, 2006
Messages
4,237
Location
Florida
Omphaloskeptic - A.B. Normal - you hit he nail right on the head! :thumbup:

tinbender_66 - I need to send some popcorn your way next time I release a new video :)

schwalby - Better tell those thieves that first step is a duesy! :lol:

The cylinders work nicely as locks and the position sensors offered easy integration with other Asylum "systems". I actually pity the fool that tries to break into this place - there just may be a surprise waiting for them. My bigger concern now is the threat of fire - I really need to focus on that sometime and come up with a master plan.
 

Omphaloskeptic

Well-known member
Joined
Oct 11, 2008
Messages
2,346
Location
Ultima Ratio, Wa.
Fire Master Plan? That lake looks like it holds enough water to supply a fairly comprehensive sprinkler system. A high volume gas/diesel powered pump ought to make it pretty much bulletproof when the zombies attack with the pitchforks and torches.
 

Wingnut65

Well-known member
Joined
Apr 21, 2010
Messages
3,170
Location
Tampa Bay, FL
I'm still waiting on the zipline from the loft to ?????

:thumbup:

And I can see a compliation video that shows all the automatic and functional sytems in the Asylum operating and in sync with the music... '2001' theme or similar crescendo as the APADO opens the roll-up door, then the action begins...

Or maybe the music needs to be a Mrs. shopnut original...
 

mdbeck1

Well-known member
Joined
Mar 7, 2010
Messages
2,297
Location
Norman, OK
:thumbup:

And I can see a compliation video that shows all the automatic and functional sytems in the Asylum operating and in sync with the music... '2001' theme or similar crescendo as the APADO opens the roll-up door, then the action begins...

Or maybe the music needs to be a Mrs. shopnut original...

We need to get Shopnut and Jack together on setting up the synchronization and video. :rocker:
 
OP
S

shopnut

Well-known member
Joined
Feb 22, 2006
Messages
4,237
Location
Florida
Omphaloskeptic - Well, the white vinyl is rated for full exterior water exposure and the tileboard sheds water nicely too. Maybe pumping a few thousand gallons of water in there at the hint of a fire is okay. It's just going to run right back in the lake anyway, right? (along with a few of my tools, and landscaping, and ... :))

Yep, water should not be an issue - I'll be expecting a comprehensive proposal in a week or so, buddy!

mdbeck1 - Maybe the zipline IS the entire Fire Master Plan if Ompha gets lazy - just zip the heck out of there! :wtf:

I really need some help with the photography/videos - my $60 GE digital camera just isn't cutting it. :sad: Maybe it's time to consult a professional for a change.

Wingnut65 - I really need to work on Mrs Shopnut for that song. Of course, who knows WHAT direction she will take the theme. I don't foresee it agreeing with my direction exactly (that's an understatement) ;)
 
OP
S

shopnut

Well-known member
Joined
Feb 22, 2006
Messages
4,237
Location
Florida
A COMPUTER DOCKING STATION FOR THE LAPTOP…

Mrs. Shopnut donated her old HP laptop to the Asylum – mighty nice of her considering she knows it will likely promote my shop craziness. It was pretty old and was acting up with a virus or something, so I had to play with it a bit. After re-formatting the hard drive and reloading all the factory software, it seems to be running pretty good.

I decided to see what accessories were available for the old girl and I found this OEM docking station, complete with wireless keyboard/mouse for $34 delivered. It’s not the normal docking station, however, as it has decent sounding speakers built in the base. This might come in handy when I just want a little music near my workbench without turning on the big amp to fill the whole room with sound. I also found a spare battery brand new for $18 delivered and that should come in handy if I need to go mobile anywhere around the Asylum compound.

1288-Shop-TV-474.JPG 1289-Shop-TV-477.JPG

I’m not sure where the laptop will end up, but I intend to find a fairly dust-free spot for it eventually. For now it will reside on top of my old beer fridge. The fridge is on casters so that’s a bonus for moving the computer where I might need it inside the shop, diagnosing cars and bikes. The plan is to have the wireless keyboard and mouse in a pull-out drawer on the main bay island workbench, but range for the wireless transmitter seems to around 6-7 feet so I’m not sure if this will work yet. I might have to get a little creative as to where I locate it – like dangling it from the jib crane like a boxing ring microphone :dunno: The fridge really needs to be replaced with a SS version, but I've been waiting until the place is done - I've dropped 2x4's on this one before but who cares.

1290-Shop-TV-482.JPG 1291-Shop-TV-487.JPG

I found this nifty little wall plate that has a VGA and 1/8” audio bulkheads for connecting the laptop to the TV. It also has a USB connector so I can attach an extension cable on the TV, allowing remote connection of the flash drive down on the wall where I can reach it easily. I painted one black in anticipation of mounting it on the silver tileboard wall.

1292-Shop-TV-461.JPG 1293-Shop-TV-467.JPG

A NEW PANO VIEW WITH THE ASYLUM SIGN IN PLACE…

Next time I need to put the camera on a tripod while I'm panning around so the individual pictures stitch together better.

1294-Pano-07.JPG
 
Last edited:

Wingnut65

Well-known member
Joined
Apr 21, 2010
Messages
3,170
Location
Tampa Bay, FL
That pano view is just so Awesome! (I tried posting it, but it is larger than my monitor, but still looks Awesome,) :thumbup:

Nice score on the vintage HP parts. I can see something in the works with a pop-up cover for the montor and slide out tray for the keyboard, all looking like a nondescript cabinet top in the shop.

And that fridge is fine, but really needs to be black. Since you have it, it is free. A SS fridge will be a little more than free. Paint is cheaper than SS.
 
OP
S

shopnut

Well-known member
Joined
Feb 22, 2006
Messages
4,237
Location
Florida
Thanks Wingnut. I was going to insert the pano directly instead of a thumbnail, but it makes the entire thread wide on the screen and I hate having to scroll side-to-side in a thread to see the pictures and text.

I need to get my main workbench figured out and part of that planning will be finding a spot for all the computer hardware. I'm still trying to find some matching drawers for the Mayline drafting board base cabinet.

I have considered painting that darn fridge more than once, but everytime I get ready to do it, I chicken out. That thing is 15 years old, and it had a tough early life sitting out in the FL heat on the pool deck before heading out to the Asylum. You can bet as soon as I give it a coat of paint, she'll die on me. :) Of course, last time I thought about painting it was about two years ago :eek:
 
OP
S

shopnut

Well-known member
Joined
Feb 22, 2006
Messages
4,237
Location
Florida
STRENGTHENING THE DOOR HEADERS TO BEAR THE FRONT LOFT WEIGHT…

This is the job I was just starting the night I had my accident. Kind of crappy memories, but I put it behind me and accomplished it this time. It was satisfying to finally cut up the board that fell to the ground with me on that unfortunate night last November.

For those just joining, the loft planning is explained in Reply#513 (Wow, that was over a year ago!).
It will be built above the main roll-up door drums and that gives me about 30” of header height to play with. Since 2x6 lumber already created 3-sided channels at the top and bottom, I simply created some trusswork in between. Here is one side all finished.

1295-Front Loft-87.JPG 1296-Front Loft-89.JPG

Here is the progression of things. The first picture shows as is was. The second shows the verticals and diagonals added in. The third shows the top cap added. I use lag screws or through-bolts for any of the major structural stuff. This wall will bear nearly 2/3rd's of the loft total weight so I did not want to cut corners here.

1297-Front Loft-72.JPG 1298-Front Loft-75.JPG 1299-Front Loft-76.JPG
 
Last edited:
OP
S

shopnut

Well-known member
Joined
Feb 22, 2006
Messages
4,237
Location
Florida
LOOK TO THE MEDICAL FIELD FOR SOME QUALITY GARAGE ITEMS…

I already mentioned the dental lights making great task lights for the workbench. Here is another idea for you - I.V. poles. No, it's not for my new intravenous beer dispenser - I was thinking a backpack type reservoir would work better for that :). My intention is to use them as paint racks for holding small parts during spraying and drying. Between the car and bike projects coming up, there will be a ton of small parts to paint.

I picked up this 4-hook version for $16. It has 5 wheels for stability and extends waaaaaay up there for those really long items. It just reeks of quality (or maybe that’s just the antiseptic??? :)) The star-shaped lock collar has a great feel to it and the entire thing is made out of aluminum or stainless - perfect!

1300-Paint-Rack-07.JPG 1301-Paint-Rack-08.JPG 1302-Paint-Rack-13.JPG

Here it is with some cycle calipers hanging on it as an example. Plastic will protect the important parts of the pole from overspray.

1303-Paint-Rack-15.JPG

Here’s another one I found for $10. It's a Sharp Pitch-It pole. It's not built as well, but what I like about it is that it collapses down to store away when not needed. I will need to come up with some hooks at the top on this one, however, to make it useful.

1304-Paint-Rack-01.JPG 1305-Paint-Rack-04.JPG

The pedestal base of the fan probably could work nicely as cheap paint rack too. For some reason, I just can’t seem to throw these out when the fan motor gives up the ghost.

1306-Paint-Rack-06.JPG

The I.V. pole idea would've never occurred to me if I wouldn't have been laying in that hospital bed staring at it. See, another good thing that came from that little ladder accident.
 
Last edited:

Wingnut65

Well-known member
Joined
Apr 21, 2010
Messages
3,170
Location
Tampa Bay, FL
Nice work on the Loft. Glad to see the work was uneventful this year! :thumbup:

I agree on the backpack, but that is a great idea for the IV post. I can see how convenient that would be. And for $16? Where did you score that?

I also have a fan base that I use to support long wood pieces on the miter saw. Its great to be resourceful!
 
OP
S

shopnut

Well-known member
Joined
Feb 22, 2006
Messages
4,237
Location
Florida
Thanks Wingnut. The IV pole came from ebay and I sniped at the last 5 seconds to get it. I hope I didn't ****** it away from a little old lady needing it for medicine or something - that will be bad luck for sure! Probably just another crazy fool like me bidding on it though. Shipping was another $15, but it was a big box. Its a good Medline brand and who knows what it costs new.
 

Red Leader

Well-known member
Joined
May 15, 2011
Messages
2,688
Location
Denver, CO
I really like the panoramic view. I love the detail shots that you do, but the larger 'forest instead of the tree' view complements the up-close pictures well.


Is the loft going above the doors? What is the plan there?
 
OP
S

shopnut

Well-known member
Joined
Feb 22, 2006
Messages
4,237
Location
Florida
For those just joining and those with really cool retro 1950's Craftsman garages, the loft planning is explained in Reply#513 (Wow, that was over a year ago!).

It will be built above the main roll-up door drums and that gives me about 30” of header height to play with.

Is the loft going above the doors? What is the plan there?

There, I reworded Reply#1316 to maybe catch your attention this time. :D (Sorry, I just couldn't resist, RL)

Every now and then I get the itch to take some overall shots and I realized I was lacking a pano with all the new clerestory windows installed. I never overdo it with the overall pictures though, because I know it's not done yet and those unfinished things are all I can normally focus on :(. Sometimes I forget you guys aren't looking at the entire interior every week like I am.
 
To avoid these ads, REGISTER NOW!
Top Bottom