Minor restoration of old rusty tools/update APRIL22
...I decided to make it a longer thread and instead of creating new ones for just the pictures of updates, I will add pictures to this one. Please look towards the end for new pictures.
PLEASE GO TO THE END OF THIS THREAD FOR UPDATES (I do not know how to add them on top...)
Updates:
April 19
April 22
Good morning.
I am a relatively new member and still do not have a restoration or expertise of the members of GJ. However, I would like to share some of the restoration projects which I did recently.
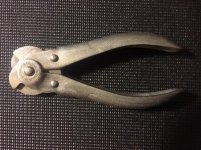
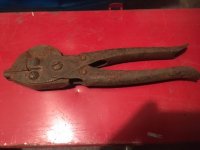
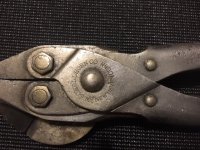
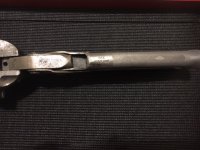
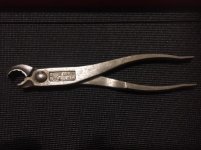
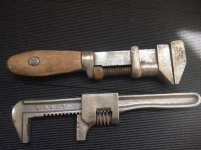
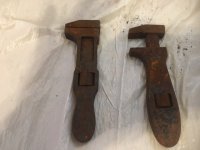
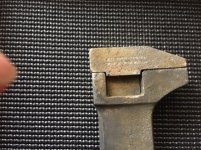
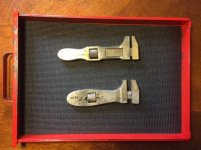
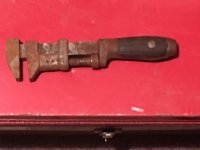
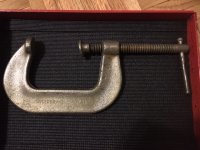
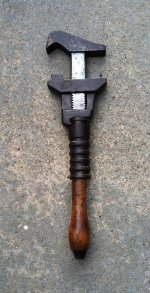
#1 Billings & Spencer CO (typeA) and J C Speirs & Co adjustable (WHITTEN GODDING CYCLE CO) wrenches.
Speirs & Co is from Worcester MA produced for WHITTEN GODDING CYCLE CO, PROVIDENCE RI)
Came completely rusted and frozen. Billings still needs some minimal sanding as it sticks during the last 5 mm (had a hard life... I can see a small area of shiny metal on the inner rod near the top)
I will add combined picture of both below
...I decided to make it a longer thread and instead of creating new ones for just the pictures of updates, I will add pictures to this one. Please look towards the end for new pictures.
PLEASE GO TO THE END OF THIS THREAD FOR UPDATES (I do not know how to add them on top...)
Updates:
April 19
April 22
Good morning.
I am a relatively new member and still do not have a restoration or expertise of the members of GJ. However, I would like to share some of the restoration projects which I did recently.
#1 Billings & Spencer CO (typeA) and J C Speirs & Co adjustable (WHITTEN GODDING CYCLE CO) wrenches.
Speirs & Co is from Worcester MA produced for WHITTEN GODDING CYCLE CO, PROVIDENCE RI)
Came completely rusted and frozen. Billings still needs some minimal sanding as it sticks during the last 5 mm (had a hard life... I can see a small area of shiny metal on the inner rod near the top)
I will add combined picture of both below
Attachments


Last edited:


")