To avoid these ads, REGISTER NOW!

6 x 10 utility trailer build

koditten

Well-known member
Joined
Apr 10, 2008
Messages
5,528
Location
Midland, Michigan
I've been meaning to do a build thread on the trailers that primarily make and sell. Have had several members ask and I promised that I would do this.

Please bear with me, I can only post and comment a few pictures a day.

Here it goes.

We are going to start out with a pile of steel and end up with what you see below.
 

Attachments

  • march2012utilitytrailer 002.jpg
    march2012utilitytrailer 002.jpg
    141.5 KB · Views: 975
  • march2012utilitytrailer 055.jpg
    march2012utilitytrailer 055.jpg
    142.8 KB · Views: 907
To avoid these ads, REGISTER NOW!
OP
K

koditten

Well-known member
Joined
Apr 10, 2008
Messages
5,528
Location
Midland, Michigan
First thing is to get the rectangular frame tacked up. Each side is 118" and the ends are 76". Measure diagonaly to get a square rectangle. As long as your measurements are less than 1/8" in difference you will be fine.

I have scraps of 5/4" deck boards that I use as spacers. I don't have to waste time measuring the proper depth tof the cross members using the spacers. If you have a floor that is not perfectly flat, you may have to compensate a bit. You will see the spacers in the pics below.
 

Attachments

  • march2012utilitytrailer 004.jpg
    march2012utilitytrailer 004.jpg
    140.8 KB · Views: 882
  • march2012utilitytrailer 008.jpg
    march2012utilitytrailer 008.jpg
    127.3 KB · Views: 697
OP
K

koditten

Well-known member
Joined
Apr 10, 2008
Messages
5,528
Location
Midland, Michigan
The second cross member is tube steel, all the rest of the cross members are angle steel. The tube steel is needed to have a solid anchor for the tongue base to weld to.

I don't measure the spacing on the cross members, just eye ball it. These parts will not be ssen once the lumber is attached. You are welcome to measure them out, I just don't have the time and have done enough of these that I can be pretty much be dead on by putting them in position based on what looks good to me.

Stay tuned

Kirk
 
OP
K

koditten

Well-known member
Joined
Apr 10, 2008
Messages
5,528
Location
Midland, Michigan
When you start welding the cross members in place, make sure that you go from corner to corner and side to side. If you start on one side and move down the frame, you will end up pulling the frame out of square. It is really amazing how much a weld will shrink and end up messing up the squareness of the frame.

Kirk
 
OP
K

koditten

Well-known member
Joined
Apr 10, 2008
Messages
5,528
Location
Midland, Michigan
I should mention that the trailer frame is up side down at this phase of the build. We will be flipping it over a bit later. In addition, the cross member steel pieces are 72" long.

Please ask questions, this is the first time I have done a build thread in detail.

Kirk
 

Zick

Well-known member
Joined
May 13, 2009
Messages
418
Location
WI
Thanks for putting this together.
Out of curiosity, how much did the steel set you back and what is the diamentions/thickness?
I've been thinking about building either a 6x10 or 6x12 for a while and I already have an axle kit, so I just need to buy the steel some day.

I'd also like to see some pictures on how you put together the tongue section.

Thanks :beer:
 
OP
K

koditten

Well-known member
Joined
Apr 10, 2008
Messages
5,528
Location
Midland, Michigan
Your welcome.

Anyways, the steel you see there is mostly 14 gauge. This is classified as a medium duty utility trailer. I do this to keep the weight down. When all said and done the trailer will weigh around 750 lbs or less. The wood will continue to dry and thus make the trailer lighter. This weight allows one to use mid-sized vehicles to pull the trailer.

What you see there in the first pic, minus the wheels and axle, you are looking at 325 bucks around here. For 50 bucks more you can move up to 1/8 wall iron.

The cross member for the tongue and the tongue itself are 1/8" wall. Those are very important structural parts and for the 6 bucks extra it costs me, it is cheap piece of mind.

Please bear in mind that I am not including the build for the tail gate. I figure that is something that can be customized to fit your needs.

Kirk
 
OP
K

koditten

Well-known member
Joined
Apr 10, 2008
Messages
5,528
Location
Midland, Michigan
On with the build:

At this point I have hoisted the frame onto my weldiong table. I made a mark that is the center of the tongue cross member. I previously attached the ball coupler and piece of scrap tubing with a 3/8 hole drilled in it. This is for the future safety chain anchor.

I only tack weld the back rear of the tongue to the tongue cross member at this piont. Once this is done, I stand in front of the tongue, back up about 6' feet and eyeball the tongue to see if it centered. Once I think I am close I will measure from the far corner to the front of the tongue. Check the oposite corner, adjust until they are equal. You will be suprized how close you will get just by eyeballing it. I would be willing to bet that you will be within 1/4" difference in your angle measurements.

Once I am happy that the tongue is ready to be welded in place, I place a nice solid tack weld were the tongue contacts the frame front. At this point I'm going to weld all the cross members completely. I will add my tongue angle braces at this time as well. Once we get alll these welds done we will be ready to install our axle.

To be continued.

Kirk
 

Attachments

  • march2012utilitytrailer 012.jpg
    march2012utilitytrailer 012.jpg
    139.3 KB · Views: 996
  • march2012utilitytrailer 010.jpg
    march2012utilitytrailer 010.jpg
    129.9 KB · Views: 943
OP
K

koditten

Well-known member
Joined
Apr 10, 2008
Messages
5,528
Location
Midland, Michigan
You will notice that my axlw has a sleeve. This is no big deal. The stress on axle tubes is near the spindles. I previously would order the size axle I needed only to recieve the wrong axle time and time again. It is just quicker for me to make the axle whatever width I require. This way I can have several on hand.

You will also notice that there is an arc to the axle tube. This gives the wheels a bit of camber. This helps on roads that have high crown. I like it, but it is not nessasary. Just my preference.

I like to place my spring seats 56" from the front of the trailer. This gives me enough tongue weight when the trailer is empty to insure safe tongue weight. Regardless what you have read or heard, I don't believe there is an actual calculation for the proper placement of an axle on a trailer. You just want to make sure you have some tongue weight empty or loaded.

I don't even bother measuring the location of the rear shackle location. The only thing I care about is that the shackle links are leaning a bit to the rear. This allows the spring to flex like it is sapposed too.

When you tighten all your bolts, make sure that the spring bolts are only snug. I made the mistake of using my impact wrench a bit too aggressivly. The bolts were so tight that the links could not pivot/flex. This caused the shackle mount to actually rip right out of the steel tubing. Only good thing about that was I knew I had good welds. Welds held, steel didn't.

Stay tuned

Thanks

Kirk
 
OP
K

koditten

Well-known member
Joined
Apr 10, 2008
Messages
5,528
Location
Midland, Michigan
Here are a few pics that go with the previous post.

Kirk
 

Attachments

  • march2012utilitytrailer 013.jpg
    march2012utilitytrailer 013.jpg
    134.5 KB · Views: 918
  • march2012utilitytrailer 014.jpg
    march2012utilitytrailer 014.jpg
    134.4 KB · Views: 1,055
OP
K

koditten

Well-known member
Joined
Apr 10, 2008
Messages
5,528
Location
Midland, Michigan
The trailer is now sitting on its right side. I have an I beam with trolly and chain fall to flip the trailer. If you don't have chain falls you can flip it with the help of a couple of friends. I have done it this way when help is around.

The trailer tires are now on with only a couple of lug bolts. Tires will come off later when I paint it.

Now that the trailer is right side up, the tops of all the cross members and frame ends will get their final welds.

More to come. I hope no one is getting bored.

Kirk
 

Attachments

  • march2012utilitytrailer 015.jpg
    march2012utilitytrailer 015.jpg
    141.1 KB · Views: 690
  • march2012utilitytrailer 016.jpg
    march2012utilitytrailer 016.jpg
    142 KB · Views: 587
OP
K

koditten

Well-known member
Joined
Apr 10, 2008
Messages
5,528
Location
Midland, Michigan
I now mark out the location of the fender brackets. You can see the white line on the ouside of the frame. I just hold the fender in its approximate position by using the tire as a visual aid. I do this front and back and on both sides of the trailer. The brackets are just 2" x 1/8" band iron. the fenders will bolt to these brackets after the paint is dry.

You can see what I use for tie down loops. Nothing more than excess axle tube cut into 1/2" rings. Cut them in half and you have 2 tie down loops. I'm not sure if you can tell from the pics, but I angle the loops to the center of the trailer. Remember that the side lumber is 1" thick and you will need space to hook your tie down straps.

I like to weld in 6 tie down loops. Gives the customer lots of options for securing the load.

Later

Kirk
 

Attachments

  • march2012utilitytrailer 017.jpg
    march2012utilitytrailer 017.jpg
    134.8 KB · Views: 525
  • march2012utilitytrailer 018.jpg
    march2012utilitytrailer 018.jpg
    125.5 KB · Views: 583
  • march2012utilitytrailer 019.jpg
    march2012utilitytrailer 019.jpg
    134.5 KB · Views: 830
OP
K

koditten

Well-known member
Joined
Apr 10, 2008
Messages
5,528
Location
Midland, Michigan
I now am ready to start attaching the uprights to the frame. There are 11, 22" 1 1/2" x 3" tube steel uprights.

I cheat when I attach the front uprights. You will need 2 of them but welded to form a right angle. I use the trailer frame corners to get my perfect 90*. You can do the same on your welding bench. I is just a bit faster if I do it this way.

I use the tube steel for 2 reasons: 1) the tube steel is great to drive the self tapping screws into, to hold the side boards to the uprights. 2) the tube steel hides the open ends on the frame corners. I dont have to use bolts and nuts. The self tapping screws work great and look great too.

You can see how I use a pair of squares to get alignment. I do the same for the back 2 corners. The only difference is that you only need one upright.

Kirk
 

Attachments

  • trailer build 058.jpg
    trailer build 058.jpg
    121.6 KB · Views: 623
  • trailer build 059.jpg
    trailer build 059.jpg
    129.5 KB · Views: 623
  • trailer build 062.jpg
    trailer build 062.jpg
    122.6 KB · Views: 600
OP
K

koditten

Well-known member
Joined
Apr 10, 2008
Messages
5,528
Location
Midland, Michigan
I never mentioned that I attached a tongue jack. This is a choice that you can make yourself. There are many styles and prices. I use the cheapest, flip up style I can find.

Kirk
 
OP
K

koditten

Well-known member
Joined
Apr 10, 2008
Messages
5,528
Location
Midland, Michigan
Now that I have the corner uprights welded in solid, I can install my top rail. I use 1.5" x 1.5" x 14gauge. I like to build the trailers with this top rail for 2 reasons. 1) the tube steel will increase the rigidity of the trailer. 2) The top rail covers the end holes in the uprights.

When you cut top rail tube steel to length, make it a few inches longer than you need. You never know if you have your uprights perfectly plumb. If the front or back uprights are tipped out, you will need a bit more lenght. If the uprights are not perfectly plumb, it is no big deal. It is easier to cut an inch off the length than to have to weld in a filler piece.

I weld in the 4 corner uprights to the top rail. Once this is done I can start placing my intermediate uprights.

Kirk
 

Attachments

  • trailer build 063.jpg
    trailer build 063.jpg
    120.8 KB · Views: 520
  • trailer build 064.jpg
    trailer build 064.jpg
    131.9 KB · Views: 429
OP
K

koditten

Well-known member
Joined
Apr 10, 2008
Messages
5,528
Location
Midland, Michigan
When it comes to placing the intermediate uprights, I don't bother measuring for their location. I just want them somewhere close to half the difference between the fender bracket and the corner upright. This goes for both, front and rear of the fender.

I do the same thing for the oposite side of the trailer. No one will be able to tell that you have one side upright closer to the fender or corner than the opposite side of the trailer. No human can see both sides of the trailer at once.

The only one that matters is the middle upright at the front, but you already know where the center is there. Your trailer tongue is a perfect reference point.

Once you get to this point, your trailer is starting to look like a trailer.

Kirk
 

Attachments

  • trailer build 065.jpg
    trailer build 065.jpg
    124 KB · Views: 346
  • trailer build 062.jpg
    trailer build 062.jpg
    122.6 KB · Views: 333
  • trailer build 066.jpg
    trailer build 066.jpg
    115.3 KB · Views: 318
To avoid these ads, REGISTER NOW!
OP
K

koditten

Well-known member
Joined
Apr 10, 2008
Messages
5,528
Location
Midland, Michigan
At this point I build my tail light boxes. This is just some 10" scraps of 2 x 4" tube steel. I use the same material that I used for the fender brackets, 1/8" x 2" band iron. I don't care how the weld look on these boxes. The welds are all going to be flap wheeled smooth anyways. I try to leave a small section of the bottom un welded. This allows any water to drain out and slow down the developement of rust from the inside out.

The last pic is of the boxes welded to the back up right. You can change the orientation or the boxes to make a nice spot to step on for climbing into the trailer without dropping the tail gate. Your choice. Regardless, you will have very sturdy tail light boxes.

Kirk
 

Attachments

  • trailer build 067.jpg
    trailer build 067.jpg
    126.7 KB · Views: 365
  • trailer build 068.jpg
    trailer build 068.jpg
    124.3 KB · Views: 389
  • trailer build 069.jpg
    trailer build 069.jpg
    123.9 KB · Views: 366
  • trailer build 071.jpg
    trailer build 071.jpg
    131.1 KB · Views: 347
  • trailer build 073.jpg
    trailer build 073.jpg
    118 KB · Views: 373
OP
K

koditten

Well-known member
Joined
Apr 10, 2008
Messages
5,528
Location
Midland, Michigan
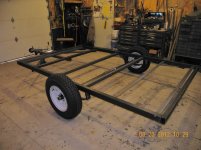
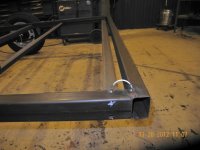
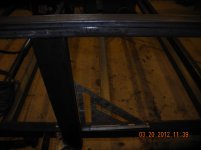
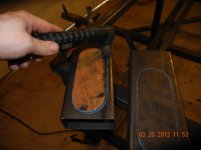
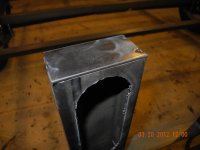
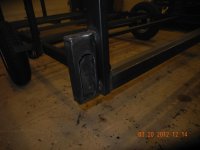
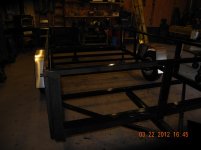
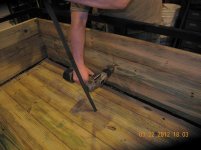
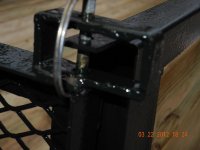
At this point I'm ready to wire the trailer. I pre drilled 1/2" holes in the tongue cross member and the main side frames. I fish the wires thru the tube steel At the junctions I go in and out of the frames around the welds. You end up with a little bit of wire exposed. I like to do it this way because wire harnesses are cheap, as in quality. If you have this trailer for many years, you WILL be rewiring it. You will be able to use the old wire to pull the new wire.

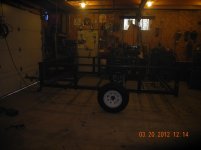
Once I get the trailer wired, I'm ready to acid wash the trailer. I use a 50% mix of "The Works", toilet bowl cleaner and water. This cuts the mill grease and allows the pressure washer to do a better job.

One word of note: Don't do this on the concrete, your concrete will have iron stains that wont come off. I do this in the gravel just off my apron. The limestone in the gravel will neutralize any acid that oversprays the trailer.

Please, no one mention that this is an environmental violation. It is not.

Once you get the trailer pressure washed down to bare metal, you will notice some wild colors appear. You can actually see the metal rust before your eyes. This is no big deal. I use Rustolium primer and paint. This paint actually "sticks" a bit better when it has a heavy tarnish to adhear to.

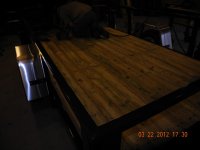
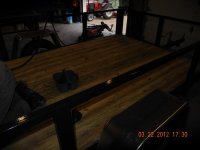
At this point I paint it. Choose your color. One word of note. For some reason Rustolium black paint only needs 1 coat to cover the primer completly. Any of the other colors seem to take 2 coats.

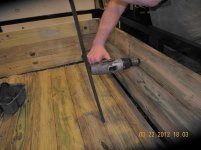
Up next: decking and fender installation.

Kirk
 

Attachments

  • trailer build 075.jpg
    trailer build 075.jpg
    128.4 KB · Views: 293
  • trailer build 074.jpg
    trailer build 074.jpg
    126.6 KB · Views: 292
OP
K

koditten

Well-known member
Joined
Apr 10, 2008
Messages
5,528
Location
Midland, Michigan
Here are a couple of pics of the fenders installed. There are 4 1/4" zinc coated bolts holding the fender in place. I had pre drilled the bracket before I mounted them. After the paint was dry I just held the fenders in place and and marked the hole location with a paint marker on the surface of the fender. Drilled holes in fender and bolted them in place.

Because the fenders are aluminum and the brackets are steel, I had to take measure to reduce galvanic corrosion. In between the bracket and the fender I have inserted plastic washers. I use the plastic washers that come with rigid insulation nails. I got a boat load of them and they were left over from a project years ago. I just have to pull the nails out of them and drill the hole a bit larger for the 1/4" bolt.

The fenders come with a plastic wrap to prevent scratching the anodizing. This comes off before you mount the fenders. I leave it on when make my hole marks, drill holes then take the plastic off. (blue paint pen) Bolt on fender.

Kirk
 

Attachments

  • trailer build 001.jpg
    trailer build 001.jpg
    125.3 KB · Views: 289
  • trailer build 002.jpg
    trailer build 002.jpg
    128.3 KB · Views: 303
OP
K

koditten

Well-known member
Joined
Apr 10, 2008
Messages
5,528
Location
Midland, Michigan
Before anyone asks, Yes the trailer is not fully painted. Because I am doing this build and write up solo, I had to move things out of order. No camera man, I'm it.

Kirk
 
OP
K

koditten

Well-known member
Joined
Apr 10, 2008
Messages
5,528
Location
Midland, Michigan
A few pics of the deck being installed.
 

Attachments

  • trailer build 008.jpg
    trailer build 008.jpg
    122.2 KB · Views: 442
  • trailer build 007.jpg
    trailer build 007.jpg
    131.4 KB · Views: 369
  • trailer build 009.jpg
    trailer build 009.jpg
    119.6 KB · Views: 353
OP
K

koditten

Well-known member
Joined
Apr 10, 2008
Messages
5,528
Location
Midland, Michigan
Because the inside demension is 118" long, I cut my boards 117 7/8" long. You are welcome to measure every one yourself. I don't mind an 1/8" gap. I pre-drill 2 holes in each end of each board and run a row of single screws in one of the middle cross members. These screws add up, so I don't install them in every cross member unless the customer request. It is over kill in my opinion. If you decide that you want screw in every cross member, try to resist the impulse to put screw in the 2 x 2 tube cross member. This is were your wire harness runs to each side of the trailer. You really don't want to risk driving a drill bit or screw into one of you taillight wires. Ask me how I know:)

The 6' wide trailer will require 13 boards, the last one will have to be ripped down to fit. I use a pair of 8' bar clamps to tighten the boards down and put the ripped board on one of the sides. Some people like to see the ripped one in the middle. It is your choice.

One other note. When I welded my tie down loops to the frame, I try to put one of the legs in the center of the nearest cross member. This allows me to have a landmark for lining up my chalk line from side to side. You wont be able to see the cross member because the wood will be on top of it, as long as you got your boards good and tight with the clamps, anyways.

Kirk

Kirk
 
OP
K

koditten

Well-known member
Joined
Apr 10, 2008
Messages
5,528
Location
Midland, Michigan
Prolly should mention that I use 6" rollers to pain the trailer. The "physical" contact of roller, paint and steel seems to make the paint last longer. I used to spray the trailers, but got tired of dealing with overspray. I actually can get more paint on the trailers this way and don't need to thin down the paint and reduce it's durability.

Kirk
 
OP
K

koditten

Well-known member
Joined
Apr 10, 2008
Messages
5,528
Location
Midland, Michigan
A few pics of the sides.

Kirk
 

Attachments

  • march2012utilitytrailer 047.jpg
    march2012utilitytrailer 047.jpg
    134.9 KB · Views: 392
  • march2012utilitytrailer 048.jpg
    march2012utilitytrailer 048.jpg
    139.4 KB · Views: 414
  • march2012utilitytrailer 049.jpg
    march2012utilitytrailer 049.jpg
    141 KB · Views: 467
OP
K

koditten

Well-known member
Joined
Apr 10, 2008
Messages
5,528
Location
Midland, Michigan
When I instal the sided I start with the front. If your uprights on the corners are plumb, the side boards will not have to be shortend. Off the rack and onto the trailer. By starting with the front boards you will be moving your side boards back 1".

If I haven't mentioned, I use 2" 1/4" self tapping machine screws. These screws have a T-30 torx head. The pan head does a nice job of countersinking themselves in the soft Southern yellow pine that the wood is made of. I pre drill the holes using a 7/32" bit. You can use a 1/4" drill bit if you want, I use an impact wrench to install the screws. The smaller hole keeps me from stripping out the screw threads.

Kirk
 
OP
K

koditten

Well-known member
Joined
Apr 10, 2008
Messages
5,528
Location
Midland, Michigan
Here is a couple shots of my "poor mans'" drill press. It gets kind of old leaning over the trailer sides to drill the remaining screw holes. Makes your "tittie" muscles kind of sore. All this is is a piece of 1" x 1" angle iron with a point cut on the bottom. Just stab the point into the deck board and lever against the rear of the drill motor. Once you get your technique dialed in, you can snap off drill bits because you can force the bit to do some serious cutting. Thank my good friend Mike for demonstrating this for the pictures.
 

Attachments

  • march2012utilitytrailer 050.jpg
    march2012utilitytrailer 050.jpg
    142.2 KB · Views: 368
  • march2012utilitytrailer 051.jpg
    march2012utilitytrailer 051.jpg
    141 KB · Views: 329
OP
K

koditten

Well-known member
Joined
Apr 10, 2008
Messages
5,528
Location
Midland, Michigan
Here are the final pictures. I included a shot or 2 of the tail gate. This is the style I like to use. The pins that hold the gate closed work great and they are cheap. You can adapt the tailgate design yourself. I like to use 1 1'2" x 1 1/2" angle iron with 1" tube steel for the mesh supports.

I hope we all found the build informative. Please forgive all typos and spelling errors. This was my first "how to" thread. I didn't have large blocks of time to git this in print. By looking at the view counts, someone found this interesting.

Please feel free to ask questions. I usually hit the GJ several times a day. Post the questions in the thread for a bit. This way others who may have had the same question can save a bit of typing. After a while, when this falls off the radar, feel free to PM with questions.

Later

Kirk
 

Attachments

  • march2012utilitytrailer 052.jpg
    march2012utilitytrailer 052.jpg
    140.1 KB · Views: 389
  • march2012utilitytrailer 053.jpg
    march2012utilitytrailer 053.jpg
    138.1 KB · Views: 371
  • march2012utilitytrailer 054.jpg
    march2012utilitytrailer 054.jpg
    125.8 KB · Views: 383
  • march2012utilitytrailer 056.jpg
    march2012utilitytrailer 056.jpg
    147.8 KB · Views: 471
  • march2012utilitytrailer 057.jpg
    march2012utilitytrailer 057.jpg
    119.6 KB · Views: 541
OP
K

koditten

Well-known member
Joined
Apr 10, 2008
Messages
5,528
Location
Midland, Michigan
I just got done reading my thread start to finish. For some reason, in my mind, I sound like I speak like a combination of George Bush Sr and a Russian imagrant. I have no idea why I don't use pronouns and forget to make words plural. Honestly, I'm just a regular American.

This was fun. Hit my with your criticism.

Kirk
 

Piper

Well-known member
Joined
Nov 17, 2006
Messages
590
Location
Muskoka, Canada
Awesome job on the trailer and fantastic write up Kirk!!

I am in the process of preparing a build myself for a 5x12 utility trailer and you have helped me in a huge way! You didn't mention what type of welder you used nor whether you are mig or stick. I'm assuming mig. Can you comment on the tools you use?

One other thing.. just out of curiosity, do you have a rough idea of the length of steel that would go into one of your trailers? I don't have a place local to me that I can buy metal and have to travel ~150 miles so my plan is to purchase excess stock. Any rough bill of materials?
 
Last edited:

NUTTSGT

Super Moderator
Staff member
Joined
Sep 14, 2009
Messages
50,854
Location
Northern Central Ohio
Post #14, right picture. Is that how all four cornes look ? Just a common 90 degree **** joint ? Any other reinforcement or braces ?
 

Zick

Well-known member
Joined
May 13, 2009
Messages
418
Location
WI
Awesome job, thank you again for your time in putting this together. I know it will come in handy down the road. :rocker:

Btw, do you have another picture of your gate latch setup? I haven't seen one like that and trying to figure out how it works exactly. The picture is kind of hard to tell.
 
OP
K

koditten

Well-known member
Joined
Apr 10, 2008
Messages
5,528
Location
Midland, Michigan
Zick:

Presently, I don't have a picture of that latch. That trailer is gone. In the pic, there is a piece of bar stock welded to the top of the top rail. It sticks past the end of the trailer and goes into the center of the tube steel that is welded to the top of the gate. I just drill thru all three pieces and the pin hold the gate to the bar stock tab. Very little rattle, which is one of my pet peeves.

I'll get to the rest of the questions in a bit.

I'm glad that this was not a waste of time.

Thanks

Kirk
 
OP
K

koditten

Well-known member
Joined
Apr 10, 2008
Messages
5,528
Location
Midland, Michigan
Awesome job on the trailer and fantastic write up Kirk!!

I am in the process of preparing a build myself for a 5x12 utility trailer and you have helped me in a huge way! You didn't mention what type of welder you used nor whether you are mig or stick. I'm assuming mig. Can you comment on the tools you use?

One other thing.. just out of curiosity, do you have a rough idea of the length of steel that would go into one of your trailers? I don't have a place local to me that I can buy metal and have to travel ~150 miles so my plan is to purchase excess stock. Any rough bill of materials?

I Have 2 Miller mig units, a Miller 250 and a Miller 210 both 240v, single phase. They are both 20 years or so old and work no different than when they were new. They get used...alot. I know mig units are expensive, but there is a reason they are so expensive. You will only buy them once.

FYA, I started doing this using a 120v unit. The only reason I switched to the 240v units was because they have better wire drive assemblies. I was worried about being in the middle of a project and the drive dieing out. A buddy of mine wanted to give me slightly less than I paid for it. Decision made. Went right out and got my first 240v unit.

I do have argon/co2 gas for the welders. I will never go back to flux core. Flux core works good, but the gas makes welding easy.

As for the material:

Frame sides-118"

Frame ends-76"

Tongue-66"

Tongue angle braces-52"

Cross mebers-72" (5 angle steel, 1 tube steel)

side uprights-22" (11)

top rail sides-80"

top rail end- 79"

Hope this answers a few of the questions.

Glad to help

Kirk
 
OP
K

koditten

Well-known member
Joined
Apr 10, 2008
Messages
5,528
Location
Midland, Michigan
Post #14, right picture. Is that how all four cornes look ? Just a common 90 degree **** joint ? Any other reinforcement or braces ?

Just the 2 front corners. There is just single uprights in the back. There are no more braces. Once you get the 3 top rail pieces tied together, you will have all the bracing you will need.

This question brings back a memory. One of my customers was in an accicent involving a semi truck and trailer while towing one of my trailers. I don,' know the details, but I was tasked with replacing a fender and 2 of the side boards. You will love how solid this trailer feels.

Later

Kirk
 
To avoid these ads, REGISTER NOW!
Top Bottom