To avoid these ads, REGISTER NOW!

Shedzilla - My first 7x10m garage [AUS]

anth

Well-known member
Joined
Jun 26, 2007
Messages
438
Location
Australia
Shedzilla - My first 7x10m garage [AUS] driveway complete!

Finished product:

DSC_7829w.jpg


- - - - - - - -

Hi all,

This thread has been a long time coming and I'm excited to be able to finally start it. If you would like to know a bit more about me, here is a link to my intro thread: http://www.garagejournal.com/forum/showthread.php?t=219977

DSC_0745.jpg

About 3 years ago, my now-wife and I bought our first home, a modest 3 bedroom brick veneer in Melbourne, Australia, 13km north of the CBD. We rented it out while we did some saving, some traveling, got engaged, and then married, before finally moving in at the end of 2013.

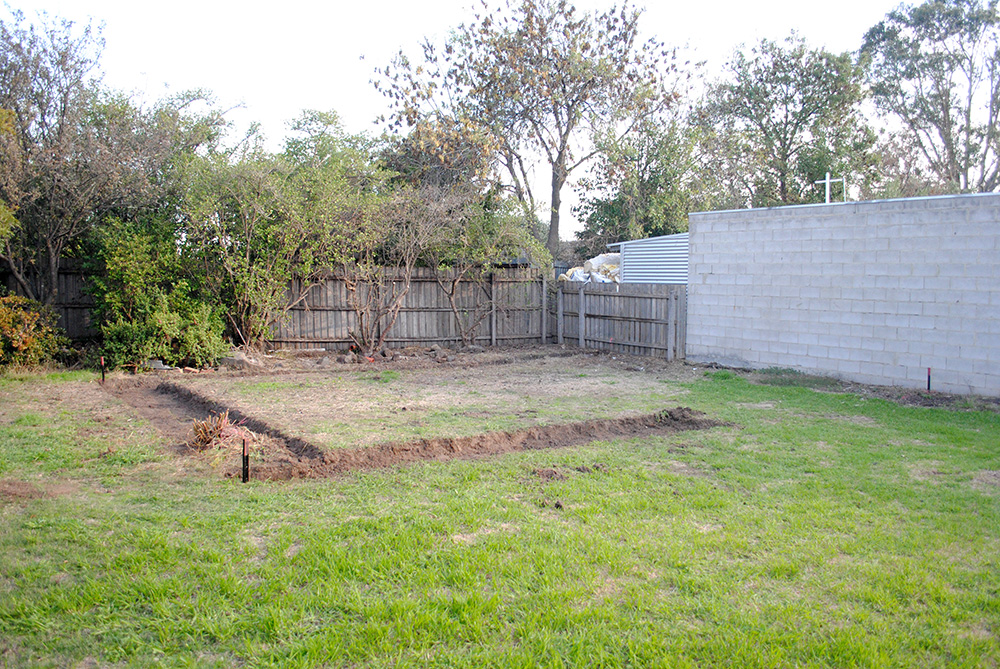
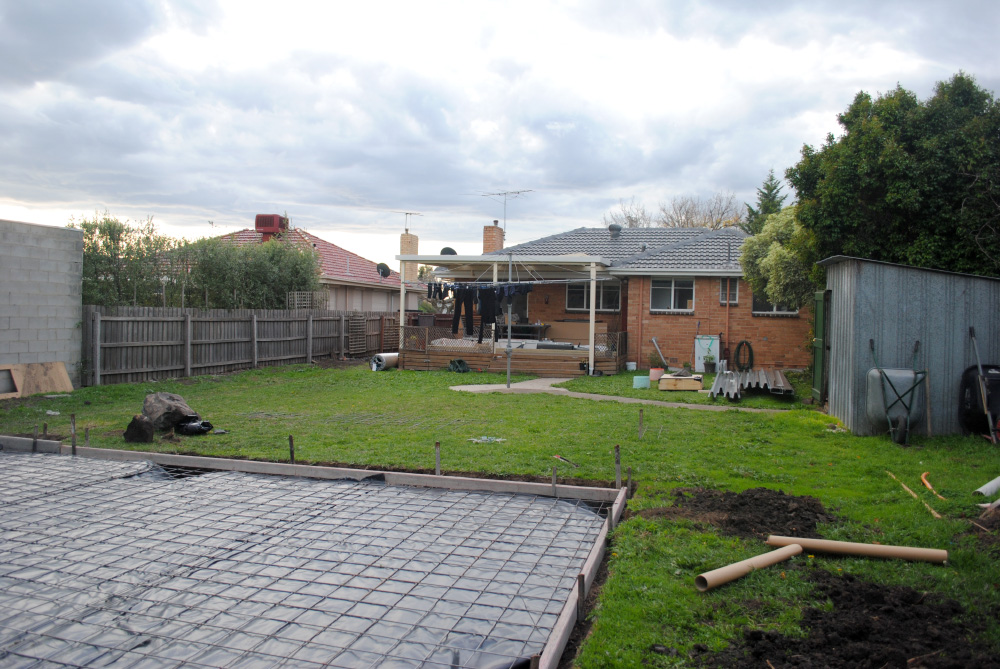
Being a car guy, of course I wanted a place with at least a double garage, or the room to build one. The house we settled on had no garage at all, but a nice and flat 720sqm block of land, plenty for me to build my own shed. So from the day we bought it I started saving any spare money I had, and was lucky enough to have saved up the required amount to bite the bullet once we took ownership.

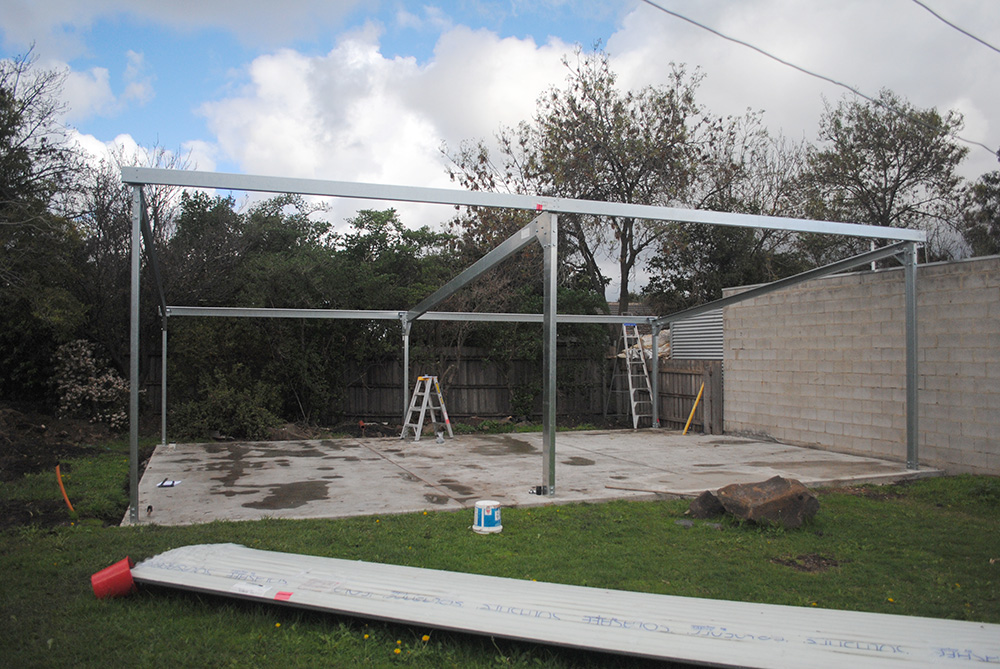
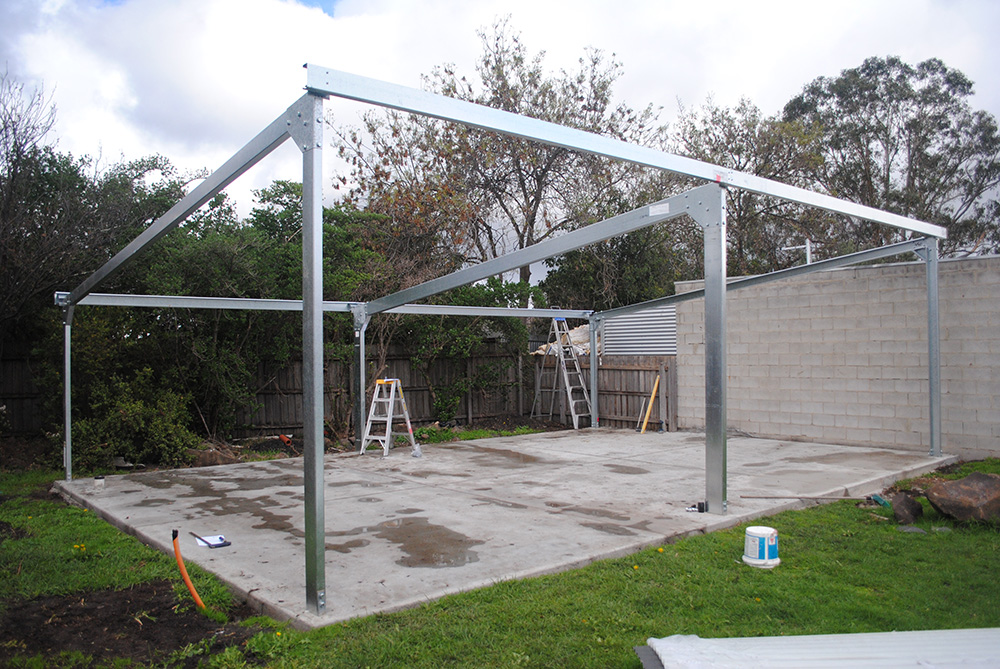
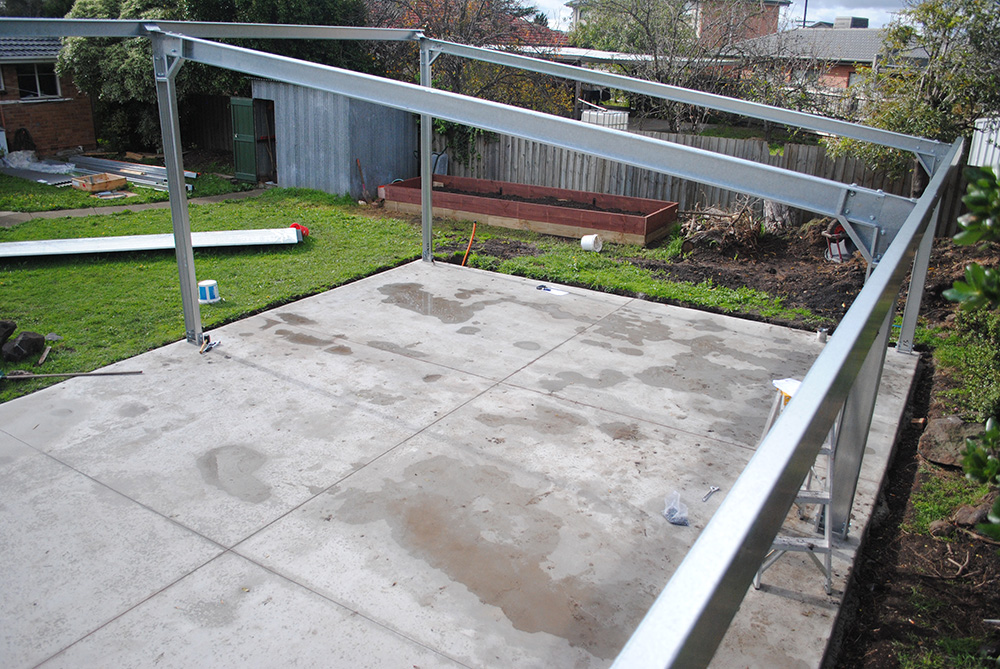
After much deliberation and research into sizing, I eventually settled on 7m deep by 10m wide. I figured I wanted enough room for my project car, a second car if anyone needed work done, and room for a workshop/storage area. With that in mind I figured a 3-car garage would be ideal, which is 6x9m, but I increased the dimensions by 1m each way just to give me a bit more wriggle room. Not quite "Shedzilla" status compared to many of the builds here, but for me it's huge!

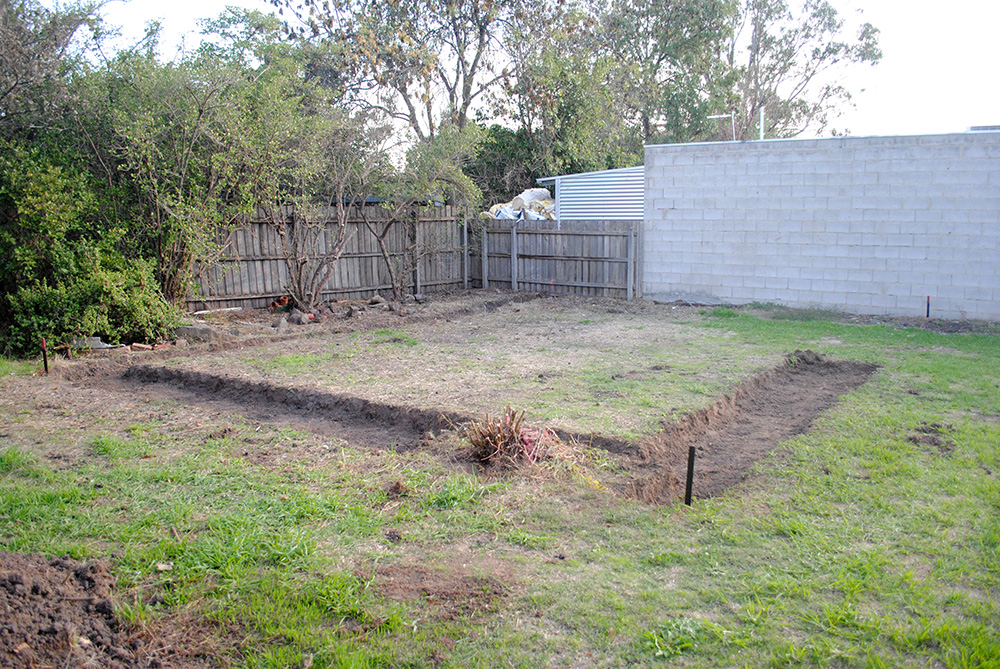
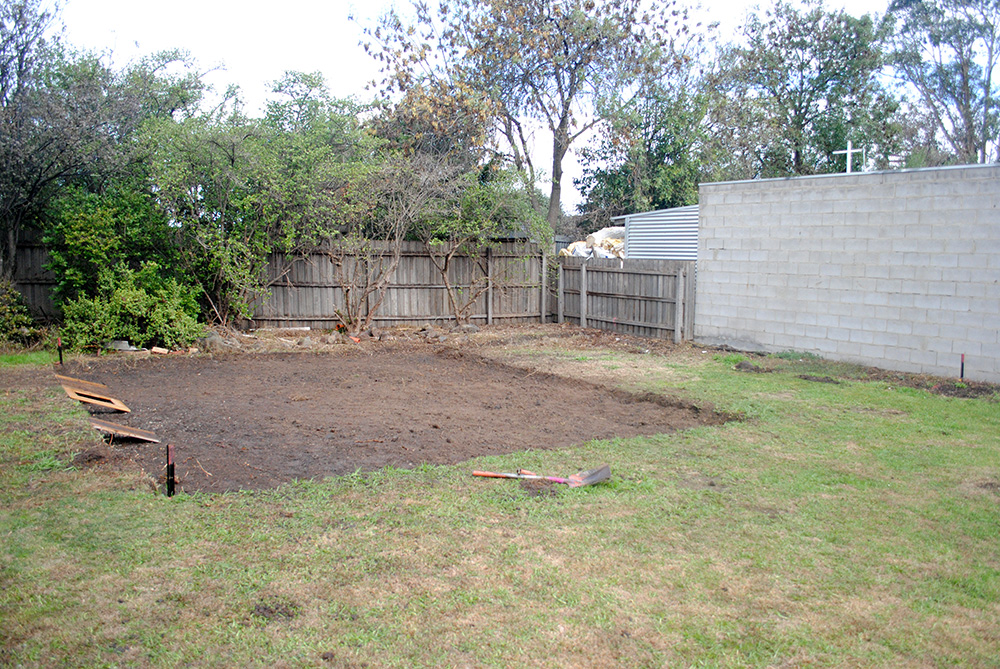
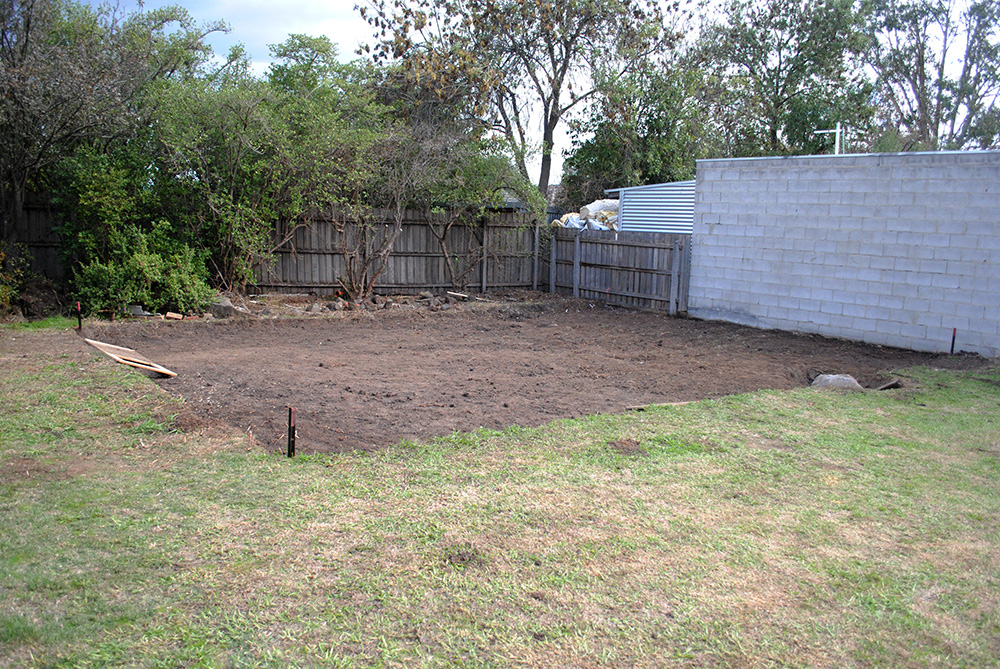
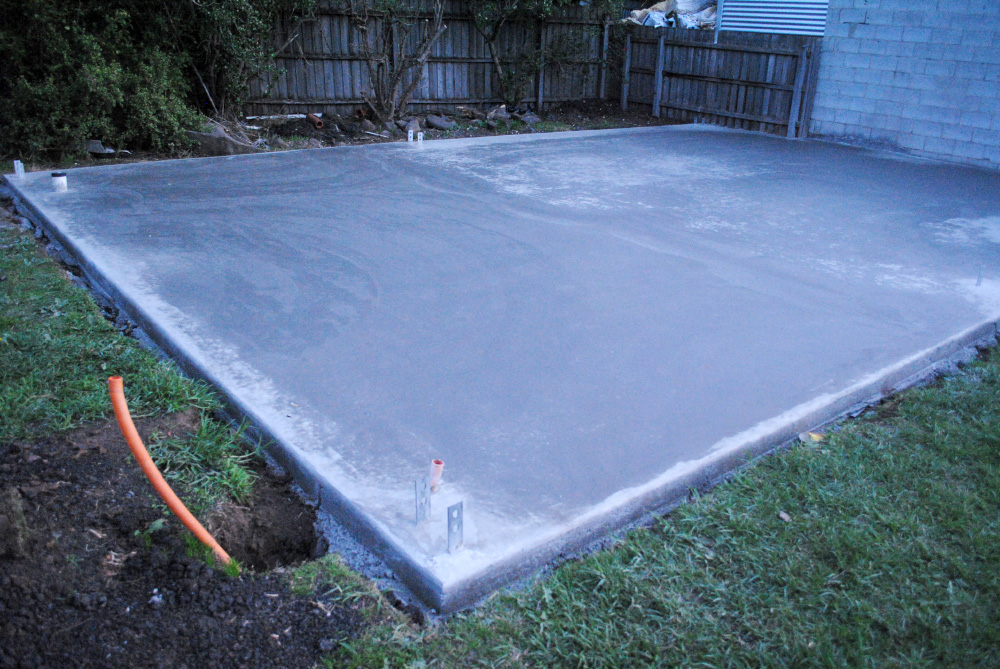
I decided to place the shed at the very back of the block, going across the width. Here is a plan a friend of mine drew up for me (roated 180deg compared to the site plan posted above)...

10x7-shed-site-plan.jpg

As you can see I have had to stay off the rear perimeter due to an easement, which I will either pave or put some gravel down and use as extra storage space.

The shed I have chosen is a Ranbuild with skillion roof, in all dark grey with vertical corrugated cladding. Even though the house is quite old in it's styling, I wanted to go for a more modern shed since it is detached from the house, hence the skillion roof. I like the all dark-grey look as I think it blends into the background better, but time will tell I guess.

Here is a rough mockup I created to show the layout, there will be a 5m roller door to the right side, with a personal access door next to it. Later on I will be adding a window to the left which I will remove from the house when we fit some french or bi-fold doors...

shed-colours-v2.jpg

And some examples of Colorbond Skillion roof sheds in all-grey. I would like to add some wooden accents later on to break it up a bit, maybe clad the access door in stained merbu slats? My cladding will run vertically, as the horizontal requires more material and more framing, therefore ups the cost considerably.

attachment.png

attachment-1.png

I have plenty of progress to post and I'm looking forward to sharing the journey with you all!
 
Last edited:
To avoid these ads, REGISTER NOW!

gazza

Well-known member
Joined
Dec 24, 2009
Messages
364
Location
Melbourne Aust
Great start, I'ts funny that I looked at the same thing with the vertical/horizontal sheets, I think the horizontal looks a bit trendier but like you said its dearer to build, so vertical it is.
 

stiffy

Member
Joined
May 11, 2008
Messages
11
Location
Melbourne Australia
Hi Gazza,

I know how difficult Councils an be.........its like you are tresspassing

on their land (when in fact it is you own)....:thumbup:

Check out my Garage build I added yesterday.

Good luck,

Rohan
 
OP
A

anth

Well-known member
Joined
Jun 26, 2007
Messages
438
Location
Australia
Thanks guys, plenty more pics to come! Also I'd like to thank the members from the GJ Aussie social group for their help and advice during my planning and permit stage.
 
OP
A

anth

Well-known member
Joined
Jun 26, 2007
Messages
438
Location
Australia
Cheers guys! Man this forum moves fast!

So once I'd locked in the shed design I started the process of getting a building permit. I chose to go with a private surveyor because I've been told they are faster than going through the council and easier to deal with. I am very lucky in that one of my best friends does drafting/architecture for a living, so he smashed out all the plans I needed to satisfy the surveyor.

Then it came time to get quotes for concrete, so I called a few people to get some prices, which varied by a few thousand dollars. Around this time another one of my best friends offered his form-work services to me to save some money. So with that we said 'screw it!' and decided to do the foundation and form work ourselves, then he would call in some contacts of his own for the concrete pour and screeding. I liked this idea at the time because it meant I would have more of a hand in the build. Even though I'm a graphic designer and spend my days in an office, I really enjoy getting my hands dirty, especially when it comes to my own house (or my car!). My dad is a jack of all trades, a really great handyman, who I grew up watching extend/renovate our family home for as long as I can remember, so I've always wanted to emulate that even though I'm way behind him in my skillset. He just has this natural ability that I don't!

A potential bobcat fell through, and being the impatient ~30 year olds that we are, we just decided to start digging!

DSC_0977.jpg


DSC_0979.jpg


DSC_0983.jpg

But not without some fuel.

DSC_0999.jpg

After one day with 4 of us we got this far.

DSC_0990.jpg

We found a friend...

DSC_1002.jpg

...and a foe :(

DSC_1004.jpg

The next day, two of us got the rest dug out. But we needed to get that rock out.

DSC_1016.jpg

A bit of this...

DSC_0009.jpg

...and some Toyota diesel power...

DSC_0010.jpg

...got the damn thing out after snapping a few ropes (and the stupid thing falling back in the hole!). Now it's just sitting there. I'd like to get it to the front yard somehow and place it in the garden as an ornament.

DSC_10011.jpg

Now I have a **** load of dirt to get rid of. I'm currently knocking up a 5.4m x 1.5m veggie garden out of pine sleepers, double height, so that should help reduce the pile. After that I'll continue that theme around the house by raising all of the existing garden beds which are all ground level. If anyone in Melbourne wants some dirt, hit me up! :lol:
 

Carves

Well-known member
Joined
Oct 9, 2013
Messages
459
Location
Central West NSW .. Australia
Geezz ... you have it easy ...

.... flat ground to start with ... and only one, big rock .. :lol:


You will be glad you went 7x10 over 6x9 ... on many occaisions .. ;)

Shed should look good in the grey .. :thumbup:
 

gazza

Well-known member
Joined
Dec 24, 2009
Messages
364
Location
Melbourne Aust
Wow, looks great that's a lot of hard work already done so it should get easier, maybe!.
Keep up with the pics and descriptions its great to see it all coming together.
 

Mr. 360

Well-known member
Joined
Nov 23, 2012
Messages
662
Location
Bowmanville, Ontario
The grey looks great imo, always been partial to grey.

I too have a pile of dirt from trenching around my garage (abt 3-4 yds), and couldnt figure out a way to get rid of it. I had a 'free fill' sign on my lawn, an ad on an online classified site, no bites, and i'm too cheap to pay for a dumpster. Not sure as too your surroundings but I drive country roads to work every day, many of which see barely any traffic, so I've been taking 3 buckets a day and dumping them on an existing dirt pile in an abandoned lot, sort of Shawshank Redemption/Great Escape style. 2 weeks in and i'm down about 1 yd. it's slow but it works.

Progress looks great, getting started is the biggest step!
 
OP
A

anth

Well-known member
Joined
Jun 26, 2007
Messages
438
Location
Australia
Geezz ... you have it easy ...

.... flat ground to start with ... and only one, big rock .. :lol:


You will be glad you went 7x10 over 6x9 ... on many occaisions .. ;)

Shed should look good in the grey .. :thumbup:

A flat block is something I've always wanted, after growing up on a sloping block. Makes it hard to play in the driveway when you're a kid! I hope the 7x10 works out well, at one stage I was going to go 7x12 but I decided to scale it back a bit due to cost!

Wow, looks great that's a lot of hard work already done so it should get easier, maybe!.
Keep up with the pics and descriptions its great to see it all coming together.
Thanks gazza, it definitely got easier because I brought in reinforcements which I'll explain in my next post.

i'm in. why not rent a skid steer? but then i'm not young anymore. lol.
I had one lined up but it fell through :(

Great start Anth, turning of the first sod so to speak.:thumbup:
:beer:

The grey looks great imo, always been partial to grey.

I too have a pile of dirt from trenching around my garage (abt 3-4 yds), and couldnt figure out a way to get rid of it. I had a 'free fill' sign on my lawn, an ad on an online classified site, no bites, and i'm too cheap to pay for a dumpster. Not sure as too your surroundings but I drive country roads to work every day, many of which see barely any traffic, so I've been taking 3 buckets a day and dumping them on an existing dirt pile in an abandoned lot, sort of Shawshank Redemption/Great Escape style. 2 weeks in and i'm down about 1 yd. it's slow but it works.

Progress looks great, getting started is the biggest step!

that gave me a chuckle! I hope I don't have to resort to that. Although we did get rid of some dirt this weekend with the start of our new veggie patch. We've only half-filled it, so the pile should get smaller once it's full.

925489_426164110861329_1608878119_n.jpg


(still need to stain the bottom sleepers, long story!)

If you scroll up to my last post you'll see that the big pile with the shovel on it is now gone, and we also dug out some dirt from the pile on the other side of the tree stumps, so it's definitely going down. Later on I'll do some more raised garden beds around the place, but only one sleeper high.
 
Last edited:
To avoid these ads, REGISTER NOW!
OP
A

anth

Well-known member
Joined
Jun 26, 2007
Messages
438
Location
Australia
That's great idea for you top soil:thumbup:
I only wish I had enough room to put in a veggie patch..

One thing I'm not short on is room! The block is a prime candidate for a knockdown and building 3 or 4 units, maybe that's my retirement fund!

Next update:

So my initial plan was to dig it out, get some material in and do the form-work with my mate, then he would source a concreter friend of his to do the pour and screeding. Unfortunately after the digging we went through much back and forth before succumbing to the fact that it was going to take a hell of a lot of time (we can only work Saturdays when we are both available), and we were also struggling to lock people in to do the work.

In the end I called up one of the concreters that I had quote the job initially to save the day. He came over and had a look at the site again and agreed to take the job on. This was on a Saturday, and luckily for me he had a job cancellation and was able to start that Monday! I ended up saving a bit of money from doing the digging so it wasn't all done in vein.

Within a few days, this greeted me on my return home from work one evening...

DSC_0063.jpg


(bar chairs not installed yet)

Then a week (or two) later, this happened...

DSC_0057.jpg


Unfortunately the truck was too big to get down my narrow driveway (damn old houses!), so he had to crane everything onto the front yard. Not wanting to leave all of those valuables on the front lawn, I went about carrying the whole shed to the back yard, one piece at a time. That was definitely not a fun exercise.

DSC_0062.jpg


DSC_0068.jpg


I wanted to put as much material as I could on the deck to keep it out of the weather, but after a while I realised that it was probably too much weight for the poor thing, so the longest parts were put on the lawn, using some wood to keep it off the ground, then covered with plastic.

DSC_0061.jpg


Roller door was delivered separately for some reason, but the guy's truck was really cool, and old 60's era International, should have taken a pic.

DSC_0065.jpg


One last view of the site from the back corner.
 
Last edited:

HOTFR8

Banned
Joined
Mar 2, 2007
Messages
24,498
Location
Castlemaine, Victoria. The Hot Rod Centre of Austr
Unfortunately the truck was too big to get down my narrow driveway (damn old houses!), so he had to crane everything onto the front yard. Not wanting to leave all of those valuables on the front lawn, I went about carrying the whole shed to the back yard, one piece at a time. That was definitely not a fun exercise.

That will keep you fit. :evil:;)

Roller door was delivered separately for some reason, but the guy's truck was really cool, and old 60's era International, should have taken a pic.

You should have taken a Pic. ;)
 

1/2 Cup

Member Emeritus
Joined
Apr 28, 2012
Messages
19,283
Location
Shepparton. Victoria. Australia
Looking good:thumbup: I bet you can't wait to get the concrete pour over and I believe you won't regret getting a concreter in, its a job I wouldn't tackle my self as you only get one chance at it.
It really makes you stand back and think when you look at a shed in kit form like that is.

Regards...........
 
OP
A

anth

Well-known member
Joined
Jun 26, 2007
Messages
438
Location
Australia
Slab done :) Now I just need the thing built. The people I was going to use might turn out to be a tad expensive, so I'm going to do some ringing around this week.

DSC_0070.jpg
 

j p smith

Well-known member
Joined
May 22, 2013
Messages
1,213
Location
Glendale, Arizona
Anth, you ought to talk to you buds and think about putting it up yourself. Get it started square, measure 2 times, slow & steady and git r done.
 
Last edited:

panthersteve

Well-known member
Joined
Jun 30, 2013
Messages
134
Location
Ipswich, Qld, Australia
I've done one before, they are not too hard as long as you pay attention to squareness early on.
The only downside can be the time factor, if you only have weekends (as I did) it can be quite a few weeks before it is anywhere near finished, although I did do most of it alone. This is compared to 2 days for the pros.
 

Ducatisoc

Well-known member
Joined
Mar 28, 2014
Messages
54
Location
Canberra
If you have a timeframe, just pay for someone to do it.

If you don't, and you want to save the ~3.5-4K, do it yourself.

I've been slowly plodding along with mine for about 2 months, I've had no rush...

Don't get daunted at the ****** instructions they've probably sent you. It's all do-able.

Who'd you buy the shed through?
 
OP
A

anth

Well-known member
Joined
Jun 26, 2007
Messages
438
Location
Australia
What I want to say is I like the pictures.
thanks!

I've done one before, they are not too hard as long as you pay attention to squareness early on.
The only downside can be the time factor, if you only have weekends (as I did) it can be quite a few weeks before it is anywhere near finished, although I did do most of it alone. This is compared to 2 days for the pros.
Yep, only weekends, mainly Saturday's. I'm in no real rush, but my back decking is like a work site so we can't really use it for bbqs at the moment, and my project car is sitting idle at my inlaws, I really want to bring it home!

Nice work so far, and I really like the dark grey. Have you gone with a lighter roof colour (to keep it a bit cooler)?
I enquired about that with the shed company but they didn't seem to think it would make much difference. I have bought insulation, though.

Anth happy to help bang up the shed!
thanks James! Got a decent list of people that have put their hand up so far, but I'll let you know if we need more.

Looks great, coming along nicely. The only thing I don't like is the electrical conduit coming through the slab on that angle & location. Or will that fall inside a wall cavity?
It will end up inside the shed, then I'll run more conduit up the wall to the fuse boxes.

If you have a timeframe, just pay for someone to do it.

If you don't, and you want to save the ~3.5-4K, do it yourself.

I've been slowly plodding along with mine for about 2 months, I've had no rush...

Don't get daunted at the ****** instructions they've probably sent you. It's all do-able.

Who'd you buy the shed through?
2 months!? :shocking: Yes the instructions are a bit average, all the information is there but you really have to read it over and over again for it to make sense. What I ended up doing was separating it into sections, like frame, cladding, doors and windows, guttering, etc. Makes it easier to manage.

Pretty well standard here as to the way that is done and most likely a metal panel will hold it to the wall on the inside.
Yep!

So this weekend we decided to give it a shot, and I have to say things went very well, we did half a day on Saturday with 4 of us, then myself and my dad buttoned up a few things this morning. We now have the main columns and rafters up.

DSC_0122.jpg


DSC_0123.jpg


DSC_0124.jpg


DSC_0125.jpg


Next Saturday we'll hit it again (weather permitting) and hopefully get majority of the framing up, at least the mullions for the roller door. Very satisfying!
Might still get someone to do the roof cladding, we'll see how we go. It's great to get a proper feel for the size now, it's a bit larger than I anticipated!
 

Ducatisoc

Well-known member
Joined
Mar 28, 2014
Messages
54
Location
Canberra
I should mention my two months is me working by myself, with ****** instructions from Dinky Di Sheds, for about 3 days a week. I'm slow, and i'd never built one before.

Edit: Actually, the best advise I could give you, is to stop overthinking stuff, and just go and bolt it together.
Ain't nothing to it, but to do it! :D
 

80WTI_55_CHEV

Well-known member
Joined
Dec 8, 2012
Messages
820
Location
bundamba australia
The shed is coming along great anth, i wish i had your energy levels and looks like you have some great mates which always makes life easier, keep up the great work.
 
To avoid these ads, REGISTER NOW!
Top Bottom