To avoid these ads, REGISTER NOW!

Irish Version of a Welding Table

richeyc2000

Well-known member
Joined
Feb 22, 2015
Messages
984
Location
Europe
Hi Folks,
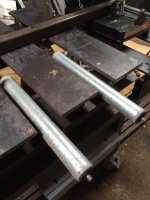
My bench has been in the works with a few weeks now (months :thumbup:) but now i feel like I have enough pictures and its in a state that works for me to show my build.
Again as with a lot of the benches / welding tables I owe credit to each and everyone of ye that has done this already as ye haven been my inspiration to build this.
It really started out with refurbishing an old Parmo vice and now its moved onto a new level. All my pictures are on my phone so i'll need to tapatalk them from there. I hope this will do ye proud fellow Garage Journal members.
 
To avoid these ads, REGISTER NOW!
OP
R

richeyc2000

Well-known member
Joined
Feb 22, 2015
Messages
984
Location
Europe
So this was the shipment of steel. Please ignore the mess surrounding these images. I only get a chance to work on this on the weekends and this is being built in the dump shed on the parents farm at home as i haven't started my shed build yet. This bench should help that project. Hope the images are not too big. c7222a52172f144d2051c158eeb8ed21.jpg


Sent from my iPhone using Tapatalk
 
Last edited:

PugetDude

ALLIANCE MEMBER
Joined
Mar 13, 2013
Messages
22,264
Location
Superstition Mountains, AZ
So this was the shipment of steel. Please ignore the mess surrounding these images. I only get a chance to work on this on the weekends and this is being built in the dump shed on the parents farm at home as i haven't started my shed build yet. This bench should help that project. Hope the images are not too big. c7222a52172f144d2051c158eeb8ed21.jpg


Sent from my iPhone using Tapatalk

Ooohh....
W-beams.
Heavy Flat bar.
Subscribed.:thumbup:
 
OP
R

richeyc2000

Well-known member
Joined
Feb 22, 2015
Messages
984
Location
Europe
So, I just laid it out to see what it would look like before the welding began. Hope the images are not too big.

35a6ca69eeca398976beb71f9acd41ad.jpg

c3aa59163e9eb208699f2b1916baa779.jpg

c6c0065c9dd4a9dcdccd7509589a4582.jpg


Sent from my iPhone using Tapatalk
 
Last edited:
OP
R

richeyc2000

Well-known member
Joined
Feb 22, 2015
Messages
984
Location
Europe
Looks like it's going to be a healthy sized table!!


Hi 2nrguy,
Yeah, current weigh in is around 400kgs. The castors I got are good up to 600kg (or so I'm told!!) but I think I need to upgrade them. We'll see how it goes. Shouldn't be moving it too often. :)


Sent from my iPhone using Tapatalk
 
OP
R

richeyc2000

Well-known member
Joined
Feb 22, 2015
Messages
984
Location
Europe
Plenty of steel there definately going to be heavy, which has me wondering if you can give that little inverter enough welly


So far that little guy has done a great job. It's nothing like the skills of a lot of the guys here but it's good enough for my needs. :)


Sent from my iPhone using Tapatalk
 
OP
R

richeyc2000

Well-known member
Joined
Feb 22, 2015
Messages
984
Location
Europe
So following on from that this is what the inverter can do. It's not up to the level of the guys here but it ain't shifting. a74a745d18e520b936394b296b7d295e.jpg
0b7d25f14420108212ef17feeb346acf.jpg


Sent from my iPhone using Tapatalk
 
Last edited by a moderator:
OP
R

richeyc2000

Well-known member
Joined
Feb 22, 2015
Messages
984
Location
Europe
So, I went with the castor plates and this is a direct carbon copy of another class bench on here. Imitation is the best form of flattery.
So, I just ground a line through the plate and bent them in a vice (Irish spelling). I cut the slot into them to help the weight transfer through the plate when it's welder in place.

369a425f55e487e03e096a29b3e5b0e9.jpgc0256dbe18f68181021c954422d5f3be.jpgbf8707ea4f464914f5896147dc53149b.jpg8ad0b6747ed3d091d2c81a402fd57aa4.jpg1ebf5043fa3966ae68607a14bf766f0a.jpg


Sent from my iPhone using Tapatalk
 
OP
R

richeyc2000

Well-known member
Joined
Feb 22, 2015
Messages
984
Location
Europe
Some weld shots of the castor plates. 8cbf77056dece39b0fb710a5ef9bbfb9.jpgd13c5b0fda7b62c08d2a5aabef404f4c.jpg

Any the castor plates in place. Pre welding.
c2239d1e045108a285aa837351db547b.jpg


Sent from my iPhone using Tapatalk
 
OP
R

richeyc2000

Well-known member
Joined
Feb 22, 2015
Messages
984
Location
Europe
Not too sure if all the images are coming up as it looks like I have broken links from Tapatalk. Hope Ye can see them.


Sent from my iPhone using Tapatalk
 
OP
R

richeyc2000

Well-known member
Joined
Feb 22, 2015
Messages
984
Location
Europe
So I built the top and bottom frame and welder it all together. Again, apologies on the state of the shed.

e9c40b3b0abad32f05ca82a9ff252eb7.jpg

33f7b22ce9b0d5ef661e81086b2a126d.jpg

So the plan was to drill out the castor plates (probably should have been done before bending but I didn't know if I could bend them without destroying them) Then needed a Mag Drill as the current drill set up wasn't up to the challenge.
Mag drill purchased. Savage bit of kit.
4355e1321b023c23c055c0fe846ed0ba.jpg

Like a knife through butter.
f714eeeba917233884f6c986f16a4aaa.jpg


fa99a45b2dee874006502575d72a5740.jpg

All four castor plates in place, drilled, bolted castors and the two dogs (Coco and Kaiser) looking as I just about managed to push it out the door. :)

370ebb3d322674bf609d2b623c2bb542.jpg

5aead0f7aff2037c5eb7b8219ae97030.jpg

Sent from my iPhone using Tapatalk
 
Last edited:
OP
R

richeyc2000

Well-known member
Joined
Feb 22, 2015
Messages
984
Location
Europe
So, with the base of the table completed I needed to focus on the top. I'm going with a slat construction and 50mm bolts, upgraded to 90mm bolts to fit the slats. Out comes the Mag Drill again.
So, it's seven slats that's a total of 28 holes at 19mm diameter. Lots of drilling and a good work out for the new (for me) mag drill.

180e55f3fbdc00ec5afad8b64f36ded8.jpg

d38e983838ca3b607a8ec9b5608d4f3a.jpg

I ground down the head of the bolts to remove the raised lettering just to help get the slats flush as seen below: There is a 80mm gap between each slat on the bench. Just enough to fit a few clamps and a roller (to be revealed later on)

2994cf8b11bd2cec2af78f78bbfa2db6.jpg


Sent from my iPhone using Tapatalk
 
Last edited:
OP
R

richeyc2000

Well-known member
Joined
Feb 22, 2015
Messages
984
Location
Europe
Next job was to set up the steel slats in place to be welded.

6841899944c0754c6a1743c760c7f879.jpg

c433c32f7c97b4132fa3ea1fff1da62e.jpg

Just enough welding to stick them and not heat the hell out of them.


Sent from my iPhone using Tapatalk
 
Last edited:
To avoid these ads, REGISTER NOW!
OP
R

richeyc2000

Well-known member
Joined
Feb 22, 2015
Messages
984
Location
Europe
So, I haven't progressed much more than this. Plan will be to paint it in a couple of weeks and make it look somewhat ****. [emoji12]
Hope Ye have enjoyed the few pictures so far. Really happy with it myself. I've a wooden top bench to do next when this is done. Rob, one of the guys I work with helped me glue up the top. He did a super job on it. When this one is done I'll start on that thread next. One at a time I suppose. [emoji106]. Now back to my beer.


Sent from my iPhone using Tapatalk
 

MarkG

Well-known member
Joined
May 23, 2012
Messages
1,219
Location
Elgin, IL
Some weld shots of the castor plates. 8cbf77056dece39b0fb710a5ef9bbfb9.jpgd13c5b0fda7b62c08d2a5aabef404f4c.jpg

Any the castor plates in place. Pre welding.
c2239d1e045108a285aa837351db547b.jpg


Sent from my iPhone using Tapatalk

That weld looks kinda cold to me, but maybe it's the pic. I'd put a cover pass on there too, it it were my project! You're not skimping on material size and thickness, so you don't just want little single-pass welds on there either.
 
OP
R

richeyc2000

Well-known member
Joined
Feb 22, 2015
Messages
984
Location
Europe
Cheers Mark. Yeah, I'll take that advice on board and hit those welds again before paint. Plan will be to make sure everything is ok before then. Lots of little jobs to do on it still. Really enjoying the process. [emoji106]


Sent from my iPhone using Tapatalk
 

larry_g

Well-known member
Joined
Apr 28, 2007
Messages
16,866
Location
oregon
Great design on the table. You say a wooden top table is next. Have you given thought to making the welding table and wooden top one the same height? It sometimes make setup of long items easier if you have a couple of tables the same height.

lg
no neat sig line
 

Richard D

Well-known member
Joined
Jan 19, 2007
Messages
1,922
Location
Texas City, between Houston and Galveston
Great design on the table. You say a wooden top table is next. Have you given thought to making the welding table and wooden top one the same height? It sometimes make setup of long items easier if you have a couple of tables the same height.

lg
no neat sig line

Good advice.

I love my mag drill, you will too. I hope you are using cutting fluid, those annular bits are expensive, you'll burn them up quick.
 
OP
R

richeyc2000

Well-known member
Joined
Feb 22, 2015
Messages
984
Location
Europe
Good advice.


I love my mag drill, you will too. I hope you are using cutting fluid, those annular bits are expensive, you'll burn them up quick.


Hi Richard/ Larry,

Yep, plenty of cutting fluid. It's cheap compared to the cost of the cutters. Don't know how I survived all along.

As regards the wooden top bench. I hadn't put too much thought into the height but 34 inches is a good working height for me so it will be the same height alright. Great points and all information and advice taken onboard.

The Plan on the wooden bench is to put a toolbox (the one in the box in the first picture in this thread) under one side of it and a place for a slip on vice on one side and a chop saw on the other side. The chop saw will be on an adjustable height as when I will have a new bench built the old chop saw may need to be upgraded. It never ends does it!!!!!!!


Sent from my iPhone using Tapatalk
 
OP
R

richeyc2000

Well-known member
Joined
Feb 22, 2015
Messages
984
Location
Europe
I picked up a small drawer to put some tools into it. It's currently grey but I think I'll go with a red colour for the drawer face.

876a82c5e7c403a3cb06df175ae5e751.jpg

8d57e0377d8290555f4593152b0d3452.jpg


Sent from my iPhone using Tapatalk
 
OP
R

richeyc2000

Well-known member
Joined
Feb 22, 2015
Messages
984
Location
Europe
The little leg above in the picture sticking out was to lift the whole table up when it finds it home. Don't think I will be moving it too often. [emoji12]
They are not perfect yet as they create a bit of wobble but I know how to rectify that. Must also get ball joints on the bottom of them so they spin on a joint.


Sent from my iPhone using Tapatalk
 
OP
R

richeyc2000

Well-known member
Joined
Feb 22, 2015
Messages
984
Location
Europe
As per the thread above this is the lifting legs I built for the table.

The 50 mm box iron fits in snugly.

ImageUploadedByTapatalk1435941177.286124.jpg

ImageUploadedByTapatalk1435941062.746699.jpg

I made four legs and this involved making caps for the 50mm box iron and drilling out Center holes in each of them.

ImageUploadedByTapatalk1435941136.016536.jpg

Then welded them up making sure the ran thru.

ImageUploadedByTapatalk1435941216.587437.jpg

When in place I should get about 6 inches of lift of the table. That will raise it up to 40/14 inches which is a good working height when sitting down for me.

I have a few bessey clamps as seen in the image above. One of the best clamps I ever used. It's the quick grip ones. Great clamping force.

Sent using Tapatalk
 
Last edited:
OP
R

richeyc2000

Well-known member
Joined
Feb 22, 2015
Messages
984
Location
Europe
So this is the bench as it currently stands. I had to wheel it out of the shed to get a few good images.

Next task will be to touch up a few welds I missed. There are loads of edges on this bench and when I was talking it together I noticed I missed a few.

Put some more drawers into it and get the strains for the chop saw and extension bar set up.


Then onto paint. Need to borrow a compressor off a friend to get it cleaned down and primed and finished.

b51c289363988b88a09b07d4929fa4e3.jpg

860a3c7771b0438462ba55152357a726.jpg

83009bf9abec363e0bc44ae15942153b.jpg

c261d5034a513c32e9c57ae2e2628006.jpg

49902694fe28a3047ee55f3f094db39c.jpg

24dfbb2c962f6b6e0a01c82d8306559b.jpg


Sent from my iPhone using Tapatalk
 
OP
R

richeyc2000

Well-known member
Joined
Feb 22, 2015
Messages
984
Location
Europe
Been a while since I updated this thread but this coming weekend I will be down on the farm to finish the work on the bench.
1. Touch up a few welds
2. Work on the extension piece for the chop saw.


Sent from my iPhone using Tapatalk
 
OP
R

richeyc2000

Well-known member
Joined
Feb 22, 2015
Messages
984
Location
Europe
So, managed to get a few hours at the bench today. I'm working on a shelf for my chop saw.
This one is just to help me stop cutting steel on the ground. This design will change as I've an idea and want to do a few sketches to see what ye think if it.

How it will look.

1d7cc436ce6157c781abc1b26bbd04ee.jpg


The bench proving its value already. Helping to clamp the slides for the chop saw.

b0a341b832fd871bb3e14b003d2b8790.jpg


Some holes to allow for the movement of the bolts.

038fc8877c598bc3fa1dbdc7616e5102.jpg


Base plate for the bolts for the chop saw to sit on.

7cd252a56ff09e868e2131e3bbbacad8.jpg


Bolt in place with the base plate.

7d8e014eb27849d89a4d0ccf4425e065.jpg


This is all just tacked into place. Don't want to hard weld it yet as I said above I want to run a few things by ye.

Thanks.


Sent from my iPhone using Tapatalk
 
OP
R

richeyc2000

Well-known member
Joined
Feb 22, 2015
Messages
984
Location
Europe
This is how it looks this morning all lined up with each slat.

ddcb78562a6adb29d0b0dafe6d288005.jpg

ed7d1e6215bf3a8bc0c272a2352c20b5.jpg


Delighted with how it turned out so far. It's going to help me finish it off. Slowly but surely.


Sent from my iPhone using Tapatalk
 
OP
R

richeyc2000

Well-known member
Joined
Feb 22, 2015
Messages
984
Location
Europe
The question I have for ye guys is how do ye set up your chop saws to allow for 45 degree cuts for example.

cf5beb08d0052c7f01e6f063e0586b01.jpg

As per the image above the steel will move off the table.

My thoughts on how I will over come this is as follows:

69389b238397151806c376584264e07c.jpg

I'm thinking I will set up two plates. One floating to allow for movement up and down etc.
A bearing next to allow for movement of a top plate.
A top plate that has the chop saw bolted down.

Then I'll be able to do the following:

d7b2342156a39b56649410c4b65a1a44.jpg

What are your thoughts on this design?

Thanks.


Sent from my iPhone using Tapatalk
 

Kiwi Canuck

Well-known member
Joined
Dec 13, 2014
Messages
156
Location
Langley BC
Richey, very nice job on your welding table.
In our shop we just use one of those portable holders with rollers on top to support the extra length, it should work and saves all the issues with trying to rotate the chop saw each time you want an angle cut.

http://reviews.canadiantire.ca/9045/0556828P/wolfcraft-single-roller-support-stand-reviews/reviews.htm


Also on your setup you manufactured the supports to lift the table, McMaster Carr carry a nice set of machine/table levers that should work well for your table.

something like this, Acme thread high capacity swivel mount

http://www.mcmaster.com/#standard-leveling-mounts/=y81cid

or this, Heavy Duty Vibration Damping Level Mounts, (top left)
Cut off the bolt head on the bottom and tread this on.
http://www.mcmaster.com/#standard-leveling-mounts/=y81d75

Keep up the nice work and look forward to seeing your progress.

Cheers, David
 
Last edited:
OP
R

richeyc2000

Well-known member
Joined
Feb 22, 2015
Messages
984
Location
Europe
Richey, very nice job on your welding table.

In our shop we just use one of those portable holders with rollers on top to support the extra length, it should work and saves all the issues with trying to rotate the chop saw each time you want an angle cut.


http://reviews.canadiantire.ca/9045...ngle-roller-support-stand-reviews/reviews.htm


Also on your setup you manufactured the supports to lift the table, McMaster Carr carry a nice set of machine/table levers that should work well for your table.


something like this, Acme thread high capacity swivel mount


http://www.mcmaster.com/#standard-leveling-mounts/=y81cid


or this, Heavy Duty Vibration Damping Level Mounts, (top left)

Cut off the bolt head on the bottom and tread this on.

http://www.mcmaster.com/#standard-leveling-mounts/=y81d75


Keep up the nice work and look forward to seeing your progress.


Cheers, David


Hi David,
Thanks for the information. I have a box load of rollers

84c7febbc3db07b6cfb1390247cf028d.jpg

My plan for them you have to guess from the image.

fc232d6b2a332adc0ccabc4accf05da0.jpg

ImageUploadedByTapatalk1438116502.144312.jpg

The plan would be to have them there so I don't have to build one of the portable roller holders. That's still an option if I can't get the bearing one to work well for me.

On the leveling feet, I'll need to get some like the link you gave me to the Master McCarr website.


Sent from my iPhone using Tapatalk
 

Attachments

  • ImageUploadedByTapatalk1438116502.144312.jpg
    ImageUploadedByTapatalk1438116502.144312.jpg
    141.7 KB · Views: 100
Last edited:
To avoid these ads, REGISTER NOW!
Top Bottom