Another personal project. Planning on not doing any big projects for customers and getting some work done on this car and the COE.
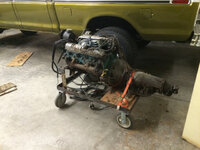
Got this car from a good friend of my grandpas. The story I have been told on the car is this - the original owner parked the car in 64 with 34,000 original miles to go into the navy. While he was in the navy his nephews broke out all the windows. When he got out of the navy he just left the car at the family farm and bought a new car. The story of the car was known by many hot rodders but no one knew where exactly it was located. One day this old timer I got it from was visiting with one of his wife's friends and was talking cars and somehow this car came up and it was her cousins. So this guy got a hold of him and bought it in the late eighties. He put a late 60's Pontiac lemans with 67,000 miles frame and running gear under the car in 1990. Then on his 50th birthday in October of 1991 he started the chop. No significant work was done after this.
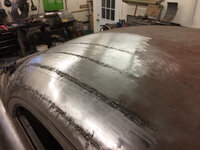
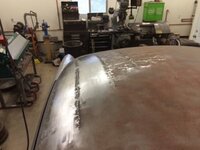
Picture of the car in October 1991.

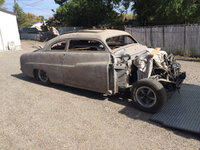
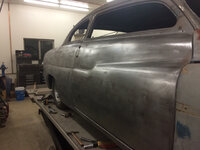
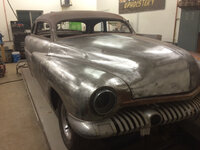
Picture of the car last weekend (25 yrs later) when I picked it up

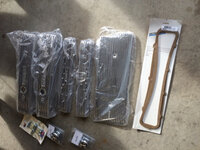
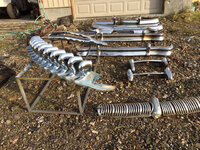
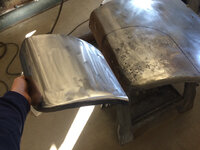
Pile of extra parts that he included with the car. At least enough factory trim for 6-10 cars. Also 52 Buick trim, kaiser and Pontiac front and rear over riders, desoto and merc bumpers. Two sets of inside window trim panels, merc and 65 t bird front and rear seats. 54 merc frenched headlights and taillights, And tons of other ****.
This was the stuff not inside the car. After this stuff was put away I pulled the car in and emptied it out and had nearly as much stuff again.


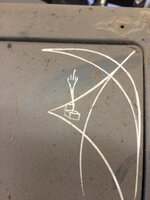
Original paint


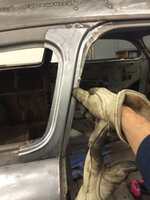
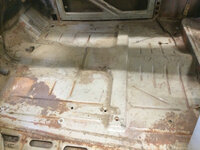
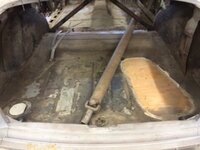
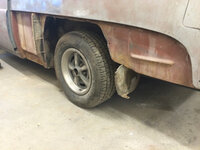
Very solid car inside and out


Owners manual in excellent shape and a magazine from 1956 on how to customize your car was in the car.


He also provided a 50 grille surround. This weekend I will be going to get more parts which include the front clip, rear glass, more bumpers the 53 desoto grille, another instrument panel, early 60 caddy seats front and rear and 56 Plymouth front fenders to lip the merc fenders. I also get to pick another grille out of his stash that I haven't decided yet.
Sent from my iPhone using Tapatalk
Got this car from a good friend of my grandpas. The story I have been told on the car is this - the original owner parked the car in 64 with 34,000 original miles to go into the navy. While he was in the navy his nephews broke out all the windows. When he got out of the navy he just left the car at the family farm and bought a new car. The story of the car was known by many hot rodders but no one knew where exactly it was located. One day this old timer I got it from was visiting with one of his wife's friends and was talking cars and somehow this car came up and it was her cousins. So this guy got a hold of him and bought it in the late eighties. He put a late 60's Pontiac lemans with 67,000 miles frame and running gear under the car in 1990. Then on his 50th birthday in October of 1991 he started the chop. No significant work was done after this.
Picture of the car in October 1991.
Picture of the car last weekend (25 yrs later) when I picked it up
Pile of extra parts that he included with the car. At least enough factory trim for 6-10 cars. Also 52 Buick trim, kaiser and Pontiac front and rear over riders, desoto and merc bumpers. Two sets of inside window trim panels, merc and 65 t bird front and rear seats. 54 merc frenched headlights and taillights, And tons of other ****.
This was the stuff not inside the car. After this stuff was put away I pulled the car in and emptied it out and had nearly as much stuff again.
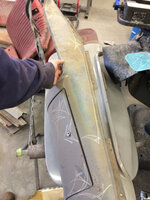
Original paint
Very solid car inside and out
Owners manual in excellent shape and a magazine from 1956 on how to customize your car was in the car.
He also provided a 50 grille surround. This weekend I will be going to get more parts which include the front clip, rear glass, more bumpers the 53 desoto grille, another instrument panel, early 60 caddy seats front and rear and 56 Plymouth front fenders to lip the merc fenders. I also get to pick another grille out of his stash that I haven't decided yet.
Sent from my iPhone using Tapatalk
Attachments
-
 038b7afebac85b186df450e1110226e0.jpg97.5 KB · Views: 0
 -
 022dac3257b2366a0b1ffca663c9cfe3.jpg14.1 KB · Views: 0
 -
 fca543d1cb614602f8d879c415166971.jpg13.4 KB · Views: 0
 -
 6446dd55554fa398b39451b03a23bda8.jpg11.4 KB · Views: 0
 -
 12450962dd2858984086b844b17c8efc.jpg86.7 KB · Views: 0
 -
 3f1944bca0085478b90e17297e13c9ce.jpg100.6 KB · Views: 0
 -
 3e42caf92b68abdd0ef2820a9bdc8aa6.jpg77.3 KB · Views: 0
 -
 e4f7137377c20d994b9b4679357db6c9.jpg86.7 KB · Views: 0
 -
 c31bd4924bbf4f8118b20a5305d6dbd4.jpg91.8 KB · Views: 0
 -
 3b7704068962aca1e92dce6c16b6a421.jpg102 KB · Views: 0
 -
 bce1c461436da1163a16ef127078e9e8.jpg425.1 KB · Views: 1
 -
 6bea0a8324bb9b125e1cca37ffe901a4.jpg15.6 KB · Views: 0
 -
 a36864bd869902a3cc42c7ac204352e0.jpg96.2 KB · Views: 0
 -
 81007525f673c4cc0f697d18606d3627.jpg336.2 KB · Views: 0
Last edited:


")