

OccupantRJ
Well-known member
I'm in the middle of putting plywood on the interior walls of my shop. I have read a few threads here relative to which way to install the plywood, whether vertically or horizontally. I also intended to space the panels a 32nd of an inch to allow easier caulking. Here is what I have encountered, as this may help someone else.
1. If you have an 8 foot high sidewall, vertical gives a few less visual seam distractions.
2. Vertical seems easier to place by yourself at this height. (bear hug style) I am using a drywall screwgun, and did not do a horizontal installation due to not having to use a countersink for the vertical mode, due to the fact that a screw placed close to the end of a sheet of plywood at butted end joints without first using a countersink will break and chip out the remaining short end grain between the screw and the end of the sheet. On the vertical application, I was able to prevent this because you have more contact area to your top and bottom plate, and the screw can then be placed further from the ends of the sheets. Side seams do OK, but can bulge factory edges, so you may want to nail install sheets to hold them in place, then come back and do your screw-out.
3 Use tempory support nails driven into the joint of the base plate /concrete block joint to help you place the panel. Remove them later.
4.I was going to use small panel nails to space the plywood for caulkable joints, but found it too difficult to fight the bowing of the plywood and the difficulty of aligning the panel by myself to make it worthwhile. Stud to sheet edge would have slowly accumulated errors also. Without using screws, the plywood would have been hard to pull tight to the studs, using a finish nailer. The plywood factory is only a few miles away, whether the plywood needed more time after manufacture, and before store delivery, to stabilize while banded, is debateable.
5. I used a finish nail gun to temporarily attach key points of the panel until I had control of it, then added 1-5/8" coarse thread drywall screws to permanently attach. The plywood I got from Lowes was relatively flat, but bowed even while being transported home at night, enough so that I had a hell of a time getting it aligned and flattened out on the studs by myself, and I'm not inexperienced.
6.Drywall screwgun has adjustable countersink capabilities, to set the screws like you want them.
I will post other observations as I encounter them.
RJ
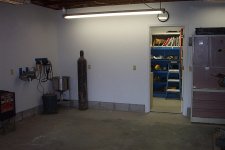
 I can just barely see a vertical seem in that picture. Which for a 'shop' is no big deal at all, to me anyway.