To avoid these ads, REGISTER NOW!

12' x 16' Shed Project

GeoTracker90

Active member
Joined
Oct 7, 2007
Messages
36
Well last fall (2009) we bought a place that included a 12' x 16' shed with full 8' walls. :bounce: The trick is to turn this into a work place that has some storage as well without letting the storage take everything over.

The first order of business was correcting the electrical service to the shed. The previous owners had a 50' extension cord plugged into the side of the house and ran it around to the shed. To tie into the shed it was spliced into some Romex house wiring. The worst part was that to accomplish the splice they just twisted the wires together and wrapped them with black tape and left it sitting on top of the ground outside the shed! :shocking:


DSCF8159.jpg


Funny thing about all of this was that the electrical distribution post sits about 10' - 12' away from the shed and had an available 30 amp 220 volt breaker. All it took was an afternoon to trench over, install some conduit and pull the wire to a new 6 breaker load box that I installed in the shed. I've now wired the shed with one circuit for the lights, two circuits for 110 volt outlets, and one circuit of 220 volts (20 amp) that I'll use for my welder.


DSCF8255.jpg


DSCF8150.jpg


You'll notice that in the picture above there is a window. This doesn't seem like much, but originally the shed had no windows and thus no ventilation either. It now has two windows for a total investment of $15. I like that!


DSCF8254.jpg


As I've been working on the inside (I now have three of the walls insulated and sheathed) I set up a small temporary workbench. This area will end up with a permanent work bench that is 24" deep and 48" wide with an additional 3' long, 18" deep bench top running down the wall to the left. And, at the end of that bench top I'll have a vertical cabinet with cubby holes for storing my power tools.


DSCF8226.jpg


The area above the workbench will have wall mount cabinets and an inexpensive dvd player / home theater unit because the south wall is going to be outfitted with a permanent movie screen. Can't wait to have a bunch of guys over and watch "Corner Gas" or "The World's Fastest Indian" or any of the other movies in my garage DVD collection.

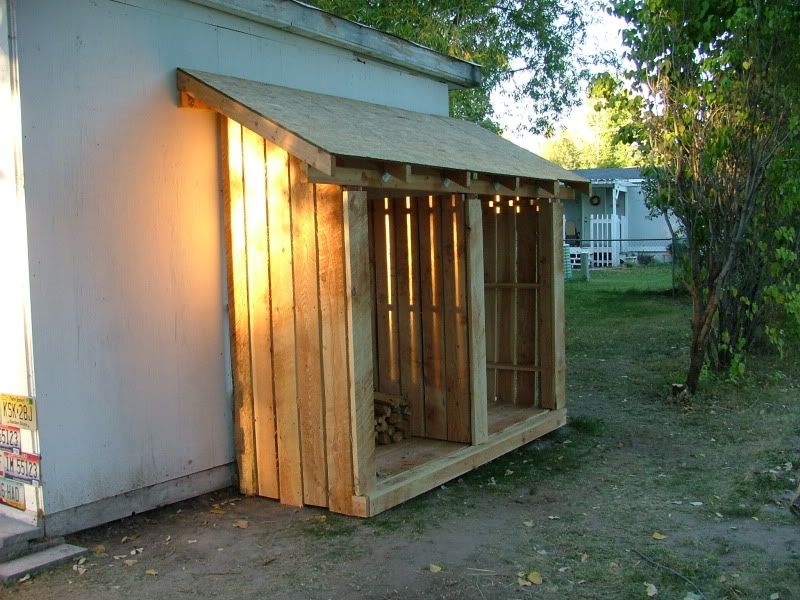
Second to last photo for now: the outside of the shed. It doesn't look like much but the plan is to round up some more license plates and complete the rest of the bottom ofthe shed with them, and then above that install wood siding.


DSCF8157.jpg


I'm getting quite excited to get the inside finished off so that I can start getting things put away in their place, but mostly I want to get the inside completed so that I can have it ready for a winter project with my two boys. We plan on building some custom bicycles and will even build a frame jig to help us out with it. Here is a picture I saved off of the internet to use as inspiration.


100_1142.jpg


Well that's all I have for the moment. I'll try to remember to update this as I make progress, but it will probably be a little slow going as I have to fit the shed project in whenever I have a few spare moments here and there. Wish me luck!!

Mike
 
To avoid these ads, REGISTER NOW!

49stude2r6

Well-known member
Joined
May 1, 2008
Messages
78
Location
Bremerton, WA
Looks like a great workspace in the making. Is it a wood floored shed? The exterior shot makes it look like it is on concrete pad but the interior shots made me think wood floor.
 
OP
G

GeoTracker90

Active member
Joined
Oct 7, 2007
Messages
36
It's actually a wood floor inside the shed with a cement ramp up to the door opening. Eventually I'd like to break out the cement and pour a larger (and level) pad in front of the shed. I need to pick up some more Romex and insulation so I can complete the sheathing of the last interior wall. After that is done I can build the work bench as well as the tool storage cabinet.

Mike
 
OP
G

GeoTracker90

Active member
Joined
Oct 7, 2007
Messages
36
Well I haven't had a lot of time or extra cash to spend on the shed recently, but I do have a mini update to post.


DSCF8257.jpg

I'm in the process of gathering the components needed to use the vintage Forney arc welder for lift or scratch start TIG welding. Here is the accessory kit and power cable adapter for the TIG torch. I still need to buy the torch and the regulator. Once I do that and get the input cable to the welder replaced I'll be in business.


DSCF8259.jpg

I also grabbed a couple more frames so I could hang up the 8.5" x 11" "posters" that I've had stashed since my last trip to Speed Week back in 1996. I really like to walk in the shed and see them up on the wall instead of being tucked away in storage. If all goes as planned I'll be going back to the salt for the beginning of Speed Week this year. I think after that I'll be able to get the last of the electrical completed and insulate and sheath the last remaining interior wall.

Can't wait!

Mike
 

John in OH

Well-known member
Joined
Jun 2, 2007
Messages
2,444
Location
SE Ohio & Eastern Virginia
Nice job making the most of a small space. It will be a great place to hang out with you sons and build bikes and memories.

Gotta also tell you that I love the old Forney welder! We had one of these on the farm while I was growing up ... mid-'60s ... and it build tons of items and repaired countless broken pieces of equipment. I think it is still laying under a pile of **** in the back of an old shed, but it long ago gave up the ghost. But a great machine that gave us years of reliable service. Glad to see you are keeping the old girl alive.
 
OP
G

GeoTracker90

Active member
Joined
Oct 7, 2007
Messages
36
Thanks for the kind words guys. I just realized tonight that it's been a little while since I've updated this thread so here are some pictures and comments to show what I've been up to.


DSCF8943.jpg


DSCF8944.jpg

I needed some more firewood storage area to augment my small firewood shed so I built the lean-to shown above. After looking at these pictures I realized that they are already out of date as I've since trimmed out the rafters and filled the back of each side with a stack of wood up to the rafters.


DSCF8945.jpg


DSCF8947.jpg


DSCF8952.jpg

Since my last post I've also been able to get the painting done inside. I like how the red and white came out and really like the shelving as well. Second picture shows a close up of the bracket that I built for attaching the front vertical supports to the ceiling. These are attached with a slew of lag bolts. Last picture shows the south wall with the painted drywall screen for the projector. Can't wait to fire it upo and watch a movie or two with the boys.


DSCF8953.jpg


Last picture is a little bit of design work I did for an off-road trailer.One design shows a trailing arm and panhard bar air spring suspension while the other frame shows a design that uses independent trailing arms and air springs. Just something I threw into a document frame and hung on the wall for inspiration.

I should be getting some more done in the next few weeks. I'll try and remember to update this as I make further progress.

Mike
 
Last edited:

zoomzoomjeff

Well-known member
Joined
Sep 21, 2009
Messages
1,471
Location
Des Moines, IA area
I love the "Speedway catalog" corner gussets on the L brackets! That looks trick and matches the theme I see going in your garage. And I didn't even notice the walls were OSB until I saw a close-up pic. Good job covering the fibers with paint.

What was the painting process for that OSB? I've got some up that the previous owner installed.
 
To avoid these ads, REGISTER NOW!

ibedayank

Well-known member
Joined
Feb 2, 2011
Messages
2,619
Location
Columbia TN
That forney will pull 50 amps plus 20 will not be even close to enough.
Even the hf 220/240 welders will draw 21-37 amps from the wall.
the lincoln ac 225 draws 50 amps
To tig weld steel it takes DC current.
The forney is a AC only machine it also has NO way to control gas flow or high freq
For that you need a HF box to add to your welder.
Welding on a wood floor is NOT a good idea remember wood burns.

ok off the safety nazi box...........

great job on the shed it looks good.
 
Last edited:
OP
G

GeoTracker90

Active member
Joined
Oct 7, 2007
Messages
36
Well guys it's time for an update that's been long over due. I've been working on another project this past year but will hold off on posting about that untill I get it a little closer to completion.

In the mean time I haven't been ignoring the 12' x 16' shed either. As they say in the internet age - it didn't happen without photos to prove it.

The curtains are a temporary way of covering the storage shelf and all that is up there. The curtains are actually just some canvas painter's drop cloth that was hemmed to size by a friend and then I added the gromets. This keeps the stuff out of sight and out of mind untill I need something. Quick and cheap.

Just before Christmas I had a few of my good friends over to the shed to watch a few episodes of "Corner Gas." Good show, good friends, good times.

Enjoy!

Mike


DSCF0546.jpg


DSCF0547.jpg


DSCF0548.jpg


DSCF0549.jpg


DSCF0551.jpg
 
Last edited:
OP
G

GeoTracker90

Active member
Joined
Oct 7, 2007
Messages
36
I forgot to add a couple more pictures when I posted my update.


DSCF0552.jpg

In addition to the firewood lean-to shown in the previous post I've also added one to the south facing exterior wall. This lean-to is roughly 4' wide and 6' deep. It was meant to house my lawnmower and garden tools but for now it is holding my tablesaw instead of the lawnmower.


DSCF0537.jpg

Back on the inside I was having a tough time deciding just how I wanted to finish off the underside of the overhead storage shelf. I had thought about just painting it, sheeting it with diamond plate or galvanized sheetmetal, but in the end it turned out that license plates were just the right size for my needs. I was pleasantly suprised to see that I didn't need to trim any license plates in order to get such good coverage.

Mike
 
Last edited:
OP
G

GeoTracker90

Active member
Joined
Oct 7, 2007
Messages
36
Well before Christmas my younger son expressed that he wanted to build a trailer to hook to his BMX bike so that he can take the garbage to the dumpster. So like any good father I figured I'd help him out and bought a couple tire/wheel assemblies for him as one of his Christmas gifts. With that done we headed out to the shop on Saturday to build an axle for the wheels to ride on.


DSCF0593.jpg
Tyler taking his first turn (ha, ha) at the metal lathe. Working at making some stub shafts for an axle.


DSCF0592.jpg
After disengaging the power feed Tyler is using the hand wheel on the apron of the lathe to move the tooling over and clean up the last little bit.


DSCF0596.jpg
One of the axle stubs with the steel tube it will be welded into. Tyler did a lot of the machining on the smaller diameter of the stub shafts.


DSCF0597.jpg
With the stub and the tube together. Now we just need to stick them together with a hot metal glue gun.


DSCF0594.jpg
And here is the axle with the two wheels. Now to get the rest of the project put together.

Today he asked me if he could use the lathe without my supervision and I responded with a great big NO! I guess he liked working with the lathe.

Mike
 
OP
G

GeoTracker90

Active member
Joined
Oct 7, 2007
Messages
36
nice progress on the shop. watch the boys clothing on the lathe, start him off safe.

Thanks for the kind words and the reminder about clothing near the lathe. We had a pretty good talk about the safety aspects of running the lathe before letting him get near it and the serious results that could come from even the smallest accidents.

I'd rather be reminded about safe lathe opperation a thousand times than to have one minor accident let alone a major one.

By the way I should be ordering a new drill chuck for use in the tailstock this week. Once it gets here we can drill and tap the ends of the axle stubs and then start working on the body of the trailer.

Mike
 

Edgee2004

Member
Joined
Feb 24, 2015
Messages
5
Hey Geotracker90 I have the same welder. It's on our farm and we are trying to repair it. If you still have this welder can you post a few more photos of the welder. The data plate on the back or side I'd what I need.
Thanks.
Did you ever get the tig conversion completed?
 
To avoid these ads, REGISTER NOW!
Top Bottom