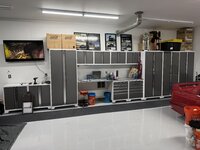
Long time coming but wanted to show off my new floor! Wolverine CFLC Ceramic epoxy in gray. No flake, easy to scuff and re-apply if I screw it up over the years and I won't lose things. I'll "try" to keep it short and sweet but that's not usually my jam.
Having done this once before with a different product, I had a good idea of the prep involved. I also knew I wanted a true 2-part epoxy system with a high build thickness. My previous house I hand-ground a 3 car slab with an angle grinder.. Never again...
Just purchased the new property which has a massive 3 car garage and an attached 600sqft shop, I knew if I don't get the floor done before I move stuff in its a nightmare to get done after the fact. 5 weeks of renovations and projects from closing until we moved in, so had to get the garage done ASAP.
Product dropped on pallet, on the street..
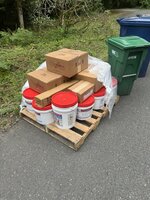
What we started with:
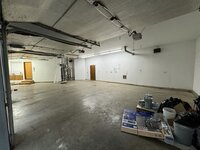
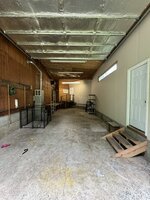
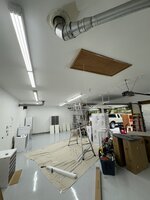
Shop
I've read countless threads on GJ about grinding and prep, Edco vs Dual head edco, etc. Do yourself a favor and just rent a Lavina.. Don't necessarily need the monster I ended up with but its was fun nonetheless and it performed like I think most of us all "assume" these edco's or other grinders to perform.. This was single to two passes and it was done. 1800 sqft took about 3-4hrs including sweeping up with the HEPA vacuum. You're looking at 1000+ a day but so so worth it. This is propane powered and weighs over 800lbs. You'll need a rampgate trailer with winch or liftgate to get it home.
Light degreasing on the concrete and then I went to town grinding.
First pass vs untouched


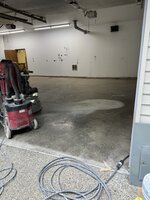

Finished Grind Product:

No expansion joints but did have a some decent cracks to chase. Used trowelease 1162pk which comes with the silica sand already (lazy option) but its heavy so costs more to ship. My wrists and hands still have not recovered from applying all of this.

Hand grind the cracks after trowelease
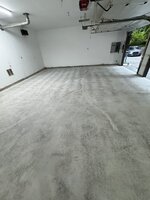
Chased cracks with a V bit on an angle grinder.. Made extremely quick work but my god its dusty and nasty.. Use a HEPA vacuum here as well and P100 respy.

My wife helped me apply this coating and we kept it at roughly 20min per 5gal bucket application and this worked well. Just premark each 5gal section in your wall so you know how far to spread and apply it. Bert was tremendously helpful the entire way, honestly, rockstar customer service. We had a gameplan and I kept him in the loop even at 11PM LOL.
Amount of Product used:
12 gallons of Bondtite
23 gallons of Liquitile
5 Gal of Trowelease 1162PK (filling cracks)
12 5gal HD Buckets
8 or 9 18" rollers 3/8 nap
1 Notched Squeegee purchased from alphagarage for Liquitile
1 Flat Squeegee for bondtite spreading/application
1/2" Corded Drill for mixing
Metal Mixing Paddle
MEK for cleaning paddle in between mixing sessions
Mixing station:

As others have said the bondtite is wild.. Very fun to apply and super easy with a regular flat squeegee. Bert and others told me to use a lid and cut a couple holes into it to control the application a bit more instead of sloshing it out of the bucket into one spot. Wife and I used spiked shoes for this, applied in evening so it was cooler and hopefully less bubbles.
Wifey cutting in the edges with bondtite
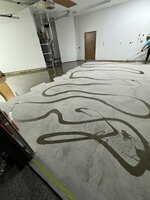
Bondtite applied and now we wait


24hr later, not a ton of bubbles but definitely had a few. I attempted to sand them with 100grit discs and a floor scrubber but that thing was unruly to use! Knocked most of the bubbles down and decided to go for it that night!
We mixed the first batch of liquitile and tried to keep a cadence of 20min per application from start of mix to finishing the rollout. I poured out ribbons within the designated area. Wife cut in the edges with small roller and I went to the notched squeegee while she followed me with the 18" roller. I took over the rolling duties as soon as I was finished spreading with the squeegee.
Do NOT overwork the product, lay it thick and let it flow. Much better results and looks immaculate. I had a few spots I worked it and you can tell a slight difference.


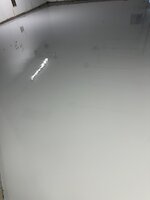
Tape up the doors to keep bugs and other creatures out

This was 18hr post
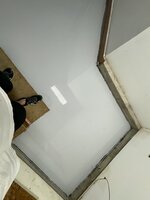


Insane....
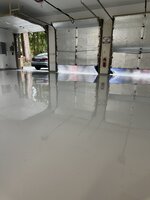
Gave it 5 days and then the chaos started!
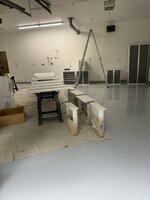
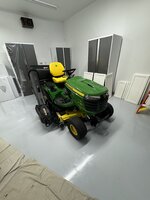
New lighting and cabinets before bringing the car home!

Bert, thank you for the help! I'm a customer for life and will be ordering a bit more to trim certain areas out with more product.
Having done this once before with a different product, I had a good idea of the prep involved. I also knew I wanted a true 2-part epoxy system with a high build thickness. My previous house I hand-ground a 3 car slab with an angle grinder.. Never again...
Just purchased the new property which has a massive 3 car garage and an attached 600sqft shop, I knew if I don't get the floor done before I move stuff in its a nightmare to get done after the fact. 5 weeks of renovations and projects from closing until we moved in, so had to get the garage done ASAP.
Product dropped on pallet, on the street..
What we started with:
Shop
I've read countless threads on GJ about grinding and prep, Edco vs Dual head edco, etc. Do yourself a favor and just rent a Lavina.. Don't necessarily need the monster I ended up with but its was fun nonetheless and it performed like I think most of us all "assume" these edco's or other grinders to perform.. This was single to two passes and it was done. 1800 sqft took about 3-4hrs including sweeping up with the HEPA vacuum. You're looking at 1000+ a day but so so worth it. This is propane powered and weighs over 800lbs. You'll need a rampgate trailer with winch or liftgate to get it home.
Light degreasing on the concrete and then I went to town grinding.
First pass vs untouched
Finished Grind Product:
No expansion joints but did have a some decent cracks to chase. Used trowelease 1162pk which comes with the silica sand already (lazy option) but its heavy so costs more to ship. My wrists and hands still have not recovered from applying all of this.
Hand grind the cracks after trowelease
Chased cracks with a V bit on an angle grinder.. Made extremely quick work but my god its dusty and nasty.. Use a HEPA vacuum here as well and P100 respy.
My wife helped me apply this coating and we kept it at roughly 20min per 5gal bucket application and this worked well. Just premark each 5gal section in your wall so you know how far to spread and apply it. Bert was tremendously helpful the entire way, honestly, rockstar customer service. We had a gameplan and I kept him in the loop even at 11PM LOL.
Amount of Product used:
12 gallons of Bondtite
23 gallons of Liquitile
5 Gal of Trowelease 1162PK (filling cracks)
12 5gal HD Buckets
8 or 9 18" rollers 3/8 nap
1 Notched Squeegee purchased from alphagarage for Liquitile
1 Flat Squeegee for bondtite spreading/application
1/2" Corded Drill for mixing
Metal Mixing Paddle
MEK for cleaning paddle in between mixing sessions
Mixing station:
As others have said the bondtite is wild.. Very fun to apply and super easy with a regular flat squeegee. Bert and others told me to use a lid and cut a couple holes into it to control the application a bit more instead of sloshing it out of the bucket into one spot. Wife and I used spiked shoes for this, applied in evening so it was cooler and hopefully less bubbles.
Wifey cutting in the edges with bondtite
Bondtite applied and now we wait
24hr later, not a ton of bubbles but definitely had a few. I attempted to sand them with 100grit discs and a floor scrubber but that thing was unruly to use! Knocked most of the bubbles down and decided to go for it that night!
We mixed the first batch of liquitile and tried to keep a cadence of 20min per application from start of mix to finishing the rollout. I poured out ribbons within the designated area. Wife cut in the edges with small roller and I went to the notched squeegee while she followed me with the 18" roller. I took over the rolling duties as soon as I was finished spreading with the squeegee.
Do NOT overwork the product, lay it thick and let it flow. Much better results and looks immaculate. I had a few spots I worked it and you can tell a slight difference.
Tape up the doors to keep bugs and other creatures out
This was 18hr post
Insane....
Gave it 5 days and then the chaos started!
New lighting and cabinets before bringing the car home!
Bert, thank you for the help! I'm a customer for life and will be ordering a bit more to trim certain areas out with more product.